
Step 1: Subscribe to the Chocolatey Newsletter (Optional)
Be the first to know about upcoming features, security releases, and news about Chocolatey.
Step 2: Choose Your Installation Method
Know the Requirements:
- Supported Windows client and server Operating Systems (can run on older Operating Systems)
- PowerShell v2+ (minimum is v3 for install from this website due to TLS 1.2 requirement)
- .NET Framework 4.8 (the installation will attempt to install .NET 4.8 if you do not have it installed)
1. Choose How to Install Chocolatey:
Install Chocolatey for Individual Use:
- First, ensure that you are using an administrative shell — you can also install as a non-admin, check out Non-Administrative Installation.
-
Install with powershell.exe
With PowerShell, you must ensure Get-ExecutionPolicy is not Restricted. We suggest using
Bypassto bypass the policy to get things installed orAllSignedfor quite a bit more security.- Run
Get-ExecutionPolicy. If it returnsRestricted, then runSet-ExecutionPolicy AllSignedorSet-ExecutionPolicy Bypass -Scope Process.
Now run the following command:
>
- Run
- Paste the copied text into your shell and press Enter.
- Wait a few seconds for the command to complete.
- If you don’t see any errors, you are ready to use Chocolatey! Type
chocoorchoco -?now, or see Getting Started for usage instructions.
This applies to both open source and commercial editions of Chocolatey.
2. Enter Your Internal Repository Url
(this should look similar to https://community.chocolatey.org/api/v2/)
3. Setup Your Environment
- Ensure you are set for organizational deployment
- Download the Chocolatey package
- Put the Chocolatey package on your internal repository
4. Get Your Scripts
1. Save this installation script
Save the following as ChocolateyInstall.ps1:
# Download and install Chocolatey nupkg from an OData (HTTP/HTTPS) url such as Artifactory, Nexus, ProGet (all of these are recommended for organizational use), or Chocolatey.Server (great for smaller organizations and POCs)
# This is where you see the top level API - with xml to Packages - should look nearly the same as https://community.chocolatey.org/api/v2/
# If you are using Nexus, always add the trailing slash or it won't work
# === EDIT HERE ===
$packageRepo = 'INTERNAL REPO URL'

# If the above $packageRepo repository requires authentication, add the username and password here. Otherwise these leave these as empty strings.
$repoUsername = ''    # this must be empty is NOT using authentication
$repoPassword = ''    # this must be empty if NOT using authentication

# Determine unzipping method
# 7zip is the most compatible, but you need an internally hosted 7za.exe.
# Make sure the version matches for the arguments as well.
# Built-in does not work with Server Core, but if you have PowerShell 5
# it uses Expand-Archive instead of COM
$unzipMethod = 'builtin'
#$unzipMethod = '7zip'
#$7zipUrl = 'https://chocolatey.org/7za.exe' (download this file, host internally, and update this to internal)

# === ENVIRONMENT VARIABLES YOU CAN SET ===
# Prior to running this script, in a PowerShell session, you can set the
# following environment variables and it will affect the output

# - $env:ChocolateyEnvironmentDebug = 'true' # see output
# - $env:chocolateyIgnoreProxy = 'true' # ignore proxy
# - $env:chocolateyProxyLocation = '' # explicit proxy
# - $env:chocolateyProxyUser = '' # explicit proxy user name (optional)
# - $env:chocolateyProxyPassword = '' # explicit proxy password (optional)

# === NO NEED TO EDIT ANYTHING BELOW THIS LINE ===
# Ensure we can run everything
Set-ExecutionPolicy Bypass -Scope Process -Force;

# If the repository requires authentication, create the Credential object
if ((-not [string]::IsNullOrEmpty($repoUsername)) -and (-not [string]::IsNullOrEmpty($repoPassword))) {
$securePassword = ConvertTo-SecureString $repoPassword -AsPlainText -Force
$repoCreds = New-Object System.Management.Automation.PSCredential ($repoUsername, $securePassword)
}

$searchUrl = ($packageRepo.Trim('/'), 'Packages()?$filter=(Id%20eq%20%27chocolatey%27)%20and%20IsLatestVersion') -join '/'

# Reroute TEMP to a local location
New-Item $env:ALLUSERSPROFILE\choco-cache -ItemType Directory -Force
$env:TEMP = "$env:ALLUSERSPROFILE\choco-cache"

$localChocolateyPackageFilePath = Join-Path $env:TEMP 'chocolatey.nupkg'
$ChocoInstallPath = "$($env:SystemDrive)\ProgramData\Chocolatey\bin"
$env:ChocolateyInstall = "$($env:SystemDrive)\ProgramData\Chocolatey"
$env:Path += ";$ChocoInstallPath"
$DebugPreference = 'Continue';

# PowerShell v2/3 caches the output stream. Then it throws errors due
# to the FileStream not being what is expected. Fixes "The OS handle's
# position is not what FileStream expected. Do not use a handle
# simultaneously in one FileStream and in Win32 code or another
# FileStream."
function Fix-PowerShellOutputRedirectionBug {
$poshMajorVerion = $PSVersionTable.PSVersion.Major

if ($poshMajorVerion -lt 4) {
try{
# http://www.leeholmes.com/blog/2008/07/30/workaround-the-os-handles-position-is-not-what-filestream-expected/ plus comments
$bindingFlags = [Reflection.BindingFlags] "Instance,NonPublic,GetField"
$objectRef = $host.GetType().GetField("externalHostRef", $bindingFlags).GetValue($host)
$bindingFlags = [Reflection.BindingFlags] "Instance,NonPublic,GetProperty"
$consoleHost = $objectRef.GetType().GetProperty("Value", $bindingFlags).GetValue($objectRef, @())
[void] $consoleHost.GetType().GetProperty("IsStandardOutputRedirected", $bindingFlags).GetValue($consoleHost, @())
$bindingFlags = [Reflection.BindingFlags] "Instance,NonPublic,GetField"
$field = $consoleHost.GetType().GetField("standardOutputWriter", $bindingFlags)
$field.SetValue($consoleHost, [Console]::Out)
[void] $consoleHost.GetType().GetProperty("IsStandardErrorRedirected", $bindingFlags).GetValue($consoleHost, @())
$field2 = $consoleHost.GetType().GetField("standardErrorWriter", $bindingFlags)
$field2.SetValue($consoleHost, [Console]::Error)
} catch {
Write-Output 'Unable to apply redirection fix.'
}
}
}

Fix-PowerShellOutputRedirectionBug

# Attempt to set highest encryption available for SecurityProtocol.
# PowerShell will not set this by default (until maybe .NET 4.6.x). This
# will typically produce a message for PowerShell v2 (just an info
# message though)
try {
# Set TLS 1.2 (3072), then TLS 1.1 (768), then TLS 1.0 (192)
# Use integers because the enumeration values for TLS 1.2 and TLS 1.1 won't
# exist in .NET 4.0, even though they are addressable if .NET 4.5+ is
# installed (.NET 4.5 is an in-place upgrade).
[System.Net.ServicePointManager]::SecurityProtocol = 3072 -bor 768 -bor 192
} catch {
Write-Output 'Unable to set PowerShell to use TLS 1.2 and TLS 1.1 due to old .NET Framework installed. If you see underlying connection closed or trust errors, you may need to upgrade to .NET Framework 4.5+ and PowerShell v3+.'
}

function Get-Downloader {
param (
[string]$url
)
$downloader = new-object System.Net.WebClient

$defaultCreds = [System.Net.CredentialCache]::DefaultCredentials
if (Test-Path -Path variable:repoCreds) {
Write-Debug "Using provided repository authentication credentials."
$downloader.Credentials = $repoCreds
} elseif ($defaultCreds -ne $null) {
Write-Debug "Using default repository authentication credentials."
$downloader.Credentials = $defaultCreds
}

$ignoreProxy = $env:chocolateyIgnoreProxy
if ($ignoreProxy -ne $null -and $ignoreProxy -eq 'true') {
Write-Debug 'Explicitly bypassing proxy due to user environment variable.'
$downloader.Proxy = [System.Net.GlobalProxySelection]::GetEmptyWebProxy()
} else {
# check if a proxy is required
$explicitProxy = $env:chocolateyProxyLocation
$explicitProxyUser = $env:chocolateyProxyUser
$explicitProxyPassword = $env:chocolateyProxyPassword
if ($explicitProxy -ne $null -and $explicitProxy -ne '') {
# explicit proxy
$proxy = New-Object System.Net.WebProxy($explicitProxy, $true)
if ($explicitProxyPassword -ne $null -and $explicitProxyPassword -ne '') {
$passwd = ConvertTo-SecureString $explicitProxyPassword -AsPlainText -Force
$proxy.Credentials = New-Object System.Management.Automation.PSCredential ($explicitProxyUser, $passwd)
}

Write-Debug "Using explicit proxy server '$explicitProxy'."
$downloader.Proxy = $proxy

} elseif (!$downloader.Proxy.IsBypassed($url)) {
# system proxy (pass through)
$creds = $defaultCreds
if ($creds -eq $null) {
Write-Debug 'Default credentials were null. Attempting backup method'
$cred = get-credential
$creds = $cred.GetNetworkCredential();
}

$proxyaddress = $downloader.Proxy.GetProxy($url).Authority
Write-Debug "Using system proxy server '$proxyaddress'."
$proxy = New-Object System.Net.WebProxy($proxyaddress)
$proxy.Credentials = $creds
$downloader.Proxy = $proxy
}
}

return $downloader
}

function Download-File {
param (
[string]$url,
[string]$file
)
$downloader = Get-Downloader $url
$downloader.DownloadFile($url, $file)
}

function Download-Package {
param (
[string]$packageODataSearchUrl,
[string]$file
)
$downloader = Get-Downloader $packageODataSearchUrl

Write-Output "Querying latest package from $packageODataSearchUrl"
[xml]$pkg = $downloader.DownloadString($packageODataSearchUrl)
$packageDownloadUrl = $pkg.feed.entry.content.src

Write-Output "Downloading $packageDownloadUrl to $file"
$downloader.DownloadFile($packageDownloadUrl, $file)
}

function Install-ChocolateyFromPackage {
param (
[string]$chocolateyPackageFilePath = ''
)

if ($chocolateyPackageFilePath -eq $null -or $chocolateyPackageFilePath -eq '') {
throw "You must specify a local package to run the local install."
}

if (!(Test-Path($chocolateyPackageFilePath))) {
throw "No file exists at $chocolateyPackageFilePath"
}

$chocTempDir = Join-Path $env:TEMP "chocolatey"
$tempDir = Join-Path $chocTempDir "chocInstall"
if (![System.IO.Directory]::Exists($tempDir)) {[System.IO.Directory]::CreateDirectory($tempDir)}
$file = Join-Path $tempDir "chocolatey.zip"
Copy-Item $chocolateyPackageFilePath $file -Force

# unzip the package
Write-Output "Extracting $file to $tempDir..."
if ($unzipMethod -eq '7zip') {
$7zaExe = Join-Path $tempDir '7za.exe'
if (-Not (Test-Path ($7zaExe))) {
Write-Output 'Downloading 7-Zip commandline tool prior to extraction.'
# download 7zip
Download-File $7zipUrl "$7zaExe"
}

$params = "x -o`"$tempDir`" -bd -y `"$file`""
# use more robust Process as compared to Start-Process -Wait (which doesn't
# wait for the process to finish in PowerShell v3)
$process = New-Object System.Diagnostics.Process
$process.StartInfo = New-Object System.Diagnostics.ProcessStartInfo($7zaExe, $params)
$process.StartInfo.RedirectStandardOutput = $true
$process.StartInfo.UseShellExecute = $false
$process.StartInfo.WindowStyle = [System.Diagnostics.ProcessWindowStyle]::Hidden
$process.Start() | Out-Null
$process.BeginOutputReadLine()
$process.WaitForExit()
$exitCode = $process.ExitCode
$process.Dispose()

$errorMessage = "Unable to unzip package using 7zip. Perhaps try setting `$env:chocolateyUseWindowsCompression = 'true' and call install again. Error:"
switch ($exitCode) {
0 { break }
1 { throw "$errorMessage Some files could not be extracted" }
2 { throw "$errorMessage 7-Zip encountered a fatal error while extracting the files" }
7 { throw "$errorMessage 7-Zip command line error" }
8 { throw "$errorMessage 7-Zip out of memory" }
255 { throw "$errorMessage Extraction cancelled by the user" }
default { throw "$errorMessage 7-Zip signalled an unknown error (code $exitCode)" }
}
} else {
if ($PSVersionTable.PSVersion.Major -lt 5) {
try {
$shellApplication = new-object -com shell.application
$zipPackage = $shellApplication.NameSpace($file)
$destinationFolder = $shellApplication.NameSpace($tempDir)
$destinationFolder.CopyHere($zipPackage.Items(),0x10)
} catch {
throw "Unable to unzip package using built-in compression. Set `$env:chocolateyUseWindowsCompression = 'false' and call install again to use 7zip to unzip. Error: `n $_"
}
} else {
Expand-Archive -Path "$file" -DestinationPath "$tempDir" -Force
}
}

# Call Chocolatey install
Write-Output 'Installing chocolatey on this machine'
$toolsFolder = Join-Path $tempDir "tools"
$chocInstallPS1 = Join-Path $toolsFolder "chocolateyInstall.ps1"

& $chocInstallPS1

Write-Output 'Ensuring chocolatey commands are on the path'
$chocInstallVariableName = 'ChocolateyInstall'
$chocoPath = [Environment]::GetEnvironmentVariable($chocInstallVariableName)
if ($chocoPath -eq $null -or $chocoPath -eq '') {
$chocoPath = 'C:\ProgramData\Chocolatey'
}

$chocoExePath = Join-Path $chocoPath 'bin'

if ($($env:Path).ToLower().Contains($($chocoExePath).ToLower()) -eq $false) {
$env:Path = [Environment]::GetEnvironmentVariable('Path',[System.EnvironmentVariableTarget]::Machine);
}

Write-Output 'Ensuring chocolatey.nupkg is in the lib folder'
$chocoPkgDir = Join-Path $chocoPath 'lib\chocolatey'
$nupkg = Join-Path $chocoPkgDir 'chocolatey.nupkg'
if (!(Test-Path $nupkg)) {
Write-Output 'Copying chocolatey.nupkg is in the lib folder'
if (![System.IO.Directory]::Exists($chocoPkgDir)) { [System.IO.Directory]::CreateDirectory($chocoPkgDir); }
Copy-Item "$file" "$nupkg" -Force -ErrorAction SilentlyContinue
}
}

# Idempotence - do not install Chocolatey if it is already installed
if (!(Test-Path $ChocoInstallPath)) {
# download the package to the local path
if (!(Test-Path $localChocolateyPackageFilePath)) {
Download-Package $searchUrl $localChocolateyPackageFilePath
}

# Install Chocolatey
Install-ChocolateyFromPackage $localChocolateyPackageFilePath
}
2. Make script accessible by internal url
Put the script somewhere internally that can be accessed by a url (like a raw/binary repository in Nexus, Artifactory, or ProGet). Do NOT put the script on a NuGet type repository (where your packages will be), create a new Raw/Binary repository.
3. Install/Deploy Chocolatey internally
Now you can do similar to the individual side, but your command will be something like:
Set-ExecutionPolicy Bypass -Scope Process -Force; iex ((New-Object System.Net.WebClient).DownloadString('INTERNAL REPO URL/ChocolateyInstall.ps1'))
3. Add the following to your playbook
# Note: `chocolateyDownloadUrl is completely different than normal
#  source locations. This is directly to the bare download url for the
#  chocolatey.nupkg, similar to what you see when you browse to
#  https://community.chocolatey.org/api/v2/package/chocolatey
node['chocolatey']['install_vars']['chocolateyDownloadUrl'] = 'INTERNAL REPO URL/check_this/chocolatey.VERSION.nupkg'
node['chocolatey']['upgrade'] = true
include_recipe 'chocolatey::default'
The install of Chocolatey is separate from the Chef built-in resources. You will need the Chocolatey Cookbook.
3. Add the following to your DSC script:
cChocoInstaller InstallChocolatey
{
  InstallDir            = "C:\ProgramData\chocolatey"
  ChocoInstallScriptUrl = "INTERNAL REPO URL/ChocolateyInstall.ps1"
}
Requires cChoco DSC Resource. See docs at https://github.com/chocolatey/cChoco.
## Note: `chocolatey_download_url is completely different than normal
##  source locations. This is directly to the bare download url for the
##  chocolatey.nupkg, similar to what you see when you browse to
##  https://community.chocolatey.org/api/v2/package/chocolatey
class {'chocolatey':
  chocolatey_download_url => 'INTERNAL REPO URL/check_this/chocolatey.VERSION.nupkg',
  use_7zip                => false,
}
Requires Puppet Chocolatey Provider module. See docs at https://forge.puppet.com/puppetlabs/chocolatey.
5. If applicable — Chocolatey configuration/installation
See infrastructure management matrix for Chocolatey configuration elements and examples.
Chocolatey Licensed Install:
Are you also installing a commercial edition of Chocolatey?
Please see Install the Licensed Edition.
Advanced Chocolatey Install:
Are you installing behind a proxy, need a completely offline install, or wanting to install a licenced edition of Chocolatey? Need even more options? Visit our Documentation or take our new Installation Course to help you get up and running with Chocolatey!
This instruction will show you how to install the Chocolatey package manager on Windows Server, which will make installing and uninstalling programs in Windows as easy and convenient as on Linux-based operating systems. In addition, you will be able to easily update your installed applications in one click or command.
What is Chocolatey?
There were times when Linux-based OSes had very complicated application installation mechanism, it is still persist and you can compile any application from a source code now using make or magic. In this case Linux developers introduced very convenient way to install applications – package managers. Now you have the possibility to compare compiling and modern package management mechanism – apt-get, yum for OSes and pip, gem for languages where applications with dependencies are installed with a simple command and are just as easy to update or remove. Windows is this case didn’t make any revolutional improvements, it just made its store but it is still not popular at all. In Windows still we have to search the web for programs and manually update them, which is not only inconvenient but also more dangerous for the security of the system. In this case Chocolatey was created to make program management in Windows more convenient and more similar to how it is done in Linux. It created a software repository and a special client for Windows that is capable of downloading, installing and updating programs from this directory almost automatically.
Installing Chocolatey
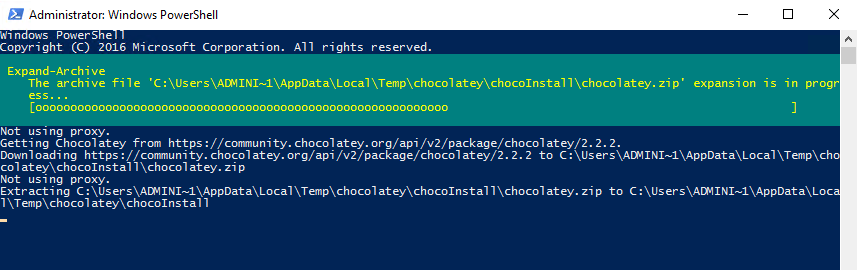
The Chocolatey client is PowerShell utility. To install it, open a Windows PowerShell with administrator privileges and enter the following code:
Set-ExecutionPolicy Bypass -Scope Process -Force; [System.Net.ServicePointManager]::SecurityProtocol = [System.Net.ServicePointManager]::SecurityProtocol -bor 3072; iex ((New-Object System.Net.WebClient).DownloadString('https://community.chocolatey.org/install.ps1'))

Now lets wait for the process to complete and the software will be ready to use. After that you can get acquainted with the main features of the program. To do this, enter the choco /? command which will show you how to use the program and basic commands.
As you have probably already understood, all operations are performed by typing special commands in the PowerShell. For example, if you need to install a program, just type:
choco install package_name
To update it:
choco update package_name
To see the entire list of available programs in the repository, type:
choco list
or use the search in the online version of the catalog — https://community.chocolatey.org/packages?q=
ChocolateyGUI
If you don’t really like typing commands manually, you can get a GUI for Chocolatey. It is called ChocolateyGUI and is installed by typing in PowerShell:
choco install chocolateygui

The process will take some time and require to type «a» to confirm the installation.
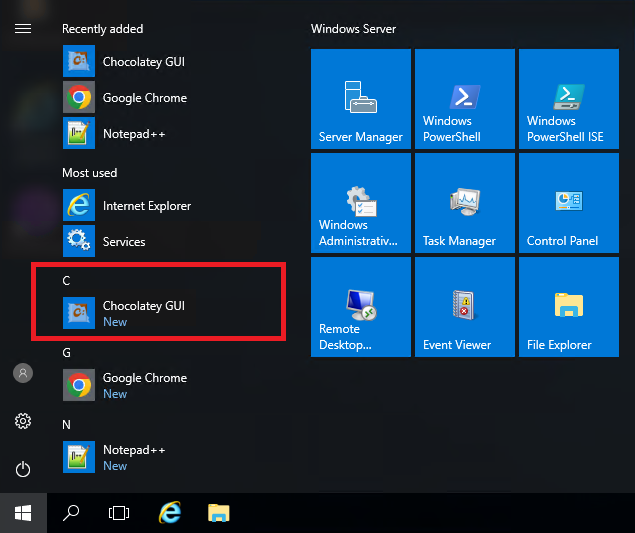
To run ChocolateyGUI just type in its name in Windows Search and it will output the installed program.
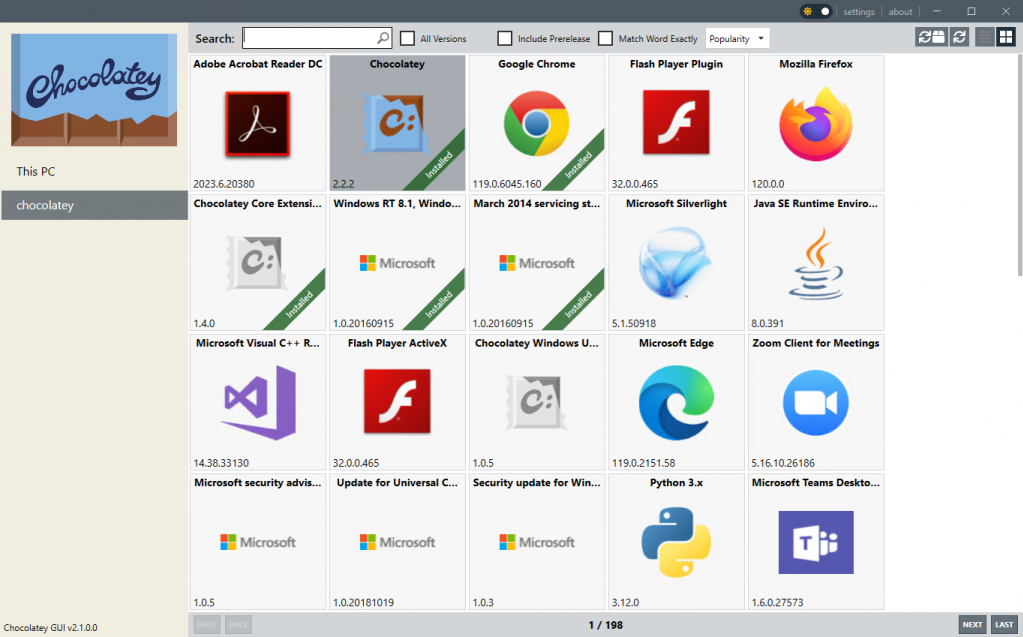
The program has a very simple and intuitive interface. The installation of the programs is very simple just rightclick the needed application from the list and click install after that.

Then wait a bit for installation to complete

After installation is complete you can find the program using Windows Search.
In order to delete software just rightclick it and select uninstall.
In order to update all software automatically, just run:
choco upgrade all
33145
North Miami, FL
2520 Coral Way apt 2-135
+1 302 425-97-76
700
300
ITGLOBAL.COM CORP
33145
North Miami, FL
2520 Coral Way apt 2-135
+1 302 425-97-76
700
300
ITGLOBAL.COM CORP
Chocolatey — это инструмент управления пакетами для Windows, аналогичный менеджерам пакетов в Linux-системах, таким как apt или yum. Он позволяет устанавливать, обновлять и удалять программное обеспечение используя командную строку.
Основная концепция Chocolatey основана на том, что пользователи могут управлять установкой и обновлением программ с помощью команд. Приложение предоставляет доступ к большому количеству программ, которые могут быть установлены автоматически, и не требует посещения веб-сайтов разработчиков.
Chocolatey также позволяет управлять версиями программ, автоматизировать установку пакетов на нескольких компьютерах одновременно и даёт возможность создавать собственные пакеты для установки программ, не представленных в репозитории Chocolatey.
Далее разберём процесс установки Chocolatey на виртуальный выделенный сервер, работающий под управлением Windows Server 2016.
Клиентское приложение Chocolatey является утилитой PowerShell. Исходя из этого его установка также производится в данной командной оболочке.
Перед началом установки Chocolatey необходимо проинсталлировать программную платформу Microsoft .NET Framework 4.8. Дистрибутив данного программного обеспечения доступен по соответствующей ссылке.
Для запуска инсталляции непосредственно Chocolatey запустите PowerShell с правами администратора и скопируйте туда следующую команду:
Set-ExecutionPolicy Bypass -Scope Process -Force; [System.Net.ServicePointManager]::SecurityProtocol = [System.Net.ServicePointManager]::SecurityProtocol -bor 3072; iex ((New-Object System.Net.WebClient).DownloadString('https://community.chocolatey.org/install.ps1'))
По окончании установки утилита уже готова к использованию. Полный перечень доступных для установки приложений вы сможете найти на странице — https://community.chocolatey.org/packages.
Например, следующая команда запускает установку браузера Google Chrome:
choco install googlechrome
А при помощи данной команды производится установка текстового редактора Notepad++:
choco install notepadplusplus.install
Список установленных приложений можно вывести на экран используя команду:
choco list
Для обновления какого-либо приложения используйте команду:
choco upgrade soft-name
Здесь soft-name — название обновляемой программы.
Для того, чтобы обновить все установленные приложения, используйте команду:
choco upgrade all
Графический интерфейс
Помимо командной строки оперировать Chocolatey можно также и при помощи графического интерфейса. Он носит имя Chocolatey GUI и для его инсталляции используется команда:
choco install chocolateygui
После завершения установки приложение станет доступно для запуска из стартового меню.
Chocolatey GUI обладает простым и интуитивно понятным интерфейсом.
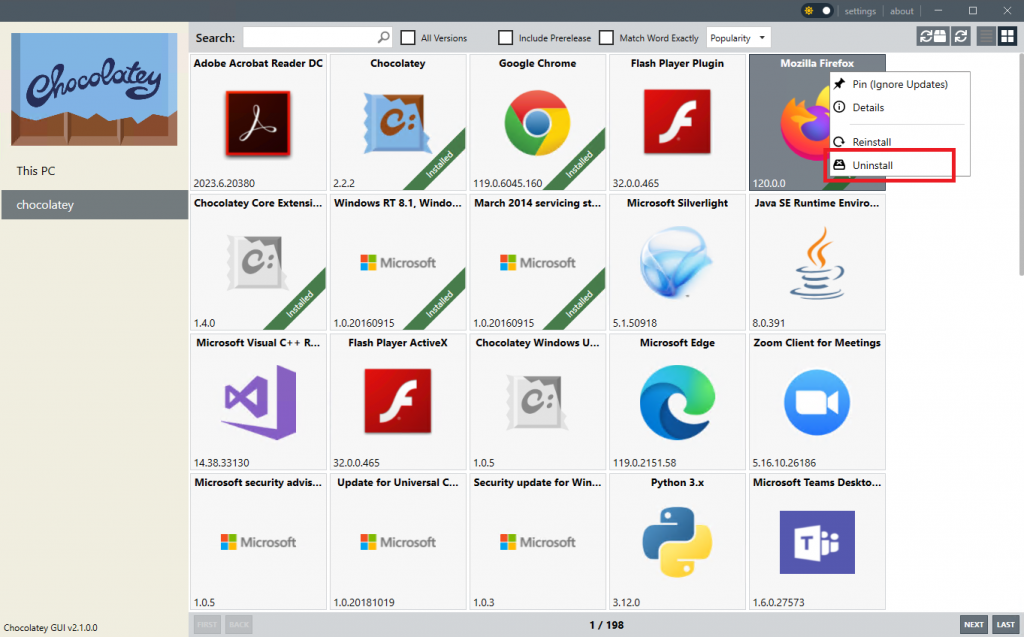
Исходя из этого, для того, чтобы установить какое-либо новое приложение, перейдите во вкладку chocolatey, выберите из списка или найдите при помощи поисковой строки нужную программу, нажмите на её ярлыке правую кнопку мыши, после чего кликните на Install.
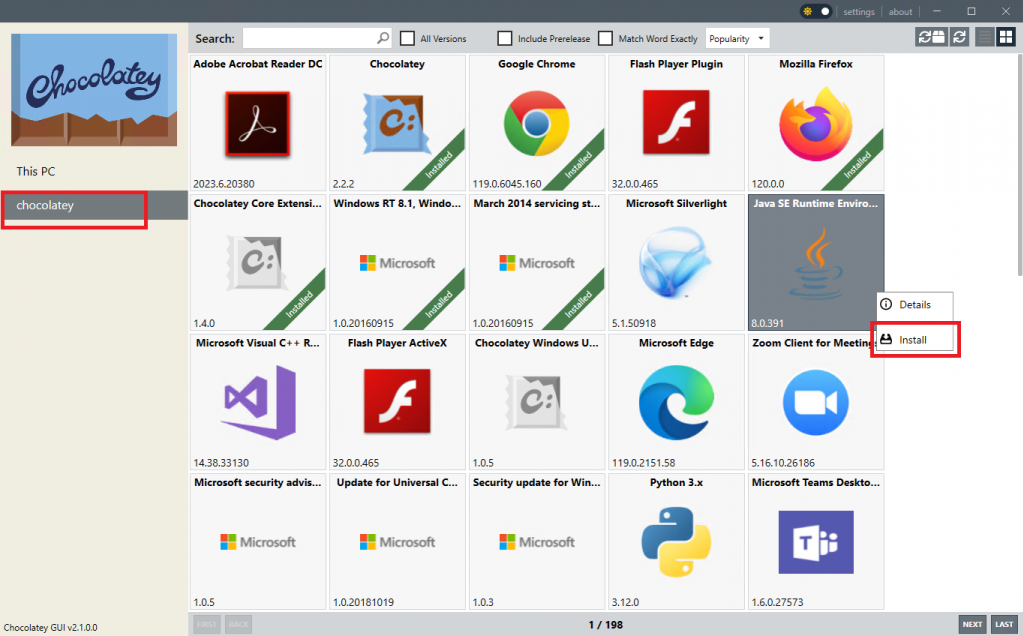
И наоборот, чтобы удалить приложение, нажмите на нём правую кнопку мыши и кликните Uninstall.
Chocolatey is a powerful package manager for Windows, designed to make software management simple and efficient. It allows you to install, update, and manage thousands of software packages from a central repository with just a few commands. Whether you’re managing a Windows-based server or a desktop, Chocolatey is an essential tool for automating software installation, especially on Windows servers hosted by AlexHost.
In this guide, we’ll walk you through the step-by-step process to install Chocolatey on your Windows server or local machine.
Why Use Chocolatey?
Chocolatey simplifies the process of software management by:
- Automating software installations with a single command.
- Keeping your software up to date with minimal effort.
- Offering access to over 9,000 packages for a wide range of tools and applications.
- Streamlining the process of software management across multiple systems.
When managing servers with AlexHost, Chocolatey can save time and reduce the complexity of software setup and maintenance.
Step 1: Ensure You Have Administrator Privileges
To install Chocolatey, you need to run the setup as an administrator. This ensures that Chocolatey has the necessary permissions to install packages and make system-wide changes.
- Open PowerShell as Administrator:
- Press Win + X and choose Windows PowerShell (Admin) or search for PowerShell in the Start menu, right-click it, and select Run as Administrator.
Make sure the PowerShell window shows Administrator in the title, indicating it has elevated permissions.
Step 2: Set PowerShell Execution Policy
Chocolatey requires the ability to run scripts on your system. To do this, you need to set the PowerShell execution policy.
In the Administrator PowerShell window, enter the following command:
powershell
Set-ExecutionPolicy Bypass -Scope Process
- Press Enter. You may be prompted to confirm the change; if so, type Y and press Enter again.
This command allows the installation script to run without modifying your system-wide policy.
Step 3: Install Chocolatey
Once the execution policy is set, you can install Chocolatey by running a simple command in PowerShell.
Copy and paste the following script into the PowerShell window:
Set-ExecutionPolicy Bypass -Scope Process -Force; ` [System.Net.ServicePointManager]::SecurityProtocol = ` [System.Net.ServicePointManager]::SecurityProtocol -bor 3072; ` iex ((New-Object System.Net.WebClient).DownloadString('https://community.chocolatey.org/install.ps1'))
- Press Enter to execute the command.
The script will download and install Chocolatey on your system. The process typically takes a few moments, depending on your server’s internet connection.
Step 4: Verify the Installation
After the installation is complete, you can verify that Chocolatey was installed correctly by checking the version.
In the same PowerShell window, type the following command:
- Press Enter. If Chocolatey was installed successfully, this command will return the installed version number.
Step 5: Install Software with Chocolatey
Now that Chocolatey is installed, you can use it to install software on your Windows server. For example, to install Git, simply run the following command:
The -y flag automatically agrees to all prompts, making the process seamless.
You can search for other software packages by using the following command:
choco search <package-name>
For example, to search for Node.js:
This command will show a list of related packages available for installation.
Step 6: Keep Your Software Updated
One of the biggest advantages of Chocolatey is that it simplifies updating software across your system. To update all installed packages, run the following command:
This will ensure that all your installed packages are up to date.
Conclusion
Chocolatey is a must-have tool for system administrators, especially when managing Windows servers from AlexHost. It automates the process of installing and updating software, saving time and effort. By following this step-by-step guide, you’ve successfully installed Chocolatey on your Windows server and can now manage software packages with ease. For more efficient and powerful server management, Chocolatey is a valuable addition to your toolkit.
Provide feedback
Saved searches
Use saved searches to filter your results more quickly
Sign up
Appearance settings