
Over time, temporary files in Windows 10 can accumulate and take up valuable disk space, potentially slowing down your system. These files are usually created by various applications for short-term use, but they can linger long after they’re needed. Knowing how to delete temporary files in Windows 10 is a quick and effective way to free up space and improve your computer’s performance. In this article, we’ll show you several methods to clear temp files safely and efficiently.
Table of Content
- Are Temporary Files the Same as Junk Files?
- Why Should You Delete Temporary Files From Your PC?
- How to Delete Temporary Files in Windows 10?
- Automated Methods
- Method 1: Delete Temporary Files in Windows Using System Settings
- Method 2: Delete Temporary Files in Windows Using Disk Cleanup Tool
- Manual Methods
- Method 1: Delete Temporary Files in Windows Using CMD
- Method 2: Delete All Temp Files Using Run Command
- Method 3: Delete local Temp Files Using Run Command
- Method 4: Delete Local Temp Files Using Prefetch
- Delete Hidden Temporary Files by Cleaning Up Browser Cache
- Delete Browser Cache from Windows 10
Are Temporary Files the Same as Junk Files?
Temporary files are created by programs to store information temporarily. Temporary files speed up tasks by storing data temporarily. For example, while working on a document, a temporary file may be created to save the changes made, reducing the time it takes for processes to complete.
However, not all temporary files become junk. Junk files are unnecessary, or unused files that gather over time, and they may include temporary files. Therefore, while some temporary files may become junk, not all temporary files are considered junk.
Why Should You Delete Temporary Files From Your PC?
Deleting temporary files from your PC is important for several reasons. First, it frees up space on your computer systems, helping your computer run faster. It also maintains your online privacy by removing traces of your activities. Deleting temporary files can improve system performance and prevent potential errors. Moreover, it reduces the risk of malware hiding in these files. In short, advantages include increased storage, enhanced privacy, improved speed, error prevention, and better protection against malware.
How to Delete Temporary Files in Windows 10?
Deleting temporary files ensures that your system doesn’t hang due to unnecessary space occupied by temporary files in your system. So delete these temp files and keep your system cool. Here we have segregated the methods of deleting temp files into automated and manual methods. So go ahead and try these methods and improve your PC’s performance now.
Automated Methods
These methods involve system configuration changes that remove temp files from your Windows regularly. Once you make these changes, your system will delete these temp files periodically when accumulated over time.
Method 1: Delete Temporary Files in Windows Using System Settings
Step 1: Open Settings by pressing Win + I.
Step 2: Go to System > Storage.
Step 3: Now click on “Temporary files”, under the “Local Disk (C:)” section.

Step 4: Check the boxes for the types of files you want to remove.
Step 5: Click “Remove files” to clear the cache.

Step 6: Click on “Continue”
Method 2: Delete Temporary Files in Windows Using Disk Cleanup Tool
Microsoft has included disk cleanup as a part of your Windows 10 that will enable you to get rid of temporary and cached files from your PC.
Step 1: Type “Disk Cleanup” in the search bar.
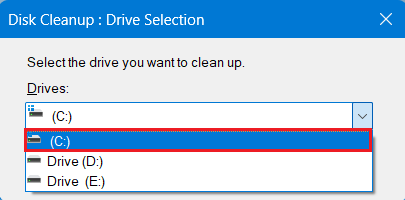
Step 2: Now select the drive you want to clean up and click “OK.”
Step 3: Check the box next to file you want to delete, Click “OK” at the bottom.
.png)
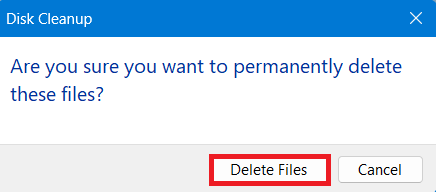
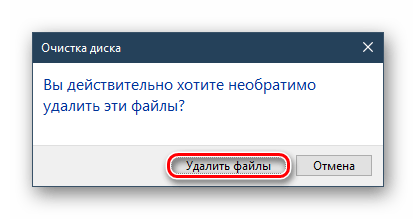
Step 4: A Dialogue box to confirmation will appear claiming to permanently delete files from your PC. Click “Delete Files”
Alternatively, you can perform Disk Cleanup Using Powershell Scripts to delete temp files or recycle bin data
Manual Methods
Unlike automated methods these methods don’t remove temp files on regular basis. Manual methods are performed explicitly. Here we have provided four different methods to delete temp files from your Windows PC.
Method 1: Delete Temporary Files in Windows Using CMD
To delete the temporary files from the command prompt:
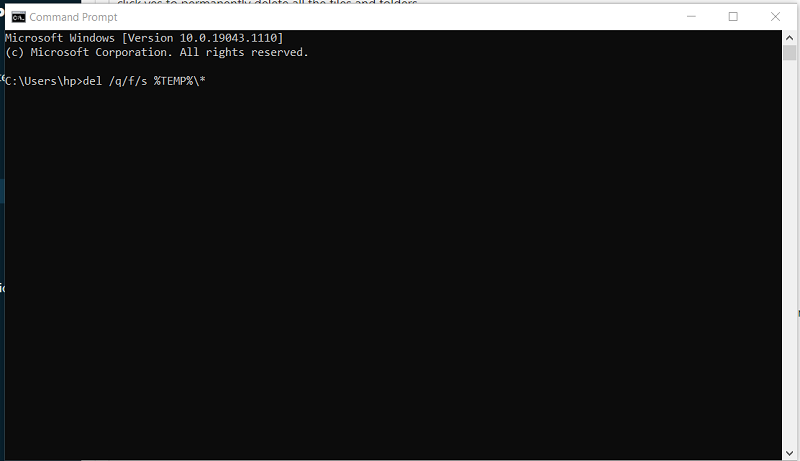
- Open Command Prompt.
- Run the following command
del /q/f/s %TEMP%\*
Method 2: Delete All Temp Files Using Run Command
To delete all the temporary files follow these simple steps:
Step 1: Press the Windows key + R to open the Run command. Then type “temp” in the search field and press OK.
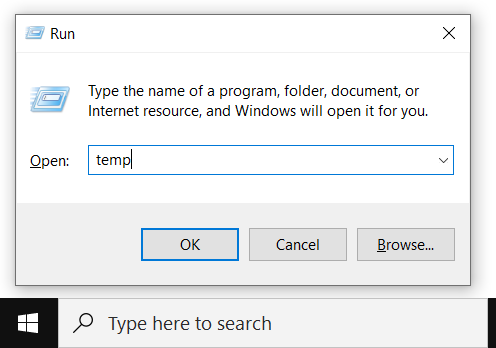
type in “temp” and press ok
Step 2: Now, select all temp files using ctrl + A and then press delete.
Select all and press delete
Method 3: Delete local Temp Files Using Run Command
There are some local temporary files into your system, you can delete these specific files using following steps:
Step 1: Press the Windows key + R to open the Run command. Then type “%temp%” in the search field and press OK.
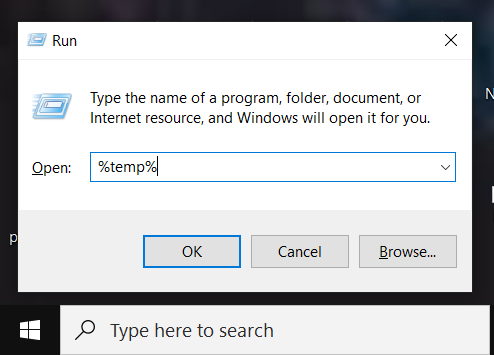
Type %temp% and press OK
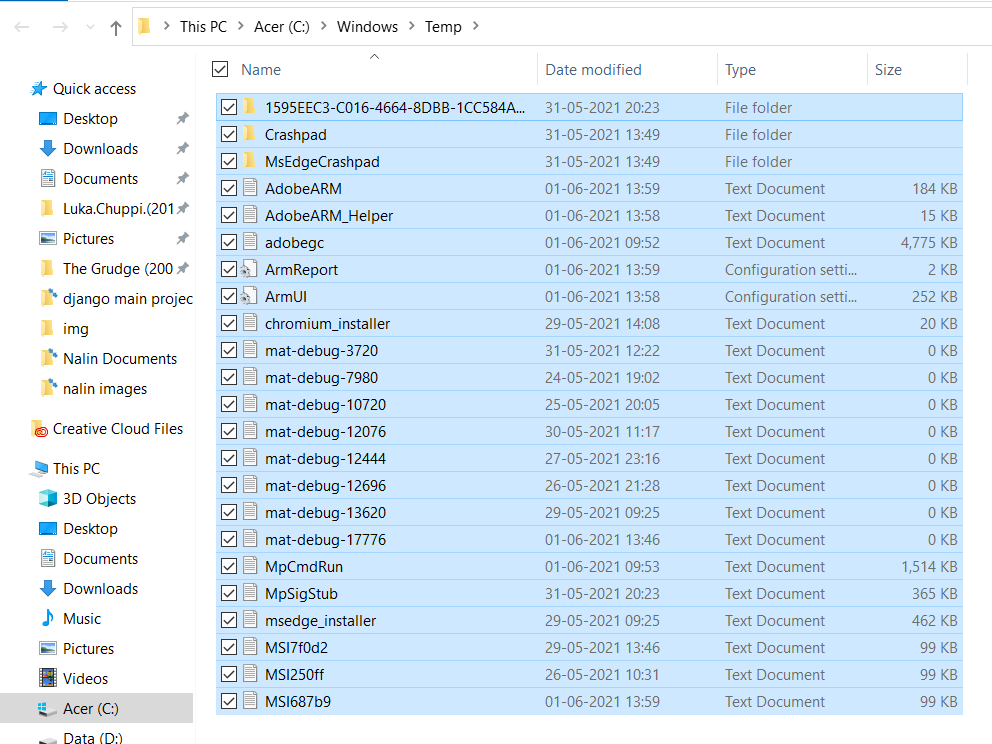
Step 2: Now, select all local temp files using Ctrl + A and then press delete.
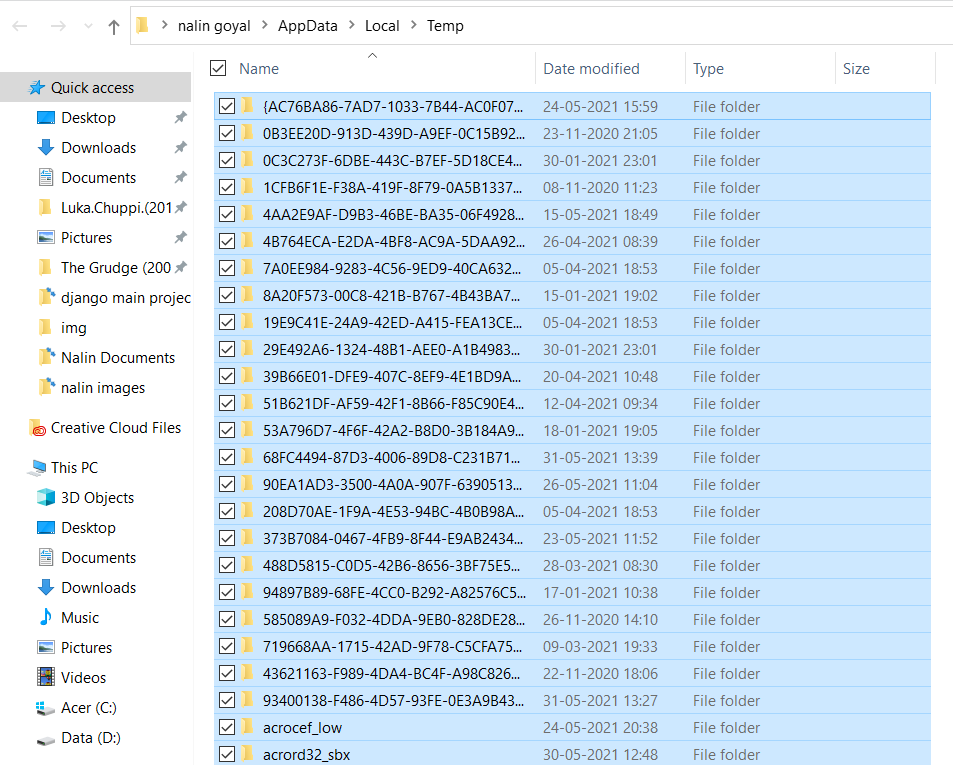
Select all files and press delete
Method 4: Delete Local Temp Files Using Prefetch
To delete the local temporary files using Prefetch follow the below steps:
Step 1: Press Windows key + R to open the Run command. Then type “Prefetch” in the search field and press OK.
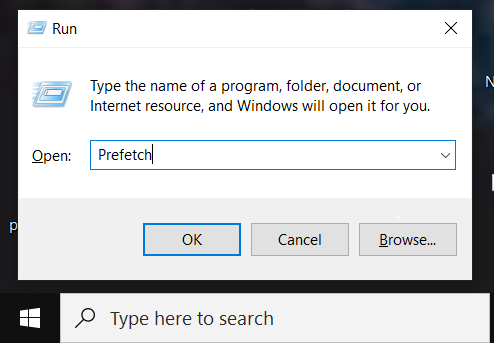
Type “prefetch” and press ok
Step 2: Now, select all prefetch files using ctrl + A and then press delete.
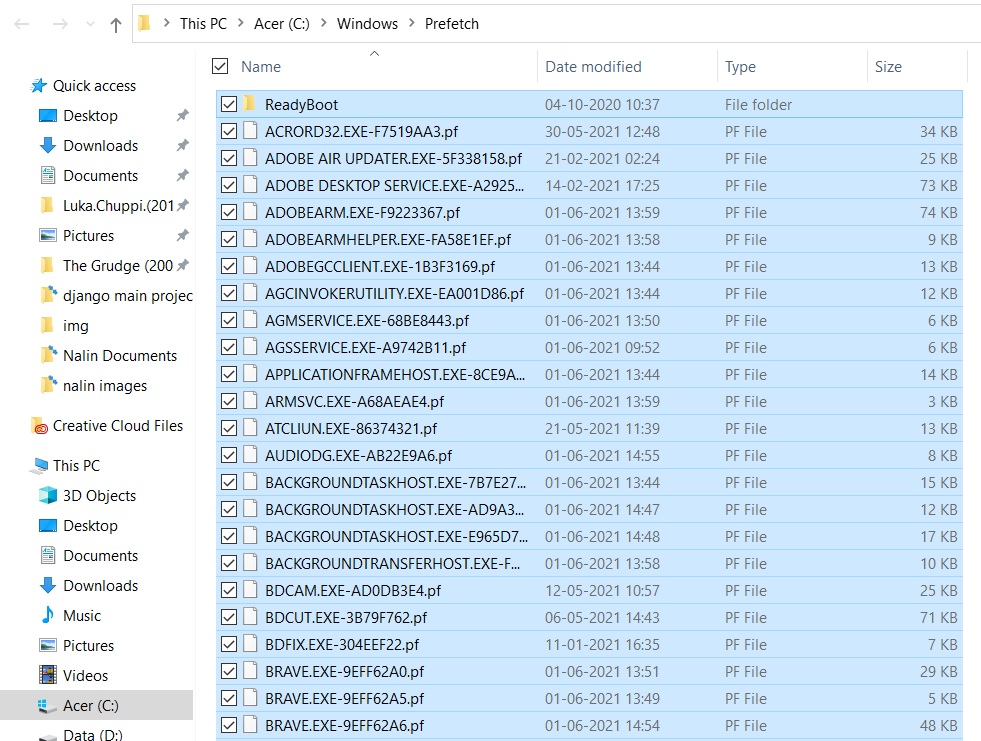
Select all prefetch files and press delete
Finally, delete all the files from recycle bin too. All temporary files are deleted, and now you are good to go!!
Temporary files are generated in various segments of application programs. Even after deleting all visible temporary files, browser cache often remains unnoticed. Is it important to clear browser cache? The answer is yes! It’s essential to regularly clear these hidden files as they occupy significant space in your system. So don’t overlook the browser cache; cleaning it helps maintain system performance by freeing up storage space and ensuring a smoother experience. Regularly cleaning up browsers cache helps to speed up internet browsing speed.
There are different Browser Cache Stored in Your System like stored data from websites, like images, pages, your saved passwords and other browsing activities are stored to speed up future visits. These Cached data are stored in specific folders on your system.
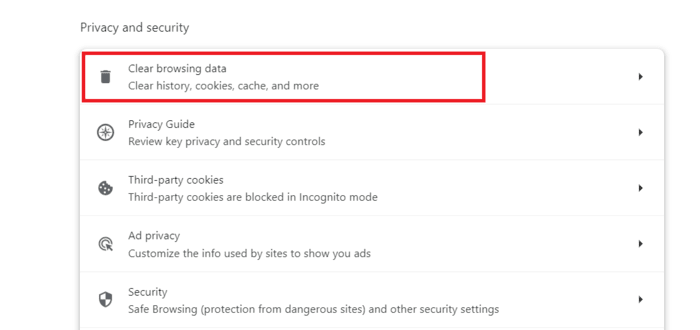
Delete Browser Cache from Windows 10
Step 1: Open your browser and Go to Settings > Privacy and security
Step 2: Select “Clear Browsing Data”.
Step 3: Check the box as per your preference and hit “Clear Data” to remove the cache.
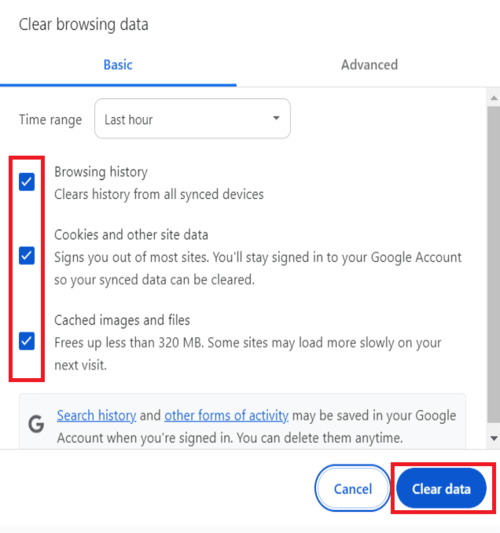
Regularly clearing browser cache helps maintain privacy and ensures updated content.
Alternatively, you can clear your Browser Cache using run command
Conclusion
Regularly deleting temporary files in Windows 10 is an important maintenance task that can help keep your system running smoothly. Whether you use the built-in Disk Cleanup tool, manually delete files from the Temp folder, or automate the process with Storage Sense, these methods will ensure that your system remains clutter-free. By following the steps outlined in this guide, you can easily clear temp files in Windows 10 and enjoy a more responsive computer.
Also Read
- How to Format a Hard Drive in Windows?
- How to clean temporary files from Ubuntu?
- How to Create Partitions of a Hard Drive in Windows 10?
Статья обновлена: 24 июня 2024
ID: 1161
Оптимальная защита для Windows
Kaspersky for Windows защищает вашу цифровую жизнь, выходя за рамки обычного антивируса.
Операционная система Microsoft Windows и запущенные приложения создают во время своей работы временные файлы на компьютере в папках TEMP, которые должны автоматически удаляться после завершения работы приложения. При ошибках в работе ОС или приложений временные файлы не удаляются и занимают свободное место на жестком диске.
Удалите временные файлы по инструкциям ниже. Очистите обе папки, если нет других уточнений от специалиста технической поддержки или рекомендаций в другой статье.
Как очистить папку TEMP для вашей учетной записи
Как очистить системную папку TEMP
Спасибо за ваш отзыв, вы помогаете нам становиться лучше!
Спасибо за ваш отзыв, вы помогаете нам становиться лучше!
Все способы:
- Очистка Windows от временных файлов
- Способ 1: CCleaner
- Способ 2: «Очистка диска»
- Способ 3: Ручное удаление
- Вопросы и ответы: 0
В операционной системе неизбежно накапливаются временные файлы, которые в целом не влияют на ее стабильность и производительность. Подавляющее их большинство находится в двух папках Temp, которые со временем могут начать весить несколько гигабайт. Поэтому у пользователей, желающих очистить жесткий диск, возникает вопрос, можно ли удалить эти папки?
Очистка Windows от временных файлов
Различные приложения и сама операционная система создают временные файлы для корректной работы программного обеспечения и внутренних процессов. Большая их часть хранится в папках Temp, которые располагаются по определенным адресам. Самостоятельно такие папки не очищаются, поэтому практически все файлы, которые туда попадают, остаются, несмотря на то, что могут больше никогда не пригодиться.
Со временем их может накопиться довольно много, а размер на жестком диске уменьшится, так как будет занят этими файлами в том числе. В условиях необходимости освобождения места на HDD или SSD пользователи начинают интересоваться, можно ли удалить папку с временными файлами.
Удалять папки Temp, являющиеся системными, нельзя! Это может нарушить работоспособность программ и Windows. Однако в целях освобождения места на жестком диске их можно очистить.
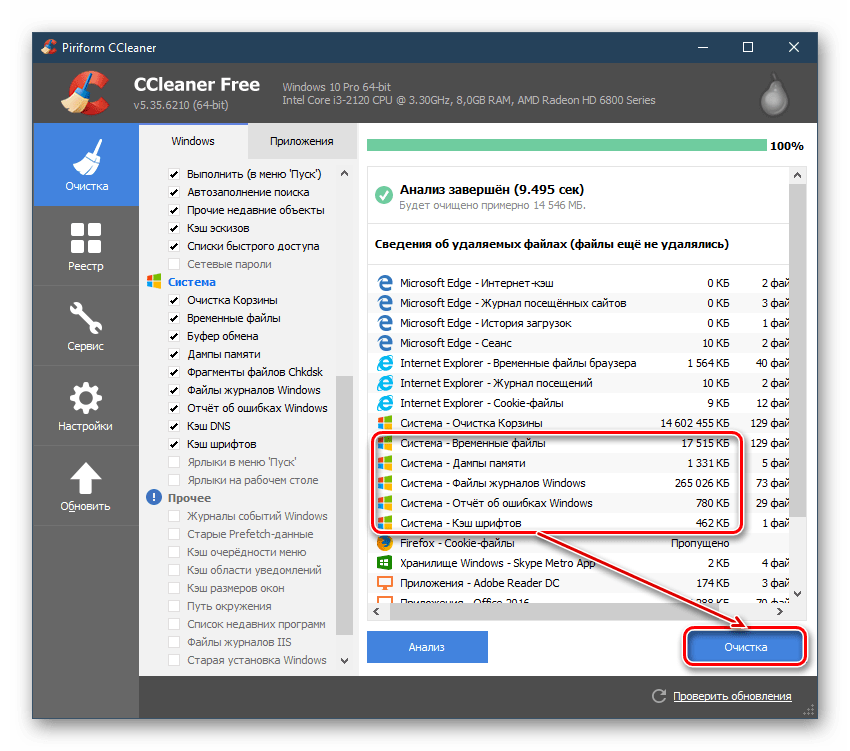
Способ 1: CCleaner
Упростить процесс очистки Windows можно использованием стороннего программного обеспечения. Приложения сами находят и очищают обе временные папки за раз. Известная многим программа CCleaner позволяет без особых усилий освободить место на жестком диске, в том числе и путем очистки Temp-папок.
- Запустите программу и перейдите на вкладку «Очистка» > «Windows». Найдите блок «Система» и поставьте галочки так, как показано на скриншоте. Галочки с остальных параметров в этой вкладке и в «Приложения» оставьте или снимите на свое усмотрение. После этого нажмите «Анализ».
- По результатам анализа вы увидите, какие файлы и в каком количестве хранятся во временных папках. Если согласны удалить их, нажмите на кнопку «Очистка».
- В окне с подтверждением своих действий нажмите «ОК».


Вместо CCleaner вы можете использовать аналогичный софт, установленный на вашем ПК и наделенный функцией удаления временных файлов. Если вы не доверяете стороннему ПО или просто не хотите устанавливать приложения для удаления, можете воспользоваться остальными способами.
Читайте также: Программы для ускорения работы компьютера
Способ 2: «Очистка диска»
В Windows есть встроенная утилита для очистки диска. Среди компонентов и мест, которые она очищает, есть и временные файлы.
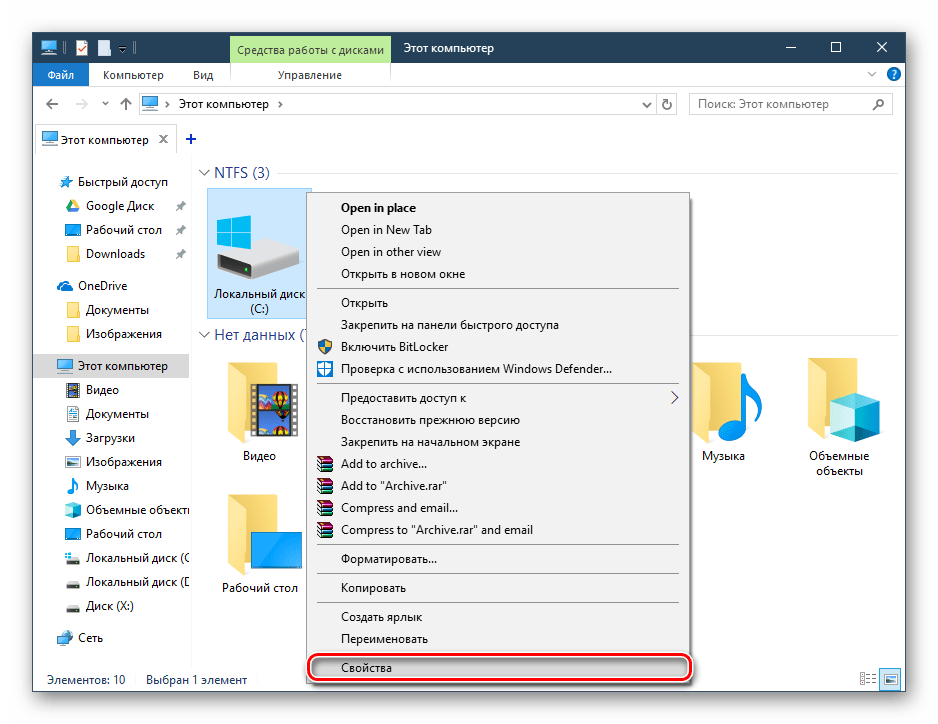
- Откройте окно «Компьютер», кликните правой кнопкой мыши по «Локальный диск (С:)» и выберите пункт «Свойства».
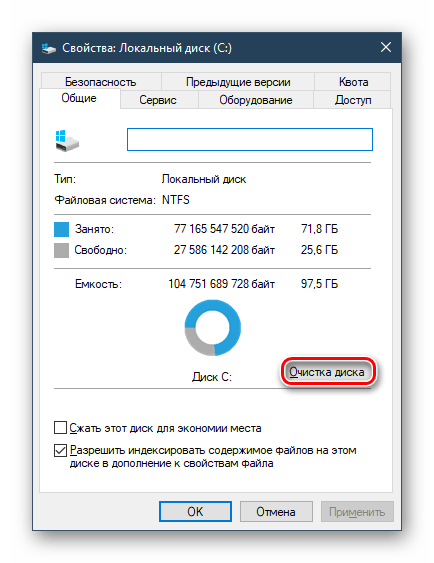
- В новом окошке, находясь на вкладке «Общие», нажмите на кнопку «Очистка диска».
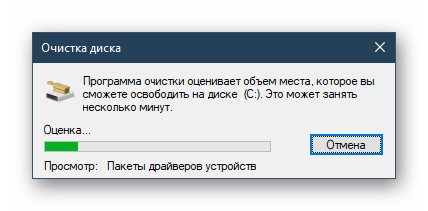
- Дождитесь окончания процесса сканирования и поиска мусорных файлов.
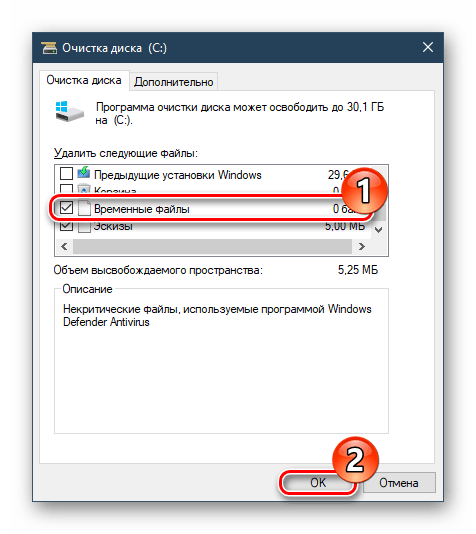
- Запустится утилита, в которой расставьте галочки на свое усмотрение, но обязательно оставьте активным параметр «Временные файлы» и нажмите «ОК».
- Появится вопрос с подтверждением своих действий, нажмите в нем «Удалить файлы».
Способ 3: Ручное удаление
Всегда можно очистить содержимое временных папок вручную. Для этого достаточно перейти к их месторасположению, выделить все файлы и удалить их как обычно.

В одной из наших статей мы уже рассказывали, где находятся 2 папки Temp в современных версиях Windows. Начиная с 7 и выше путь для них одинаков.
Подробнее: Где находятся папки Temp в Windows
Еще раз хотим обратить ваше внимание — не удаляйте папки целиком! Зайдите в них и очистите содержимое, оставив сами папки пустыми.
Мы рассмотрели основные способы очистки папок Temp в Windows. Для пользователей, выполняющих оптимизацию ПК программным обеспечением, удобнее будет воспользоваться Способами 1 и 2. Всем тем, кто не использует подобные утилиты, а просто желает освободить место на накопителе, подойдет Способ 3. Удалять эти файлы постоянно не имеет смысла, поскольку чаще всего они весят мало и не отнимают ресурсов ПК. Достаточно делать это только в том случае, когда место на системном диске заканчивается из-за Temp.
Читайте также:
Как очистить жесткий диск от мусора на Windows
Очистка папки «Windows» от мусора в Windows
Наша группа в TelegramПолезные советы и помощь
Download Article
Free up disk space & speed up your PC by deleting temporary files
Download Article
- Using Disk Cleanup
- Using Storage Settings
- Using the Command Prompt
- Using the Run Dialog
- FAQ
- Video
|
|
|
|
|
Windows 10 creates temporary files while you use certain apps to speed up certain processes. However, your PC can create hundreds of temporary files in a day, which takes up hard drive space and can even slow down your computer. This wikiHow will show you how to clear temporary files from your Windows 10 PC and answer some common questions about temporary files on Windows.
Quick Steps
- Search «Disk Cleanup» in the Windows search bar.
- Open the Disk Cleanup app,
- Select the drive you want to clean and click Ok.
- Check «Temporary Files» and Temporary Internet Files.»
- Click Ok.
- Click Delete Files.
-

The easiest way to clean up temporary files on your Windows 10 or 11 computer is to use the Disk Cleanup app. Use the following steps to open it:[1]
- Press the Windows key and type disk cleanup.
- Click Disk Cleanup in the search results.
-
The drive you use the most will have the most temporary files. In most cases, this will be the «C:» drive.
- If you aren’t given the option to select a disk, you probably only have one disk drive on your computer.
Advertisement
-
Suggested boxes to delete are selected by default. Ensure the boxes next to «Temporary Internet Files» and «Temporary Files» are checked, then click OK.[2]
- You’ll see how much space they will free up below the right side of the columns.
-
This confirms that you want to delete the files permanently. The files will be promptly removed from your computer.
- For more tips on speeding up your device, check out our guides on how to speed up a slow Windows computer for free and fix common issues slowing down your computer.


Advertisement
-
You can click the Start icon and then the gear to open Settings.
-
To get there, click System, and then click Storage.[3]
-
It usually has a Windows logo over the drive icon and might be called “This PC” or «OS C:».
-
The number here represents how much space the temporary files are taking up. The next page shows you all the files that are considered temporary files, including files in the Downloads folder, files in the Recycle Bin, and thumbnails.[4]
-
Ensure the boxes next to «Temporary Files» and «Temporary Internet Files» are selected.
-
It’s at the top of the page above the checkboxes.[5]
-
This confirms you want to remove the files and starts deleting them. You’ll see a progress bar of the deletion process.
-
While you’re in the Storage Settings menu, make sure the toggle switch next to «Storage Sense» is on if you want to clean out your temporary files automatically when your disk space is low. It will also empty the Recycle Bin automatically.[6]
- If you click Storage Sense in the Settings menu, you can set how often you want your computer to delete your temporary files and empty the Recycle Bin automatically. By default, it will only delete your temporary files when your storage space is low and empty the Recycle Bin once every 30 days.


Advertisement
-
The Command Prompt is the Windows command-line Interface that allows you to perform Windows operations using text commands. You can easily clear temp files with a quick Command Prompt command. To get started:[7]
- Click the WIndows Start button.
- Type CMD.
- Click Command Prompt.
-
This command will delete all your temporary files.


Advertisement
-

This is the most involved method of clearing your temporary files, as you’ll be clearing the files manually.
-
You’ll be directed to the folder that contains all the temporary files.
-
To do so, press Ctrl + A to select all files at once. This will highlight all the folders.
-
This will move all the temporary files to the Recycle Bin.
- If you need to free up storage space, empty the Recycle Bin. To do so, right-click the Recycle Bin on your desktop and click Empty Recycle Bin.
- If Storage Sense is turned on, Windows will empty the Recycle Bin automatically every 30 days.
- All those files are moved into the Recycle Bin and can be restored if needed. To restore the files, open the Recycle Bin and click Restore all items at the top.
- For more Windows file management, check out our guide on finding hidden files and folders.


Advertisement
-
Temporary files are files that programs use to store temporary information. This allows the programs to run more efficiently and saves your progress as you work. For example, when you open a Microsoft Word document, Windows creates a temporary copy of the file every few minutes so you don’t lose anything important if you forget to save your document.
-
No, it is completely safe to delete your temporary files in Windows. You may lose your history and need to log in again, but Windows and your applications will not be harmed by deleting your temporary files.
-

Deleting temporary files can help you free up hard drive space on your computer and help your computer run faster and more efficiently, especially if you are low on disk space.
-
Not necessarily. Temporary files can help speed up tasks by storing temporary data. They can also save your data in the event of a crash. Temporary files only become junk files if they are sitting on your computer, taking up space, and not being used.


Advertisement
Ask a Question
200 characters left
Include your email address to get a message when this question is answered.
Submit
Advertisement
Video
Thanks for submitting a tip for review!
About This Article
Article SummaryX
1. Open Disk Cleanup.
2. Click to check the boxes next to Temporary Internet Files and Temporary Files.
3. Click OK.
Did this summary help you?
Thanks to all authors for creating a page that has been read 346,911 times.
Is this article up to date?
При работе программ, игр, а также при процедурах обновления системы, установки драйверов и подобных вещах Windows 10 создаются временные файлы, при этом они не всегда и не все удаляются автоматически. В этой инструкции для начинающих пошагово о том, как удалить временные файлы в Windows 10 встроенными средствами системы. Также в конце статьи информация о том, где в системе хранятся временные файлы и видео с демонстрацией всего описанного в статье. Обновление 2017: В Windows 10 Creators Update появилась автоматическая очистка диска от временных файлов.
Отмечу, что описываемые ниже способы позволяют удалить лишь те временные файлы, которые система смогла определить как таковые, однако в некоторых случаях на компьютере могут быть и другие ненужные данные, подлежащие очистке (см. Как узнать чем занято место на диске). Преимущество описанных вариантов в том, что они полностью безопасны для ОС, но если нужны более действенные методы, можете ознакомиться со статьей Как очистить диск от ненужных файлов.
Удаление временных файлов с помощью опции «Хранилище» в Windows 10
В Windows 10 появился новый инструмент для анализа содержимого дисков компьютера или ноутбука, а также их очистки от ненужных файлов. Найти его можно, зайдя в «Параметры» (через меню Пуск или нажав клавиши Win+I) — «Система» — «Хранилище».
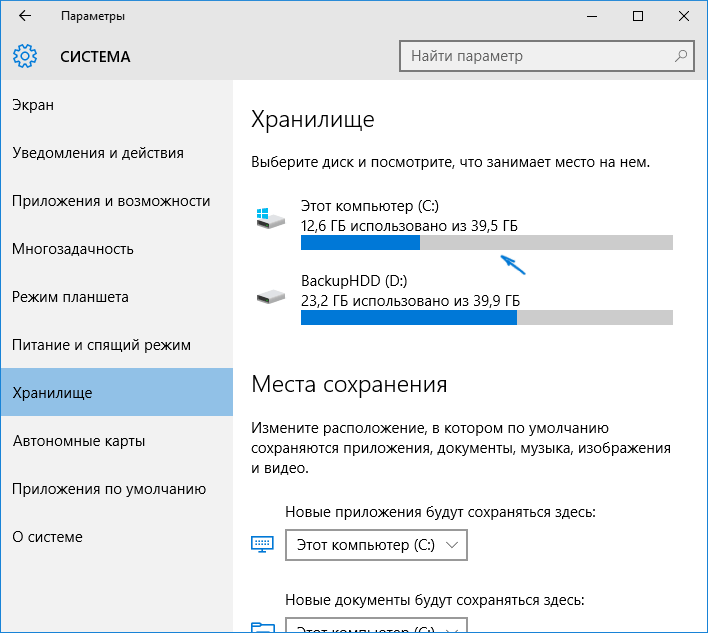
В этом разделе будут отображаться подключенные к компьютеру жесткие диски или, вернее, разделы на них. При выборе любого из дисков, вы сможете изучить, чем занято место на нем. Для примера выберем системный диск C (так как именно на нем в большинстве случаев и располагаются временные файлы).
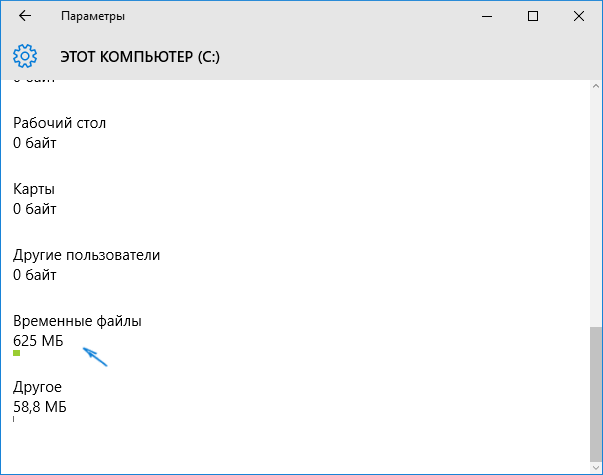
Если пролистать список с элементами, хранящимися на диске, до конца, вы увидите пункт «Временные файлы» с указанием занимаемого места на диске. Нажмите по этому пункту.
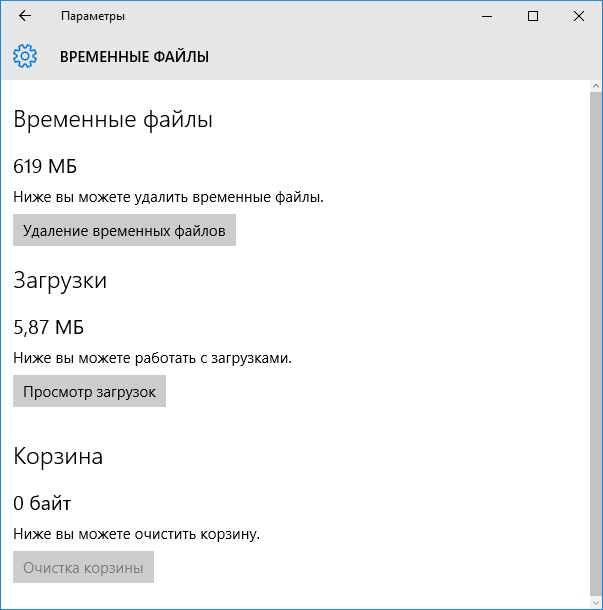
В следующем окне вы можете отдельно удалить временные файлы, изучить и очистить содержимое папки «Загрузки», узнать, сколько места занимает корзина и очистить ее.
В моем случае, на почти идеально чистой Windows 10 нашлось 600 с лишним мегабайт временных файлов. Нажимаем «Очистить» и подтверждаем удаление временных файлов. Начнется процесс удаления (который никак не демонстрируется, а просто написано «Мы удаляем временные файлы») и через короткое время они исчезнут с жесткого диска компьютера (при этом держать окно очистки открытым необязательно).
Использование утилиты очистки диска для удаления временных файлов
В Windows 10 также имеется встроенная программа «Очистка диска» (которая присутствует и в предыдущих версиях ОС). Она может удалить и те временные файлы, которые доступны при очистке с помощью предыдущего способа и некоторые дополнительные.
Для ее запуска можно использовать поиск или нажать клавиши Win+R на клавиатуре и ввести cleanmgr в окно «Выполнить».
После запуска программы, выберите диск, который нужно очистить, а затем элементы, которые нужно удалить. Среди временных файлов здесь представлены «Временные файлы Интернета» и просто «Временные файлы» (те же, что удалялись предыдущим способом). Кстати, вы также безопасно можете удалить и компонент RetailDemo Offline Content (это материалы, для демонстрации Windows 10 в магазинах).
Для начала процесса удаления нажмите «Ок» и дождитесь завершения процесса очистки диска от временных файлов.
Удаление временных файлов Windows 10 — видео
Ну и видео инструкция, в котором все шаги, связанные с удалением временных файлов из системы показаны и рассказаны.
Где в Windows 10 хранятся временные файлы
Если вы хотите удалить временные файлы вручную, то найти их можно в следующих типичных расположениях (но могут быть и дополнительные, используемые некоторыми программами):
- C:\Windows\Temp\
- C:\ Users\ Имя_пользователя\ AppData\ Local\ Temp (папка AppData по умолчанию скрыта. Как показать скрытые папки Windows 10.)
С учетом того, что данная инструкция предназначена для начинающих, думаю, достаточно. Удалив содержимое указанных папок вы, почти гарантированно, ничего не повредите в Windows 10. Возможно, вам также пригодится статья: Лучшие программы для очистки компьютера. Если же остались какие-то вопросы или непонимание, спрашивайте в комментариях, постараюсь ответить.