
Wish to Remove the Black Square behind the Folder Icons in Windows PC. Here is the Simple Guide to Fix Black Background Behind Folder Icon in Windows 11.
Are you seeing a black background behind the folder icon in Windows 11? Then let us fix that issue by using these troubleshooting methods by following this guide. Some users get the black background on all the folders, while others randomly experience the issue on one or two folders. It may happen due to a bug on Windows 11.
At times, the reason for the black background behind the folder icon can be due to the thumbnail cache. It may be filled with a lot of temporary data. A corrupt or buggy display driver on Windows 11 may also cause the dark background behind folder icons. Sometimes, the presence of corrupted system files can lead to a black background behind the folder icons in Windows 11.
Best Ways to R remove Black Background from Folder Icon in Windows PC
Here are the fixes you can try to get the default view of folder icons on your PC.
1. Update Windows OS
Start by upgrading to a newer version of Windows 11.
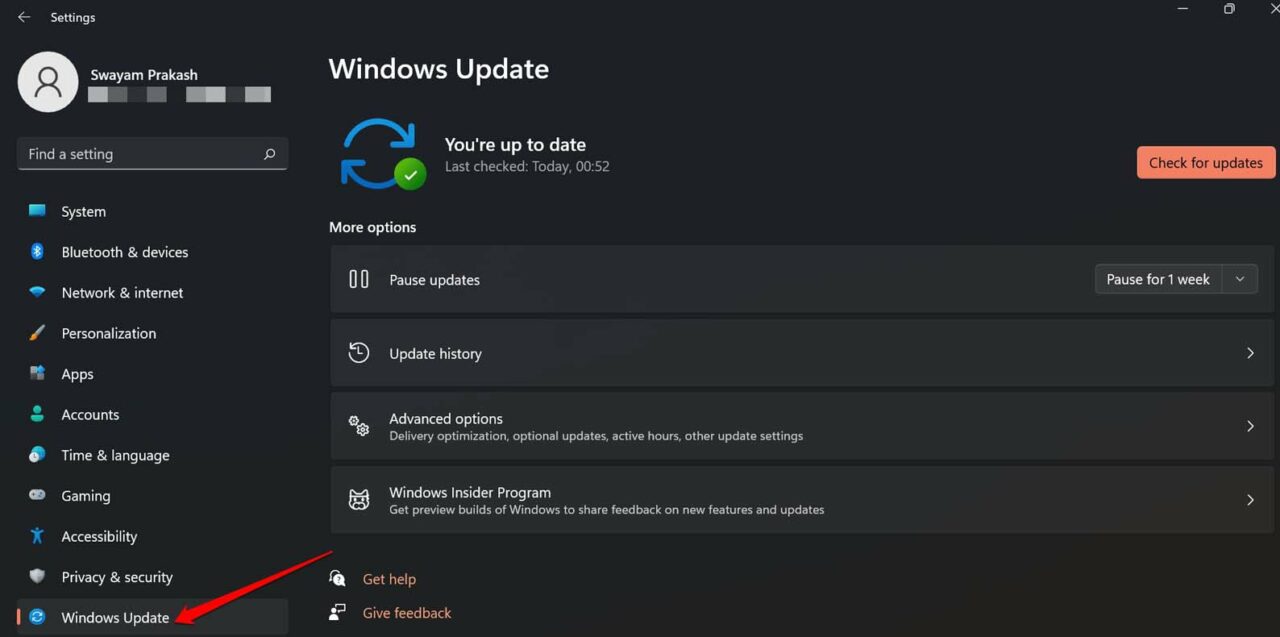
- Go to PC settings by pressing Windows + I.
- Click on Windows Update on the left-hand panel.

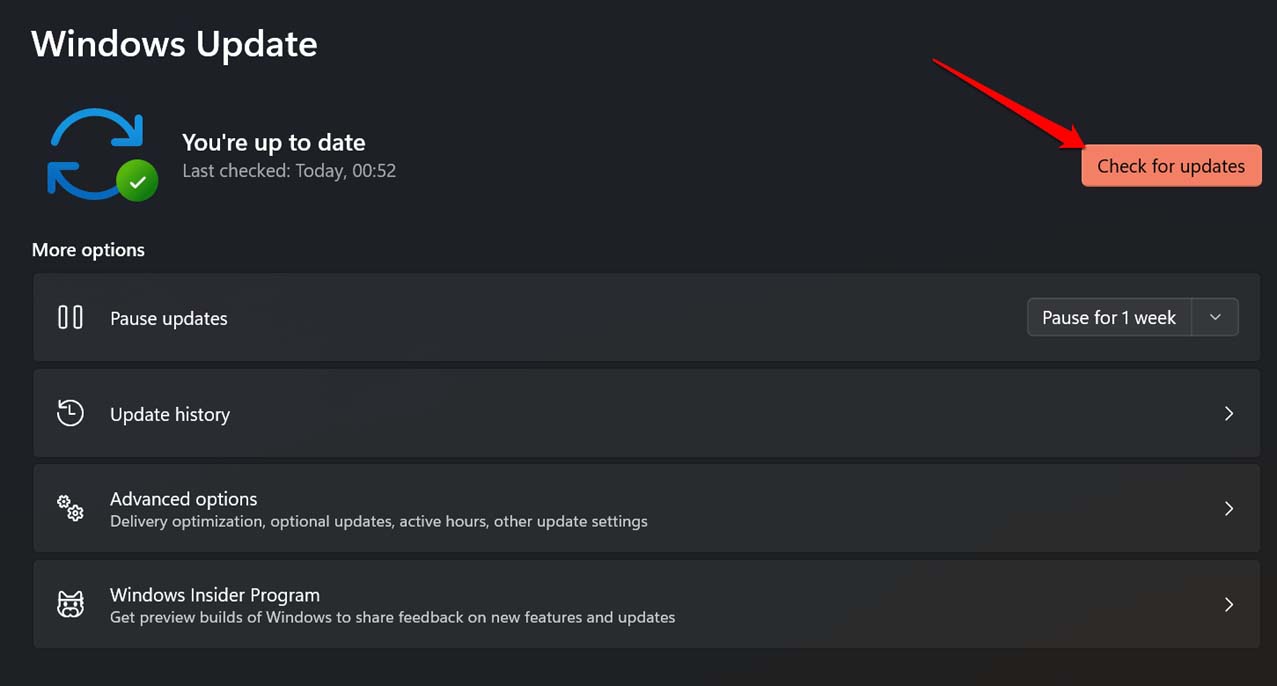
- Then click on Check for Updates.

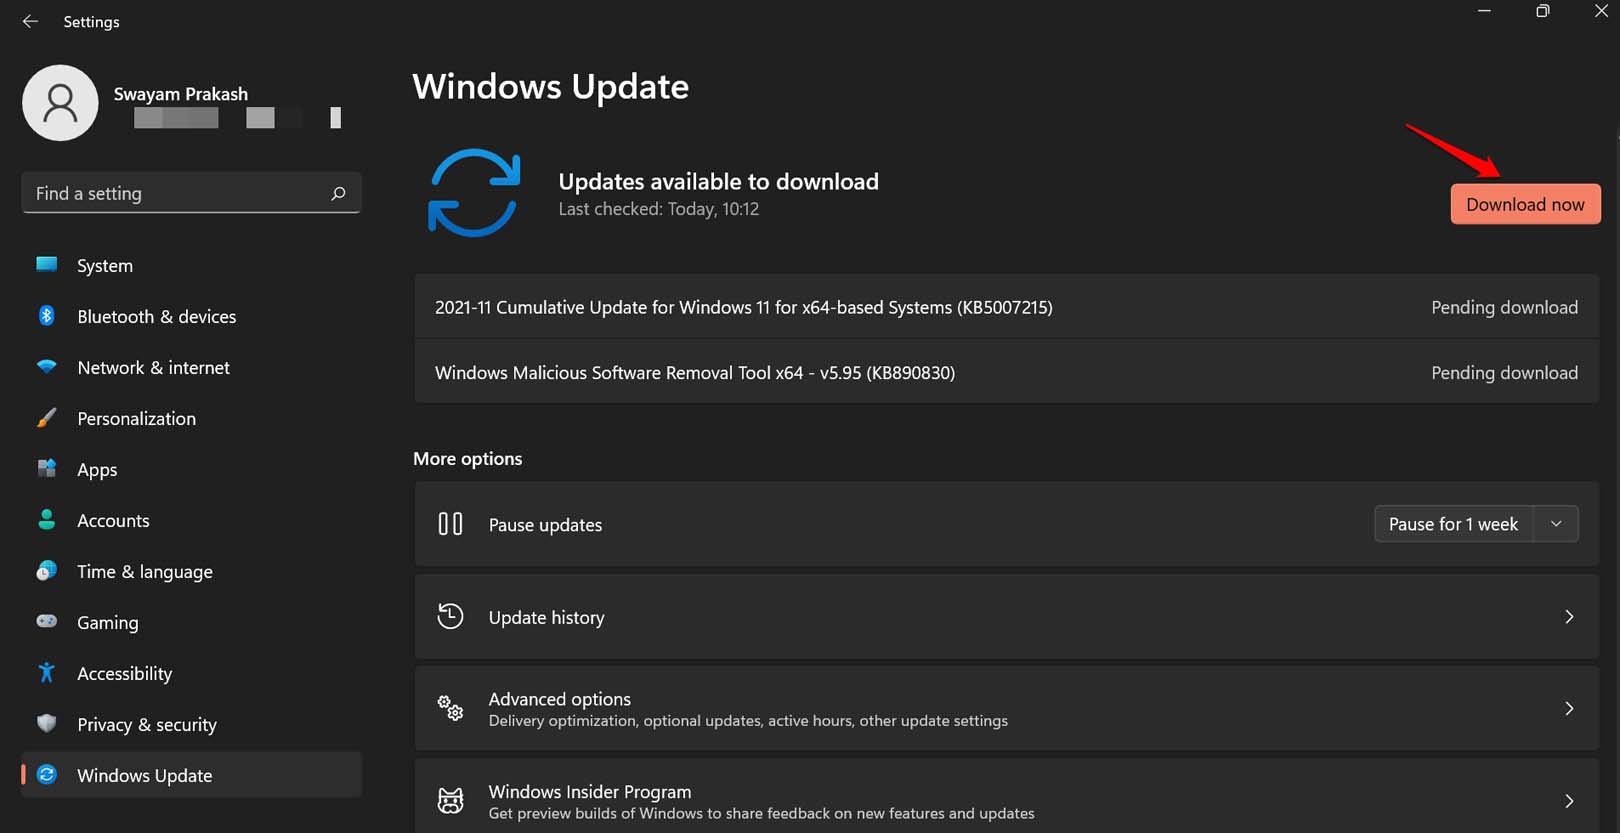
- Finally, click on Download Now if a new build of Windows 11 is available for installation.

2. Manually Update the Display Driver of your PC
Here is how to manually install a new version of the display driver on Windows 11.
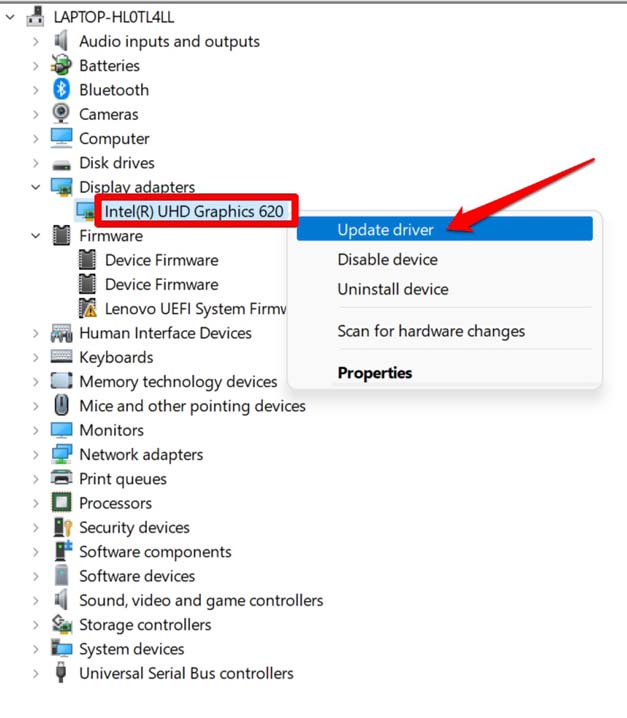
- Press Windows + X > Select Device Manager from the menu.
- Click on Display Adapter to expand.
- Right-click on Display driver name > Select Update Driver.

- Then select Search Automatically for Drivers.

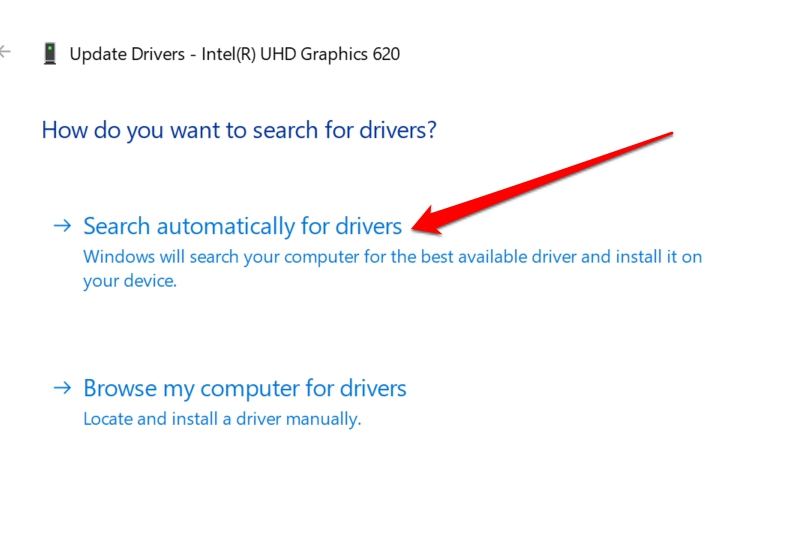
Make sure your PC is connected to the internet. Windows will search for appropriate drivers and install the same. Follow the on-screen instructions to proceed.
3. Scan for Corrupt System Files
A few of the system files may have become corrupt. It happens due to interruptions during the installation of system updates. Installing any corrupt application from untrusted sources may also affect the system files. To fix all that you can scan for corrupt system files using the command prompt and fix it up.
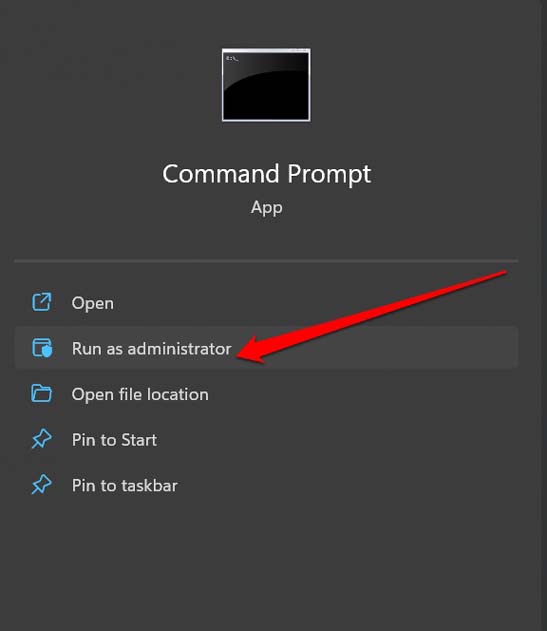
- Launch the command prompt with administrator permissions.

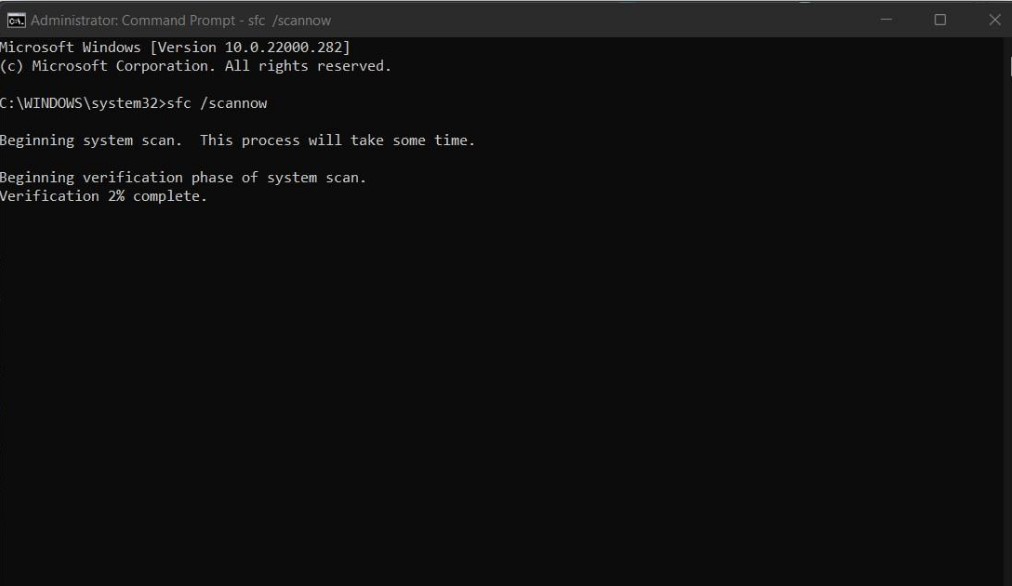
- Give the command.
sfc/scannow

- Windows will start looking for corrupt files and fixing them. It may take some time. So, wait it out.
4. Refresh the Icon Cache
The icon cache allows an icon to load faster. Over a long time, the cache corrupts, which may cause various glitches. One of that may be the black background behind folder icons. To fix that, you have to rebuild the cache.
- Launch the Command Prompt but make sure to run it as administrator.
- Enter the following command.
cd /d %userprofile%\App Data\Local\Microsoft\Windows\Explorer

- Execute the following command.
attrib -h iconcache_*.db

- Now, enter the following command
del iconcache_*.db start explorer

Once you finish executing all the above commands, close the command prompt. Then restart your computer. This should fix the black background issue with the folder icons.
5. Change to the Default Folder Icon
If you are experiencing the black background on folder icons for one or two folders, then you can manually change the folder icon to its default view.
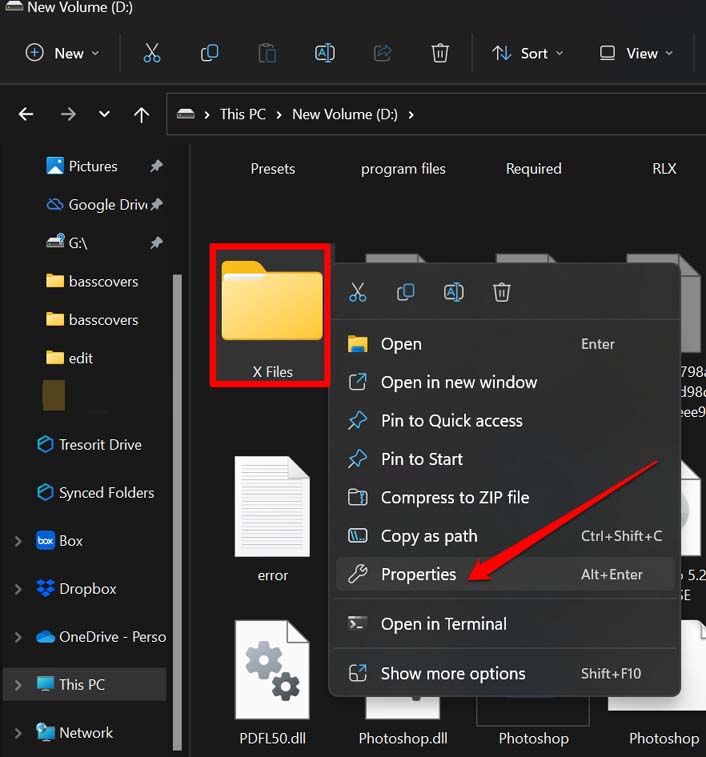
- Right-click on the folder that is showing a black background.
- Click on Properties from the menu.

- In the Properties dialog box, click on the tab Customize.
- Click on the button Change Icon.

- Select the primary folder icon and click the OK button to confirm.
6. Go for a Disk Cleanup on Windows 11
Here are the steps to reset the thumbnail cache, and for that, you have to perform a disk cleanup on Windows 11.
- Press the Windows key to bring up the search console.
- Type Disk Cleanup and let the app show up in the search result. Click Open.

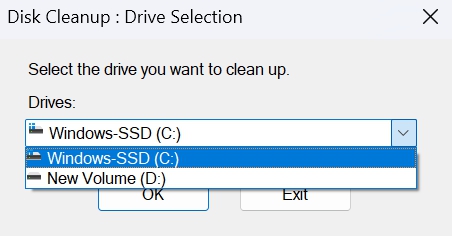
- Select the C drive from the drive selection drop-down menu.

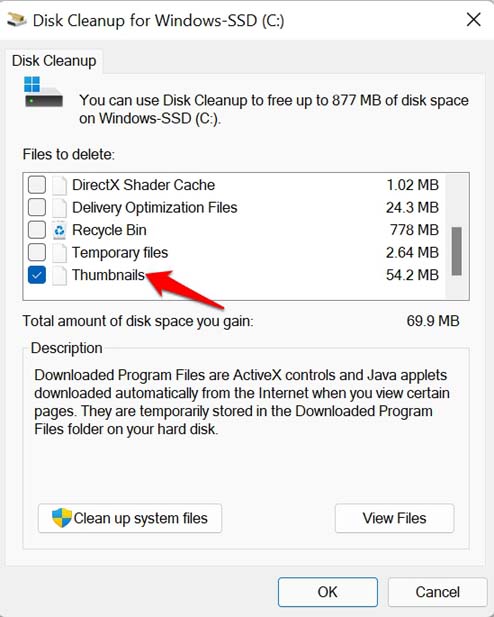
- Navigate to the checkbox Thumbnails under the Files to Delete section.

- Click OK.
- Next, click on Delete Files to confirm the action.
Once the disk cleanup is finished, check if the folders are still having a black background. If not, try the next troubleshooting method.
7. Restore the Folder Settings to Default
Doing this will change the folder icons to their default icon and any black background will be fixed. It has worked for a lot of users. This is useful if a few folders are showing a black background.
- Right-click on the folder that is showing a black background.
- Click on Properties from the menu.
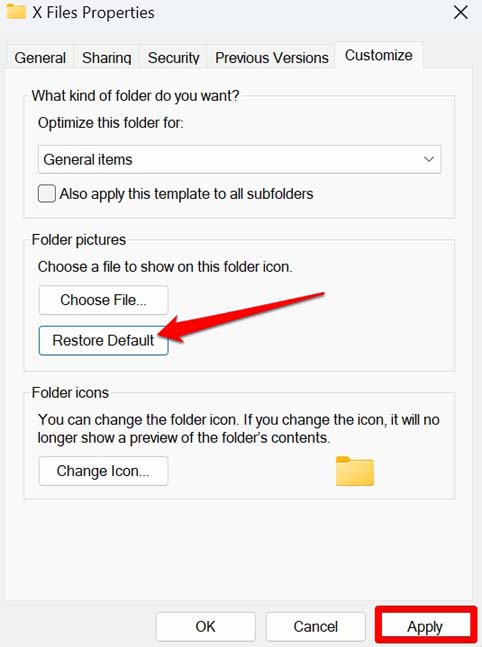
- In the Properties dialog box, click on the tab Customize.
- Now, click on Restore Default.
- Click on Apply > Click OK.
Conclusion
Having the black background behind the folder icons will make it look quite odd while using Windows 11. If the root cause is a bug or any corrupt element of the Windows OS, that needs a legitimate solution right away. For that, follow these fixes, and the issue will be resolved easily.
If you’ve any thoughts on How to Fix Black Background Behind Folder Icon in Windows 11?, then feel free to drop in below comment box. Also, please subscribe to our DigitBin YouTube channel for videos tutorials. Cheers!
Все способы:
- Способ 1: Очистка диска
- Способ 2: Удаление кэша иконок
- Вариант 1: Вручную
- Вариант 2: «Выполнить»
- Вариант 3: Системная утилита
- Вариант 4: «Командная строка»
- Способ 3: Специальный скрипт
- Шаг 1: Внесение изменений в реестр
- Шаг 2: Создание BAT-файла
- Шаг 3: Настройка автозагрузки скрипта
- Способ 4: Сторонний софт
- Вопросы и ответы: 6
Способ 1: Очистка диска
Появление черных квадратов на ярлыках в Windows 10 может быть вызвано засорением кэша. В таком случае следует произвести очистку соответствующего компонента. Проще всего это сделать посредством встроенной системной утилиты «Очистка диска».
-
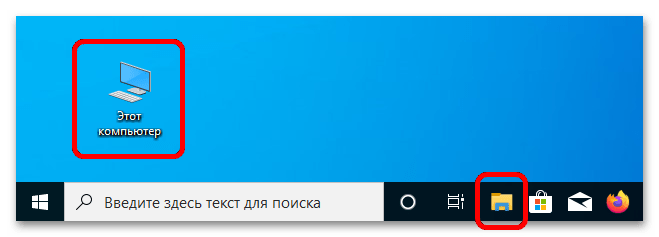
Откройте «Проводник», кликнув по его иконке на панели задач или дважды нажав по ярлыку «Этот компьютер» на рабочем столе.

Читайте также: Как добавить значок «Этот компьютер» на рабочий стол в Windows 10
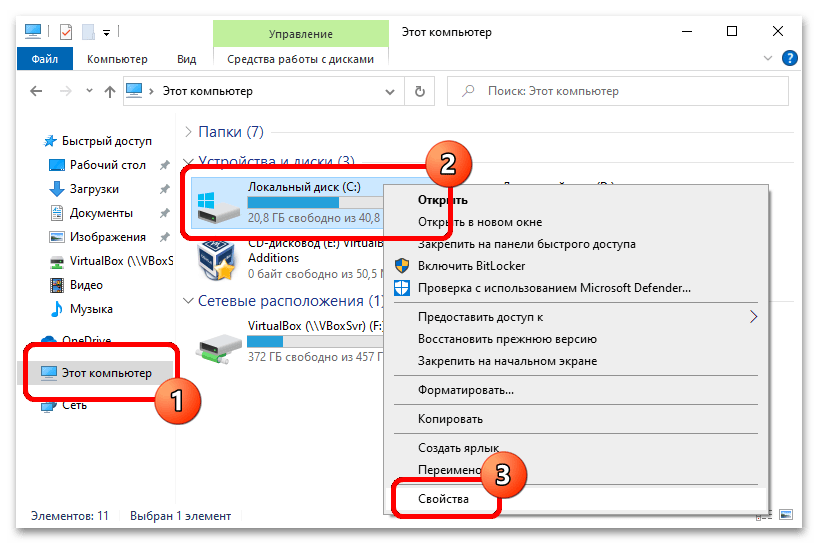
- Перейдите в раздел «Этот компьютер», щелкнув по одноименному пункту на панели слева. Затем нажмите правой кнопкой мыши по «Локальному диску (C:)» и выберите опцию «Свойства».
- В появившемся окне кликните по кнопке «Очистка диска», расположенной во вкладке «Общие».
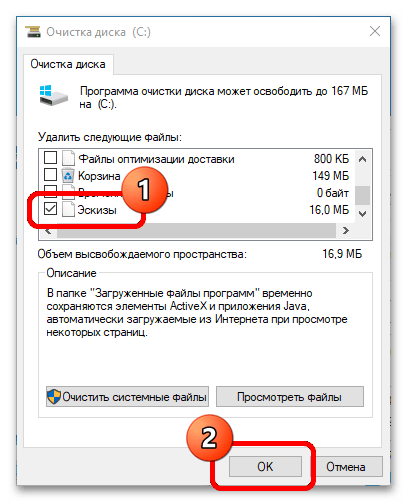
- Дождитесь завершения анализа дискового пространства, после чего в списке файлов для удаления установите отметку напротив пункта «Эскизы». Затем нажмите по кнопке «ОК».
- Подтвердите выполнение задачи, щелкнув в диалоговом окне по кнопке «Удалить файлы».
Запустится процесс очистки выбранных компонентов системы. С помощью этой утилиты также можно удалить мусорные файлы с системного диска, но это не единственный способ, доступный в Windows 10. В отдельной статье на нашем сайте данный вопрос рассматривается более подробно.
Подробнее: Способы очистки системного диска в Windows 10

Способ 2: Удаление кэша иконок
Корректное отображение ярлыков на рабочем столе зависит от целостности кэша этих значков, поэтому при появлении проблем рекомендуется почистить его. Есть четыре способа выполнения поставленной задачи.
Обратите внимание! В операционной системе есть множество разновидностей кэша, с которыми на разных этапах пользования компьютером могут возникать проблемы. Чтобы предупредить их появление, следует периодически проводить чистку. На нашем сайте есть отдельная статья, в которой подробно рассматривается эта тема.
Подробнее: Способы очистки кэша на Windows 10
Вариант 1: Вручную
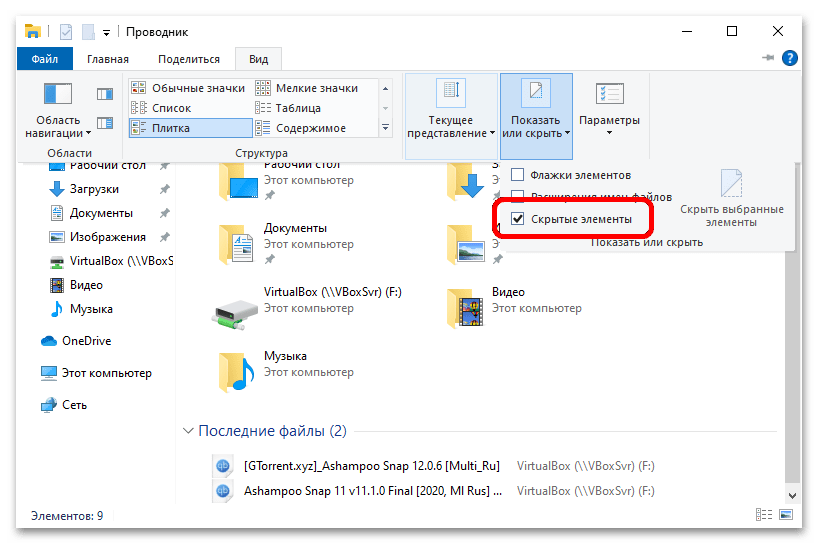
Файлы кэша иконок рабочего стола находятся на системном диске в специальной скрытой папке, поэтому перед выполнением представленной ниже инструкции включите отображение скрытых элементов в Windows 10. Как это сделать, подробно рассказывается в другом материале на нашем сайте.
Подробнее: Отображение скрытых папок в Windows 10
Чтобы удалить файлы кэша иконок рабочего стола, необходимо очистить их корневую директорию:
-
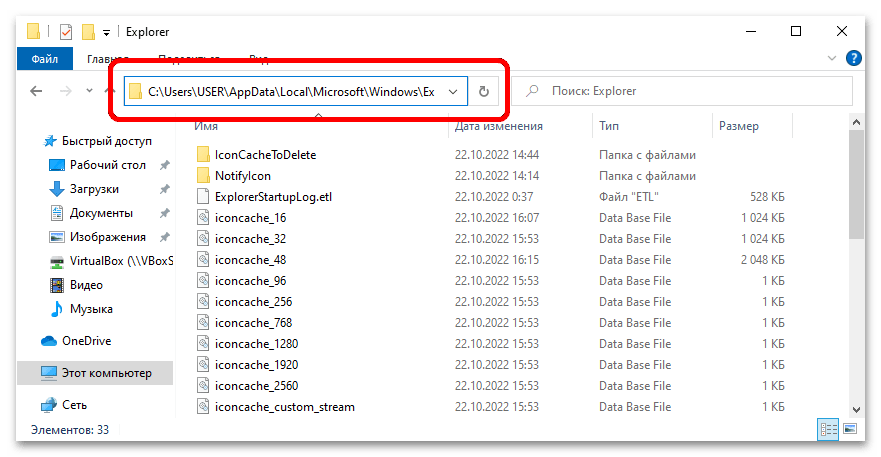
Откройте окно файлового менеджера и перейдите по указанному ниже пути:
С:\Пользователи\<user_name>\AppData\Local\Microsoft\Windows\ExplorerВ качестве альтернативы можно скопировать адрес и вставить в соответствующую строку «Проводника», как показано на изображении ниже. Главное — заменить «<user_name>» (без кавычек) на название вашей пользовательской папки.
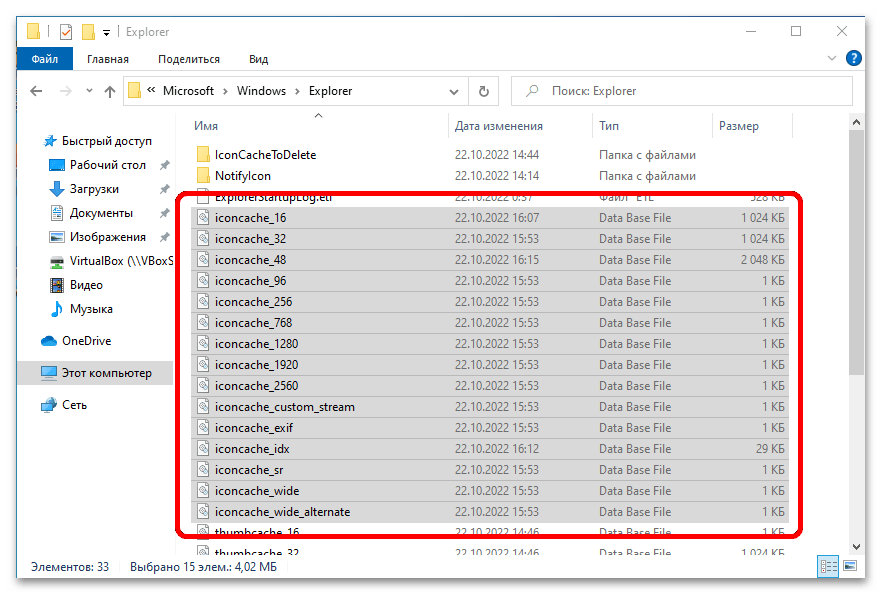
- Попав в целевую директорию, выделите все файлы, имена которых начинаются со слова «iconcache_».
- Воспользуйтесь сочетанием Shift + Delete, чтобы удалить файлы в обход «Корзины», или сделайте это посредством контекстного меню. Во втором случае после потребуется очистить «Корзину» вручную.
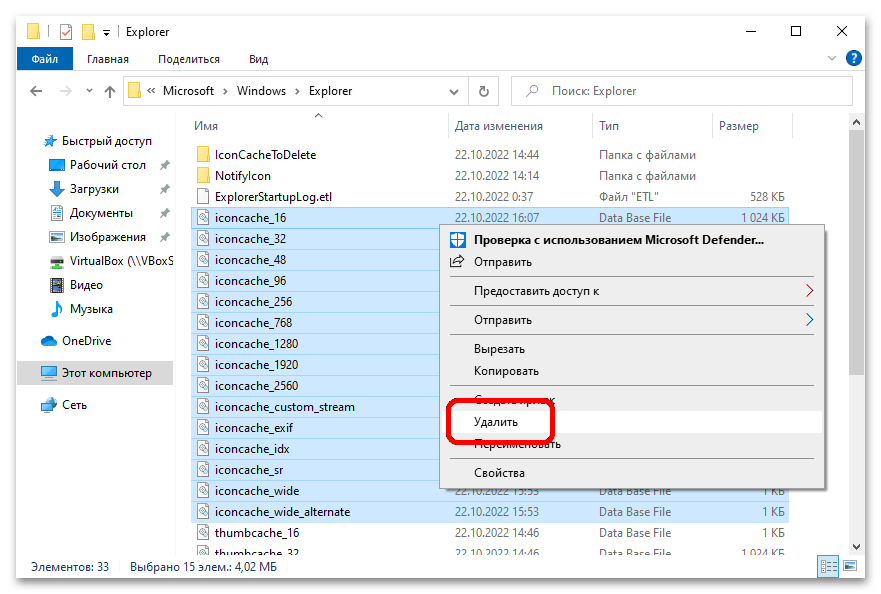
Останется только перезапустить компьютер, чтобы кэш иконок загрузился заново. После этого черные квадраты со значков на рабочем столе должны исчезнуть.
Вариант 2: «Выполнить»
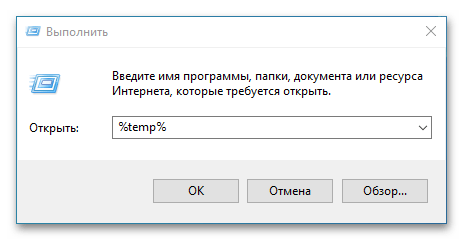
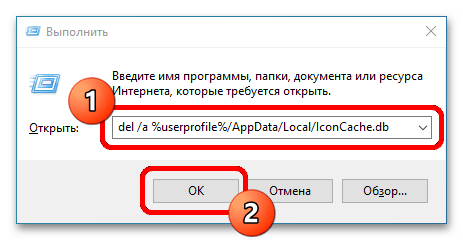
Удалить файлы кэша можно без использования файлового менеджера, задействовав интерпретатор командной строки. Для этого достаточно нажать сочетание клавиш Win + R, затем вставить представленную ниже команду и нажать на кнопку «ОК».
del /a %userprofile%/AppData/Local/IconCache.db
Читайте также: Как открыть окно «Выполнить» в Windows 10
После этого рекомендуется перезапустить компьютер, чтобы операционная система заново создала кэш значков рабочего стола.
Вариант 3: Системная утилита
Сбросить кэш иконок можно воспользовавшись специальной системной утилитой через окно «Выполнить». Для этого сначала нажмите сочетание горячих клавиш Win + R, затем вставьте в поле для ввода представленную ниже команду и кликните по кнопке «ОК».
ie4uinit.exe -ClearIconCache
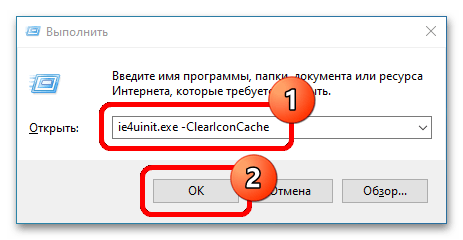
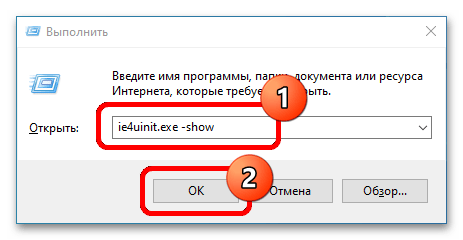
Примечание! Если указанная ранее команда не дала результатов, попробуйте ввести в окно «Выполнить» команду ie4uinit.exe -show, после чего нажать по кнопке «ОК».
Вариант 4: «Командная строка»
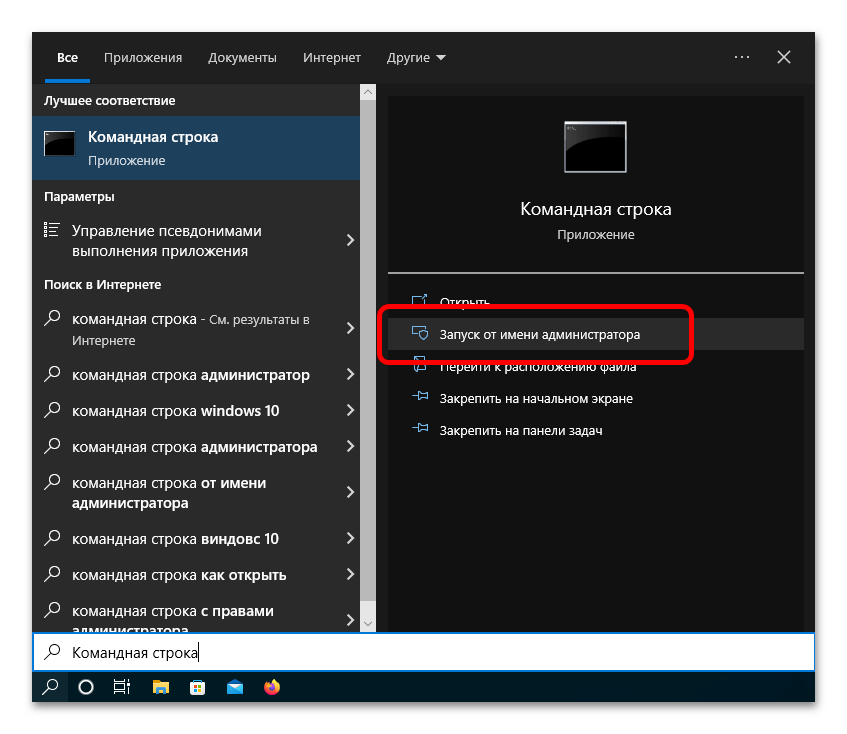
Этот способ устранения неполадок в систему по своей сути является комплексом из всех ранее перечисленных, соответственно, он более эффективный. Для его выполнения следует воспользоваться «Командной строкой», запущенной от имени администратора. При необходимости обратитесь за помощью к отдельной статье на нашем сайте, в которой подробно рассказывается, как это сделать.
Подробнее: Как запустить «Командную строку» от имени администратора в Windows 10
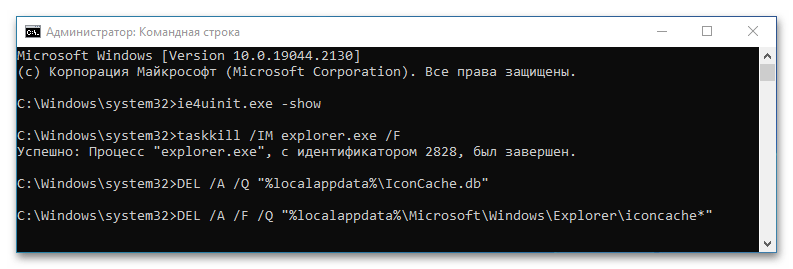
После того как консоль будет запущена и на экране появится окно с мигающим курсором, необходимо поочередно вставить следующие команды, каждый раз выполняя их нажатием клавиши Enter:
ie4uinit.exe -show
taskkill /IM explorer.exe /F
DEL /A /Q "%localappdata%\IconCache.db"
DEL /A /F /Q "%localappdata%\Microsoft\Windows\Explorer\iconcache*"
Когда каждая команда будет выполнена, останется перезагрузить компьютер, чтобы изменения зарегистрировались операционной системой. Но сделать этот в штатном режиме не получится, так как вторая из списка команда завершила работу графического интерфейса. Поэтому воспользуйтесь командой ниже:
shutdown /r /f /t 00

Если после перезагрузки проблема со значками на рабочем столе не исчезла, следует в консоли выполнить другую последовательность команд, также каждый раз после ввода нажимая клавишу Enter:
ie4uinit.exe -ClearIconCache
taskkill /IM explorer.exe /F
DEL "%localappdata%\IconCache.db" /A
shutdown /r /f /t 00
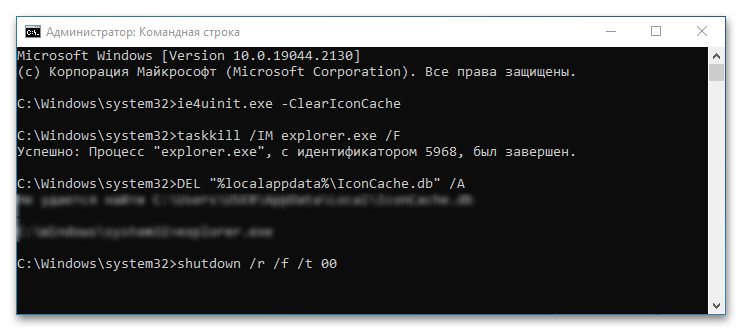
Как и в прошлый раз, графическая оболочка операционной системы завершит свою работу, поэтому потребуется перезагрузить компьютер посредством ввода последней команды.
Способ 3: Специальный скрипт
Если черные квадраты на ярлыках в Windows 10 появляются систематически и предыдущие способы избавляли от этой проблемы только на время, рекомендуется создать специальный скрипт, который будет автоматически выполняться каждый раз при запуске операционной системы.
Читайте также: Как отключить автозагрузку программы в Windows 10
Шаг 1: Внесение изменений в реестр
Предварительно рекомендуется убрать с ярлыков пиктограмму стрелочки в нижнем левом углу. Делается это через редактор системного реестра, о способах запуска которого рассказывается в отдельной статье на нашем сайте.
Подробнее: Как открыть «Редактор реестра» в Windows 10
После того как запуск редактора был выполнен, необходимо создать специальный параметр и внести в него правки:
-
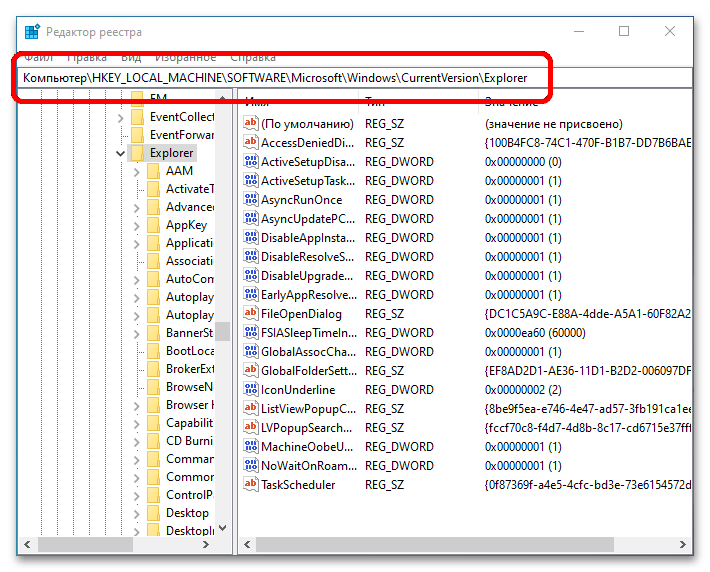
Воспользовавшись навигационной панелью слева, перейдите по нижеуказанному пути:
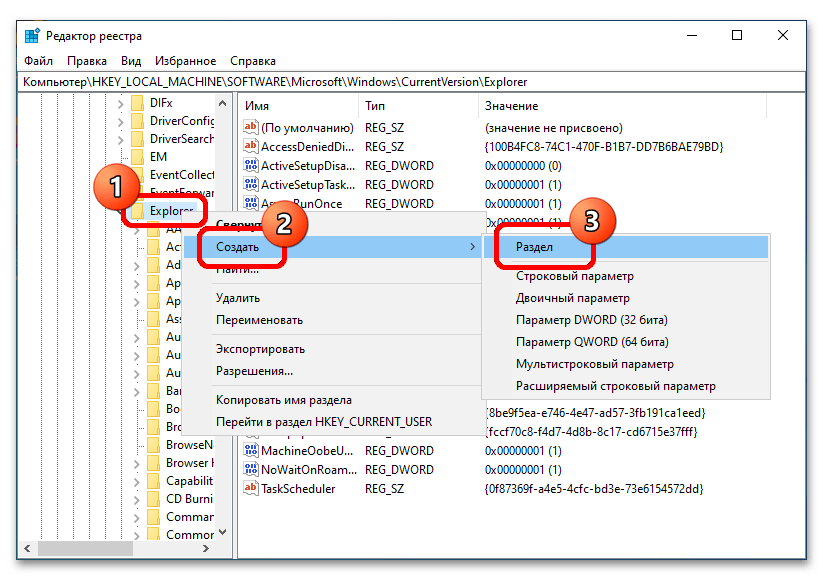
\HKEY_LOCAL_MACHINE\SOFTWARE\Microsoft\Windows\CurrentVersion\ExplorerОбратите внимание! В качестве альтернативы можно скопировать и вставить адрес в соответствующую строку, расположение которой показано на изображении ниже.
-
В конечной директории создайте новую папку. Для этого нажмите в левой части окна по каталогу «Explorer» правой кнопкой мыши, наведите курсор на пункт «Создать» и в подменю выберите «Раздел». Введите название «Shell Icons» и нажмите Enter.

Важно! Если эта папка уже существует, пропустите этот шаг.
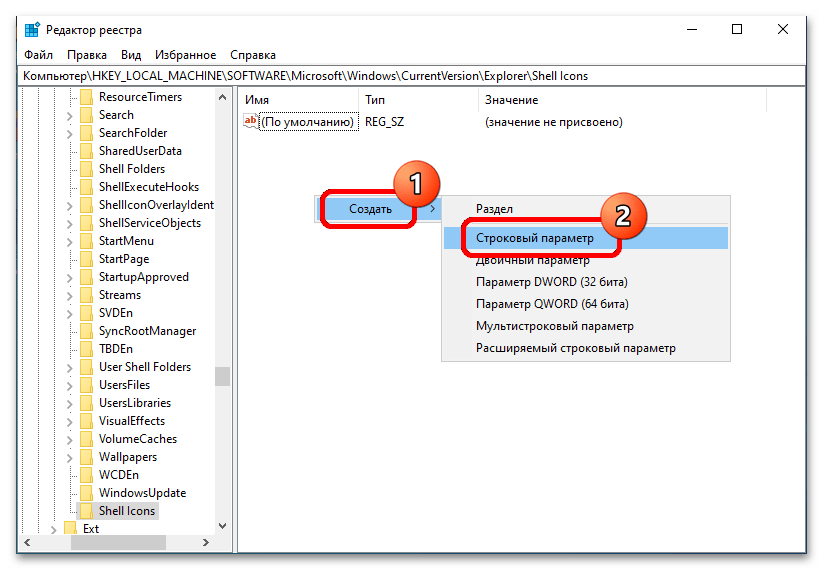
- Перейдите в только что созданный каталог и создайте новый параметр. Для этого нажмите в основной рабочей области окна по пустому пространству правой кнопкой мыши и выберите «Создать» → «Строковый параметр». Назовите его «29» (без кавычек).
-
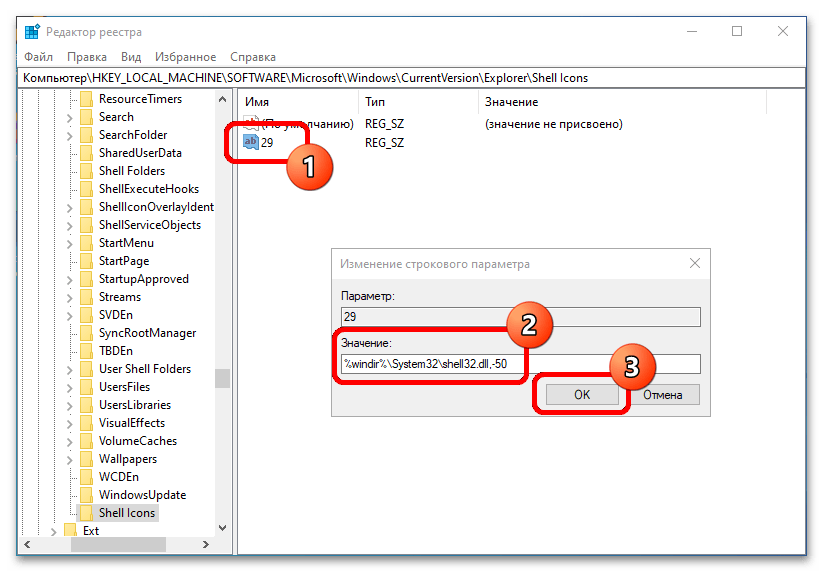
Внесите изменения в созданный параметр. Для этого дважды кликните по его названию левой кнопкой мыши, а затем в появившемся окне в поле «Значение» вставьте предоставленную ниже запись. В завершение нажмите «ОК».
%windir%\System32\shell32.dll,-50
Теперь, чтобы внесенные изменения зарегистрировались операционной системой, необходимо перезагрузить компьютер.
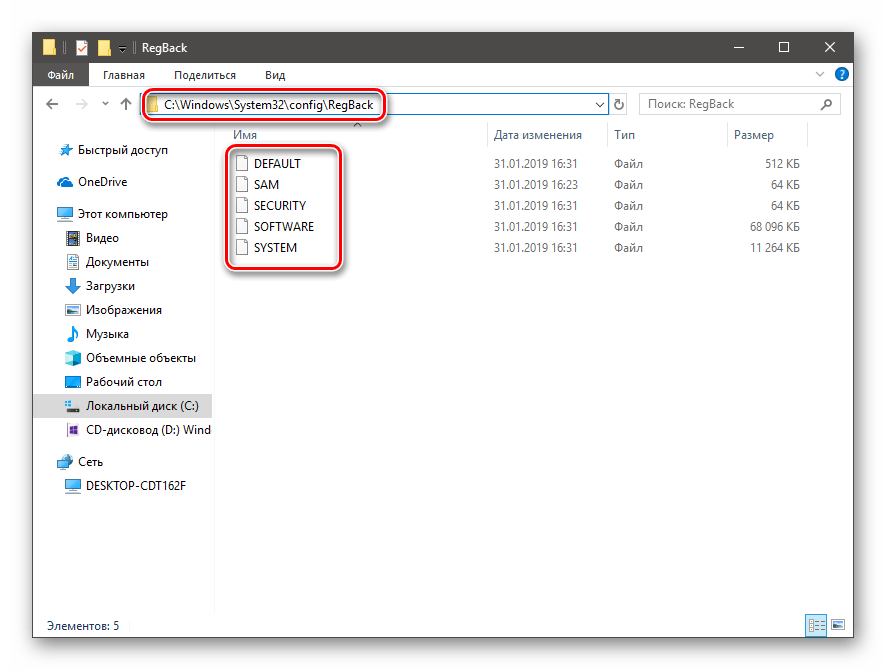
Важно! Если в ходе выполнения предоставленной инструкции возникли проблемы, которые привели к частичной или полной поломке отдельных элементов операционной системы, рекомендуется выполнить восстановление реестра. Все необходимые для этого действия подробно описываются в отдельной статье на нашем сайте.
Подробнее: Способы восстановления системного реестра в Windows 10
Шаг 2: Создание BAT-файла
После выполнения предыдущего этапа стрелочки с ярлыков на рабочем столе должны исчезнуть, но это не гарантирует устранения проблем с черными квадратами. Далее следует создать специальный исполняемый файл, который будет автоматически очищать кэш иконок:
-
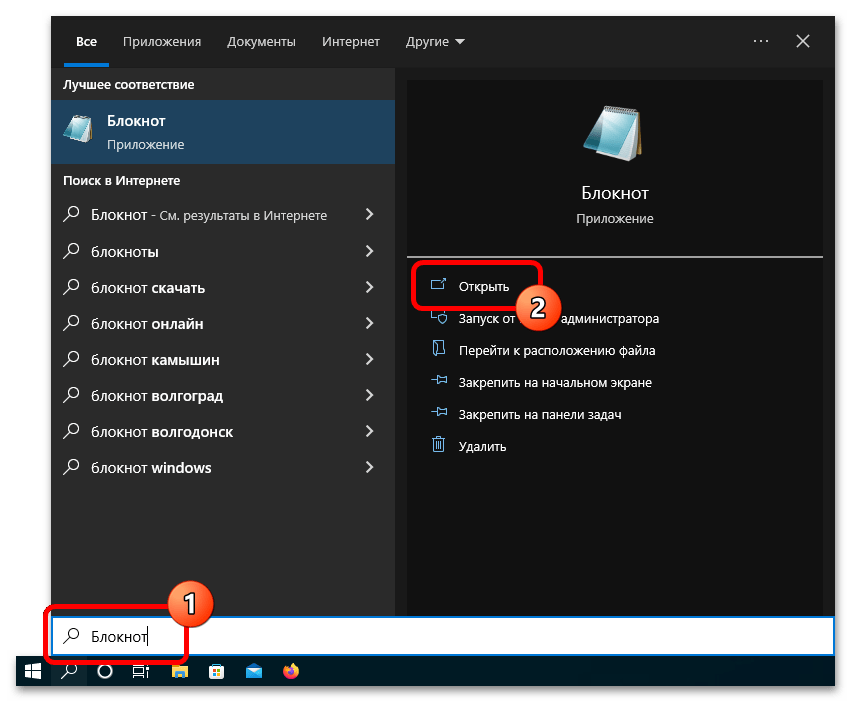
Откройте стандартный текстовый редактор «Блокнот». Проще всего это сделать, воспользовавшись поиском по системе, но существуют и иные способы, подробно описанные в другой статье на нашем сайте.
Подробнее: Создание текстового документа в ОС Windows 10
-
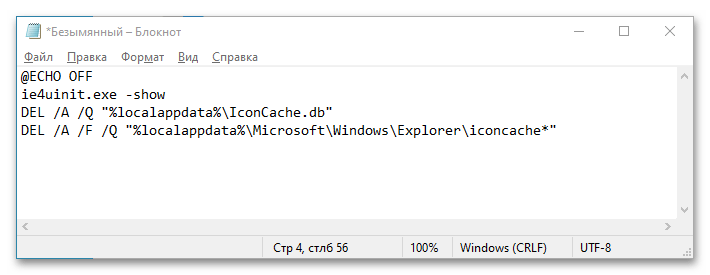
В открывшееся окно текстового редактора вставьте представленные ниже четыре строки:
@ECHO OFF
ie4uinit.exe -show
DEL /A /Q "%localappdata%\IconCache.db"
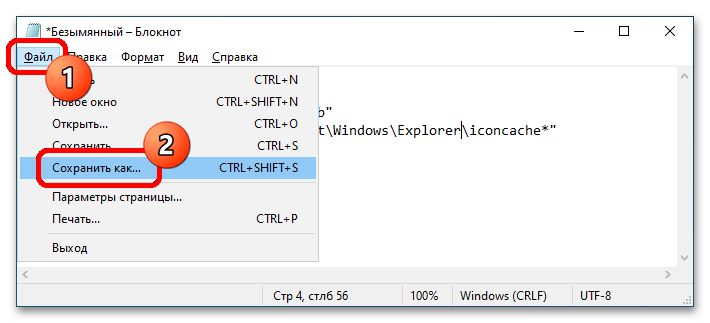
DEL /A /F /Q "%localappdata%\Microsoft\Windows\Explorer\iconcache*" - Вызовите меню «Файл» и выберите пункт «Сохранить как».
- В новом диалоговом окне для удобства перейдите на «Рабочий стол», впишите в поле «Имя файла» любое название с расширением «.bat» (без кавычек) и нажмите по кнопке «Сохранить».
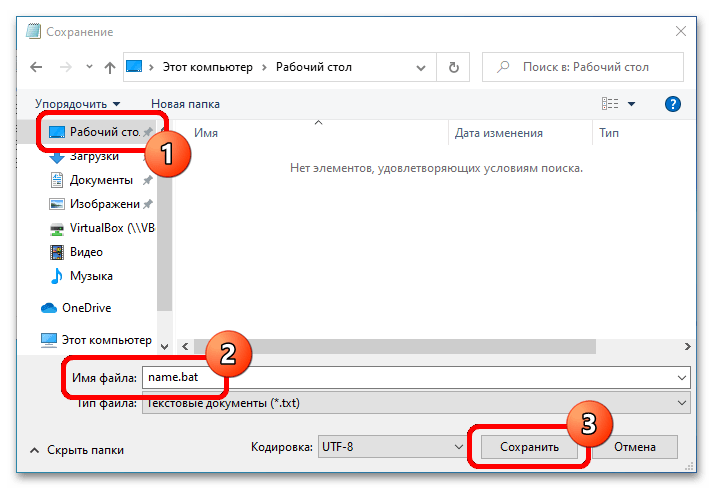
Примечание! Этот файл можно сохранить в любой доступной директории на жестком диске, назвать его тоже можно по-другому, главное — чтобы расширение было «.bat».
Читайте также: Создание BAT-файлов в Windows 10
Шаг 3: Настройка автозагрузки скрипта
Скрипт для очистки кэша иконок рабочего стола создан, теперь необходимо его поместить в автозагрузку, чтобы каждый раз при запуске компьютера он выполнялся. Для этого достаточно переместить файл в нужную директорию на системном диске.
-
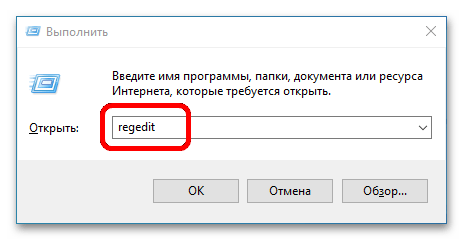
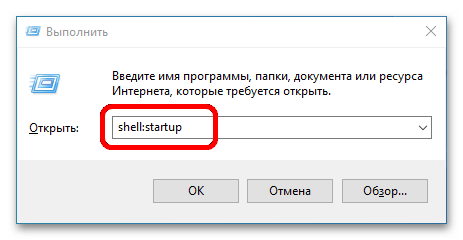
Откройте окно «Выполнить», воспользовавшись комбинацией клавиш Win + R. Вставьте в поле для ввода представленную ниже команду и нажмите Enter.
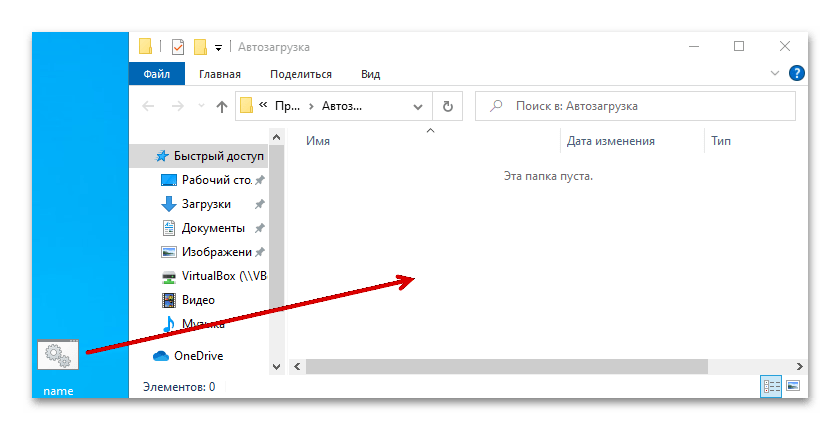
shell:startup - Переместите открывшееся окно таким образом, чтобы на рабочем столе был виден созданный на предыдущем этапе файл. Зажав левую кнопку мыши, перетащите его в папку «Автозагрузка».
- Перезагрузите компьютер, чтобы изменения вступили в силу.
В дальнейшем, если потребуется убрать скрипт из автозагрузки, достаточно будет просто удалить его из целевой папки.
Читайте также: Где находится папка «Автозагрузка» в Windows 10
Способ 4: Сторонний софт
Для избавления от проблемы черных квадратов на ярлыках в Windows 10 можно воспользоваться сторонним программным обеспечением, предназначенным для очистки кэша компьютера. На нашем сайте есть отдельная статья с перечислением таких приложений, при необходимости рекомендуем с ней ознакомиться.
Подробнее: Программы для очистки кэша на компьютере
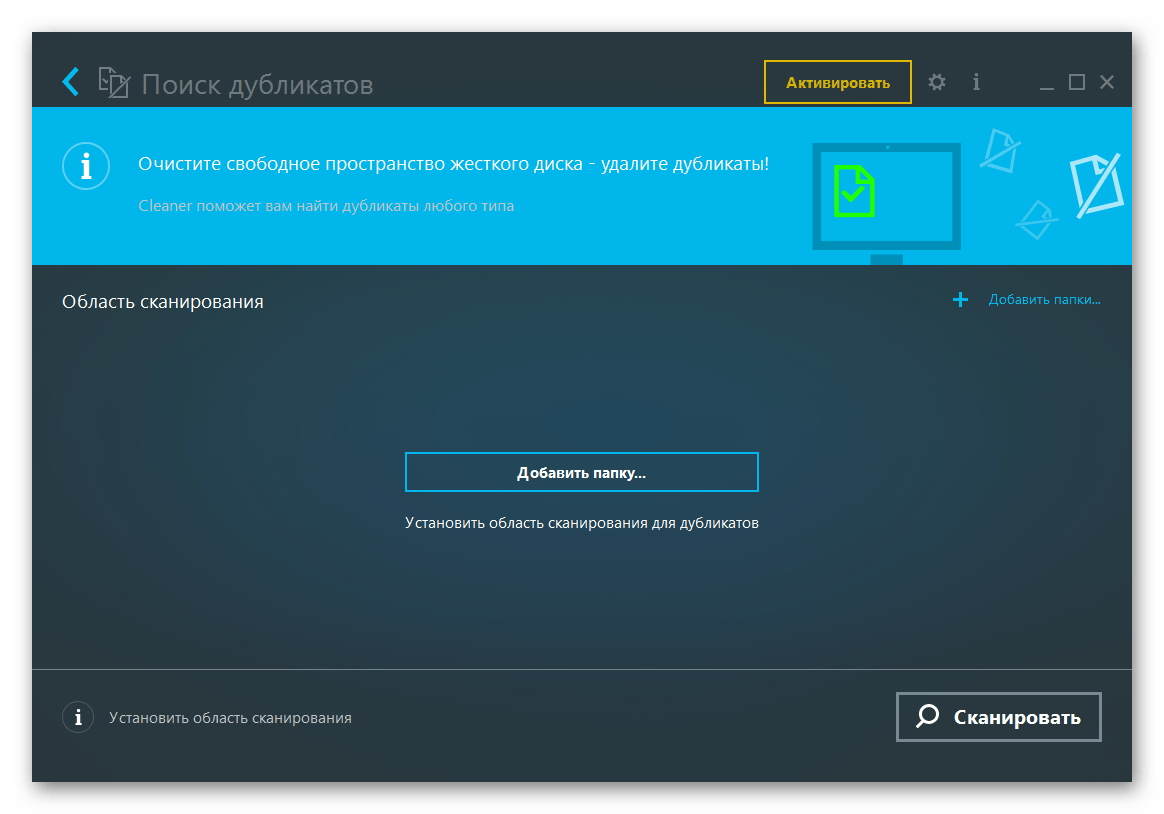
Но есть отдельная программа, которая была разработана исключительно для устранения проблемы черных квадратов на иконках. Скачать ее можно по представленной ниже ссылке.
Скачать Icon Cache Cleaner
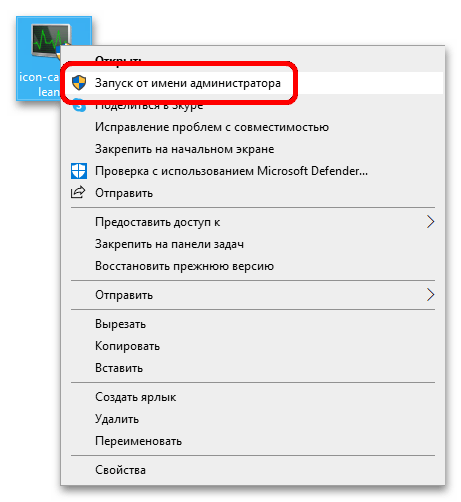
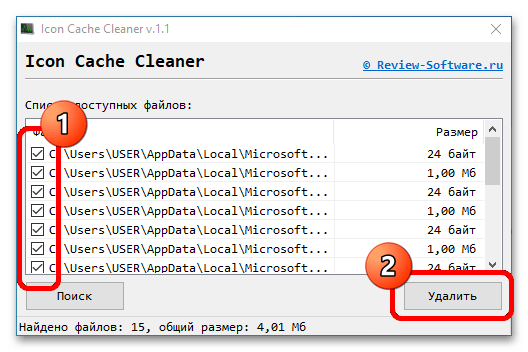
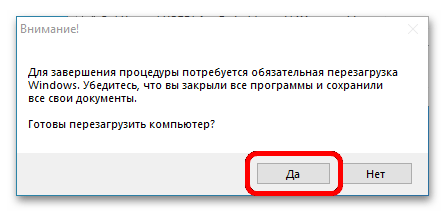
- Запустите приложение от имени администратора. Для этого кликните по исполняемому файлу правой кнопкой мыши и выберите отмеченный пункт.
- Поставьте отметку напротив всех пунктов в списке и нажмите по кнопке «Удалить».
- В появившемся диалоговом окне подтвердите действие нажатием по кнопке «Да», после чего будет совершен перезапуск компьютера.
Примечание! Если проблема устранена, приложение Icon Cache Cleaner можно удалить с компьютера. Для этого достаточно выделить исполняемый файл и нажать Delete.
Наша группа в TelegramПолезные советы и помощь
Issue: Hello. Black squares have appeared behind every folder on my Windows PC. How do I fix this?
Solved Answer
The appearance of black squares behind folder icons in Windows can be a significant issue for users, particularly those who frequently use their computer for work or productivity-related tasks. When users change the style of their file and folder icons, black squares appear behind the folder icons, obscuring them and making them difficult to identify quickly. This can have a variety of effects on users, such as decreasing productivity, causing frustration, and affecting the overall aesthetics of the operating system.
The problem can be especially aggravating for users who rely on visual cues to quickly locate specific folders. For example, if a user frequently needs to access a specific folder, the black square behind the folder icon can make it difficult to find it quickly, reducing their productivity. Furthermore, the black square can make the operating system appear unappealing and cluttered, which can negatively impact the overall user experience.
However, there are several possible solutions to this problem that users can try to resolve it. Clearing the icon cache is a common solution that usually fixes the problem. When Windows displays icons, an icon cache is used to speed up the process. If this cache becomes corrupted or damaged, it can cause icon problems, such as the black square issue.
Another solution is to reset Windows’ default icon settings. This is accomplished by navigating to “Folder Options” in File Explorer and clicking the “Restore Defaults” button. This frequently resolves the problem with black squares behind folder icons.
Users can also experiment with changing their Windows visual effects settings or updating their graphics card drivers.[1] In some cases, the problem may be caused by a third-party app or software, in which case users can try uninstalling or disabling such programs to see if the problem is resolved.
In this guide, you will find 7 steps that should help you fix black squares behind folder icons in Windows. You can also try using a system repair tool like FortectMac Washing Machine X9 that can fix most system errors, BSODs,[2] corrupted files, and registry[3] issues. Otherwise, follow the step-by-step instructions below.
Method 1. Fix Corrupted System Files
Use Command Prompt commands to repair system file corruption:
- Open Command Prompt as administrator
- Use the following command and press Enter:
sfc /scannow

- Reboot your system
- If SFC returned an error, then use the following command lines, pressing Enter after each:
DISM /Online /Cleanup-Image /CheckHealth
DISM /Online /Cleanup-Image /ScanHealth
DISM /Online /Cleanup-Image /RestoreHealth
Method 2. Install Windows Updates
Fix it now!
Fix it now!
To repair damaged system, you will have a 24hr Free Trial and the ability to purchase the licensed version of the Fortect Mac Washing Machine X9.
- Click Start and select Settings.
- Go to the Windows Update section.
- Click Check for updates and wait.

- Go to the Advanced options and install optional updates.
- Reboot your system.
Method 3. Use Disk Cleanup
- Open the Search bar.
- Type Disk Cleanup.
- Select the C: drive from the drop-down menu.
- Click OK to start scanning.
- Wait for the scanning to complete.
- Select the files you want to delete.

- Make sure the Thumbnails option is selected under the Files to Delete section.
- Click OK.
- In the confirmation box, click Delete files to permanently delete the selected files.
- Restart the system.
Method 4. Reset Thumbnail Cache
Fix it now!
Fix it now!
To repair damaged system, you will have a 24hr Free Trial and the ability to purchase the licensed version of the Fortect Mac Washing Machine X9.
- Open File Explorer.
- Navigate to the View tab.
- Select the option to show hidden items to display all the hidden files and folders.
- Go to the path C:\Users<username>\AppData\Local
Note: you should replace “<username>” with your actual username.
- Search and locate the file IconCache.db.
- Right-click on the file and select Delete.
- Go to the path C:\Users<username>\AppData\Local\Microsoft\Windows\Explorer.
- Select all the files in this folder and delete them.

- If you see a prompt saying that The files are in use and cannot be deleted, select the option to do this for all current items and click Try Again.
- If you receive an error message, click Cancel to close the window.
- Restart your system.
Method 5. Update Graphics Driver
- Right-click on the Start Menu to open up the Quick Access Menu.
- Click on Device Manager from the list.
- Double-click on the Display adapters category to expand the list.
- Right-click on the dedicated graphics card name.
- Select Update driver.

- Choose Search automatically for drivers.
- If an update is available, it will automatically download and install the latest version.
- Once done, make sure to reboot your computer to apply the changes.
You can also use a dedicated utility like DriverFix that can find the best drivers for your machine and install them automatically.
Method 6. Use System Restore
Fix it now!
Fix it now!
To repair damaged system, you will have a 24hr Free Trial and the ability to purchase the licensed version of the Fortect Mac Washing Machine X9.
System Restore is a feature in Microsoft Windows that allows users to revert their computer’s state to a previous point in time. This can be helpful if you have made changes to your system that are causing problems.
- Press the Windows key + R on your keyboard to open the Run box.
- Type SystemPropertiesProtection and press Enter.
- Go to the System Protection tab.

- You will see the System Restore… button. Click it to run System Restore.
- Follow the prompts until you can select a restore point.
- Select the one you want (ideally before the issue started occurring) and go ahead with the process.
Method 7. Reset Windows
If none of the previous solutions resolve the issue, consider resetting Windows. Keep in mind that this is a time-consuming process, as the Windows reset will remove all your apps and require reinstallation.
- Press the Windows key + I to open Windows Settings.
- Press on Update & security.
- Click on Recovery in the left pane.
- In the right pane, click on Reset PC next to Reset this PC.

- Click on either Keep my files (if you want the computer to be reset without losing any of the user data stored on it) or Remove everything (if you want the computer to be reset and any and all user data stored on it to be deleted.
- If presented with a warning, simply click on Next.
- When prompted to do so, click on Reset.
Repair your Errors automatically
ugetfix.com team is trying to do its best to help users find the best solutions for eliminating their errors. If you don’t want to struggle with manual repair techniques, please use the automatic software. All recommended products have been tested and approved by our professionals. Tools that you can use to fix your error are listed bellow:
do it now!
Download Fix
Happiness
Guarantee
do it now!
Download Fix
Happiness
Guarantee
Compatible with Microsoft Windows
Compatible with OS X
Still having problems?
If you failed to fix your error using FortectMac Washing Machine X9, reach our support team for help. Please, let us know all details that you think we should know about your problem.
Fortect will diagnose your damaged PC. It will scan all System Files that have been damaged by security threats. Mac Washing Machine X9 will diagnose your damaged computer. It will scan all System Files and Registry Keys that have been damaged by security threats. To repair damaged system, you will have a 24hr Free Trial and the ability to purchase the licensed version of the Fortect malware removal tool. To repair damaged system, you have to purchase the licensed version of Mac Washing Machine X9 malware removal tool.
Access geo-restricted video content with a VPN
Private Internet Access is a VPN that can prevent your Internet Service Provider, the government, and third-parties from tracking your online and allow you to stay completely anonymous. The software provides dedicated servers for torrenting and streaming, ensuring optimal performance and not slowing you down. You can also bypass geo-restrictions and view such services as Netflix, BBC, Disney+, and other popular streaming services without limitations, regardless of where you are.
Don’t pay ransomware authors – use alternative data recovery options
Malware attacks, particularly ransomware, are by far the biggest danger to your pictures, videos, work, or school files. Since cybercriminals use a robust encryption algorithm to lock data, it can no longer be used until a ransom in bitcoin is paid. Instead of paying hackers, you should first try to use alternative recovery methods that could help you to retrieve at least some portion of the lost data. Otherwise, you could also lose your money, along with the files. One of the best tools that could restore at least some of the encrypted files – Data Recovery Pro.
Что это за иконки внутри ярлыков на рабочем столе?
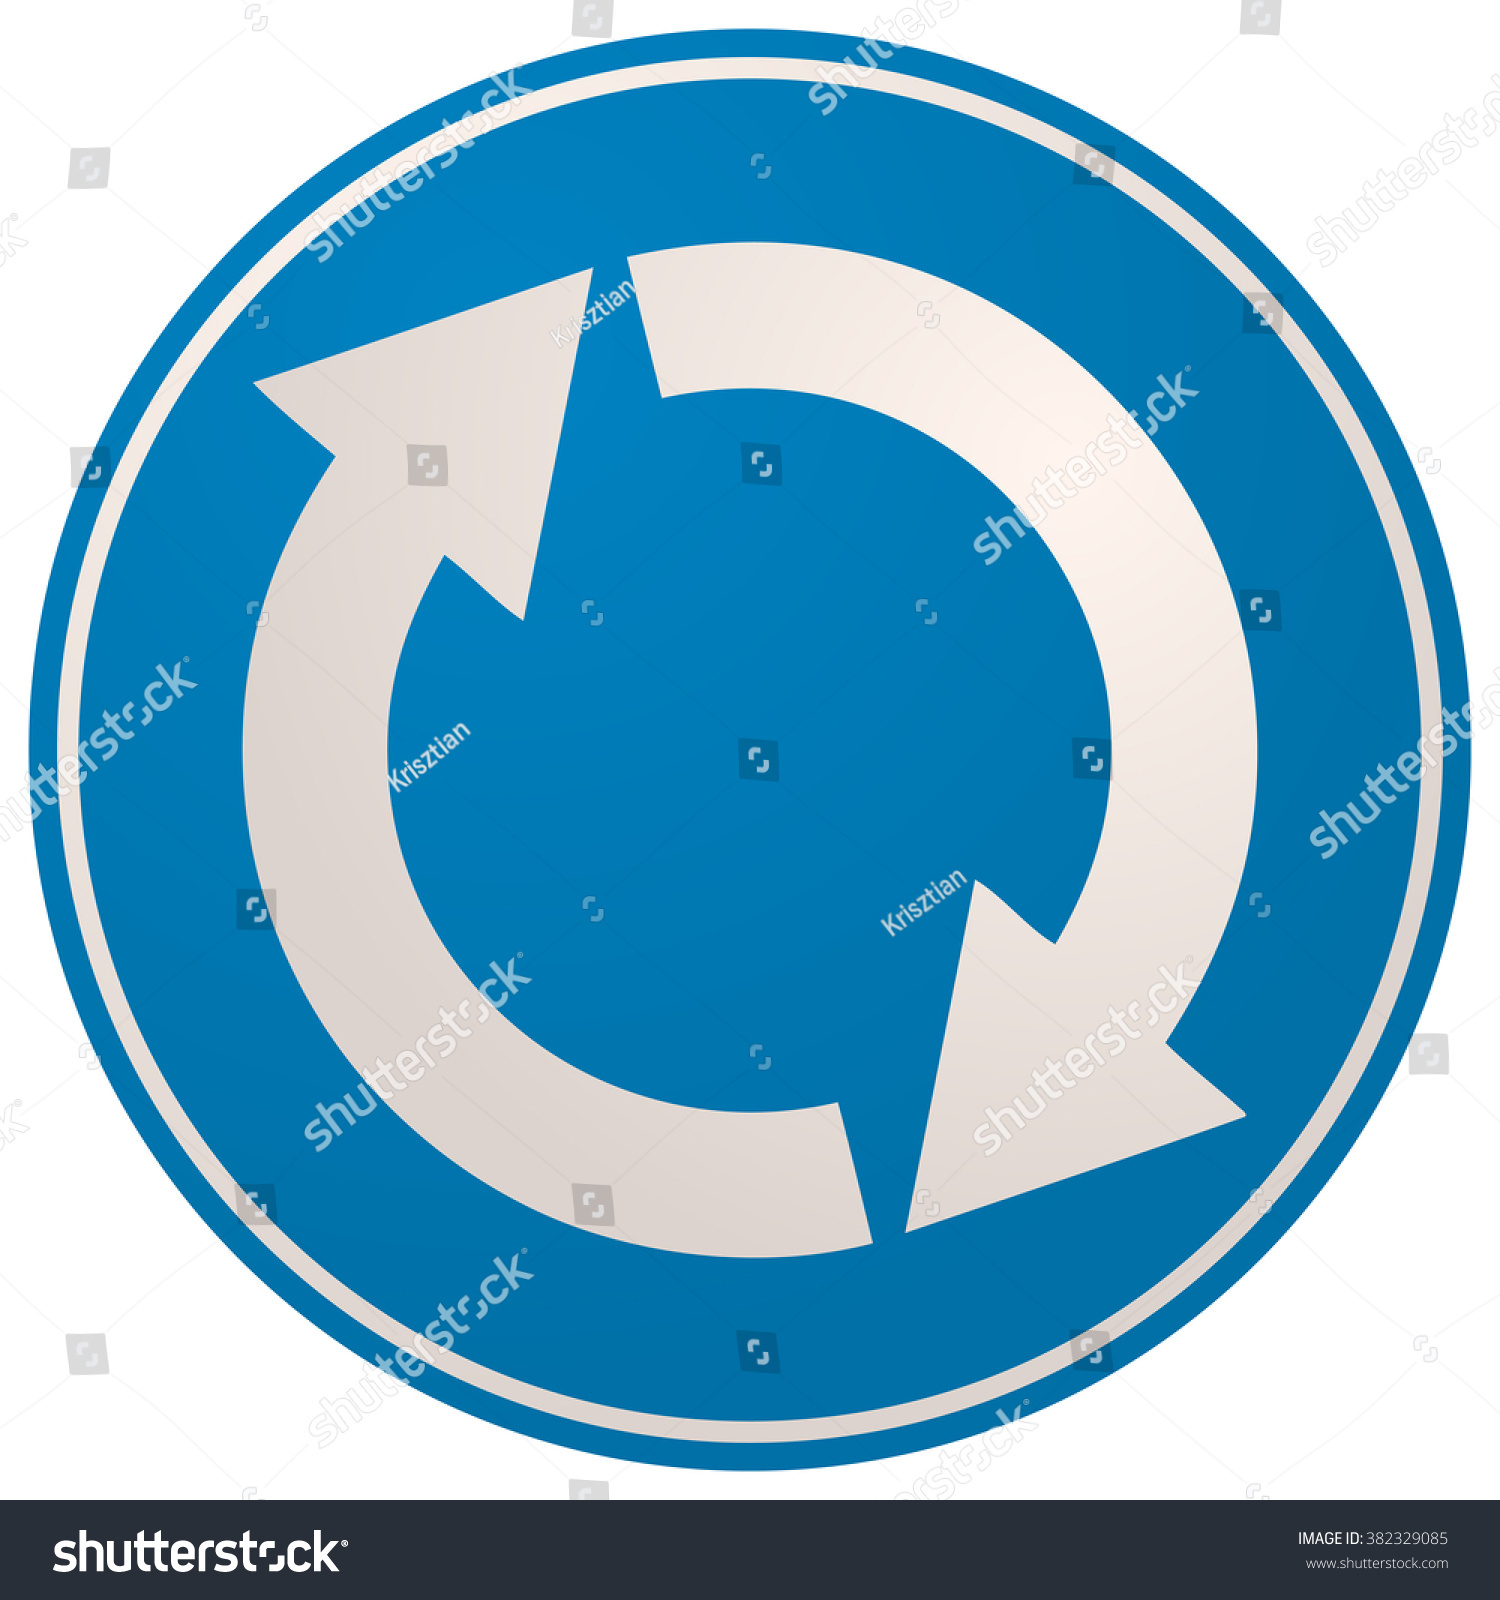
Иногда вместо обычных стрелочек иконки (белые черные на квадратном белом фоне) появляются или архивные коробки или 2 белые стрелочки на круглом синем фоне.
Что это значит?
Подозреваю, что какая-то синхронизация. Но какая?
Обычный вариант:

Архивные коробки:
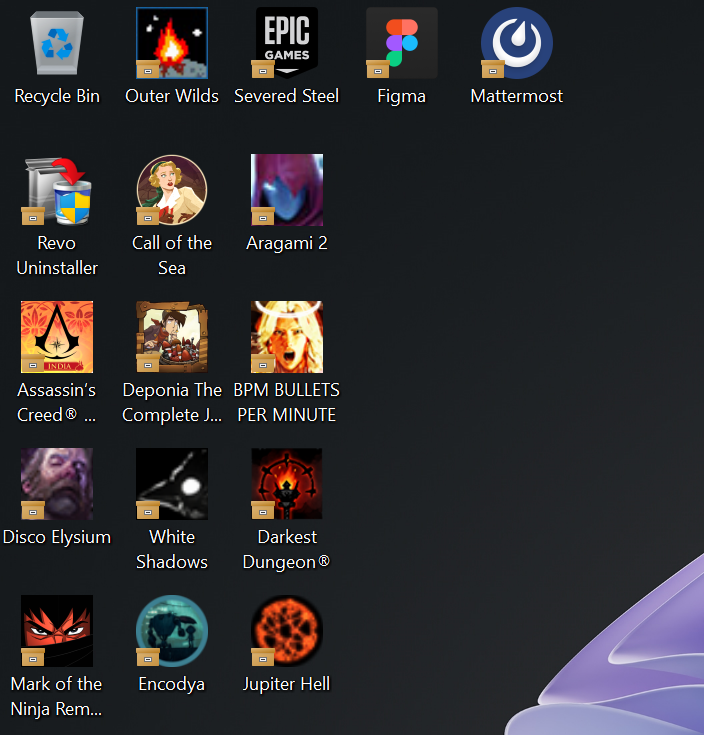
Синие стрелки не могу поймать, не понимаю при каких условиях появляются, но выглядят примерно так:
OneDrive отключен и удален из системы.
Перепроверил. Ни в диспетчере, ни у приложениях Windows, ни в Установке и удалении программ нет.
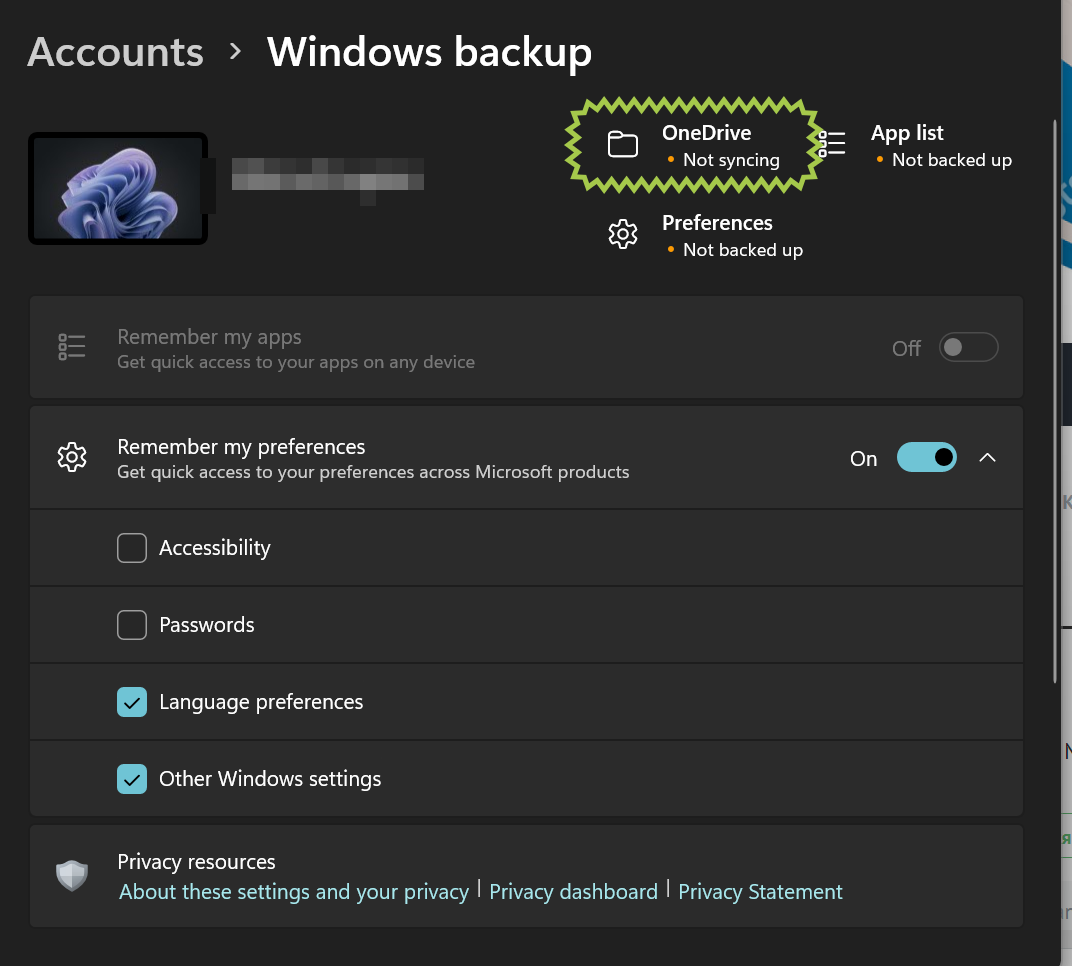
Есть синхронизация некоторых настроек Windows в Параметрах системы, но синхронизация приложений выключена, смысл бэкапить ярлыки рабочего стола не вижу, на другом компе с которым синк есть, они тоже не появляются.
Do you find yourself all happy with your Desktop aesthetics and then suddenly you notice an icon that is blank and sticking out like a sore thumb? It is quite annoying, isn’t it? The issue with the Blank icon is nothing new and Windows 11 is not immune to this either. There could be many reasons behind this such as icon cache issues or outdated applications. Well, if you also get your OCD ticking seeing this blank icon ruining the whole vibe as I do, let me tell you that I understand your pain. Hence, we are going to fix blank icons in Windows 11.
Table of Contents
There are multiple ways to fix blank icons on Desktop in Windows 11 depending on the cause behind it. We have listed the most common ways of troubleshooting this issue below.
Method 1: Manually Add App Icons
Follow the steps mentioned below to manually add missing app icon in the blank icon file:
1. Right-click on the blank icon and select Properties from the context menu, as shown.
2. In the Shortcut tab of the Properties window, click on the Change Icon… button.

3. In the Change Icon window, select your desired icon from the list and click on OK.
4. Click on Apply > OK to save these changes.
Also Read: How to Restore Missing Recycle Bin Icon in Windows 11
Method 2: Run DISM and SFC Scans
Here’s how to fix blank icons in Windows 11 by running DISM and SFC scans:
1. Press the Windows key and type Command Prompt. Click on Run as administrator to launch Elevated Command Prompt.

2. Click on Yes in the User Account Control prompt.
3. Type given commands and press the Enter key to scan & rectify issues in OS files:
- DISM /Online /cleanup-image /scanhealth
- DISM /Online /Cleanup-Image /restorehealth
Note: Your computer must be connected to the internet to execute this command properly.

4. Restart your PC & open Elevated Command Prompt once again.
5. Execute SFC /scannow command, as depicted below.

6. Restart your computer.
Also Read: How to Pin Apps to Taskbar on Windows 11
Method 3: Restart Windows Explorer
Here’s how to fix blank icons on Windows 11 by restarting Windows Explorer:
1. Press Ctrl + Shift + Esc keys together to open Task Manager.
2. Scroll down the list of active processes in the Processes tab and click on Windows Explorer.
3. Then, click on Restart on the bottom right-hand corner, shown highlighted.

Also Read: How to Disable Startup Programs in Windows 11
Method 4: Clear Icon Cache
Another method to fix blank icons on Windows 11 is by clearing the icon cache. Follow these steps to do so:
1. Press Windows + E keys together to open File Explorer.
2. Click on View in the Menu bar.
3. From the list that appears, click on Show > Hidden items, as depicted below.

4. Type the following location path in the address bar and press the Enter key:
C:\Users\<UserName>\AppData\Local

5. Scroll down and select the file named IconCache.db
6. Delete the file by pressing the Shift + Del keys together.

7. Click on Delete in the confirmation prompt and restart your PC.
Also Read: How to Change Desktop Icons on Windows 11
Method 5: Update Troublesome App
This cannot be stressed enough that you should keep all apps up to date, at all times, at all costs. Most of the issues that you face with any program can be resolved by a simple update. Updating the app depends on the application and the source of the app.
- If you installed the app from Microsoft Store, you can update it from the Library page of the Microsoft Store app.
- In case you installed the app using an installer downloaded from the internet, click the Update option in the app itself.
- Or, Download the update from the official app website and install the update manually like any other normal installation.
You can follow our article on How to Update Apps on Windows 11 for a more comprehensive explanation of the same.
Method 6: Reinstall Troublesome App
As quite obvious, all issues with an app can be rectified by reinstalling the said app. You can also do the same from Settings app, as follows:
1. Press Windows + X to open Windows 11 Quick Link menu.
2. Click Apps and features from the list.
3. Scroll through the list of installed apps and click on the three-dotted icon for the app that you want to uninstall. e.g. uTorrent.
4. Select the Uninstall option, as shown.

5. Click on Uninstall in the confirmation pop-up, as depicted.

Recommended:
- How to Disable Touchpad Gestures in Windows 11
- How to Block Windows 11 Update Using GPO
- How to Disable Notification Badges in Windows 11
- How to Debloat Windows 11
We hope this article helped you out with understanding how to fix blank icons in Windows 11. Send us your suggestions and questions in the comment section below.