
To check the JDK version in the command prompt (cmd), you can use the following command:
java -version
Understanding CMD
Command Prompt (CMD) is a powerful tool included with Windows operating systems that allows users to execute commands and perform various system tasks directly through a text-based interface. For developers and those working with Java, CMD provides a convenient way to check the status of Java installations and to troubleshoot related issues.
To check the version of the Java Development Kit (JDK), using CMD is both straightforward and efficient. Knowing the JDK version you have installed is crucial for ensuring compatibility with frameworks and libraries, especially when working on Java projects.
Check Java Version in Cmd: A Quick Guide
What You Need Before You Start
Before you begin, ensure that you have the JDK installed on your system. If you haven’t done so already, you can download it from the [Oracle website](https://www.oracle.com/java/technologies/javase-jdk11-downloads.html) or any other Java distributions like OpenJDK.
Additionally, for CMD to recognize Java commands, you must set up the following environment variables:
- JAVA_HOME: This should point to the directory where the JDK is installed.
- PATH: This should include the `bin` directory of the JDK installation, allowing you to run Java commands from any command prompt.
Steps to Check JDK Version
Open Command Prompt
To get started, you need to launch Command Prompt:
- Press the `Windows + R` keys simultaneously, which will open the Run dialog box.
- Type `cmd` and hit `Enter`. This action will open the Command Prompt window.
Use the Java Version Command
Once CMD is open, you can check the JDK version by executing the following command:
java -version
Upon entering this command, you will receive a response that displays the version of Java currently running on your machine. The output will typically look something like this:
java version "1.8.0_281"
Java(TM) SE Runtime Environment (build 1.8.0_281-b09)
Java HotSpot(TM) 64-Bit Server VM (build 25.281-b09, mixed mode)
In this output:
- The first line specifies the version of Java currently installed. In this case, it indicates Java 1.8, also known as Java 8.
- The subsequent lines provide additional details, such as the runtime environment and the specific build of the Java HotSpot Virtual Machine.
Checking JDK Version Specifically
To confirm your JDK version specifically (as opposed to just the runtime version), you can use the following command:
javac -version
This command checks the Java Compiler version, providing a more complete picture of your JDK installation. You may see an output similar to:
javac 1.8.0_281
This indicates that the Java Compiler version is also 1.8.0_281.
Command to Check Python Version in Cmd: A Quick Guide
Troubleshooting Common Issues
If CMD Says ‘java’ is Not Recognized
If you encounter a message stating that `’java’ is not recognized as an internal or external command`, it typically indicates one of the following issues:
- JDK not installed: You might not have the JDK installed on your system. To remedy this, install the JDK as described above.
- JAVA_HOME or PATH not set correctly: If the JDK is installed, you may need to check your environment variables. Here are steps to set them correctly:
-
Setting JAVA_HOME:
- Right-click on ‘This PC’ or ‘Computer’ and select ‘Properties’.
- Click on ‘Advanced system settings’.
- In the System Properties window, click on ‘Environment Variables’.
- Under System Variables, click ‘New’ and enter `JAVA_HOME` as the Variable Name and the path to your JDK (e.g., `C:\Program Files\Java\jdk1.8.0_281`) as the Variable Value.
-
Updating the PATH variable:
- In the same Environment Variables window, find the `Path` variable and select it, then click on ‘Edit’.
- Click ‘New’ and add the path to the `bin` directory of your JDK (e.g., `C:\Program Files\Java\jdk1.8.0_281\bin`).
- Click ‘OK’ to save your changes.
If Multiple JDK Versions are Installed
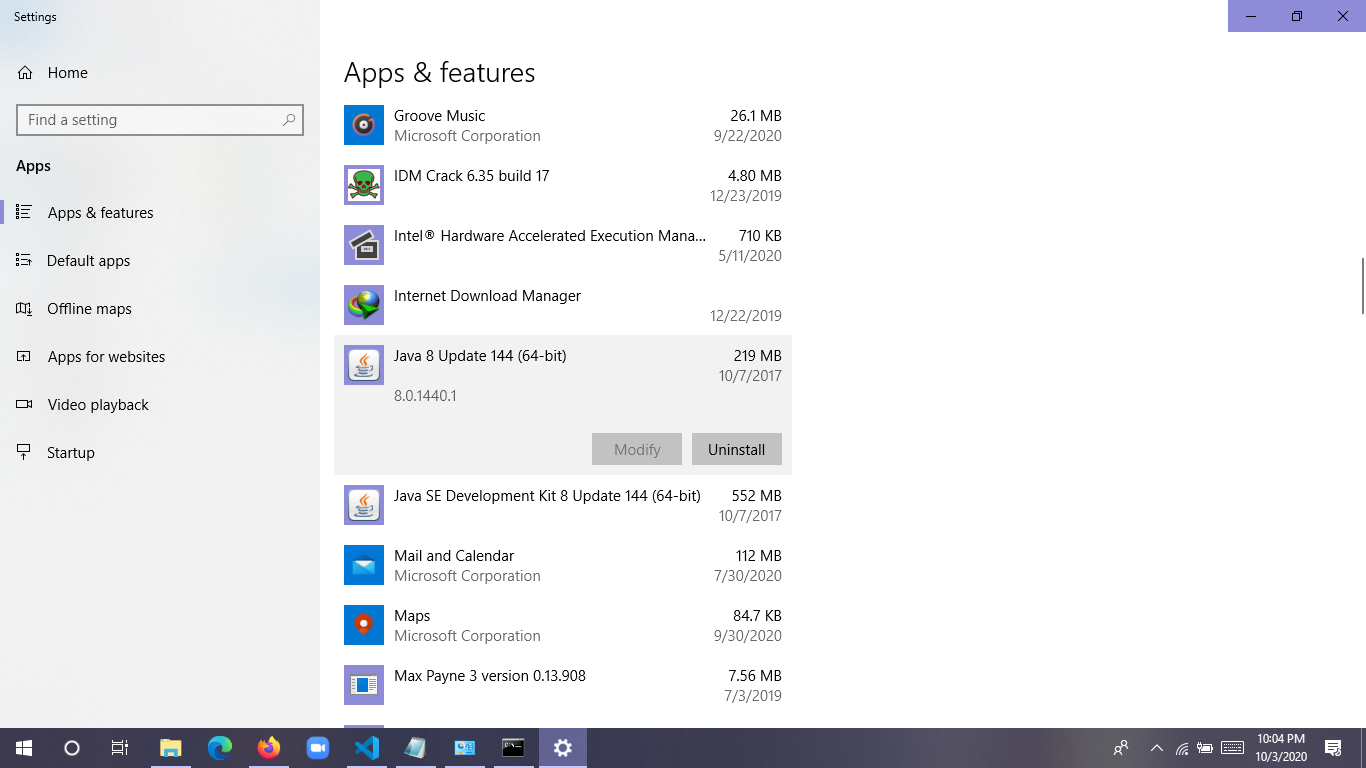
If you have multiple versions of the JDK installed, CMD might reference an earlier version by default. To check which versions are installed:
- Navigate to Control Panel > Programs > Programs and Features.
- There, you will see a list of the Java installations. Take note of the version numbers.
To ensure you are using the correct version in CMD, set the `JAVA_HOME` variable to point to the desired JDK installation, and ensure the corresponding `bin` directory is correctly added to your PATH.
How to Check System Details in Cmd Quickly
Summary
Knowing how to check JDK version in CMD is essential for Java developers. It allows you to quickly verify your environment and ensure that your Java applications are running on the intended Java version. Regularly checking your Java installation will help you avoid compatibility issues and maintain optimal system performance.
How to Check Ping Through Cmd in a Snap
Additional Resources
For more detailed information, consider checking out Oracle’s official [JDK documentation](https://docs.oracle.com/en/java/javase/11/docs/api/index.html). It offers comprehensive guidance on using Java, including CMD commands and environment setup.
How to List Drives in Cmd: A Quick Guide
Call to Action
If you found this guide helpful, subscribe to our mailing list for more tips and tricks on using CMD effectively. Feel free to leave your questions or comments below—let’s build a knowledgeable community together!
Last Updated :
29 Oct, 2020
Java is a programming language that is platform-independent, popular, simple, secure, and statically typed. Before discussing let’s clear Java language needs a runtime platform so before going ahead let’s clear how java is present on the machine.
Java language comprises three components mainly:
- Java Development Kit
- Java Runtime Environment
- Java Virtual Machine
Runtime Concepts than only we will check whether Java is there on the Platform (Operating System + Architecture)
1. Java Virtual Machine
This is a machine–specific software which is responsible for byte code on that machine and converts it into machine-specific instructions.
JVM is different for Windows
JVM is different for Linux
JVM is different for Different Platforms
So as a programmer we don’t need to check presence on the machine as it is pre-installed in the machine. It is responsible for running Java code line by line.
2. Java Runtime Environment
It is simply a package that provides an environment to only run our java code on the machine. No development takes place here because of the absence of developmental tools.
3. Java Development Kit
It is also a package that provides an environment to develop and execute where JRE is a part of it along with developmental tools.
- JDK = JRE + Developmental Tools
- JRE = JVM + Library Classes
Now, The first and Foremost step is to check the Java Development Kit in Windows which is also known as JDK. There are lots of versions of Java. Depending upon the operating system methods there are several methods to find the version of Installed JAVA on your Machine:
Let us discuss 3 standard methods in Windows
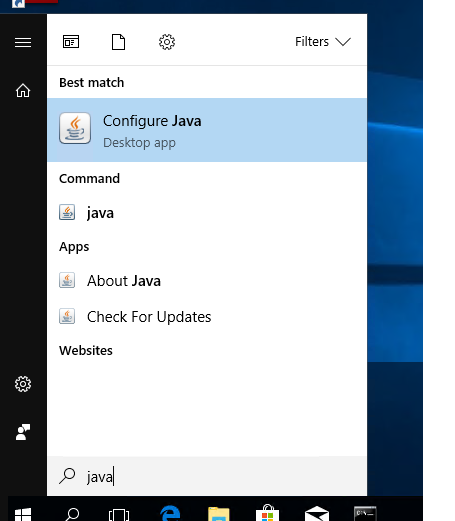
- User needs to open Command Prompt and enter- ‘java -version’
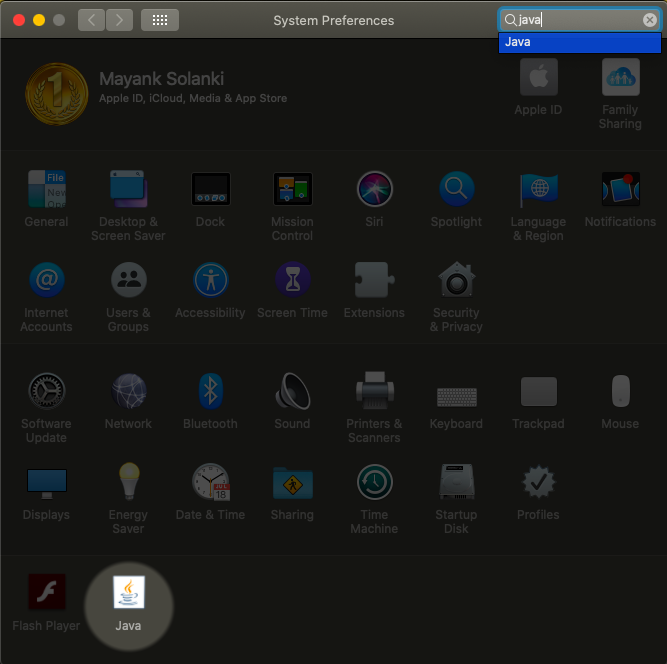
- Open control panel and lookup for Java
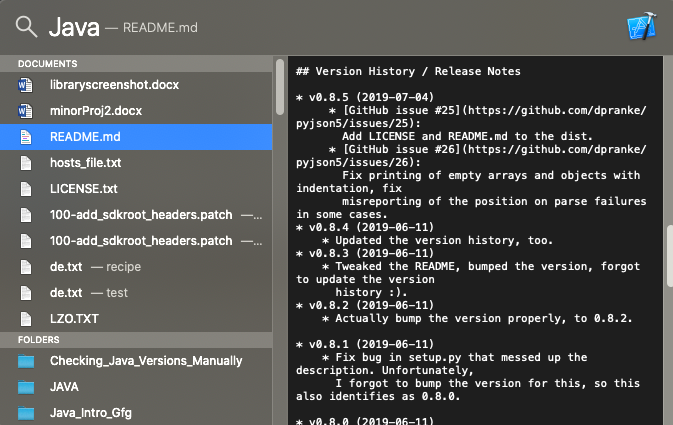
- Directories method- Click the Menu ‘Start’ and typing About.java or readme file
Taking one by one, showcasing in-depth individually
1. Command Prompt
The CMD (Command Interpreter is a command-line Interface. It supports a set of commands and utilities; and has its own programming language for writing batch files. Open CMD and search java -version. First, we have to an environment variable to the installed path location of the java folder. Otherwise, it will show invalid command. It is called ‘Terminal’ in the case of mac operating systems.
java -version // CMD/Terminal command to check java version on the machine
In the case of Windows OS: It is showing java is installed on the machine with version 1.8.0 (See carefully at line number 5)
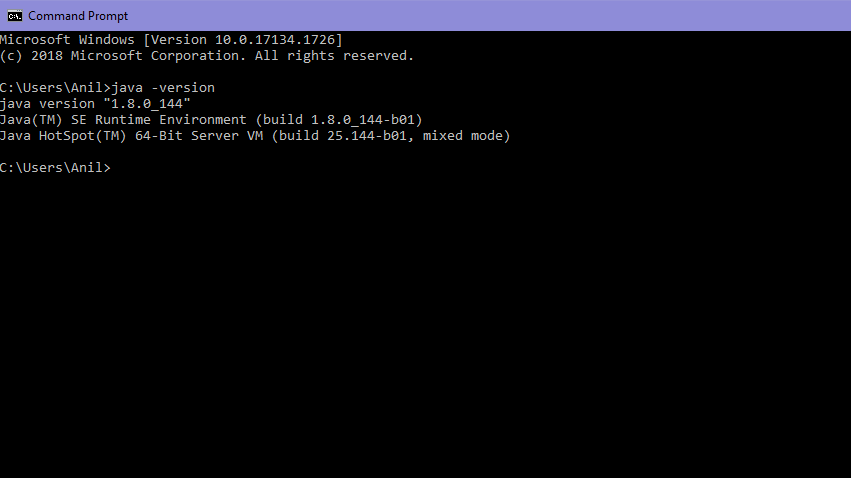
“1.8.0_144” is the version of the java
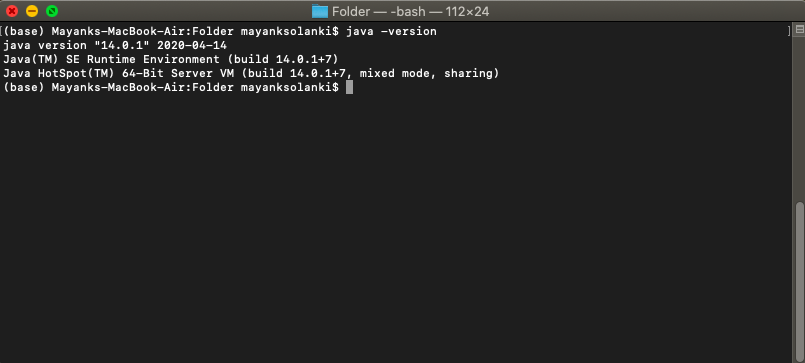
In the case of macOS: It is showing java is installed on the machine with version 14.0.1 ( see carefully at line number 2)
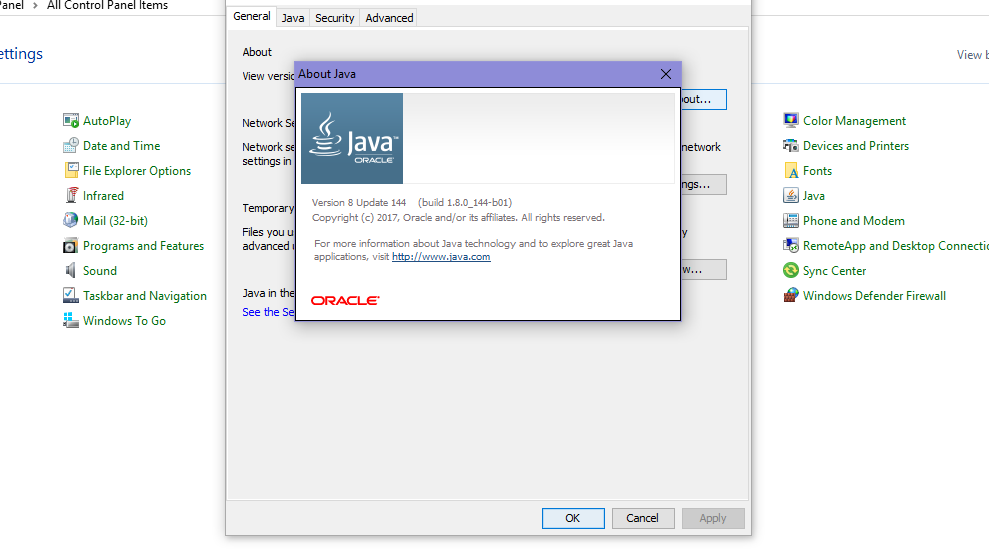
Second Method:
- Open Control Panel and there is an option of the java on the interface of the control panel
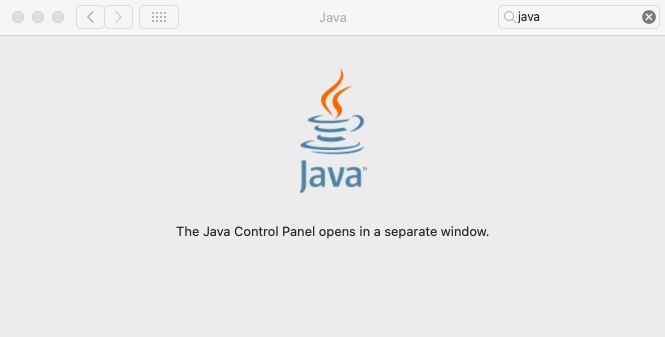
- Click on the java option and click about a small pop window will appear
In the case of Windows:
In the case of Mac: Click on the Java icon downside. System preferences in mac are the same as the Control panel in Windows.
Third Method:
Search Program and features in the control panel and search JAVA Named option
In the case of Windows: Simply custom search- About Java
In the case of Mac:
Press the command button followed by a spacebar without lifting fingers from the command button.
A popup box will appear for less than a second followed by another pop-up as shown below:
To totally unlock this section you need to Log-in
Firts of all, for end-users, they need to install JRE to run the Java program, and the JDK is for developers. For the production environment, the deployment team only need to install JRE to run the Java program. However, developers often request to install the JDK, instead of the standalone JRE on the production server, because the JDK contains JRE and also extra tools to monitor and debug the running Java program.
The Java development kit (JDK) contains tools for Java development, and the Java Runtime Environment (JRE) contains a JVM to convert byte code .class to machine code, and execute it, in short, the JRE runs Java program.
A common way to check JDK version is by using the following simple command to find out the version of the installed JDK. In the below example, the JDK version is 11.0.7:
$ javac -version
javac 11.0.7
Check JRE Version
Similarly, we can use java -version to find out the version of the installed JRE. In the below example, the JRE version is 1.8.0_252:
$ java -version
openjdk version "1.8.0_252"
OpenJDK Runtime Environment (build 1.8.0_252-8u252-b09-1~19.10-b09)
OpenJDK 64-Bit Server VM (build 25.252-b09, mixed mode)
The JDK and JRE versions can be different on the same computer. Multiple JDK and JRE versions are allowed on the same computer; it is better to find out which version is configured in the system classpath to run or compile the Java program.
Where JDK is installed?
On Ubuntu or Linux system, we can use which javac to find out where JDK is installed:
$ which javac
/usr/bin/javac

$ ls -lsah /usr/bin/javac
/usr/bin/javac -> /etc/alternatives/javac

$ ls -lsah /etc/alternatives/javac
/etc/alternatives/javac -> /usr/lib/jvm/adoptopenjdk-11-hotspot-amd64/bin/javac

$ cd /usr/lib/jvm/adoptopenjdk-11-hotspot-amd64/bin/
$ ./javac -version
javac 11.0.7
In the above example, the JDK is installed at /usr/lib/jvm/adoptopenjdk-11-hotspot-amd64/.
In addition, we can use Linux apt package manager (Debian/Ubuntu systems) to get info about installed Java:
sudo apt list --installed | grep -i openjdk
We can also list all installed packages and filter for Java using the dpkg command:
dpkg -l | grep -i openjdk
And below on RedHat/CentOS systems (obviously the java -version approach is still valid):
rpm -qi openjdk

OR

yum info "openjdk"

OR

yum list installed | grep -i openjdk
On Microsoft Windows, we can use dir /b /s javac.exe to find out where JDK is installed.
Microsoft Windows [Version 10.0.18362.900]
(c) 2019 Microsoft Corporation. All rights reserved.

C:\>dir /b /s javac.exe
C:\Program Files\Common Files\Oracle\Java\javapath\javac.exe
C:\Program Files\Common Files\Oracle\Java\javapath_target_52887656\javac.exe
C:\Program Files\Java\jdk-11.0.12\bin\javac.exe
C:\Program Files\Java\jdk1.8.0_271\bin\javac.exe
Or, alternatively, using Powershell:
Get-Childitem –Path C:\ -Include javac.exe -Recurse -ErrorAction SilentlyContinue
Check Java Version in Windows 10 (GUI)
You can get the version number of Java installed on your computer if you enter java in Windows 10 search box and run Java applet.
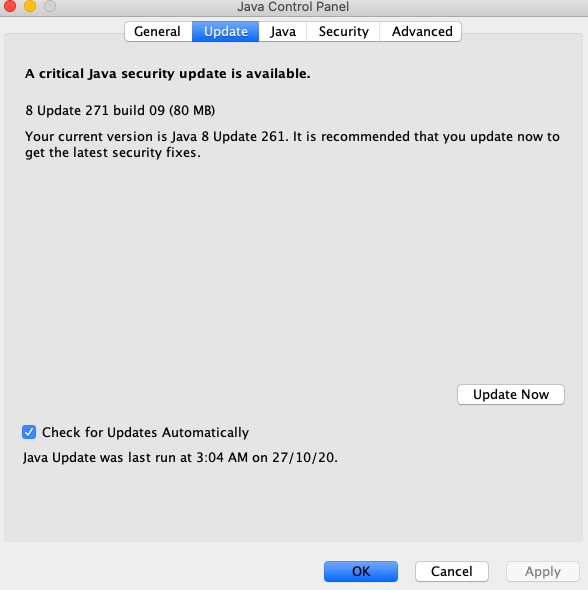
In About Java window, the current JRE version is specified. In this case, it is Java Version 8 Update 261 (build 1.8.0_261-b12). Note the value of the JRE build. All Java versions have 1 at the beginning followed by the number of major JRE version (it is 8 in this case) and the update number.

We can also check the current Java version in Windows Program and Features (Win+R -> appwiz.cpl).

Check Java Version using PowerShell
You can check Java version installed on your computer using PowerShell. You can just check the version of the executable file java.exe (the path to it is set in the environment variables when JRE SE is installed on your computer). Display the java file version:
Get-Command Java | Select-Object Version

We can view detailed information about Java version, update and release number:
Get-Command java | Select-Object -ExpandProperty Version

Major Minor Build Revision
----- ----- ----- --------
8 0 2610 12
If we want to get a string value of your Java JRE version to be used in scripts, use the command:
(Get-Command java | Select-Object -ExpandProperty Version).tostring()

If we want to specifically be sureabout the JDK version installed on the system, we can use the following Powershell command targeting the Java compiler, javac.exe:
(Get-Command javac | Select-Object -ExpandProperty Version).tostring()
We can also find out your Java version using WMI class Win32_Product (contains the list of installed programs in Windows):
Get-WmiObject -Class Win32_Product -Filter "Name like '%Java%'"

The IDs may be used later to correctly uninstall JRE.
If you want to display only Java version without Java Auto Updater, use the following command:
Get-WmiObject -Class Win32_Product -Filter "Name like '%Java%' and not Name like '%Java Auto Updater%'" | Select -Expand Version
Finally, we can dig directly into the Windows Registry, using Powershell, to get the actual installed version of both JRE and JDK packages with the following two commands:
dir "HKLM:\SOFTWARE\JavaSoft\Java Runtime Environment"  | select -ExpandProperty pschildname -Last 1
dir "HKLM:\SOFTWARE\JavaSoft\Java Development Kit"  | select -ExpandProperty pschildname -Last 1
Check Java Version on Remote Computers (Powershell)
If we want to get Java versions used on all computers or servers in your domain, you can use the following PowerShell script. The script can get the information from all servers remotely according to the list you enter manually or from a text file. You can also get the list of servers or computers in AD using the Get-ADComputer cmdlet from the RSAT-AD-PowerShell module.
# Check Java version against the list of servers in a text file
#$computers=Get-content C:\PS\ServerList.txt

# To get Java version on all Windows Servers in AD domain
$computers = ((get-adcomputer -Filter { enabled -eq “true” -and OperatingSystem -Like ‘*Windows Server*’ }).name).tostring()
Get-WmiObject  -Class Win32_Product -ComputerName $computers -Filter “Name like ‘%Java%’ and not Name like ‘%Java Auto Updater%'” | Select __Server, Version
An additional, similar, way to get Java version info from remote systems, by using Powershell, is the following Invoke-Command approach:
$Servers = Get-Content 'C:\Server.txt'
$ServersNotAvailable = @()
$JavaVersion = {
    function GetJavaVersion()
    {
    Try {
        $ret = java -version 2>&1 | Select-String "version" | select @{n="Server";e={$env:COMPUTERNAME}},@{n="JavaVersion";e={$_.Line}}
        return $ret
        }
    Catch {
    $Prop = [ordered]@{Server = $env:COMPUTERNAME
                       JavaVersion = "Java Not Available"
                       }
    New-Object -TypeName psobject -Property $Prop
           }
    }
    GetJavaVersion
}
foreach($Server in $Servers) {
          $TestCon = Test-Connection -ComputerName $Server -Count 1 -Quiet
          if($TestCon) {
               Invoke-Command -ComputerName $Server -ScriptBlock $javaversion | Select Server,JavaVersion
          }
          else {
               $ServersNotAvailable = $Server + "," + $ServersNotAvailable
          }
}
### Below is list of servers which are not available over the network or not pingable
Write-Host "`nServers Not reachable over Network" -ForegroundColor Green
$ServersNotAvailable
Summary
Article Name
Java (JRE/JDK) — Check version installed
Description
The Java development kit (JDK) contains tools for Java development, and the Java Runtime Environment (JRE) contains a JVM to convert byte code .class to machine code, and execute it, in short, the JRE runs Java program. In this this article we will see different methods to check which version is installed on a Linux/Windows system.
Author
Publisher Name
Heelpbook.net
Started Java development on a Windows system that is not owned by you or just want to know what version of Java is installed on your system, here are the commands to follow. After installing the JDK which is important to develop Java applications, the command prompt or Powershell is the easiest and straightforward way to know about your Java envrionment, here in this article we learn how to do that.
Using the Java Command1. Open CMD or PowerShell:2. Identify Java version on Windows 11 or 103. View the Version Information:Using the Javac Command (Optional)View the Version Information:
Using the Java Command
The Java command line tool will be available once you successfully install the JDK on your system. However, if you have not done that already then learn the single command to install the latest version of OpenJDK on Windows 10 or 11 systems.
1. Open CMD or PowerShell:
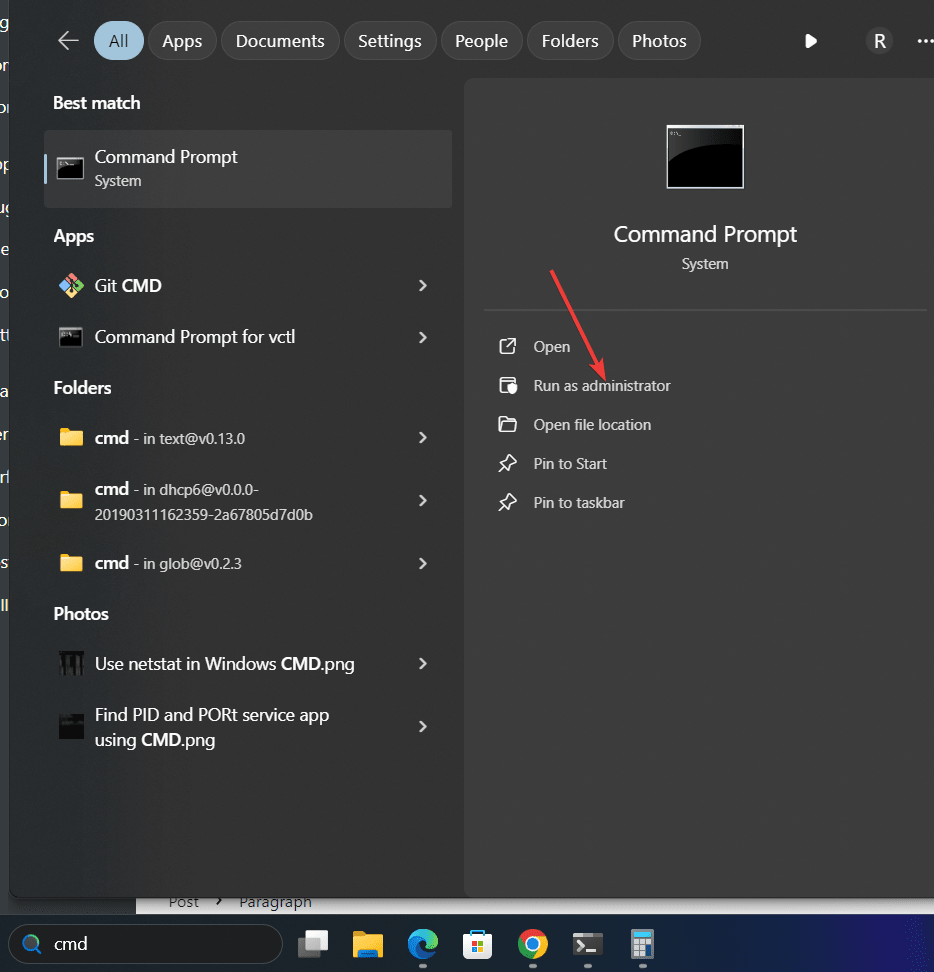
You can use PowerShell, however here we are using the Command prompt to check the version of the installed Java. So, either press Windows Key + R to open the Run dialog and type cmd to open command prompt or click on the Windows start button and search CMD, as it appears click to run it.
2. Identify Java version on Windows 11 or 10
We are assuming that you already have the JDK installed on your Windows system, hence run the given command and you will get the output revealing the currently installed version of Java on your Windows system.
In the Command Prompt, type the following command and press Enter key.
java -version3. View the Version Information:
Once you execute the command given in the previous step, you will have the output something like given below:
Example output: We have version 11 of Java. the same is shown in the given result:
openjdk version "11.0.15" 2022-04-19 LTS
OpenJDK Runtime Environment 18.9 (build 11.0.15+9-LTS)
OpenJDK 64-Bit Server VM 18.9 (build 11.0.15+9-LTS, mixed mode)
The version information produced by the command of this step will also include the build date, Runtime Environment, and Java server VM details apart from the core Java version.
Using the Javac Command (Optional)
Another way to check the installed version of Java not only in Windows but also on other operating systems is by looking at the version of Java Complier or Javac. So, in the command prompt instead of using the “java” command, you can use the given one as well:
javac -versionView the Version Information:
The output version of Javac will be the version of JDK installed on your Windows PC or laptop.
javac 11.0.15Note: If you have multiple JDK versions installed, make sure the version you want to use is set in your system’s PATH environment variable.
Other Articles:
- How to install WebStorm JavaScript IDE on Linux
- Download Visual Studio code portable for Windows 11/10 or Linux
- How to Install and Use Github Copilot in JetBrains IntelliJ idea
- Best 8 Text Editors for Python Programming
- Download & install npm and node.js packages on Windows 11 |10
Java is the backbone of countless applications and tools, yet dealing with its setup on Windows can feel like wrestling with a greased-up octopus. Fear not, though! Whether you’re checking your Java version, updating it, or setting the ever-elusive JAVA_HOME environment variable, this guide will make you feel like a Java ninja—sarcastic commentary included (free of charge).
How to Check the Java Version on Windows
Let’s start with the basics. You can’t manage your Java setup if you don’t know what you’re working with. Checking your Java version is like finding out which friend brought the weird casserole to the potluck: it’s critical information.
- Open Command Prompt:
PressWin + R, typecmd, and hit Enter. Alternatively, search for “Command Prompt” in the Start menu. - Type the Magic Words:
Type the following command and hit Enter:java -version - Interpret the Result:
You’ll see something like this:java version "17.0.3" 2021-09-14 LTS Java(TM) SE Runtime Environment (build 17.0.3+7-LTS) Java HotSpot(TM) 64-Bit Server VM (build 17.0.3+7-LTS, mixed mode)The first line tells you the installed Java version. If you see an error message likejava is not recognized, congratulations—you don’t have Java installed (or it’s hiding somewhere deep in the bowels of your PATH).
How to Check the JDK Version on Windows
If you’re working with Java Development Kit (JDK), the process is eerily similar:
- Open Command Prompt:
You know the drill—Win + R, typecmd, Enter. - Run the Command:
Enter:javac -version - Read the Output:
You’ll see something like this:javac 17.0.3If this doesn’t work, your JDK isn’t installed or your PATH hasn’t been configured properly. No judgment—fixing it is our next mission.
How to Change the Java Version on Windows
Let’s say you have multiple Java versions installed because, hey, why not make life complicated? Here’s how to switch between them:
- Check Installed Versions:
Locate all installed Java versions. These are usually inC:\Program Files\Java. - Update the PATH Variable:
- Press
Win + Sand search for Environment Variables. - Under System Variables, find
Pathand click Edit. - Remove the current Java path and add the one you want to use (e.g.,
C:\Program Files\Java\jdk-17.0.3\bin). - Click OK and restart any open Command Prompt sessions.
- Press
- Verify the Change:
Runjava -versionagain to confirm the active Java version.
How to Set JAVA_HOME on Windows
Ah, the infamous JAVA_HOME. Setting this is like deciphering ancient hieroglyphs, but once you master it, you’ll feel invincible.
- Locate Your Java Installation Directory:
Typically found inC:\Program Files\Java\jdk-XX, whereXXis your JDK version. - Open Environment Variables:
- Press
Win + S, type Environment Variables, and open it. - Under System Variables, click New.
- Press
- Create the Variable:
- Name it
JAVA_HOME. - Set the value to your Java installation directory (e.g.,
C:\Program Files\Java\jdk-17.0.3).
- Name it
- Add JAVA_HOME to PATH:
- In the same Environment Variables window, edit the
Pathvariable. - Add
%JAVA_HOME%\binto the list.
- In the same Environment Variables window, edit the
- Verify It Works:
Open Command Prompt and type:echo %JAVA_HOME%If it spits out the correct path, congratulations—you’ve done it!
How to Update Java on Windows 11
Updating Java doesn’t have to be a pain (unless you enjoy unnecessary stress, in which case, proceed without reading this).
- Check for Updates:
- Visit the Java Downloads Page.
- Compare your installed version (
java -version) with the latest available.
- Download the Latest Version:
Choose the correct version for your system (x64 for most modern PCs). - Install the Update:
Run the installer and follow the prompts. During installation, you can opt to remove older versions if you’re feeling bold. - Update PATH and JAVA_HOME:
Repeat the steps above to update your environment variables if needed. - Verify the Update:
Usejava -versionto confirm you’re running the latest version.
Quick Comparison of Commands and Tasks
| Task | Command/Steps | Difficulty Level |
|---|---|---|
| Check Java version | java -version |
Easy |
| Check JDK version | javac -version |
Easy |
| Change Java version | Update PATH variable | Medium |
| Set JAVA_HOME | Create and configure variable | Medium |
| Update Java | Download, install, reconfigure | Medium |
Final Thoughts
Dealing with Java on Windows can seem daunting at first, but with a bit of patience (and coffee, lots of coffee), it’s manageable. Whether you’re a developer, a student, or just someone trying to run that one weird application that only works with Java 8, these steps will keep you on track.
Now go forth, command-line warriors, and conquer Java setup like the coding pros you are—or at least, like someone who knows their way around cmd.