
While the default Windows icons get the job done, they aren’t particularly exciting. If you want to put a personal spin on your computer, changing Windows 10 icons is a great way to do this.
We’ll show you how to change icons on Windows 10, including program and folder icons. With a bit of work, you’ll have an all-new interface with a unique look! While we focus on Windows 10 here, these tips largely work the same on Windows 11.
Where to Find Custom Icons for Windows 10
Before you start changing your current Windows 10 icons, you need some new icons to replace them with. The OS has a few additional icons built-in, but they’re not that great.
Flaticon is a great resource for all your Windows icon needs. The site contains millions of high-quality icons arranged in thousands of convenient packs. You can grab everything in a pack at once, or download single icons.
The site offers downloads in several formats. We recommend downloading them in PNG for easy conversion to the ICO format. Keep all the raw downloads in a folder called PNG Icons or similar.
If you don’t find what you’re looking for here, try Findicons, IconArchive, or GraphicBurger. We’ve also looked at some great Windows icon packs in the past.
Converting PNG Images to ICO Icons
Windows uses ICO files for its icons. Thus, you’ll need to convert images from PNG (or other image formats) before you use them as icons.
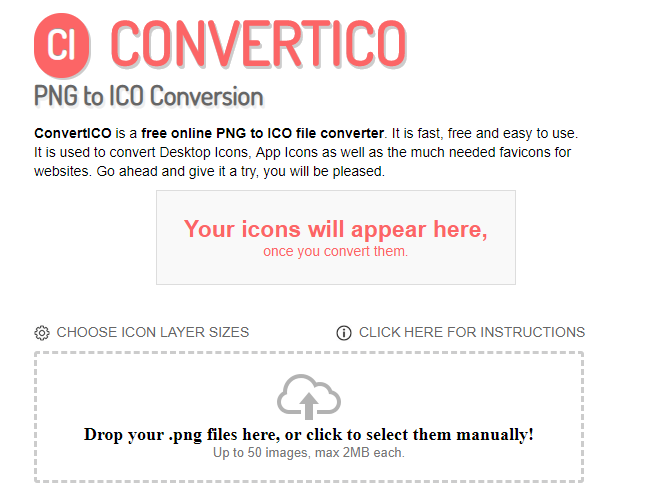
ConvertICO offers an easy way to do this. You can upload up to 50 PNG images at once to convert them into the ICO format. If you prefer, you can also enter the URL of an image you want to convert, cutting out the middle step of downloading the PNG.
Keep all your ICO files in their own folder. Make sure you put this somewhere permanent, as moving icon files after you have assigned them will break the link, requiring you to set them up again.
How to Change Program Icons in Windows 10
Windows 10 makes it easy to change the program icon for a shortcut, but not the main executable. Thus, you should make a desktop shortcut for the app icon you want to change, if you don’t have one already.
To do this, search for an app in the Start menu, then right-click its name and choose Open file location. In the resulting folder, right-click the program name and choose Send to > Desktop (create shortcut).
Now you can modify the new shortcut on your desktop. Right-click it and choose Properties to open a new window. Here, switch to the Shortcut tab and click the Change Icon button at the bottom.
You’ll see a list of alternative icons included in the app, if there are any. To set your own icon, click Browse and navigate to the place where you saved your ICO files.
Double-click one to select it, then choose OK on both open dialog boxes. That’s all you have to do to change a program icon in Windows 10.
Pinning Custom Icons to the Taskbar
Want to customize the icons on your Taskbar too? The easiest way to do this is to follow the steps above to create custom desktop icons. After that, simply right-click a shortcut and choose Pin to Taskbar.
If you’d rather, you can customize an icon already pinned to your Taskbar. While holding Shift, right-click the app icon and choose Properties. From here, you can follow the same steps as above to set a new icon.
You may need to wait a few moments for changes you make in this way to take effect.
How to Change Individual Folder Icons in Windows 10
Changing a folder icon is similar to the above process: to begin, right-click the folder you’d like to change and choose Properties.
On the resulting window, switch to the Customize tab. Select the Change Icon button at the bottom to select a new icon from your computer. Windows includes many default icons for this, but most of them are old-school and ugly. Hit Browse to locate your custom icons instead.
If you ever change your mind, just open this window and choose Restore Defaults to get the original folder icon back.
How to Change All Windows Folder Icons at Once
Want to change all the standard folder icons on your computer with one action? You’ll have to dig into the Registry to do so.
Remember that it’s possible to damage your system by modifying the Registry, so take care not to touch any other values while inside.
First, type regedit into the Start menu to open the utility. You’ll need to provide administrator permissions to continue. Navigate to the following location:
HKEY_LOCAL_MACHINE\SOFTWARE\Microsoft\Windows\CurrentVersion\Explorer
Now, right-click on the Explorer folder in the left navigation tree and select New > Key. Name the new key Shell Icons, then select it in the left panel. In the blank space on the right, right-click and choose New > Expandable String Value. Set its name as 3. Repeat this to create another string called 4.
Now, double-click the 3 string you just made. In the Value data field, enter the location of your folder icon in quotes. An easy way to do this is by holding Shift while right-clicking your ICO file, then selecting the Copy as path option. It should look something like this:
"C:\Users\User\Documents\ICO Icons\folder.ico"
Repeat this for the 4 string, then click OK and exit the Registry Editor.
If you don’t see the change take effect upon opening a new File Explorer window, you’ll need to restart File Explorer for your changes to take effect. To do this, press Ctrl + Shift + Esc to open the Task Manager. Click More details to expand it if needed. On the Processes tab, find Windows Explorer. Right-click this and choose Restart.
This should apply your new icon to all folders. To remove this in the future, simply delete the Shell Icons Registry key you created.
We tested this method as working in Windows 10 version 20H2, but other users have reported that it has no effect. Your mileage may thus vary depending on your version of Windows 10.
How to Change File Icons by Type
Normally, for each file type, Windows shows an icon of the default program. If you’d like to change this, you can use a free utility called FileTypesMan to change the icon for any file type.
After downloading and running it, press Ctrl + F to locate the file type you want to change. Double-click it in the list to open a new window with many more options. Next to the Default Icon field, you’ll see a … (ellipsis) button.
Click this and you’ll open the familiar Windows dialog box that lets you change the icon.
Using this, you can set up separate icons to distinguish file types, even if they open in the same program. You might want to make it easier to highlight JPG and PNG files at a glance, or spot old DOC Word files not using the newer DOCX format, for instance.
How to Change Drive Icons in Windows
Want to change the icons that you see in This PC for your various computer drives? A free utility called Drive Icon Changer makes this easy.
It’s similar to FileTypesMan mentioned above, but much more basic. Simply select a drive and the desired icon, and it will apply them for you after a restart. That’s all it takes.
How to Create Blank Taskbar Icons
Usually, all of your Taskbar icons appear alongside each other. If you’d like to add some space—perhaps to separate icons by type—you can achieve this with a workaround.
Creating Dummy Batch Files
To start, create a new folder somewhere you can keep permanently. Name it Spaces or something similar. Inside this folder, right-click again and choose New > Text document. Double-click the file to open it.
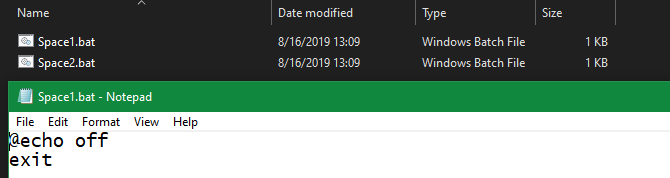
Inside the text file, enter the following. This will create a batch file that’s a dummy; it immediately opens and closes a Command Prompt window if you click on it.
        @echo off
exit
After this, go to File > Save As. In the saving dialog box, give the file a name ending in .BAT. If you want to create multiple spaces, you should then copy, paste, and rename the file so you have several named Space1.bat, Space2.bat, and so on.
Set Up a Blank Icon
Windows has blank icons built-in. But in our testing, these can appear as black squares on your Taskbar instead of transparent boxes, which is no good. This means you’ll need to quickly make your own «blank» icon.
Open an image editor (we used Paint.NET) and hit Ctrl + Shift + R to change the canvas size. Create one that’s perfectly square; 256×256 will work. Press Ctrl + A to select the entire image, then press Del to erase it. This will create a transparent square when saved as a PNG.
However, if you leave it like this, you’ll run into the same black block problem. Thus, you need to take the Pencil tool, zoom in, and use it to draw a single pixel in a corner of the image. This will effectively be invisible when it sits on your Taskbar.
Save the file as a PNG, then use an online converter as mentioned above to convert this into an ICO file.
Creating and Pinning Shortcuts
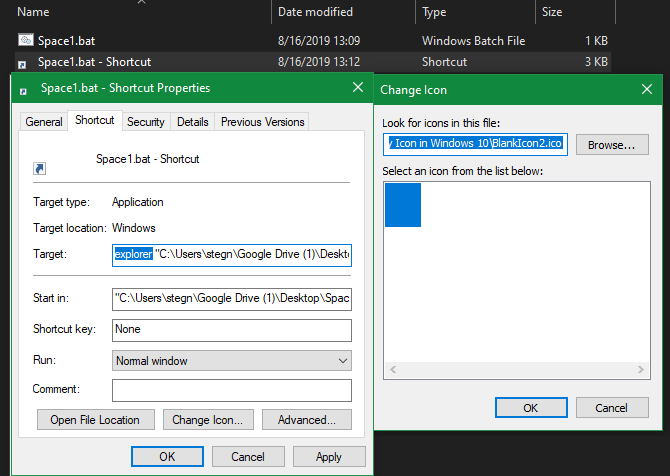
Now, right-click each Space file you made and choose Create shortcut, as you’ll need a shortcut, not the main BAT file, in order to change the icon. Then right-click each shortcut file, select Properties, and use the Change Icon button to select your new blank icon.
Once this is done, you’ll need to add one more element in order to add these shortcuts to your Taskbar. In the Shortcut tab of each BAT file, enter explorer in front of everything in the Target box. Make sure there’s a space before the opening quotes.
Now you can right-click all your Space files and choose Pin to taskbar. They’ll appear as blank icons, allowing you to drag them wherever you like and group your other icons.
How to Change the Desktop Icon Size on Windows 10
Just want to adjust the size of Windows 10 icons on your desktop? That’s an easy fix. On the desktop, you can right-click any empty space and choose View to select Small icons, Medium icons, or Large icons.
If you don’t like one of those presets, hold the Ctrl key and scroll your mouse wheel. This gives you more granular control over icon size.
In a File Explorer window, you’ll find more size options under the View menu. The method of scrolling your mouse wheel while holding Ctrl works, too.
Windows 10 Desktop Icons Missing?
If you don’t see any icons on your desktop, chances are that you’ve hidden them all. Getting them back takes just a few clicks. Right-click anywhere on your desktop, then select View > Show desktop icons if it’s not already checked. With this enabled, you should see your desktop icons with no problem.
If this didn’t fix your problem, your computer may be in tablet mode, which prevents your desktop icons from showing. To disable tablet mode, visit Settings > System > Tablet.
Finally, if you’re missing the default Windows 10 system icons, you’ll need to restore them in another menu. Go to Settings > Personalization > Themes and on the right side of the window, select Desktop icon settings.
This will launch a new window where you can toggle the icons for This PC, your user folder, Network, Control Panel, and the Recycle Bin. While here, you can also change the icons for these shortcuts if you want.
Customize Every Icon in Windows
Now you know how to change nearly every icon on your Windows system. Whether you want to completely overhaul everything or just want to change a few shortcut icons, you have the tools to personalize your computer in a fun way.
If you love personalization, it thankfully doesn’t end here. There are many other ways to customize the look and feel of your Windows environment.
When compared to the vast world of Linux and other open-source platforms, Windows could be one of the least customizable Operating Systems out there. However, this does not mean that you cannot personalize the experience at all. Even with the restricted nature, there are some aspects of Windows that you can alter, and icon packs are one of them. Changing the icon pack in Windows can transform the way the interface will look to you and others.
So, at least once in a while, that’s a way of marking your own style by choosing the right set of icons.
In this article, we have listed 10 of the most beautiful Windows 10 icon packs you can find. Because Windows 10 has built-in support for changing the icons and ensuring the best customizability, the process of changing the icons is relatively simple. For the sake of those who are new to this, we will also tell you how to do it. So, before we start the list of icon packs and how diverse they are, we will tell you how you change icons in the Windows 10 environment. Check best Windows 10 themes and Windows 11 icons packs.
Also Check:
- Best Windows 11 Themes, Skins and Icons for Windows 10
- Best Mac Themes for Windows 10 : Transform Windows into a Mac
- Best Windows 11 Themes & Skins To Download: Themes for Windows 11
How to Change Icons in Windows 10
Before we go to the steps, you need to understand something: there are three types of icons in Windows 10 and changing them requires different steps. The three ones are desktop icons, shortcut icons and file and folder icons. We will take you through the process of changing all these icon packs or individual icons. Let’s get started.
How to Change Desktop Icons in Windows 10
This process is comparatively easy. If you want to change the icons for desktop icons like Computer and Bin, you need to follow the steps shown below.
- Click on the Start button and choose Settings from the menu
- Go to Personalization and pick Themes from the sidebar
- Now, click on the link called Desktop icon settings.
- Here, you will be able to decide which icons are present on the desktop.
- To change an individual icon, click on the icon and select the option named Change Icon
- In the upcoming window, you can see a list of available icons. You can press the Browse button if you want to explore further.
- Using the dialogue box, open the icon pack you want to.
- Select the icon you want to replace the existing ones with.
Yay! This way, you will be able to change how the desktop icons look.
How to Change Folder Icons in Windows 10
Given that you are not using a third-party application, you have to change the icons of individual folders, one by one. The process is as follows.
- You have to right click on the Folder you want to change the icon of and choose Properties
- Under the Customize tab in the next window, choose the Change Icon button
- In the upcoming window as well, click on the Change Icon button.
- Just like we did before, you can browse and choose the Icon pack
- Wait for Windows to apply the changes
This is very simple and there is a restore button if you ever want to go back.
How to Change File Icons in Windows 10
Instead of changing individual file icons, you can change the icons for certain file types. However, you need a third-party app like FileTypesMan to do this. Once you have downloaded this program, you can follow the steps below to get the job done.
- You have to open FileTypesMan and you will be able to see the list of file types available in your PC.
- From the list, you have to select the file type whose icon you want to change.
- Right click on the selection and choose Edit Selected File Type to proceed.
- Now, in the upcoming window, click on the Browse button next to the Default Icon option
- Choose the icon from the file explorer and enjoy the new looks.
This wasn’t that hard, was it? FileTypesMan is actually a great tool when it comes to managing file types in the computer and not just for changing the icons of individual files.
Best 10 Beautiful Windows 10 Icon Packs
Now that you know how to change icons for each category, shall we check out the best icon packs for Windows 10?
#1 Simplus

Simplus is a popular icon pack that adds minimalism to your Windows 10 interface. Noted for the minimalist set of looks and shades, Simplus icons give pleasure to the eyes. These are mostly folder icons and you will be able to choose between Light icons and Dark icons as per your needs. It can be installed using the second method.
#2 Lumicons
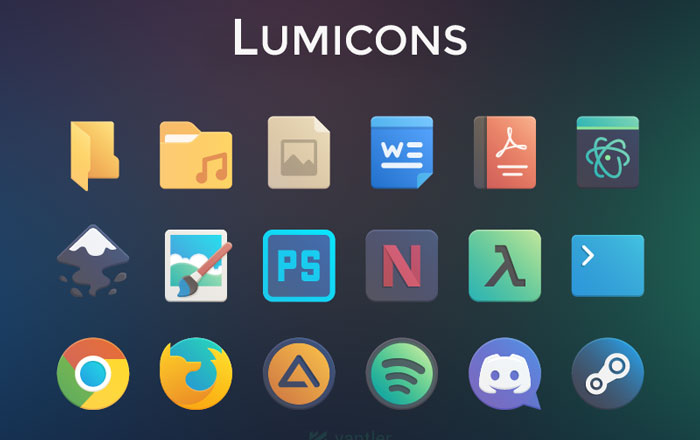
If you are looking for something more advanced and colorful, you should consider the Lumicons icon pack for Windows 10. Unlike the first pack, this one contains a variety of icons such as Desktop Icons, Windows icons, Adobe CC apps, folder icons and all. Even within these selections, you can choose different shades and colors.
#3 Winremix Slate Icon Pack
Winremix Slate Icon Pack is a great choice if you are looking for some modern UI icons for Windows 10. Once again, this is a comprehensive icon pack in that you get icons for various types. Not only the desktop icons but also the other folder icons and app icons are included in the pack. This icon pack would add a new flare to your PC experience.
#4 Folder Flat Colors
This is a great icon pack if you just want variety while organizing folders. As the name says, you can’t expect anything more than folder icons in the package. That having said, it gets the job done when you need one well-organized desktop. Of course, the installation is simple, and you can change the individual folder icons as per your needs.
#5 Insignia Icon Theme
Insignia Icon Theme is an amazing choice if you need a different approach towards file icons on Windows 10 system. Because we are dealing with a comprehensive package, you don’t have to search any further. Just like icing on the cake, Insignia Icon Theme offers you icons even for web apps like Google Drive and Gmail, if you’re into that.
#6 Numix Circle
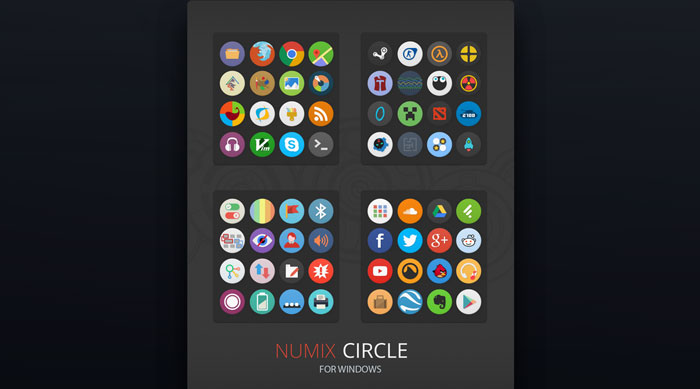
Numix Circle could be one of the best Windows 10 icon packs out there if you are looking for a circular icon set. The beauty of the icon pack is in how it transforms your taskbar and desktop into a modern one in just no time. Another comprehensive package, you don’t have to worry about mixing and matching some icons to create a disruption.
#7 Shadow 135
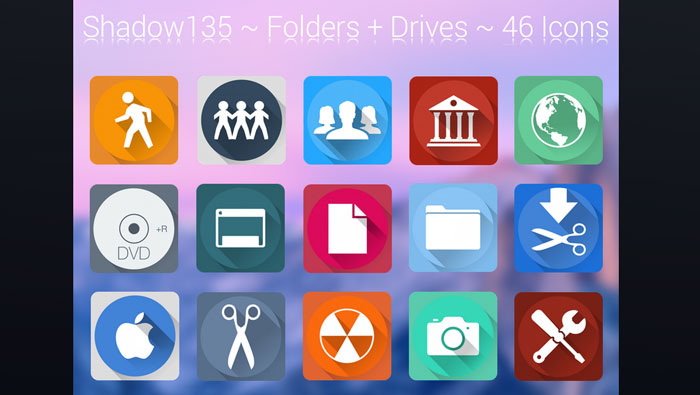
If you want some extra shadow-ish icons for the Windows 10 interface, you should consider the Shadow 135 icon pack for sure. Packed with icons for almost every purpose, this icon pack would make things easier for the aesthetic enthusiast in you. While it does not have many app-based icons, it will replace almost all the Folder and Drive icons.
#8 Star Trek Folders
If you are a Star Trek fan and want to add some tone of the same into your desktop and UI, you should check out this wonderful icon pack. The Star Trek Folders icon pack is very easy to install and offers some of the best looks you can give for Windows 10. What’s more, the same set is available for macOS, if you are into making things common.
#9 Agua
Agua is actually an icon pack that has originally been made for macOS versions, but you would love to have the same icons on your Windows 10 task bar. The icons are known for their simple design and the overall appeal to the eyes. The problem here is that the collection is very limited, but Agua can help you when you have time to customize.
#10 Pixelated Icon Set
Pixelated Icon Set is your gateway if you want to give that retro look to your desktop and task bar. The icons may cause some problem to the eyes, but you will get used to the style in no time. Once everything is done and dusted, do not mind if the desktop looks like an old video game from 80s or 90s. Despite all these, it’s a cool choice.
The Bottom Line
What do you think of these icon packs? We believe they add some flare and individuality to the Windows 10 experience you want to have. We hope this list helps.
Одним из недостатков Windows является скудный набор встроенной кастомизации. Более того, с каждой версией операционной системы он становился всё меньше и меньше: сначала исчезли темы приложений, а вскоре и гаджеты Windows. Благо, в ОС от Microsoft есть достаточно возможностей для разработчиков для создания своих приложений, позволяющих кастомизировать систему на усмотрение пользователя.
- В тему: Как изменить цвет выделения в Windows 10 без сторонних программ
WinDynamicDesktop — установка динамических обоев

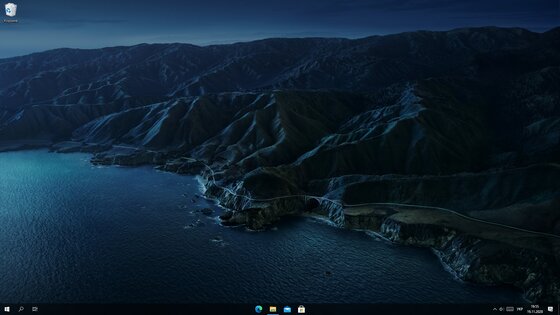
Это бесплатная программа с открытым исходным кодом, благодаря которой пользователи Windows с лёгкостью смогут устанавливать динамические обои из macOS, которые меняются в зависимости от времени суток (к примеру, когда у вас за окном рассвет, на обоях тоже рассвет). Сразу же после запуска, приложение спрашивает ваше местоположение для того, чтобы узнать время восхода и заката солнца в вашем регионе, также его можно ввести вручную. После этого можно выбрать одну из многих тем, доступных по умолчанию, либо создать свою.
GitHub | Microsoft Store (бесплатно)
TaskbarX — кастомизация панели задач
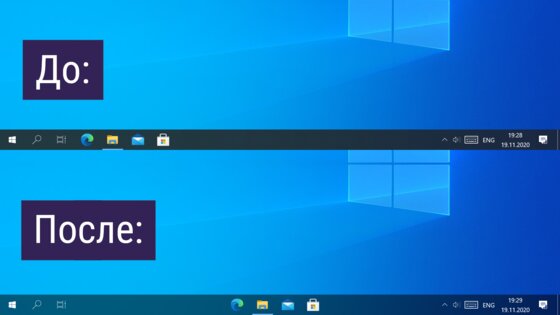
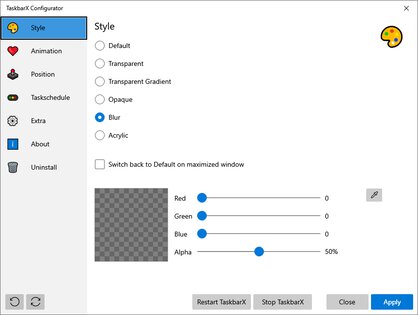
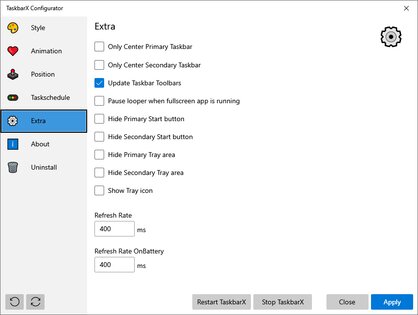
TaskbarX позволяет настроить панель задач Windows 10, изменить её фон или центрировать иконки, а также скрывать трей, иконки и кнопку пуска на других мониторах. Программа очень быстрая и легковесная, а также не затрагивает реестр, что делает ее полностью безопасной.
GitHub (бесплатно) | Microsoft Store (1 доллар)
Rainmeter — виджеты из Windows 7 и macOS

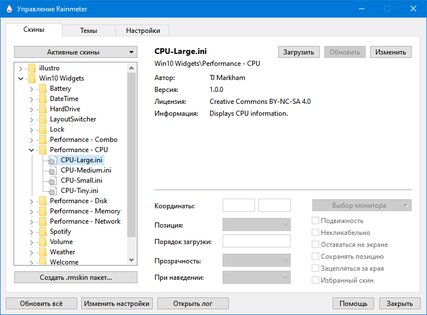
Windows Vista хоть и невзлюбили за ее нестабильность, но вот гаджеты (виджеты в Vista и 7) многим пользователям пришлись по нраву, их даже сумели портировать на Windows XP. По каким-то причинам Microsoft решила убрать этот функционал в Windows 8 (вероятнее всего, из-за живых плиток, которые выполняют похожую функцию). Да, гаджеты можно вернуть и в Windows 10, но зачем, когда есть стороннее приложение под названием Rainmeter, которое имеет даже больше функционала и регулярно обновляется?
Rainmeter позволяет отображать виджеты на рабочем столе с практически любым функционалом, начиная от простых часов и заканчивая мониторингом использования процессора. В приложении есть поддержка сторонних скинов на любой вкус и цвет, коих большое количество в интернете. Один разработчик сумел даже скопировать виджеты macOS Big Sur и её Dock. Мои любимые же — Win10Widgets, которые выполнены в стиле Fluent Design и прекрасно вписываются в рабочий стол Windows 10.
Кроме этого, приложение легковесное (занимает 16 МБ ОЗУ) и потребляет минимум ресурсов, что подойдёт даже для ноутбуков. Как и первые две утилиты, эта тоже имеет открытый исходный код и совершенно бесплатна.
Официальный сайт (бесплатно)
Winaero Tweaker — твикер с кучей возможностей
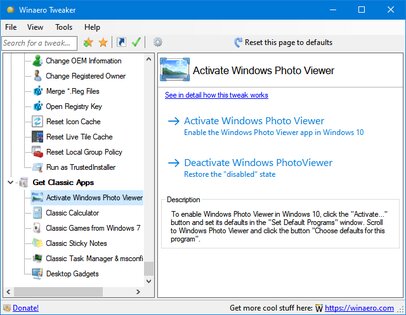
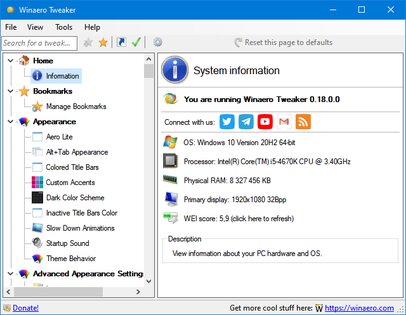
Под Windows существует множество программ-твикеров для кастомизации системы, но самая мощная из них — Winaero Tweaker. Количество доступных настроек просто зашкаливает, и наверняка какая-то из них придётся вам по душе. Приложение позволяет настроить как внешний вид системы, так и её функционал, а также не требует установки.
Твикер встречает нас окном с двумя частями: слева дерево доступных опций, а справа — их настройки. Под каждым пунктом есть подробное описание на английском языке. Также присутствует поиск для того, чтобы быстро найти нужный пункт.
Краткий список функций (полный список доступен на этой странице):
- возможность установить свой акцентный цвет системы;
- выключение автоматических обновлений Windows и драйверов;
- выбор звука включения ПК;
- настройки системных шрифтов и их размера;
- отключение Windows Defender;
- возможность изменения цвета и толщины рамки окон;
- отключение запроса пароля после выхода компьютера из спящего режима;
- включение старых встроенных приложений Windows (например, просмотрщика фото);
- возможность вернуть старый вид настроек громкости звука и батареи в панели задач.
ВНИМАНИЕ! Перед использованием, обязательно сделайте точку восстановления системы на случай каких-либо проблем.
Официальный сайт (бесплатно)
QuickLook — предпросмотр файлов без полного открытия
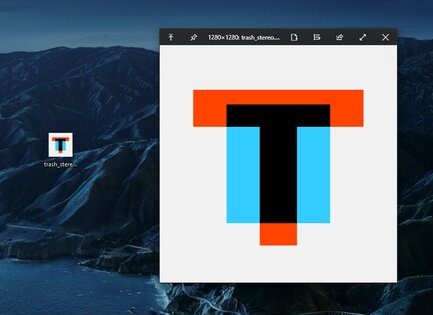
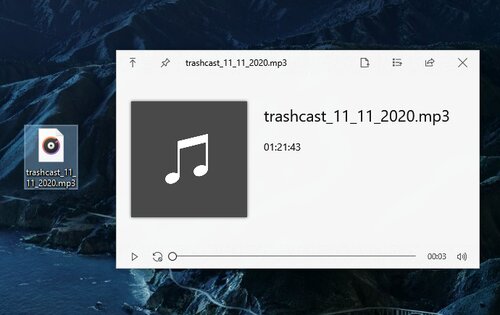
Это приложение позволяет выводить содержание файла на экран нажатием на пробел, прямо как в macOS. Таким образом можно быстро просматривать документы, фотографии и даже видео. С помощью Ctrl и колеса мыши можно увеличивать или уменьшать превью, а кликом на Enter откроется стандартное приложение для открытия данного типа файлов. Также твик поддерживает различные плагины для интеграции с другими файловыми менеджерами, либо открытия неподдерживаемых типов файлов.
GitHub | Microsoft Store (бесплатно)
SmartTaskbar — автоматическое скрытие панели задач
Данная утилита пригодится обладателям ноутбуков, позволяя автоматически скрывать панель задач при открытии окон на весь экран, тем самым увеличивая количество полезного пространства. Также у приложения есть ручной режим работы, который позволяет скрывать панель задач двойным кликом по иконке программы в трее и возможность выключить анимацию сворачивания.
GitHub | Microsoft Store (бесплатно)
PowerToys — продвинутая панель поиска и активные углы из macOS
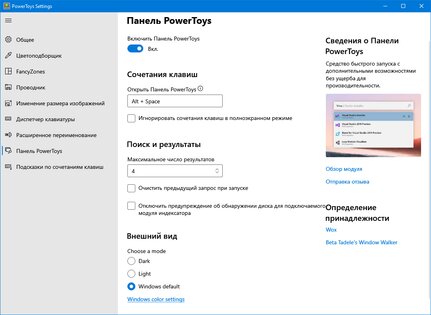
Microsoft PowerToys — это набор полезных утилит от самой Microsoft, призванных расширить функционал системы. Впервые этот набор создавался ещё для Windows 95 и позже был адаптирован под Windows XP. Спустя 12 лет, компания вспомнила об этом приложении и решила перезагрузить проект уже для Windows 10, с новыми функциями и открытым исходным кодом.
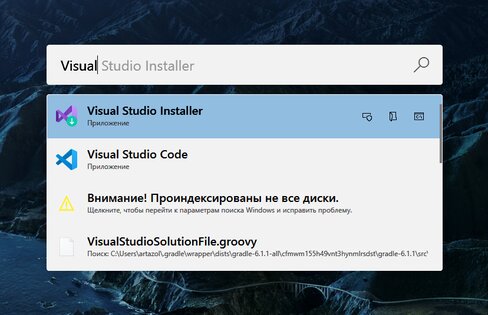
Одной из самых интересных утилит является PowerToys Run, которая добавляет в Windows 10 поиск наподобие Spotlight из macOS, которая работает по всей системе и позволяет искать приложения, файлы, запущенные процессы или даже проводить простые математические расчёты. Запускается же он сочетанием клавиш Alt + Space, при желании его можно изменить в настройках.
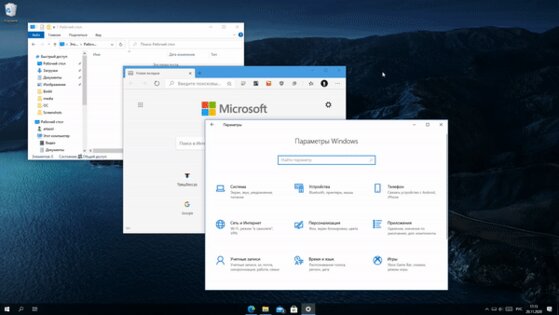
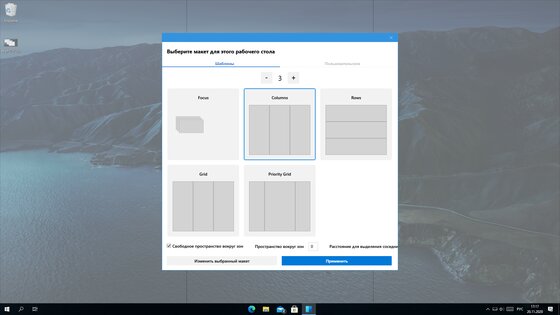
Вторая полезная функция — FancyZones. В Windows 10, если вы перетащите окно в угол или сторону экрана, оно изменится до определенного размера, заполнив половину или четверть экрана. FancyZones же позволяет создавать свои макеты расположения окон и быстро их применять. В приложении можно выбирать как заготовленные шаблоны отображения, так и создавать свои. Чтобы воспользоваться ими, достаточно зажать Shift и переместить окно приложения в нужную область.
GitHub (бесплатно)
The Windows 10 desktop offers a clean and organized space where users can place their most-used files, apps, and folders for easy access. By default, a snap-to-grid method arranges desktop icons on the desktop, automatically aligning them in a uniform layout. However, not everyone wants this format. If you wish to align desktop icons differently, keep reading for some steps to turn the feature on or off.
What does it mean to Align icons to grid?
You’ll notice that the Windows desktop icons automatically align to a structured grid layout. The Align icons to grid feature in Windows makes this possible, ensuring the icons are always neatly arranged with even horizontal and vertical spaces between individual “compartments.” The uniform placement prevents icons from overlapping or being hidden, making finding and accessing specific files or folders easier.
How to turn off Align icons to grid
Users can choose between two methods to modify the icon placement on the desktop: the desktop context menu and the Registry Editor.
Option 1: Use the desktop context menu
Below is the easiest way to change your Windows icon display. Users can change the settings in the desktop context menu to place icons anywhere on the desktop without following a set alignment.
- Right-click on a space on your desktop to open the context menu.
- Hover over View, which will open a submenu.
- Click Align icons to grid from the submenu to uncheck the option.
You should now be able to drag and drop your desktop icons anywhere without aligning them to a grid format.
Option 2: Adjust icon spacing via Registry Editor (Advanced users)
Some users find the grid layout useful but are dissatisfied with the default spacing, usually set to -1125. However, you won’t find an option to change the desktop icon spacing in Settings. If you want to adjust it, you must use the Registry Editor, which is usually only accessed by IT professionals, developers, and advanced users with admin privileges. With the risk of system issues from editing the registry incorrectly, backing it up before you make changes is advised.
- Open the Registry Editor. Press the keyboard shortcut, Windows key + R, and type regedit in the pop-up window or search for Registry Editor in the Start menu.
- Follow this path on the left pane:
HKEY_CURRENT_USER\Control Panel\Desktop\WindowMetrics - On the right pane, double-click the IconSpacing key to open an Edit String window where you can change the horizontal desktop icon spacing (the spaces between columns).
- Input a new value from -480 (minimum, tighter spacing) to -2730 (maximum, wider spacing) and click OK.
- To change the vertical desktop icon spacing (the spaces between rows), double-click the IconVerticalSpacing key and enter any value from -480 to -2730. Then click OK.
- To see the changes, restart your device.
Why turn off the desktop icon alignment?
Some users prefer a more flexible way to organize their desktop. Here are a few reasons why users might want to turn off icon alignment:
- Despite the structure and order that the “Align icons to grid” feature offers, some people want more freedom when arranging their desktop icons.
- Users may not like their files and folders confined in a forced grid layout.
- Users may also wish to just manually organize them in less conventional positions to suit their workflow.
- Most of the time, customizing how users access their desktop icons is just a matter of preference.
Troubleshooting issues
The instructions to align desktop icons differently from the usual layout are relatively straightforward (Option 1), but if you do not follow them correctly, you may encounter some issues, especially after using the Registry Editor (Option 2). Read about common problems and their possible solutions below.
The option is grayed out or not working
Windows Explorer may sometimes glitch and prevent the context menu from functioning correctly. If the option is not working or is grayed out, restart Windows Explorer.
- To do this, press Ctrl + Shift + Esc to open the Task Manager.
- On the left pane, find Windows Explorer under Windows processes.
- Then, right-click on Windows Explorer and select Restart.
You can now check if the option is available by right-clicking on the desktop.
If the option is still grayed out, your IT administrator likely manages the setting, preventing you from making changes. Consider reaching out to your organization’s IT support team for assistance.
The icon positions keep resetting
Make sure to disable the Auto-arrange icons option from the context menu. Follow the instructions in Option 1. You should also disable third-party software like cloud sync services or desktop management tools that may override your icon placement. You can manually adjust the settings in those apps to prevent automatic rearrangement of your desktop icons.
The spacing changes, but the icons still snap to a grid
Confirm that you have disabled the Align icons to grid option in the context menu. If it is disabled and the icons remain in a grid formation, try logging out and back into your account for the changes in the registry to take effect.
Frequently Asked Questions (FAQs)
What’s the difference between “Align icons to grid” and “Auto-arrange icons“?
The “Align icons to grid” feature commands your icons to always snap back to the grid format, but you can manually move them around anywhere on your desktop. On the other hand, the “Auto-arrange icons” is one of the options offered for arranging icons on a desktop. This feature automatically organizes your icons from left to right and top to bottom, preventing manual placement.
Can I place icons anywhere on the desktop after turning off grid alignment?
Yes. After turning off the Align icons to grid AND the Auto-arrange icons features, you can drag and drop your icons anywhere, even on top of each other, so that they overlap.
Does turning off this feature affect multiple monitors?
Turning this feature off can affect how Windows displays the icons across monitors. However, switching between multiple monitor setups can cause the icons to rearrange or reset to the primary display due to a monitor resolution change or layout differences.
Why do my icons keep moving even after disabling grid alignment?
First, your icons may keep moving if you still have Auto-arrange icons enabled. They can also move if you switch monitors, causing a resolution change or display scaling adjustment. Finally, you may have third-party software that forces your icons to reset their positions.
How do I reset icon positions if I want to re-enable grid alignment?
To re-enable the grid alignment, right-click on your desktop, hover over View, and check Align icons to grid. You can now manually rearrange the icons while following the grid format. You can also enable the Auto-arrange icons feature to reset the icons’ default positions.
Understanding personalized icon placement
Customizing your desktop layout, specifically the icon placement, can improve its general appearance to suit your preferences and enhance your workflow. You can control your computer screen view by disabling the feature from the context menu. Always check the auto-arrange settings and restart Windows Explorer to resolve common issues. Keep this guide handy, and you’ll be on your way to a more efficient and visually appealing desktop experience.
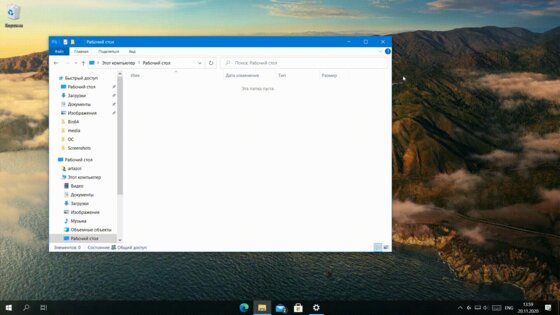
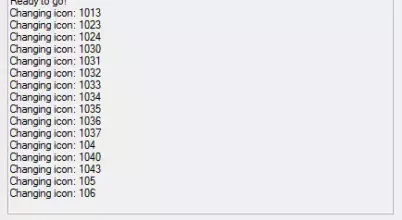
Приложение Icon Changer позволяет пользователю всего за несколько кликов добавить в Windows 10 стандартный набор иконок из Windows 7. Для запуска утилиты необходимо использовать права администратора. Замена системных иконок происходит автоматически после нажатия кнопки «Patch». Чтобы вернуться к настройкам по умолчанию, достаточно воспользоваться кнопкой «Restore».
В последующих версиях приложения планируется реализовать поддержку системных иконок из ОС Windows 8. Перед запуском программы для работы с иконками рекомендуется создать контрольную точку восстановления. Утилита подменяет некоторые системные файлы, чтобы иконки отображались корректно, поэтому лучше перестраховаться.

Мы не имеем отношения к разработке программ и (или) их содержимому. Не отвечаем за последствия при их использовании — отказ от ответственности. Все жалобы и претензии следует направлять
на официальные веб-сайты разработчиков
и (или) страницы GitHub (раздел issues). Рекомендуется ВСЕГДА, без исключительных случаев, создавать точку восстановления системы.