
Cannot Check Cellular Option in Windows PC. Here is the Simple Guide to Fix Cellular Option Missing in Windows 11.
Windows 11 has a built-in feature that lets you connect to the cellular network automatically. However, several users who depend on cellular data access for their laptops or tablets may find the missing cellular option in Windows 11 irritating. This can happen due to several reasons, such as outdated or problematic driver issues, software bugs, or misconfigured Windows 11 settings.
Windows 11’s cellular option enables users to access the internet using a SIM card and a cellular data subscription when Wi-Fi or Ethernet connections are unavailable. Here are some measures you can take to resolve the problem of a missing cellular option in Windows 11.
Here are some methods you should implement in order to bring the missing cellular option back.
1. Enable the Cellular Option using the Settings app
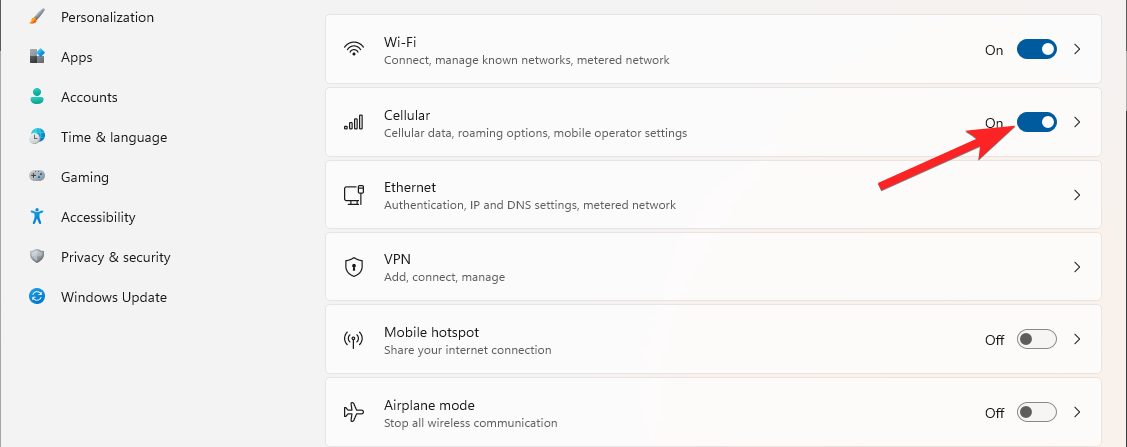
The cellular option will not be available if the option has been disabled from the settings app. Enable the Cellular option from the Settings app as described below:
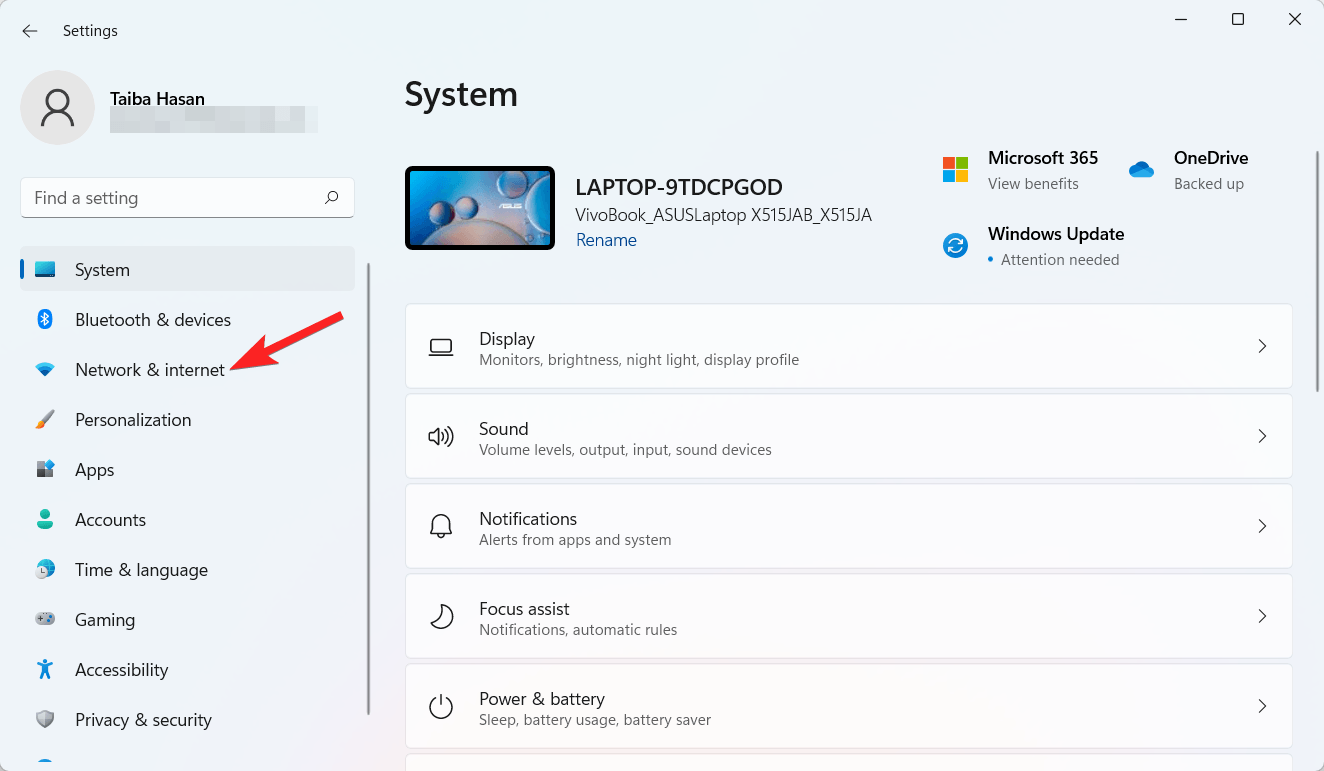
- Launch the Windows 11 Settings app with the Windows + I shortcut.
- Choose the Network & Internet option from the left navigation menu.

- Activate the toggle next to the Cellular option.


2. Enable the Cellular option using the Quick Settings Panel
You can also enable the cellular option directly from the Quick Settings panel on the left. Here are the steps for it.
- Click the Network, Volume, or Battery icon in the taskbar system tray to open the Quick Settings panel.

- To activate it, click the Cellular Quick Setting icon.
- To connect to a cellular data network, join an existing profile or create a new one.
- You may disable or turn it off using the same Cellular Quick setting.
3. Enable the Cellular option using the Airplane mode Settings
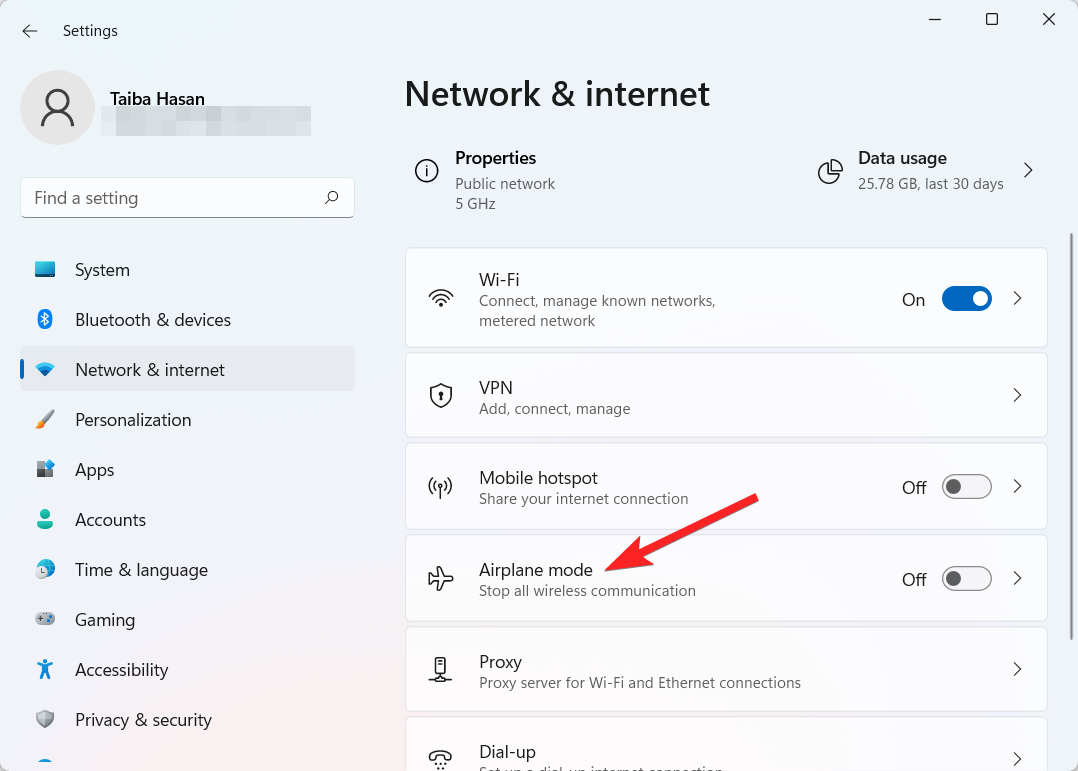
To launch the Settings app, right-click the Start button and choose the Settings option.
- Go to the Internet & Networks category from the left navigation panel.

- Choose Airplane mode settings on the right side. Do not activate the Airplane mode. Access it instead.

- Toggle it on or off using the Cellular toggle (in the Wireless Devices section).

4. Run the Windows 11 Network Troubleshooter
Windows 11 includes a built-in Network Troubleshooter tool designed to help pinpoint and resolve network-related issues on your computer. This tool scans your system for problems and guides you in fixing them. Follow the steps below to utilize this utility:
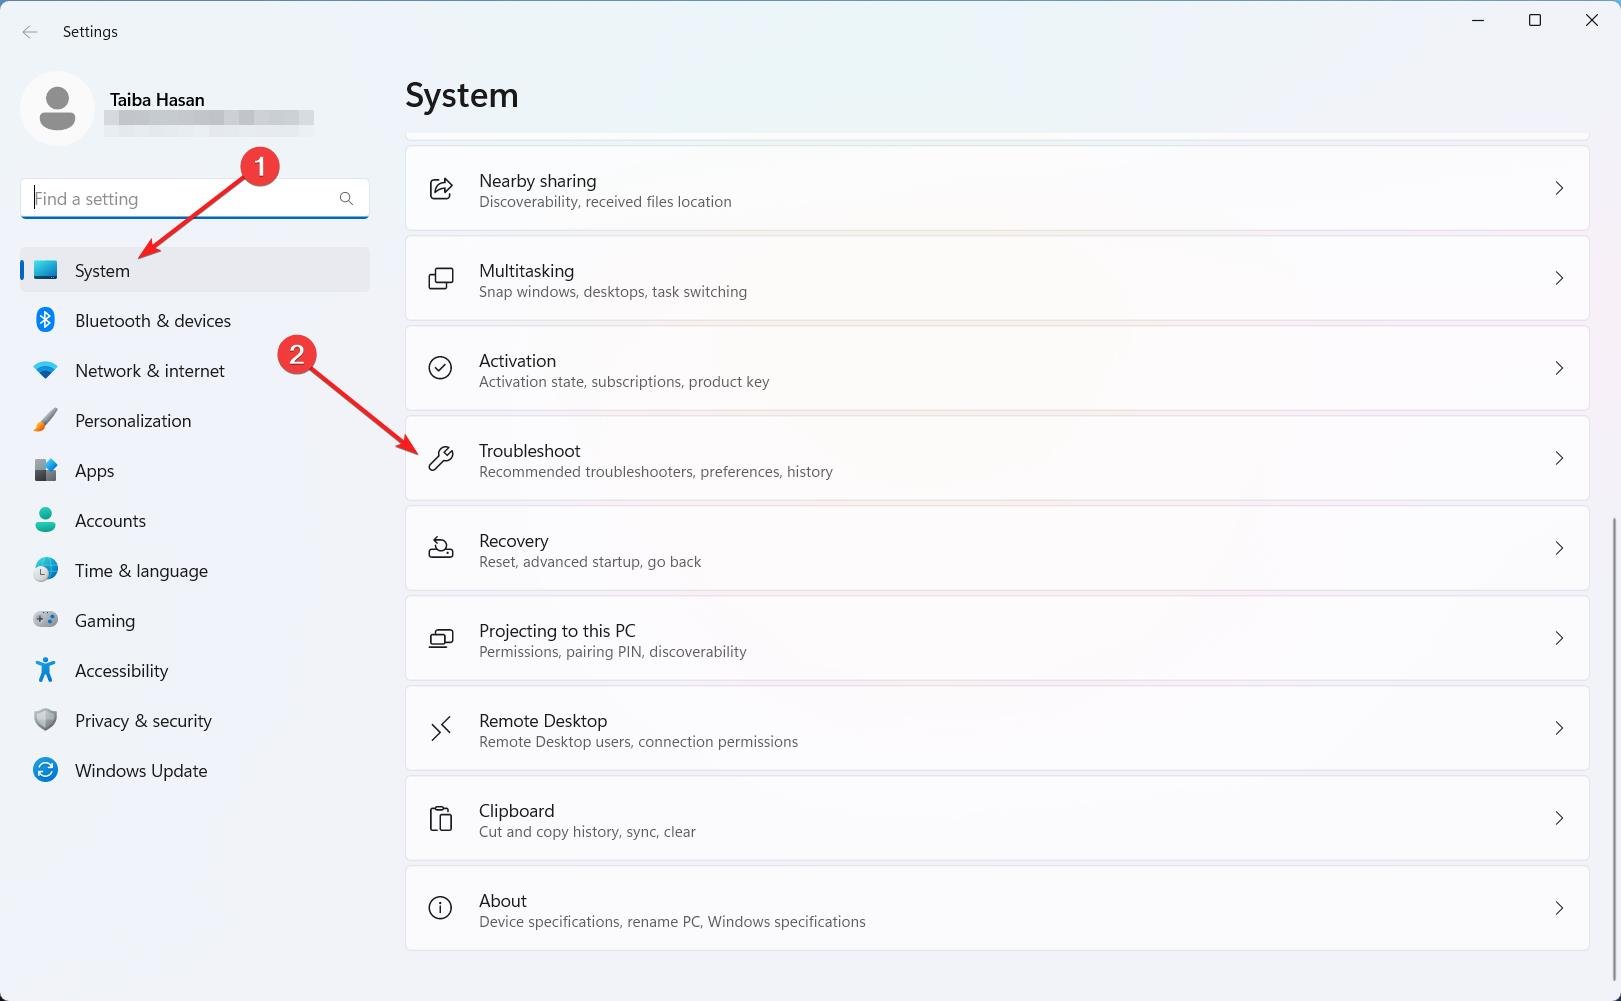
- To begin, press the Windows + I keys simultaneously to open the Settings application.
- Within the Settings app, navigate to the right-hand pane and click the Troubleshoot option.

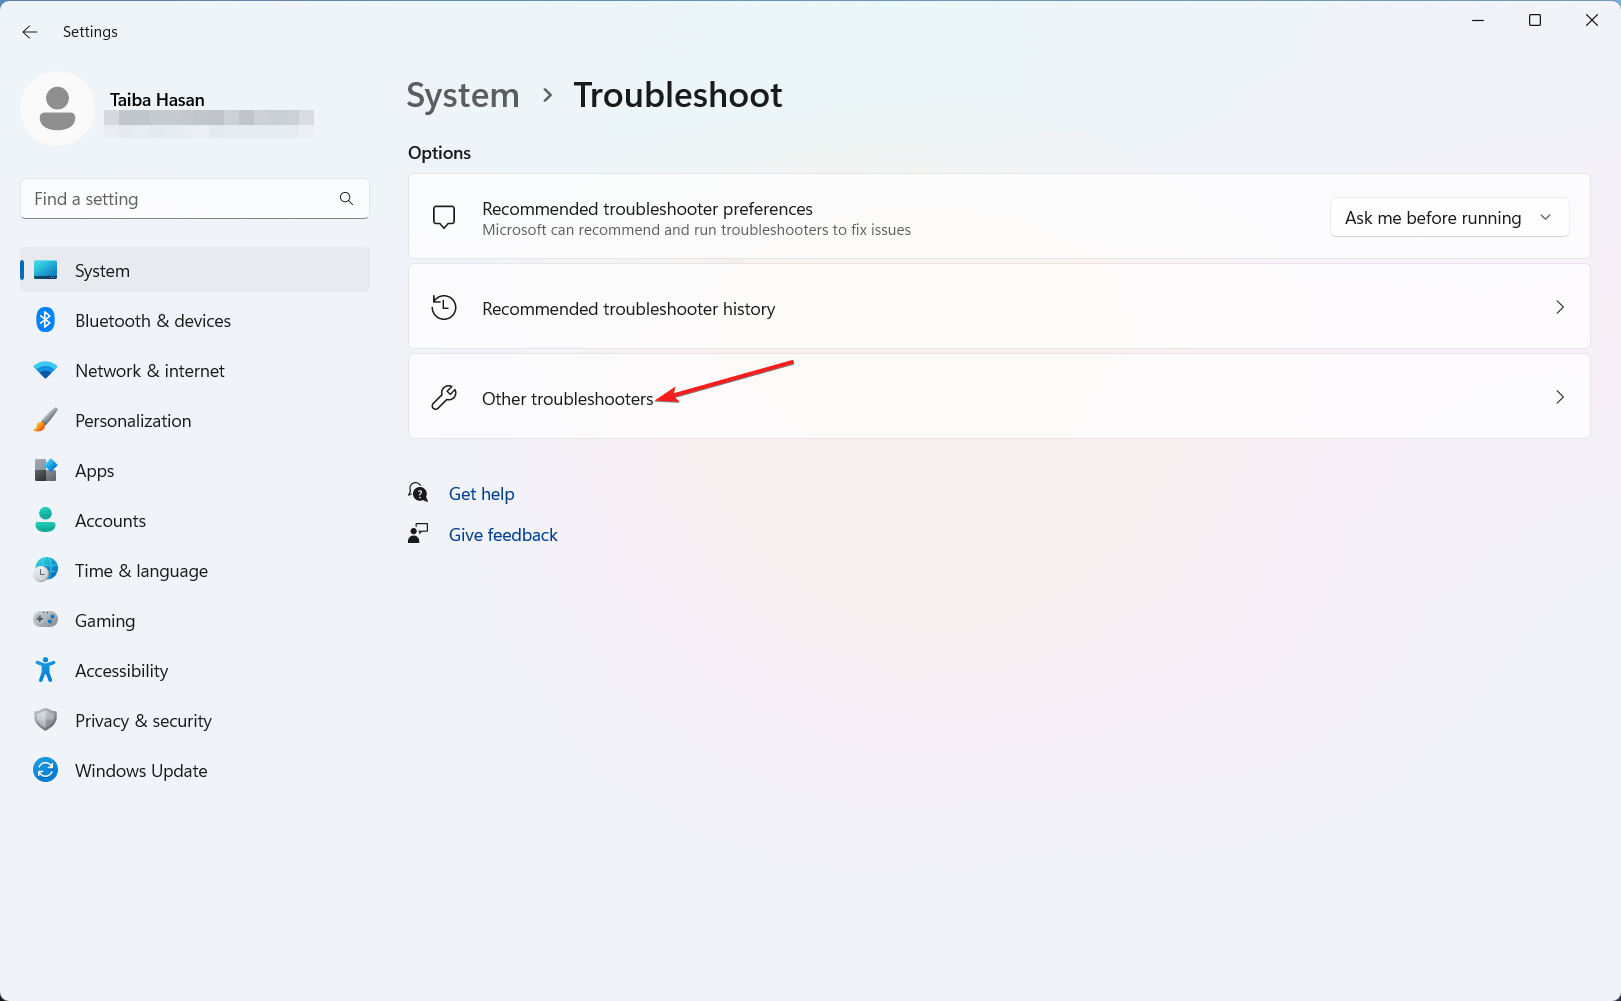
- Next, choose Other troubleshooters from the available options.

- Locate the Internet Connections troubleshooter and click on the associated Run button.

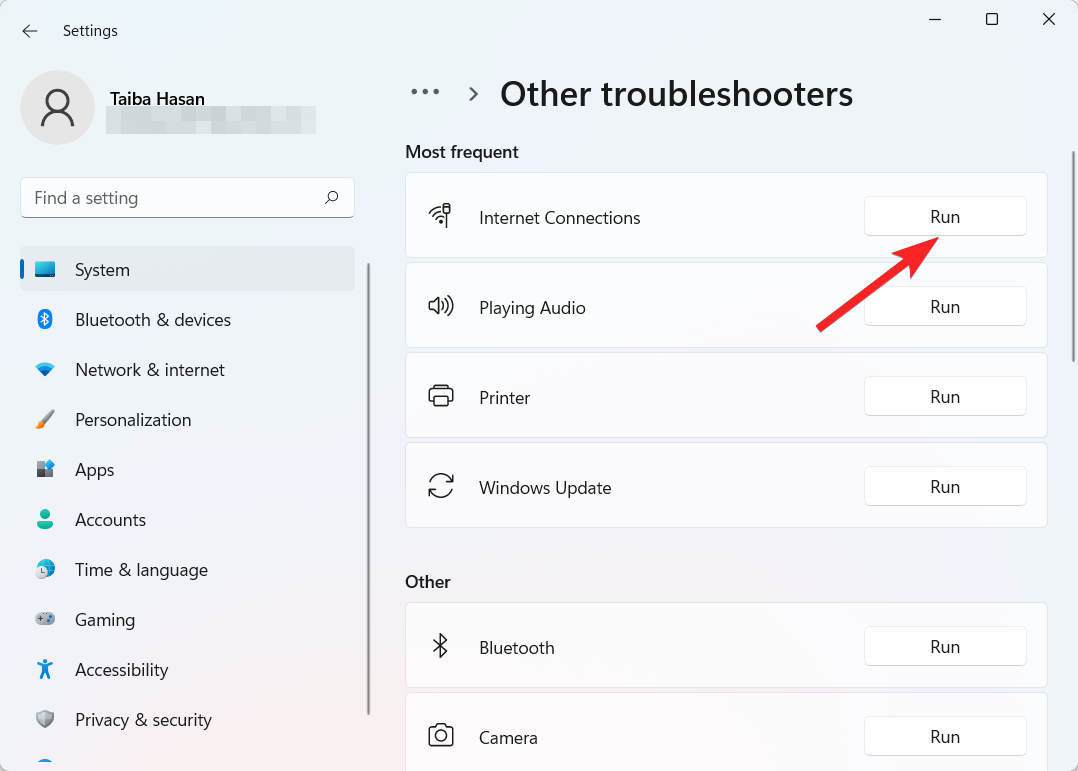
Allow the troubleshooter to analyze your system; if any issues are detected, it will either automatically fix them or provide recommendations on how to resolve them.
5. Enable the Cellular Adapter
It’s crucial to ensure this feature is enabled when attempting to establish an internet connection via cellular. In many cases where issues arise, you may have overlooked activating this setting, rendering the feature non-functional.
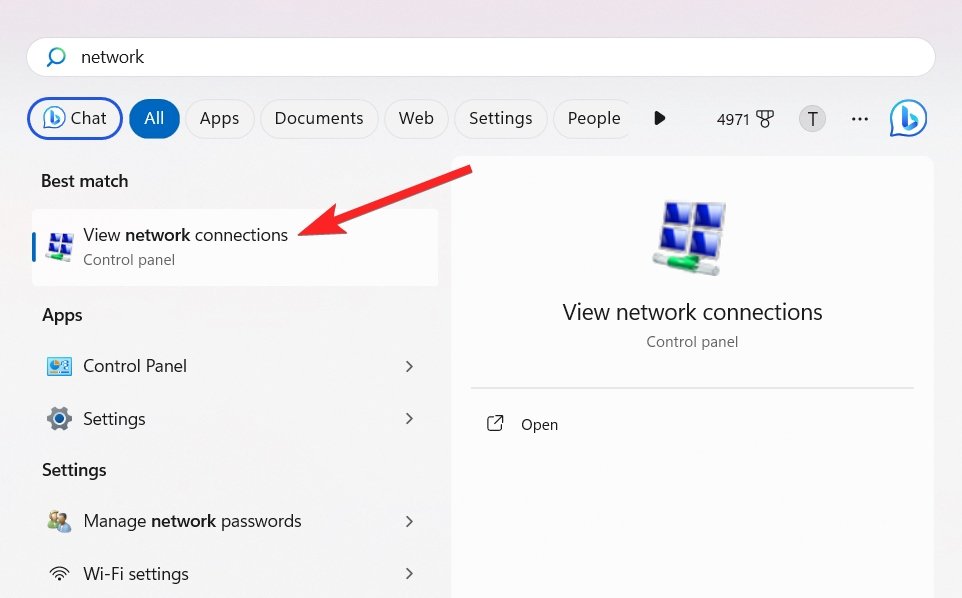
- First, press the Windows icon. Type Network Connections in the search bar on top, and select the View Network Connections option from the search results.

- Subsequently, right-click on your cellular adapter and choose the Enable option in the context menu.
If it’s already enabled, and you don’t find this option, you may need to explore alternative solutions to resolve the issue as discussed under.
6. Update Cellular Adapter Drivers
Drivers play a crucial role in bridging the gap between hardware and software in the Windows operating system. When these drivers become outdated, you may encounter various issues. For instance, an outdated Network Adapter driver can lead to the disappearance of the cellular option in Windows 11.
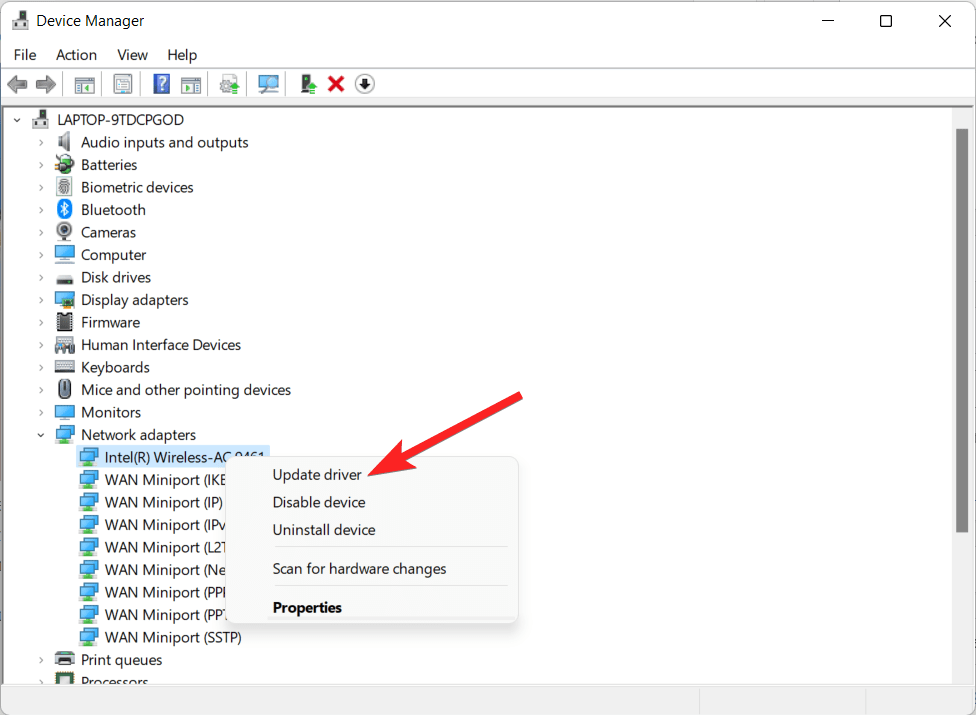
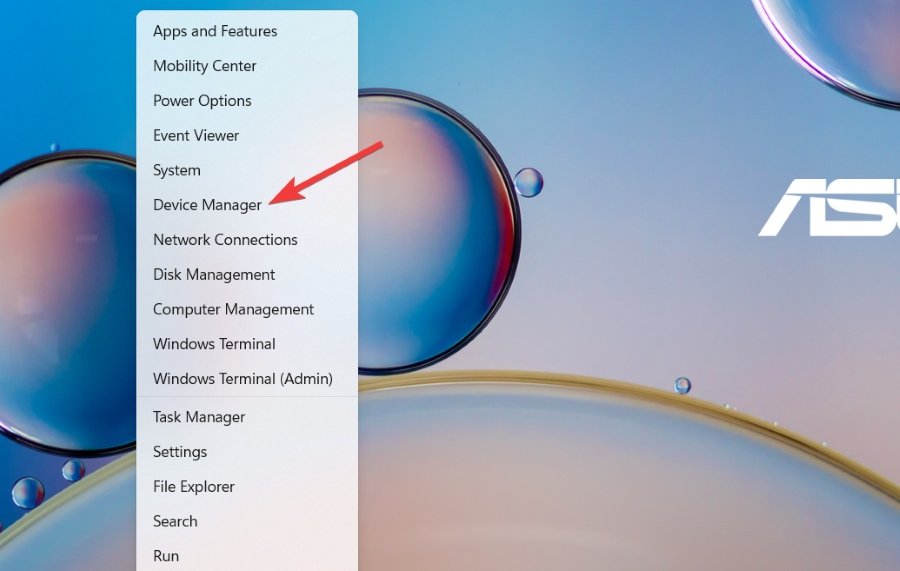
- Right-click the Start icon in the taskbar and choose the Device Manager option from the context menu.

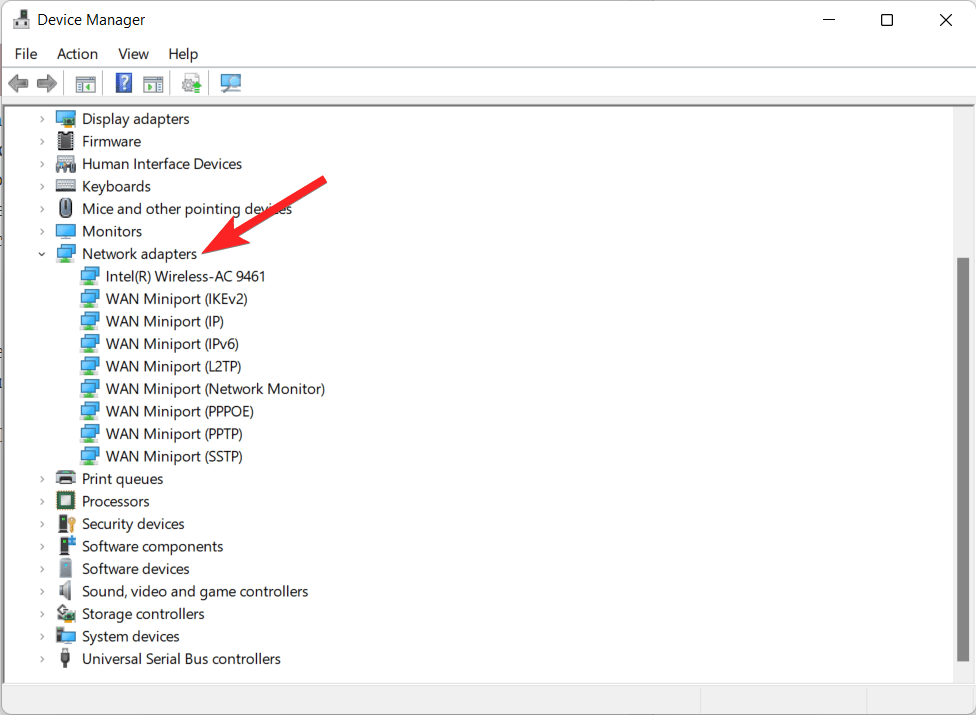
- Locate and expand the Network adapters category in Device Manager.
- Next, choose the Update driver option by right-clicking the network adapter.

- Choose Search automatically for the driver‘s option from the next popup that opens.


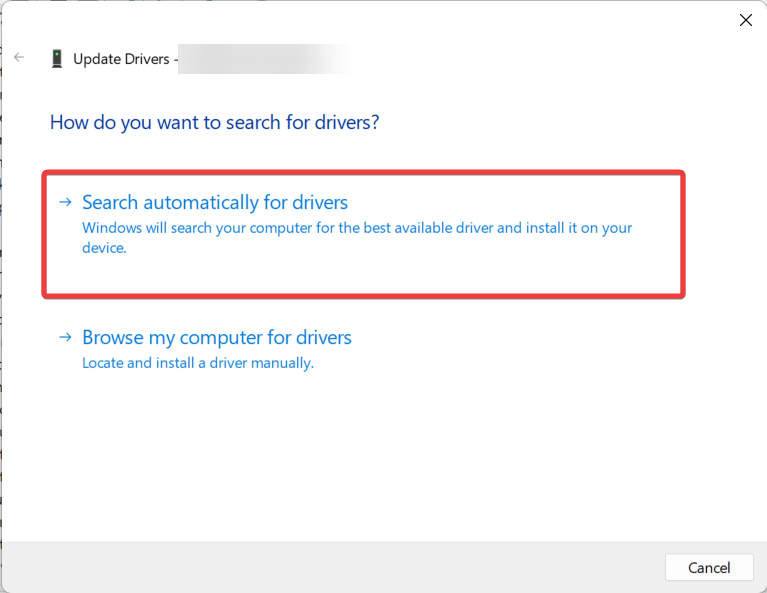
This will force Windows to find and install the most recent driver for your network card.
7. Reset Network Settings
Resetting your network settings will resolve any problems such as the missing cellular option in Windows 11 which was triggered by corrupt or misconfigured network settings. Windows performs this process by wiping out all previously saved configurations and returning them to their default settings.
- Begin by pressing the Windows key, and I key simultaneously to open the Settings app.
- Next, navigate to the Network & Internet section on the left-hand side of the Settings window.

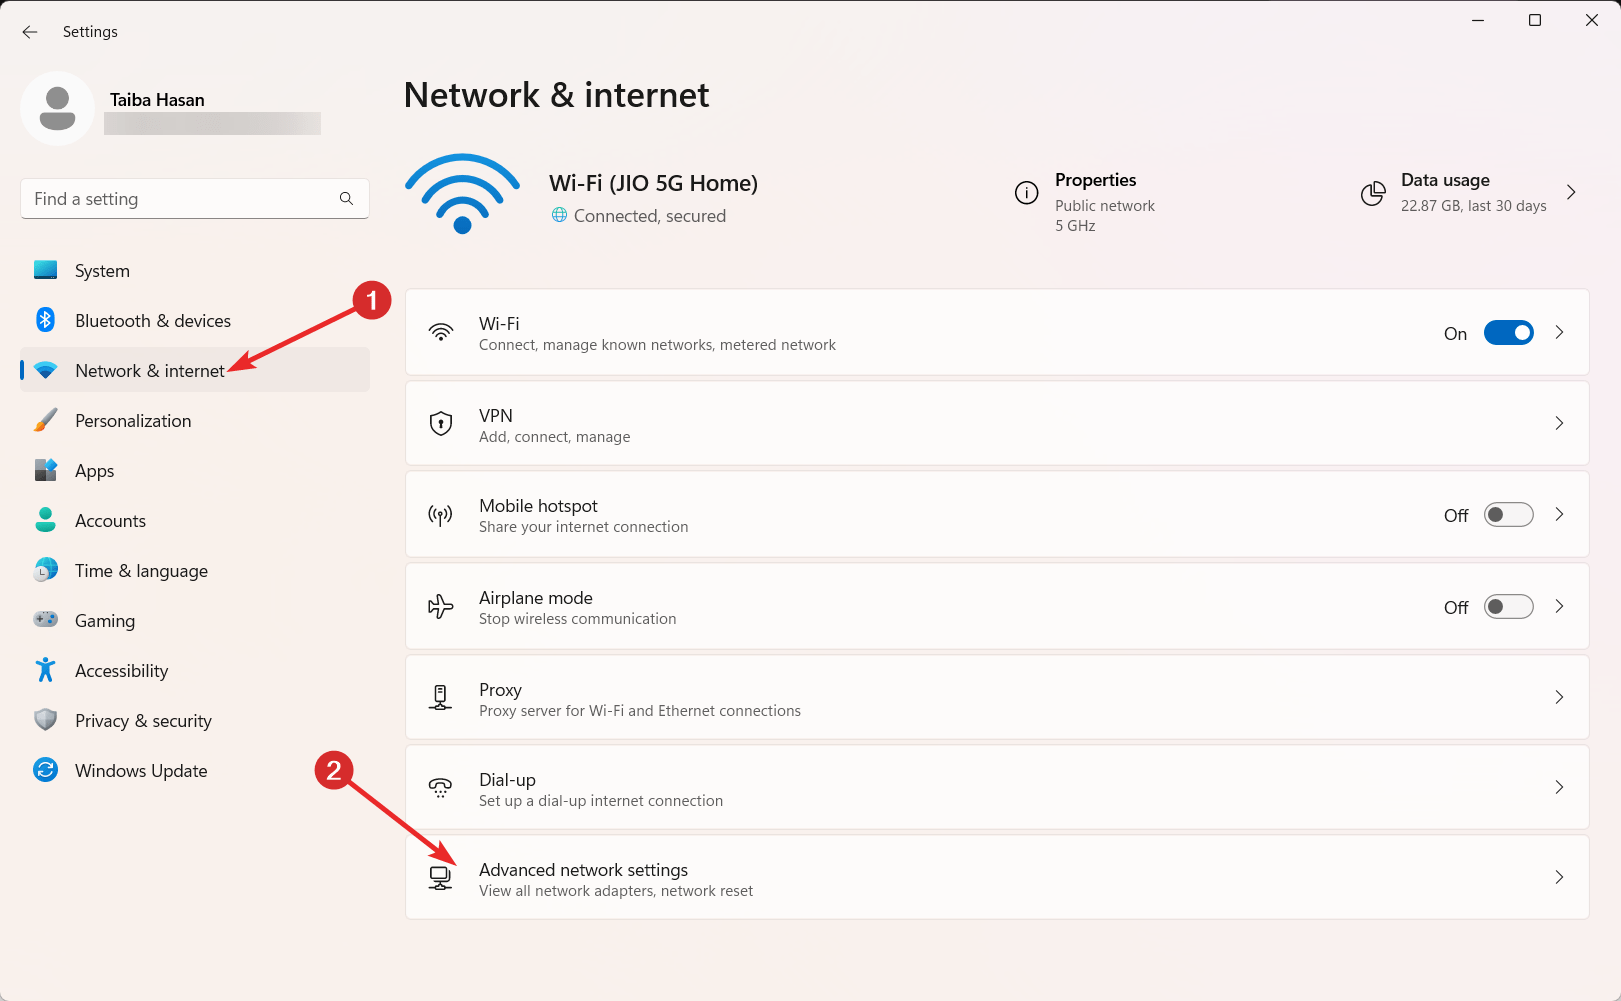
- In the Network & Internet section, locate and click Advanced Network Settings on the right.

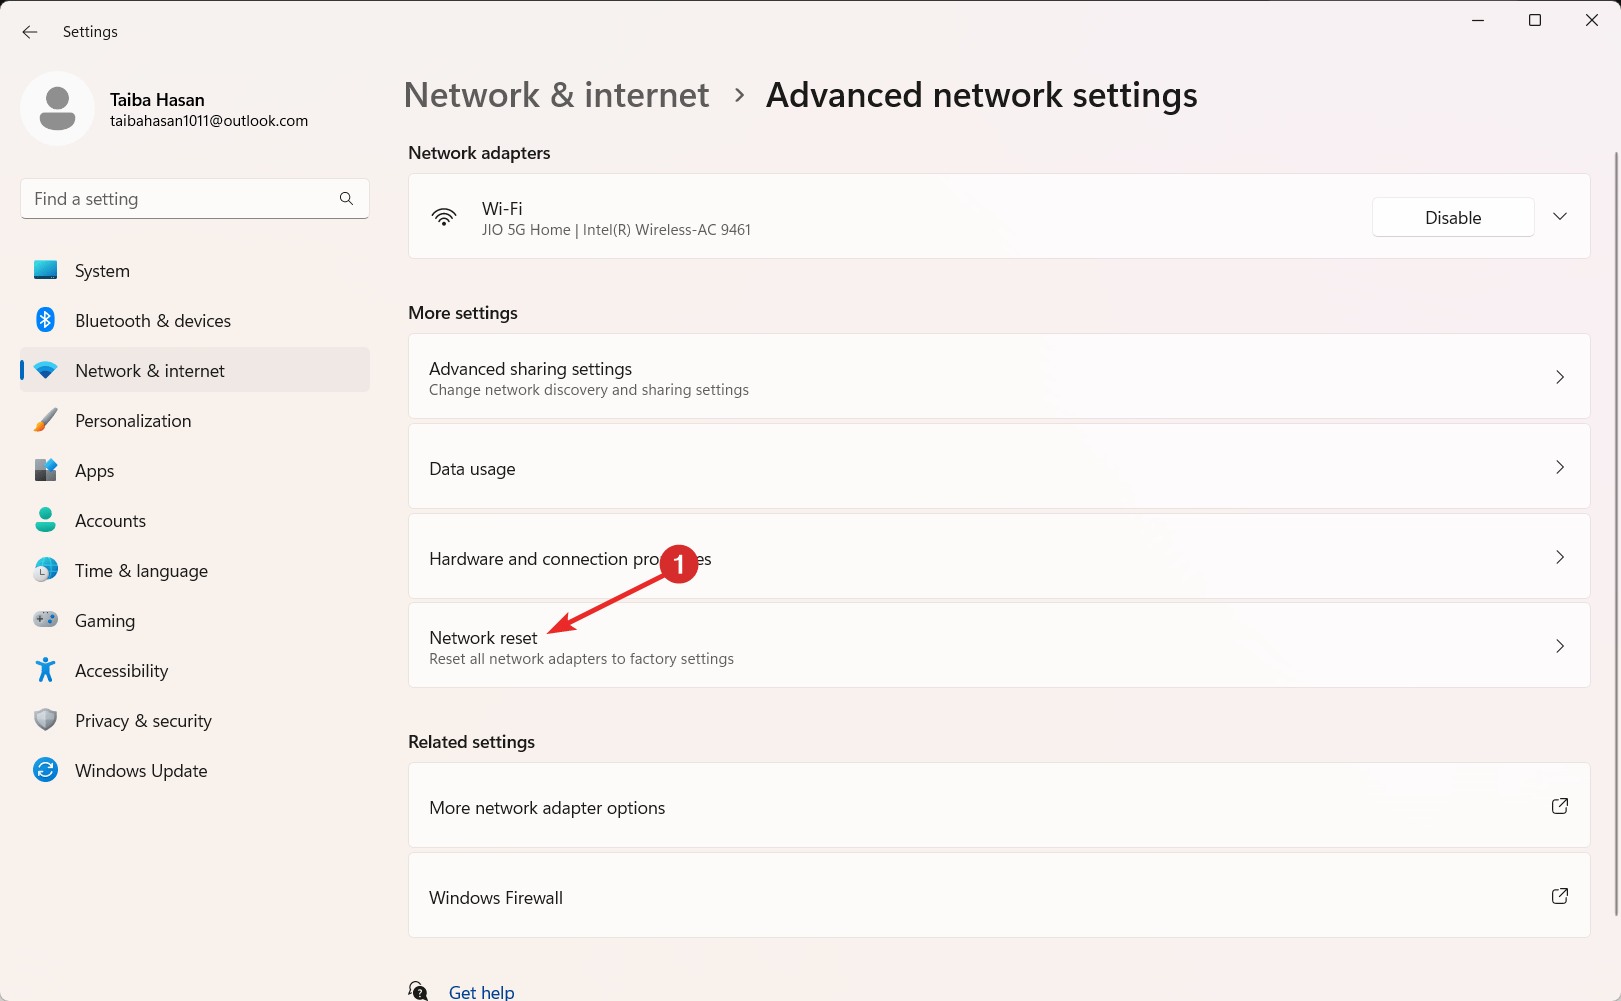
- Scroll down within the Advanced Network Settings menu until you find the Network Reset option.
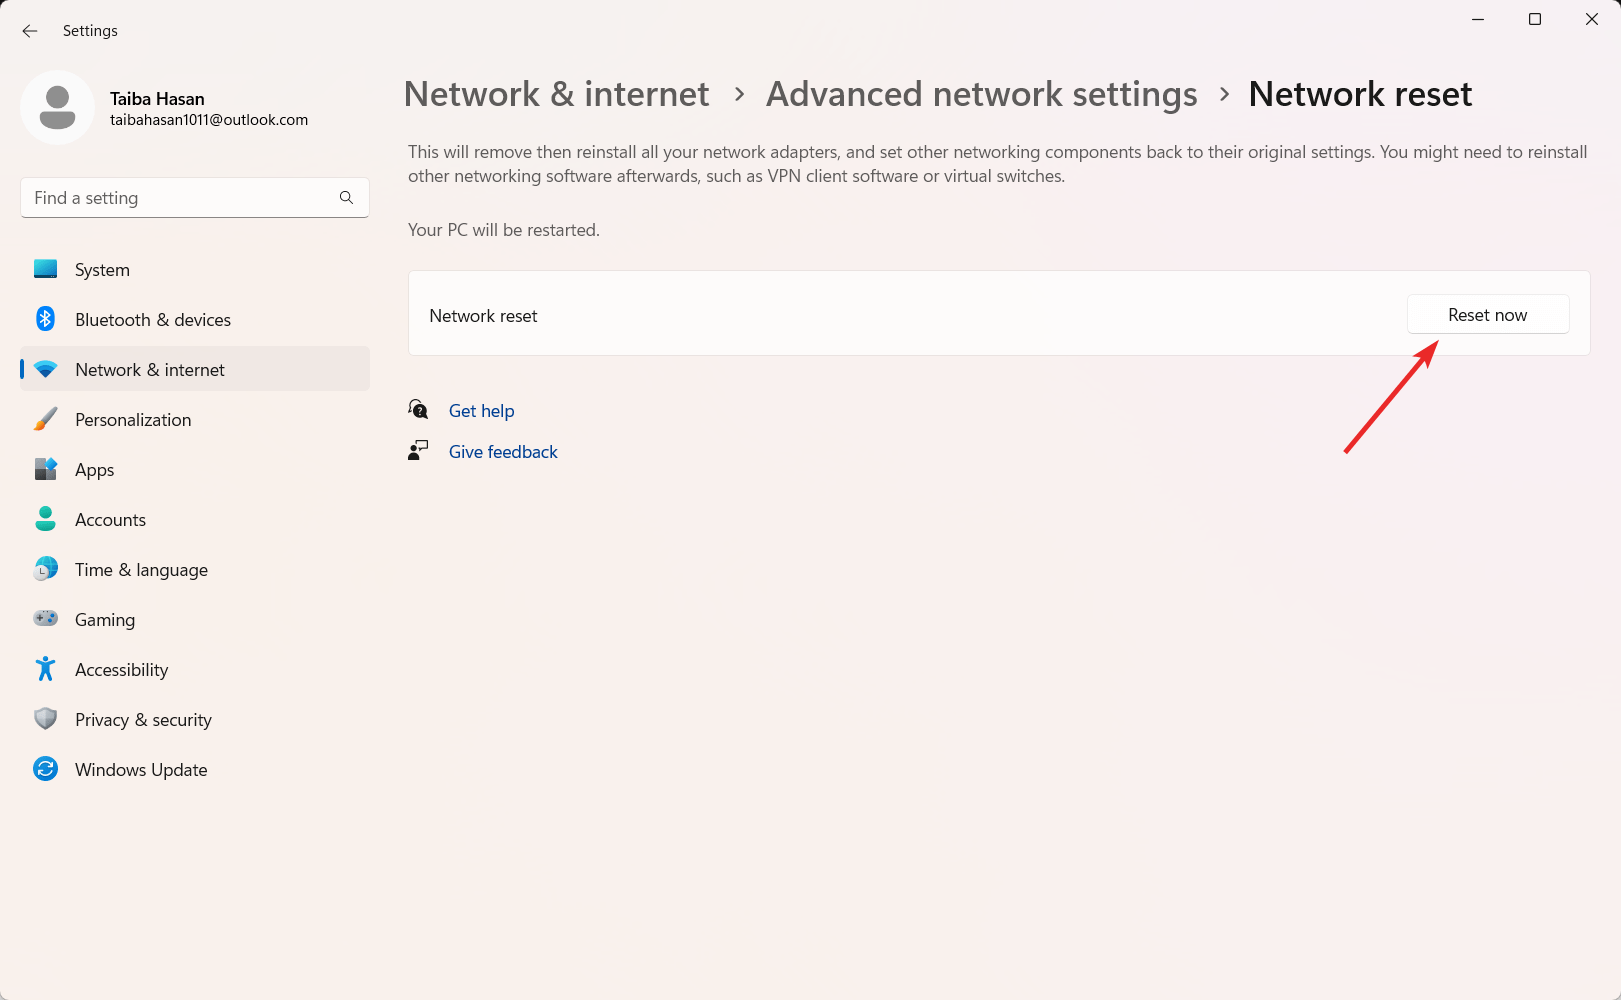
- Finally, click on Reset now and confirm your choice. This action will initiate the network reset process, restoring your network settings to their default configurations.

8. Uninstall and Reinstall Cellular Adapter Drivers
Having a corrupt cellular adapter driver may be the reason why the cellular option is missing in Windows 11. If this is the case, uninstalling and reinstalling the cellular network drivers will do the trick. Follow these steps:
- Click the Windows icon on the taskbar and choose the Device Manager option from the context menu.

- Expand the Network Adapters category in the device manager window to view the related drivers.

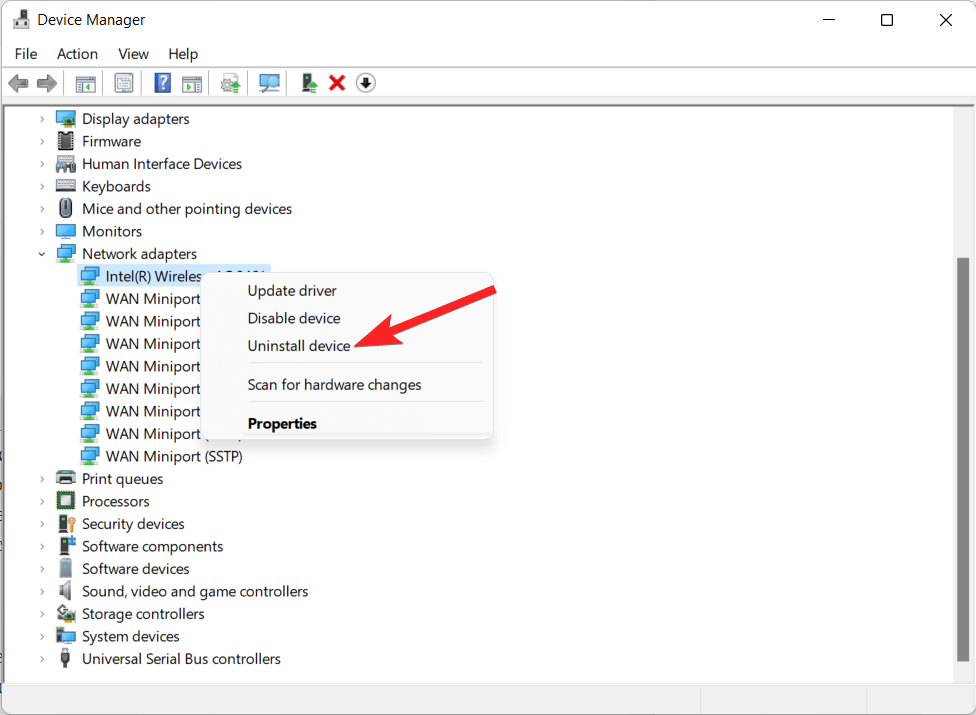
- Right-click the driver related to the cellular option and choose the Uninstall Device option from the context menu.

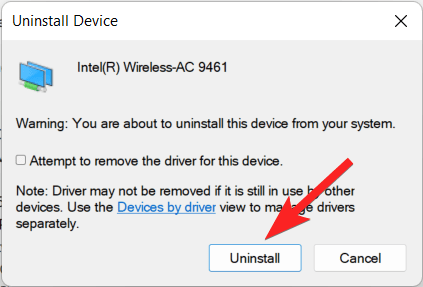
- A confirmation prompt will appear. Click the Uninstall button to confirm your choice.

- Next, reopen Device Manager and click the Check for Hardware Changes icon located on the top.

- This action will prompt Windows to install the latest version of the driver automatically. Then restart your PC to apply your changes.
9. Clean boot Windows PC
You can initiate a clean boot in Windows to troubleshoot issues by minimizing the number of active apps, processes, and drivers. This will help identify the root cause of why the cellular option is missing in Windows 11. Here is the step-by-step process of the same.
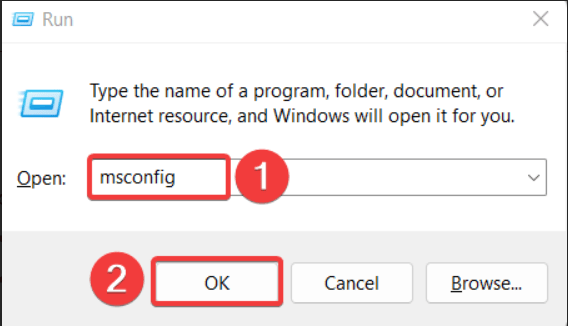
- Use the Windows key + R shortcut combination to launch the Run dialog box. Type msconfig in the search bar on top and press Enter to execute it.

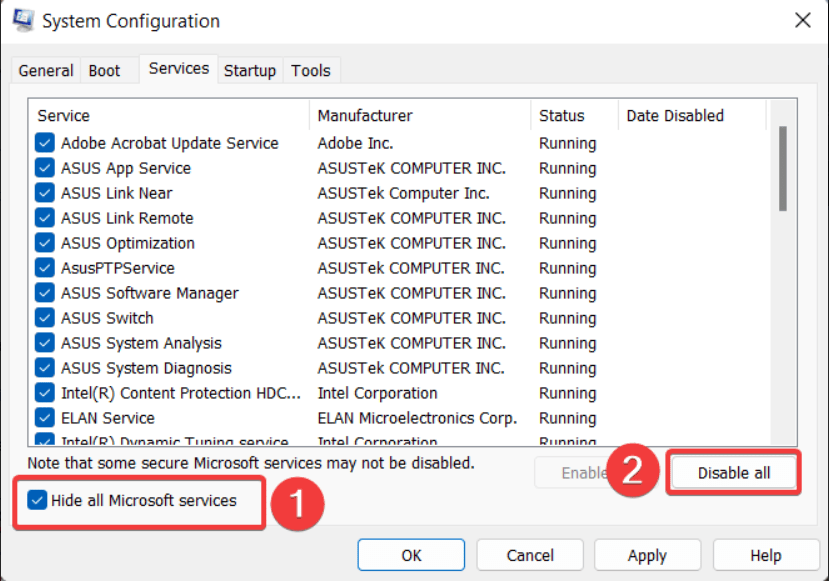
- In the System Configuration window, navigate to the Services tab.
- Select the Disable All option after selecting the Hide All Microsoft services checkbox.

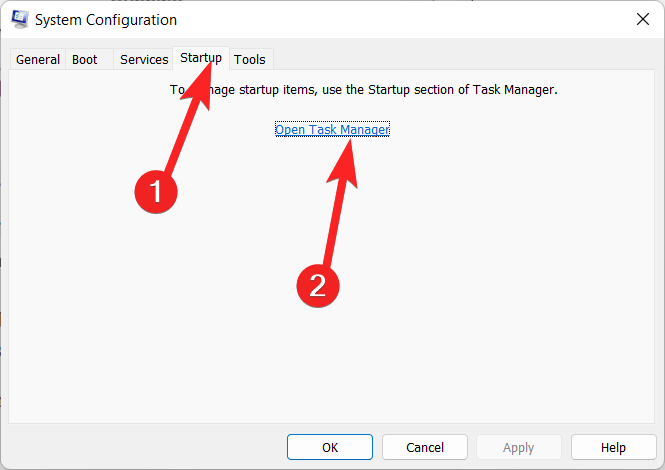
- Now switch to the Startup tab and click the Open Task Manager button.

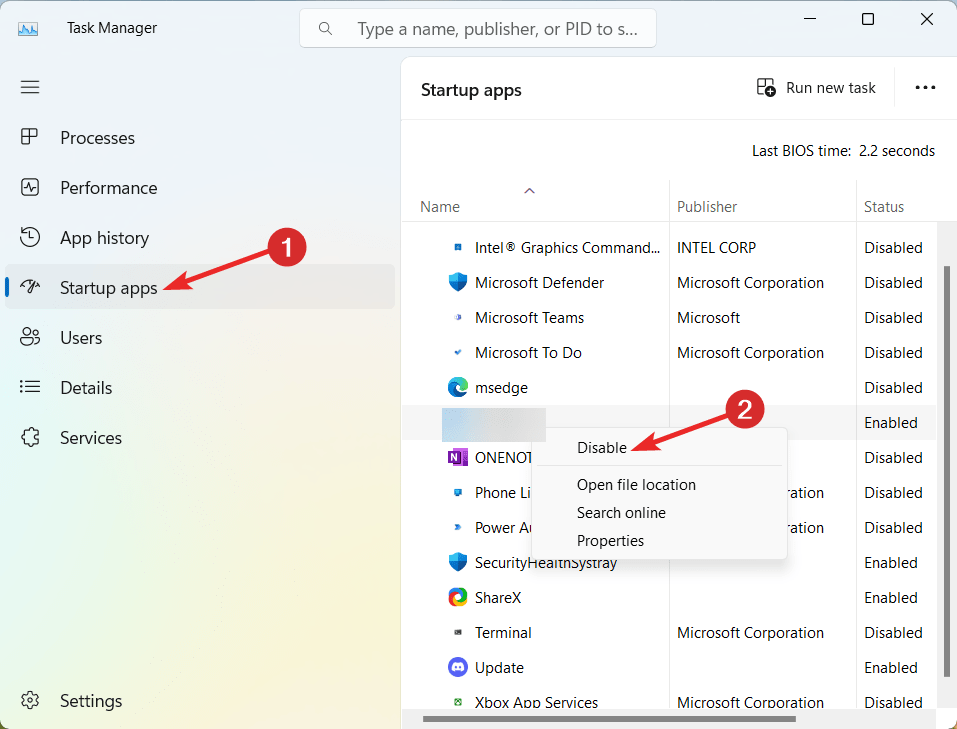
- In Task Manager, choose a startup app and click the Disable button.

- Perform this process for any other startup apps you wish to disable.
- Return to the System Configuration screen and click OK to save the changes.
You can now gradually re-enable individual apps to pinpoint which one might be causing the issue with missing cellular options in Windows 11.
Conclusion
That’s all in this guide! The solutions presented in this article should assist in resolving Windows 11’s missing cellular option.
It’s important to remember that not all of these solutions will function in every circumstance. Depending on the precise problem-causing factor, the efficacy of each remedy may differ. But one of these approaches ought to work to fix the problem.
Which of these tricks worked for you? Do let us know in the comments section below.
If you’ve any thoughts on How to Fix Missing Cellular Option in Windows 11?, then feel free to drop in below comment box. Also, please subscribe to our DigitBin YouTube channel for videos tutorials. Cheers!
How to Fix Missing Cellular Option in Windows 11
In the rapidly evolving digital world, technology continues to provide us with new enhancements daily, and Windows 11 is no exception. With its sleek design, improved user interface, and enhanced functionalities, it is an operating system that many are eager to adopt. However, like any system, Windows 11 can run into issues that affect user experience. One common problem that many users encounter is the missing cellular option, crucial for mobile connectivity. This article will explore possible reasons for this issue and provide detailed steps to fix it.
Understanding the Cellular Option
The cellular option in Windows 11 enables users to connect to mobile networks through cellular data. This feature is particularly beneficial for users who rely on 4G or 5G networks for internet access, especially when Wi-Fi is not available. The absence of the cellular option can lead to significant inconvenience, limiting connectivity options and affecting productivity.
Reasons for Missing Cellular Option
Before we delve into the solutions, it’s essential to understand why the cellular option might be missing on your Windows 11 device:
-
Hardware Compatibility Issues: Some devices may lack the necessary hardware for cellular connectivity. Ensure your device has a supported mobile broadband card.
-
Driver Issues: Outdated or missing drivers for your cellular device can cause the option to disappear.
-
Windows Updates: Sometimes, updates can cause glitches or bugs that affect system features, including network options.
-
System Configuration Issues: Incorrect configuration settings within Windows can prevent recognition of cellular devices.
-
Airplane Mode: If the device is in airplane mode, the cellular option will not be available.
-
Network Settings: Misconfigurations or issues within your network settings could lead to network options being hidden.
Now that we have identified potential reasons, let’s walk through the steps to troubleshoot and resolve the missing cellular option in Windows 11.
Step 1: Check Hardware Compatibility
Before diving into software fixes, it’s essential to ensure that your device is equipped for cellular connectivity.
-
Check Device Specifications: Review the specifications of your device on the manufacturer’s website. Look for information concerning supported cellular networks and whether a mobile broadband card is installed.
-
Install Mobile Broadband Hardware: If your device does not have the required hardware, you may need to install a compatible mobile broadband card.
Step 2: Verify Airplane Mode Status
Airplane mode disables all wireless communications, so it’s critical to ensure it is turned off.
-
Open Quick Settings: Click on the network icon located in the taskbar.
-
Turn off Airplane Mode: If airplane mode is enabled, you will see an icon resembling an airplane. Click to disable it.
Step 3: Enable the Cellular Adapter in Settings
Sometimes, the cellular adapter might be disabled in system settings.
-
Open Settings: Click the Start button and select Settings (gear icon), or press
Windows + I. -
Go to Network & Internet: In the sidebar, click on «Network & Internet».
-
Select Cellular: If you do not see the cellular section, proceed to the next step. If it is visible, click on it and ensure it is enabled.
Step 4: Update Network Drivers
Updating drivers is a critical step in resolving connectivity issues. An outdated or malfunctioning driver may prevent the cellular option from showing up.
-
Open Device Manager: Right-click on the Start button and select «Device Manager».
-
Expand Network Adapters: Find the section labeled «Network Adapters» and expand it.
-
Locate Cellular Device: Look for your cellular modem or mobile broadband device in the list. It may be listed as «Mobile Broadband Adapter» or something similar.
-
Update Driver: Right-click on the adapter and select «Update driver». Choose «Search automatically for updated driver software». Windows will search and install any available updates.
Step 5: Reinstall Network Drivers
If updating the driver does not resolve the issue, you may need to reinstall it.
-
Return to Device Manager: Follow the instructions above to open Device Manager.
-
Uninstall Driver: Right-click on the cellular adapter and select «Uninstall device». In the confirmation dialog, check the option to delete the driver software as well.
-
Reboot Your Device: Restart your system. Upon reboot, Windows should automatically reinstall the necessary drivers.
Step 6: Run the Network Troubleshooter
Windows 11 includes a built-in troubleshooter that can assist in diagnosing connectivity issues.
-
Open Settings: Open Settings using
Windows + I. -
Navigate to Troubleshoot: Click on «System», then select «Troubleshoot».
-
Select Other Troubleshooters: Click on «Other troubleshooters».
-
Run Network Troubleshooter: Look for «Network Adapter» and click on the «Run» button next to it. Follow the on-screen instructions to test and resolve any detected issues.
Step 7: Check Windows Updates
Keeping the system updated is vital to ensuring all features operate smoothly.
-
Open Settings: Access the settings menu as described earlier.
-
Go to Windows Update: Click on «Windows Update» in the sidebar.
-
Check for Updates: Click on «Check for updates». If updates are available, download and install them. A reboot may be required afterwards.
Step 8: Reset Network Settings
If the cellular option is still missing, resetting all network settings may help.
-
Open Settings: Access settings using
Windows + I. -
Find Network Reset: Click on «Network & internet», then scroll down and select «Advanced network settings».
-
Select Network Reset: Under the «More settings» section, find and click on «Network reset».
-
Initiate Reset: Read the information regarding the impact of this reset. Click on “Reset now” to start the process. After a reboot, reconfigure your network connections.
Step 9: Use Windows System File Checker
Corrupted system files can lead to unexpected behavior, including missing options in the network settings.
-
Open Command Prompt: Type «cmd» in the Start search bar, right-click on «Command Prompt,» and select «Run as administrator.»
-
Run SFC Scan: Enter the command
sfc /scannowand press Enter. This scan will check for and attempt to repair corrupted files. -
Wait for the Process to Complete: The process might take some time, and you’ll receive a summary of any repairs after it finishes.
Step 10: Check for Third-Party Software Interference
Having third-party software, such as VPNs or firewall applications, could interfere with your network settings.
-
Disable Third-Party Firewall/Antivirus: Temporarily disable any third-party security applications and see if the cellular option appears.
-
Check VPN Settings: Disconnect from VPN services, as they can redirect network traffic and cause connectivity issues.
Step 11: Advanced Network Configuration
If the cellular option is still not displayed, advanced configurations might be necessary.
-
Access Network Connections: Right-click on the Start button and select “Network Connections”.
-
Change Adapter Options: Click on «Advanced network settings», then under “More settings”, choose “Network and Sharing Center”.
-
Locate Cellular Connection: In the Network Connections window, look for anything labeled as “Cellular” or “Mobile” and ensure it is not disabled. If it is greyed out, right-click and select «Enable».
Conclusion
Experiencing a missing cellular option in Windows 11 can be frustrating, particularly for users who rely heavily on mobile data. However, by systematically following the steps outlined above, the chances of resolving this issue are significantly increased.
From verifying hardware compatibility to updating drivers, enabling network settings, and more, each step is crucial in returning the cellular option to your system. In most cases, these troubleshooting methods will restore the functionality that allows you to stay connected to cellular networks smoothly.
Ultimately, it is also essential to remain vigilant regarding regular maintenance of your system because keeping software updated and regularly troubleshooting can prevent issues before they become significant hindrances. If you continuously experience problems, consider reaching out to Microsoft Support or a professional technician for further assistance. Stay connected, and enjoy the full capabilities of Windows 11!
Readers help support Windows Report. We may get a commission if you buy through our links.
Read our disclosure page to find out how can you help Windows Report sustain the editorial team. Read more
A few users reported that the cellular option is missing in Windows 11. No matter whether they restart the PC or unplug and reinsert the SIM, the cellular option is not showing in Windows 11. And remember, some Windows 10 users, too, faced the same problem.
First, make sure your device supports cellular network capability. Just having a SIM card slot doesn’t confirm compatibility. Also, contact the network operator and check for any issues from their end. You may have to replace the physical SIM card if it’s not being detected in Windows 11.
Verify that you have enabled Cellular in Windows 11 from the Network & Internet settings. Turn on Airplane mode for at least 30 seconds and then disable it if the Internet connection is limited.
We also have a guide on how to enable eSIM on Windows 11. If none of the solutions work, head to the fixes listed next.
How do I enable the missing cellular option again on Windows 11?
1. Reinstall the cellular adapter drivers
- Press Windows + X to open the Power User menu, and select Device Manager from the list.
- Expand the Network adapters entry, right-click on the Mobile Broadband Device or one with a similar name, and select Uninstall device.

- Tick the checkbox for Attempt to remove the drivers for this device, and click Uninstall.
- Once done, restart the computer, and Windows will automatically install a fresh copy of the driver.

2. Roll back the drivers
- Press Windows + S to open Search, type Device Manager, and click on the relevant search result.
- Double-click on Network adapters, right-click the broadband device, and select Properties.
- Go to the Driver tab, and click the Roll Back Driver button.

- Select a reason for reverting to the previous driver version, and click Yes to confirm.


Users often found a bug in the installed driver version to be responsible for the missing cellular option in Windows 11. And in this case, rolling back the driver did the trick.
If the Roll Back Driver option is greyed out, either the driver was not updated, or Windows didn’t store the necessary files. Here, simply head to the manufacturer’s website, locate the previous stable version, and manually install the driver.
3. Update the drivers
- Press Windows + R to open Run, type devmgmt.msc in the text field, and hit Enter.

- Expand Network adapters, right-click on the Mobile Broadband device or the relevant cellular adapter, and select Update drivers.
- Click on Search automatically for drivers and wait for Windows to scan the PC for the latest version and install it.

- Finally, restart the computer.


A problematic network device can be fixed by updating the drivers.
If Windows can’t find the latest version, head to the driver download page on the manufacturer’s website, choose your PC, select Modem/communication (or a similar entry) as the driver category, and download the update.

Look for any drivers with words like LTE, WWAN, or Mobile Broadband and install them.
For Lenovo devices:
- Sierra Wireless EM7345 4G LTE
For HP devices:
- HP LT4120 Qualcomm® Snapdragon X5 LTE Mobile Broadband Module
- HP HS3110 HSPA+ Intel® Mobile Broadband Module
If manually looking for driver updates sounds like a hassle, you can try a driver updater that will find the latest updates within seconds.
4. Reconfigure the adapter settings
- Press Windows + R to open Run, type ncpa.cpl in the text field, and click OK.
- Right-click on the cellular network adapter, and select Properties.

- Click the Configure button.
- Go to the Advanced tab, choose Selective Suspend under Properties, and then select Enabled from the Value dropdown menu.

- Finally, click OK to save the changes, then restart the computer and check for improvements.


- Microsoft wants Windows 10 users to upgrade to Windows 11 or Copilot + PCs
- Windows 11 KB5055627 update makes File Explorer more fluid
5. Perform a system restore
- Press Windows + S to open the Search menu, type Create a restore point, and click the relevant search result.
- Click the System Restore button.

- Select Choose a different restore point if the option is available, or go with the default settings, and then click Next.
- Pick the oldest restore point from the list, and click Next.

- Verify the details, and click Finish to start the restore process.
- Once done, check whether you can use the cellular plan for Internet access on Windows 11.


6. Roll back Windows
If the problem problem appeared after you upgraded to Windows 11, it’s likely an incompatibility between the device and the latest iteration to blame.
And in this case, rolling back to Windows 10 could work as a solution. But do not forget to backup the stored files in order to avoid data loss.
How do I download & install a cellular driver on Windows 11?
For Windows 11 cellular driver download, the easiest option is to use the Device Manager. Or you could download the latest driver version from Optional Updates.

Besides, some prefer manually installing the driver from the manufacturer’s website, but it’s often risky. Getting the wrong drivers can lead to device malfunction. That’s why we recommend downloading an effective driver updater utility.
When the cellular option is missing in Windows 11, it could be both the hardware and software to blame. Check the network connection details, look for any problems, and rectify them for quick troubleshooting.
Besides, once you have things up and running, find out how to set up a hotspot on Windows 11 and connect other devices to it. This will help when there are issues with the ISP.
If you know any other solutions that work, drop a comment below.
Kazim Ali Alvi
Windows Hardware Expert
Kazim has always been fond of technology, be it scrolling through the settings on his iPhone, Android device, or Windows PC. He’s specialized in hardware devices, always ready to remove a screw or two to find out the real cause of a problem.
Long-time Windows user, Kazim is ready to provide a solution for your every software & hardware error on Windows 11, Windows 10 and any previous iteration. He’s also one of our experts in Networking & Security.
Download Windows Speedup Tool to fix errors and make PC run faster
In Windows 11/10, there is a dedicated Cellular feature to connect to a cellular data network. Now, if your device has eSIM or a SIM card in it or you have an external cellular device with a SIM card in it, then you can turn on or enable the Cellular option in Windows 11/10. This tutorial will help you with that. Once the Cellular option is enabled or turned on, you can connect your Windows PC to a cellular plan of your mobile account by adding a SIM profile.
There are multiple ways to turn on or enable the Cellular option in Windows 11/10 PC. These are:
- Enable the Cellular option in Windows 11/10 using the Settings app
- Enable the Cellular option using Quick Settings Panel in Windows 11
- Turn on the Cellular option in Windows 11/10 using the Airplane mode Setting.
Let’s check all these options.
1] Enable the Cellular option in Windows 11/10 using the Settings app

- Use the Win+I shortcut key to open the Settings app of Windows 11/10
- Select the Network & internet setting
- Turn on the Cellular button to enable the option. If you are using Windows 10, then click on the Cellular page from the left section, and then select a SIM for cellular data.
Related: How to connect to a Cellular Network on Windows in S Mode
2] Enable the Cellular option using Quick Settings Panel in Windows 11

The steps are as follows:
- Click on the Network, Volume, or Battery icon in the taskbar system tray to open the Quick Settings panel
- Click on the Cellular quick setting icon to enable it
- Connect to a profile or add a new profile to connect to a cellular data network
- Use the same Cellular quick setting to turn it off or disable it.
TIP: In Windows 10, there is no Quick Settings panel. Instead, you can open the Action Center (Win+A), and then expand the quick actions. Look for the Cellular option and tap or click to enable the feature.
3] Turn on the Cellular option in Windows 11/10 using the Airplane mode Setting

The Settings app of Windows 11/10 has an Airplane mode setting. You can access that setting to turn on the Cellular option. For this, use the following steps:
- Right-click on the Start button and select the Settings option to open the Settings app
- Access the Network & internet category
- Select the Airplane mode option. Do not turn on the Airplane mode. You only have to access it
- Use the Cellular toggle (under the Wireless devices section) to enable or disable it.
Read: How to Enable or Disable Cellular Data Roaming in Windows 11
How to fix Windows 11 cellular missing?
If the Cellular option is missing from the Windows 11 Settings app, then check if the cellular adapter is connected and cellular drivers are installed or up-to-date. Also, use Network and Internet troubleshooter in the Get Help app of Windows 11 to find and fix the issues. In addition, make sure that the cellular adapter is not disabled. For this type network connections in the Search box and hit the Enter key. In the Network Connections window, right-click on the Cellular adapter, and select the Enable option (if it is disabled).
Where to download Windows 11 Cellular driver?
In Windows 11, open the Settings app > Windows Update > Advanced options > Optional updates. Check if cellular driver-related updates are available. If yes, select it, and then download and install the cellular driver. Alternatively, open the official website of the device manufacturer (say HP, Dell, etc.), and access the Support page. There, look for the Drivers & Downloads section or something similar. Now you can manually find the cellular driver by selecting the download type (Drivers), and category (like Communications), and download the driver for your device.
Hope this helps.
Read next: How to Disable or Enable Mobile Hotspot in Windows PC.
Laxman has done Bachelor’s in Computer Science, followed by an MBA. Writing about Windows OS and the free software and services that are available for the Windows operating system is what excites him.
Reader Interactions
Views: 680
Some Windows 10 devices have a SIM card or eSIM in them that lets you connect to a cellular data network, so you can get online in more places by using a cellular signal.
If your Windows 10 device doesn’t have a SIM card or eSIM, you can still connect to a cellular network by plugging in an external cellular device (also called a cellular modem or mobile broadband device). Either way, you must have a data plan from a mobile operator to connect.
If your cellular data connection is working correctly, you shouldn’t need to change the cellular settings. However, if you’re having cellular connection problems, changing one or more settings may help.
The following is a list of the cellular settings that you can use to try and fix cellular connection problems. Settings vary by Windows 10 device model and mobile operator.

| Setting | Does this |
|---|---|
| Let Windows manage this connection | Determines if your Windows 10 device will automatically connect to the cellular data network when it’s available. Clear the check box if you want to manually connect each time you want to use your cellular data connection. Select it if you want Windows to manage the connection for you. When selected, you’ll connect to cellular data automatically when you’re not connected to another kind of network.
To find this setting, select the Start button, then select Settings > Network & Internet > Cellular > Let Windows manage this connection. This setting is available when you’re disconnected from the cellular data network, and it’s applied when you select Connect. |
| Use this SIM for cellular data | Determines which SIM or eSIM profile is used for your cellular data connection. To help control costs, you can choose the cellular network connection to use for cellular data. For example, you might choose one SIM or eSIM profile over another because data costs less. This setting only appears on Windows 10 devices that have both a SIM and an eSIM.
To find this setting, select the Start button, then select Settings > Network & Internet > Cellular > Use this SIM for cellular data. |
| Data roaming options | Determines if your cellular data connection stays on when your Windows 10 device is outside your mobile operator’s network. Selecting Don’t roam can help prevent data roaming charges.
If you do allow roaming, you can use cellular data when your Windows 10 device is in a roaming area. Depending on your data plan, you might pay more for data you use when roaming. To find this setting, select the Start button, then select Settings > Network & Internet > Cellular > Data roaming options. |
| Use cellular instead of Wi-Fi | Sometimes you might be connected to a slower Wi-Fi network, or you might be in an area where using cellular data would be faster than Wi-Fi. In cases like this, Windows can connect you to the best network based on your current location if you select When Wi-Fi is poor or Always. When cellular data is used, it will use data from your data plan and you may incur charges.
To find this setting, select the Start button, then select Settings > Network & Internet > Cellular . |
| Choose apps that can use your cellular data | To help control your data usage, you can choose which apps can or can’t use cellular data. For example, if you have an app that uses a lot of data, but you don’t use it often when you’re on the go, you might not want that app to use cellular data.
To find this setting, select the Start button, then select Settings > Network & Internet > Cellular > Choose apps that can use your cellular data. On the Cellular data screen, do one or more of the following:
|
| Network selection | Appears when roaming and determines which cellular network connection is used. The default setting is Automatic.
If you try to connect to a cellular network and see a message that the selected network isn’t available, you can choose Search for networks, and then select another cellular network. To find this setting, select the Start button, then select Settings > Network & Internet > Cellular > Advanced options. |
| Active network | Displays the name of the cellular network that you’re using.
To find this setting, select the Start button, then select Settings > Network & Internet > Cellular > Advanced options. |
| Set as a metered connection | A metered connection is an Internet connection that has a data limit associated with it. By default, cellular data connections are set as metered. Some apps might work differently on a metered connection to help reduce your data usage. Also, some updates for Windows won’t be installed automatically.
If you set a data limit in Data usage settings for your cellular data connection, Windows can help you stay under your data limit and set the metered connection setting for you. To find this setting, select the Start button, then select Settings > Network & Internet > Cellular > Advanced options. |
| Add an APN | The Internet access point name (APN) is the address your Windows 10 device uses to connect to the Internet when using your cellular data connection. Usually, the Internet APN is set automatically.
If your cellular data connection isn’t working and you can’t connect to the Internet, type a new Internet APN based on your location and mobile operator. If you can connect to a Wi‑Fi network on your Windows 10 device or have a phone handy, try searching online to find the Internet APN settings for your mobile operator.
|
|
Properties |
This displays information about your SIM and cellular data connection. For example, you can find your IMEI number here.
Select Copy to copy the information to paste into an email or elsewhere. This can be helpful if you’re having connection problems and need to send information to your mobile operator or support person. To find this Properties setting, select the Start button, then select Settings > Network & Internet > Cellular > Advanced options. |