
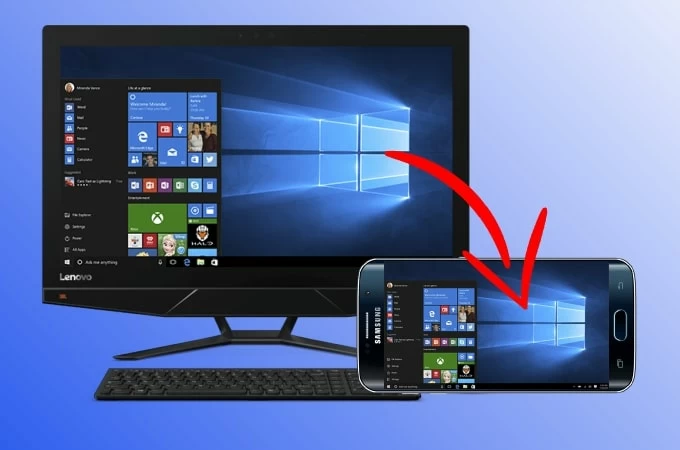
It is easy to mirror Android screen to PC, but sometimes you may need to share your PC screen to Android for sharing files or gameplay. How to do that? Good thing is that it is now possible to cast PC screen to Android with the top screen mirroring apps introduced in this article.
Download
- ApowerMirror
- LetsView
- Chrome Remote Desktop
ApowerMirror
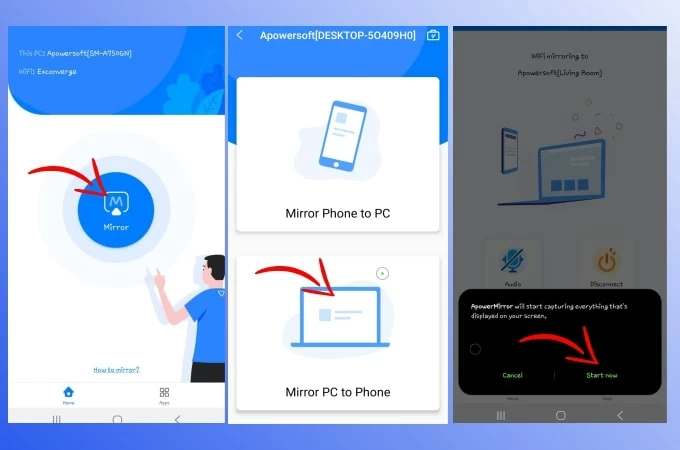
The first tool that you can use to stream PC to Android is Apowermirror. This amazing tool can help you control your PC using your Android phone remotely. You can also mark the screen with its annotation feature. Also, documents can also be quickly edited without using your PC. To use this tool, just make sure that both of your devices are connected to the same WiFi. Just follow the simple steps below to mirror your PC screen to your Android phone.
- Download the app on your phone and PC. Launch it afterward.
Download
- On your Android phone, tap the Mirror button, choose the name of your PC, then tap Mirror PC to Phone. Finally, hit Start now to start mirroring your PC screen to your phone.

LetsView
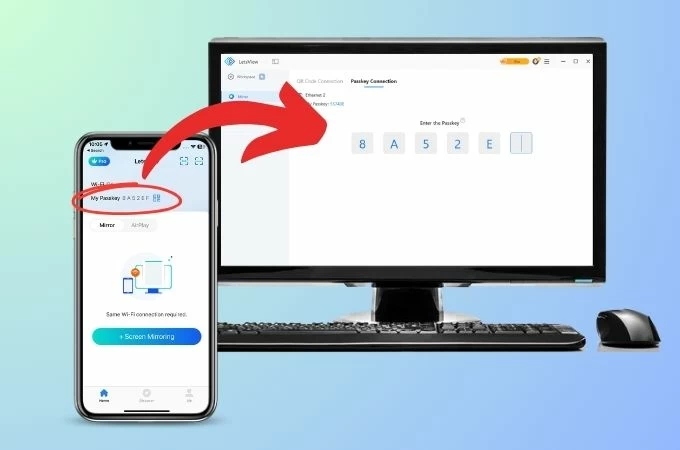
LetsView is also a screen mirroring app that allows you to cast PC screen to Android phone. This can be used on different platforms like Windows, Mac, Android, and iOS devices for more options to use. It can help you with your business, meetings, entertainment, as well as on live streaming. To learn how to stream PC screen to Android, check out the steps below.
- Download the application and install it on your Android phone and PC. Open it afterward.
Download
- Open the app on your PC and mobile phone.
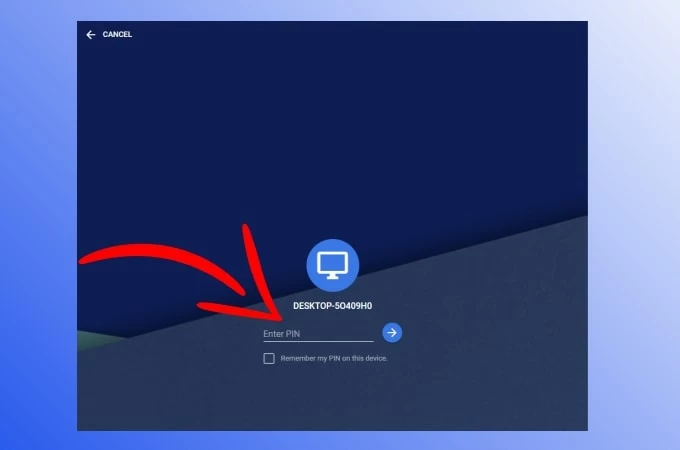
- Input the PIN code provided on your Android phone then your PC’s screen will be mirrored to your phone.
Chrome Remote Desktop
The third tool that can help you out is the Chrome Remote Desktop. With this tool, you will have access to your PC by just using your Android phone. Aside from that, this tool is a cross-platform screen mirroring application that you can use to Windows, Linux, Mac, Android, and iOS. To learn how to mirror PC to Android phone, simply follow the steps below.
- Go to your web browser and install the app on your PC and Android phone.
- Then, choose the Access another computer with Chrome Remote Desktop.
- Click Access and enter the PIN to access your Computer. Then your PC screen will be shown on your Android immediately.
Conclusion
The above-mentioned are the best tools for you to mirror PC screen to Android via WiFi. All tools are great and easy to use. You can try each method to know what’s the best screen mirroring tool for you.
Posted by:Amanda Smithon March 19, 2022toPhone Mirror, Tips and Resources.Last updated on September 20, 2023
- AirDroid Cast Screen Mirroring App
- Mirror your phone/PC screen to another device.
- Mirror Windows and MacOS screens to a computer wirelessly.
Sharing a PC screen with a mobile seems strange, but it’s functional too when you have to watch a movie in bed and watch your PC’s screen. Reading this post and learning how to mirror PC to Android will allow you to access your PC from the mobile and accomplish the task in the comfort of your home, away from the rigors of the daily office grind.

Let’s discuss each of these approaches in depth so we can start using screen mirroring in our daily lives.
- 1 :3 Best Ways to Mirror PC Screen to Android Phone
- AirDroid Cast or AirDroid Cast Web
- Chrome Remote Desktop
- AweSun
- 2 :What Makes A Best Screen mirroring App for PC to Android?
- 3 :How to Mirror PC to Android TV? (Guide)
1 3 Best Ways to Mirror PC Screen to Android Phone
In this article, we will discuss the three best ways of screen mirroring from PC to Android in detail, including their steps and the benefits of using these methods. So, let’s start with the first one, i.e., AirDroid Cast.
Way 1. AirDroid Cast
Screen mirroring from PC to Android is easily manageable using AirDroid Cast Web version. It is one of the fastest and best screen mirroring apps for PC to Android.

It is the best option as it provides a cross-platform sharing service to its users. Mirroring is possible on any phone, tablet, computer, or Smart TV with no location and time barrier. The best part of this beautiful web application is that it does not require downloading at the receiver end. A web browser must open the web link and start screen mirroring.
Easy 3 steps to start mirror PC to Android
-
Open the web browser on your Android phone and type webcast.airdroid.com on the browser to get access to the AirDroid Cast web version.
-
Download the AirDroid Cast software on your PC and launch it. Find “Cast to” in the interface and tap on it.
-
Enter the 9-digit cast code that shown on the browser, within 1 minute, your PC screen will be shown on your Android phone.
Tips : If you also download AirDroid Cast on your Android and use the latest version(V1.0.6), now you even can mirror your PC screen to the phone without using the web version.
Check the following steps to mirror PC to Android only using AirDroid Cast:
- Step 1. Download and launch the app on both devices. On your Android, you’ll need to tap the «Receive Screen Cast» button on your phone, and the screen will diplay a 9-digit code and a QR code.
- Step 2. Enter the code onto the AirDroid Cast Desktop on your PC. After allowing the permissions asked on the Android, in no time at all, you can start streaming content from your PC onto your Android device.
More Features You Can Get from AirDroid Cast
AirDroid Cast is a lovely App, and some of its unique features that attract the users are:
Typing on Mobile from PC
AirDroid Cast allows you to type on your phone using your phone’s keyboard. It also allows you to control one device from another by installing an additional App for screen control.
Display Quality
It provides HD quality display in screen mirroring. Moreover, it enables users to display five screens simultaneously when mirror Android/iOS/PC to another PC.

Audio Transmission
AirDroid Cast provides two-way audio transmission, you can directly use the microphone and audio of your phone on PC when screen mirroring, this is useful for one-to-one meetings and online games playing. (Web version only supports one-way audio)
Way 2. Chrome Remote Desktop
Chrome Remote Desktop is a remote desktop tool developed by Google, and it is one of the most straightforward methods for screen mirroring from PC to Android. You can manage your files and other tasks on your Windows or Mac computer with your Android mobile. Google recommends the Chrome browser to get the best out of this application.
How to Mirror PC to Android with Chrome Remote Desktop?
-
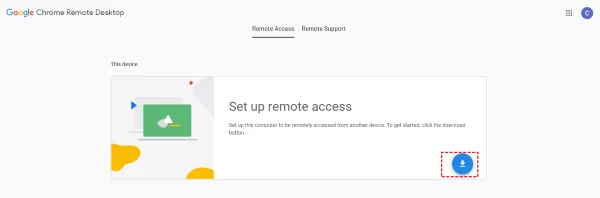
Open the Google Remote Desktop and click on the page’s download icon to start downloading. Launch it once you download it.
-
Open Google Play Store on your mobile and download the Chrome Remote Desktop App.
-
Open the application on your mobile and choose the computer you want to mirror. Enter the pin code to start mirroring. Right after entering the code, you will mirror your screen on the mobile.

What Can You Do with Chrome Remote Desktop?
-
Using this excellent and effective tool, you can share your Windows, Mac, and Linux OS to your Android mobile.
-
You can transfer files, upload, and download the files between the computer and the mobile using Chrome Remote Desktop.
-
You can also view the full-screen mode of the screen mirroring.
-
You can enter data into your computer by typing from the mobile phone, which is one reason we prefer this tool for screen mirroring PC to Android.
Way 3. AweSun
AweSun is also a remote desktop software that provides a solution for accessing and controlling other devices. It is designed with highly secure encryption technology to protect your data. It supports Windows, Mac, Linux, Android, and iOS devices for cross-platform sharing.
It is free from location and area specifications. You can use it remotely to access your computers. You can remotely support your team and family members in solving any issue they have on their PC using your mobile.
How to Set Up AweSun?
To control the PC from mobile, read the following steps:
-
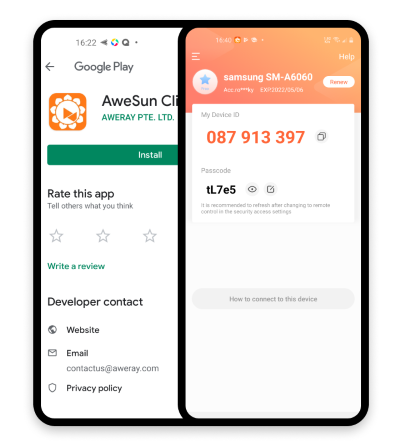
Download the app on your mobile phone and PC.
-
Open the app on your mobile and click on the ‘Discover’ tab. Then select ‘Remote Assist’.
-
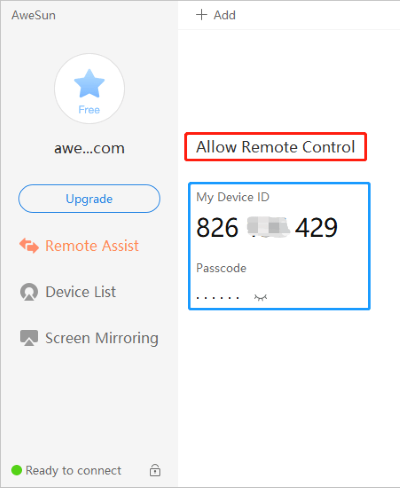
A window will appear asking for your PC’s device I.D and passcode. Enter the relevant data and press the ‘Connect’ tab. Now, you can control your PC from the Android mobile.
What Can You Do with AweSun?
Enable Black Screen
Suppose you forget to shut down your system and now want to protect your data from others. You can use the black screen feature of AweSun that will display a full black screen on your connected device, and everyone watching it will consider it as if it is powered off.
White Board
Use the whiteboard feature for office meetings and teaching your students online remotely. Whatever you will type from your mobile will be displayed on the PC.
File management
You can remotely manage your files on the computer. Delete any file, and download files on your computer with the help of the mobile attached using AweSun. It provides a fully secure system for file transfer, and you can also rename your files easily.
2 What Makes the Best Screen mirroring App for PC to Android?
Best for Screenshare PC to Android
Screen mirroring from PC to Android is undoubtedly difficult. The most challenging is getting quality results for audio and video transmission. Android Cast is declared to be the most convenient way to mirror the screen. Because you don’t need any setup and installation on the received device, you can start mirroring within 1 minute.
Best for Control PC from Android
The primary purpose of sharing PC to Android is to manage your simple PC tasks from a mobile phone that is easy to handle and that you can use while in bed. So, AweSun has proved to be a perfect match for controlling PC from Android. AweSun allows you to manage files on your PC remotely. You can delete any file and also rename them or move them. Other features like a black screen are also up to the mark this excellent tool provides.
Best Security App to Access PC
As already described, it is designed by Google, so it is definite that Chrome Remote Desktop is entirely secure to use. As Google has proved by each product for many years, it is serving us. There is no threat of breach of your data while mirroring PC to Android using Chrome Remote Desktop.
3 How to Mirror PC to Android TV?
If you want to mirror your PC on Android TV, you can use various applications, such as AirDroid Cast Web. and even it is possible using an HDMI cable.
Connect one end of the HDMI cable to the PC and the other end to the TV, and then select the TV source as HDMI. Most TVs come with more than one HDMI port, so be vigilant while selecting the port. Many third-party apps are also designed for screen mirroring, and each App differs from the others based on its features.
Mirror PC to Android TV using Chromecast
Chromecast is a Google device that is also famous for the exact cause. It is free to use lifetime after it is purchased. Open the Chrome browser on the PC, click on Cast from the Menu, and select the Chromecast device to start mirroring on the TV.
If you prefer to use wireless ways to mirror PC to TV, don’t hesitate to try these 7 proven ways.
5 Conclusion
In this article, we have discussed 3 best ways to stream PC to phone, they are also useful when you want to mirror Android to PC. You can control your PC from Android mobile using the Chrome remote Desktop and the AweSun application. These are highly secure applications and allow you to manage your PC remotely. Suppose you want to mirror a PC on your Android. In that case, you must use AirDroid Cast as a primary option for screen mirroring because it is a fast application and provide a quality result with accurate audio transmission.
Приведение к внешнему дисплею с компьютера с Windows
Вы можете подключить компьютер по беспроводной сети к телевизору, проектору или другому внешнему дисплею с поддержкой Miracast.
-
Включите телевизор, проектор или другой дисплей. Если вы используете ключ или адаптер Miracast, убедитесь, что он подключен к дисплею.
-
Нажмите клавишу с логотипом Windows + K, а затем выберите в списке доступных устройств дисплей, к который вы хотите привести.
-
Следуйте всем дополнительным инструкциям на экране. В противном случае, все готово.
Приведение к другому компьютеру с Windows с компьютера с Windows
-
На компьютере, на который вы хотите проецировать:
-
Нажмите кнопку Пуск > Настройки > Система > Проецирование на этот компьютер .
-
В разделе Добавление необязательной функции «Беспроводной дисплей» для проецирования на этот компьютер, выберите Необязательные функции.
-
Рядом с пунктом Добавление необязательной функции выберите Просмотр функций и введите «беспроводной дисплей».
-
Установите флажок рядом с пунктом Беспроводной дисплей в списке результатов, выберите Далее, затем нажмите Установить.
-
После установки беспроводного дисплея выберите Назад , чтобы управлять параметрами проекции на странице Проецирование на этот компьютер в разделе Параметры.
-
Запустите приложение Wireless Display, введя «беспроводной дисплей» в поле поиска на панели задач и выберите Беспроводной дисплей в списке результатов.
Примечание: Приложение Wireless Display доступно на устройствах под управлением Windows 11 версии 22H2 и более поздних версий. Если вы используете более раннюю версию Windows, запустите приложение Connect, введя connect в поле поиска на панели задач и выбрав Подключить в списке результатов.
Чтобы узнать, какую версию Windows вы используете, см. статью Какая версия операционной системы Windows используется?
-
-
На компьютере, с который вы проецироваться, выберите клавиши с логотипом Windows + K и выберите компьютер, к которому вы хотите подключиться.Вы также можете выполнить поиск по запросу Приведение на панели поиска Windows, а затем выбрать Подключиться к беспроводному дисплею. На странице Параметры отображения в разделе Несколько дисплеев выберите Подключиться к беспроводному дисплею, а затем выберите Подключиться.
Примечание: Если не удается найти компьютер, на который нужно проецироваться, убедитесь, что на нем Wi-Fi включен и установлено и запущено приложение для беспроводного отображения.
Подключение к внешнему дисплею с помощью док-станции WiGig
Беспроводное подключение компьютера к монитору, проектору или другому внешнему дисплею, подключенном к док-станции WiGig .
-
Включите телевизор или проектор.
-
Включите свою док-станцию WiGig и убедитесь, что она подключена к дисплею.
-
Убедитесь, что компьютер поддерживает WiGig и что он включен. Если ваш компьютер поддерживает WiGig, вы увидите элемент управления WiGig в разделе Параметры > сеть & Интернет > режиме в самолете.
-
Нажмите клавишу с логотипом Windows + K, а затем выберите свою док-станцию.
-
Следуйте всем дополнительным инструкциям на экране. В противном случае, все готово.
Проверьте, поддерживает ли ваш компьютер WiGig
Выбор варианта отображения
Чтобы изменить то, что отображается на ваших дисплеях, нажмите клавишу Windows + P. Вот параметры, которые можно выбрать.
|
Если необходимо: |
Выберите |
|
Просматривать элементы только на одном мониторе. |
Только экран компьютера |
|
Просматривать одинаковые элементы на всех мониторах. |
Повторяющийся |
|
Просматривать рабочий стол на нескольких экранах. При расширении мониторов вы можете перемещать элементы между двумя экранами. |
Расширить |
|
Просматривать все только на втором мониторе. |
Только второй экран |

Screencasting is a cool feature that was built into the Windows 10 Anniversary update in 2019.
It’s also called Wireless Display. It lets you project your phone display to a Windows 10 computer – which can help you out in a lot of ways, especially if you’re a YouTuber.
Getting around the configurations and necessary setup to establish a wireless connection with an Android phone on Windows 10 can be tricky. It took me days to figure it out.
And so, in this article, I’m going to show you how to do it.
To cast your Android screen to a Windows 10 laptop, you need to enable wireless display by installing the Connect app on your computer. It doesn’t come as a pre-installed app anymore, so you need to download it.
How to Set it Up on a Windows 10 Computer
The steps below show you how to set up the Connect app on Windows 10:
Step 1: Head over to Settings by pressing WIN (Windows logo key) + I on your keyboard.
Step 2: Select System from the menu tiles.
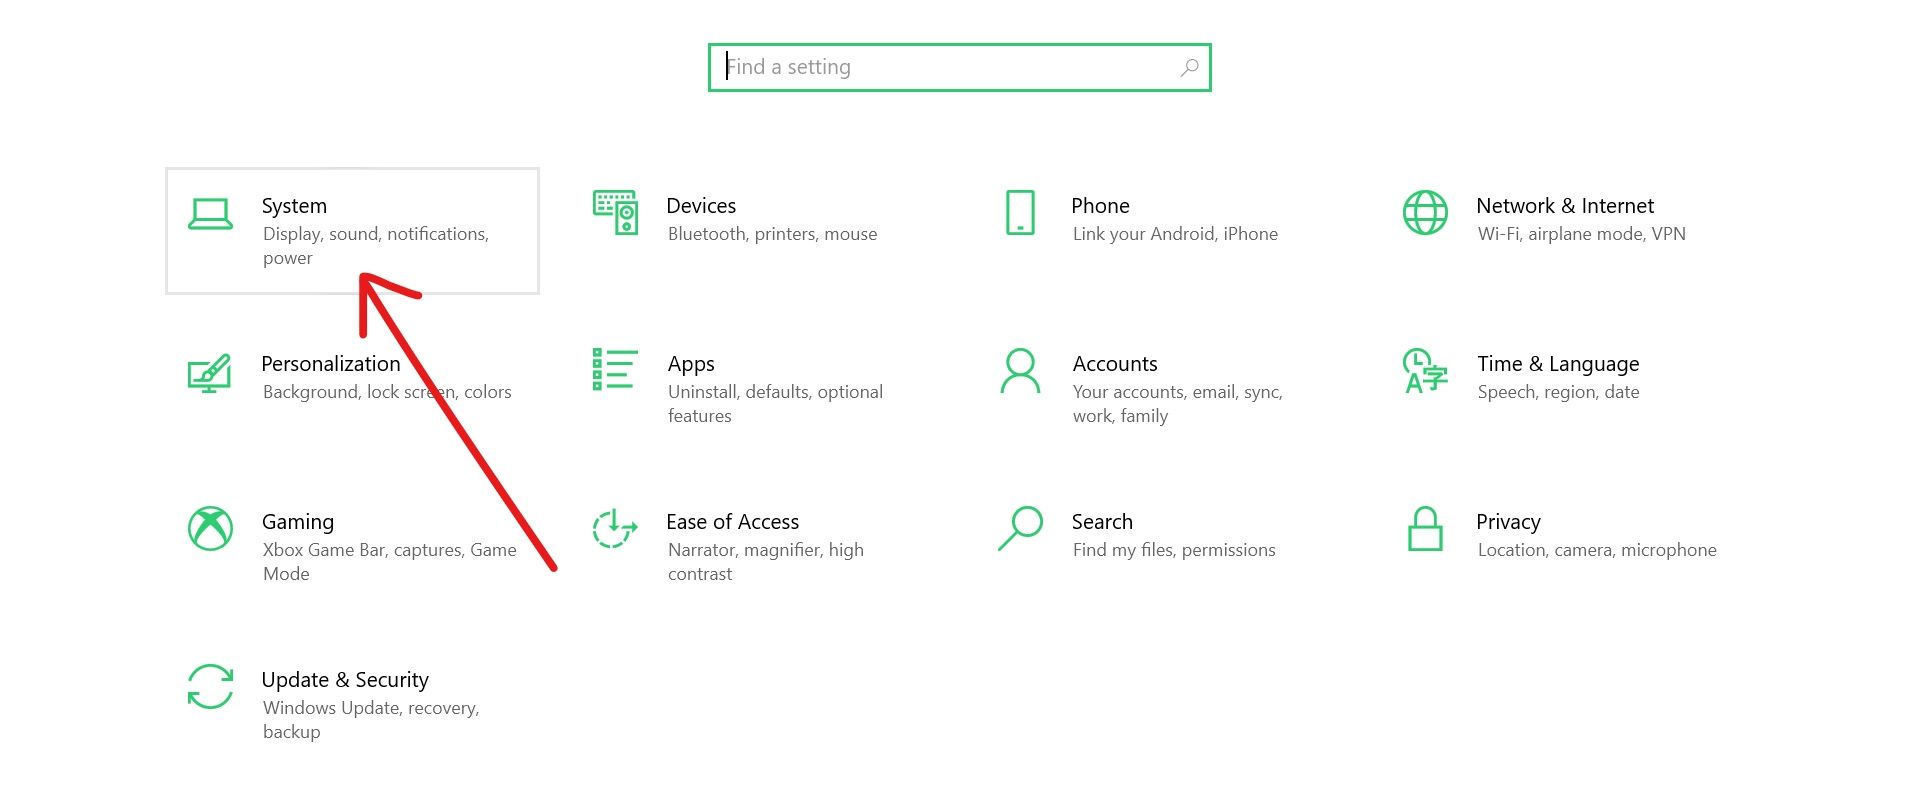
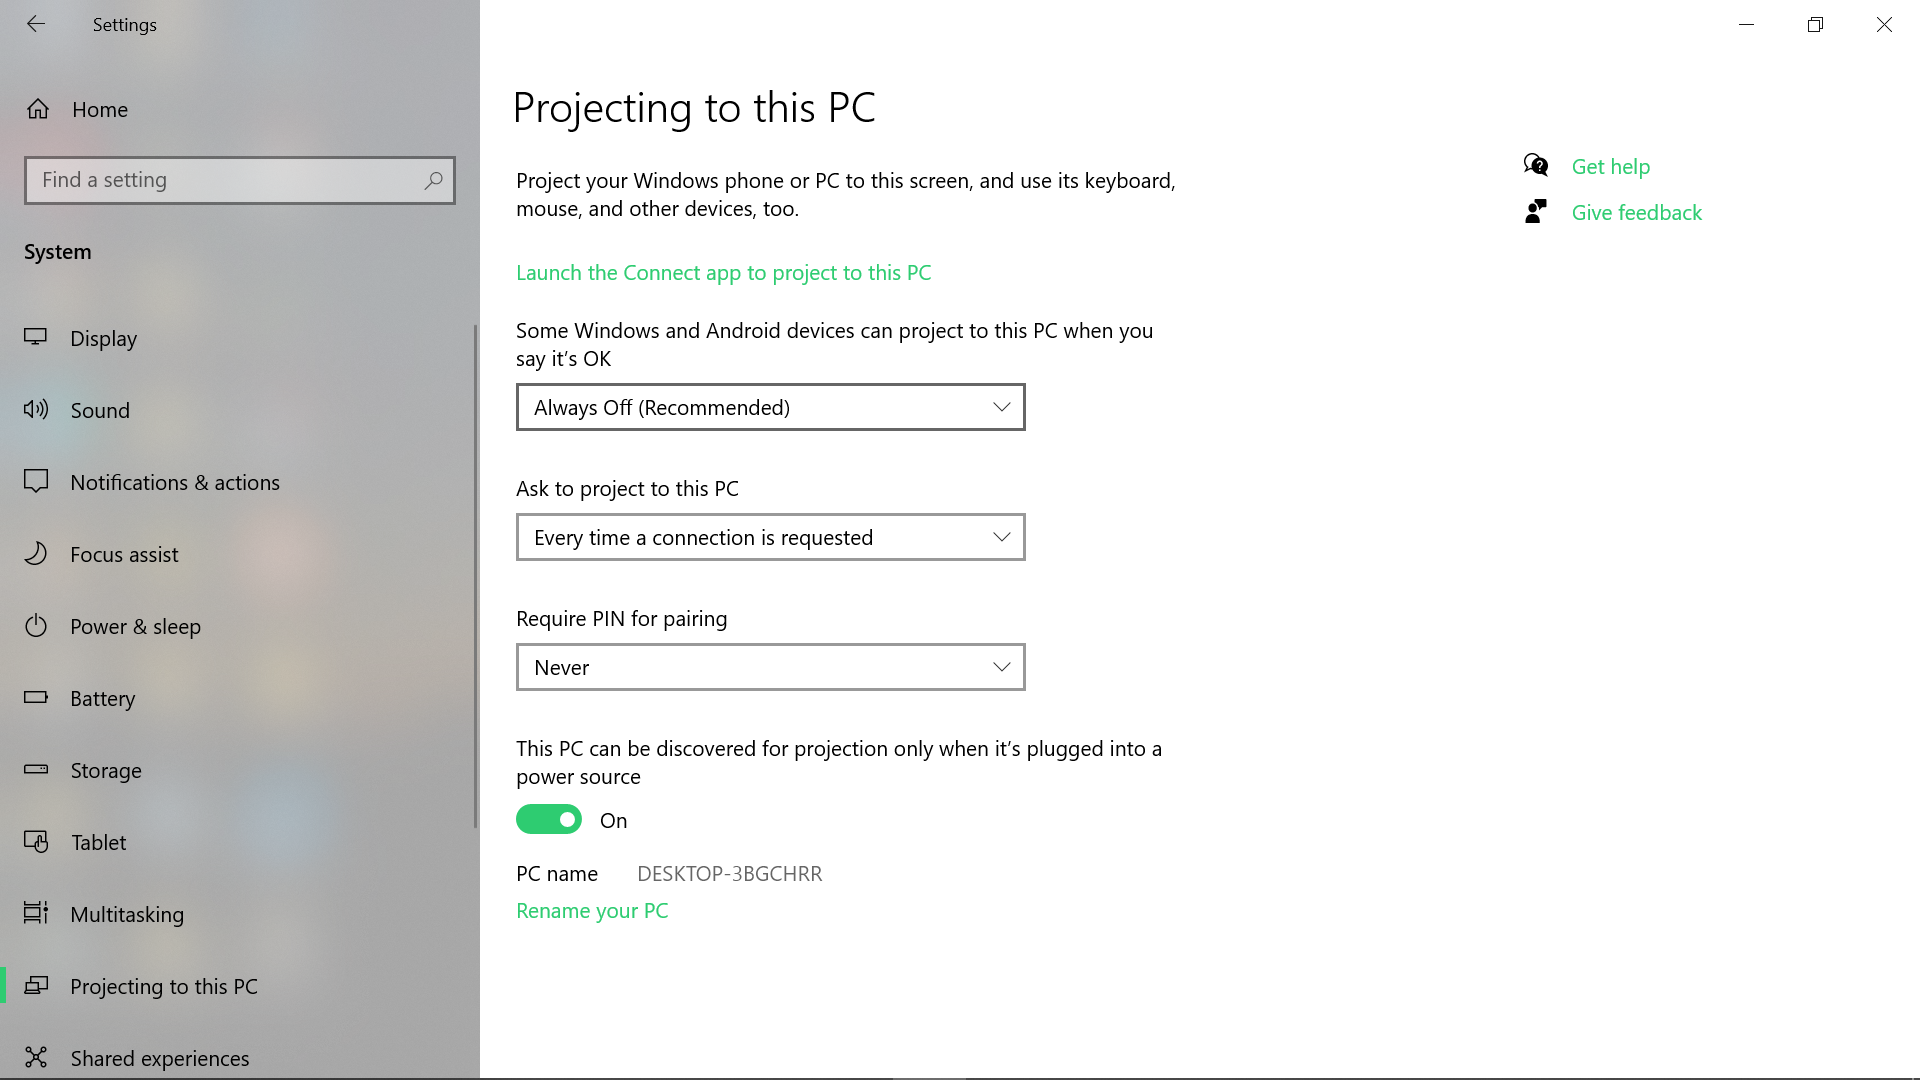
Step 3: Switch to the “Projecting to this PC” tab and click the Optional features link.
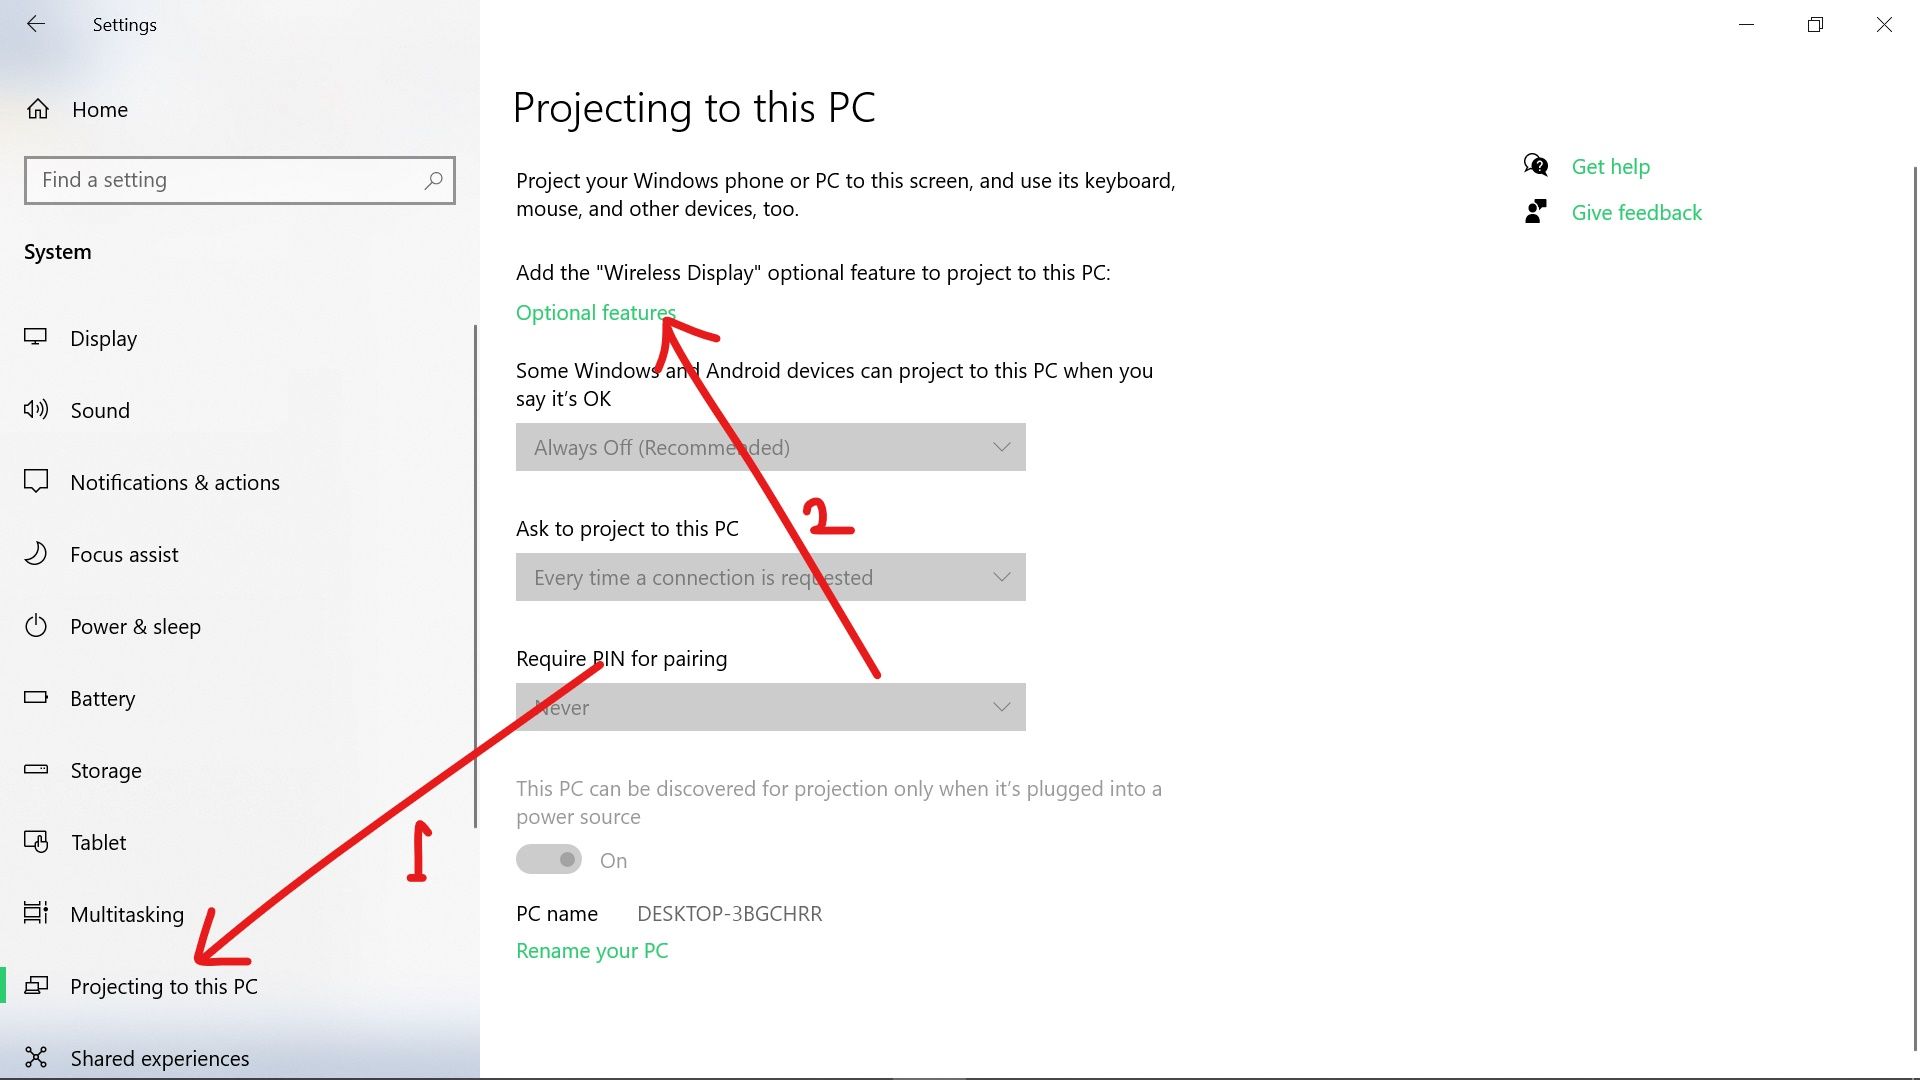
Remember that the wireless display isn’t pre-installed, so you need to add it by clicking on the “Optional feature” link. Once you click the link, you will see several additional features you can add to your computer.
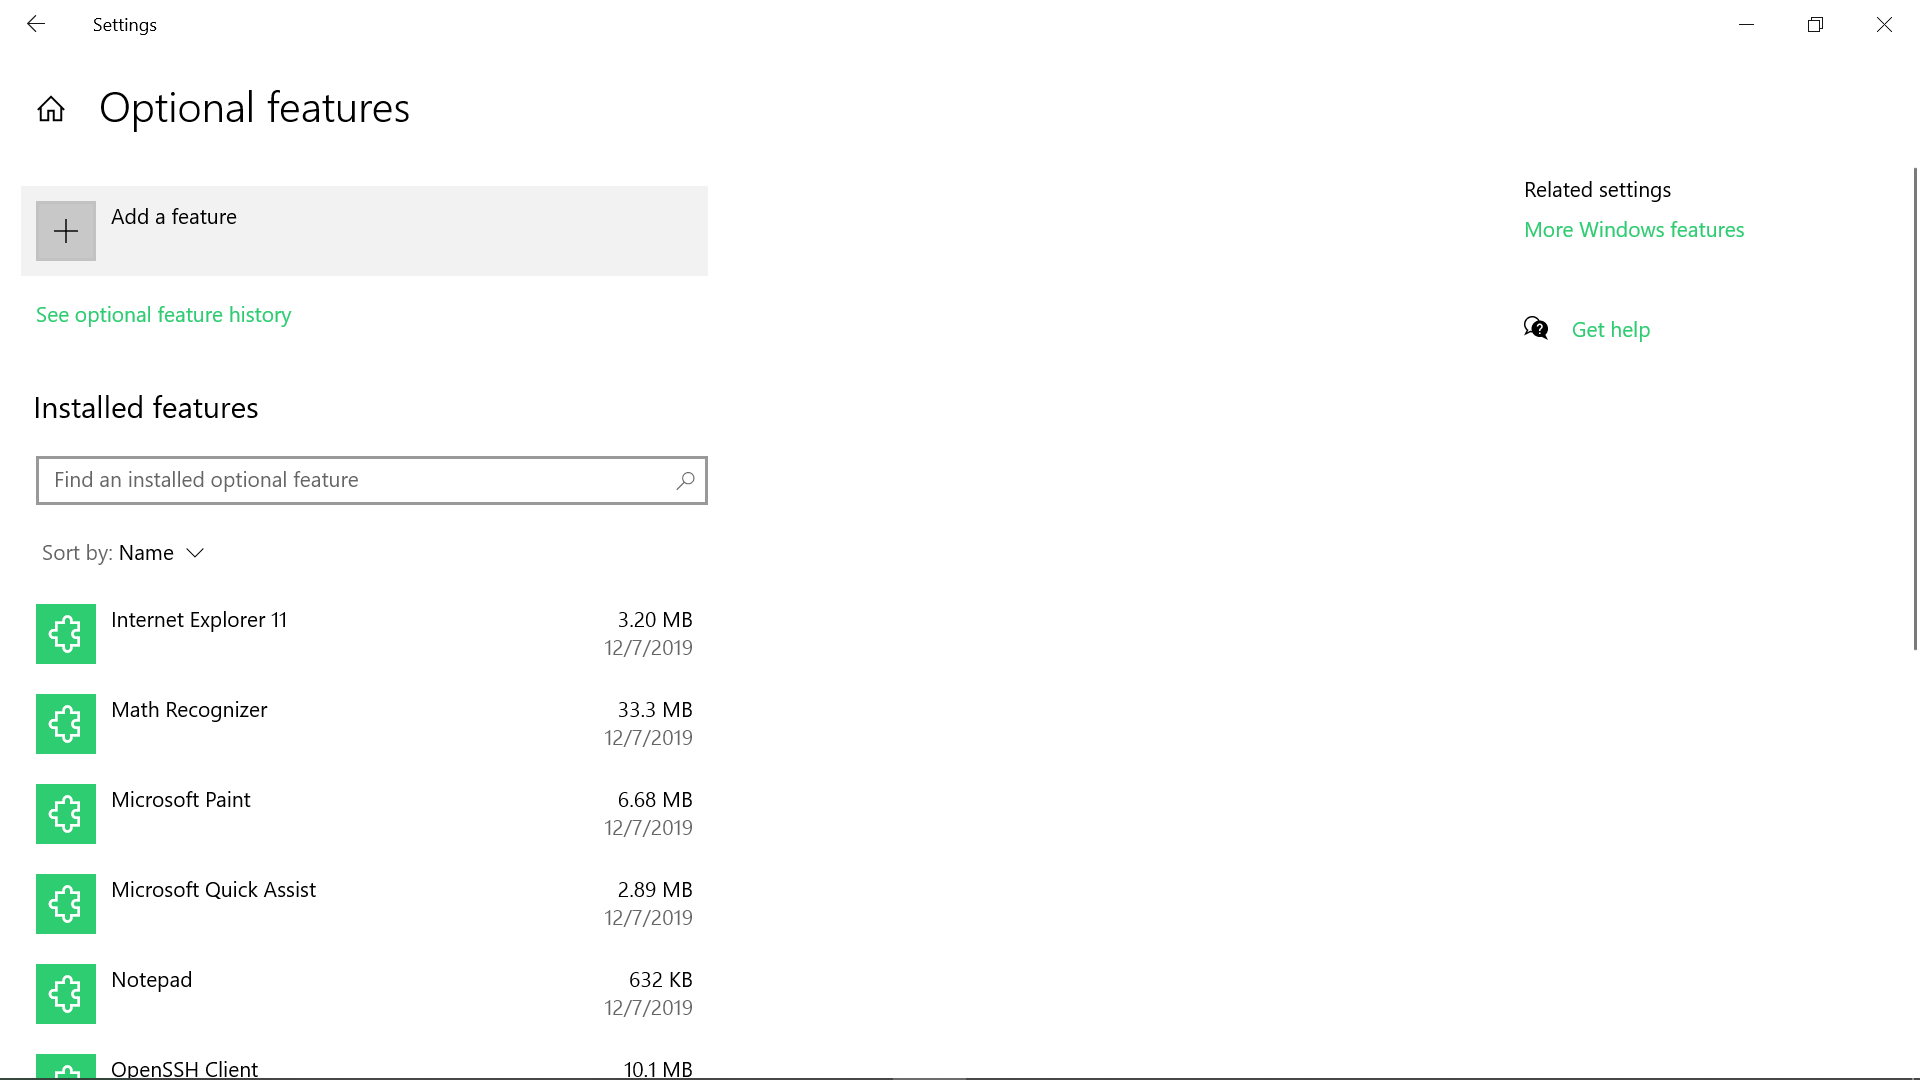
Step 4: Locate Wireless Display from the list and check it, then click install.
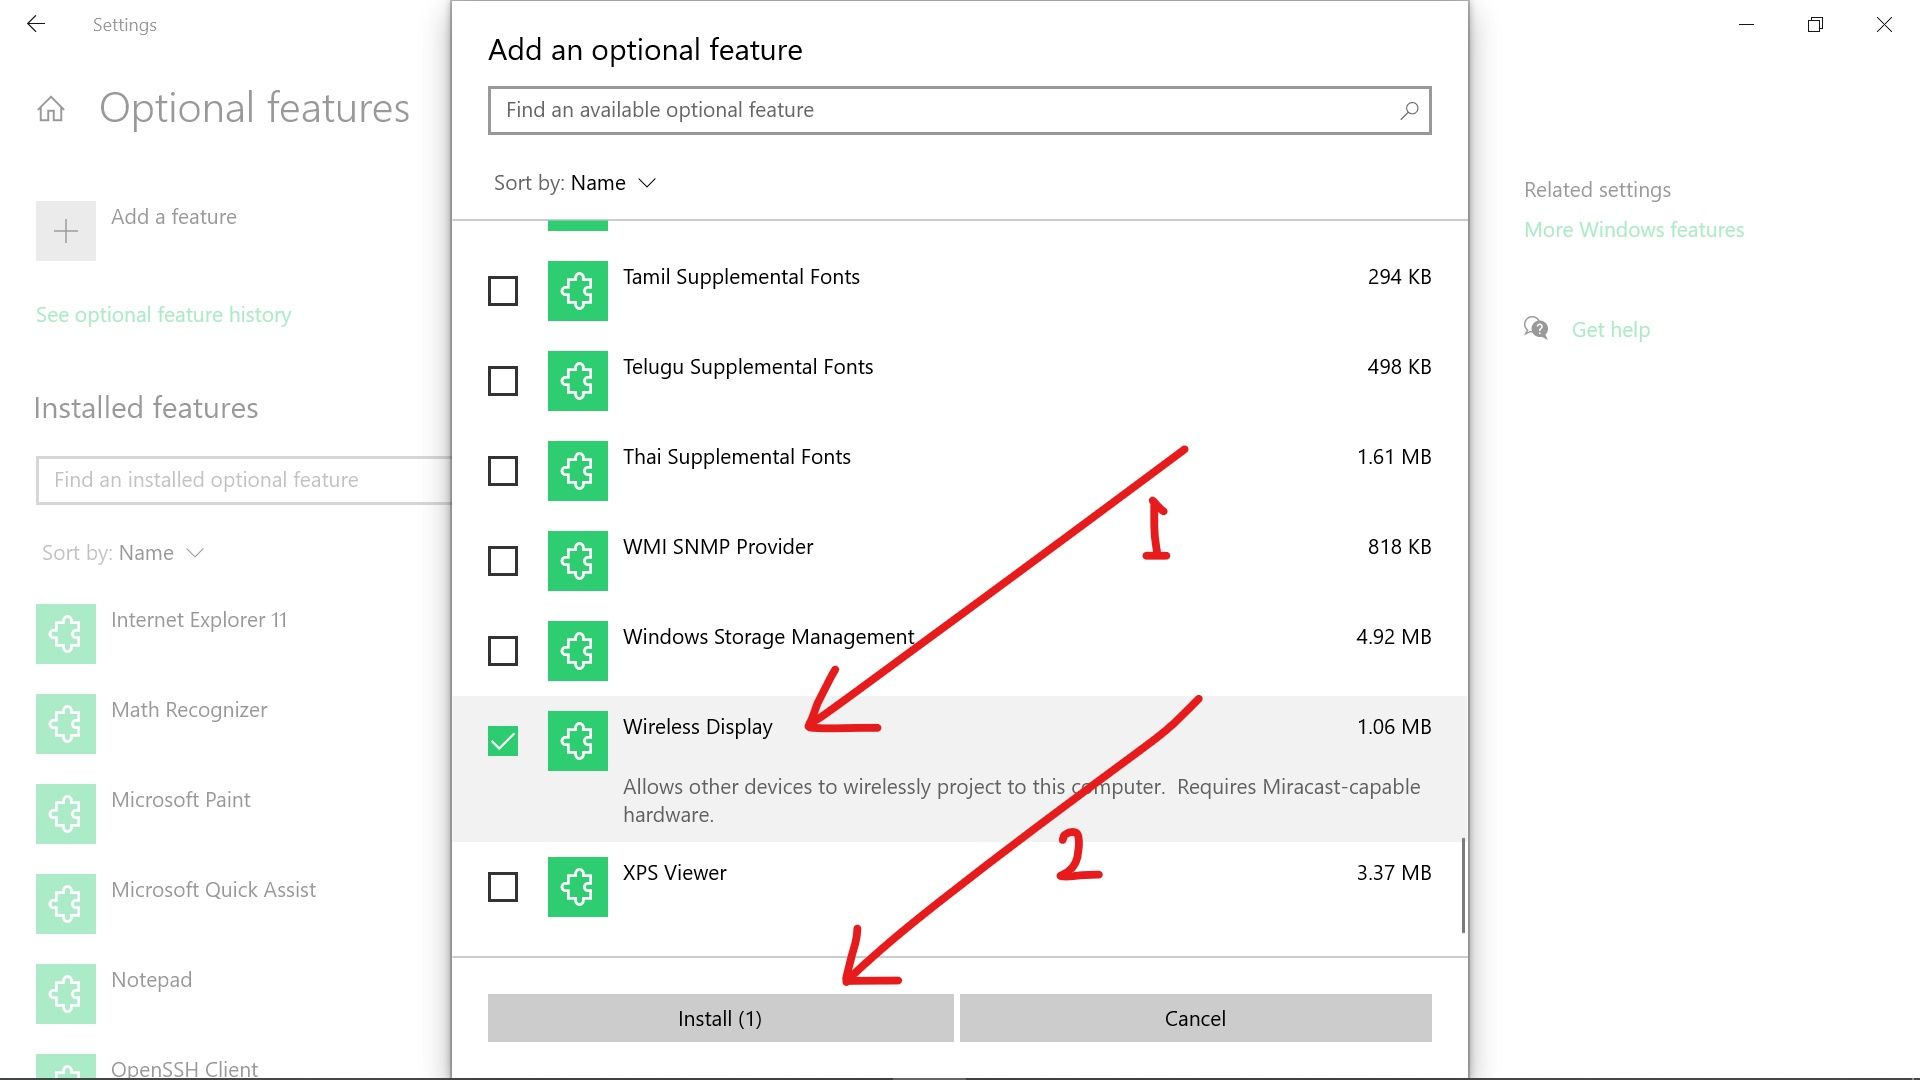
Note that if your current internet connection is metered, this feature will not install. So, make sure you’re not on a metered network.
When the wireless display is installed, the several projecting options that were not available in Step 3 should now be available. And most importantly, you now have access to the Windows 10 Connect app.
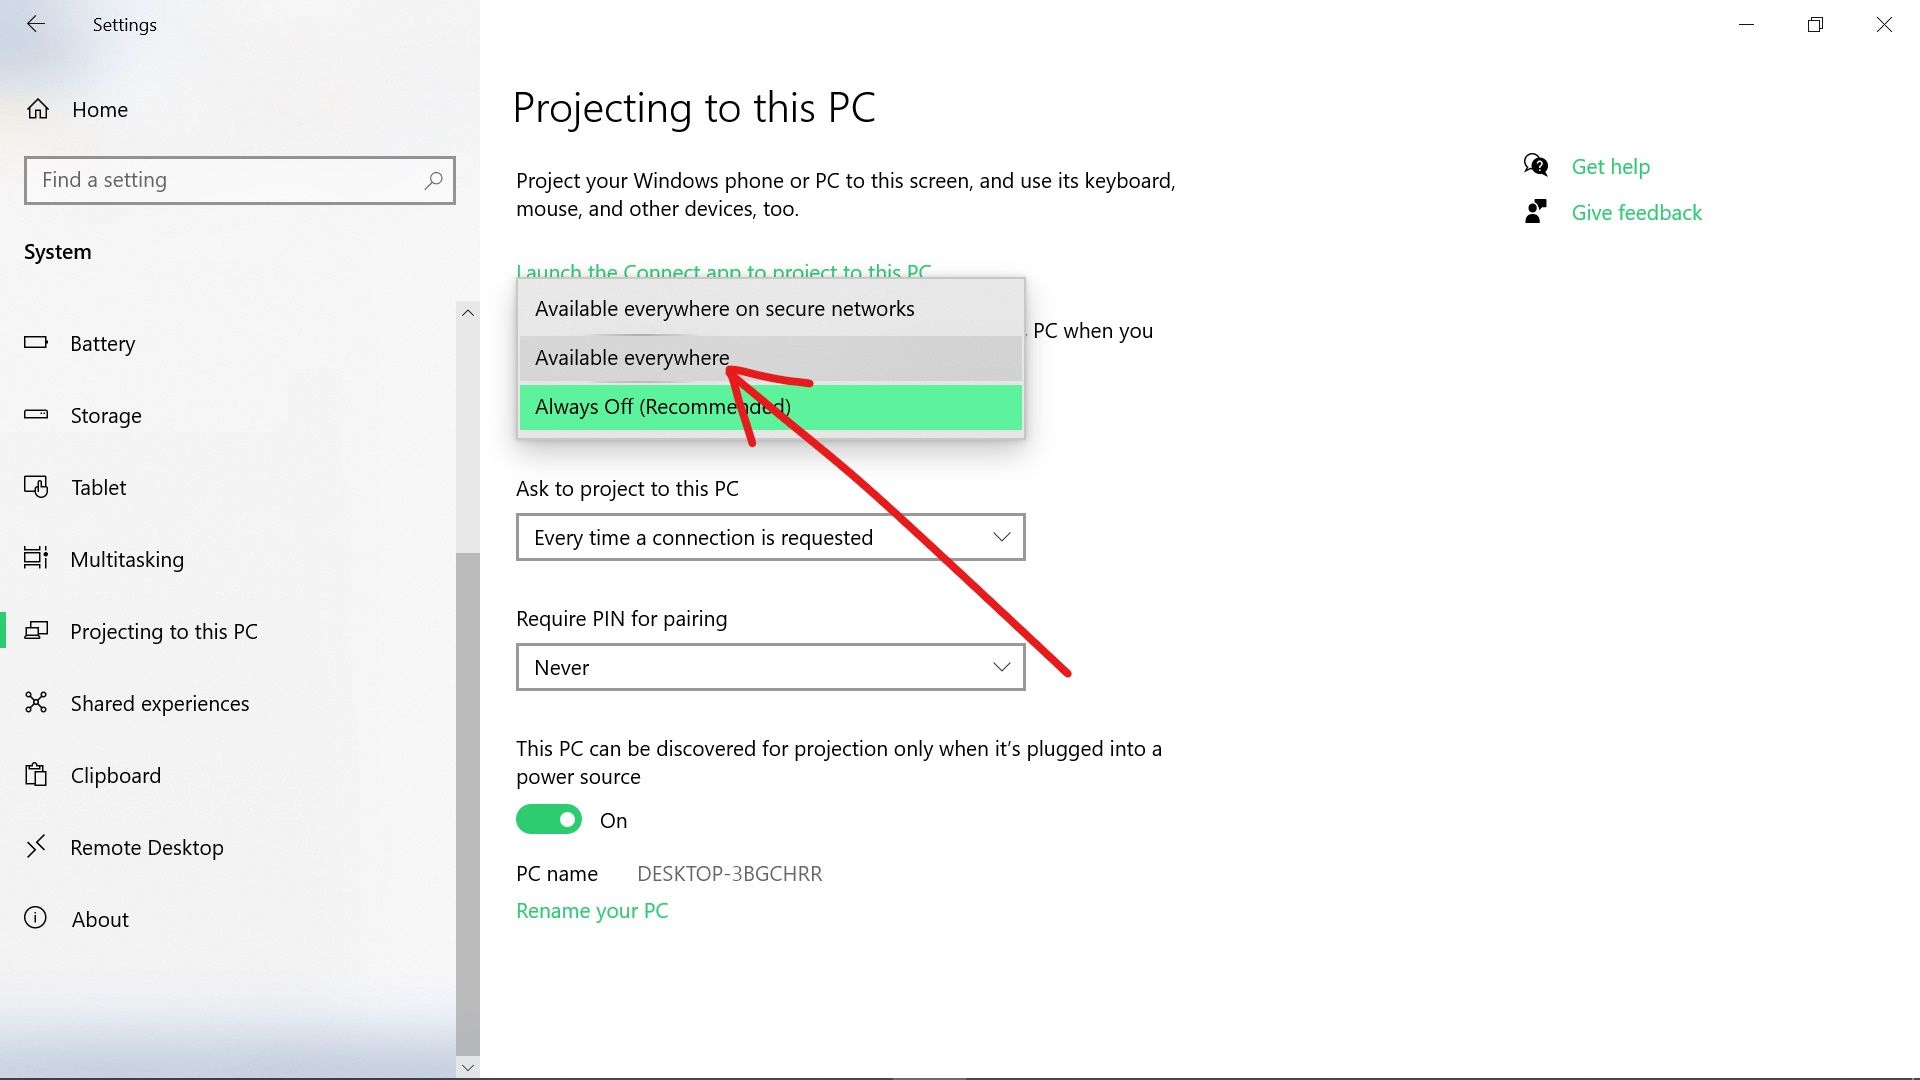
Step 6: Change the first option to available everywhere so the display (screen) of Android devices can connect to your computer wirelessly.
Step 7: Click on the link that says “Launch the Connect app to project to this PC”.
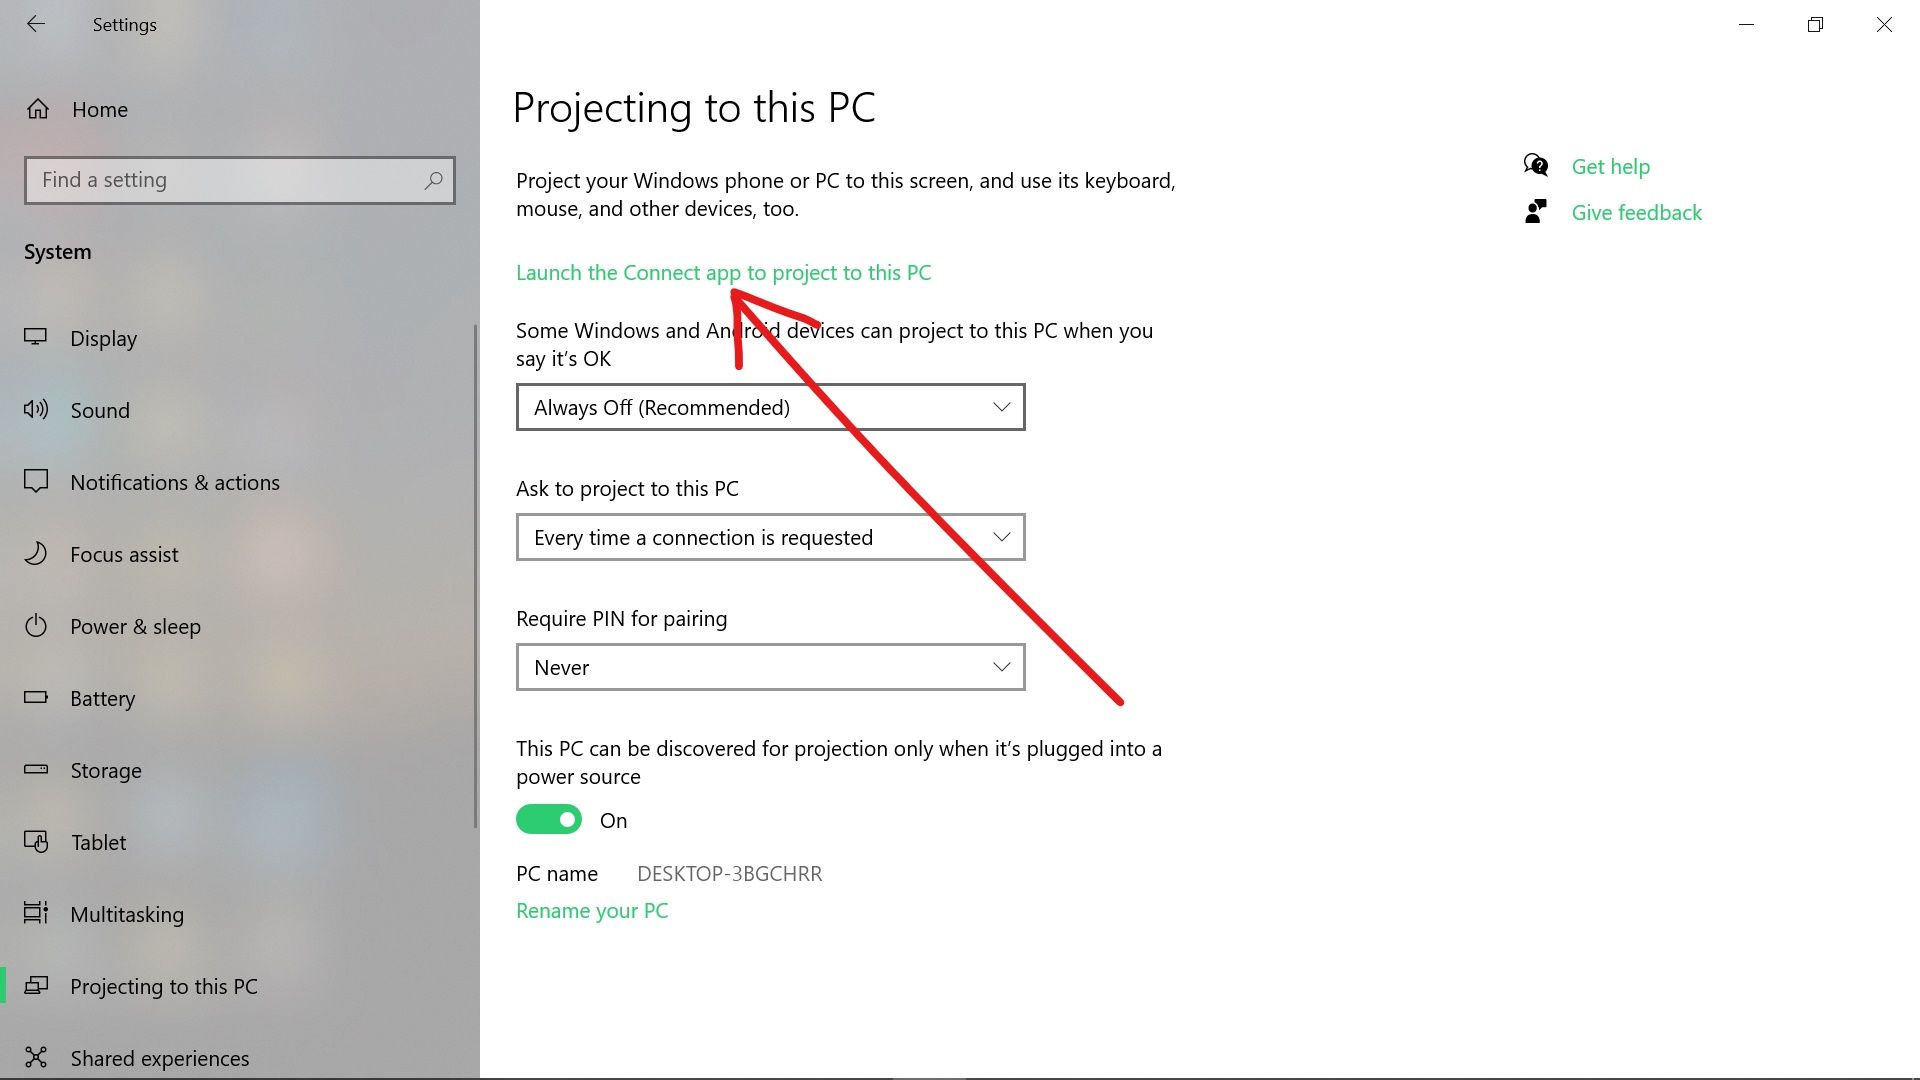
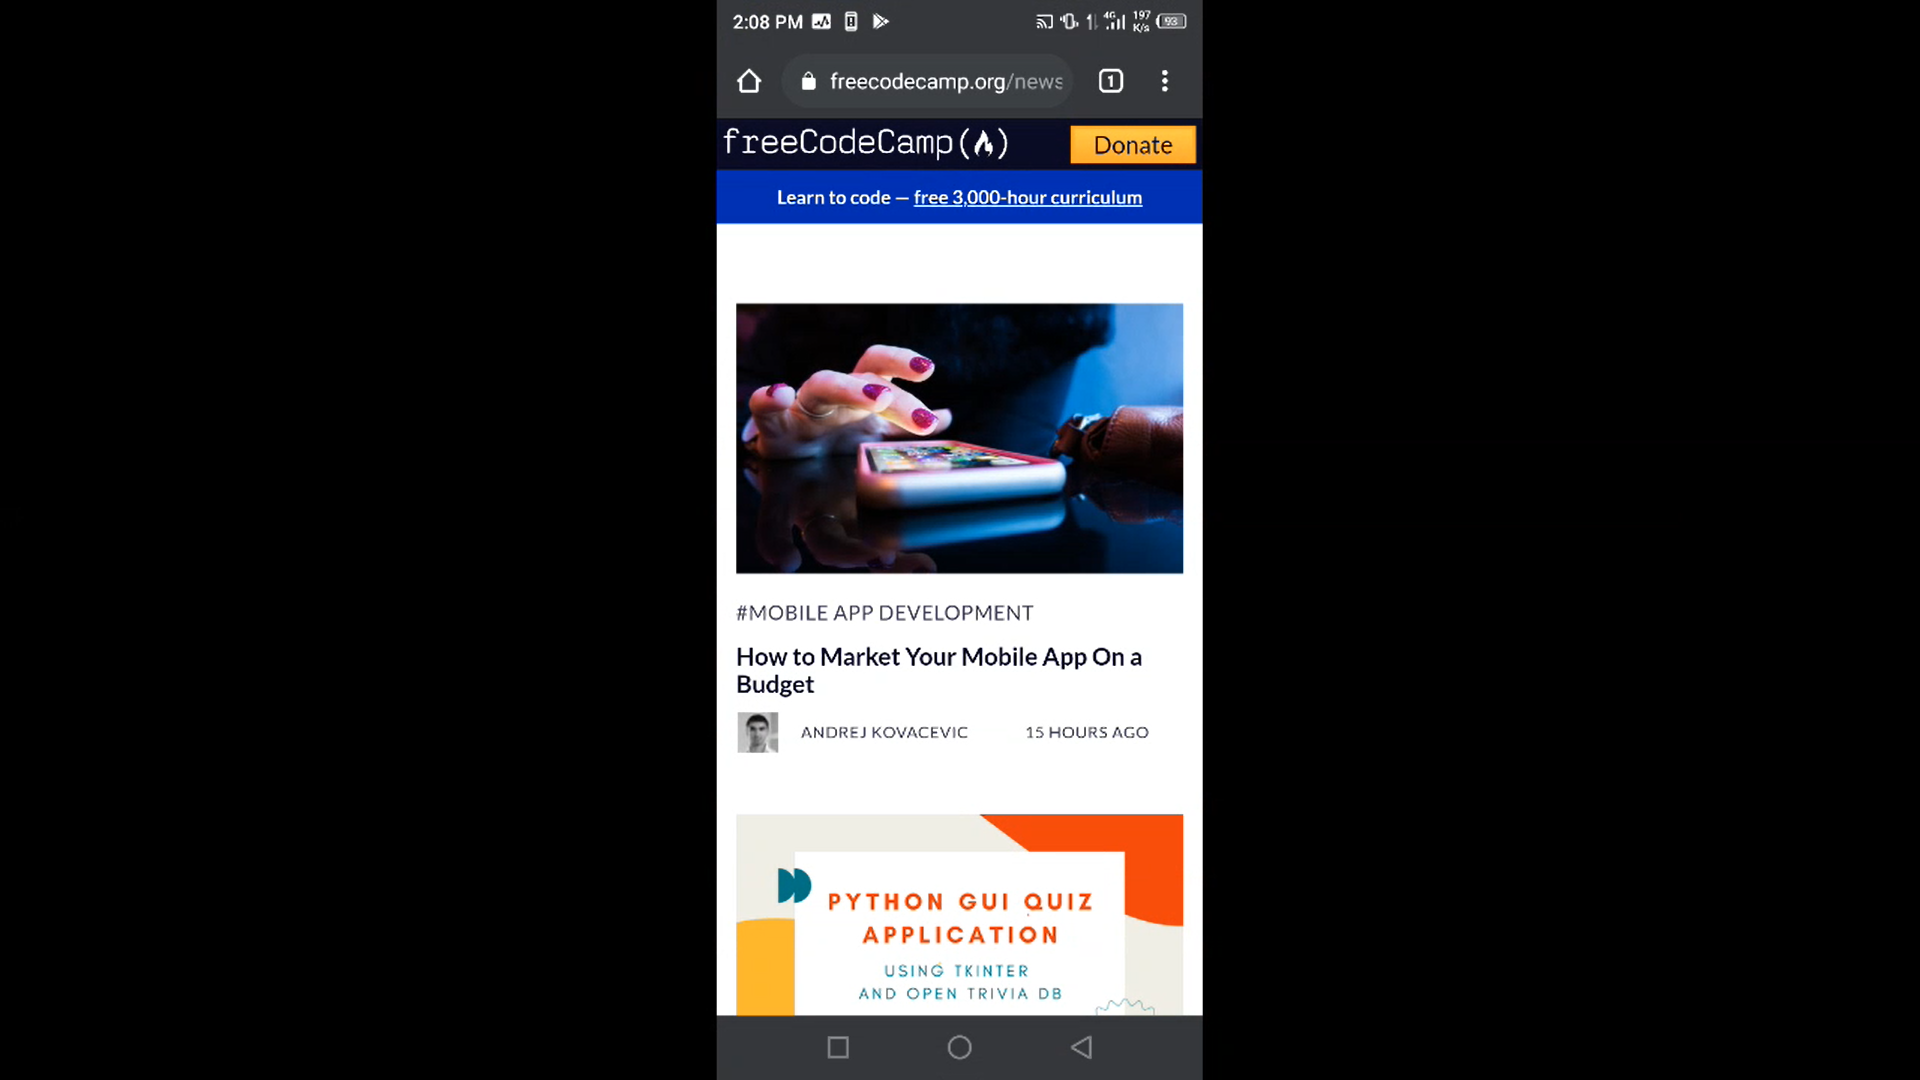
When you launch the Connect app, you should see a screen like the one below:
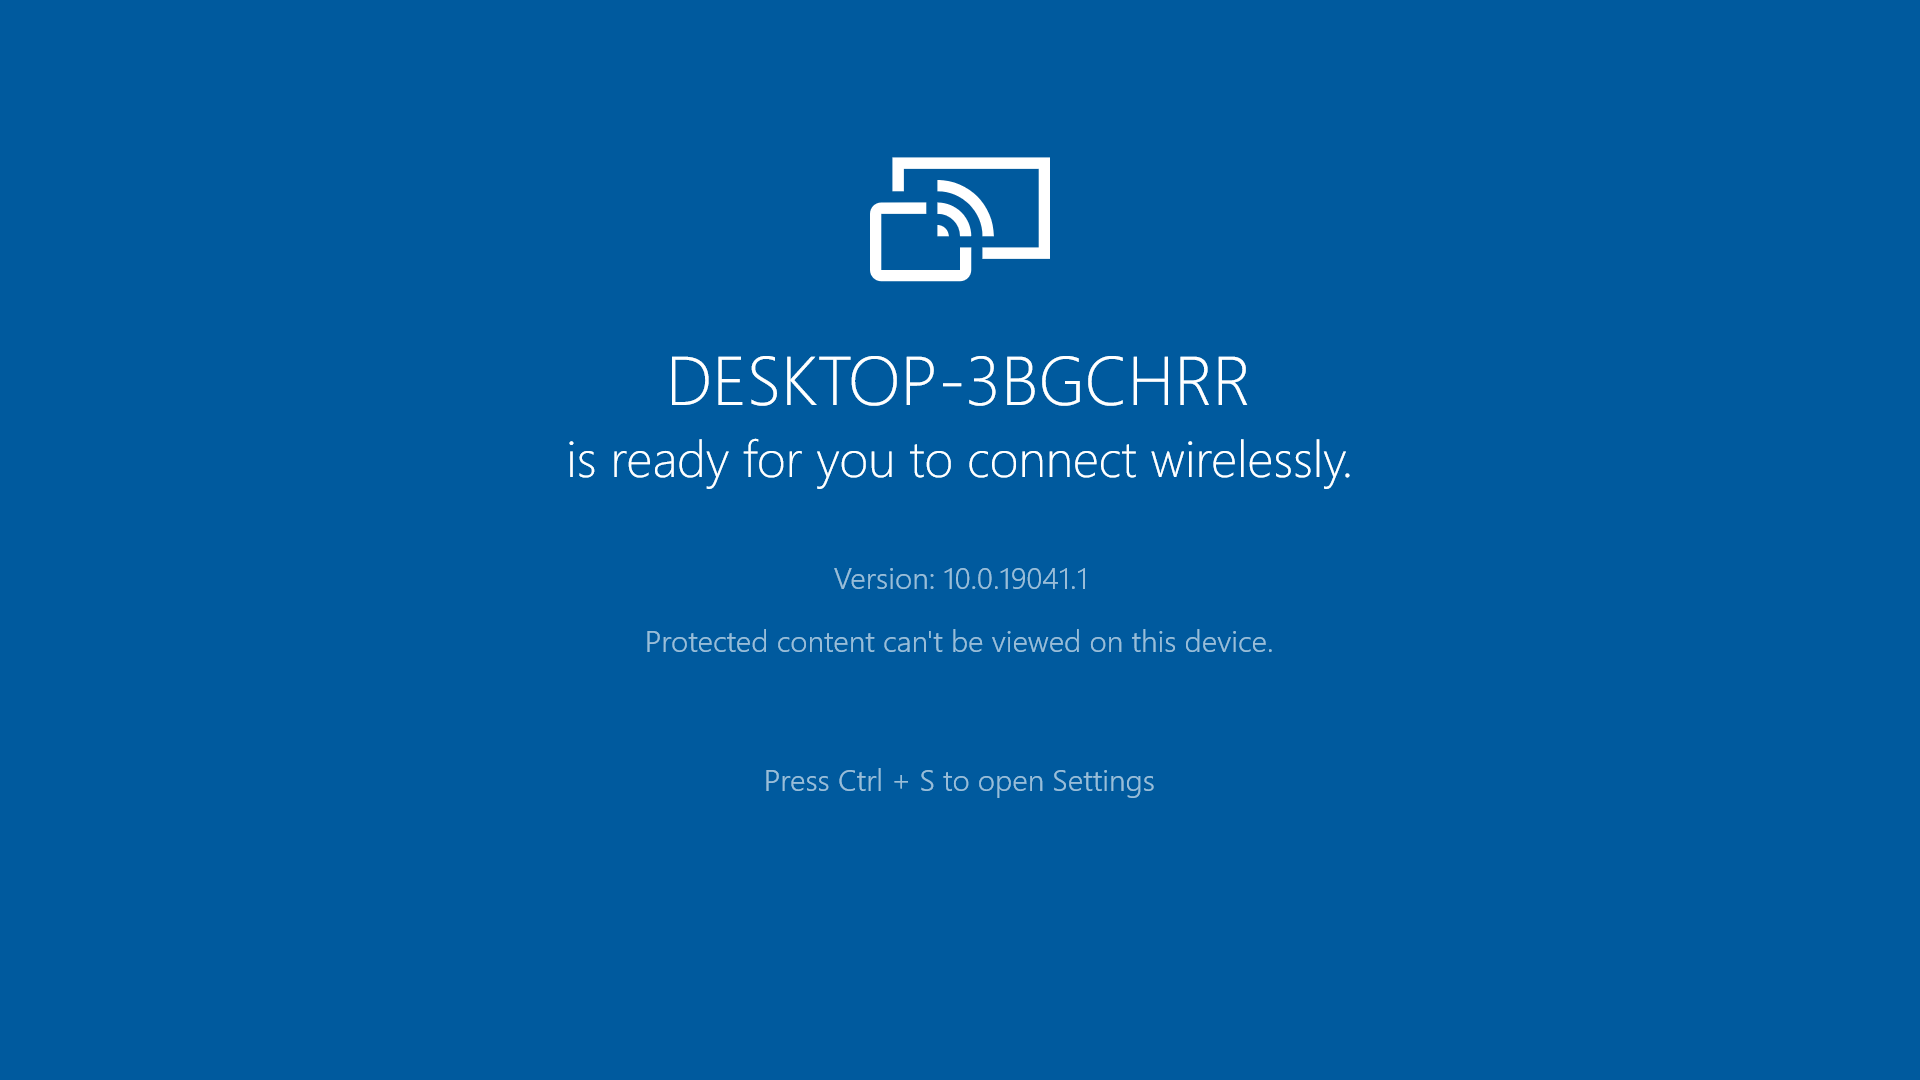
The rest of the setup should now be done on your Android phone.
How to Set it Up on an Android Phone
Each Android manufacturer has what they call the casting feature. On Tecno and Infinix phones, it is called “Cast”, and on HTC, it is called “HTC Connect”. On other phones, it could be available as smart share, smart mirroring, and so on.
In this guide, I will be using an Infinix Smart 10i phone.
To set the feature up and request a connection to your Windows 10 computer, follow the steps below:
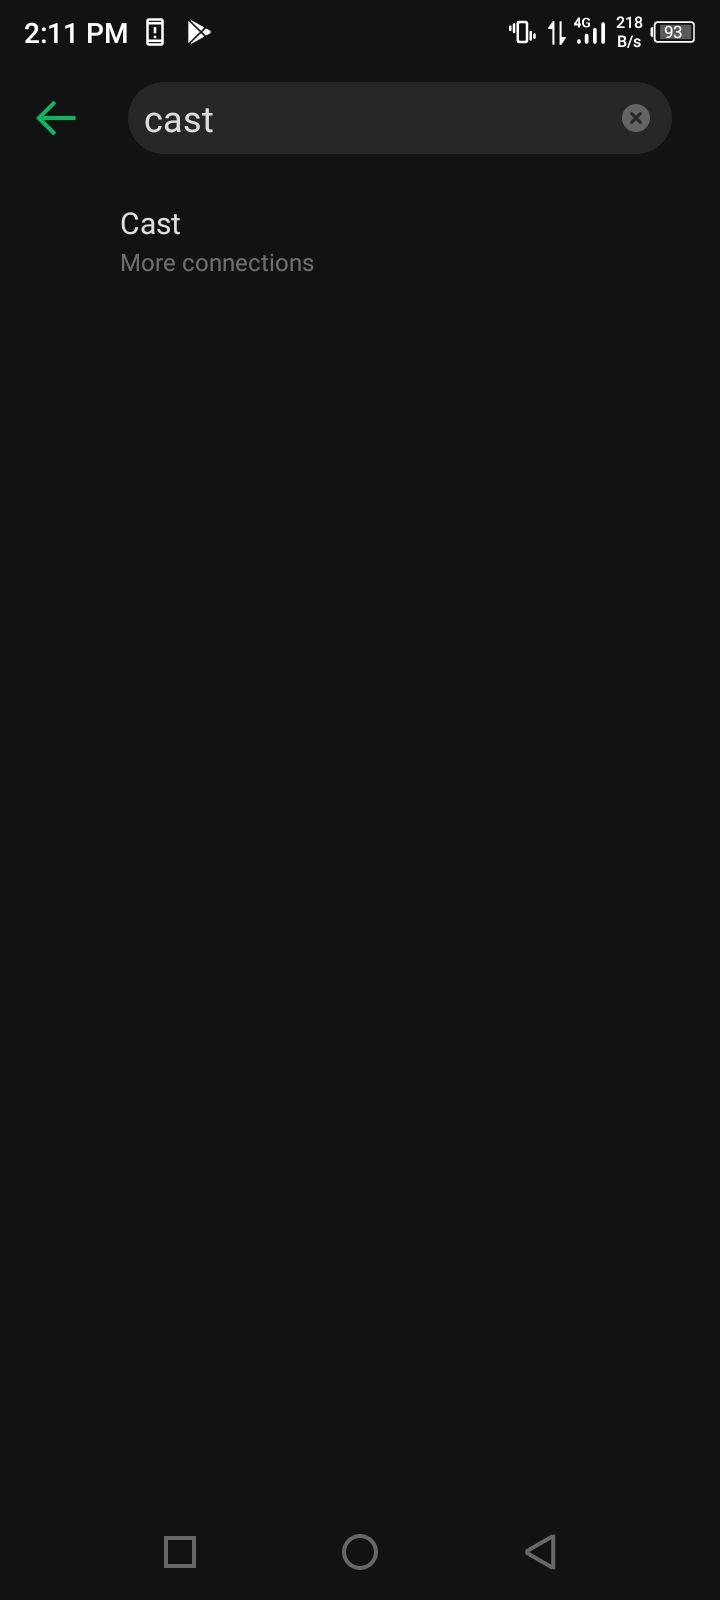
Step 1: Launch Settings, search for “cast”, and click the search result.
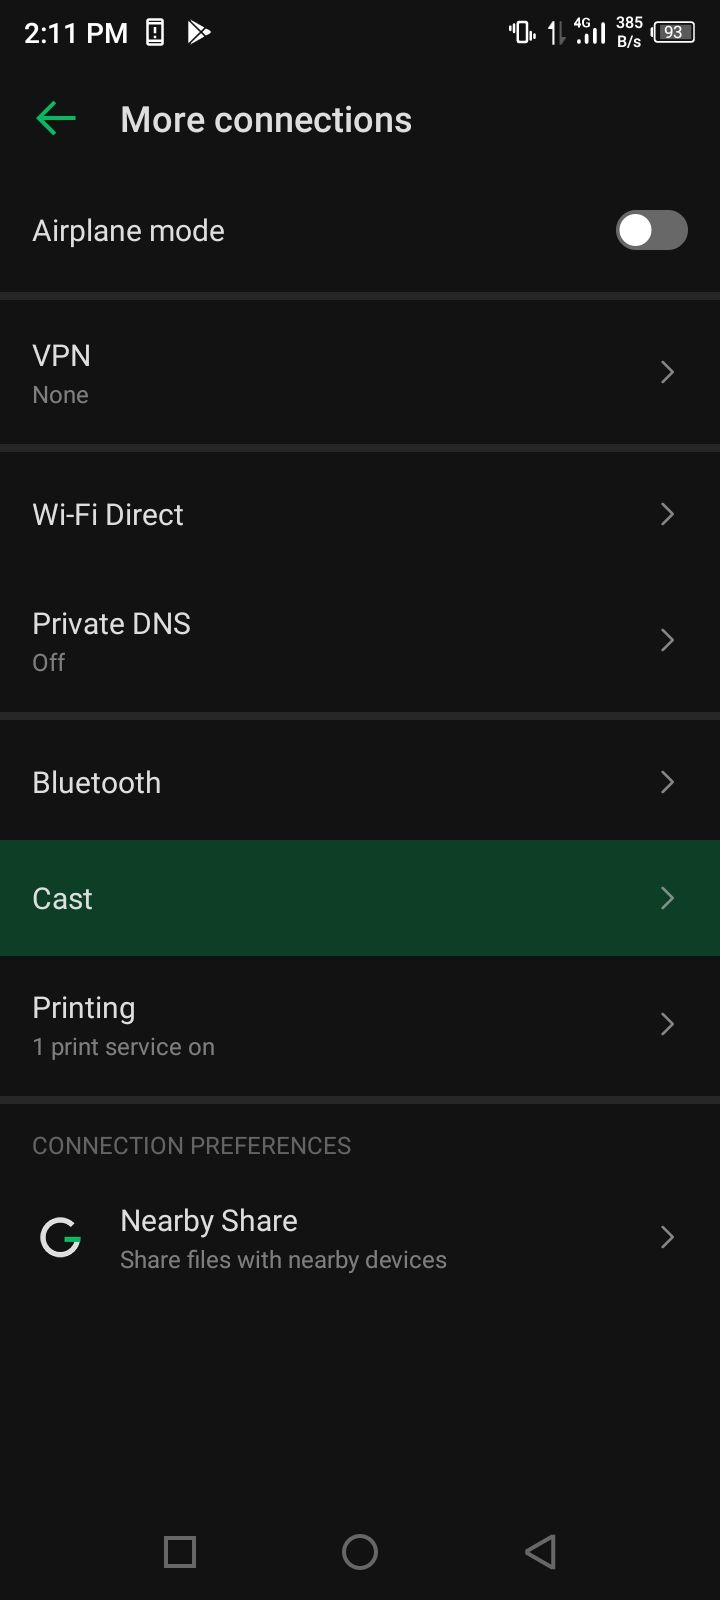
Step 2: Tap Cast.
Step 3: Click the 3 dots on the top-right corner and tick-mark “Enable Wireless Display”.
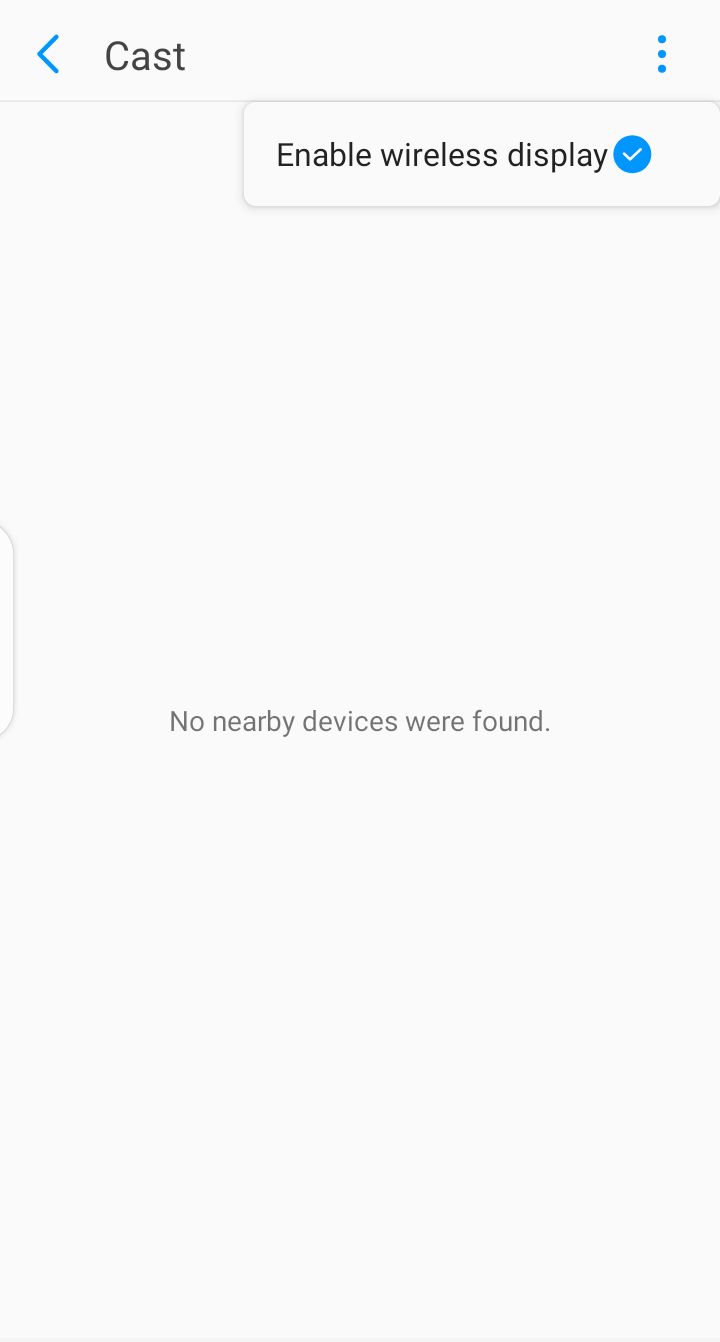
Step 4: Your Windows 10 Device name should now appear. Tap it.
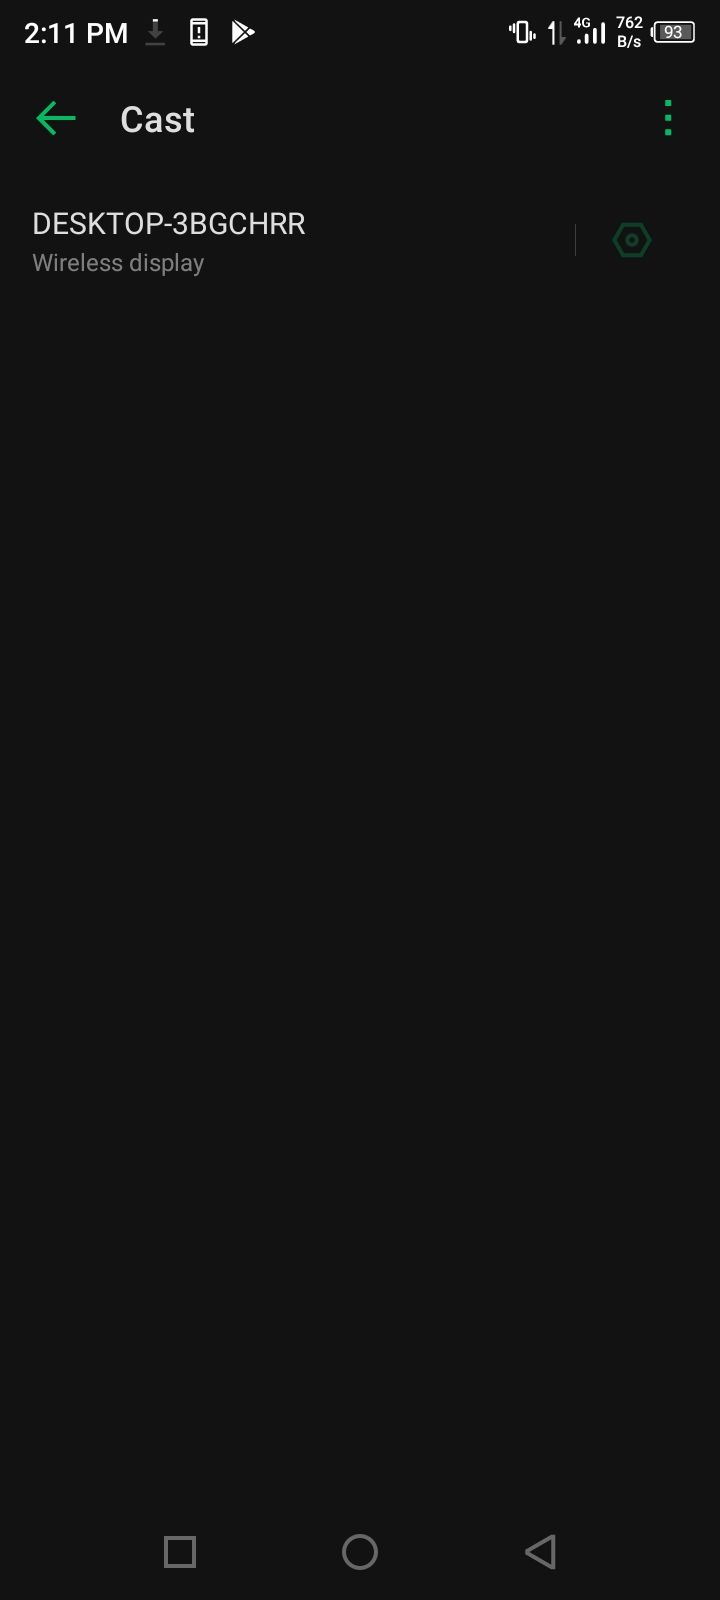
Step 5: Your Android display will now be cast to your Windows 10 PC.
Whatever you do on your phone will now show up on your Windows 10 PC. How cool is that?
Thank you for reading this article. If you find it useful, please share it with your family and friends. I would really appreciate that.
Learn to code for free. freeCodeCamp’s open source curriculum has helped more than 40,000 people get jobs as developers. Get started
While Chromecast works remarkably well within the Android – Chrome ecosystem, the moment you step out of Google’s hallowed garden, you realize there is little choice for Windows users. You can’t cast local media stored on your Windows 10 computer to Android TV. Neither you can cast any program other than Chrome. So if you are looking for a solution to cast Windows 10 in its entirety to Android TV then you have come to the right place. Here, we show you how to set up screen mirroring from Windows 10 to Android TV or for that matter, any other smart TV using Miracast. So without any delay, let’s go through the guide.
Here, we have mentioned all the methods so that you can follow the instructions step-by-step. Before you proceed, go through the requirements and check if your device has support for Miracast. You can click on the link below to seamlessly jump to the section.
- Requirements
- Find Miracast Support on Windows 10
- Find Miracast Support on Android TV
- Cast Windows 10 to Android TV
Project Windows 10 Screen to Android TV
Requirements
- Miracast-compliant TV
- Miracast-compliant Windows PC or Laptop
- Both your Android TV and Windows 10 computer should be connected to a common WiFi network.
Find Miracast Support on Windows 10
1. Press Win + R to open the Run window. Here, enter dxdiag and hit enter.

2. Now, click on “Save All Information” and save the file on the desktop. It will be saved in a text file.

3. Open the text file and look for “Miracast“. If it shows “Available” then you are good to go.

4. In case, it shows “Not supported by Graphics driver” then download Intel Driver Assistant (Free) and update all drivers. It might be the case that your computer has the right hardware, but due to the lack of a proper driver, Miracast might not be available on your device. So go ahead and give it a try through the Intel Driver Assistant. Keep in mind, for Miracast to work, both hardware and software support is needed.

5. You can also try updating the Microsoft Wireless Display Adapter (Free) from the Microsoft Store.

Find Miracast Support on Android TV
Before we begin, let me tell you I am using Mi TV 4X running the latest Android 9. Xiaomi recently added support for Miracast on Mi TV so I am able to use the Miracast feature now. Xiaomi has added a separate Miracast app to connect with wireless displays.
For Android TVs manufactured by other vendors such as Sony, Samsung, LG et al, you may have to dig into settings and find the “Miracast” menu. This is applicable for not just Android TV but all smart TVs. Make sure Miracast is enabled and discoverable. I would also recommend you to go through Settings -> Apps -> See All Apps.
If need be, go through all the System Apps (located at the bottom) and find the Miracast menu. You can also go through all the Settings menu and find the Miracast option. As for this guide, I am going to show how you can find Miracast support on Mi TVs.
1. On the Android TV interface, move to the “+” button which is available along the “Apps” section.

2. Here, you will find the “Miracast” app. Simply select it and the app will be added to your favorite apps section. If Miracast is not available here then search it under Settings -> Apps -> See All Apps.

3. Now open the Miracast app and the wireless display feature will be enabled. You should stick to this screen while casting Windows 10 to Android TV.

Cast Windows 10 to Android TV
1. Open the Miracast app on your Android TV and stay on that screen. For your information, Definition Priority means the highest clarity possible, but real-time syncing will take a back seat. Fluency Priority means a stable connection with real-time syncing but in low-res quality (better for low-end devices). I like to keep Definition Priority as default.
2. Now, move back to your Windows 10 computer and press the “Win + K” keyboard shortcut. It will open a “Connect” window on the right pane.

3. If the “Connect” window does not pop up then open Settings -> System -> Display. Here, scroll down and click on “Connect to a wireless display”.

4. Now, it will start the search and within a few seconds, your Android TV will show up. Make sure the Miracast app is open on your Android TV and both your devices are connected to the common WiFi network. Next, click on your Android TV.

5. Finally, Windows 10 will cast its screen on your Android TV. Just like Chromecast, you can play music and it will be routed through your TV’s speaker. You can browse the internet, open any app (not just limited to Chrome), play games, and a lot more.

6. In case, you want to extend your display or make the setup second screen only then press “Win +P ” and change the projection mode.
Screen Mirroring from Windows 10 to Android TV Using Miracast
So that is how you can cast Windows 10 to Android TV and play any media or games. If you have a powerful computer, router, and Android TV then you can very well make your Android TV as a second screen. Anyway, that is all from us. If you want to learn more such Mi TV tips and tricks then go through our linked guide. And if you are facing any issue then comment down below and let us know. We will surely try to help you out.