
When you upgrade from one version of Windows to a higher version, new features get added to your computer, and at the same time, your files & data remain intact and unaffected. This means that a user can use their existing Windows 7 key to upgrade their computer to Windows 10 and stay activated with a genuine copy of Windows 10. However, there are multiple ways by which a user can upgrade from Windows 7 to Windows 10 without losing data.
You would want to upgrade from Windows 7 to Windows 10 because of the fact that, Windows 7 is reaching its end of support in January 2020 and will no longer get security updates. Microsoft recommends upgrading to Windows 10 only due to the fact that is a robust new operating system that follows a different servicing model.
You should consider upgrading Windows 7 to Windows 10, as it will be difficult to secure Widows 7 after End Of Support.
Two of the main methods that help you upgrade your PC from Windows 7 to Windows 10 without losing data are as follows:
-
- Using the Media Creation Tool.
- Using the latest Windows 10 ISO file.
1] Upgrade Windows 7 to Windows 10 using Media Creation Tool
- Download the latest version of the Media Creation Tool.
- Run the executable file that you just downloaded.
- Agree to the terms of use that you are shown.
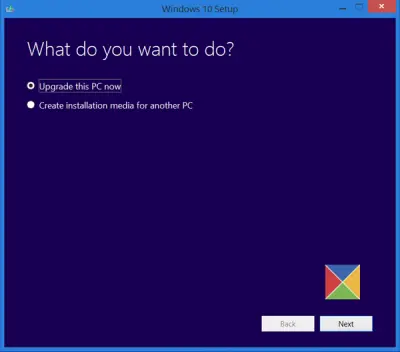
- Then you will be asked if you want to Upgrade this PC now or Create installation media for another PC.
- You need to select Upgrade this PC.
Once you have made the selection, you need to follow the wizard, the details of which have been explained below in detail.
Now, you will be asked if you want to Keep personal files and apps. Make sure you check those boxes.
When you proceed, it will start downloading the latest build of Windows 10 for your computer and then will upgrade you to Windows 10 without deleting any of your personal files.
Read: Windows 7 to Windows 10 Migration Tools.
2] Upgrade Windows 7 using the latest Windows 10 ISO file
- For this, you will have to download the Windows 10 ISO that you wish to use to upgrade Windows 7 to Windows 10.
- Browse to the location where you have the Windows 10 ISO file saved.
- Right-click on it. Select Open with Windows File Explorer.
- You will be able to see the contents of the ISO file. Click on setup.
The setup will begin, and you will be asked if you want to download updates now or later.
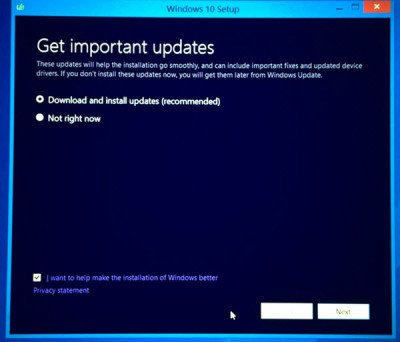
If you wish to get the latest driver updates first, select Next.
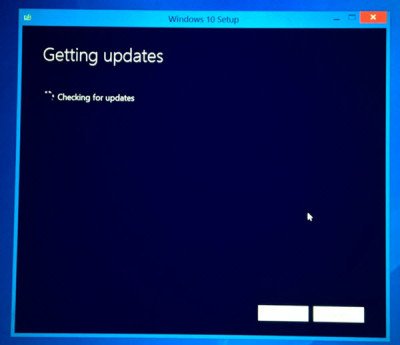
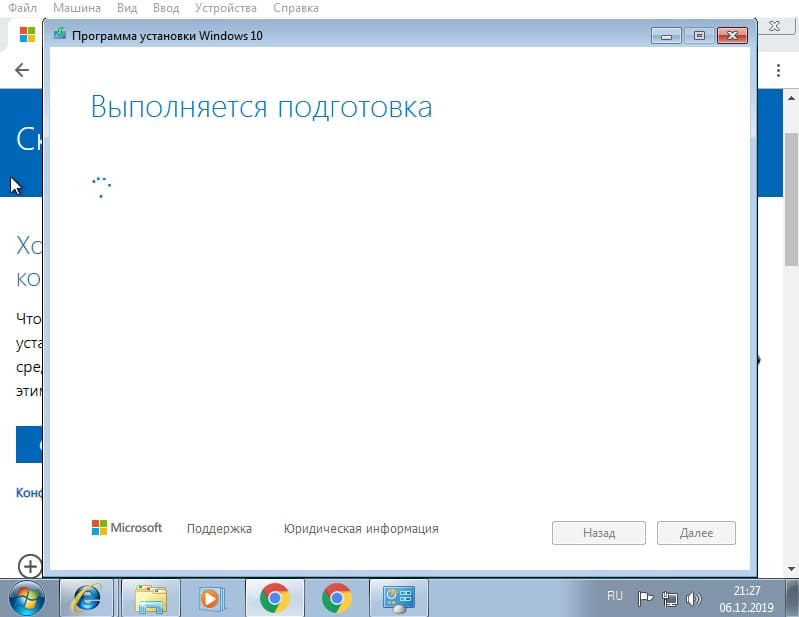
It will be then followed by, the setup getting a few things ready.

Once you are all set, you will be asked to Accept the license terms.
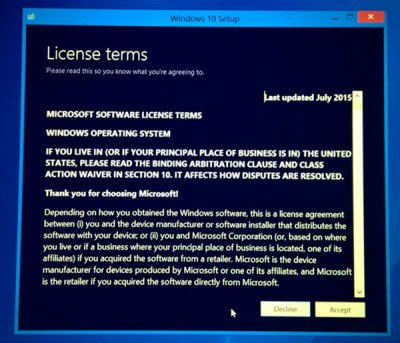
Click on Accept to proceed. You will see a Making sure message.
The setup will make sure that your PC is ready to install. If anything requires your attention, it will be highlighted.
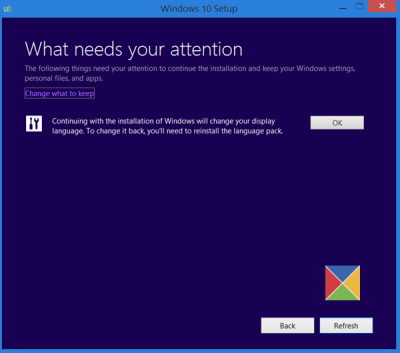
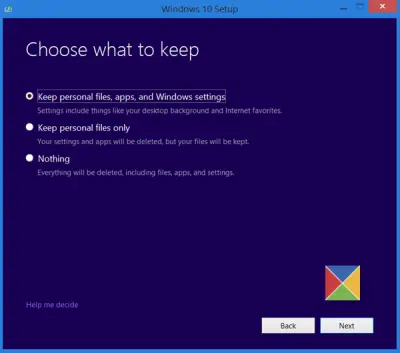
It could be a message about Language Packs, media Center or anything else. Here you can also click on the Choose what to keep link-
- Keep personal files, apps, and Windows settings
- Keep personal files only
- Nothing.
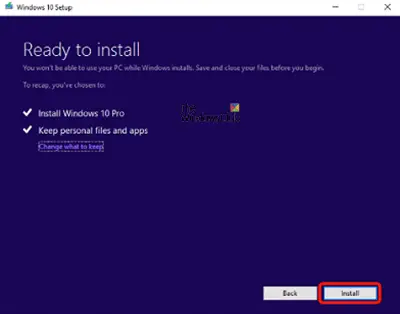
Select Keep personal files, apps, and Windows settings.
Click on Confirm > Next. The setup will check if your PC has enough space and then a Ready to install message.
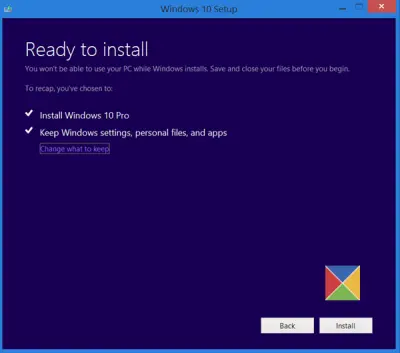
Click on Install to proceed. Your computer will commence installation and restart several times.

Finally, you will see the following screen at boot.

Once the upgrade is completed, you will see the following welcome screen.
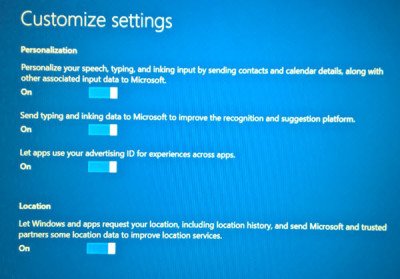
After logging for the first time, you may see the following screen. You can click on Use Express setting, or you may Customize.

You will be informed about the new apps in Windows 10. You may choose your default apps here or move on.
Finally, after a few ‘Taking care of a few things’ messages, you will be taken to your Windows 10 desktop screen.
I hope you found this guide easy to follow.
Can I upgrade from Windows 7 to Windows 11 free?
You will have the option to upgrade, clean install, or reimage Windows 10 devices to move to Windows 11. For Windows 7 and Windows 8.1 devices that meet hardware requirements, you will need to clean install or reimage to go directly to Windows 11. So this means that you can perform an in-place upgrade to move from Windows 10 to Windows 11, but you will have to perform a Clean install to move from Windows 8.1/7 to Windows 11.
Let us know if you have any questions.
Tom Warren is a senior editor and author of Notepad, who has been covering all things Microsoft, PC, and tech for over 20 years.
Editor’s note, October 2023: Microsoft originally announced that Windows 10 would be a free upgrade from Windows 7 for the first year only. That was back in 2015, yet the company wound up accepting Windows 7 keys for free Windows 10 and even Windows 11 upgrades for over eight years. But you can no longer do this — Microsoft finally closed the loophole this week.
This has been one of the most popular How To guides we’ve ever written, so we’re leaving it below for posterity.
Original story continues:
Microsoft’s free upgrade offer for Windows 7 and Windows 8.1 users ended a few years ago, but you can still technically upgrade to Windows 10 free of charge. While Microsoft has removed the special upgrade offer sites, the company continues to activate Windows 10 licenses for people who upgrade from Windows 7 or Windows 8.1. That may even mean you’ll be able to upgrade to Windows 11 for free as well — here’s how the free Windows 11 upgrade works.
ZDNet’s Ed Bott has been testing the Windows 10 method for years, and the free upgrade still works. It’s also really simple for anyone to upgrade from Windows 7, especially as support ends for the operating system today. Assuming your PC supports the minimum requirements for Windows 10, you’ll be able to upgrade from Microsoft’s site.
The most important thing to remember is that the Windows 7 to Windows 10 upgrade could wipe your settings and apps. There’s an option to keep your files and personal data, but because of differences between Windows 10 and Windows 7, it’s not always possible to keep all of your existing apps. Make sure you’ve noted what apps you use regularly so you can easily obtain them by downloading the installers again. Windows 8.1 can also be upgraded the same way, but without needing to wipe your apps and settings.
Here’s how to upgrade from Windows 7 to Windows 10:
- Back up all of your important documents, apps, and data
- Head over to Microsoft’s Windows 10 download site
- In the Create Windows 10 installation media section, select “Download tool now,” and run the app
- When prompted, choose “Upgrade this PC now.”

- You’ll then be asked whether you want to keep your personal files or start fresh. Remember: starting fresh or keeping your files still means that all apps and settings will be deleted for the Windows 10 upgrade.
- Once the upgrade is complete, you should receive a digital license for Windows 10, which can be found under Settings > Update & Security > Activation.
Update October 7th, 2021: Added links to the free upgrade path from Windows 10 to Windows 11.
Update October 11th, 2023: Added new editor’s note confirming the loophole has closed.
В этой статье мы пошагово покажем как обновиться с Windows 7 до Windows 10. На примере исходная операционная система у нас будет Windows 7 Professional, соответственно она обновится до Windows 10 Pro.
Если у Вас Windows 7 Ultimate, то она обновится так же до Windows 10 Pro, если у Вас Windows 7 Home (базовая или расширенная), то она обновится до Windows 10 Home (Домашняя).
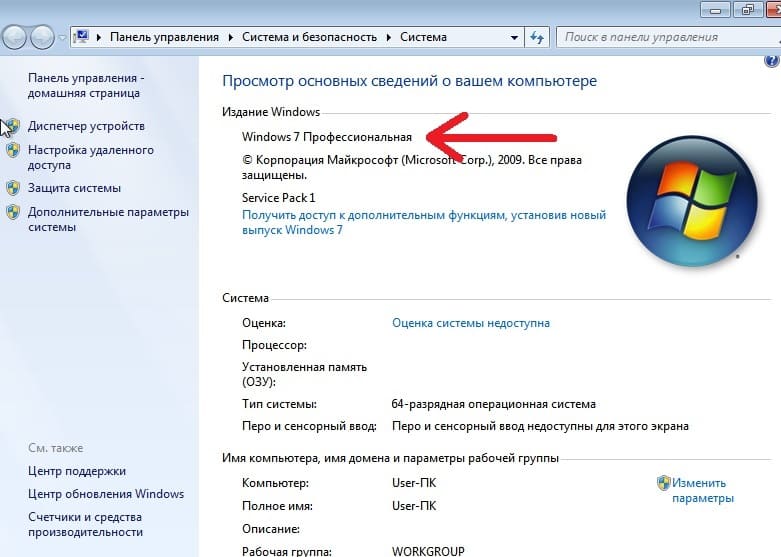
1) Первым шагом желательно проверить, какая именно версия у Вас установлена, на нашем примере как мы уже сказали ранее Windows 7 Профессиональная (Pro).
На данный момент для пользователей из России из-за действующих ограничений имеются проблемы с использованием официального онлайн установщика (приложения для обновления) от Microsoft — Media Creation Tool, а так же для пользователей из РФ имеются проблемы скачивания дистрибутива с сайта Майкрософт. Вы можете попробовать скачать дистрибутив Windows 10 с официального сайта Microsoft, но данный метод как правило не работает для пользователей из РФ.
2) Мы рекомендуем:
— Скачать дистрибутив Windows 10 с нашего каталога на следующей странице. В нашем каталоге дистрибутивы оригинальные MSDN, проверить хеш-сумму можете на странице скачивания.
— Открыть дистрибутив можете по инструкции из п.2.
3) Запускаете дистрибутив.
4) Соглашаемся с лицензионным соглашением.

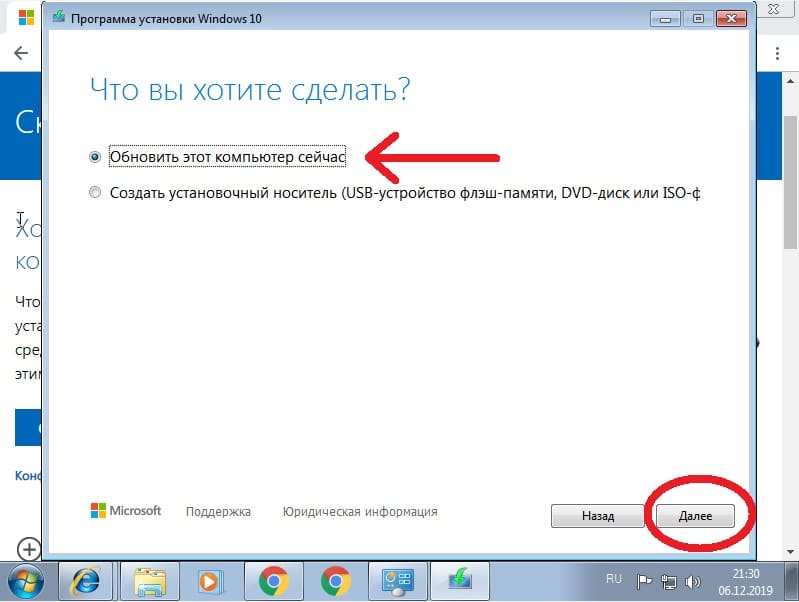
5) Выбираем пункт «Обновить этот компьютер сейчас» и жмем «Далее».
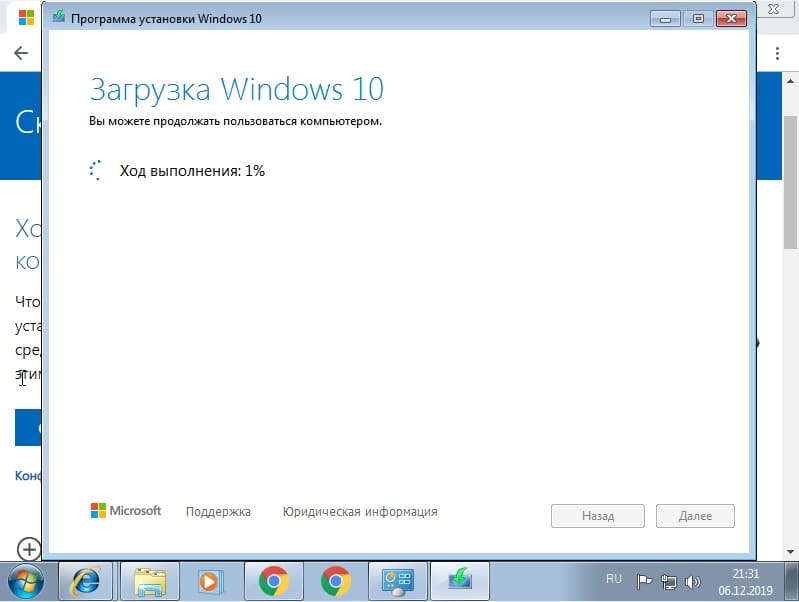
6) Ожидаете пока будет происходить загрузка файлов Windows 10. Скорость скачивания зависит от скорости Вашего соединения с интернетом.
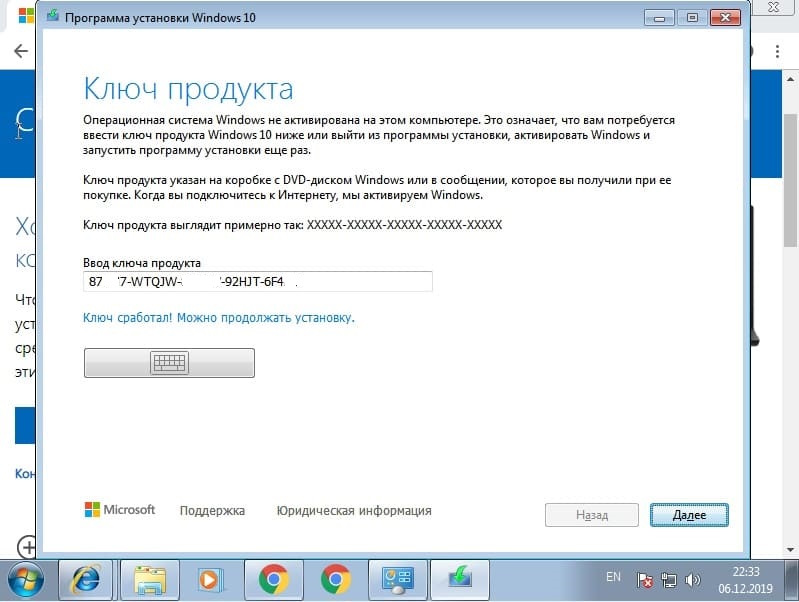
7) После у Вас запросит ввести ключ активации для Windows 10. В нашем случае ключ нужен от Windows 10 Pro. Приобрести ключ активации для различных версий Windows 10 можете в нашем каталоге по самым низким ценам, моментальная доставка ключа активации на Вашу электронную почту сразу после оплаты.
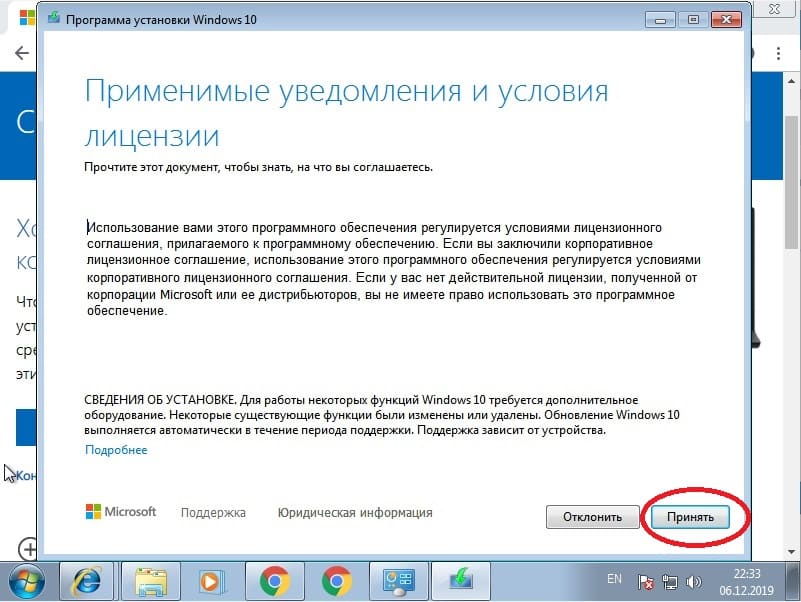
 Снова принимаем лицензионное соглашение.
9) Когда файлы скачались, оставляем все пункты на своем месте. Т.е установку Windows 10 с сохранением всех личных файлов и приложений.

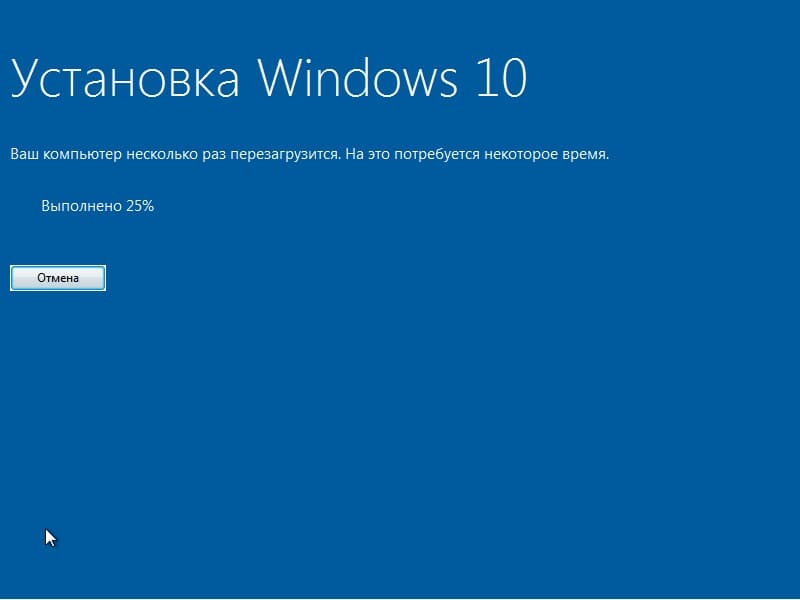
10) Ожидаете пока установится Windows 10. Компьютер пару раз перезагрузится для установки новой операционной системы.


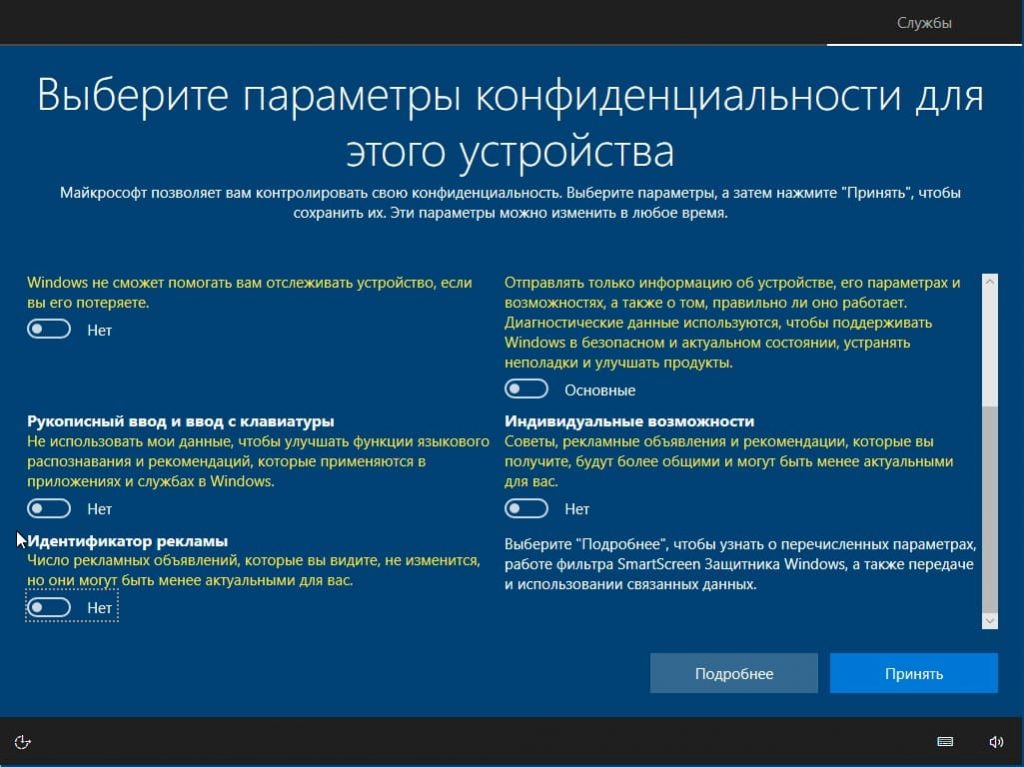
11) На шаге параметров конфиденциальности советуем отключить все пункты.
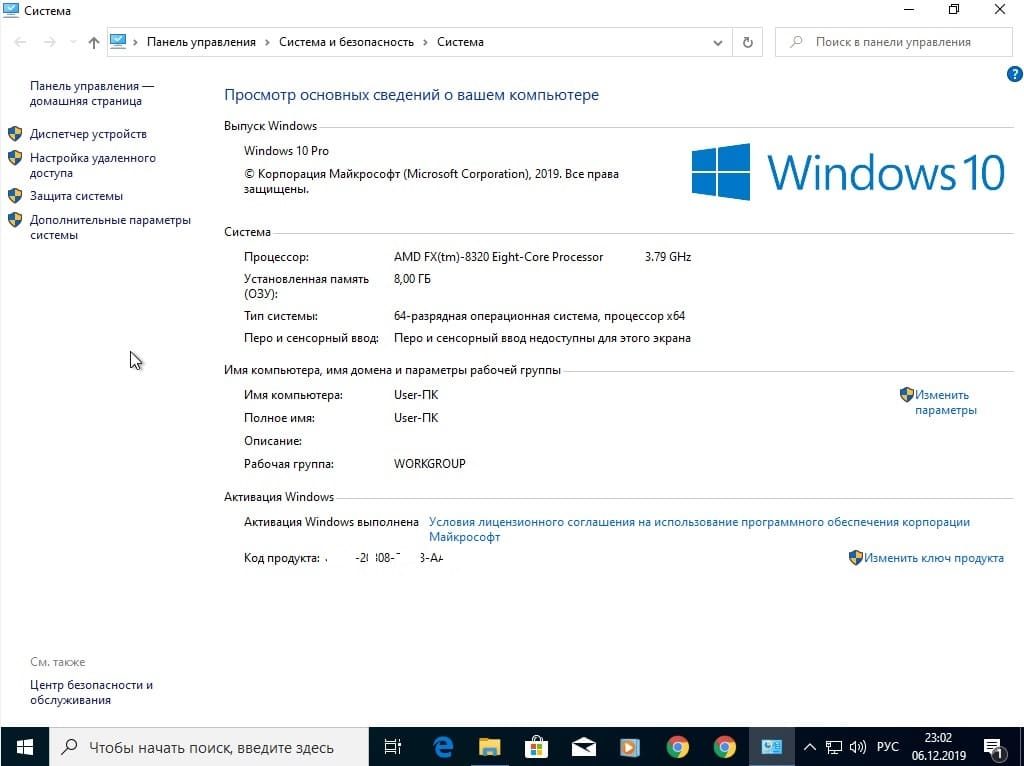
12) В целом все. Процедура по обновлению с Windows 7 до Windows 10 закончена. Вам остается только проверить в свойствах компьютера Вашу операционную систему. А так же после ввода ключа в начале обновления у Вас будет уже активированная Windows 10.
Лицензионный ключ активации Windows 10 от

Are you still using Windows 7 and looking to make the most of your computing experience? Look no further! In this guide, we’ll explore the process to upgrade from Windows 7 to Windows 10.
Upgrading to Windows 10 not only ensures that you stay up to date with the latest advanced features but also guarantees continued support and security updates from Microsoft. Whether you’re a casual user, a business professional, or a creative enthusiast, Windows 10 provides a solid foundation for all your computing needs.
In this guide, we’ll take you through the step-by-step process of upgrading your operating system. We’ll cover everything from system requirements and data backup to the actual installation procedure, ensuring a smooth transition to Windows 10. Let’s get started!
We have divided the entire upgrading process into several simple steps, so you would upgrade your OS easily. Here is a quick look at what we did:
- Pre-requisites
- Download Windows 10 ISO
- Create a bootable media of Windows 10
- Upgrade Windows to Windows 10
Step 1: Pre-requisites
Before proceeding with the upgrade from Windows 7 to Windows 10, there are a few prerequisites that you should consider. These prerequisites will help ensure a smooth and successful transition to the new operating system. Here are some key points to keep in mind:
1. Check system requirements: Verify that your computer meets the minimum system requirements for Windows 10. These typically include a compatible processor, sufficient RAM, available storage space, and a compatible graphics card. You can find the detailed system requirements on the Microsoft website or refer to the Windows 10 documentation. Check Windows System Requirements here.
2. Backup your data: It is crucial to back up all your important files, documents, and settings before initiating the upgrade process. This will protect your data in case of any unforeseen issues during the upgrade. Consider using an external hard drive, cloud storage, or any other reliable backup method to ensure the safety of your files.
3. Update software and drivers: Prior to the upgrade, make sure to update your current software applications and device drivers to their latest versions. This will help ensure compatibility with Windows 10 and avoid any potential conflicts or issues.
4. Make a note of product keys: If you have product keys for any licensed software installed on your Windows 7 system, it’s advisable to keep a record of them. This will make it easier to reactivate your software applications after the upgrade.
By addressing these prerequisites, you will be better prepared for a successful upgrade of your OS. Take the necessary steps to ensure a smooth transition and enjoy the benefits of the latest and most advanced operating system from Microsoft.
Step 2: Download Windows 10 ISO
After completing the step above, you are going to download Windows 10 ISO file. For this, you can download Windows 10 ISO file from the Official Microsoft site or use this link. As this link will take you to a direct link to download a Windows ISO file from Dumbfile.
No matter which one you choose, make sure the setup file is not corrupt or infected. While downloading also make sure to select the correct edition and language that you want to install. Then you will download the ISO and continue to the next step.
Step 3: Create a bootable media of Windows 10
Now you are going to create a bootable media of Windows 10 using Rufus:
1. Download Rufus: Download the latest version of Rufus compatible with your operating system.
2. Connect your USB drive: Plug in a USB flash drive with sufficient storage capacity (at least 8GB) into your computer. Please note that all data on the USB drive will be erased during the process, so ensure you have backed up any important files.
3. Run Rufus: Open Rufus, which you downloaded in step 1. You may be prompted for administrative privileges.
4. Select the USB drive: In the Rufus interface, under the Device section, choose your USB drive from the dropdown menu. Make sure you have selected the correct drive as all data on it will be deleted.
5. Select the Windows 10 ISO: In the Boot selection section, click on the Select button and navigate to the location where you saved the Windows 10 ISO file. Select the ISO file and click Open to load it in Rufus.
6. Choose partition scheme and target system type: Under the Partition scheme section, select MBR if your computer uses BIOS, or GPT if it uses UEFI. If you’re not sure, you can check your computer’s documentation or consult the manufacturer’s website. For the File system, choose NTFS for better compatibility.
7. Configure Rufus settings: You can leave most settings in Rufus at their default values. However, if you want to assign a custom volume label or enable any additional options, you can make those changes.
8. Create the bootable media: Once you have verified all the settings, click the Start button in Rufus. You’ll see a warning that all data on the USB drive will be destroyed. Confirm by clicking OK to begin the process.
Rufus will format the USB drive and copy the Windows 10 installation files onto it. The process may take some time, so be patient.
Step 4: Upgrade Windows to Windows 10
Reaching here means, you have completed half of the work. From now on, you are going to do the easy work.
NOTE: Before proceeding with the upgrade, it is crucial to back up all your important files, documents, and settings. This ensures that your data is safe in case of any unforeseen issues during the upgrade process.
Insert the bootable USB drive: Plug the bootable USB drive into a USB port on your computer.
Enter the boot menu: During the restart process, your computer’s manufacturer may display a message indicating which key to press to enter the boot menu. Common keys include F12, F10, or Esc. Press the designated key to access the boot menu.
Install Windows 10: Your computer should now boot from the USB drive, and the Windows 10 installation process will begin. Follow the on-screen instructions to complete the installation.
Install Windows 10 on your PC
Your computer will now boot from the USB drive and load the Windows 10 installation environment. Follow the on-screen instructions to begin the installation process.
During the installation process, you will be prompted to choose various options such as language preferences, license agreement, and installation type. Make the appropriate selections and proceed.

In the installation process, you will have the option to either upgrade your current version of Windows or perform a clean installation. Choose the Upgrade option to keep your files, settings, and applications intact. If you prefer a clean installation, select the corresponding option and follow the instructions.
Windows 10 will guide you through the remaining installation steps. These may include configuring regional settings, creating a user account, and customizing additional settings. Provide the required information and follow the prompts until the installation is complete.
Once the installation is finished, Windows 10 will finalize the setup process. You may be prompted to sign in with your Microsoft account, set up privacy preferences, and configure additional settings.
Now you have fully running Windows 10 on your PC.
Bonus: Additional Tasks
After the upgrade, restore your backed-up data to the appropriate locations on your new Windows 10 system. Reinstall any applications that were not carried over during the upgrade process.
By following these steps, you have upgraded your Windows 7 to Windows 10 using a bootable USB drive.
QnA
Can I upgrade from Windows 7 to Windows 10 for free?
No, the free upgrade offer from Windows 7 & Windows 8.1 users to Windows 10 ended on July 29, 2016. You’ll need to purchase a Windows 10 license to upgrade from Windows 7.
What are the system requirements for upgrading to Windows 10?
The minimum system requirements for upgrading to Windows 10 include a 1 GHz or faster processor, 1 GB of RAM for 32-bit or 2 GB for 64-bit, 16 GB of available hard disk space for 32-bit or 20 GB for 64-bit, a DirectX 9 graphics card, and a display with a resolution of at least 800×600 pixels.
How long does it take to upgrade from Windows 7 to Windows 10?
The time it takes to upgrade from Windows 7 to Windows 10 varies depending on factors such as the speed of your computer, the amount of data being transferred, and the complexity of your system. On average, the upgrade process can take anywhere from 1 to 3 hours.
Upgrading from Windows 7 to Windows 10 is a crucial step to ensure the security and functionality of your computer system. With the end of support for Windows 7, continuing to use it leaves your device vulnerable to cyber threats and limits your access to the latest features. But fear not, because upgrading to Windows 10 is a relatively simple process that can be done in a few steps.
To upgrade from Windows 7 to Windows 10, you can take advantage of the free upgrade offer provided by Microsoft. This offer allows eligible Windows 7 users to upgrade to Windows 10 without any additional cost. By upgrading, you’ll have access to improved performance, enhanced security features, and a more user-friendly interface. It’s a win-win situation that ensures your computer stays up to date with the latest advancements in technology.
To upgrade from Windows 7 to Windows 10, follow these steps:
- Backup your important files and data.
- Make sure your PC meets the system requirements for Windows 10. Check processor, RAM, and storage requirements.
- Download the Windows 10 Media Creation Tool from the official Microsoft website.
- Run the tool, select «Upgrade this PC now,» and follow the on-screen instructions.
- Once the upgrade is complete, go to Settings > Update & Security and check for updates.
- Update device drivers and reinstall applications if needed.
- Finally, customize your settings and start enjoying the enhanced features of Windows 10.

Understanding the Process of Upgrading from Windows 7 to Windows 10
Upgrading your operating system is an important step to ensure that your computer is running on the latest software with enhanced features and security updates. If you are currently using Windows 7 and considering upgrading to Windows 10, you have come to the right place. This article will guide you through the process of upgrading from Windows 7 to Windows 10 and provide you with the essential information you need to know.
1. System Requirements for Upgrading
Before you embark on the journey of upgrading from Windows 7 to Windows 10, it is crucial to ensure that your computer meets the system requirements for a seamless transition. Here are the minimum requirements:
- Processor: 1 GHz or faster processor or SoC
- RAM: 1 GB for 32-bit or 2 GB for 64-bit
- Hard disk space: 16 GB for 32-bit OS or 20 GB for 64-bit OS
- Graphics card: DirectX 9 or later with WDDM 1.0 driver
- Display: 800×600 resolution
Ensuring that your computer meets these requirements will guarantee a smooth and successful transition to Windows 10 without any compatibility issues.
2. Backing Up Your Data
Prior to upgrading to Windows 10, it is highly recommended to back up all your important data. While the upgrade process is designed to preserve your files, it is always better to be safe than sorry. Creating a backup will protect your data in case of any unforeseen circumstances during the upgrade process.
You can back up your data by using an external hard drive or cloud storage services. Copying your files, documents, photos, and any other valuable data to a separate location will ensure that nothing gets lost during the transition. Additionally, it is advisable to create a system image backup, which will allow you to revert back to Windows 7 if needed.
Once you have completed the backup process, you can proceed with the upgrade to Windows 10 with confidence, knowing that your data is safe and secure.
3. Upgrading to Windows 10 through Windows Update
One of the easiest methods to upgrade from Windows 7 to Windows 10 is through the built-in Windows Update feature. Follow these steps to initiate the upgrade process:
- Open the Start menu and go to Settings.
- Select Update & Security.
- Click on Windows Update.
- Click on Check for Updates.
- Once the available updates are displayed, look for the option to upgrade to Windows 10.
- Click on Download and Install.
- Follow the on-screen prompts to complete the installation.
During this process, your computer will download the necessary files and install Windows 10. It is important to note that this method may not be available for all Windows 7 users, especially those who are using older versions or specific editions of Windows 7. In such cases, alternative methods can be used, which will be discussed later in this article.
3.1 Benefits of Upgrading through Windows Update
The advantage of upgrading through Windows Update is that it is a straightforward and hassle-free process. It allows your computer to automatically detect the compatibility of Windows 10 with your system, and you can simply follow the on-screen instructions to complete the upgrade.
Furthermore, using this method ensures that your computer receives the necessary driver updates and patches required for Windows 10 compatibility. It guarantees a smooth transition without the need to manually search and install drivers.
However, if you encounter any issues or if the Windows Update method is not available for your specific system, there are alternative methods that can be utilized, as discussed below.
4. Using the Media Creation Tool
If the Windows Update method is not applicable for your computer, you can still upgrade to Windows 10 by using the Media Creation Tool provided by Microsoft. This tool allows you to create a bootable USB drive or download an ISO file, which can be used to install Windows 10.
Here is how you can use the Media Creation Tool:
- Download the Media Creation Tool from the official Microsoft website.
- Run the tool and accept the license terms.
- Select the option to create installation media (USB flash drive, DVD, or ISO file) for another PC.
- Choose the language, edition, and architecture (32-bit or 64-bit) of Windows 10 that matches your current Windows 7 installation.
- Select the type of media you want to create (USB flash drive or ISO file).
- Follow the instructions to complete the creation of the installation media.
- Once the media is created, insert the USB flash drive or use the ISO file to initiate the installation process.
- Follow the on-screen instructions to upgrade to Windows 10.
This method provides an alternative route to upgrade to Windows 10 for systems that are not eligible for the Windows Update method. It allows you to manually install Windows 10 while preserving your files and applications. However, it is still recommended to create a backup of your data before proceeding with the upgrade.
5. Clean Installation of Windows 10
If you prefer to have a fresh start with your computer by performing a clean installation of Windows 10, you can choose this option. However, it is important to note that a clean installation will erase all your files and applications, so it is crucial to back up your data beforehand.
To perform a clean installation of Windows 10, you will need a bootable USB drive or DVD with the Windows 10 installation media. Here are the steps:
- Insert the bootable USB drive or DVD into your computer.
- Restart your computer and enter the BIOS settings by pressing the appropriate key (usually F2, F12, or Del) during startup.
- Change the boot order to prioritize the USB drive or DVD.
- Save the changes and exit the BIOS settings.
- Follow the on-screen instructions to install Windows 10, selecting the custom installation option.
- During the installation process, you will have the option to format the hard drive and perform a clean installation.
- Once the installation is complete, follow the setup wizard to configure your settings and personalize your Windows 10 experience.
A clean installation of Windows 10 provides a fresh and optimized operating system, free from any remnants of the previous Windows 7 installation. It is recommended for users who want to start afresh or are experiencing significant performance issues with their current Windows 7 installation.
Exploring the Benefits of Upgrading from Windows 7 to Windows 10
In addition to the technical process of upgrading, it is important to understand the benefits of transitioning from Windows 7 to Windows 10. Here are some key advantages:
1. Enhanced Security
Windows 10 offers improved security features compared to Windows 7. With regular security updates and built-in antivirus protection, Windows 10 provides a more secure environment to safeguard your data from malicious threats, viruses, and malware.
Additionally, Windows 10 supports the latest security technologies, such as biometric authentication through Windows Hello, ensuring that only authorized users can access your device.
Upgrading to Windows 10 will help protect your computer and personal information, contributing to a safer computing experience.
2. Improved Performance
Windows 10 is designed to deliver better performance and efficiency compared to previous versions. It utilizes system resources more effectively, resulting in faster startup times, improved battery life for laptops, and optimized overall performance.
The streamlined user interface and advanced features of Windows 10 contribute to a smoother and more responsive user experience, enhancing productivity and reducing system delays.
By upgrading to Windows 10, you can take advantage of these performance enhancements and enjoy a more snappy and efficient computing experience.
3. Access to New Features and Apps
Windows 10 introduces a range of new features and apps that enhance productivity and entertainment. Features such as virtual desktops, Cortana digital assistant, Action Center, and Microsoft Edge web browser provide a more integrated and intuitive user experience.
Add to this the availability of the Microsoft Store, which provides a wide range of apps and games, and you have access to a plethora of new possibilities to explore and enjoy.
By upgrading to Windows 10, you can harness the power of these new features and apps, expanding your computing horizons and staying up to date with the latest advancements.
4. Long-Term Support and Updates
Windows 7 reached its end of life on January 14, 2020, which means it will no longer receive security updates, bug fixes, or technical support from Microsoft. By upgrading to Windows 10, you ensure that your computer remains supported and receives regular updates to address any vulnerabilities or issues that may arise.
Microsoft follows a consistent update schedule for Windows 10, providing new features and improvements through major updates twice a year. This ensures that your computer stays up to date with the latest advancements and is equipped to handle the evolving digital landscape.
By embracing Windows 10, you can enjoy the peace of mind that comes with ongoing support and updates from Microsoft, keeping your computer secure and up to date.
Upgrading from Windows 7 to Windows 10 is a significant step to ensure that your computer remains secure, performs optimally, and stays up to date with the latest technology. Following the outlined upgrade processes and understanding the benefits of transitioning to Windows 10 will empower you to make a well-informed decision and enjoy an enhanced computing experience.

Upgrading from Windows 7 to Windows 10
If you are currently using Windows 7 and want to upgrade to Windows 10, there are several methods you can use. One option is to use the Windows 10 Media Creation Tool. This tool allows you to create installation media (such as a USB drive or DVD) that you can use to upgrade your Windows 7 system. Simply download the tool from the Microsoft website, run it, and follow the on-screen instructions. Another option is to use the Windows Update feature. If your Windows 7 system is set to receive automatic updates, you may be prompted to upgrade to Windows 10 through Windows Update. If not, you can manually check for updates and see if the option to upgrade to Windows 10 is available.
Before upgrading, it is important to back up your important files and documents. Additionally, ensure that your system meets the minimum requirements for Windows 10, such as having sufficient storage space and compatible hardware. Lastly, it is recommended to uninstall any outdated or incompatible software before starting the upgrade process to avoid any compatibility issues.
### How Can I Upgrade Windows 7 to Windows 10 — Key Takeaways
- Backup your important files and data before upgrading to Windows 10.
- Check if your computer meets the system requirements for Windows 10.
- Download and run the Windows 10 Update Assistant to upgrade your operating system.
- Consider doing a clean installation of Windows 10 for a smoother upgrade process.
- Make sure to reinstall your software and drivers after upgrading to Windows 10.
Frequently Asked Questions
Upgrading your operating system is essential to ensure your computer stays secure and up to date. If you’re currently using Windows 7 and looking to upgrade to Windows 10, here are some common questions and answers to guide you through the process.
1. Can I upgrade directly from Windows 7 to Windows 10?
Yes, you can upgrade directly from Windows 7 to Windows 10. Microsoft offers a free upgrade path for Windows 7 users, allowing you to seamlessly transition to the latest version. However, it’s important to note that the free upgrade offer ended on July 29, 2016. If you missed the deadline, you’ll need to purchase a new Windows 10 license.
Before upgrading, make sure to back up your important files and create a system restore point. Additionally, check if your current hardware meets the minimum system requirements for Windows 10 to ensure a smooth upgrade process.
2. How can I upgrade from Windows 7 to Windows 10?
To upgrade from Windows 7 to Windows 10, follow these steps:
- Go to the Microsoft website and download the Windows 10 Media Creation Tool.
- Run the tool and select the «Upgrade this PC now» option.
- Follow the on-screen instructions and choose the «Keep personal files and apps» option.
- Wait for the upgrade process to complete, and your computer will be running Windows 10.
During the upgrade process, it’s important to stay connected to the internet and keep your computer plugged in to avoid any interruptions. The upgrade may take some time, so be patient and let the process finish without interruption.
3. What should I do if I encounter any issues during the upgrade?
If you encounter any issues during the upgrade from Windows 7 to Windows 10, here are a few troubleshooting steps you can try:
- Restart your computer and try the upgrade process again.
- Disable any third-party antivirus software temporarily, as it may interfere with the upgrade process.
- Ensure that you have enough free disk space for the upgrade.
- Update the drivers for your hardware devices, as outdated drivers can sometimes cause compatibility issues.
- If all else fails, you can perform a clean installation of Windows 10 by creating a bootable USB drive or DVD.
If you’re still unable to resolve the issue, it’s recommended to seek assistance from Microsoft support or consult a professional IT technician.
4. Will my files and apps be preserved during the upgrade?
When upgrading from Windows 7 to Windows 10, you have the option to keep your personal files and apps. This means that documents, photos, and other files stored in your user profile folders will be preserved. However, it’s always recommended to back up your important files before performing any major system upgrade.
While the majority of apps will be preserved during the upgrade, certain incompatible or outdated apps may not work correctly or need to be reinstalled. It’s advisable to check the compatibility of your apps with Windows 10 before upgrading.
5. How can I check if my computer meets the minimum requirements for Windows 10?
To check if your computer meets the minimum system requirements for Windows 10, follow these steps:
- Go to the Microsoft website and search for «Windows 10 system requirements».
- Click on the official Windows 10 system requirements page.
- Review the minimum hardware requirements, including processor, RAM, and storage.
If your computer doesn’t meet the minimum requirements, you may need to consider upgrading your hardware before proceeding with the Windows 10 upgrade. It’s always best to have a compatible and optimized system for the best performance.
Upgrading from Windows 7 to Windows 10 is a straightforward process that can improve your computer’s performance and security. To upgrade, you can either purchase a Windows 10 license or use the free Windows 10 upgrade offer. If you choose the latter, make sure your Windows 7 is genuine and activated.
To start the upgrade, download the Windows 10 Media Creation Tool from Microsoft’s website. Run the tool and select «Upgrade this PC now.» Follow the on-screen instructions and let the tool do its work. Your files and applications will be preserved, but it’s always a good idea to back up your important data before upgrading.
Remember to check for compatibility issues with your current hardware and software, as some older devices or programs may not be compatible with Windows 10. After the upgrade, you can enjoy the benefits of Windows 10, such as improved speed, enhanced security features, and access to the latest updates and applications.