
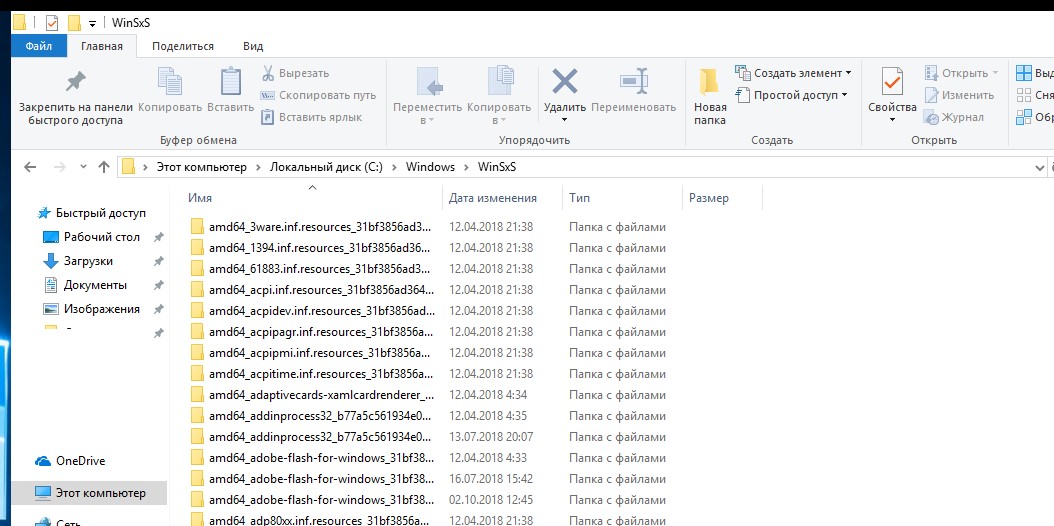
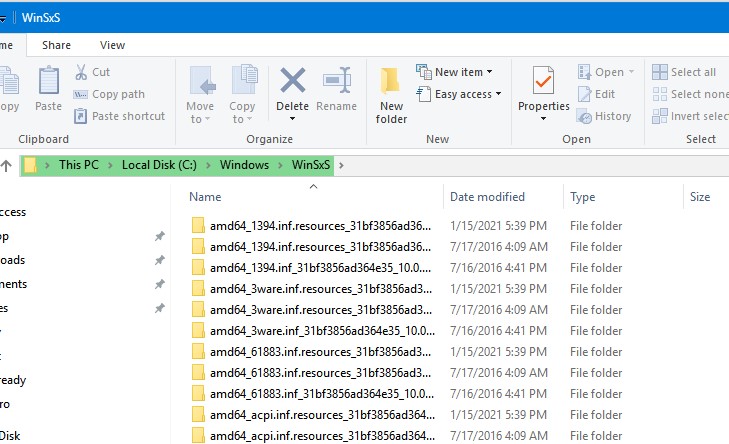
В этой статье мы поговорим о каталоге WinSxS в Windows, причинах его постоянного роста и способах очистки. Каталог C:\windows\WinSxS является хранилищем компонентов Windows. В этом каталоге хранятся dll библиотеки, бинарные и xml файлы, необходимые для установки и работы различных ролей и компонентов Windows. Каждый раз когда вы устанавливаете обновления Windows (это происходит ежемесячно), новая версия обновляемого компонента устанавливается в систему, а старая сохраняется в хранилище компонентов WinSxS (это необходимо для обеспечения совместимости и возможности “отката“ к старым версиям компонентов при удалении проблемного обновления).
Со временем размер каталога WinSxS постоянно увеличивается. Причем его размер ничем не ограничен (хотя на практике размер папки WinSxS в Windows 10 редко превышает 15-20 Гб.)
В этой статье мы рассмотрим наиболее безвредные способы очистки папки WinSxS в Windows 10 и Windows Server.
- Оптимизация хранилища компонентов и удаление старых версий компонентов, оставшихся после установки обновлений Windows;
- Технология Features on Demand (функции по требованию), позволяющая удалить неиспользуемые компоненты Windows с диска;
- Сжатие файлов в папке WinSxS – способ уменьшить размер каталога WinSxS за счет включения NTFS компрессии.
У многих пользователей возникает естественный вопрос можно ли вручную удалить файлы из папки WinSxS. Ответ на этот вопрос – категоричное НЕТ! Такими действиями с большой долей вероятности вы сломаете свою Windows. И хотя отдельные попытки удаления конкретных файлов из папки WinSxS могут быть удачными, рекомендовать этот способ нельзя.
Содержание:
- Как узнать реальный размер папки WinSxS в Windows 10?
- Очистка хранилища компонентов WinSxS в Windows
- Удаление неиспользуемых компонентов Windows (Windows Server)
- Включаем NTFS сжатие на папке WinSxS в Windows
Как узнать реальный размер папки WinSxS в Windows 10?
Самый простой способ получить текущий размер каталога WinSxS в Windows, запустить проводник File Explorer и открыть свойства папки %windir%\WinSxS (или воспользоваться скриптом PowerShell). Но имейте в виду, что большинство файловых менеджеров (в том числе File Explorer) показывают несколько больший размер каталога WinSxS, чем он занимает на диске.
Дело в том, что в каталоге WinSxS есть большое количество hard links (жестких символических ссылок) на файлы в других системных каталогах. Файловые менеджеры при подсчете размера папки WinSxS учитывают объем файлов, на которые ссылаются жесткие ссылки, а это не корректно.
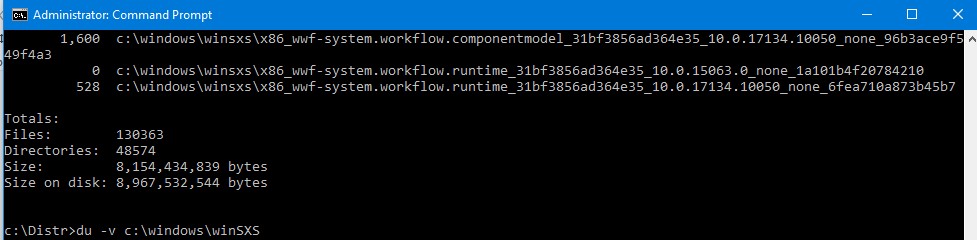
Чтобы реальный (без учета жестких ссылок) размер папки WinSxS, воспользуйтесь утилитой SysInternal du:
du -v c:\windows\winSXS
Но проще всего проанализировать размер хранилища компонентов в папке WinSxS с помощью команды DISM:
Dism.exe /Online /Cleanup-Image /AnalyzeComponentStore
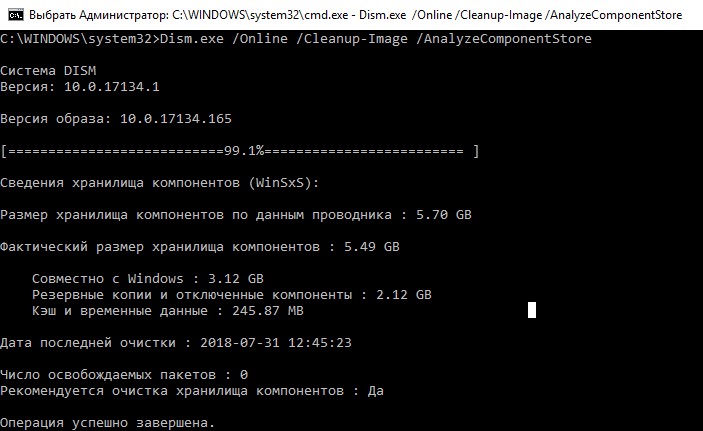
Разберемся, что возвращает данная команда:
Размер хранилища компонентов по данным проводника : 5.70 GB (это размер хранилища с учета жестких ссылок, который отображается в проводнике)
Фактический размер хранилища компонентов : 5.49 GB (реальный размер хранилища компонентов за исключением жестких ссылок)
Совместно с Windows : 3.12 GB (обязательные файлы системы, не могут быть удалены)
Резервные копии и отключенные компоненты : 2.12 GB (устаревшие файлы компонентов, которые нужны на случай проблем с установленными обновлениями)
Кэш и временные данные : 245.87 MB (файлы используются для ускорения работы системы обслуживания)
Дата последней очистки : 2018-07-31 12:45:23
Число освобождаемых пакетов : 10 (файлы, которые обновились после установки обновлений Windows, они будут удалены при очистке хранилища)
Рекомендуется очистка хранилища компонентов : Да
Как вы видите, в данном случае можно уменьшить размер каталога WinSxS на 2.1 Гб + 250 Мб.
Очистка хранилища компонентов WinSxS в Windows
Самый быстрый и простой способ освободить место в хранилище компонентов Windows (т.е. очистить папку WinSxS) – оптимизация хранилища командой:
Dism.exe /Online /Cleanup-Image /StartComponentCleanup
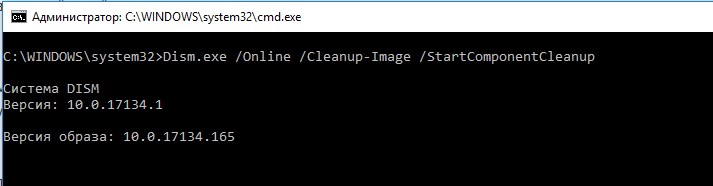
Опция Dism /StartComponentCleanup поддерживается во всех версиях Windows, начиная с Windows 8/Windows Server.
После окончания очистки проверьте текущий размер хранилища компонентов:
Dism.exe /Online /Cleanup-Image /AnalyzeComponentStore
В моем примере это помогло уменьшить размер папки WinSxS на 2,5 Гб.
С помощью еще одного параметра /ResetBase вы можете удалить все предыдущие версии компонентов, оставшиеся после установки обновлений Windows. После этого вы не сможете удалить установленные обновления или Service Pack, а в панели обновлений
appwiz.cpl
у обновлений пропадет кнопка «Удалить»).
Чтобы очистить старые версии компонентов, выполните:
Dism.exe /Online /Cleanup-Image /StartComponentCleanup /ResetBase
В Windows 7 и Windows Server 2008 R2 для очистки старых версий компонентов, оставшихся после установки сервис пака, использовался еще один параметр DISM:
dism /online /Cleanup-Image /spsuperseded
Также вы можете удалить устаревшие обновления с помощью мастера очистки диска. Выполните команду cleanmgr c правами администратора.
В окне утилиты выберите диск и в следующем окне нажмите кнопку «Очистить системны файлы».
Далее выберите опцию “Файлы журнала обновления Windows» и нажмите ОK. Утилита очистки диска покажет сколько места вы можете освободить, удалив файлы журнала старых обновлений Windows. В моем примере это 427 Мб.
После окончания очистки хранилища с помощью DISM проверьте сколько освободилось места на диске.
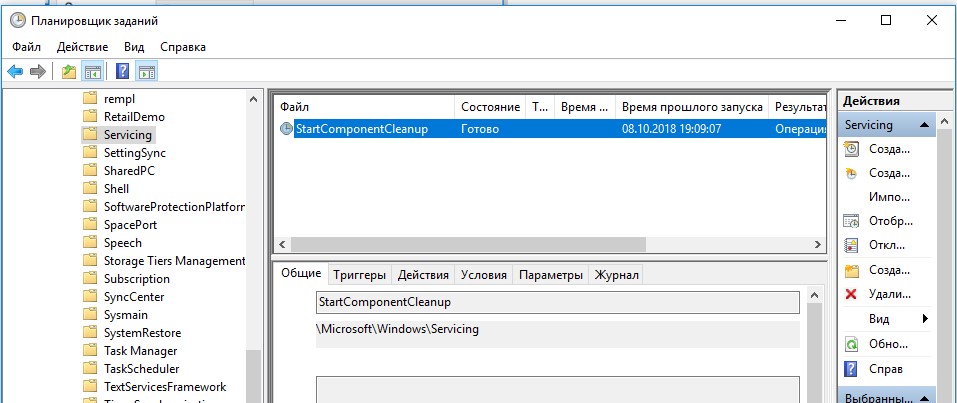
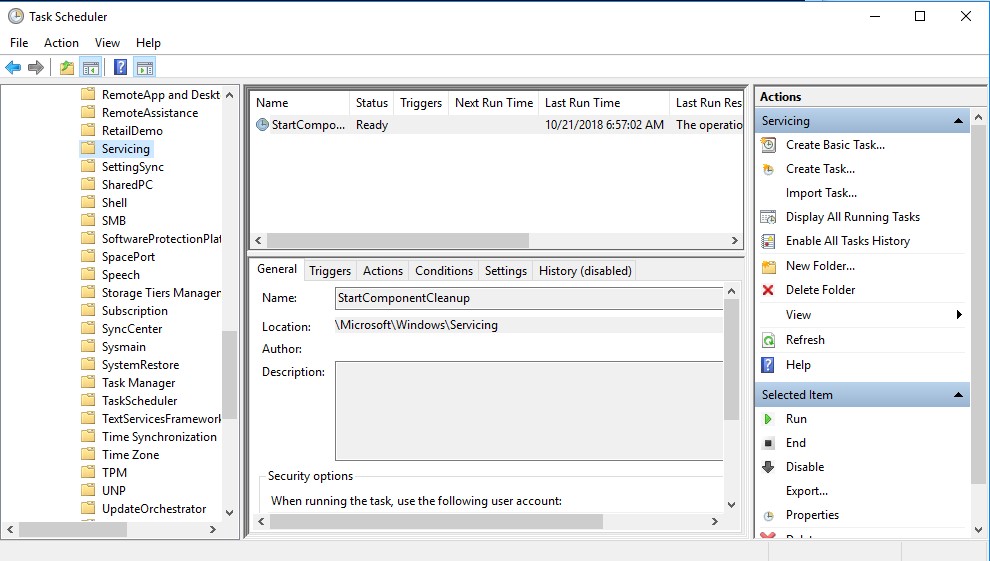
В планировщике задания Windows 10 и Windows Server 2016 есть специальное задание автоматического обслуживания, которое регулярно выполняет оптимизацию и очистку каталога WinSxS (выполняется действия, аналогичные команде dism с ключом StartComponentCleanup). Это задание StartComponentCleanup находится в разделе \Microsoft\Windows\Servicing. Данное задание запускается в фоновом режиме и автоматически удаляет версии компонентов старше 30 дней, которое были заменены более новыми версиями.
Можно запустить это задание вручную так:
schtasks.exe /Run /TN "\Microsoft\Windows\Servicing\StartComponentCleanup"
Удаление неиспользуемых компонентов Windows (Windows Server)
В статье Безопасная очистка папки WinSxS в Windows Server 2016/2012 мы рассмотрели функцию Features on Demand (функции по требованию), предоставляющую возможность удаления с диска бинарных файлов неиспользуемых ролей и компонентов из каталога WinSxS. Для этого в Windows Server используется командлет PoweShell Uninstall-WindowsFeature.
В Windows 10 командлет Uninstall-WindowsFeature отсуствует, и для удаления компонентов Windows из образа нужно использовать DISM.
DISM в отличии от Uninstall-WindowsFeature не удаляет зависимые компоненты.
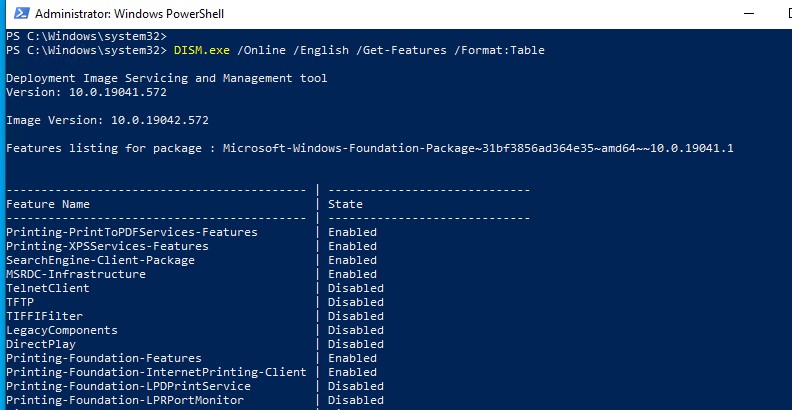
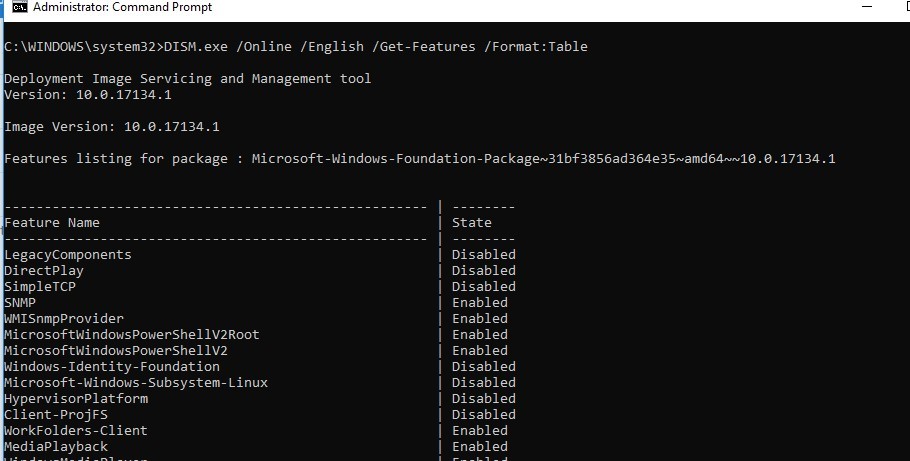
Полный список доступных функций в образе Windows 10 можно получить с помощью команды:
DISM.exe /Online /English /Get-Features /Format:Table
Чтобы удалить, например компонент TelnetClient с диска (из каталога WinSxS), выполните команду:
DISM.exe /Online /Disable-Feature /Featurename:TelnetClient /Remove

Если еще раз вывести список всех доступных функций по требованию в Windows, вы увидите, что статус компонента изменится на Disabled with Payload Removed.
Таким образом в Windows можно существенно уменьшить размер папки WinSxS, удалив с диска неиспользуемые компоненты. Единственный нюанс, это вариант очистки каталога WinSxS подойдет для достаточной продвинутых пользователей, которые разбираются в компонентах Windows 10 и их назначении.
Включаем NTFS сжатие на папке WinSxS в Windows
Еще один способ уменьшить размера каталога WinSxS в Windows 10 – сжать содержимое каталога на уровне файловой системы NTFS.
- Откройте командную строку с правами администратора;
- Остановите и отключите службы Windows Installer и Windows Module Installer:
sc stop msiserver

sc stop TrustedInstaller

sc config msiserver start= disabled

sc config TrustedInstaller start= disabled
- Создайте резервную копию списков доступа (ACL) назначенных на файлы и папки в каталоге WinSxS с помощью утилиты icacls. Резервная копия ACL представляет собой обычной текстовый файл, в котором указаны все файлы и каталоги и назначенные на них NTFS разрешения (в дальнейшем этот файл понадобиться для восстановления оригинальных ACL):
icacls "%WINDIR%\WinSxS" /save "%WINDIR%\WinSxS_NTFS.acl" /t

- Назначьте себя владельцем папки WinSxS и всех вложенных каталогов:
takeown /f "%WINDIR%\WinSxS" /r
- Предоставьте своей учетной записи полные права на каталог WinSxS:
icacls "%WINDIR%\WinSxS" /grant "%USERDOMAIN%\%USERNAME%":(F) /t
- Теперь можно выполнить сжатие файлов в каталоге WinSxS с помощью команды compact. Т.к. часть файлов может использоваться Windows, нужно указать параметр /i. Иначе сжатие будет остановлено на первом же занятом файле (в Windows 10 можно использовать более прогрессивное LZX сжатие):
compact /s:"%WINDIR%\WinSxS" /c /a /i *

- Теперь нужно восстановить TrustedInstaller как владельца каталога WinSxS:
icacls "%WINDIR%\WinSxS" /setowner "NT SERVICE\TrustedInstaller" /t
- И вернуть оригинальные NTFS разрешения на каталог WinSxS из резервной копии ACL:
icacls "%WINDIR%" /restore "%WINDIR%\WinSxS_NTFS.acl" - Измените типа тип запуска служб Windows Installer и Windows Module Installer:
sc config msiserver start= demand

sc config TrustedInstaller start= demand


Проверьте текущий размер каталога WinSxS.
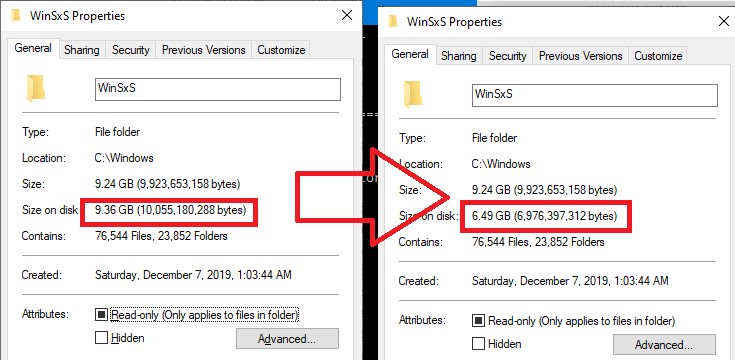
Как вы видите, в нашем примере размер папки WinSxS за счет сжатия уменьшился с 9,36 Гб до 6,5 Гб (примерно на треть). Неплохо, особо для небольшого по размеру SSD-диска.
Указанные команды можно выполнять по отдельности (так проще контролировать успешность выполнения каждой из них), либо можно объединить все операции в один файл скрипт. Вы можете скачать готовый bat файл для сжатия WinSxS здесь compress_winsxs.bat
Данный скрипт нужно запускать периодически, т.к. в каталоге WinSxS будут появляться новые «несжатые» файлы после установки новых обновлений Windows и программ.
На что может повлиять сжатие каталога WinSxS? Windows работает со сжатыми файлами в прозрачном режиме, однако при обработке таких файлов, ей может понадобиться дополнительное время на их декомпрессию/компрессию. Это может вызвать небольшое замедление при установке компонентов Windows или обновлений. Однако для современных процессоров (CPU) операция компрессии/декомпрессии файлов выполняется практически мгновенно, так что реального уменьшения скорости пользователь даже не заметит.
Most of you may have noticed the WinSxS folder in Windows 11/10/8/7 and been surprised at its size. For those who have not, the folder is situated at C:\Windows\WinSxS and has a whopping size! Mine is almost 5 GB and has around 6000 folders & 25000 files and occupies almost 40% of the Windows folder!
While the size of this WinSxS folder, in XP, is around 25-50 MB; its large size in Windows 11. Windows 10, Windows 8, Windows 7, and Windows Vista, is intriguing to many! Check the image below.
So what is the mystery of this Winsxs folder in Windows 11/10? Let us find so, in this post.The WinSxS folder stores multiple copies of dll, exe, and other system files to let multiple applications run in Windows without any compatibility problems. If you browse inside, you will see what looks like a lot of duplicate files, each with the same name. These are actually different versions of the same files being stored, as different programs may require different versions.
Winsxs, which stands for ‘Windows Side By Side’, is Windows native assembly cache. Libraries that are being by multiple applications are stored there. This feature was first introduced, in Windows ME and was considered as Microsoft’s solution to the so-called ‘dll hell’ issues that plagued Windows 9x.
The ‘backup’ folder is the largest folder in WinSxS, as the image below shows.

Again, as can be seen in the image below, in the WinSxS folder, the ‘Other’ File types take the bulk of the space. These primarily consist of .imd, .ngr, .csd, .dll, .dll.mui, .exe and such other file types.

In Windows now, there isn’t a ‘dllcache’ folder and nor can you find the ‘i386’ folder, where the system caches (like in XP) all it’s source modules. It is this WinSxS folder that stores the shared components of side-by-side applications. These files can be multiple versions of the same assembly or application. Every side-by-side assembly has a unique identity. One of the attributes of the assembly identity is its version.
“Side-by-side assemblies are used by the operating system as fundamental units of naming, binding, versioning, deployment, and configuration. The Winsxs folder includes all manifests, optional components, and 3rd party Win32 files”, says Microsoft.
But, why so many subfolders and why keep so many different versions of the same dll, exe, or other files?
As mentioned, Windows stores the old dlls and library components in the WinSxS folder. If a newer version of this file is part of the OS, but a particular application requires an older version for running, then the older version from the WinSxS folder will be used, leaving the newer version in its present place for other applications that may require it.
Is it safe to delete WinSxS folder?
You cannot delete this directory or move it elsewhere. Nor is it advisable to delete anything here, as such a step could probably make your applications unworkable or even break your system! If you have many applications installed, you can expect to have a jumbo-sized WinSxS folder. This WinSxs folder cannot reside on any other volume than the system volume. This is because of the NTFS hard links. If you try to move the folder, it may result in Windows updates, service packs, features, etc., not installing correctly.
If you delete components from the WinSxS folder like the manifests or the assemblies, etc., you could be in trouble. Each system would react differently. What may work for one could break another! For instance, if you install a program that requires that particular assembly, which you may have deleted, then that program will just not run! Compressing the folder is also a no-no, as it could cause problems during WindowsUpdates or while installing a Hotfix.
The safest way to clean it is by simply uninstalling applications that you don’t require. However, this, too, is not fool-proof, as many applications still leave behind their files here, since they may be shared between other applications. So the probability of dud unused dll‘s being left behind is quite high.
We would not advise the use of WinSxS cleanup tools like WinSxSLite as you could end up breaking your Windows.
If you are into trying out new software or installing and uninstalling frequently, you may notice that your Winsxs size is indeed large. Windows stores multiple copies of these dll files to allow multiple applications without compatibility problems.
Why does WinSxS get so big?
The WinSxS folder grows large because it stores multiple versions of Windows system files and components, which are necessary for updates and software compatibility. It contains hard links, which make it appear larger than it is. Deleting files from WinSxS can cause issues and might increase disk space usage due to dependency errors.
WinSxS Folder Cleanup in Windows 11/10
Windows introduced a new command-line option for WinSxS folder cleanup: DISM.exe, /AnalyzeComponentStore. Running this command, will analyze the WinSxS folder and tell you whether a Component Store Cleanup is recommended or not. It is present in Windows 11/10, as well.
- In Windows 11/10/8.1/8, open Disk Cleanup Tool and use the Windows Update Cleanup option to clean the WinSxS.
- For Windows 7, Microsoft released an update that added the Windows Update Cleanup option to the Disk Cleanup tool.
- Windows Server users can now also clean up WinSxS in Windows Server with the new Update.
Here are some other options you may consider to free up disk space – some routine and some extreme:
- Run Disk Cleanup tool
- Uninstall unused applications
- Move Page file to another drive
- Disable hibernation
- Use the dedicated dump file option to capture memory dump files on another volume on the system.
- Disable system restore points
- Offload user profile and program file directories to another volume on the system.
Information fromTechNet Blogs: One of the largest changes between previous versions of Windows was a move from an INF described OS to componentization. All of the components in the operating system are found in the WinSxS folder – in fact, we call this location the component store. Each component has a unique name that includes the version, language, and processor architecture it was built for. The WinSxS folder is the only location where the component is found on the system; all other instances of the files you see are “projected” by hard linking from the component store.
Now that you know why the store can grow so large, your next question is probably why we don’t remove the older versions of the components. The short answer to that is reliability. The component store, along with other information on the system, allows us to determine at any given time the best version of a component to the project is. That means that if you uninstall a security update, we can install the next highest version on the system – we no longer have an “out of order uninstall” problem. It also means that if you decide to install an optional feature, we don’t just choose the RTM version of the component, we’ll look to see what the highest available version on the system is.
The only way to safely reduce the size of the WinSxS folder is to reduce the set of possible actions that the system can take – the easiest way to do that is to remove the packages that installed the components in the first place. This can be done by uninstalling superseded versions of packages that are on your system. Service Pack 1 contains a binary called VSP1CLN.EXE, a tool that will make the Service Pack package permanent (not removable) on your system, and remove the RTM versions of all superseded components. This can only be done because by making the Service Pack permanent; we can guarantee that we won’t ever need the RTM versions.
Information from E7 Blogs: “Modularizing” the operating system was an engineering goal in Windows. This was to solve several issues in legacy Windows related to installation, servicing, and reliability. The Windows SxS directory represents the “installation and servicing state” of all system components. But in reality, it doesn’t consume as much disk space as it appears when using the built-in tools (DIR and Explorer) to measure disk space used. The fact that we make it tricky for you to know how much space is consumed in a directory is a fair point! The WinSxS directory also enables offline servicing, and makes Windows and later “safe for imaging”.
There have been several blogs and even some “underground” tools that tell you it’s ok to delete the WinSxS directory, and it’s certainly true that after installation, you can remove it from the system, and it will appear that the system boots and runs fine. But as described above, this is a very bad practice, as you’re removing the ability to reliably service, all operating system components and the ability to update or configure optional components on your system. Windows only supports the WinSxS directory on the physical drive in its originally installed location.
Conclusion
Let the WinSxS folder be as it is!
Learn about the Sysnative folder, Panther folder and Catroot & Catroot2 folders here.
Additional reads:
In this article we will talk about the WinSxS folder in Windows, the reasons for its constant growth, and ways to clean up it. The C:\Windows\WinSxS directory is the repository of Windows components. This directory contains DLLs, binary, and XML files necessary for the installation and operation of various Windows roles or features. When installing the Windows updates (usually this happens every month), the new version of the updated component is installed on the system, while the old one is saved to the WinSxS folder (it is necessary to provide compatibility and make it possible to rollback to the previous versions of the components when you uninstall the Windows update).
The WinSxS directory has grown in size over time. Moreover, its size is not limited by anything (although in practice the size of the WinSxS folder in Windows 10 rarely exceeds 15-20 GB).
Contents:
- How to Check the Actual Size of WinSxS Folder on Windows 10?
- How to Clean Up the Component Store (WinSxS folder) on Windows?
- Remove Unused Roles and Features from Windows 10/Windows Server
- How to Enable NTFS Compress on WinSxS Folder on Windows 10?
In this article, we’ll go over the safest ways to clean up the WinSxS folder on Windows 10 and Windows Server 2016/2019:
- Optimize the component store and remove old versions of Windows component files left after installing Windows updates;
- Features on Demand – allows you to remove unused Windows components from the disk;
- Enable NTFS compression on the WinSxS folder – a way to reduce the size of the WinSxS directory using the built-in compression of the NTFS file system.
Many users often ask: if it’s possible to manually delete files from the WinSxS folder. The answer is categorically NO! These actions can damage your Windows image. Though some attempts to remove files from the WinSxS folder can be successful, this method cannot be recommended.
How to Check the Actual Size of WinSxS Folder on Windows 10?
The easiest way to get the current size of the WinSxS folder on Windows is to open the properties of the %windir%\WinSxS folder in File Explorer (or use a PowerShell script). But keep in mind that most file managers (including File Explorer) show a slightly larger WinSxS folder size than it takes on disk.
The fact is that the WinSxS directory contains a large number of hard links (symbolic links) to system files in other folders. File managers, when calculating the size of the WinSxS folder, take into account the size of files referenced by hard links, but this is not correct.
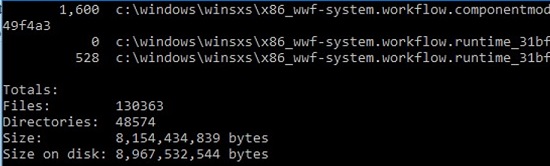
You can find out the real size of the WinSxS folder on disk using the du tool from Sysinternals:
du -v c:\windows\winSXS
You can also analyze the size of the component store (WinSxS folder) using the DISM command:
Dism.exe /Online /Cleanup-Image /AnalyzeComponentStore
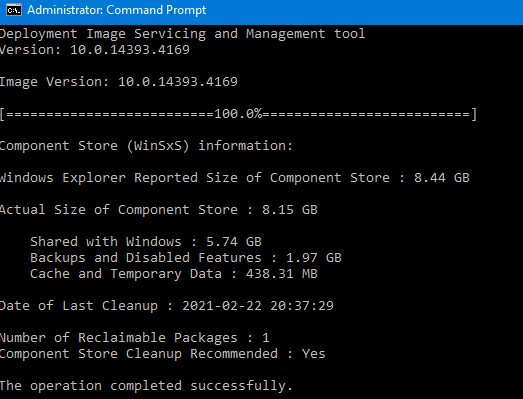
Deployment Image Servicing and Management tool
[==========================100.0%==========================]
Component Store (WinSxS) information:
Windows Explorer Reported Size of Component Store : 8.44 GB
Actual Size of Component Store : 8.15 GB
Shared with Windows : 5. 74GB
Backups and Disabled Features : 1.97 GB
Cache and Temporary Data : 438.31 MB
Date of Last Cleanup : 2021-02-22 20:37:29
Number of Reclaimable Packages : 1
Component Store Cleanup Recommended : Yes
The operation completed successfully.
As you can see, in this case, I can reduce the size of the WinSxS folder by (1,97 + 0,44) Gb.
How to Clean Up the Component Store (WinSxS folder) on Windows?
The fastest and easiest way to clear the Windows Component Store (the WinSxS folder) is to optimize the storage with the command:
Dism.exe /Online /Cleanup-Image /StartComponentCleanup
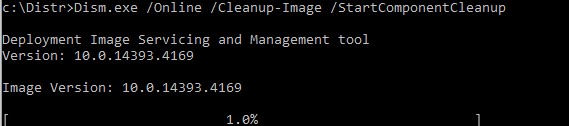
The StartComponentCleanup DISM option is supported on all Windows versions starting from Windows 8 and Windows Server 2012.
After cleaning is complete, check the current size of the component store:
Dism.exe /Online /Cleanup-Image /AnalyzeComponentStore
In my example, this reduced the size of the WinSxS folder by 2.4 GB.
The /StartComponentCleanup option has an additional /ResetBase option that allows you to remove all previous versions of components left after installing Windows updates. After that, you won’t be able to remove installed updates or Service Packs, and the Uninstall button will disappear from the Uninstall an Update Control Panel item). To clean up old versions of components, run:
Dism.exe /Online /Cleanup-Image /StartComponentCleanup /ResetBase
In Windows 7 and Windows Server 2008 R2, an additional DISM option was used to clean up old versions of components that were left over after installing service packs.
DISM /online /Cleanup-Image /spsuperseded
You can also remove old update files using the “Disk Cleanup” wizard:
- Run the
cleanmgrcommand as an administrator; - Select the disk and in the next window, click the “Clean up system files” button;
- Then select the “Windows update cleanup” option. The Disk Cleanup tool will show how much space you can free up by deleting old Windows update files. In my example, this is 324 MB. Click OK to start the cleanup.
After you finish cleaning up the component store using DISM, check how much disk space has been freed.
In addition, Windows 10/Windows Server 2016 Task Scheduler has a special automatic maintenance task that regularly optimizes and cleans up the WinSxS folder (same operation as DISM with StartComponentCleanup parameter). This StartComponentCleanup task is located under the \Microsoft\Windows\Servicing section of the taskschd.msc. This task runs in the background and automatically removes component versions older than 30 days that have been superseded by newer files.
You can start this task manually like this:
schtasks.exe /Run /TN "\Microsoft\Windows\Servicing\StartComponentCleanup"
Remove Unused Roles and Features from Windows 10/Windows Server
Features on Demand on Windows allows to remove binary files of the unused roles from the WinSxS folder. You can remove role and feature binaries on Windows Server using the Uninstall-WindowsFeature PowerShell cmdlet.
Windows 10 does not have the Uninstall-WindowsFeature cmdlet, and you must use DISM.exe to remove features from the Windows image.
Note that DISM, unlike the Uninstall-WindowsFeature PowerShell cmdlet doesn’t remove dependent features.
A complete list of available features in Windows 10 image can be obtained using the command:
DISM.exe /Online /English /Get-Features /Format:Table
To remove, for example, the TelnetClient feature from the Windows image (from the WinSxS folder), run the command:
DISM.exe /Online /Disable-Feature /Featurename:TelnetClient /Remove

If you display the list of all on-demand features available in Windows, you will see that the component status has changed to Disabled with Payload Removed.
Thus, Windows allows to significantly reduce the size of the WinSxS folder by removing the unused components from the disk. The only thing is that this cleanup method suits only advanced users, who are familiar with the Windows 10 features and their purpose.
How to Enable NTFS Compress on WinSxS Folder on Windows 10?
Another way to reduce the size of the WinSxS directory on Windows 10 is to compress the directory contents on the level of the NTFS file system.
Note. As in case of any non-standard intervention into the system configuration, you are strongly recommended to create a full backup of your Windows 10 image.
- Open the command prompt as administrator;
- Stop and disable Windows Installer and Windows Module Installer services:
sc stop msiserver
 sc stop TrustedInstaller
 sc config msiserver start= disabled
sc config TrustedInstaller start= disabled - Let’s backup the Access Control Lists (ACLs) assigned to the files and folders in the WinSxS directory using the built-in icacls tool. A backup copy of an ACL is a plain text file that lists all files and directories and the NTFS permissions assigned to them (later this file will be needed to restore the original ACLs):
icacls "%WINDIR%\WinSxS" /save "%WINDIR%\WinSxS_NTFS.acl" /t

- Assign yourself as an owner of the WinSxS folder and all its subfolders:
takeown /f "%WINDIR%\WinSxS" /r - Grant your account full control permissions on the WinSxS directory:
icacls "%WINDIR%\WinSxS" /grant "%USERDOMAIN%\%USERNAME%":(F) /t - You can now compress files in the WinSxS directory using the compact command. Because some of the files can be used by Windows, you need to specify the
/ioption. Otherwise, compression will stop at the first locked file (in Windows 10, you can use more advanced LZX compression):
compact /s:"%WINDIR%\WinSxS" /c /a /i *

- Restore the owner of the WinSxS directory back to TrustedInstaller:
icacls "%WINDIR%\WinSxS" /setowner "NT SERVICE\TrustedInstaller" /t - Restore the original ACLs for the WinSxS folder items using the ACL backup file you created earlier:
icacls "%WINDIR%" /restore "%WINDIR%\WinSxS_NTFS.acl" - Restore the default startup type for the Windows Installer and Windows Module Installer services:
sc config msiserver start= demand
 sc config TrustedInstaller start= demand


Now check the current size of the WinSxS folder:
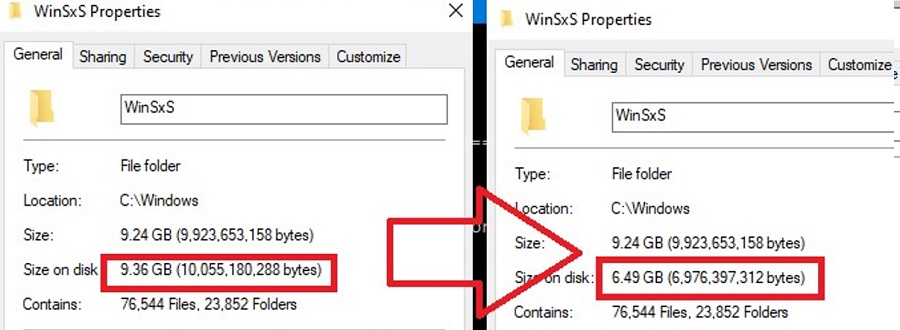
As you can see, in our example the size of the WinSxS folder after the compression has reduced from 9.4GB to 6.5GB (about a third). Not bad, especially for a small-sized SSD drive.
These commands can either be run separately (then it is much easier to track the results of each of them) or used in a single script file. If you run it, the described compression procedure for items in the WinSxS folder will start. You can download the ready-to-use batch file to enable NTFS compression on WinSxS here: winsxs_ntfs_compress.bat
You can use this script regularly because new uncompressed files will appear in the WinSxS folder after you install new Windows updates or apps.
What can be affected by compressing the WinSxS folder? Windows works transparently with compressed files. However, when processing such files, it may take additional CPU time to decompress/compress them. This may cause a slight slowdown when installing Windows components or updates. However, on modern CPUs, the file compression/ decompression operations are performed almost instantly, so the user may not even notice the real impact on performance.
Одна из папок Windows 11, 10 и предыдущих версий системы, вызывающая наибольшее количество вопросов у пользователей — папка C:\Windows\WinSxS, размеры которой могут впечатлять и вызывать желание уменьшить занимаемое папкой пространство или же вовсе удалить её.
В этой инструкции подробно о том, что представляет собой папка WinSxS в Windows, почему она может занимать много места и действительно ли она его занимает, и как её очистить.
Назначение папки
Папка WinSxS является хранилищем компонентов (библиотеки DLL, некоторые драйверы, исполняемые и другие файлы) Windows, как установленных и используемых в системе, так и доступных для установки. Файлы из этой папки, по сути, представляют собой все системные файлы Windows (большинство системных файлов в папках Windows, System32 и SysWOW64 фактически являются жесткими ссылками на файлы в папке WinSxS), а также используются для:
- Предоставления нужной версии библиотек при запуске ПО, которому требуется определённая версия
- Восстановления системных файлов
- Установки дополнительных компонентов Windows
- Удаления обновлений Windows
- Изменения редакции операционной системы
По первому пункту чуть подробнее: предположим, есть две разные программы, которым для запуска требуется одна и та же библиотека DLL, но в разных версиях. Эти программы подключают её из стандартной системной папки, например, System32, но в зависимости от манифеста приложения, им будут предоставлены разные версии этого файла, находящиеся в WinSxS.
Например, на скриншоте ниже мы с помощью команды fsutil hardlink list проверяем список жестких ссылок для одной из библиотек DLL из папки System32 и можем увидеть, что этот файл присутствует в двух разных версиях в папке WinSxS, а при его вызове какой-либо программой будет вызвана та, которая требуется.

Подводя итог, содержимое папки WinSxS — это, фактически, почти все файлы вашей ОС Windows, именно там содержится те файлы, которые вы видите в обычных системных папках.
Размер папки WinSxS
Как было отмечено ранее, папка WinSxS содержит большую часть системных файлов Windows и её компонентов, а также предыдущие версии компонентов, если система обновлялась — это объясняет её размер.
При этом следует учитывать, что Проводник Windows не может верно подсчитать размер этой папки из-за упомянутых жестких ссылок: допустим, фактически файл занимает какое-то пространство на диске, при этом присутствует жесткая ссылка на него в другом расположении, Проводник посчитает размер для каждого из экземпляров отдельно.
Чтобы узнать фактический размер папки WinSxS, можно использовать следующую команду, запущенную в командной строке от имени администратора:
dism /Online /Cleanup-Image /AnalyzeComponentStore
В результате вы увидите:
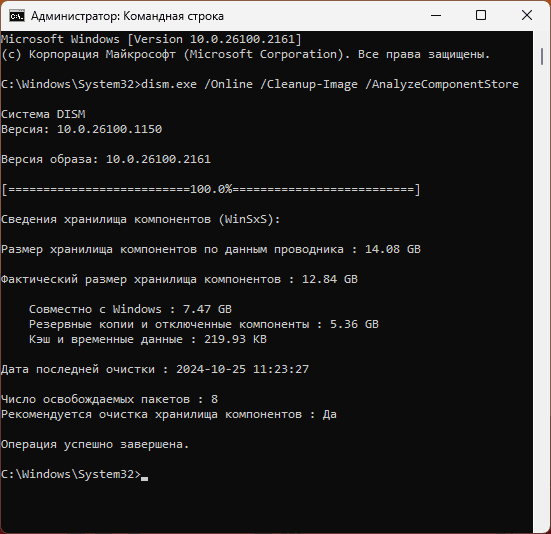
- Размер по данным проводника, который может незначительно отличаться от того, который вы видели в свойствах папки.
- Фактический размер хранилища компонентов.
- Размер части, которая используется в Windows. При этом если вы решите проверить размер папки Windows в проводнике, размер этой части будет удвоен по сравнению с реально занимаемым на диске: будут подсчитаны файлы, находящиеся в WinSxS и те же файлы (жесткие ссылки) находящиеся в «рабочих» папках Windows.
- Объем резервных копий (например, из предыдущей версии системы) и отключенных в настоящий момент компонентов Windows.
С той частью хранилища компонентов, которая используется в Windows, сделать ничего не получится (не отключая компоненты Windows) — это и есть ваша система. Для оставшейся части можно выполнить некоторые действия по очистке.
Очистка WinSxS
Прежде чем начать: некоторые пользователи спрашивают, можно ли удалить папку WinSxS? Ответ: нет, ни в коем случае — даже если вы это сделаете каким-либо образом, ваша Windows больше не запустится.
Безопасно выполнить очистку папки WinSxS можно:
- Выполнив очистку системных файлов с помощью утилиты «Очистка диска»: нажмите клавиши Win+R на клавиатуре, введите cleanmgr и нажмите Enter, нажмите кнопку «Очистить системные файлы» и выполните очистку доступных элементов, имеющих отношение к обновлениям Windows и предыдущим версиям системы. Это действие повлияет в большей степени на другие системные расположение, но отчасти скажется и на фактическом размере папки WinSxS.

- Запустив очистку хранилища компонентов в командной строке, запущенной от имени администратора с помощью команды
dism /online /Cleanup-Image /StartComponentCleanup
Если при выполнении команды вы увидите сообщение об ошибке, связанной с другой транзакцией, перезагрузите компьютер и повторите выполнение команды.
- При необходимости — использовав ещё два варианта предыдущей команды: первый удалит все замененные новыми версиями компоненты (что сделает невозможным удаление обновлений), второй — резервные копии пакетов обновления.
dism /online /Cleanup-Image /StartComponentCleanup /ResetBase
dism /online /Cleanup-Image /SPSuperseded

Результат в моём случае:

Как видим, резервные копии были очищены, но остались ещё и отключенные компоненты. Их мы тоже можем удалить. И, хотя я этого не могу прямо рекомендовать, шаги будут следующими:
- В командной строке, запущенной от имени администратора, введите команду
dism /Online /English /Get-Features /Format:Table

- Вы увидите список имеющихся компонентов Windows и их статуса: Enabled — включены, Disabled — отключены. Для удаления файлов отключенного компонента введите команду
dism /Online /Disable-Feature /featurename:ИМЯ_КОМПОНЕНТА /Remove
- Перезагрузите компьютер после завершения удаления компонентов.

Сам компонент не исчезнет из списка доступных для установки в Windows, но установка будет производиться только после автоматического скачивания необходимых файлов из Интернета.
В Планировщике заданий Windows (Win+R — taskschd.msc) в разделе «Библиотека планировщика заданий» — «Microsoft» — «Windows» — «Servicing» присутствует задача очистки хранилища компонентов «Start Component Cleanup».
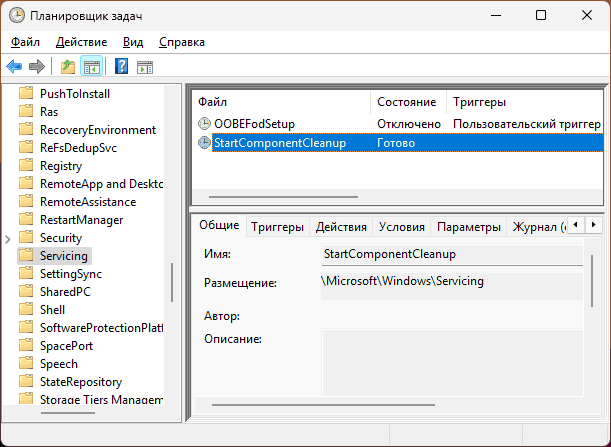
При желании вы можете настроить собственные триггеры в свойствах задания для его выполнения и регулярной автоматической очистки или выполнить задание вручную.
Некоторые дополнительные материалы на близкую тему:
- Очистка папки DriverStore\FileRepository в System32
- Очистка диска Windows 11 средствами системы
- Лучшие программы очистки диска от ненужных файлов
- Как отключить зарезервированное хранилище в Windows 11 (подойдет и для Windows 10)
Windows users who have run a disk space analyzer like TreeSize or WizTree in the last days may have stumbled for the first time upon the Winsxs folder in the Windows directory.
The folder usually has a size of about 5 to 8 Gigabytes on Windows Vista and Windows 7 or newer, there are however reports of bigger folders, up to 16 Gigabytes and more.
Especially Windows XP users who recently switched to Windows 7 may have asked themselves why the size of the folder increased from a few Megabytes to Gigabytes.
Internet search engines and message boards are full with questions about the folder, many users want to know if it is safe to delete the Winsxs folder, if it needs to be included in operating system backups or why it has such an enormous size compared to other Windows folders.
It is important to take a look back in time. Back in Windows 9x, the operating system had troubles with dynamic link libraries, more precisely with different versions of the same dll. There was simply no way to store multiple versions of a dll, which led to incompatibilities and other problems.
Then in Windows ME, Microsoft began to include options to store multiple dll versions using the same name in the operating system. It was not until Windows Vista that this technology was turned into what Vista and Windows 7 users are experiencing today.
If you open the folder in Windows Explorer you will notice a huge folder list, with each folder containing at least one file, but often multiple files. Folders that begin with the same name host different versions of the same dll, there are sometimes five or more folders that host different versions of the same dynamic link library.

Winsxs, stands for Windows Side by Side, referring to the concept of hosting the same files in different versions in the operating system.
The backup folder is displayed as the largest folder in the Winsxs folder, followed by the naturallanguage6 folder and Manifests.
A Technet blog post by Jeff Hugh explains the move from an INF described OS to componentization in Windows Vista.
All of the components in the operating system are found in the WinSxS folder – in fact we call this location the component store. Each component has a unique name that includes the version, language, and processor architecture that it was built for. The WinSxS folder is the only location that the component is found on the system, all other instances of the files that you see on the system are “projected†by hard linking from the component store. Let me repeat that last point – there is only one instance (or full data copy) of each version of each file in the OS, and that instance is located in the WinSxS folder. So looked at from that perspective, the WinSxS folder is really the entirety of the whole OS, referred to as a «flat» in down-level operating systems. This also accounts for why you will no longer be prompted for media when running operations such as System File Checker (SFC), or when installing additional features and roles.
Jeff’s post gives an answer to the question if it is safe to delete files in the winsxs folder, in short: It is not.
The only option to reduce the file size of that folder safely is to remove software from the operating system that is not needed anymore, but even that won’t drop the file size considerably.
The only way to safely reduce the size of the WinSxS folder is to reduce the set of possible actions that the system can take – the easiest way to do that is to remove the packages that installed the components in the first place. This can be done by uninstalling superseded versions of packages that are on your system. Service Pack 1 contains a binary called VSP1CLN.EXE, a tool that will make the Service Pack package permanent (not removable) on your system, and remove the RTM versions of all superseded components. This can only be done because by making the Service Pack permanent we can guarantee that we won’t ever need the RTM versions.
It is best to leave the folder alone. Windows Vista users may be able to reduce the size of the Winsxs folder by running a third party application WinsxsLite
WinsxsLite is meant as a tool to help reduce the size of winsxs in Vista.
.
WinsxsLite is split into two phases.
The first phase searches the Program Files and Windows folders for files,
that are exactly identical to files in the winsxs folder.
.
The second phase replaces all the old versions of each file in winsxs,
with hardlinks to the highest version file.
So, it will still seem like there’s, say, 16 different versions of a
particular file, but in reality, there’s only one data object pointed to
by 16 directory entries.
Additionally, unused localized files can be eliminated, by replacing them
with hardlinks to the corresponding files in other languages.
.
Note: Both phases are optional.
.
Note: If Vista SP1 is installed, make sure vsp1cln.exe has been run.
It is highly advised to create a system backup before running WinsxsLite, considering that the software makes irreversible changes to the Windows system partition that can only be undone by a backup.
The latest version of the program is always available at the Google Code project website. The site links to a Rapidshare download location, we have taken the liberty to upload the latest file to our servers as well. You can download the 20K tool below: WinsxsLite1.86
Please note that it is only compatible with Windows Vista, and not Windows 7.
Windows Vista users with the Service Pack installed can furthermore run the VSP1CLN command-line tool to remove files that are not longer needed after the service pack has been installed. Please note that these files are needed for uninstalling the SP in Vista.
Do you have additional tips on reducing the size of the Winsxs folder? Let us know about them in the comments.
Update: Recent information indicate that the Winsxs folder may in fact not be as large as it is reported by the system, and the main reason for that is that many of the files in the folder are hard links pointing to files elsewhere on the system.
“The Windows SxS directory represents the “installation and servicing state†of all system components. But in reality it doesn’t actually consume as much disk space as it appears when using the built-in tools (DIR and Explorer) to measure disk space used. The fact that we make it tricky for you to know how much space is actually consumed in a directory is definitely a fair point!
In practice, nearly every file in the WinSxS directory is a “hard link†to the physical files elsewhere on the system—meaning that the files are not actually in this directory. For instance in the WinSxS there might be a file called advapi32.dll that takes up >700K however what’s being reported is a hard link to the actual file that lives in the Windows\System32, and it will be counted twice (or more) when simply looking at the individual directories from Windows Explorer.â€
You may analyze and cleanup the WinSXS folder using DISM commands on Windows 8 or newer versions of the Windows operating system.
More information about that is available on the Engineering Windows 7 blog.
Summary
Article Name
The Winsxs Folder Explained
Description
A guide that provides you with information about the WinSxS folder of the Windows operating system describing what its purpose is and how to reduce it in size.
Author
Martin Brinkmann
Publisher
Ghacks Technology News
Logo
Advertisement