
Если у вас возникает данная ошибка, выполните следующие действия:
- Скачайте Capicom
- Установите Capicom. При установке, задайте путь: «C:\WINDOWS\system32\»
Если у вас на рабочем месте установлена 64-разрядная ОС Windows, для установки CAPICOM выполните следующие действия:
- Cкачайте файл Capicom
- Распакуйте архив в каталог «C:\windows\syswow64»
- Зарегистрируйте библиотеку dll, для этого в командной строке ( Пуск — Выполнить ) введите: c:\windows\syswow64\regsvr32.exe capicom.dll
- Для создания хранилища скачайте файл CreateOP
- Разархивируйте файл CreateOP_capicom.rar и скопируйте файлы из папки
- Зайдите по пути C:\WINDOWS\system32 и вставьте скопированные файлы с заменой файла
- Запустите файл CreateOP.bat (если у Вас не отображается расширение «.bat», то необходимо запустить файл, который отображается как «Пакетный файл MS-DOS»)
- После запуска файла, должно появиться окно, нажмите в нем ОК
- В следующем окне снова нажмите ОК
Если предыдущие действия не помогли, установите на рабочее место 32-битный Internet Explorer
Вы определились с выбором?
Перейти к оформлению заказа
Возникла ошибка:
«Возможно, модуль«capicom.dll» не совместим с версией Windows, работающей на этом компьютере. Проверьте, совместим ли этот модуль с х86(32-разрядной)или х64(64-разрядной)версией regsvr32.exe.»
В этом случае вы можете воспользоваться x32 битной версией утилитки, находится она тут C:\Windows\SysWOW64
C:\Windows\SysWOW64\regsvr32.exe capicom.dll
Первоисточник (http://social.msdn.microsoft.com/Forums/pl-PL/netfx64bit/thread/813f13ec-0180-496a-8af0-b57dfd4e4de4)
There are 2 tools for different purposes of software components’ registeration. Regsvr32.exe and Regasm.exe. Following are their descriptions:
Regsvr32.exe: The Regsvr32 Tool (regsvr32.exe) is used to register or un–register a COM DLL.
Indeed, there’re 2 versions of regsvr32.exe on 64-bit operating system. The one located at C:\Windows\SysWOW64 is 32-bit version. The one located at C:\Windows\System32 is 64-bit version.
If your VB DLL is 32-bit COM DLL, the 32-bit version regsvr32.exe under C:\Windows\SysWOW64 should register it fine. Ex
- 1 Удаление временных файлов интернета
- 2 Установка компонента ComTools1.2
- 3 Установка программы печати отчетов (FormFiller)
- 4 Настройка надёжных узлов
- 5 Установка Capicom и создание хранилища CreateOP
Удаление временных файлов интернета
Чтобы удалить временные файлы, выполните следующее:
- Зайдите в Internet Explorer
- Откройте вкладку Сервис
- Выберите пункт Свойства обозревателя
- Перейдите во вкладку Общие
- Нажмите кнопку «Удалить…»
- Затем поставьте галочки рядом с пунктами «Временные файлы Интернета» и «Куки-файлы», затем нажмите «Удалить»
Установка компонента ComTools1.2
Для того, чтобы скачать компонент ComTools, Щёлкните здесь
Скачанный файл необходимо установить.
Установка программы печати отчетов (FormFiller)
Для того, чтобы скачать компонент печати, щёлкните здесь
Скачанный файл необходимо установить.
Настройка надёжных узлов
- Зайдите в меню Пуск
- Щелкните по пункту Настройка, если такого пункта нет, перейдите к следующему шагу.
- Щелкните пункт Панель управления
- Щелкните два раза по иконке Свойства обозревателя
- Перейдите на вкладку Безопасность
- Нажмите на зеленую галочку с надписью Надежные узлы
- Затем нажмите кнопку Узлы
- В появившемся окне в поле «Вэб-узлы» найдите https://*.atlasnw.ru.
Если у вас нет данного узла, впишите в поле «добавить в зону следующий узел:» https://*.atlasnw.ru и нажмите кнопку Добавить
Установка Capicom и создание хранилища CreateOP
Для установки Capicom выполните следующее:
- Загрузите компонент и сохраните его на компьютер Capicom v.2.1.0.2. (нажмите здесь для того, чтобы скачать)
- Запустите файл CAPICOM-KB931906-v2102.exe и установите его
Для создания хранилища CreateOP выполните следующее:
- Для скачивания скрипта для создания хранилища CreateOP щелкните здесь
- Разархивируйте файл CreateOP_capicom.rar и скопируйте файлы из папки
- Вставьте скопированные файлы с заменой в каталог:
- C:\WINDOWS\system32 — если у вас 32-разрядная ОС
- C:\WINDOWS\syswow64 — если у вас 64-разрядная ОС
Если вы не знаете разрядность вашей ОС, воспользуйтесь данной инструкцией
- Запустите файл CreateOP.bat (если у Вас не отображается расширение «.bat», то необходимо запустить файл, который отображается как «Пакетный файл MS-DOS»)
- Должно появиться сообщение DLLRegisterServer в capicom.dll завершено успешно. Нажмите «ОК»
- Далее появится второе сообщение: Хранилище создано успешно. Нажмите «ОК»
- Если возникнет следующая ошибка, выполните следующее:
- Скачайте файл capicom64.rar
- Распакуйте архив capicom64.rar в каталог C:\windows\syswow64
- Зарегистрируйте библиотеку dll, для этого в командной строке ( Пуск — Выполнить ) введите: c:\windows\syswow64\regsvr32.exe capicom.dll
- Если предыдущие действия не помогли, установите на рабочее место 32-битный Internet Explorer
Note: Outbyte PC Repair tool has been proven to identify and fix the CAPICOM.DLL error. See more information about Outbyte and Uninstall Instructions. Please review Outbyte EULA and Privacy Policy.
Introduction
One of the most common errors a Windows user faces is the missing DLL error. This error will simply not let you run the application. When you try to open the application you will notice a pop-up window with the following error message.
‘The program can’t start because CAPICOM.DLL is missing from your computer’
Don’t worry! This is a common issue faced by Windows users all over the world and there are several ways to fix this.
In this detailed post, I’ll provide multiple solutions to fix the DLL file not found errors on Windows 11, 10, 8.1, 8, and 7 PCs.
What is a CAPICOM.DLL error?
The term ‘DLL’ refers to dynamically linked libraries, which may be found in Windows 11, 10, 8, 7, and other previous OS versions. A dynamic link library (DLL) is a collection of small programs that larger programs can load when needed to complete specific tasks. The small program, called a DLL file, contains instructions that help the larger program handle what may not be a core function of the original program. These instructions can be called upon multiple programs simultaneously. When you run a program on any Windows operating system, much of the functionality of the program may be provided by DLLs.
A dependency is created every time a DLL is used by a program. If another program uses a DLL and somehow breaks the dependency between the two programs then the first program will no longer execute. That is when you will see errors like,
‘The program can’t start because CAPICOM.DLL is missing from your computer. Try reinstalling the program to fix this problem.’
Causes of CAPICOM.DLL Missing Error
The typical reasons for the ‘CAPICOM.DLL missing error’ on Windows 10, 11, 8, 7, and other versions, are compiled below,
a) Deleted or corrupted CAPICOM.DLL — The DLL file used by a certain program has modified or deleted CAPICOM.DLL.
b) Missing or corrupted files of Microsoft Visual C++ Redistributable — The CAPICOM.DLL file is part of the Microsoft Visual C++ software runtime library. VC++ Runtime libraries are DLL files required to run programs compiled with Microsoft Visual Studio. If some files are missing or if Visual Studio is not installed correctly, then the ‘CAPICOM.DLL is missing’ error might appear.
c) System is infected with virus or malware – There is a possibility your system is corrupted or damaged with virus/malware. As a result, CAPICOM.DLL may have been damaged or corrupt.
d) Damaged/corrupted System files – If your Windows system files are corrupted after engaging with programs containing a virus or some malicious applications then CAPICOM.DLL might not work correctly.
Some other common CAPICOM.DLL errors include:
CAPICOM.DLL is missing
Cannot register CAPICOM.DLL
Problem starting CAPICOM.DLL
CAPICOM.DLL Access Violation
The procedure entry point CAPICOM.DLL error
CAPICOM.DLL error loading
CAPICOM.DLL crash
Cannot find CAPICOM.DLL
CAPICOM.DLL was not found
CAPICOM.DLL could not be located
CAPICOM.DLL — System Error
The program can’t start because CAPICOM.DLL is missing from your computer. Try reinstalling the program to fix the problem.
There are several ways to fix this DLL error and we will be looking at them in detail below.
1. Download CAPICOM.DLL
The CAPICOM.DLL file can be manually downloaded and added/replaced with the missing or corrupt DLL file.
Step 1: Select and download the DLL files from the table below irrespective of the version of your OS i.e. Windows 11, 10, 8.1, 8 or 7.,
Download CAPICOM.DLL
| Version | Description | OS | Size | Language | MD5 | SHA1 | Download |
|---|---|---|---|---|---|---|---|
| 2.0.0.1 | CAPICOM Module | 32 | 0.46 MB | U.S. English |
ec48299… ec4… |
31e252d… 31e… |
|
| 2.1.0.2 | CAPICOM Module | 32 | 0.49 MB | U.S. English |
9130cce… 913… |
14485ae… 144… |
Step 2: Once downloaded, extract each file into separate folders using either Windows Compressed folders (comes with windows) or with an app like WinRAR.
Step 3: Next, copy the 64-bit ‘CAPICOM.DLL’ file and paste it into the C:\Windows\System32 folder. And copy the 32-bit ‘CAPICOM.DLL’ file and paste it into the C:\Windows\SysWOW64 folder. If there is an existing ‘CAPICOM.DLL’ file in either of these folders then replace it with the new file. However, if you have a 32-bit Windows system then place only the 32-bit file into the C:\Windows\System32 folder.
Re-launch the affected program to see if the issue is fixed. If not, please try the next method.
2. Fix missing CAPICOM.DLL error automatically
The missing DLL error can be fixed using a repair tool, like Outbyte PC Repair, which helps to solve any system issues, cleans up junk files, and fixes any DLL errors in the process.
Step 1: Download the installation file from here.
Step 2: Install PC Repair and scan your PC
Step 3: Click ‘Repair’ to fix all items that may cause the missing DLL errors.
Step 4: Launch the application to see if the error is fixed.
Recommended Download: Fix CAPICOM.DLL error or missing CAPICOM.DLL error with Outbyte.
Compatible with Windows 11, 10, 8, 7, Vista, XP and 2000
3. Re-register the DLL file
Another efficient method to fix the DLL error is to re-register the DLL file.
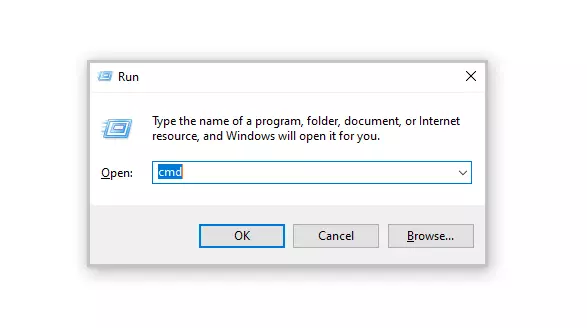
Step 1: Launch the Run utility by pressing Windows + R keys on your keyboard. Type in ‘cmd’ in the text input field. Then press Ctrl+Shift+Enter keys to open the Command Prompt in administrator mode.
Step 2: In the prompt window, select ‘Yes’ to allow Command Prompt to make modifications to your device.
Step 3: Now it’s time to unregister the DLL file from your computer. Type in or copy and paste the following command, then press Enter,
regsvr32 /u CAPICOM.DLL
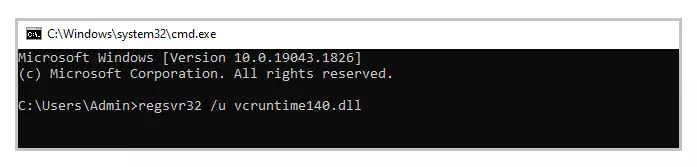
Note: Replace vcruntime140.dll with CAPICOM.DLL
Step 4: Next, you need to re-register the file. To do this run the following command,
regsvr32 CAPICOM.DLL
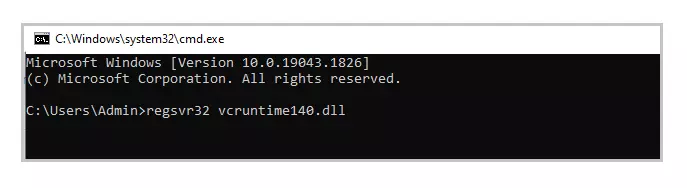
Note: Replace vcruntime140.dll with CAPICOM.DLL
Step 5: Exit the Command Prompt and run the application again.
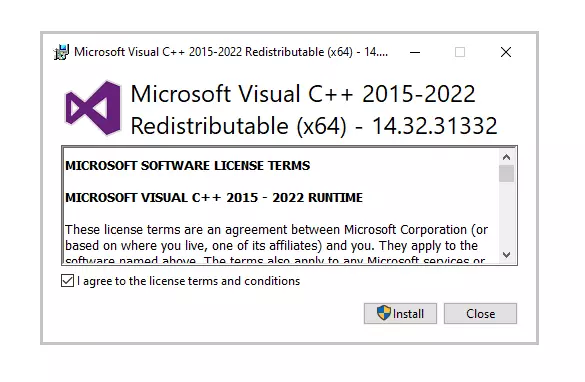
4. Reinstall the Latest Visual C++ Redistributable 2015 — 2022 for Visual Studio
The most commonly used solution is to re-install Microsoft Visual C++ Redistributable to fix DLL errors. Follow the steps mentioned below,
Step 1: To access the official page from where Microsoft Visual C++ Redistributable can be downloaded, please click on the link provided here
Select ‘Install’. The installation will begin and will take a couple of seconds to complete.
Step 2: Alternatively, you can also download it from below based on the version of Windows,
Download x86 version from here
Download x64 version from here
Step 3: Once you’ve selected the file, proceed to download. The download may take a while, depending on your internet connection speed.
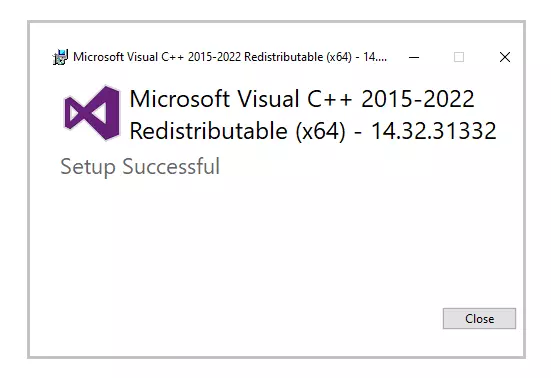
Step 4: Once the download is complete install the downloaded file. When the installation begins tick the ‘I agree to the license terms and conditions’ box and then click on ‘Install’.
Step 5: It may take a few minutes for the installation to finish. Once the installation is completed restart the computer and launch the program again to see if the DLL error is fixed.
5. Run System File Checker (SFC) Scan
Step 1: To open the Run utility, press Windows + R on your computer. Enter ‘cmd’ in the input area and then press Ctrl+Shift+Enter.
Step 2: Select ‘Yes’ in the pop-up window to open the command prompt in administrator mode.
Step 3: Next, enter the below command and press Enter to execute it,
sfc/scannow
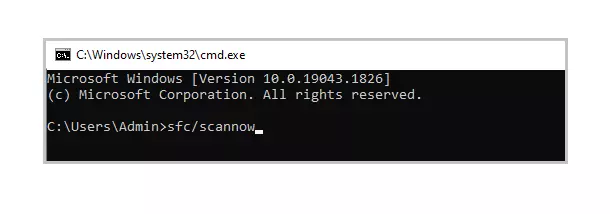
Step 4: This command will try to search and fix corrupt system files (including DLL files). Once the process is complete, you can check the log file created in the path shown in the command prompt. If in the log file you find details of the fixed DLL File then you can run the application again.

6. Reinstall the Program that cannot be launched
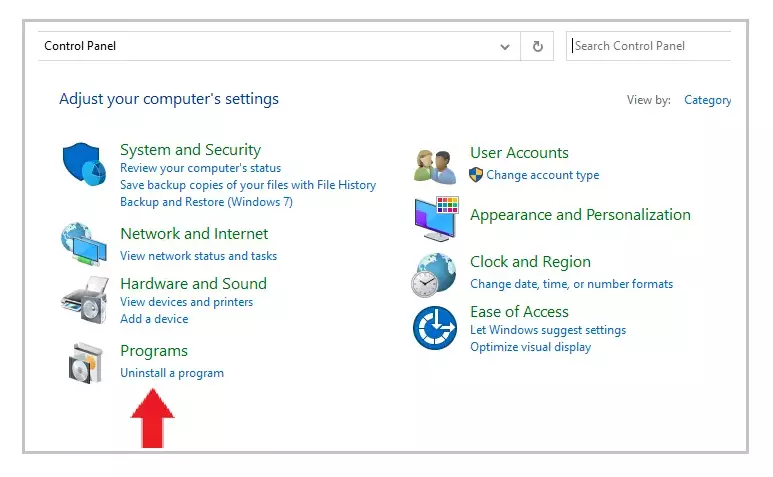
Step 1: Open Control Panel and click on ‘Uninstall a program’ under ‘Programs’.
Step 2: Search and find the program you’re experiencing problems with and click on it.
Step 3: Then click on the ‘Uninstall’ button, and proceed to continue with the uninstallation procedure of the application.
Step 4: Reinstall the program from its source. Either download the setup file or if you already have it then run the installation again to check if you can run the application this time.
7. Update drivers
In some cases, DLL errors can occur due to drivers. If the DLL error message appeared during or after you installed a program, then first update your drivers to the latest version.
Alternatively, there is also a possibility you might face the DLL error after updating drivers. In such a scenario, you need to roll back the driver to the previous version.
There are two ways to update drivers,
Method 1: Automatically Update Drivers
Step 1: Use a tool like Outbyte Driver Updater that automatically searches for missing and out dated drivers in your system and updates it. You can download the tool from here
Step 2: Download time depends on your internet speed connection. Once the download is completed start with the installation of the tool.
Step 3: Launch the application.
Step 4: Inside the application run update. Then, the Driver Updater tool will scan your computer for out dated and missing drivers.
Step 5: Finally, select the drivers and click update.
Method 2: Manually Update Drivers
Step 1: Go to the Taskbar search box – enter the text Device Manager and select Device Manager.
Step 2: Select the hardware device that needs to be updated. Expand the selection – select the device, right-click and select ‘Update Driver’.
Step 3: Choose the ‘Search automatically for drivers’ option.
Step 4: If the latest drivers are found then they will be installed automatically.
Step 5: Sometimes, Windows might not be able to find the latest driver. In such cases, the user can visit the manufacturer’s website, search for the driver, and instructions on how to proceed with the installation.
8. System Restore
In this method, your PC needs to be restored to its earlier version when it was working without any error. There is a chance the new updates to your PC caused the error, so the user must remove the new updates and roll back to a previous version.
To apply System Restore, first, check if you have a previous backup of your system. To check this,
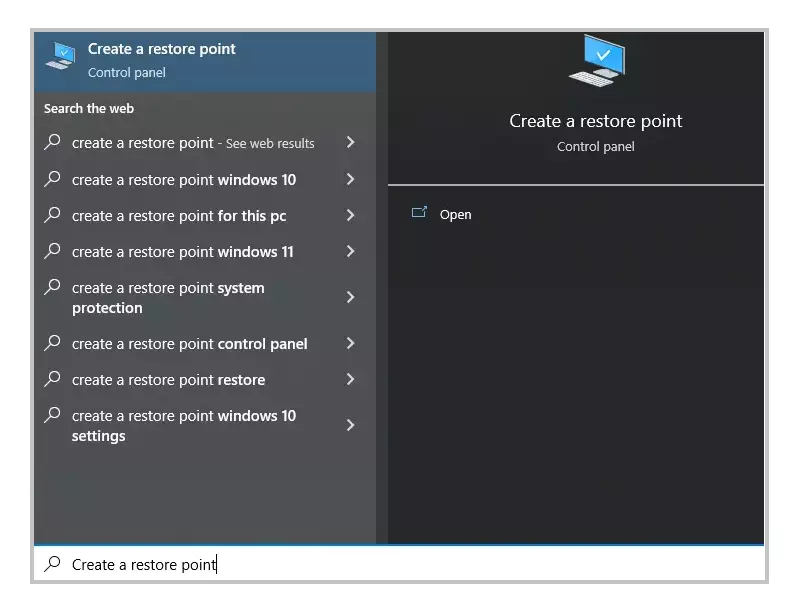
Step 1: Begin by clicking on the start button.
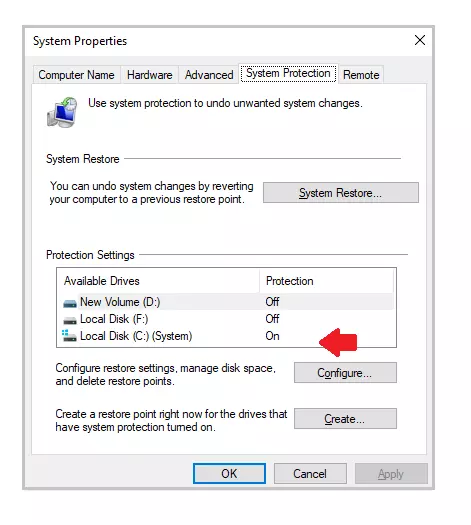
Step 2: To access the System Properties window, search for ‘Create a restore point’ and click the first result.
Step 3: Under the ‘System Protection’ tab select the ‘System’ drive. ‘Protection’ should be turned on for this drive.
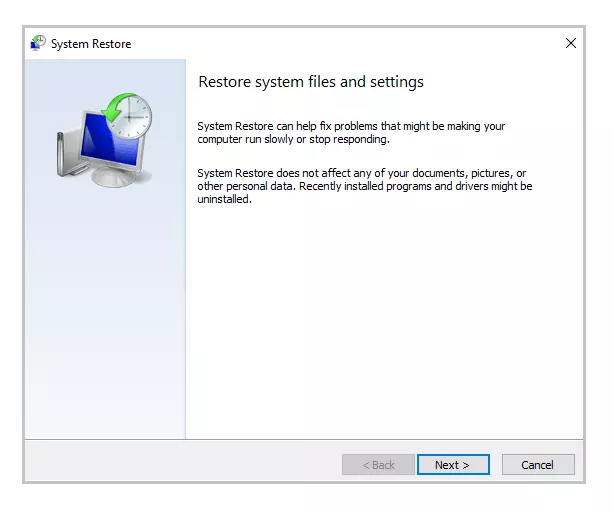
Step 4: Select ‘System Restore’ and click ‘Next’ on the initial screen
Step 5: A list of restore points will be displayed. Select the restore point when your application was running correctly without any error. Then select ‘Next’.
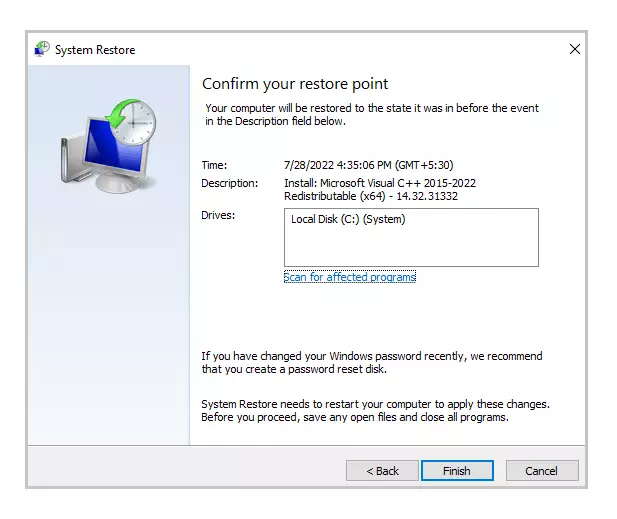
Step 6: Review your selection and click ‘Finish’. If a warning window pop-up appears then select Yes’.
Step 7: The System Restore will begin and your PC will restart once the process is complete. When you log in again, you will see a notification that the System Restore is complete. Now, you can run the application again to see if the error is fixed.
Note: If System Restore was not set up earlier or you’ve never backed up your PC before then this method might not apply to you.
9. Update Windows
CAPICOM.DLL missing issues have been reported by several windows users to disappear by upgrading to the latest edition of Windows.
Step 1: Go to settings by selecting Start > Settings or using Windows + I shortcut
Step 2: Open the ‘Update and security’ option.

Step 3: See if there are any new updates by clicking on ‘Check for updates.’
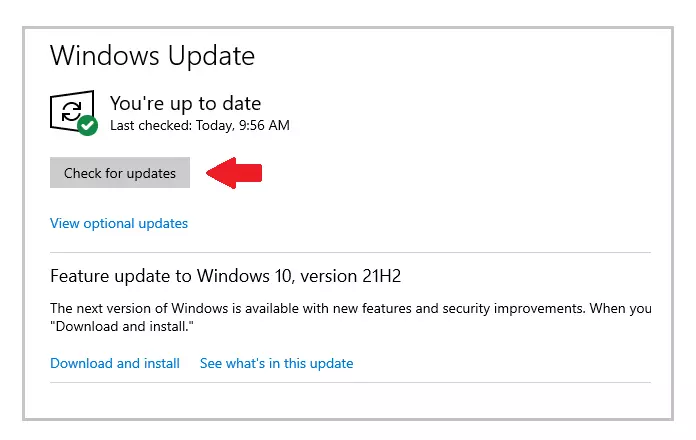
Step 4: If a newer version is discovered, then the windows update will download and install to the latest version.
Step 5: After installing the newest version, run the program again to check if you face the CAPICOM.DLL was not found error.
Following these steps should have definitely helped you to fix the missing CAPICOM.DLL error.
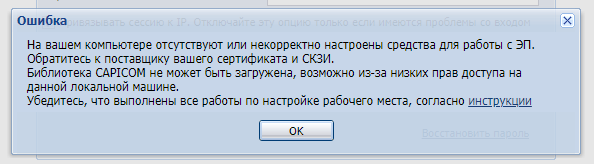
Ошибка «Библиотека CAPICOM не может быть загружена» чаще всего связана с тем, что библиотека не установлена на компьютере или Ваш браузер не поддерживает работу с данной библиотекой.
1. Убедитесь, что Ваш браузер поддерживает работу с библиотекой CAPICOM
Работу с библиотекой CAPICOM поддерживает только браузер Internet Explorer. Если электронная площадка поддерживает только работу с данной библиотекой, убедитесь, что у Вас запущен Internet Explorer.
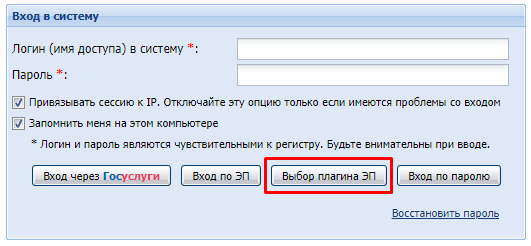
2. Проверьте, есть ли возможность выбора плагина для работы с электронной подписью
На некоторых электронный площадках на странице авторизации есть возможность выбора плагина для работы с подписью. К примеру, на странице авторизации ЭТП Росэлторг есть кнопка «Выбор плагина ЭП». Кликнув на нее, есть возможность выбрать плагин:
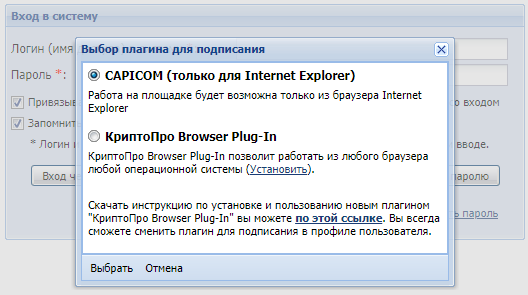
- CAPICOM — только для Internet Explorer,
- КриптоПро Browser Plug-In — для любого браузера (плагин должен быть установлен и настроен — инструкция).
Если Вы используете браузер не Internet Explorer, выберите вариант КриптоПро Browser Plug-In и нажмите «Выбрать».
3. Установите библиотеку CAPICOM
- capicom2102.msi — стандартная библиотека CAPICOM от Microsoft.
Перейдите по ссылке для скачивания установочного файла, после завершения загрузки запустите файл. Примите лицензионное соглашение, во всех окнах подтверждения жмите «Далее» и дождитесь завершения установки.
4. Выполните настройки
Если библиотеки установлены, но ошибка остается – необходимо произвести следующие настройки Internet Explorer:
4.1. Добавить адреса ЭТП в Надежные узлы.
- в Internet Explorer «Сервис» — «Свойства обозревателя» — вкладка «Безопасность»;
- выделить «Надежные узлы» («Надежные сайты»); — кнопка «Узлы» («Сайты»);
- убрать внизу флаг «Для всех узлов этой зоны требуется проверка серверов (https:)» (не все ЭТП работают по защищенному соединению https://);
- в строку «Добавить в зону следующий узел» ввести адрес ЭТП (по http и https); кнопка «Добавить».
4.2. Для зоны «Надежные узлы» («Надежные сайты») разрешить использование элементов Active-X.
- в Internet Explorer «Сервис» – «Свойства обозревателя» — вкладка «Безопасность»; выделить «Надежные узлы» («Надежные сайты»); нажать кнопку «Другой…»;
- в разделе «Элементы Active-X и модули подключения» у всех параметров отметить «Включить» (для IE 6 – «Разрешить»).
4.3. Установить и зарегистрировать библиотеку capicom.dll.
- скачайте файл capicom.dll
- скопируйте файл capicom.dll в папку C:\WINDOWS\system32 (для Windows XP, Vista, Win7 — C:\WINDOWS\system32\regsvr32);
- нажмите кнопку «Пуск» и выберите «Выполнить»;
- в окне «Запуск программы» в поле «Открыть» наберите или скопируйте: для Windows XP, Vista, Win7 — C:\WINDOWS\system32\regsvr32 capicom.dll нажмите кнопку «ОК».
- Регистрация библиотек может быть запрещена локальной политикой прав доступа. В таком случае, нужно обращаться к системному администратору.
4.4. Проверить статус сертификата
- зайдите в «Панель управления Рутокен» — вкладка «Сертификаты»
- выделите сертификат — статус сертификата должен быть «Действителен»
- возможны ошибки: «Сертификат ненадежен»/»Не удалось проверить статус отзыва» или «Не установлен корневой сертификат. Просмотреть | Установить», выполните решение из инструкции.
4.5. Проверить права на библиотеку capicom.dll
- откройте каталог C:\Windows\System32,
- найдите capicom.dll,
- правой кнопкой мыши «Свойства» — вкладка «Безопасность» — «Дополнительно» — «Изменить разрешения».
- в списке найти текущего пользователя компьютера, проверить, какой статус стоит в колонке «Разрешения». Если отличный от «Полный доступ» — выделить строку, нажать «Изменить». Поставить галку «Полный доступ», сохранить.
Если при сохранении выйдет сообщение о нехватке прав — перейти на вкладку «Владелец», Изменить, выбрать текущего пользователя компьютера, попробовать заново назначить «Полный доступ».
4.6. Проверить версию браузера Internet Explorer
Как правило, для участия в торгах необходимо пользоваться браузером Internet Explorer версии 6.0 и выше. В IE 9 и выше могут возникать ошибки, которые можно решить, воспользовавшись режимом совместимости («Свойства браузера» — «Сервис» — «Параметры режима представления совместимости» — добавить адрес площадки.
Это общие настройки для всех ЭТП. На некоторых площадках необходимо установить дополнительные компоненты, необходимые для корректной работы.
Оцените документ
Остались вопросы? Как мы можем помочь?
Как мы можем помочь?
При входе на Сбербанк-АСТ ошибка: «Клиентский сертификат не сопоставлен с пользователем»