If you have ever looked at the processes running on your Windows computer, you might have noticed a process called Igfxpers.exe. What is this process and what does it do? Is it safe or malicious? Should you remove it or keep it? In this blog post, we will answer these questions and more.

What is Igfxpers.exe?
Igfxpers.exe is a process that belongs to Intel Graphics and Media Control Panel. It is responsible for managing the display settings of your Intel graphics card, such as resolution, color depth, brightness, contrast, etc. It also allows you to access the Intel Graphics and Media Control Panel from the system tray.
Igfxpers.exe is usually located in the C:\Windows\System32 folder. The file size can vary depending on the version of your Intel graphics driver. The process is not essential for Windows to run, but it can improve the performance and functionality of your Intel graphics card.
Should you remove igfxpers.exe or keep it?
If igfxpers.exe is a genuine process from Intel Corporation, then you do not need to remove it. It does not consume a lot of CPU or memory resources and it does not affect your system performance. It can also help you adjust your display settings according to your preferences.
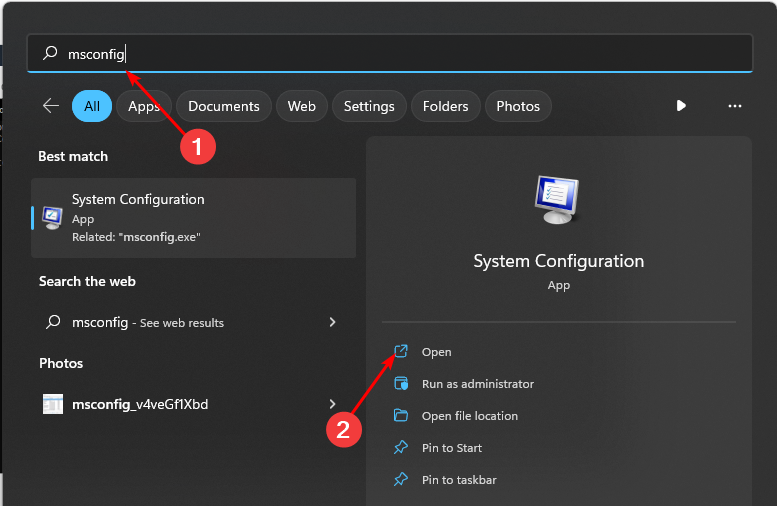
However, if you do not use the Intel Graphics and Media Control Panel or if you have another graphics card installed on your computer, then you can disable igfxpers.exe from running at startup. This can free up some system resources and prevent any potential conflicts with other graphics drivers. To disable igfxpers.exe from running at startup, you can follow these steps:
- Press Windows + R keys to open the Run dialog box.
- Type msconfig and click OK to open the System Configuration window.
- Click on the Startup tab and uncheck the box next to igfxpers.exe.
- Click Apply and OK to save the changes.
- Restart your computer for the changes to take effect.
Alternatively, you can use a third-party program like CCleaner to manage your startup programs and disable igfxpers.exe from there.
Is Igfxpers.exe malware?
Igfxpers.exe is a legitimate process that comes from Intel Corporation. It is not a virus or malware. However, some malware can disguise themselves as igfxpers.exe and run in the background. To check if the process is genuine or not, you can right-click on it in the Task Manager and select Properties. Then, look at the file location and the digital signature. If the file location is not C:\Windows\System32 or if the digital signature is not from Intel Corporation, then you might have a fake igfxpers.exe on your computer.
Should you be uncertain as to whether Igfxpers.exe is malicious or a false positive detection, you can submit the affected file to VirusTotal to be scanned with multiple antivirus engines.
If you suspect that Igfxpers.exe is infected with malware, you can follow the below free malware removal guide to clean up your device.
Remove malware from your Windows device
The below malware removal instructions are for Windows users, however, we also have an Android Guide and a Mac Guide which should help clean up your device.
This malware removal guide may appear overwhelming due to the number of steps and numerous programs that are being used. We have only written it this way to provide clear, detailed, and easy-to-understand instructions that anyone can use to remove malware for free.
Please perform all the steps in the correct order. If you have any questions or doubts at any point, stop and ask for our assistance.
To remove the Igfxpers.exe Trojan and other malware from your computer, follow these steps:
- STEP 1: Uninstall malicious programs from Windows
- STEP 2: Reset browsers back to default settings
- STEP 3: Use Malwarebytes Anti-Malware to remove malware and unwanted programs
- STEP 4: Use HitmanPro to scan your computer for badware
- STEP 5: Use AdwCleaner to remove adware and malicious browser policies
STEP 1: Uninstall malicious programs from Windows
In this first step, we will manually check if any unknown or malicious programs are installed on the computer. Sometimes adware and browser hijackers can have a usable Uninstall entry that can be used to remove them.
Windows 11Windows 10Windows 8Windows 7
-
Press the Windows key + I on your keyboard to open the Settings app.
First, open Windows Settings by pressing Windows+I on your keyboard. You can also right-click your Start button and select “Settings” from the list.

-
In the Settings app, click on “Apps” and then “Apps & features”.
When Settings opens, click “Apps” in the sidebar, then select “Apps & Features”.

-
Find the malicious program in the list of installed apps and uninstall it.
In Apps & Features settings, scroll down to the app list and search for unknown or suspicious programs. To make things easier, you can sort all installed programs by their installation date. To do this, click “Sort by” and select “Install date”.
Look out for any suspicious program that could be behind all the drama – anything you don’t remember downloading or that doesn’t sound like a genuine program. When you find a malicious program, click the three dots button beside it and select “Uninstall” in the menu that appears.
If you have checked your computer for malicious programs and did not find any, you can proceed with the next step in this guide.
-
Follow the prompts to uninstall the program.
In the next message box, confirm the uninstall process by clicking on Uninstall, then follow the prompts to uninstall the malicious program.
Make sure to read all of the prompts carefully, because some malicious programs try to sneak things in hoping that you won’t read them closely.


-
Press the Windows key + I on your keyboard to open the Settings app.
Press the Windows key + I on your keyboard to open the Settings app. You can also ope the Settings app by clicking the Start button on the taskbar, then select “Settings” (gear icon).

-
In the Settings app, click on “Apps”.
When the “Windows Settings” window opens, click on “Apps“. By default, it should open “Apps and Features” but if it doesn’t, select it from the list on the left.

-
Find the malicious program in the list of installed apps and uninstall it.
In Apps & Features settings, scroll down to the app list and search for unknown or suspicious programs. To make things easier, you can sort all installed programs by their installation date. To do this, click “Sort by” and select “Install date”.
Look out for any suspicious program that could be behind all the drama – anything you don’t remember downloading or that doesn’t sound like a genuine program. When you find a malicious program, click on it and select “Uninstall” in the menu that appears.
If you have checked your computer for malicious programs and did not find any, you can proceed with the next step in this guide.
-
Follow the prompts to uninstall the program.
In the next message box, confirm the uninstall process by clicking on Uninstall, then follow the prompts to uninstall the malicious program.
Make sure to read all of the prompts carefully, because some malicious programs try to sneak things in hoping that you won’t read closely.


-
Go to “Program and Features”.
Right-click on the Start button in the taskbar, then select “Programs and Features”. This will take you directly to your list of installed programs.

-
Search for malicious program and uninstall it.
The “Programs and Features” screen will be displayed with a list of all the programs installed on your computer. Scroll through the list until you find any unknown or suspicious program, then click to highlight it, then click the “Uninstall” button.
Look out for any suspicious program that could be behind all the drama – anything you don’t remember downloading or that doesn’t sound like a genuine program.
If you have checked your computer for malicious programs and did not find any, you can proceed with the next step in this guide.

-
Follow the on-screen prompts to uninstall malicious program.
In the next message box, confirm the uninstall process by clicking on Yes, then follow the prompts to uninstall malicious program. Make sure to read all of the prompts carefully, because some malicious programs try to sneak things in hoping that you won’t read closely.


-
Open the “Control Panel”.
Click on the “Start” button, then click on “Control Panel“.
-
Click on “Uninstall a Program”.
When the “Control Panel” appears, click on “Uninstall a Program” from the Programs category.

-
Search for malicious programs and uninstall them.
The “Programs and Features” screen will be displayed with a list of all the programs installed on your computer. Scroll through the list until you find any suspicious or unknown program, then click to highlight it, then click the “Uninstall” button.
Look out for any suspicious program that could be behind all the drama – anything you don’t remember downloading or that doesn’t sound like a genuine program.If you have checked your computer for malicious programs and did not find any, you can proceed with the next step in this guide.

-
Follow the on-screen prompts to uninstall malicious program.
In the next message box, confirm the uninstall process by clicking on Yes, then follow the prompts to uninstall malicious program. Make sure to read all of the prompts carefully, because some malicious programs try to sneak things in hoping that you won’t read closely.


If you are experiencing difficulty while attempting to uninstall a program, you can use Revo Uninstaller to completely remove the unwanted program from your computer.
Now that the malicious programs have been removed from your computer, we can proceed with the next step in this guide.
STEP 2: Reset browsers back to default settings
In this step, we will remove spam notifications, malicious extensions, and change to default any settings that might have been changed by malware.
Please note that this method will remove all extensions, toolbars, and other customizations but will leave your bookmarks and favorites intact. For each browser that you have installed on your computer, please click on the browsers tab below and follow the displayed steps to reset that browser.
ChromeFirefoxMicrosoft EdgeInternet Explorer
Reset Chrome for Windows to default settings
We will now reset your Chrome browser settings to their original defaults. This will reset your startup page, new tab page, search engine, and pinned tabs. It will also disable all extensions and clear temporary data like cookies. Your favorites, history, and saved passwords will not be cleared.
-
Click the three dots in the top-right corner and then click on “Settings”.
Open Chrome and click on the menu button (represented by three vertical dots) in the top right corner of the window. In the dropdown menu that opens, click “Settings“.

-
Click “Advanced”.
Chrome’s “Settings” should now be displayed in a new tab or window, depending on your configuration. In the left sidebar, click on the “Advanced” link.

-
Click “Reset and clean up”.
In the left sidebar, under the “Advanced” section, click on “Reset and clean up“.

-
Click “Reset settings to their original defaults”.
In the main window, the “Reset and clean up” section is visible, as shown in the screenshot below. Click on “Reset settings to their original defaults“.
-
Click “Reset settings”.
A confirmation dialog will now be displayed, detailing the components that will be restored to their default state should you continue with the reset process. To complete the restoration process, click on the “Reset settings” button.

-
(Optional) Reset Chrome Data Sync.
In case a malicious extension reinstalls itself even after performing a browser reset, you have an additional option to reset the data sync for your browser. To do this, navigate to chrome.google.com/sync and click on the Clear Data button.


Reset Firefox for Windows to default settings
We will now reset your Firefox browser settings to their default. The reset feature fixes many issues by restoring Firefox to its factory default state while saving your essential information like bookmarks, passwords, web form auto-fill information, browsing history, and open tabs.
-
Click the three horizontal lines in the top-right corner and then click on “Help”.
Click on Firefox’s main menu button, represented by three horizontal lines. When the drop-down menu appears, select the option labeled “Help“.

-
Click “More troubleshooting information”.
From the Help menu, click on “More troubleshooting information“.

-
Click on “Refresh Firefox”
When the “Troubleshooting Information” page opens, click on the “Refresh Firefox” button.

-
Confirm that you want to reset your browser settings.
To finish the reset process, click on the “Refresh Firefox” button in the new confirmation window that opens.
-
Click “Finish”.
Firefox will now close itself and will revert to its default settings. When it’s done, a window will list the information that was imported. Click on “Finish“.
Your old Firefox profile will be placed on your desktop in a folder named “Old Firefox Data“. If the reset didn’t fix your problem you can restore some of the information not saved by copying files to the new profile that was created. If you don’t need this folder any longer, you should delete it as it contains sensitive information.


Reset Microsoft Edge to default settings
We will now reset your Microsoft Edge browser settings to their default. This will reset your startup page, new tab page, search engine, and pinned tabs. It will also disable all extensions and clear temporary data like cookies. Your favorites, history, and saved passwords will not be cleared.
-
Click the three dots in the top-right corner and then click on “Settings”.
In the top right corner, click on Microsoft Edge’s main menu button, represented by three horizontal dots. When the drop-down menu appears, click on “Settings“.

-
Click on “Reset Settings”.
On the left side of the window, click on “Reset Settings“.
-
Click on “Restore settings to their default values”.
In the main window, click on “Restore settings to their default values“.

-
Click “Reset”.
A confirmation dialog should now be displayed, detailing the components that will be restored to their default state should you continue with the reset process. To complete the restoration process, click on the “Reset” button.
Microsoft Edge will now erase all your personal data, browsing history, and disable all installed extensions. Your bookmarks, though, will remain intact and still be accessible.


Reset Internet Explorer to default settings
We will now reset your Internet Explorer browser settings to their default. You can reset Internet Explorer settings to return them to the state they were in when Internet Explorer was first installed on your computer.
-
Go to “Internet Options”.
Open Internet Explorer, click on the gear icon in the upper-right part of your browser, then select “Internet Options“.
-
Select the “Advanced” tab, then click “Reset”
In the “Internet Options” dialog box, select the “Advanced” tab, then click on the “Reset” button.
-
Click on “Reset”.
In the “Reset Internet Explorer settings” section, select the “Delete personal settings” checkbox, then click on the “Reset” button.
-
Click on “Close”.
When Internet Explorer has completed its task, click on the “Close” button in the confirmation dialogue box.
Close your browser and then you can open Internet Explorer again.
STEP 3: Use Malwarebytes Anti-Malware to remove malware and unwanted programs
In this third step, we will install Malwarebytes to scan and remove any infections, adware, or potentially unwanted programs that may be present on your computer.
Malwarebytes stands out as one of the leading and widely-used anti-malware solutions for Windows, and for good reason. It effectively eradicates various types of malware that other programs often overlook, all at no cost to you. When it comes to disinfecting an infected device, Malwarebytes has consistently been a free and indispensable tool in the battle against malware. We highly recommend it for maintaining a clean and secure system.
-
Download Malwarebytes for Windows
You can download Malwarebytes by clicking the link below.
-
Install Malwarebytes
After the download is complete, locate the MBSetup file, typically found in your Downloads folder. Double-click on the MBSetup file to begin the installation of Malwarebytes on your computer. If a User Account Control pop-up appears, click “Yes” to continue the Malwarebytes installation.

-
Follow the On-Screen Prompts to Install Malwarebytes
When the Malwarebytes installation begins, the setup wizard will guide you through the process.
-
You’ll first be prompted to choose the type of computer you’re installing the program on—select either “Personal Computer” or “Work Computer” as appropriate, then click on Next.

-
Malwarebytes will now begin the installation process on your device.

-
When the Malwarebytes installation is complete, the program will automatically open to the “Welcome to Malwarebytes” screen.

-
On the final screen, simply click on the Open Malwarebytes option to start the program.

-
-
Enable “Rootkit scanning”.
Malwarebytes Anti-Malware will now start, and you will see the main screen as shown below. To maximize Malwarebytes’ ability to detect malware and unwanted programs, we need to enable rootkit scanning. Click on the “Settings” gear icon located on the left of the screen to access the general settings section.

In the settings menu, enable the “Scan for rootkits” option by clicking the toggle switch until it turns blue.

Now that you have enabled rootkit scanning, click on the “Dashboard” button in the left pane to get back to the main screen.
-
Perform a Scan with Malwarebytes.
To start a scan, click the Scan button. Malwarebytes will automatically update its antivirus database and begin scanning your computer for malicious programs.

-
Wait for the Malwarebytes scan to complete.
Malwarebytes will now scan your computer for browser hijackers and other malicious programs. This process can take a few minutes, so we suggest you do something else and periodically check the status of the scan to see when it is finished.
-
Quarantine detected malware
Once the Malwarebytes scan is complete, it will display a list of detected malware, adware, and potentially unwanted programs. To effectively remove these threats, click the “Quarantine” button.

Malwarebytes will now delete all of the files and registry keys and add them to the program’s quarantine.
-
Restart your computer.
When removing files, Malwarebytes may require a reboot to fully eliminate some threats. If you see a message indicating that a reboot is needed, please allow it. Once your computer has restarted and you are logged back in, you can continue with the remaining steps.


STEP 4: Use HitmanPro to scan your computer for badware
In this next step, we will scan the computer with HitmanPro to ensure that no other malicious programs are installed on your device.
HitmanPro is a second-opinion scanner that takes a unique cloud-based approach to malware scanning. HitmanPro scans the behavior of active files and also files in locations where malware normally resides for suspicious activity. If it finds a suspicious file that’s not already known, HitmanPro sends it to its clouds to be scanned by two of the best antivirus engines today, which are Bitdefender and Kaspersky.
Although HitmanPro is shareware and costs $24.95 for 1 year on 1 PC, there is no limit on scanning. The limitation only kicks in when there is a need to remove or quarantine detected malware by HitmanPro on your system and by then, you can activate the one-time 30-days trial to enable the cleanup.
-
Download HitmanPro.
You can download HitmanPro by clicking the link below.
HITMANPRO DOWNLOAD LINK
(The above link will open a new web page from where you can download HitmanPro) -
Install HitmanPro.
When HitmanPro has finished downloading, double-click on “hitmanpro.exe” (for 32-bit versions of Windows) or “hitmanpro_x64.exe” (for 64-bit versions of Windows) to install this program on your computer. In most cases, downloaded files are saved to the Downloads folder.

You may be presented with a User Account Control pop-up asking if you want to allow HitmanPro to make changes to your device. If this happens, you should click “Yes” to continue with the installation.

-
Follow the on-screen prompts.
When HitmanPro starts you will be presented with the start screen as shown below. Click on the “Next” button to perform a system scan.


-
Wait for the HitmanPro scan to complete.
HitmanPro will now begin to scan your computer for malicious programs.
-
Click on “Next”.
When HitmanPro has finished the scan, it will display a list of all the malware that it has found. Click on the “Next” button to have HitmanPro remove the detected items.

-
Click on “Activate free license”.
HitmanPro may now require to activate the free 30-days trial to remove the malicious files. To do this, click on the “Activate free license” button to begin the free 30 days trial and remove all the malicious files from your computer.

When the malware removal process is complete, it will display a screen that shows the status of the various programs that were removed. At this screen, you should click on the Next button and then if prompted you should click on the Reboot button. If HitmanPro does not prompt you to reboot, please just click on the Close button.


STEP 5: Use AdwCleaner to remove adware and malicious browser policies
In this final step, we will use AdwCleaner to remove the malicious browser policies that were set by browser hijackers on your computer and delete malicious browser extensions.
AdwCleaner is a free popular on-demand scanner that can detect and remove malware that even the most well-known anti-virus and anti-malware applications fail to find. This on-demand scanner includes a lot of tools that can be used to fix the side effects of adware. browser hijackers and other malware.
-
Download AdwCleaner.
You can download AdwCleaner by clicking the link below.
-
Double-click on the setup file.
Double-click on the file named “adwcleaner_x.x.x.exe” to start AdwCleaner. In most cases, downloaded files are saved to the Downloads folder.

AdwCleaner program will now open and you will be presented with the program’s license agreement. After you read it, click on the I agree button if you wish to continue. If Windows prompts you as to whether or not you wish to run AdwCleaner, please allow it to run.

-
Enable “Reset Chrome policies” to remove malicious browser policies.
When AdwCleaner starts, on the left side of the window, click on “Settings” and then enable “Reset Chrome policies“.

-
Click on the “Scan” button.
On the left side of the AdwCleaner window, click on “Dashboard” and then click “Scan” to perform a computer scan.

-
Wait for the AdwCleaner scan to finish.
AdwCleaner will now scan your computer for malware. This process can take a few minutes.
-
Click on “Quarantine” to remove malware.
When the AdwCleaner scan is completed it will display all of the items it has found. Click on the “Quarantine” button to remove the malicious programs from your computer.

-
Click on “Continue” to remove the malicious programs.
AdwCleaner will now prompt you to save any open files or data as the program will need to close any open programs before it starts to clean. Click on the “Continue” button to finish the removal process.

AdwCleaner will now delete all detected malware from your computer. When the malware removal process is complete, you may be asked to restart your computer.


Your computer should now be free of the Igfxpers.exe Trojan and other malware.
If your current antivirus allowed this malicious program on your computer, you may want to consider purchasing Malwarebytes Premium to protect against these types of threats in the future.
If you are still having problems with your computer after completing these instructions, then please follow one of the steps:
- Run a computer scan with ESET Online Scanner
- Ask for help in our Windows Malware Removal Help & Support forum.
Here are 10 basic security tips to help you avoid malware and protect your device:
To avoid potential dangers on the internet, it’s important to follow these 10 basic safety rules. By doing so, you can protect yourself from many of the unpleasant surprises that can arise when using the web.
Attention Before you read this post, I highly recommend you check out my resources page for access to the tools and services I use to not only maintain my system but also fix all my computer errors, by clicking here!
If while looking in Windows Task Manager, you noticed the igfxpers.exe process running in the background, you may be confused as to what it is, primarily because of its cryptic name. That said, first things first, it’s not a malicious file, so you don’t need to worry about that. This process is from Intel and is installed along with your graphics card drivers on Intel-based chipset motherboards.
How Igfxpers.exe Works
To delve a little deeper, igfxpers.exe is a component of the Intel Graphics Media Accelerator Drivers, representing the Intel graphics Persistence Module. This component is one aspect of the Intel Common User Interface Application and is usually installed with the igfxtray.exe process, which is an Intel graphics tray application that enables the end user access the graphics configuration options for their graphics card. The purpose of this process is to allow for the restoration of a native screen resolution after shutdown, hibernation or a restart.
It also allows for simple resolution chances, such as running your Ultra-Mobile PC (UMPC) on a scaled up display resolution or simply changing the resolution for your desktop. Without this component the computer will lose its current screen resolution settings after you turn it off.
Igfxpers.exe will usually load during system boot up. It’s a digitally signed file, which means it has been tested and proven to be compatible with Windows operating systems. As previously mentioned, it’s not a malicious file, but is known to cause a number of issues for your system, all of which I intend to discuss in this post.
The default location for this file is the following:
C:\Windows\system32\igfxpers.exe
Intel states that the igfxpers.exe file is crucial to the smooth functionality of your display drivers and card.
Dangers of Igfxpers.exe
The igfxpers.exe file is an executable process which can be found on a number of systems with Intel based chipset mothers. So there’s reason to believe that many hackers would specifically target this component when creating spyware and viruses, disguising their malicious files as this legitimate process.
These malicious files will usually have the exact same name as this process, but be stored in a location other than the default location mentioned above. Other viruses may use a name that appears to be similar, but with slight changes in order to infect and corrupt the machine. So it’s most prudent we take the necessary steps and look out for these malicious files when operating our computers.
Another strong indication that your computer has been infected with a virus is when you notice, what appears to be more than one instance of the same process running in the background of your computer. Certain files, such as DLL files, are shared and thus, run several times across several programs, however this is very rarely the case with .exe files.
Common Issues
- The igfxpers.exe process consumes a considerable amount of CPU resources.
- A fault with the igfxpers.exe process causes BSOD errors with the 0x0000007E stop code.
It is possible for you to stop this process, because it’s not an essential file. To stop the process, the user need only remove the Intel Common User Interface Module from their computer, as this process is a part of the greater program.
Another thing to keep in mind is that this process is not considered to be CPU intensive that said; running loads of programs in the background of your computer is more than capable of degrading system performance.
Common Error Messages
For the end users that have come face to face with igfxpers.exe related error messages, they have reported seeing the following most commonly:
Cannot find Igfxpers.exe file
Igfxpers.exe file not found
Device not recognised missing Igfxpers.exe
As this process also interacts with the motherboard USB connections, it’s possible that your mouse, keyboard or some other hardware component connected to your system (through the USB port) is causing these commonly encountered issues.
What Causes These Errors
These particular error messages are usually caused by a conflict between an installation profile and file, the corruption of a system file or a virus infection of the computer.
When issues arise with a particular process, the related application may be unable to transmit data between corresponding and related files.
When a directory has been damaged, the application that uses it, may also fail to load.
A malicious viral attack is capable of rendering your system inoperable or preventing you from using certain components of the operating system.
That said, knowing the cause is crucial when it comes to repairing a problem, as it will help when prescribing a viable remedy.
How to Fix It
With all of that said, above, if you’re having problems with this particular process, there are several things that can be done to fix it. All of these solutions have been outlined below; one only needs to establish the cause of the problem in order to effectively tackle it.
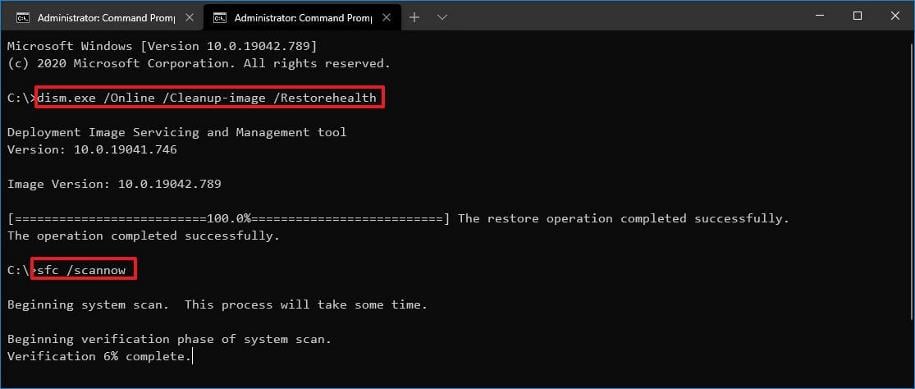
Run a Registry Scan
The first thing you should do when confronted with an igfxpers.exe error is run a full registry scan of your system. Alternatively depending on the exact problem you’re experiencing you may decide to adopt the registry edit (advanced solution below), which will help you, when your system fails to keep its original screen resolution when you restart, shutdown or put it into hibernation.
That said, the registry cleaner tool is more than capable of carrying out this task for you, so depending on your level of expertise, it’s recommended that you use Advanced System Repair Pro, because of its efficiency, ease of use and ability to optimise system performance. You can download this tool from here:
CLICK HERE TO CHECK OUT ADVANCED SYSTEM REPAIR PRO
Update Hardware Drivers
If after attempting the method outlined above, you’re still having problems with this particular file, then you should consider updating or reinstalling the driver files for this particular component.
In order to do that, you will need to go to the official (Intel) website and locate and download the appropriate drivers. Alternatively, if you’re unable to locate the appropriate chipset drivers, then you can use the automated driver updater tool called DriverFinder. This tool, when installed on your computer, will automatically search the internet and download the latest drivers, for not just your motherboard, but all the devices connected to your computer, with a single click of a button.
DriverFinder is a very powerful, efficient, time saving tool, which you can download from here:
CLICK HERE TO CHECK OUT DRIVERFINDER
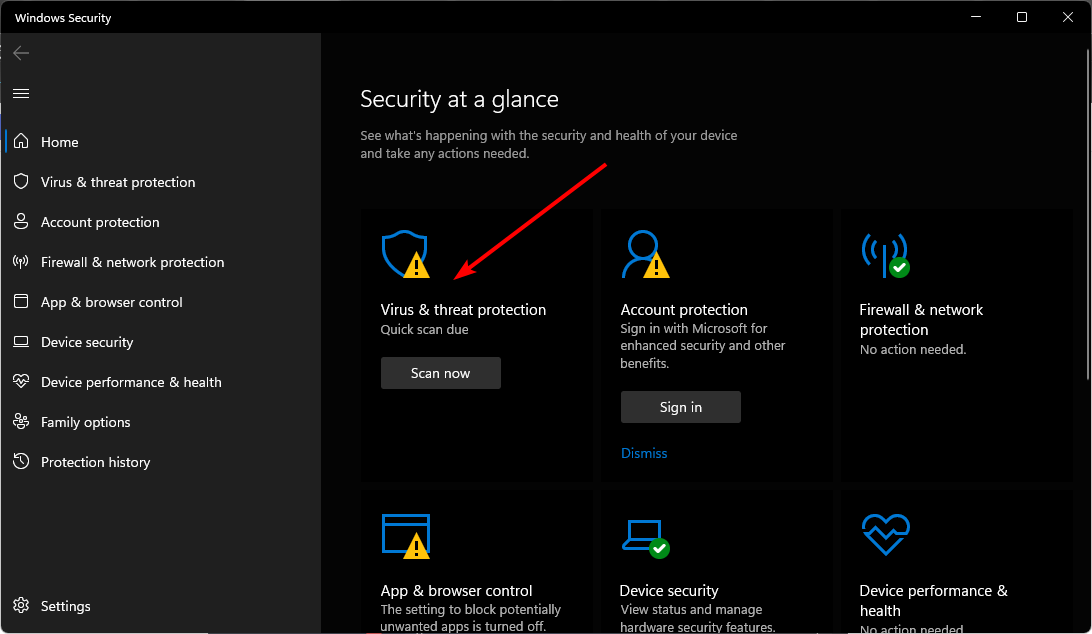
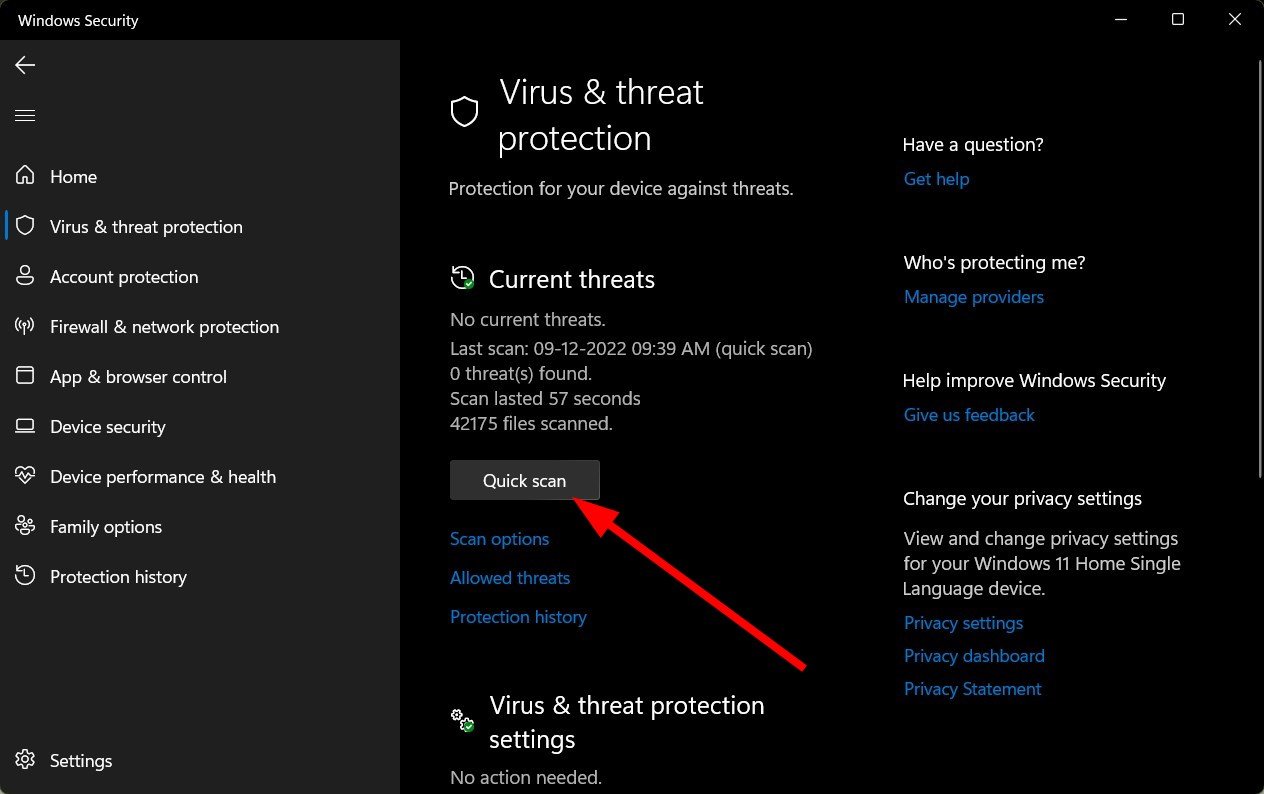
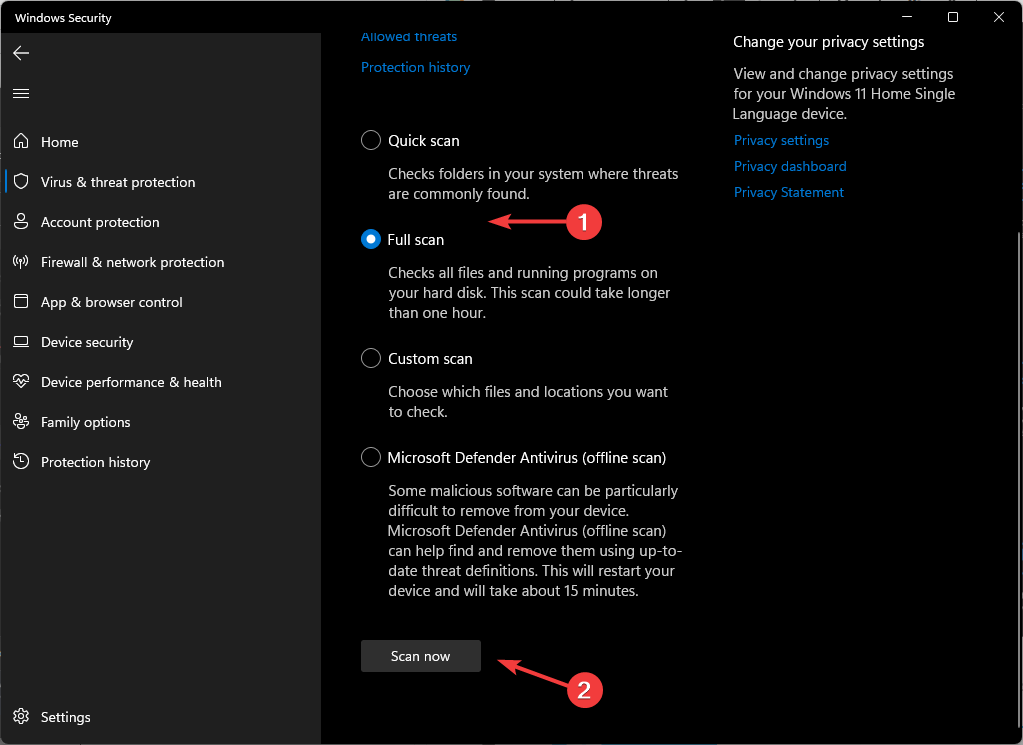
Run a Virus Scan
When confronted with igfxpers.exe errors another thing you’ll want to do to rectify it, is run a full virus scan of your system. Assuming you already have an antivirus tool installed on your computer, you can go right ahead and do that.
Alternatively, if you do not have an antivirus tool on your computer or you’re not totally convinced you have the best solution, then I recommend you use SpyHunter, which is the very best antimalware tool on the internet. SpyHunter is capable of detecting and removing malware, spyware, adware and viruses, and it’s also capable of repairing previously damaged system components, so it’s a great tool to have on your computer.
With that said, you can download SpyHunter from here:
CLICK HERE TO CHECK OUT SPYHUNTER
Edit the Registry
Alternatively, if you feel you have the expertise and knowhow, you can edit the registry yourself, by doing the following:
WARNING: If you delete or edit the wrong registry key, you could permanently damage your operating system, so tread with caution.
1. First, boot into your computer with your default user profile that has administrative rights.
2. Then press + R, type regedit and click on OK.
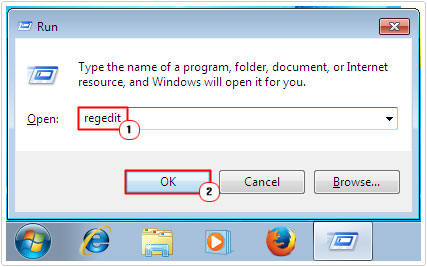
3. Once Registry Editor loads up, navigate to the following path:
HKEY_LOCAL_MACHINE\SOFTWARE\Microsoft\Windows\CurrentVersion\Run
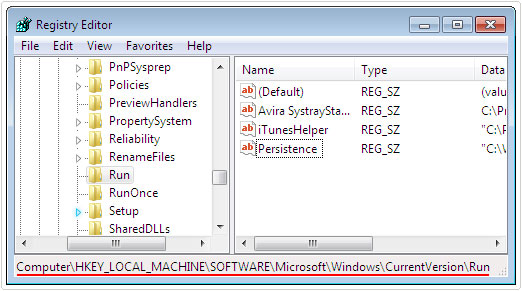
4. Once there, locate and right click on the Persistence key and select Delete.
5. Lastly, close the Registry Editor and restart your computer.
Are you looking for a way to repair all the errors on your computer?
If the answer is Yes, then I highly recommend you check out Advanced System Repair Pro.
Which is the leading registry cleaner program online that is able to cure your system from a number of different ailments such as Windows Installer Errors, Runtime Errors, Malicious Software, Spyware, System Freezing, Active Malware, Blue Screen of Death Errors, Rundll Errors, Slow Erratic Computer Performance, ActiveX Errors and much more. Click here to check it out NOW!