
By Timothy Tibbetts |
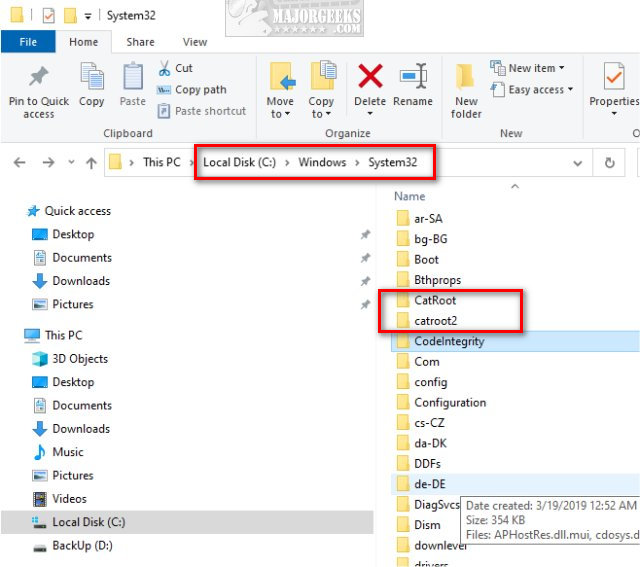
CatRoot and catroot2 are two folders found in C:\Windows\System32. In this tutorial, we explain what these two folders are and how to delete (one of) them if needed.
Catroot and Catroot2 are Windows system folders required for Windows Updates. The folders contain numerous files and folders, including signatures of the Windows Update package.
Deleting the contents of the Catroot2 folder has been known to fix Windows Update errors or problems.
Deleting the Catroot and Catroot2 is for Advanced Users Only. If you remove the Catroot folder, your computer won’t boot. If you delete Catroot2, the folder is automatically created when you reboot. We spent hours testing this and found that removing the Catroot folder consistently rendered our computer unbootable.
Video tutorial:
To delete the folders, open File Explorer and go to C:\Windows\System32.
Catroot2:
Double-click on the catroot2 folder.
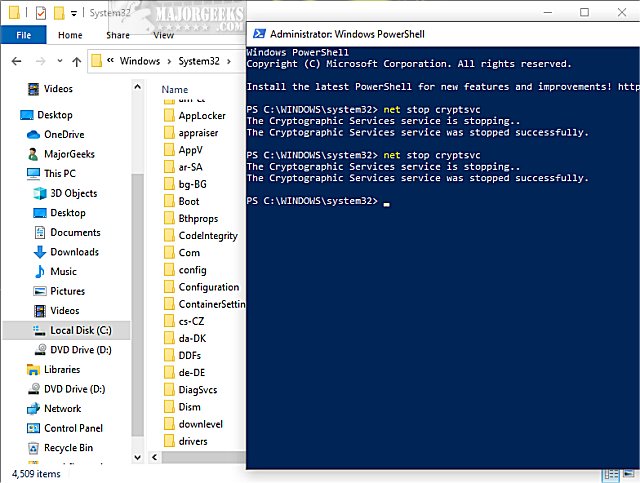
Open PowerShell as Admin.
Press Ctrl + A to highlight all files and folders and press Delete.
When you see the Folder in use error switch back to Powershell and type in net stop cryptsvc
Switch back to File Explorer and continue deleting by pressing Try Again.
You will need to press Continue multiple times.
CatRoot (Not Recommended):
Stop! Deleting the CatRoot folder will cause your computer to not boot. The folder is intentionally difficult to delete. This information is for advanced users and informational purposes.
If you were to delete the CatRoot folder, you’d follow the same steps for the catroot1 folder.
Similar:
comments powered by Disqus
Catroot2 and SoftwareDistribution are two important cache folders on Windows 11/10 PC. Whenever you update your device, some information is saved inside these folders. When their database increase in size, they may start causing different error codes on your PC and even prevent updates from happening automatically. In this blog post, we have discussed how to find and purge this Catroot2 folder on Windows PC.
See Also: How to Clear the SoftwareDistribution Folder on Windows 11
How to Purge the contents inside the Catroot2 folder
If you are struggling with an update error code, clearing the contents inside the Catroot2 folder might help. Here’s how to purge this folder on Windows PC –
Note: Before you begin clearing the contents inside this folder, make sure to disable the update services first.
- Press Windows + R to launch the Run dialog box.
- Type “
services.msc” on it and hit OK. - When the Services window opens up, scroll down to the Background Intelligent Transfer service.
- Right-click on this service, and choose the Stop option from the context menu.
- In a similar way, disable the services – Windows Update and Cryptographic services as well.
- Once disabled, open File Explorer by pressing Win + E and reach out to the below path –
C:\Windows\System32
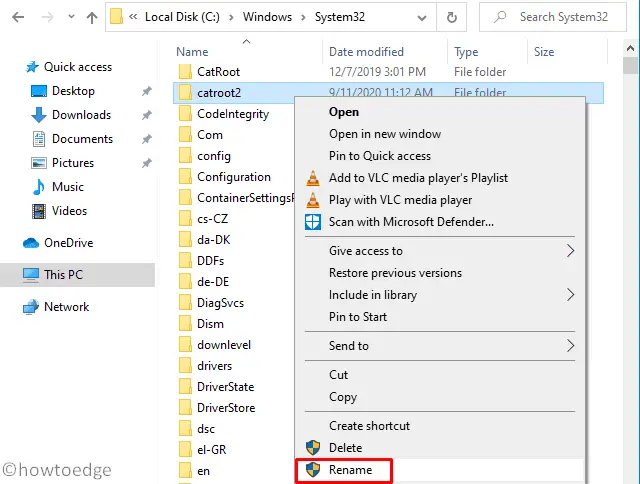
- Locate and double-click on Catroot2 to open this folder.
- Use Ctrl + A to select all items, right-click on any one item, and choose to delete them.
Note: Though you may delete this folder, we suggest renaming this folder to something catroot2.old. This way, all the files inside this folder are with you and you may use them in case something went wrong on your computer.
- Once deleted or renamed, you may restart all those services that you have stopped before.
Restart your Windows PC and check if the persisting update error resolves afterward. When you reach out to the Catroot folder’s location, you will find new files and folders lying there.
Note: If you had renamed this folder, you will find two different folders starting with catroot2. Out of them, one is the folder bearing “.old” extension while the latter is recently created by Windows.
2] Deleting the Catroot2 Folder using CMD or PowerShell
Since the Catroot2 folder contains some important data related to previous updates on your Windows PC, we suggest not deleting this folder or purging its contents. Instead, you may rename this folder to something like catroot2.old. This way, you not only contain the catroot2 folder from deleting but also severs the deletion purpose.
Follow the below instructions on how to perform this task on Windows 11 –
- Press Windows + X to launch the Power Menu.
- Select Terminal (Admin) and when the UAC window prompts, hit Yes.
- This will default open Windows PowerShell having admin privileges.
Note: Alternatively, you may also use Ctrl + Shift + 2 to invoke Command Prompt on the terminal.
- Copy/paste the following codes on the elevated console to stop all major update services.
net stop bits
net stop wuauserv
net stop appidsvc
net stop cryptsvc

- After you stopped the update services from running on your system, run the following code to delete the catroot2 folder from your system.
rmdir %systemroot%\system32\catroot2 /S /Q
Note: If you want, you may even choose to rename this folder to something – “catroot.old” as well. Do note to run this code instead of running the above command –
rename C:\Windows\System32\catroot2 Catroot2.old
- Restart all those services that you stopped earlier by executing the below series of commands –
net start wuauserv
net start bits
net start appidsvc
net start cryptsvc

- After you have run all these codes successfully, close Command Prompt/PowerShell, and restart your PC.
Sign back into your device again and you will find this Catroot2 folder lying inside the C:\Windows\System32 folder.
Renaming Software Distribution Folder and Catroot2: A Comprehensive Guide
When troubleshooting Windows update issues, one of the common steps recommended by support technicians is renaming certain folders related to the Windows Update process, specifically the Software Distribution folder and the Catroot2 folder. These directories often house temporary files that can become corrupted or outdated, leading to errors in the update process. Renaming these folders can force Windows to create new ones and resolve potential conflicts. In this detailed guide, we will walk you through the process, explaining both folders’ significance, how to rename them, and important considerations when performing these actions.
Understanding the Software Distribution Folder and Catroot2
To properly appreciate why you may need to rename these folders, it is important to understand their roles in Windows operations.
Software Distribution Folder
The Software Distribution folder is primarily located at C:WindowsSoftwareDistribution. This directory serves as a temporary repository for files needed during the Windows Update process. When Windows downloads updates, it stores them in this folder before installation. The folder is divided into several subdirectories, including:
- Download: Contains all the updates that have been downloaded.
- DataStore: Holds the database file which tracks updates and their installation status.
Over time, these files can accumulate, leading to issues such as stalled updates, update errors, or Windows Update failures.
Catroot2 Folder
The Catroot2 folder can be found at C:WindowsSystem32catroot2. It plays a crucial role in the installation of Windows updates and is involved in the signature verification process for updates. The folder contains additional files required for the installation of updates as well as a database to track the status of these updates. Similar to the Software Distribution folder, corruption or other issues in this directory can lead to problems with Windows Update.
Why You Should Rename These Folders
Renaming the Software Distribution and Catroot2 folders effectively resets them, prompting Windows to recreate them automatically. This can resolve issues stemming from:
- Corrupted files that prevent updates from installing correctly.
- Stale data causing the update process to hang or fail.
- Other unforeseen errors that arise during the Windows Update process.
Renaming the Folders: Step-by-Step Guide
Before you begin the renaming process, it is crucial to ensure that you are performing these steps with administrator privileges to avoid any permission issues. Additionally, consider creating a backup of your important data as a precaution.
Step 1: Stop Windows Update Services
-
Open Command Prompt as Administrator:
- Press
Windows + Xto open the Power User menu. - Select
Windows Terminal (Admin)orCommand Prompt (Admin). - If prompted by User Account Control, click
Yesto allow.
- Press
-
Stop the Windows Update Services:
You will need to stop services related to the update process. Type the following commands, pressingEnterafter each one:net stop wuauserv net stop cryptSvc net stop bits net stop msiserverThese commands halt the Windows Update service (
wuauserv), Cryptographic service (cryptSvc), Background Intelligent Transfer Service (bits), and the Windows Installer service (msiserver).
Step 2: Rename the Software Distribution Folder
-
Navigate to the Software Distribution Folder:
- In the Command Prompt window, type the command:
ren C:WindowsSoftwareDistribution SoftwareDistribution.old
This command will rename the
SoftwareDistributionfolder toSoftwareDistribution.old. - In the Command Prompt window, type the command:
Step 3: Rename the Catroot2 Folder
-
Navigate to the Catroot2 Folder:
- Similarly, type the following command in the Command Prompt:
ren C:WindowsSystem32catroot2 catroot2.old
This renames the
catroot2folder tocatroot2.old. - Similarly, type the following command in the Command Prompt:
Step 4: Restart Windows Update Services
Once you have renamed both folders, it is crucial to restart the stopped services so the update process can function correctly again.
- Start the Windows Update Services:
Type the following commands in the Command Prompt, pressingEnterafter each:net start wuauserv net start cryptSvc net start bits net start msiserver
Step 5: Verify Update Process
With the new folders in place, it is time to check for updates and ensure everything is functioning correctly.
- Open Windows Update Settings:
- Press
Windows + Ito open the Settings. - Go to
Update & Securityand click onWindows Update. - Click on
Check for updatesto see if your system can now successfully fetch and install updates.
- Press
Troubleshooting Common Issues
Sometimes users may still encounter issues even after renaming the folders. Below are some common problems and solutions associated with the Windows Update process:
Windows Update Failures
If updates fail to install despite resetting the folders, consider these steps:
-
Run Windows Update Troubleshooter:
- In the Windows Update settings, scroll down and click on
Troubleshoot. - Select
Additional troubleshooters, then click onWindows Updateand run the troubleshooter.
- In the Windows Update settings, scroll down and click on
-
Check for Corrupted System Files:
Use the System File Checker (SFC) tool to repair any corrupted files.- In Command Prompt (Admin), run:
sfc /scannow
- In Command Prompt (Admin), run:
-
Use DISM Tool:
If SFC fails to repair issues, you can use the DISM (Deployment Imaging Service and Management Tool):DISM /Online /Cleanup-Image /RestoreHealth -
Manual Update Installation:
If specific updates continue to fail, visit the Microsoft Update Catalog website and manually download and install the updates.
Best Practices to Avoid Issues with Software Distribution and Catroot2
-
Regular System Maintenance: Perform regular cleaning and maintenance on your system to prevent accumulation of outdated files.
-
Use a Reliable Antivirus: Ensure that you have a reputable antivirus solution installed to prevent malware that may corrupt update files.
-
Backup Your System: Regularly back up your system to create restore points that you can revert to in case of failure.
-
Keep Windows Updated: Regularly apply updates to your operating system to ensure stability and security in your system.
-
Check Disk Health: Use native tools like
chkdskto scan and repair disk-related issues that can impact the Windows update process.
Conclusion
Renaming the Software Distribution folder and Catroot2 can be an effective remedy for resolving persistent Windows Update issues. It allows Windows to reset its update mechanisms by creating fresh folders, avoiding problems related to corruption and outdated files.
By following the outlined procedures and best practices, users can have a smoother experience with the Windows Update process. Regular troubleshooting and maintenance will not only enhance system performance but also contribute to ongoing stability and security for the operating system.
This comprehensive guide should equip you with the knowledge and confidence to address issues related to Windows updates on your own. If problems persist despite these efforts, consider seeking further assistance or engaging with the Microsoft community support for advanced troubleshooting. Remember that keeping your system updated and well-maintained is key to a seamless computing experience.
Quick Tips
- The Catroot2 folder contains signatures needed to facilitate the update process on your PC.
- The SoftwareDistribution folder contains temporary files required to install the update.
- Deleting or renaming both of these folders can help you fix issues and problems with Windows Update.
What Happens When You Reset SoftwareDistribution and Catroot2 Folders
Catroot2 folder contains catalog files (.cat) that are cryptographic hashes and digital signatures for system files. If these files become corrupted, it can lead to problems with Windows Update. Renaming or deleting the existing folder forces Windows to create a new Catroot2 folder with fresh catalog files. The new folder is less likely to get corrupted, helping you smoothly install the update on your PC.
The SoftwareDistribution folder is where Windows stores temporary files related to Windows Updates, including downloaded update files and installation components. Renaming or deleting this folder clears the cache of downloaded updates and resets the Windows Update components. These junk and cache files may be responsible for executing bugs. Therefore, deleting them can help prevent problems with updates.
If you are facing issues with Windows Updates, try to rename or delete SoftwareDistribution or Catroot2 folders on your PC. We’ll show you everything you need to know.
Renaming the SoftwareDistribution and Catroot2 folders helps your PC create fresh instances. You will need to use Command Prompt to rename the folders.
Step 1: Open Command Prompt on your PC as an administrator.

Step 2: You must stop a few services before you rename the folders.
Enter the following commands on CMD to stop the related services. Type the commands one after the other and hit the enter key.
net stop wuauserv
net stop cryptSvc
net stop bits
net stop msiserver
Step 3: Now, enter the following commands to rename the folders.
ren C:\Windows\SoftwareDistribution SoftwareDistribution.bak ren C:\Windows\System32\catroot2 Catroot2.bak
Step 4: The folders will be successfully renamed. Now, you need to restart the services that you just stopped.
Enter the following commands on CMD to restart the services.
net start wuauserv
net start cryptSvc
net start bits
net start msiserver
You can now try to install the latest Windows Update on your PC.
How to Delete SoftwareDistribution and Catroot2 Folders
Here’s how to delete the SoftwareDistribution and Catroot2 folders on your PC.
Step 1: You must stop a few services before deleting the folders. Open Command Prompt as an administrator.
Enter the following commands on CMD to stop the related services. Type the commands one after the other and hit the enter key.
net stop wuauserv
net stop cryptSvc
net stop bits
net stop msiserver
Step 2: Open Windows Explorer and paste the following location in the address bar :
C:\Windows\SoftwareDistribution
Alternatively, you can also navigate to the folder.
Step 3: Once you open the folder, select all the contents and delete them. This will delete the SoftwareDistribution folder from your PC.

Step 4: Similarly, paste the following destination in the address bar of File Explorer to open the CatRoot2 folder.
C:\Windows\System32\catroot2
Step 5: Select all the contents and delete them. This will delete the Catroot2 folder from your PC.

Step 6: Open Command Prompt as an administrator. Now, restart the services you stopped.
Enter the following commands on CMD to restart the services.
net start wuauserv
net start cryptSvc
net start bits
net start msiserver
Also Read: How to unpause Windows Updates.
Was this helpful?
Thanks for your feedback!
The article above may contain affiliate links which help support Guiding Tech. The content remains unbiased and authentic and will never affect our editorial integrity.
Все способы:
- Способ 1: Скрытый «Администратор»
- Способ 2: Настройки безопасности
- Способ 3: Отключение UAC
- Способ 4: Пересоздание папки «catroot2»
- Дополнительные рекомендации
- «Командная строка»
- Проверка файла mmc.exe
- Вопросы и ответы: 0
Ошибка может возникнуть при запуске любой оснастки управления компьютером, открываемой через интерфейс штатного компонента «Microsoft Windows Operating System».
Способ 1: Скрытый «Администратор»
Для обхода ограничений прав доступа на локальном компьютере можно использовать встроенную в Windows 10 учетную запись «Администратор», обладающую более высокими привилегиями, чем обычный администратор. По умолчанию она отключена, а чтобы ее активировать, сделайте следующее:
- Запустите от имени администратора классическую «Командную строку» или «PowerShell».
- Выполните команду
net user Администратор /active:yes, после чего выйдите из текущей учетной записи и войдите в активированную.

По умолчанию учетная запись «Администратор» не имеет пароля. После входа в нее запуск оснасток и других приложений будет выполняться без участия функции UAC.
Способ 2: Настройки безопасности
Чтобы получить доступ к политикам безопасности, возможно, придется прибегнуть к решению, описанному в Способе 1, так как приложение управления политиками безопасности само входит в группу оснасток MSC.
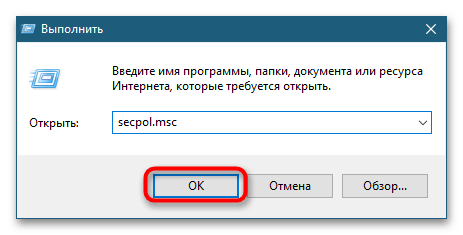
- Откройте оснастку «Локальная политика безопасности» командой
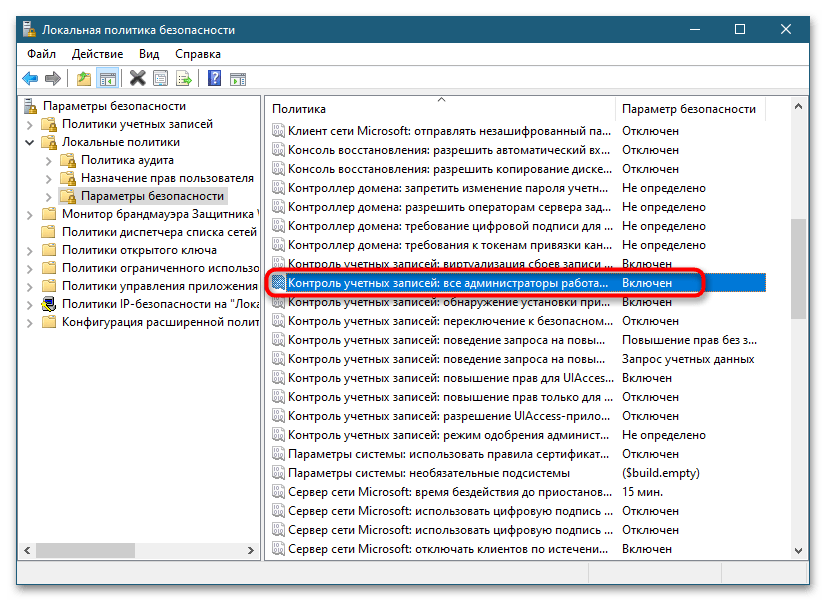
secpol.msc, выполненной в диалоговом окошке «Выполнить» (Win + R), а в случае ошибки – той же командой через запущенную с администраторскими правами «Командную строку» или «PowerShell». - Перейдите в раздел «Локальные политики» → «Параметры безопасности», найдите справа политику «Контроль учетных записей: все администраторы работают в режиме одобрения администратором» и откройте ее «Свойства» двойным по ней кликом.
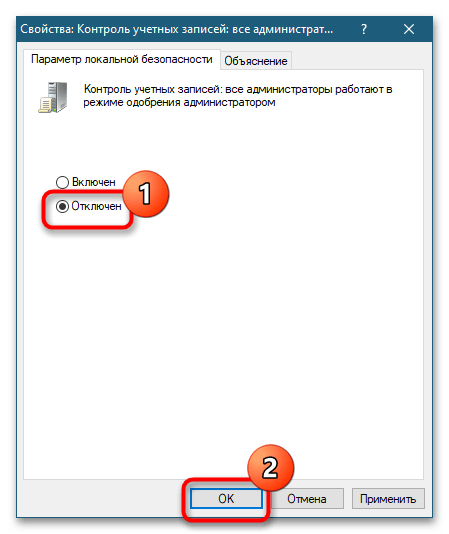
- Отключите ее, сохраните настройки и перезагрузите компьютер.
Способ 3: Отключение UAC
Как вариант, можно отключить на время выполнения нужных действий с консолями MMC «Контроль учетных записей.». Это делается как минимум двумя способами, мы же рассмотрим только один из них.
- Запустите от имени администратора «Командную строку».
- Выполните команду
reg ADD HKLM\SOFTWARE\Microsoft\Windows\CurrentVersion\Policies\System /v EnableLUA /t REG_DWORD /d 0 /f - Обязательно перезагрузите компьютер.

Подробнее: Отключение UAC в Windows 10
Способ 4: Пересоздание папки «catroot2»
Поскольку предыдущие методы направлены на понижении защиты Windows, подойдут они не всем. Для целенаправленного исправления возникшей неполадки предлагается решение, заключающееся в пересоздании системной базы данных каталогов.
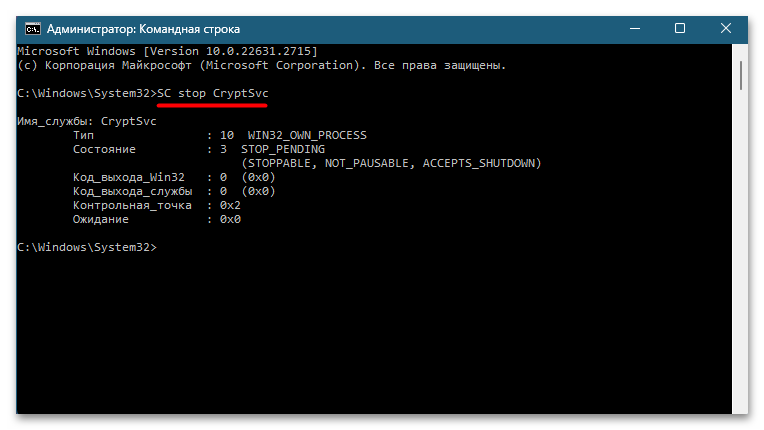
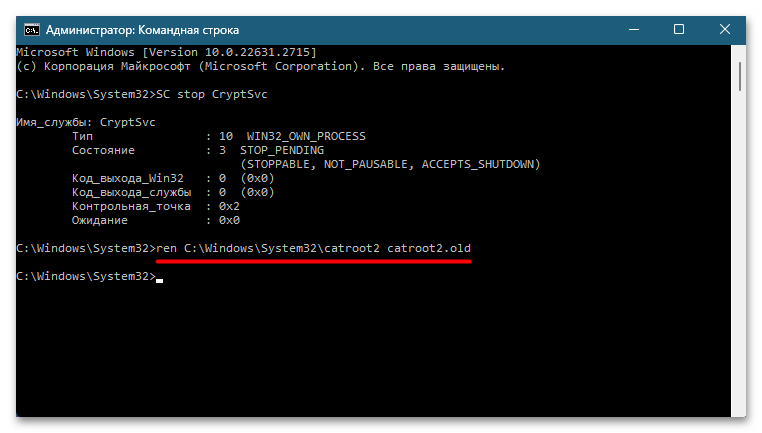
- Открываем «Командную строку» с правами администратора, где вписываем команду
SC stop CryptSvcи жмем Enter. Это остановит службу криптографии. - Следующей вводим
ren C:\Windows\System32\catroot2 catroot2.old— она переименовывает папку «catroot2», в результате чего та будет пересоздана. - Перезагружаем ПК обычным методом или командой
shutdown /r /t 0в консоли.
Вместо «Командной строки» вы также можете использовать «PowerShell». В этом случае последовательно введите следующее:
Stop-Service cryptsvc

Rename-Item -Path "C:\Windows\System32\catroot2" -NewName catroot2.old

Restart-Computer -Force
Не забудьте предварительно сохранить всю работу в Windows, так как команды
shutdown /r /t 0,Restart-Computer -Forceзавершают сеанс мгновенно.
После перезагрузки папка «catroot2» пересоздастся, и проблема должна быть исправлена. К слову, вы можете перейти по C:\Windows\System32\ и удалить там «catroot2.old».
Дополнительные рекомендации
Помимо непосредственного устранения неполадки, есть также пара дополнительных рекомендаций: запуск оснасток через консоль (подойдет в ситуации, когда почему-то не получается исправить проблему или нет на это времени) и проверка файла на оригинальность, поскольку он вполне мог пострадать из-за вирусов.
Читайте также: Как проверить Windows 10 на вирусы и другие угрозы
«Командная строка»
Данный метод хорош тем, что не требует изменения настроек безопасности Windows, но у него есть и свой недостаток – сам по себе он не устраняет причины неполадки. В случае запуска оснастки mmc.exe обычным способом ошибка, скорее всего, повторится.
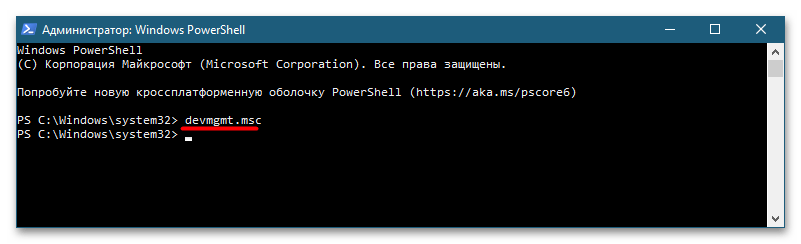
- Запустите от имени администратора классическую «Командную строку» или «PowerShell» любым удобным способом – из контекстного меню кнопки «Пуск» или из поиска Windows.
- Выполните команду запуска нужной оснастки MMC — например, «Диспетчер устройств» можно запустить командой
devmgmt.msc.

Названия оснасток MMC и соответствующие им команды запуска без проблем можно найти в интернете.
Проверка файла mmc.exe
Это решение, как уже было сказано, является дополнительным, оно позволит убедиться, что исполняемый файл консоли mmc.exe не поврежден и не подменен. Также оно позволяет восстановить файл в случае повреждение оригинала.
- Запустите с правами администратора «Командную строку» или «PowerShell».
- Выполните команду
sfc /scanfile=C:\Windows\System32\mmc.exe.
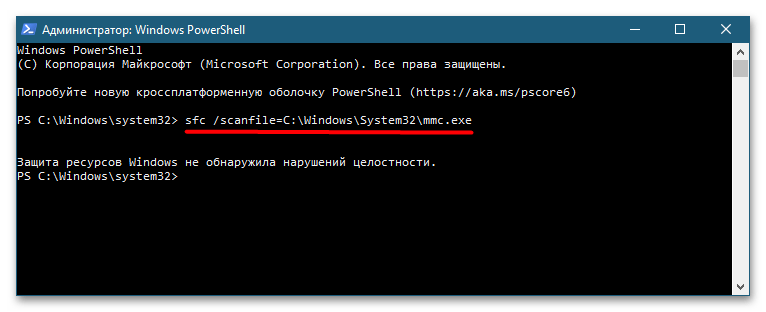
Результат не заставит себя долго ждать. Если файл не поврежден, команда вернет сообщение «Защита ресурсов Windows не обнаружила нарушений целостности». В противном случае система восстановит оригинал из хранилища компонентов.
Наша группа в TelegramПолезные советы и помощь