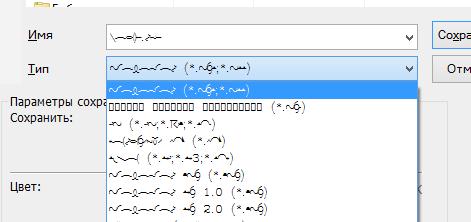
Если вы удалили или заменили один, или несколько системных шрифтов в Windows, вы можете воспользоваться восстановления стандартных шрифтов и их настроек. Если в системных (и не только) диалоговых окнах вместо нормальных символов отображаются что-то непонятное или вообще нечитаемые символы (в нашем примере, это иероглифы и квадратики), скорее всего в Windows отсутствуют какие-то файлы системных шрифтов. Такая проблема может возникнуть после деинсталляции стороннего приложения, которое при удалении вместе с собой удалило несколько файлов системных шрифтов (вплоть до полной очистки каталога со шрифтами C:\Windows\Fonts). Также проблема с шрифтами может встречаться, когда некая программа при установке заменила один из стандартных шрифтов своим собственным файлов.
В этой статье мы разберем методику, позволяющую восстановить стандартные системные шрифты Windows 10 или Windows 11 к состоянию чистой системы.
Содержание:
- Встроенное средство восстановления шрифтов Windows
- Как извлечь файлы стандартных системных шрифтов из установочного образа Windows 10 или 11?
- Сброс кэша шрифтов Windows
- Готовые архивы со стандартными шрифтами для Windows 10, 11 и 8.1
Встроенное средство восстановления шрифтов Windows
В первую очередь стоит попробовать восстановить стандартные шрифты Windows 10/8.1 с помощью встроенного функционала. Для этого:
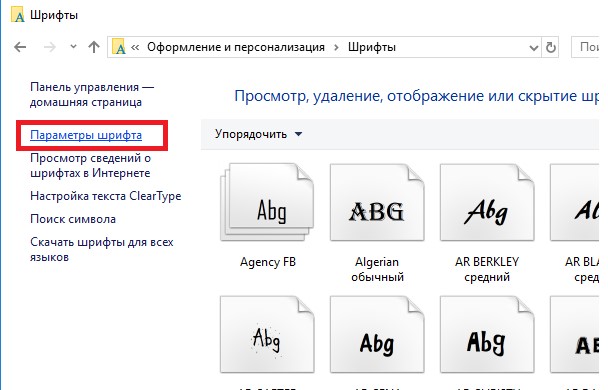
- Откройте Панель управления и перейдите в раздел Оформление и персонализация –> Шрифты (Control Panel -> Appearance and Personalization -> Fonts). Эту панель можно открыть, выполнив команду:
control fonts
; - В левой панели выберите пункт Параметры шрифта (Font settings);
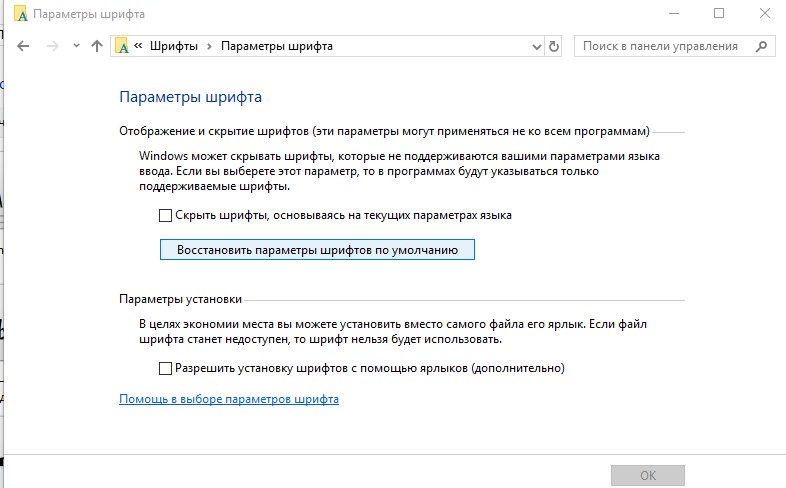
- В открывшемся окне нажмите кнопку Восстановить параметры шрифтов по умолчанию (Restore default font settings);
Данная опция позволяет удалить все сторонние шрифты, оставив только стандартные шрифты, поставляемые в дистрибутиве Windows. Однако, если файл нужного шрифта (*.fon или *.ttf) был удален или заменен, функция сброса не поможет.
В современных версиях Windows для отображения системного интерфейса по умолчанию используется шрифт Segoe UI. Убедитесь, что он есть в списке шрифтов в панели управления.
Чтобы вернуть нужный шрифт можно скопировать нужный файл из дистрибутива Windows (или с другого компьютера), скачав и установив файл шрифта вручную или через GPO (обратите внимание, что в Windows 10 есть функция блокировки установки сторонних шрифтов, которая может мешать установке новых шрифтов).
Совет. Установка большого количества шрифтов в Windows может привести к проблемам с производительностью системы и некоторых приложений (как правило, связанных с графикой и версткой).
Как извлечь файлы стандартных системных шрифтов из установочного образа Windows 10 или 11?
В Windows файлы шрифтов хранятся в каталоге C:\Windows\fonts. Попробуйте открыть ее в Проводнике File Explorer. Если в этом каталоге вы увидите только несколько файлов шрифтов с расширениями *.fon и *.ttf, значит, стандартные файлы шрифтов были удалены и их сброс встроенными средствами (как описано выше) не поможет.
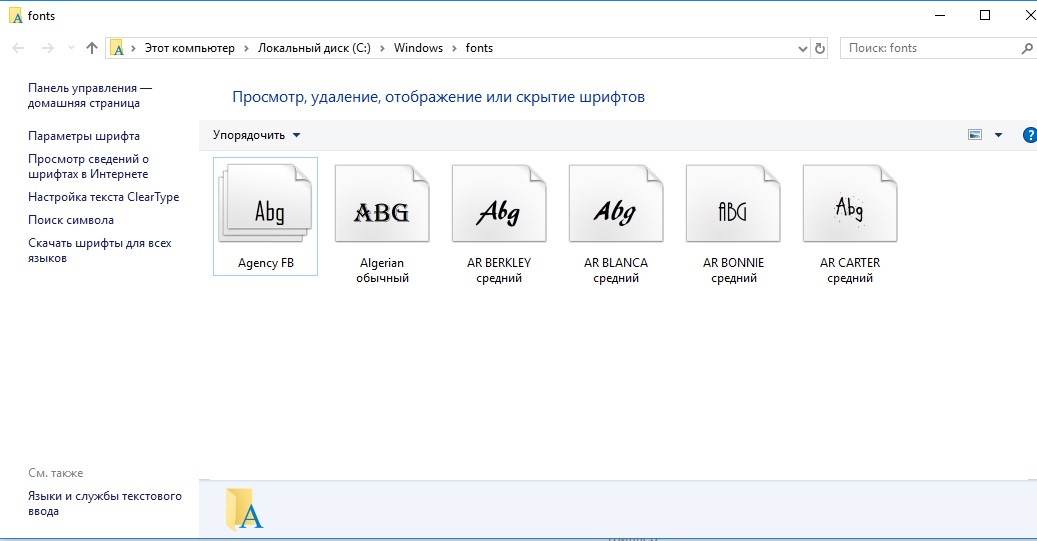
Недостающие файлы шрифтов можно скопировать с любого компьютера с той же версией ОС, либо извлечь их из установочного диска или ISO/WIM образа Windows 10 (11). Рассмотрим второй случай.
Для этого нам понадобится установочный диск с Windows 10. Проще всего создать установочный ISO образ Windows с помощью утилиты Media CreationTool. Смонтируйте ISO образ в виртуальный привод (допустим, ему назначена буква диска H:).
Откройте командную строку PowerShell с административными правами и скопируйте файл H:\sources\install.wim или H:\sources\install.esd (подробнее про esd формат образа здесь) в каталог C:\Distr\.
Copy-Item D:\sources\install.wim C:\Distr\
Совет. Если в вашем дистрибутиве Windows есть только файл install.esd (подробнее про esd формат образа здесь), вы можете переконвертировать ESD файл в формат WIM с помощью команды:
dism /export-image /SourceImageFile:c:\distr\install.esd /SourceIndex:4 /DestinationImageFile: c:\distr\install.wim /Compress:max /CheckIntegrity
Смонтируйте файл установочного образа Windows 10 install.wim в каталог C:\Distr\wim:
dism /mount-wim /wimfile:C:\Distr\install.wim /index:1 /mountdir:C:\Distr\wim

Совет. Если команда DISM возвращает ошибку Error: 0xc1510111: You do not have permissions to mount and modify this image (
Ошибка: 0xc1510111: Отсутствуют разрешения на подключение и изменение образа
), проверьте, что в свойствах файла install.wim не установлен атрибут Read-Only.
Скопируйте оригинальные файлы шрифтов из каталога C:\Distr\wim\Windows\Fonts в системную папку C:\Windows\Fonts с заменой файлов в целевом каталоге. Воспользуйтесь такой командой PowerShell:
Copy-Item -path C:\Distr\wim\Windows\Fonts -Destination C:\Windows -recurse –container -force
Файлы шрифтов будут заменены оригинальными. Часть системных шрифтов, которые используются в текущий момент, заменить не удастся, об этом будет свидетельствовать ряд ошибок в окне консоли.
Теперь можно отключить WIM образ:
dism /unmount-wim /mountdir:C:\Distr\wim /discard
Перезагрузите компьютер и проверьте, исчезла ли проблема со шрифтами.
Сброс кэша шрифтов Windows
В Windows по-умолчанию включено кэширование шрифтов в каталоге
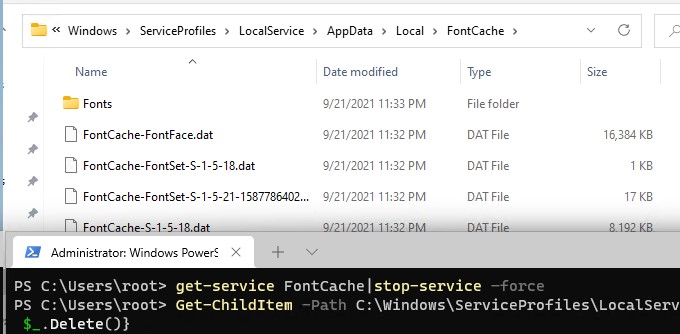
%WinDir%\ServiceProfiles\LocalService\AppData\Local\FontCache
(по аналогии с кэшем иконок). Это позволяет ускорить загрузку шрифтов в диалоговых окнах и приложения. Если кэш шрифтов поврежден, это также может вызвать проблемы с отображением шрифтов в Windows. Рекомендуем вручную сбросить текущий кэш шрифтов Windows.
Для этого нужно:
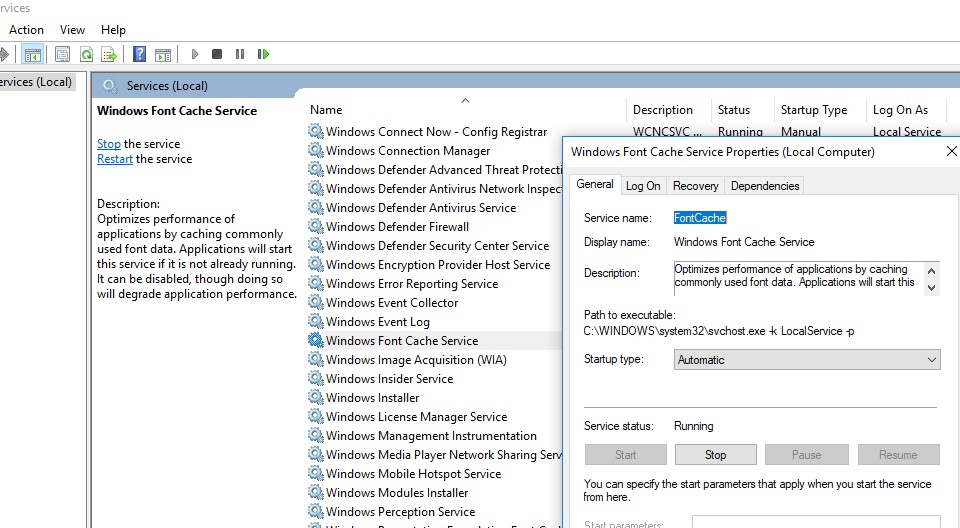
- Запустите консоль управления службами (
services.msc
); - Остановите службу Служба кэша шрифтов Windows (Windows Font Cache Service) в консоли или с помощью команды PowerShell:
get-service FontCache|stop-service –force - Очистите каталог %WinDir%\ServiceProfiles\LocalService\AppData\Local\FontCache:
Get-ChildItem -Path C:\Windows\ServiceProfiles\LocalService\AppData\Local\FontCache -File | foreach { $_.Delete()}; - Удалите файл C:\Windows\System32\FNTCACHE.DAT: C:\Windows\System32\FNTCACHE.DAT:
Remove-Item c:\Windows\System32\FNTCACHE.DAT
- Запустите службу FontCache и перезагрузите компьютер.
Готовые архивы со стандартными шрифтами для Windows 10, 11 и 8.1
Для тех, у кого под рукой нет дистрибутива Windows 10 (Windows 11 b Windows 8.1), можно скопировать каталог с оригинальными шрифтами с другого компьютера с той же версий ОС, либо воспользоваться готовыми архивами со шрифтами. Вы можете скачать архивы по ссылкам ниже:
- Оригинальные шрифты для Windows 8.1 — OrigFontsWin8-1.zip (263 Мб);
- Оригинальные шрифты для Windows 10 21H1 (подойдет и для других билдов Windows 10) —OrigFonts-win10-21h1.zip (189 Мб)
- Оригинальные шрифты для Windows 11 — OrigFonts-win11.zip (190 Мб)
Скачайте и распакуйте архив для вашей версии Windows. Скопируйте содержимое архива в каталог C:\Windows\Fonts с заменой файлов.
Затем скачайте и примените reg файлы со стандартными настройками шрифтов в реестре для вашей версии Windows:
- Windows 10 — win10-default-fonts-reg.zip
- Windows 11 — win11-default-fonts-reg.zip
Каждый архив содержит три файла:
- win_10_fonts.reg содержит список стандартных шрифтов, зарегистрированных в реестре (HKLM\SOFTWARE\Microsoft\Windows NT\CurrentVersion\Fonts);
- win_10_FontSubstitutes.reg файл с настройками ассоциаций шрифтов (HKLM \SOFTWARE\Microsoft\Windows NT\CurrentVersion\FontSubstitutes);
- win_restore_default_user_font_settings.reg – восстанавливает стандартные настройки шрифтов в пользовательской ветке реестра (HKCU\Software\Microsoft\Windows NT\CurrentVersion\Font Management).
Распакуйте архив и примените (дважды щелкните) по каждому reg файлу.
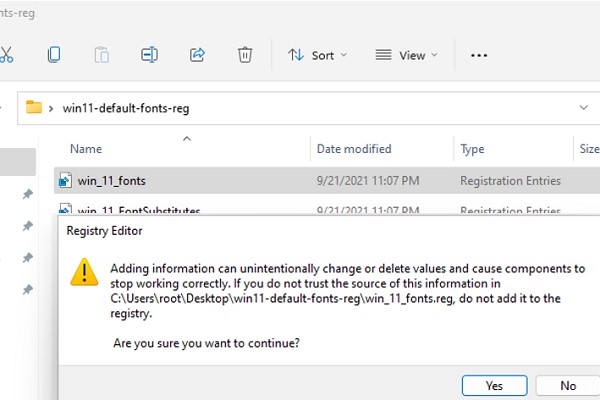
Перезагрузите компьютер, проблема со шрифтами должна пропасть!
Совет. Если проблема со шрифтами вызвана установкой нового шрифта, содержимое C:\Windows\Fonts перед заменой можно предварительно сбросить (используемые шрифты удалить не получится). Эта операция выполняется кнопкой в панели управления, о которой мы говорили выше.
Если ничего не помогает и шрифты отображаются некорректно, попробуйте проверить целостность вашего образа Windows с помощью команд:
sfc /scannow
DISM /Online /Cleanup-Image /RestoreHealth
Font Cache works the same way as Icon Cache, and Windows operating system creates a cache for fonts to load them faster and to display them to the interface of the app, Explorer etc. If for some reason the font cache is corrupted then the fonts may not appear properly, or it starts displaying invalid font characters in Windows 10. To resolve this issue, you need to rebuild the font cache, and in this post, we will see how to do that.

The font cache file is stored in the Windows folders: C:\Windows\ServiceProfiles\LocalService\AppData\Local\FontCache, If you are trying to access this folder then you won’t be able to do that directly as Windows protect this folder. Font’s are cached in more than one files in the above folder. Anyway, without wasting any time, let’s see How to Rebuild Font Cache in Windows 10 with the help of the below-listed tutorial.
Make sure to create a restore point just in case something goes wrong.
Method 1: Manually Rebuild Font Cache in Windows 10
1. Press Windows Key + R then type services.msc and hit Enter.
2. Scroll down till you find “Windows Font Cache service” in the services window.
Note: Press W key on the keyboard to locate the Windows Font Cache service.
3. Right-click on Window Font Cache Service then selects Properties.

4. Make sure to click on Stop then set the Startup type as Disabled.

5. Click Apply, followed by OK.
6. Do the same (Follow the steps 3 to 5) for Windows Presentation Foundation Font Cache 3.0.0.0.

7. Now navigate to the following folder by going to one folder at a time:
C:\Windows\ServiceProfiles\LocalService\AppData\Local
Note: Do not copy and paste the above path as certain directories are protected by Windows. You need to manually double-click on each of the above folders and click Continue to access the above folders.

8. Now once inside the Local folder, delete all the files with the name FontCache and .dat as the extension.

9. Next, double-click on the FontCache folder and delete all of its content.

10. You need to also delete the file FNTCACHE.DAT from the following directory:
C:\Windows\System32\
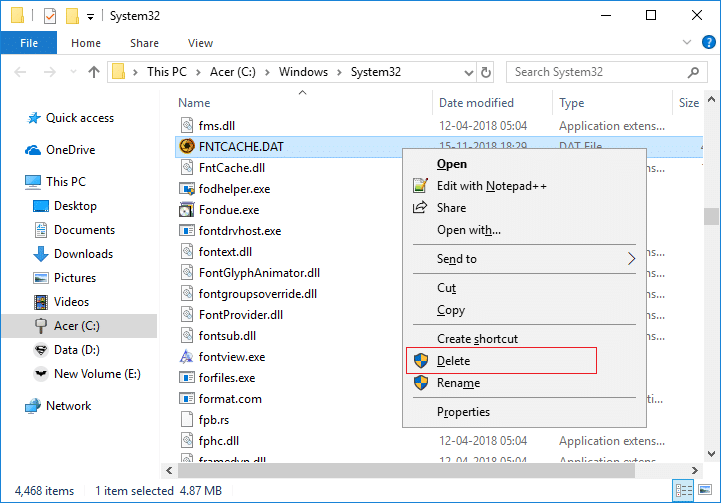
11. Once done, reboot your PC to save changes.
12. After the reboot, make sure to start the following services and set their startup type as Automatic:
Windows Font Cache Service
Windows Presentation Foundation Font Cache 3.0.0.0

13. This will successfully Rebuild Font Cache in Windows 10.
If you still see the invalid characters after restarting, you need to repair your Windows 10 using DISM.
Method 2: Rebuild Font Cache in Windows 10 using the BAT file
1.Open Notepad then copy & paste the following:
@echo off

:: Stop and disable "Windows Font Cache Service" service
:FontCache
sc stop "FontCache"
sc config "FontCache" start=disabled
sc query FontCache | findstr /I /C:"STOPPED"
if not %errorlevel%==0 (goto FontCache)

:: Grant access rights to current user for "%WinDir%\ServiceProfiles\LocalService" folder and contents
icacls "%WinDir%\ServiceProfiles\LocalService" /grant "%UserName%":F /C /T /Q

:: Delete font cache
del /A /F /Q "%WinDir%\ServiceProfiles\LocalService\AppData\Local\FontCache\*FontCache*"

del /A /F /Q "%WinDir%\System32\FNTCACHE.DAT"

:: Enable and start "Windows Font Cache Service" service
sc config "FontCache" start=auto
sc start "FontCache"
2.Now from Notepad menu click on File then click Save as.

3. From Save as type drop-down select “All Files” then under File name type Rebuild_FontCache.bat (.bat extension is very important).

4. Make sure to navigate to desktop then click on Save.
5. Double-click on Rebuild_FontCache.bat to run it and once done reboot your PC to save changes.
Recommended:
- Fix Bluetooth won’t turn ON in Windows 10
- Turn Off Recent Items and Frequent Places in Windows 10
- Enable or Disable Inline AutoComplete in Windows 10
- Fix Memory Management Error in Windows 10
That’s it, you successfully learned How to Rebuild Font Cache in Windows 10 but if you still have any questions regarding this tutorial then feel free to ask them in the comment’s section.
We all know that ‘cache’ is a set of information that is often used. The cache is stored in hidden or inaccessible place, usually. Font cache corresponds to set of fonts that are installed on your system and often used. The font cache thus helps the system the load the fonts quickly. However the ‘cache’ thing sometimes suffers with corruption problem. That is, if the cache is corrupted, loading the fonts would not working as usual, unless corruption is fixed.
So in case if you’re facing problems with fonts on your system, resetting or rebuilding font cache is the solution that will help you. The below mentioned steps will guide you to rebuild the font cache in Windows 10. You’ll need to follow these steps using administrative privileges.
How To Reset Font Cache In Windows 10
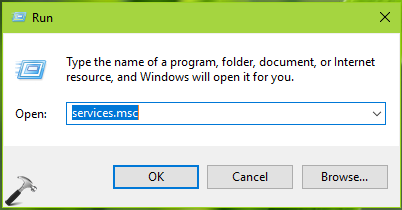
1. Press + R and type services.msc in the Run dialog box, hit Enter key to open Services snap-in.
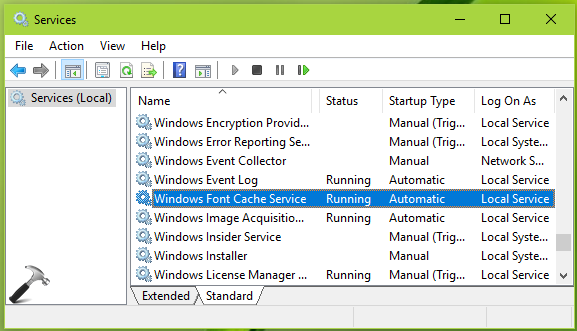
2. In the Services snap-in, locate the Windows Font Cache Service. It must be running by default. Double click on it to modify its status.
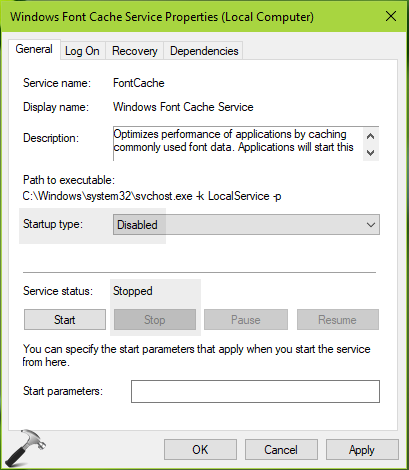
3. On the service property sheet, set the Startup type to Disabled. Click on Stop button to terminate the service then. Click Apply followed by OK.
Exit Services Snap-in.
4. Open File Explorer and navigate here:
C:\Windows\ServiceProfiles\LocalService\AppData\Local\FontCache
*Replace C: with your system root drive. Here, AppData is hidden folder. To make it visible click View > check Hidden items in File Explorer ribbon. If you get access denied in opening any of the folders, take the ownership of that folder.
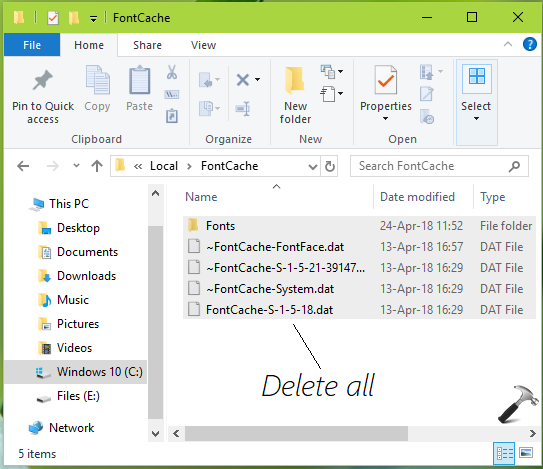
5. In the FontCache folder, delete all the contents. Next, run %WinDir%\System32 command to open System32 folder. Locate the FNTCACHE.DAT file and delete it.
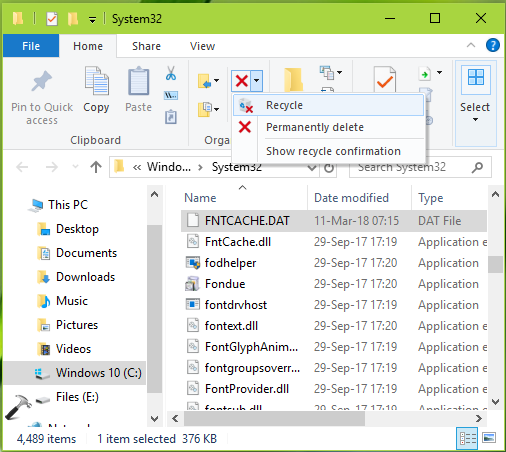
Now all you need to do is to reboot the machine. Once you restart the machine, Windows will automatically generate new font cache. In this way, you’ve now reset or rebuilt the font cache for your Windows 10.
That’s it!
RELATED ARTICLES
Similarly to the icon cache, Windows creates a cache for fonts to load them faster and display the user interface of apps, documents and other controls faster. When it is corrupted, fonts may not appear properly, or some fonts might be missing in the font list available for certain apps. In this article, we will see how to rebuild the font cache.
The font cache is a special file in the folder %WinDir%\ServiceProfiles\LocalService\AppData\Local\FontCache. This folder is protected by default so if you directly attempt to access this path, Windows will give you an error. Fonts are cached in a number of files in this folder. If for some reason, your fonts are corrupted and not displaying properly, you may need to remove these files in order to rebuild the font cache. Here is how it can be done.
Before proceeding, ensure that your user account has administrative privileges. Now, follow the instructions below.
To rebuild the font cache in Windows 10, do the following.
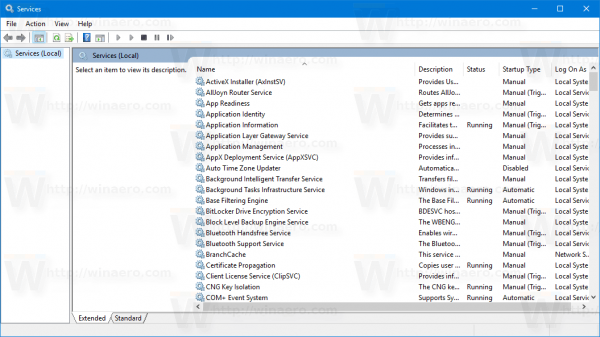
- Press Win + R shortcut keys on the keyboard to open the Run dialog. Type services.msc in the Run box.
- The Services console will be opened.
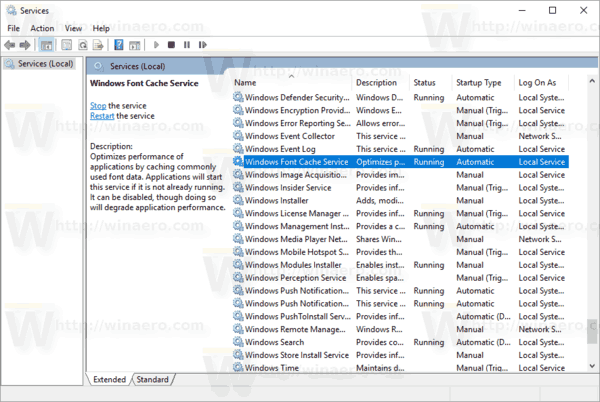
- Find the Windows Font Cache service in the list.
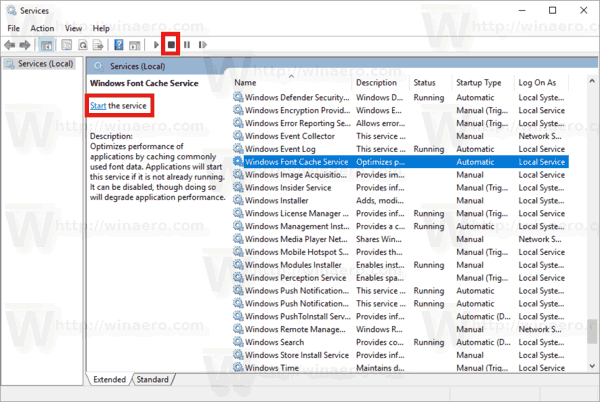
- Click on the stop button on the toolbar.
Tip: See the following detailed guide on how to start, stop or restart a service in Windows 10.
- Open This PC in File Explorer.
- Go to the following folder by navigating one folder at a time. Do not copy paste the path directly as certain folders are protected and you may need to press the Continue button to access them:
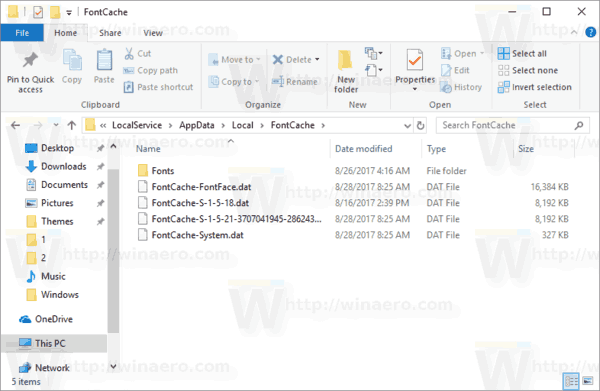
C:\Windows\ServiceProfiles\LocalService\AppData\Local\FontCache
- Delete the contents of that folder.
- Delete the file %WinDir%\System32\FNTCACHE.DAT.
- Now, you can start the Windows Font Cache service which you previously stopped.
- Restart Windows 10.
Note: If you have stopped the service but still cannot delete the files, here is a workaround.
- Download ExecTI.
- Use ExecTI to run cmd.exe as TrustedInstaller.
- In the command prompt opened as trusted installer, type or copy-paste the following command:
del /A /F /Q "%WinDir%\ServiceProfiles\LocalService\AppData\Local\FontCache\*FontCache*"
This should resolve the issue.
Tip: You can use the following command to stop and start the Windows Font Cache service.
net stop FontCache
net start FontCache
On Windows 7 and Windows 8.1, the Font Cache files are located directly in the following folder:
%Windir%\ServiceProfiles\LocalService\AppData\Local
There is no separate FontCache directory like Windows 10. In this case, be careful to not delete the other folders. Delete only the *.DAT files related to the font cache.
Note: If your fonts are still corrupted and displaying invalid characters after resetting the cache, the installed fonts in C:\Windows\Fonts themselves may be damaged. To restore the default fonts that ship with Windows, run the following command from an elevated command prompt:
sfc /scannow
Let Windows restore the original font files. If the font files in your Component Store are corrupted, refer to the following article to learn how to use DISM to repair them: How to Fix Windows 10 using DISM
Support us
Winaero greatly relies on your support. You can help the site keep bringing you interesting and useful content and software by using these options:
If you like this article, please share it using the buttons below. It won’t take a lot from you, but it will help us grow. Thanks for your support!
The Windows Font Cache Service is an important part of Windows, helping your computer show text faster in apps by keeping a copy of commonly used fonts ready to go. Sometimes, though, it might not work correctly — maybe it won’t start, uses too much of your computer’s brain power (CPU), or causes other issues. We’re going to talk about what this service does, the troubles you might run into, and how to sort them out, whether you’re using Windows 11 or Windows 10.
Also see: How to Limit CPU Usage of a Process in Windows 11
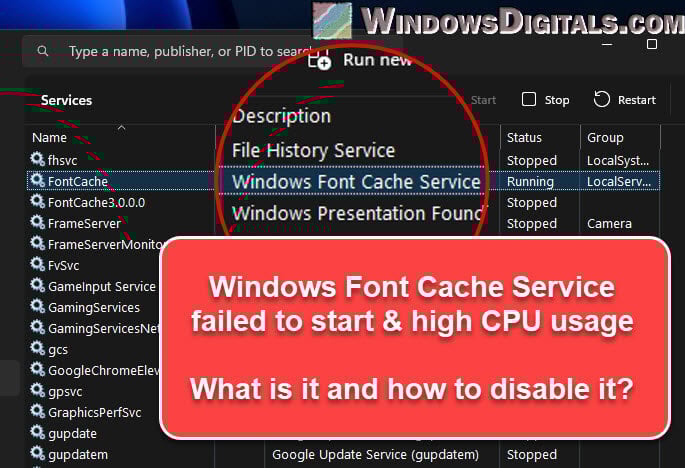
What does Windows Font Cache Service actually do?
The Windows Font Cache Service basically stores font caches so that the OS and apps can show fonts quicker by using the stored caches. It’s especially helpful when an app has a huge amount of text that needs to be shown on the screen.
This service usually shows up as svchost.exe in your Task Manager’s Details tab because it shares a space with other system services.
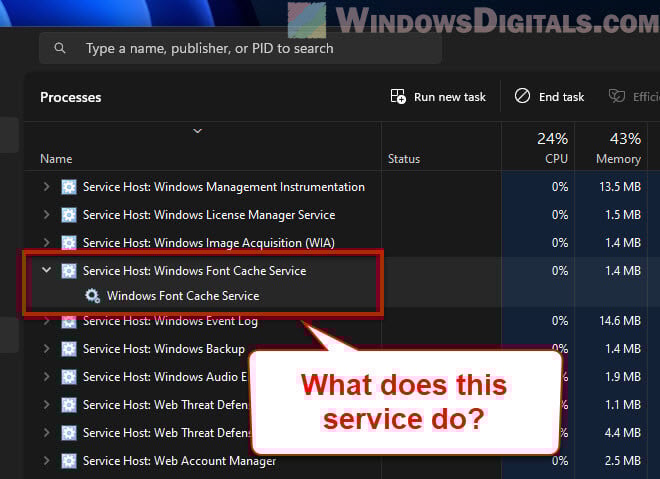
Every time an app needs to show text, it asks Windows for the font data. With the Font Cache service working, this data is pulled from the cache and makes displaying the font more efficient. Even though it’s usually helpful, sometimes it can cause issues.
Linked issue: Service Host Local System High CPU, Disk or Memory Usage
What if Windows Font Cache Service won’t start?
If you get an “Error 1920 or 1921: Windows Font Cache Service failed to start” message, you might need to manually start the service yourself. This usually pops up when you’re installing something and the installer can’t get the service working. Here’s how to manually start the service:
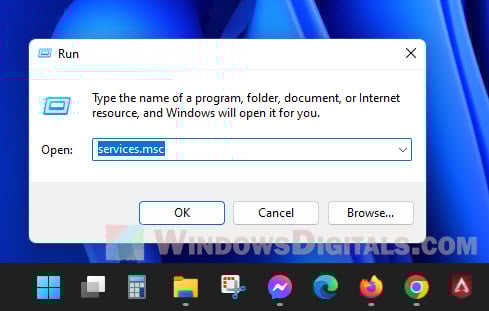
- Hit Windows + R to open the Run box.
- Type “services.msc” and hit Enter to bring up the Services window.
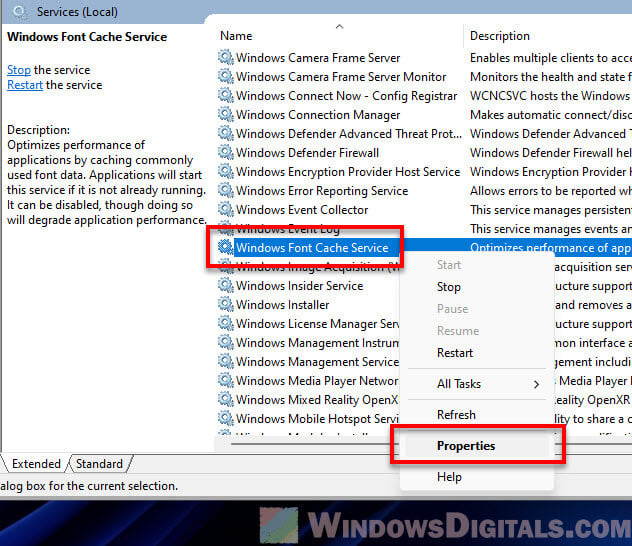
- Look for “Windows Font Cache Service”, right-click it, and choose “Properties”.
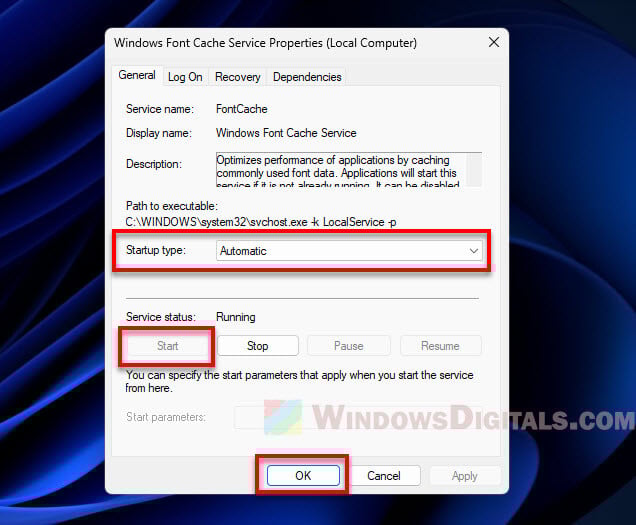
- Pick “Automatic” from the “Startup type” menu.
- Hit the “Start” button under the Service status area.
- Click “Apply” then “OK” to save your changes.
If it still won’t start after trying these steps, you might need to repair or reinstall the service.
Related concern: Why is My Memory Usage So High When Nothing is Running?
Fixing high CPU use by Windows Font Cache Service
Sometimes, the Windows Font Cache Service might unexpectedly make your CPU work harder than it should, which can slow your computer down. This could mean there’s something up with the service or the font cache.
If that’s the case, you can try clearing the font cache. Follow the steps below to do so:
- Open “Windows Explorer”.
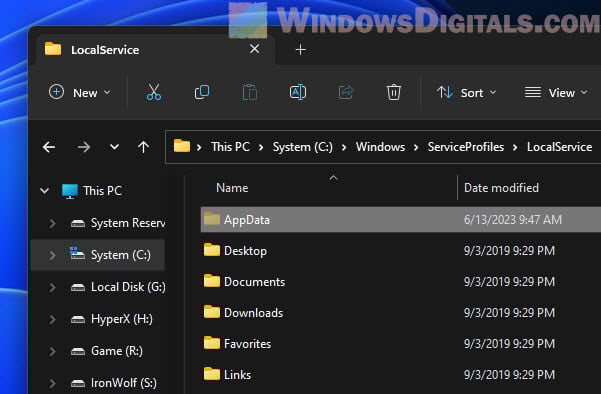
- Go to “C:\Windows\ServiceProfiles\LocalService\AppData\Local”. You’ll have to click through the folders since typing the path won’t work due to permissions. If you can’t see the “AppData” folder, you might need to turn on the “Show hidden files, folders, and drives” option.
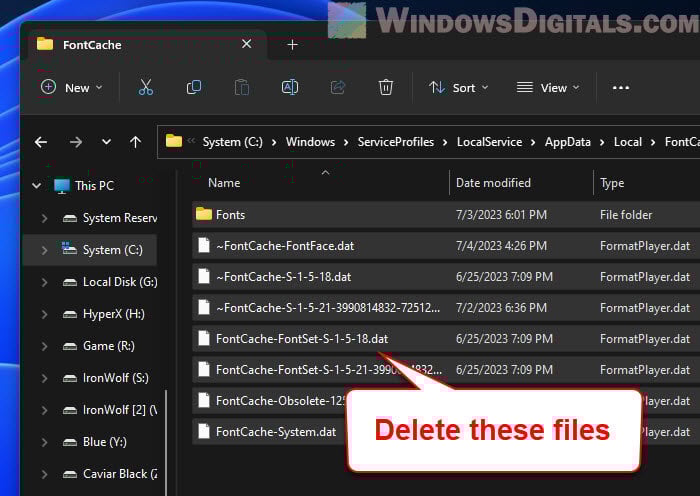
- Find a folder called “FontCache”. Open it and delete everything inside.
- Restart your computer.
After restarting, Windows will make a new font cache, which should fix the CPU hogging issue for most people.
Useful tip: 30+ Windows 11 Services to Disable for Gaming Performance
Disabling Windows Font Cache Service
The Windows Font Cache Service doesn’t normally cause too many issues. But if it’s consistently causing high CPU usage or creating other problems, you might consider turning it off. Note that this might make fonts load more slowly in your apps. Follow the steps below to disable the service:
- Press “Windows + R” to bring up the Run box.
- Type “services.msc” and hit enter. This opens the Services window.
- Find the “Windows Font Cache Service” in the list, right-click on it, and choose “Properties”.
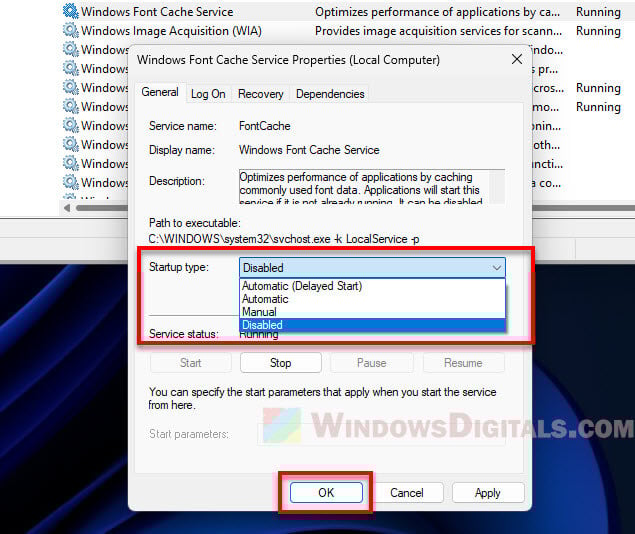
- Change the “Startup type” to “Disabled”.
- Click “Stop” to stop the service if it’s running.
- Hit “Apply” and then “OK” for the changes to take effect.
Relevant guide: How to Delete a Service in Windows 11 or 10 Using CMD
Windows Font Cache Service starts then stops
Sometimes, the Windows Font Cache Service might start up but then stop all of a sudden. This can mess with apps that need to show text. It usually means there’s an error with reading the cached font data.
Fixing these issues can often be as simple as clearing the font cache, like we talked about earlier, or reinstalling the program that’s causing problems.
How to reinstall the FontCache service (FntCache.dll)
Reinstalling the Windows Font Cache Service is a bit more complicated and should only be your last resort. You’ll need to re-register the service DLL file and restart the service.
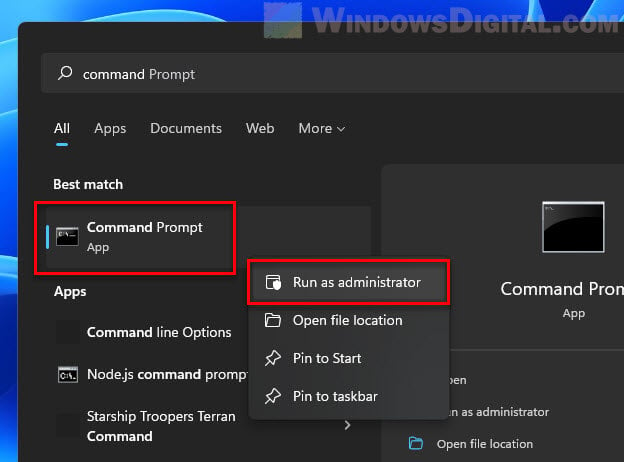
- Hit the Windows Start button, type “cmd”, right-click on “Command Prompt” from the results, and choose “Run as administrator”.
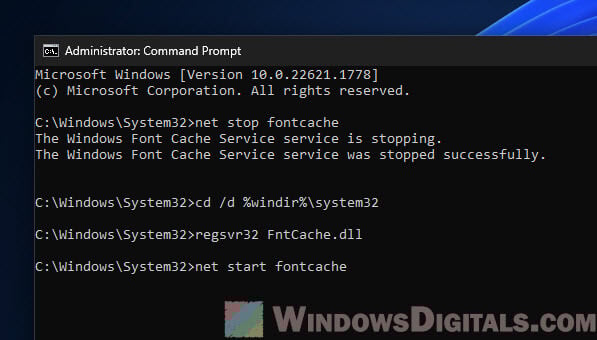
- In the Command Prompt, type these commands one after the other, hitting Enter after each one:
net stop fontcache
cd /d %windir%\system32
regsvr32 FntCache.dll
net start fontcache
This stops the font cache service, re-registers the DLL file for the service, and then starting it up again.
Please note that these are advanced steps. Only try them if you’re sure about what you’re doing. If you’re not comfortable, it’s a good idea to ask for help from a pro. And, always make a system restore point before you start changing things, just in case something goes wrong.

