
You can either download binaries or source code archives for the latest stable or previous release or access the current development (aka nightly) distribution through Git. This software may not be exported in violation of any U.S. export laws or regulations. For more information regarding Export Control matters, please visit our Legal page.
Latest Release (4.0.2)
The release was packaged with CPack which is included as part of the release. The .sh files are self extracting gziped tar files. To install a .sh file, run it with /bin/sh and follow the directions. The OS-machine.tar.gz files are gziped tar files of the install tree. The OS-machine.tar.Z files are compressed tar files of the install tree. The tar file distributions can be untared in any directory. They are prefixed by the version of CMake. For example, the linux-x86_64 tar file is all under the directory cmake–linux-x86_64. This prefix can be removed as long as the share, bin, man and doc directories are moved relative to each other. To build the source distributions, unpack them with zip or tar and follow the instructions in README.rst at the top of the source tree. See also the CMake 4.0 Release Notes.
Source distributions:
| Platform | Files |
|---|---|
| Unix/Linux Source (has \n line feeds) | cmake-4.0.2.tar.gz |
| Windows Source (has \r\n line feeds) | cmake-4.0.2.zip |
Binary distributions:
| Platform | Files |
|---|---|
| Windows x64 Installer: | cmake-4.0.2-windows-x86_64.msi |
| Windows x64 ZIP | cmake-4.0.2-windows-x86_64.zip |
| Windows i386 Installer: | cmake-4.0.2-windows-i386.msi |
| Windows i386 ZIP | cmake-4.0.2-windows-i386.zip |
| Windows ARM64 Installer: | cmake-4.0.2-windows-arm64.msi |
| Windows ARM64 ZIP | cmake-4.0.2-windows-arm64.zip |
| macOS 10.13 or later | cmake-4.0.2-macos-universal.dmg |
| cmake-4.0.2-macos-universal.tar.gz | |
| macOS 10.10 or later | cmake-4.0.2-macos10.10-universal.dmg |
| cmake-4.0.2-macos10.10-universal.tar.gz | |
| Linux x86_64 | cmake-4.0.2-linux-x86_64.sh |
| cmake-4.0.2-linux-x86_64.tar.gz | |
| Linux aarch64 | cmake-4.0.2-linux-aarch64.sh |
| cmake-4.0.2-linux-aarch64.tar.gz | |
| SunOS sparc64 | cmake-4.0.2-sunos-sparc64.sh |
| cmake-4.0.2-sunos-sparc64.tar.gz | |
| SunOS x86_64 | cmake-4.0.2-sunos-x86_64.sh |
| cmake-4.0.2-sunos-x86_64.tar.gz |
Summary files:
| Role | Files |
|---|---|
| File Table v1 | cmake-4.0.2-files-v1.json |
| Cryptographic Hashes | cmake-4.0.2-SHA-256.txt |
| PGP sig by 2D2CEF1034921684 | cmake-4.0.2-SHA-256.txt.asc |
Previous Release (3.31.7)
The release was packaged with CPack which is included as part of the release. The .sh files are self extracting gziped tar files. To install a .sh file, run it with /bin/sh and follow the directions. The OS-machine.tar.gz files are gziped tar files of the install tree. The OS-machine.tar.Z files are compressed tar files of the install tree. The tar file distributions can be untared in any directory. They are prefixed by the version of CMake. For example, the linux-x86_64 tar file is all under the directory cmake–linux-x86_64. This prefix can be removed as long as the share, bin, man and doc directories are moved relative to each other. To build the source distributions, unpack them with zip or tar and follow the instructions in README.rst at the top of the source tree. See also the CMake 3.31 Release Notes.
Source distributions:
| Platform | Files |
|---|---|
| Unix/Linux Source (has \n line feeds) | cmake-3.31.7.tar.gz |
| Windows Source (has \r\n line feeds) | cmake-3.31.7.zip |
Binary distributions:
| Platform | Files |
|---|---|
| Windows x64 Installer: | cmake-3.31.7-windows-x86_64.msi |
| Windows x64 ZIP | cmake-3.31.7-windows-x86_64.zip |
| Windows i386 Installer: | cmake-3.31.7-windows-i386.msi |
| Windows i386 ZIP | cmake-3.31.7-windows-i386.zip |
| Windows ARM64 Installer: | cmake-3.31.7-windows-arm64.msi |
| Windows ARM64 ZIP | cmake-3.31.7-windows-arm64.zip |
| macOS 10.13 or later | cmake-3.31.7-macos-universal.dmg |
| cmake-3.31.7-macos-universal.tar.gz | |
| macOS 10.10 or later | cmake-3.31.7-macos10.10-universal.dmg |
| cmake-3.31.7-macos10.10-universal.tar.gz | |
| Linux x86_64 | cmake-3.31.7-linux-x86_64.sh |
| cmake-3.31.7-linux-x86_64.tar.gz | |
| Linux aarch64 | cmake-3.31.7-linux-aarch64.sh |
| cmake-3.31.7-linux-aarch64.tar.gz |
Summary files:
| Role | Files |
|---|---|
| File Table v1 | cmake-3.31.7-files-v1.json |
| Cryptographic Hashes | cmake-3.31.7-SHA-256.txt |
| PGP sig by 2D2CEF1034921684 | cmake-3.31.7-SHA-256.txt.asc |
Alternative Binary Releases
| Host | Link |
|---|---|
| Kitware’s Ubuntu packages | https://apt.kitware.com/ |
| snap | https://snapcraft.io/cmake |
| pip | https://pypi.org/project/cmake/ |
Older Releases
| Host | Link |
|---|---|
| kitware | https://cmake.org/files |
| github | https://github.com/Kitware/CMake/releases |
Editor Syntax Files
| Editor | Files |
|---|---|
| emacs | cmake-mode.el |
| vim | vim-cmake-syntax |
Current development distribution
Each night binaries are created as part of the testing process. Other than passing all of the tests in CMake, this version of CMake should not be expected to work in a production environment. It is being produced so that users can test bug fixes done upstream without having to build CMake.
| Nightly Binaries | Link |
|---|---|
| https | https://cmake.org/files/dev/ |
Alternatively one may build from source. Development is managed on Kitware’s GitLab instance:
- https://gitlab.kitware.com/cmake/cmake
On UNIX, one may use the bootstrap script provided in the source tree to build CMake. In order to build the Windows version of CMake, you will need a current binary installation of CMake to bootstrap the build process.
This article explains how CMake handles complex build processes. Earthly provides robust caching mechanisms to improve on CMake’s efficiency. Learn more about Earthly.
CMake is an open source multiplatform tool that you can use to help with build automation, testing, packaging, and the installation of software. One of the main advantages of CMake is that it supports generating build scripts for a wide variety of platforms including Windows, macOS, and Linux. This gives developers the flexibility they need when building a new project and hopefully helps speed up the build.
In this article, you’ll learn more about CMake and if it’s the right solution for you. You’ll also walk through the process of installing it on Windows.
Pros and Cons of CMake

There are a number of benefits to using CMake to help build your solutions, including the fact that CMake can run on all major platforms, including Windows, Linux, and macOS. This means that a team of developers who are using different operating systems can still have common development tools.
Using CMake for projects, instead of something like Visual Studio projects, helps you avoid being locked into one integrated development environment (IDE). A team can create a project using CMake, and then each developer can use their preferred IDE to work on it. CMake integration is supported by a variety of IDE tools, including CLion, Atom, and Visual Studio.
It may be useful for some developers and software architects to understand what dependencies are within their projects and the nature of the dependency. CMake can create a visualization of any dependencies within the project, that you can use to create documentation.
While many would assume that CMake’s active development is an advantage (which it is!), it also has its downsides: Not everyone within a developer team will be running the same version of CMake. However, to help reduce this issue, CMake has introduced policies that define how certain CMake features should behave. This means your team can set a common policy regardless of what version people are using.
Another disadvantage of CMake is the lack of information available for some versions. It can be hard to find accurate information to resolve an issue or answer a question.
When to Use CMake
As you can see, CMake can be a useful build system. Developers using CMake can quickly check performance on different build backends and easily move between them.
CMake can also help to keep your source code folder clean. It can separate the build system, intermediaries, and output files from the source code, keeping your code clean for the future.
Install CMake on Windows
There are several ways to install CMake on Windows. The first option is to use pre-compiled binaries as either the Windows Installer file (MSI) or the compressed version (ZIP) files. You just have to download the files and then walk through the interactive installation wizard.
The second option is to download and build CMake from the source, and CMake even includes a source release download option.
The third option is to use a package manager tool, such as Windows Package Manager or Chocolatey. This can be especially convenient if you already have either installed on your machine. We will use the package manager method you’ll use for your installation here.
If you’re using Windows Package Manager, run the following command to install CMake:
winget install kitware.cmakeIf you’re using Chocolatey, use the following command:
Install a CMake Extension with Visual Studio
Once you’ve finished installing CMake on Windows, you need to install an extension that lets you integrate the functionality of CMake into your IDE (Visual Studio is used here).
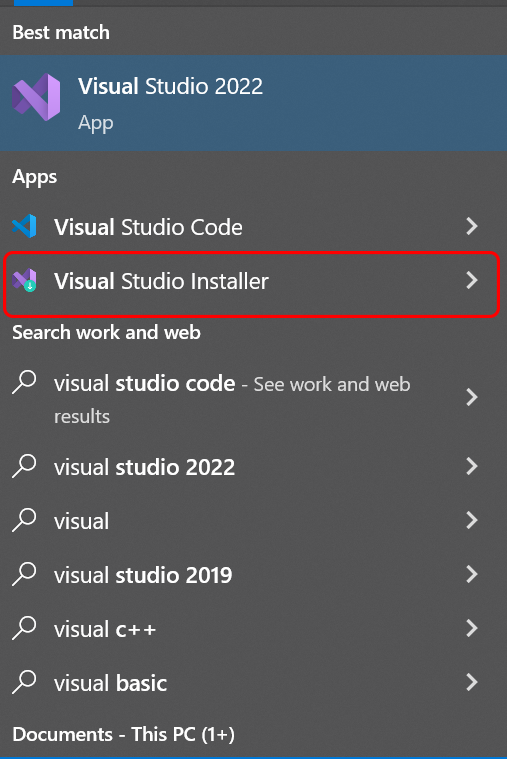
To install the CMake extension, you need to select Start and then open the Visual Studio Installer from the menu:
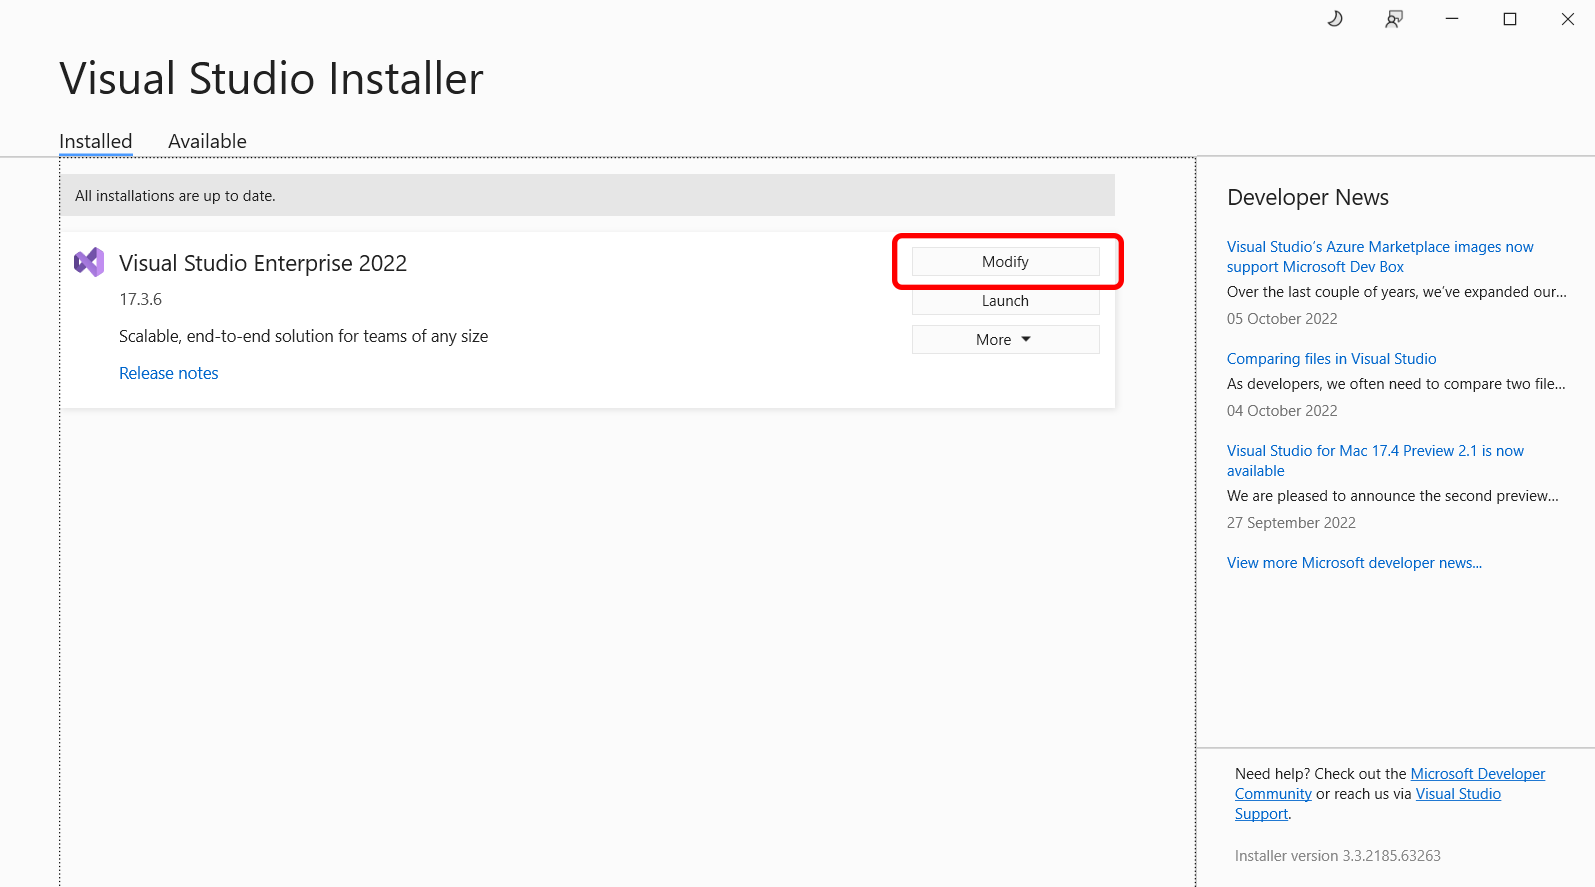
Once the Visual Studio Installer loads, select Modify:
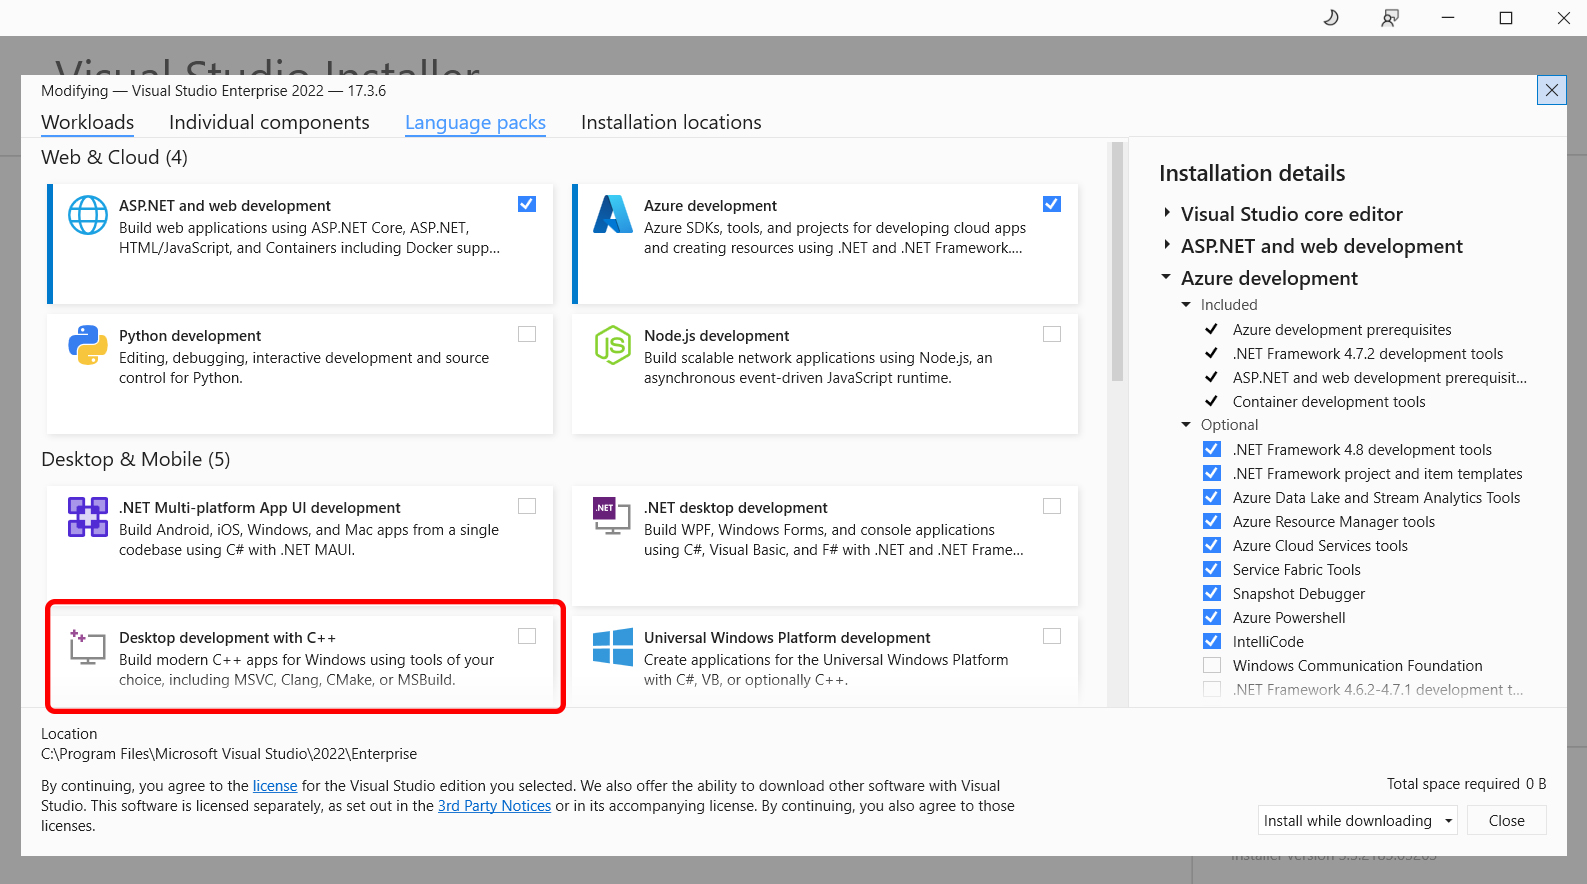
Under Workloads, locate Desktop development with C++, which can be found under Desktop & Mobile:
On this same page, you also need to find and select the Linux and embedded development with C++ component. This component ensures you have cross-platform CMake development capabilities:
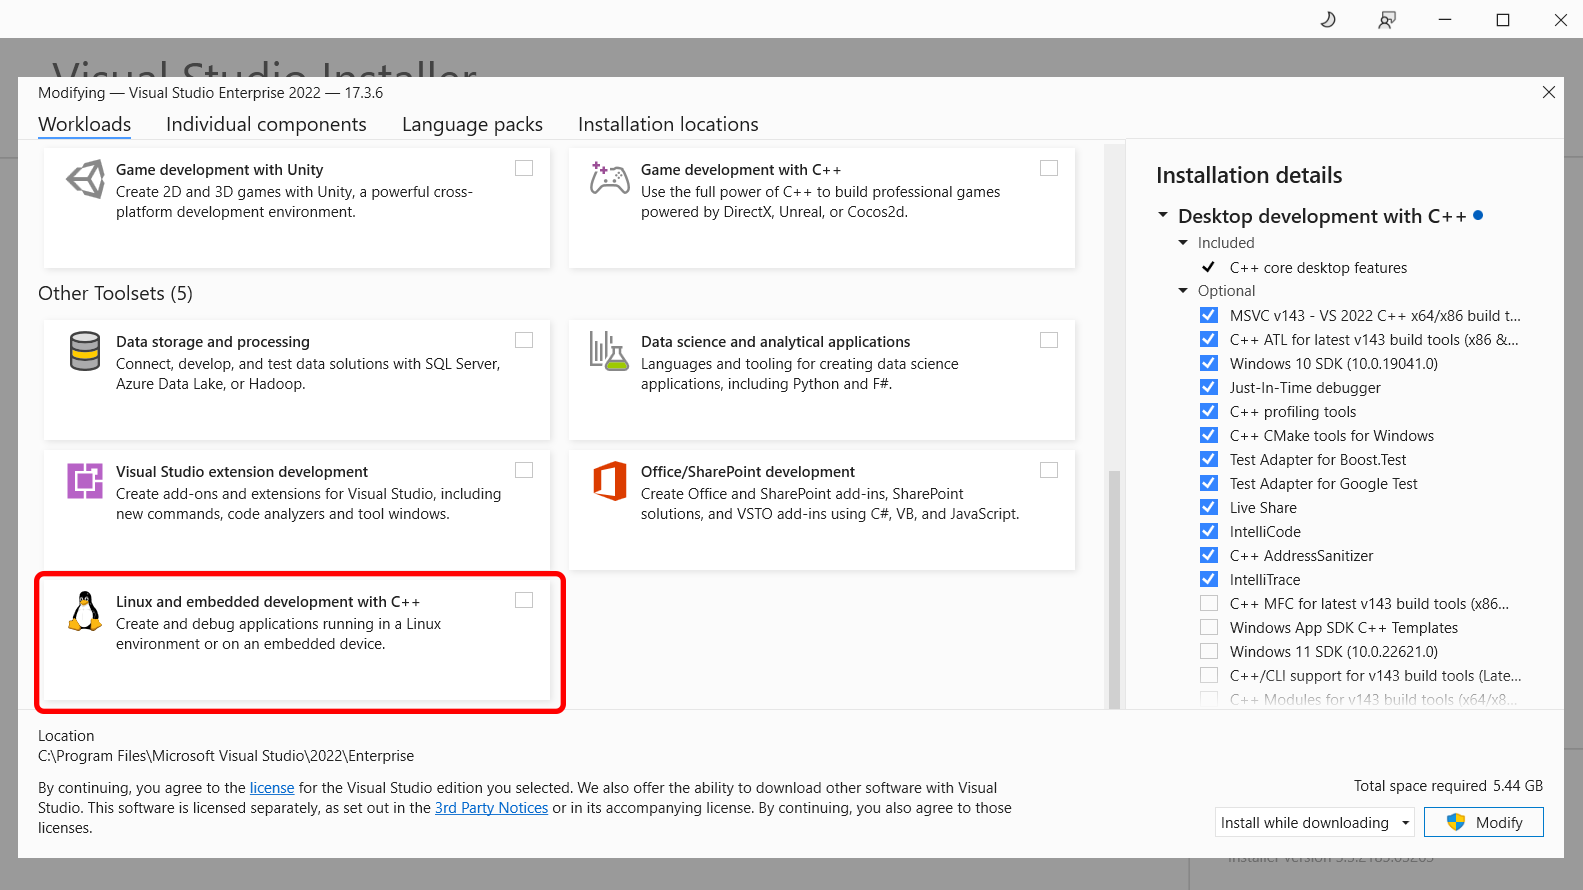
Once you’ve selected both, select Modify again, and the additional tools will be installed.
Integrate an IDE
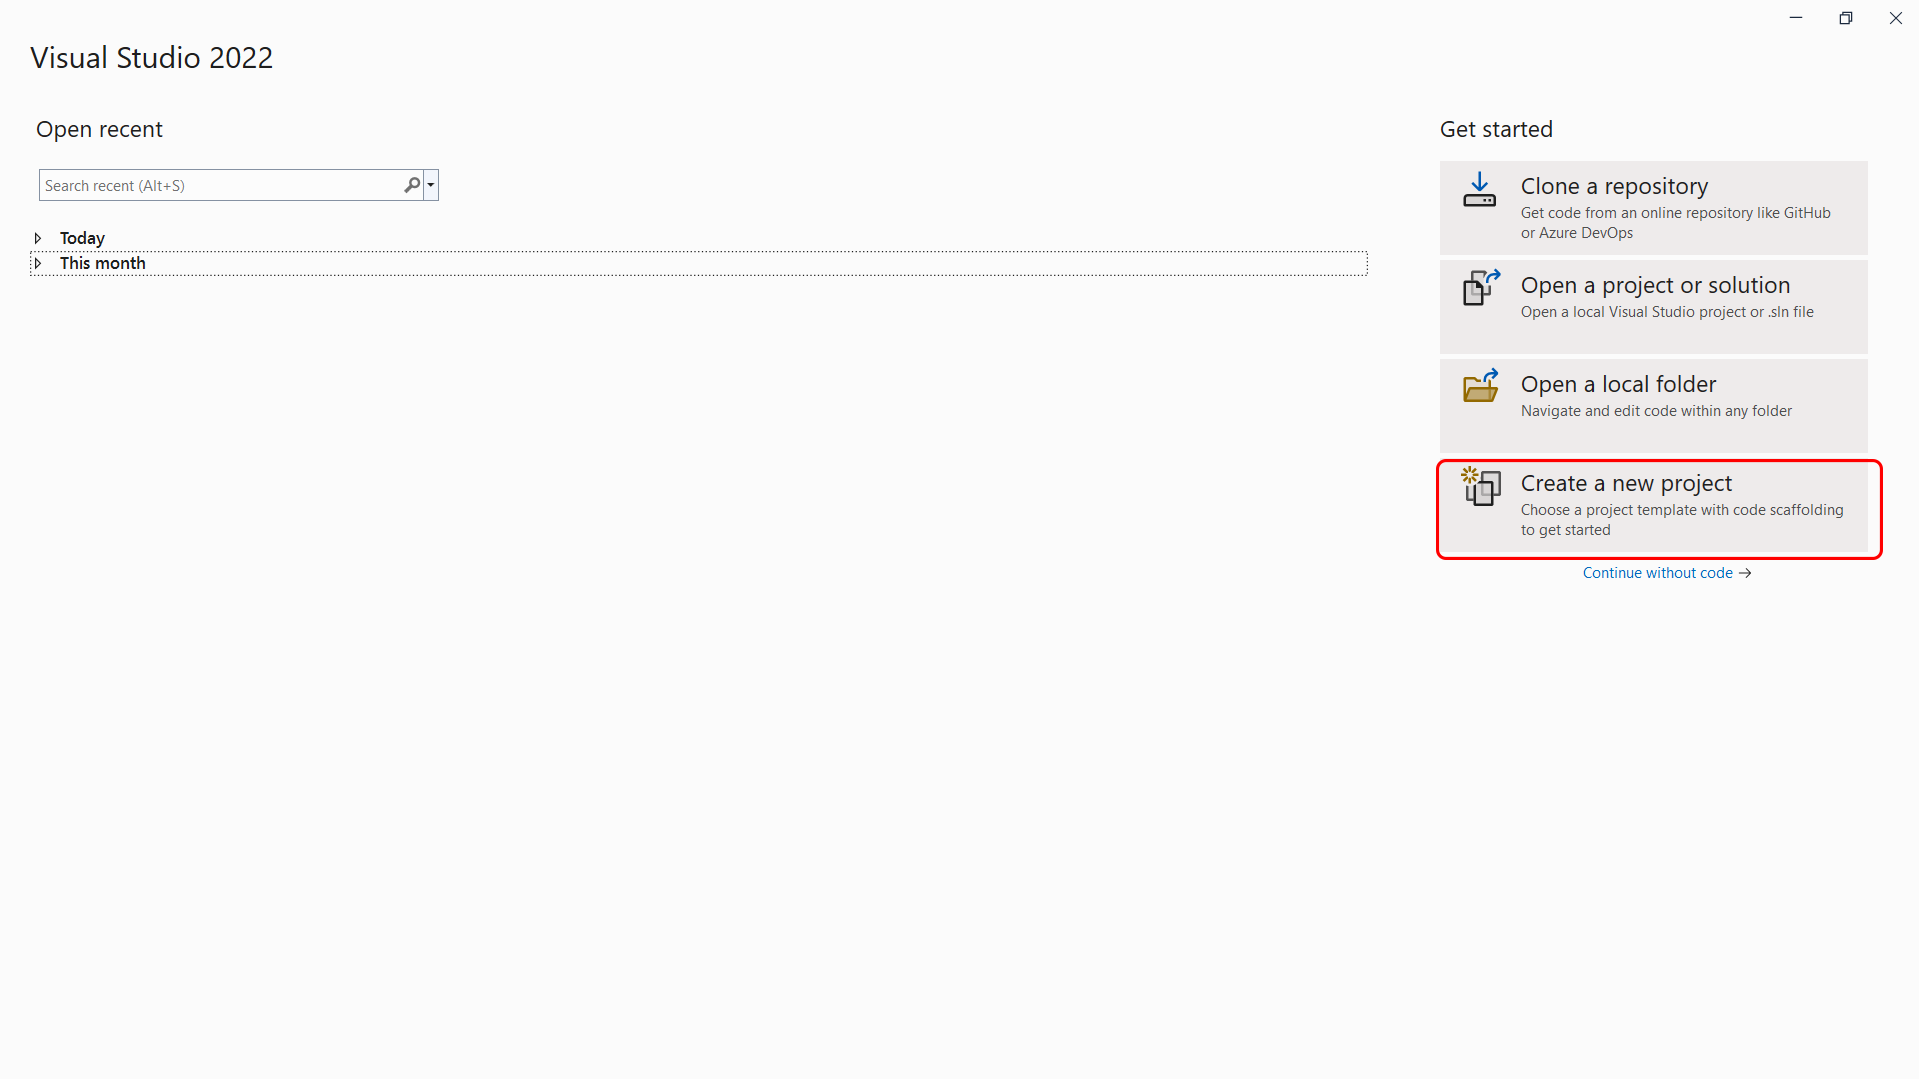
Now that you’ve installed CMake and a few components, it’s time to use them. Start a new project by opening Visual Studio and selecting Create a new project > CMake project:
After selecting CMake project, Visual Studio, and CMake will create a directory and a file called CMakeLists.txt, which is a set of instructions describing certain settings within the project, such as source files and targets.
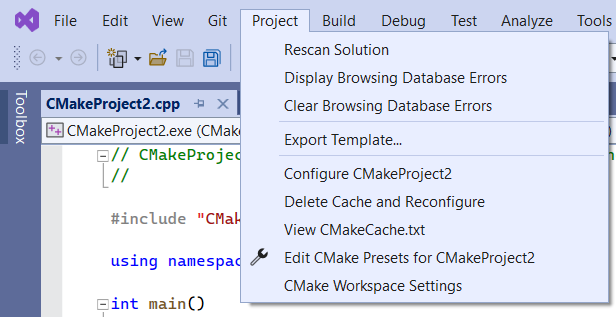
When Visual Studio detects that there is a CMakeLists.txt file within a project that’s been opened, it adds CMake items to the Project menu, which gives you access to commands for viewing and editing CMake scripts:
Configure CMake Projects
CMake supports two files that let you specify build and test options. These files are CMakePresets.json and CMakeUserPresets.json. Microsoft recommends that you use CMakePresets.json.
To ensure that Visual Studio uses the CMakePresets.json file, you need to enable it. You can do so via Tools > Options > CMake > General. Please ensure that the Always use CMake Presets option is selected:

If Visual Studio can’t find a CMakePresets.json file, it will fall back to using the default configure presets.
There are three key settings within your CMakePresets.json file: target systems, configure presets, and build presets. The target system is the system on which CMake is invoked to configure and build your project. You can use systems installed on your local machine, SSH connections, and all Windows Subsystem for Linux (WSL) installations.
The configure preset option is used when CMake is invoked to generate the project build system. Depending on your target system, the options for this will change. So if you are using Ubuntu as your target system, your configure preset could be Linux debug.
The build preset value is used when CMake is invoked to build the project and should align with the configure preset. If Visual Studio can’t find any build presets that are associated with the configure preset, then it will provide the default build preset.
As you can see, there are a lot of options available to configure your CMake projects to suit your needs and project. If you’re looking for even more information on how to configure your projects, check out this Visual Studio documentation.
Build CMake Projects on Visual Studio
When you’re ready, Visual Studio gives you several options to build your CMake projects, including the toolbar or the Solution Explorer.
If you want to use the toolbar, you need to find the Startup Item drop-down:

Select your preferred target to build, and either press F5 or choose Run.
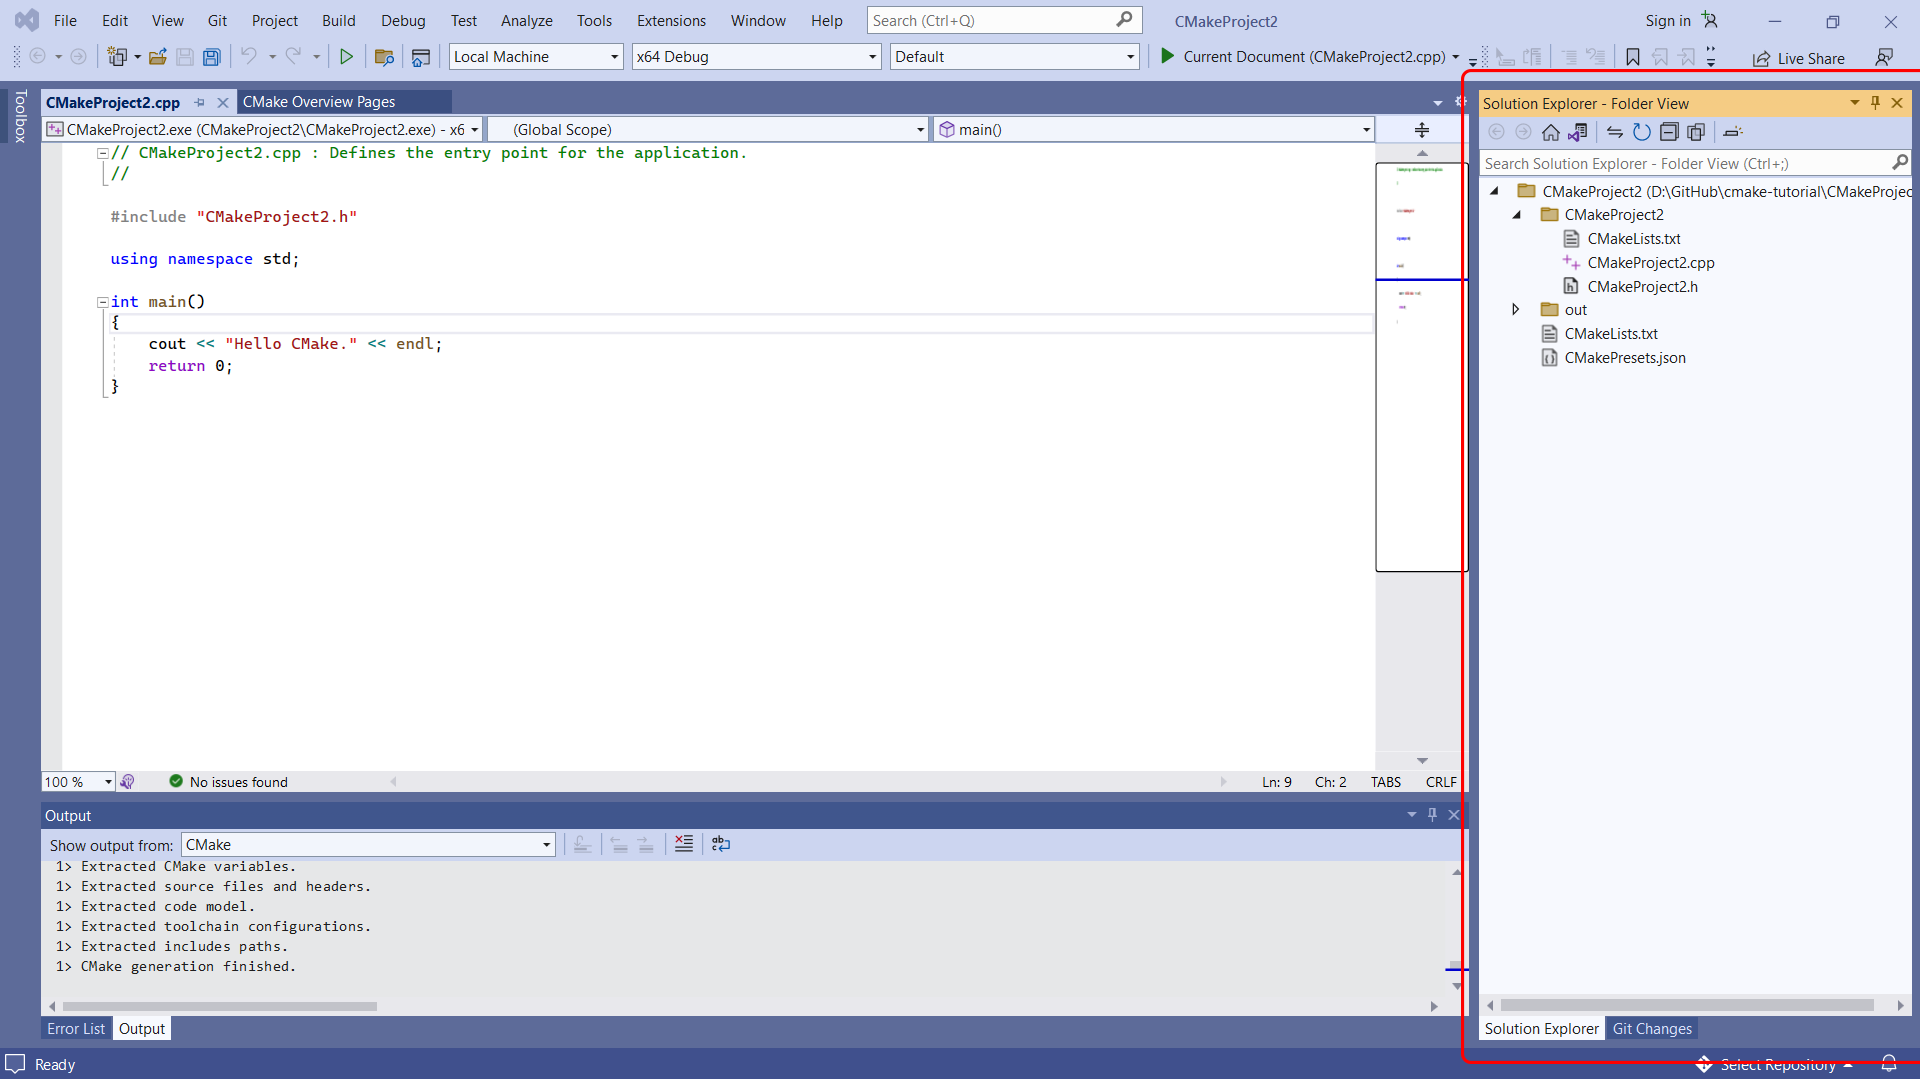
If you want to use the Solution Explorer, navigate to the Solution Explorer on the right-hand side of your screen. By default, it will be set to the Folder View:
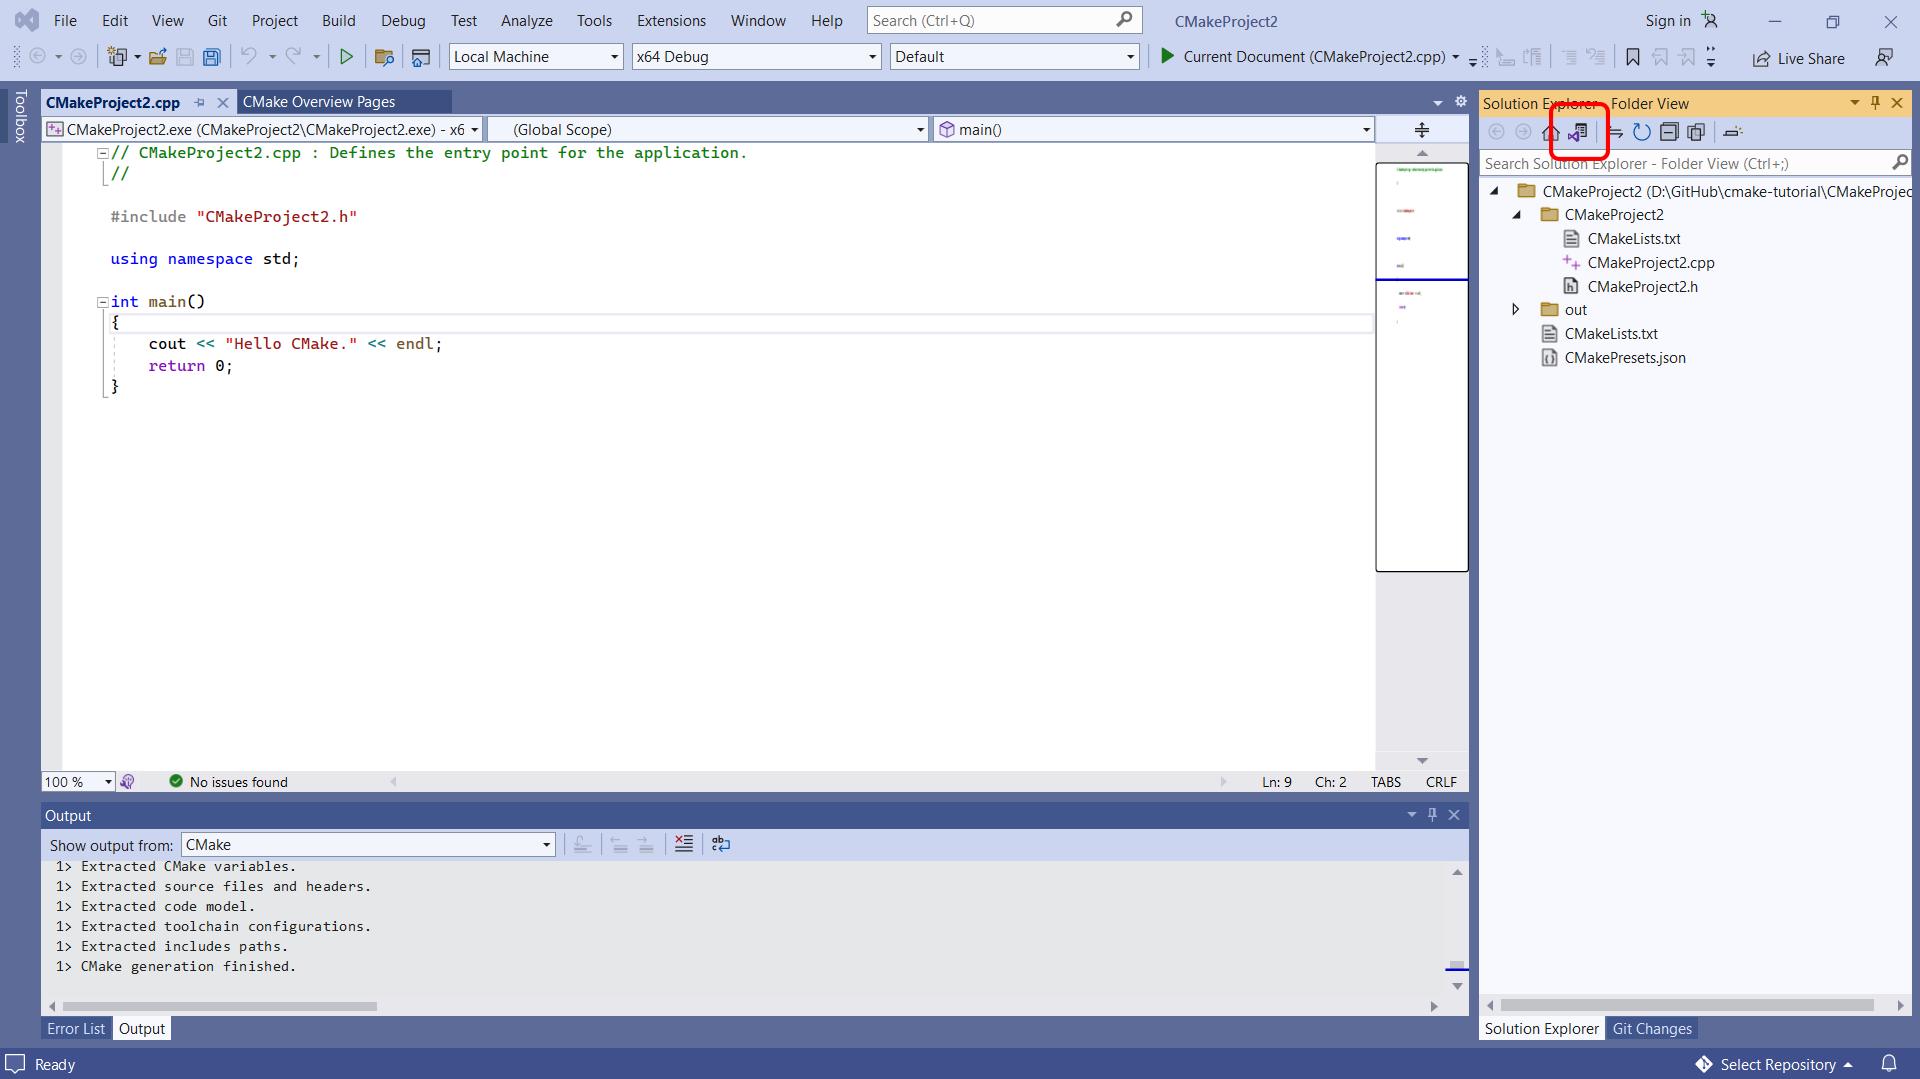
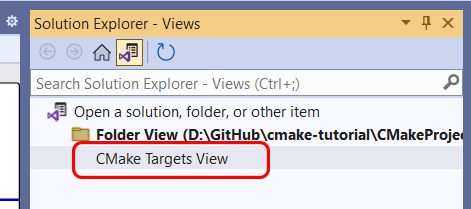
You need to change the Folder View to the CMake Targets View. To do this, select the view icon:
Then select CMake Targets View:
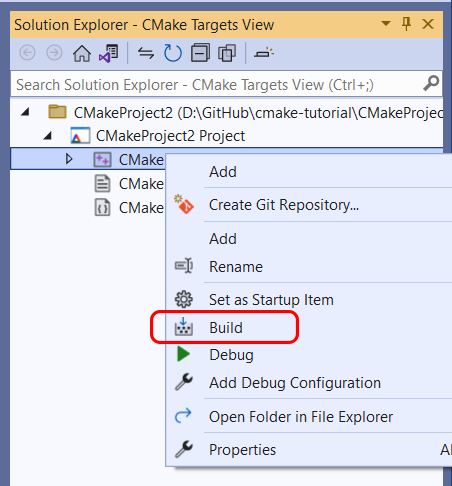
Then right-click on CMake Target and select Build from the context menu:
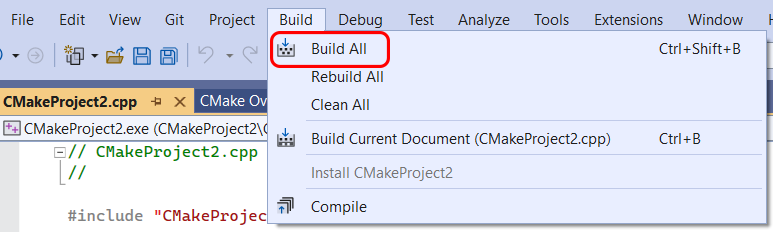
Lastly, you can select Build > Build All from the main menu of Visual Studio to build your CMake project:
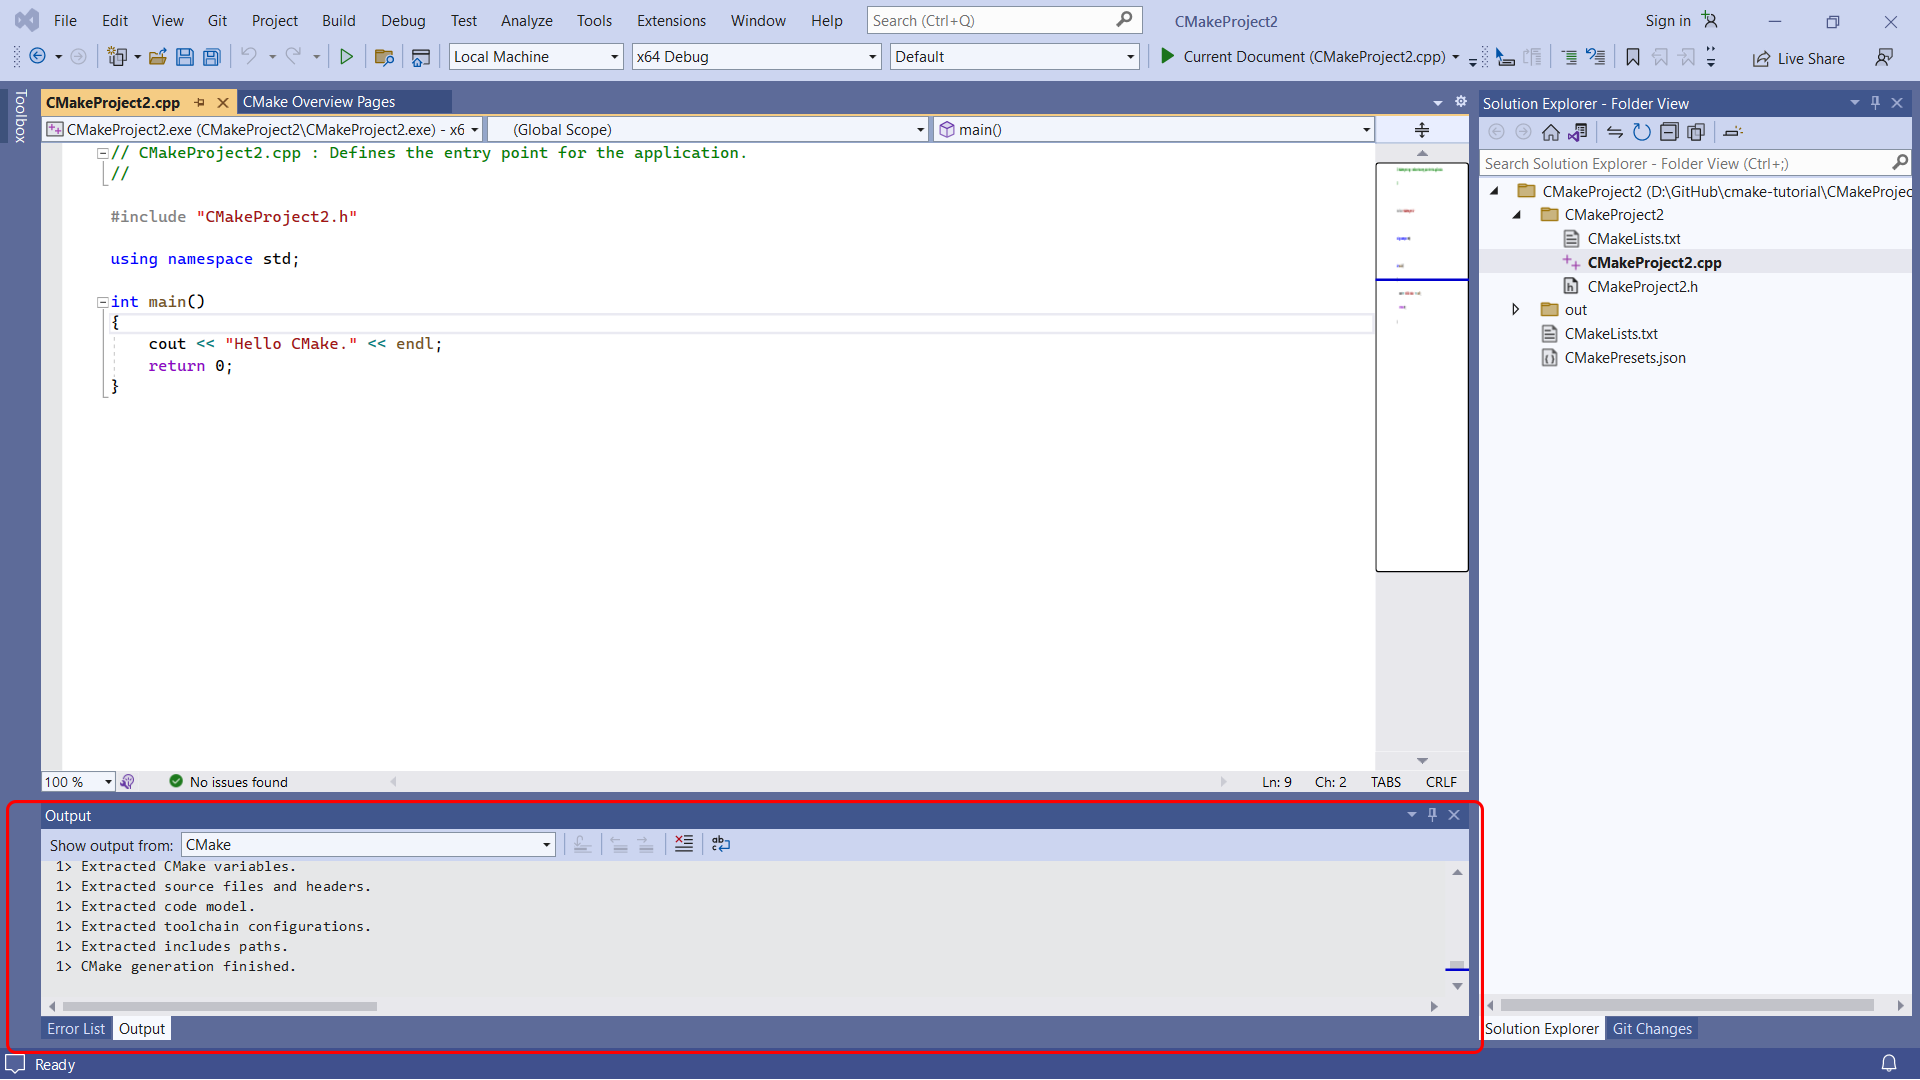
After completing either one of these options, you can find the build results within the Output window and Error List:
Debug CMake Projects
As you know, when writing code, it’s never perfect the first time, which is why you’ll need to be able to debug your code.
To debug your CMake project using Visual Studio, start by selecting one of the targets shown in the Startup Item drop-down within the toolbar:
Then select Debug > Start Debugging from the main toolbar:
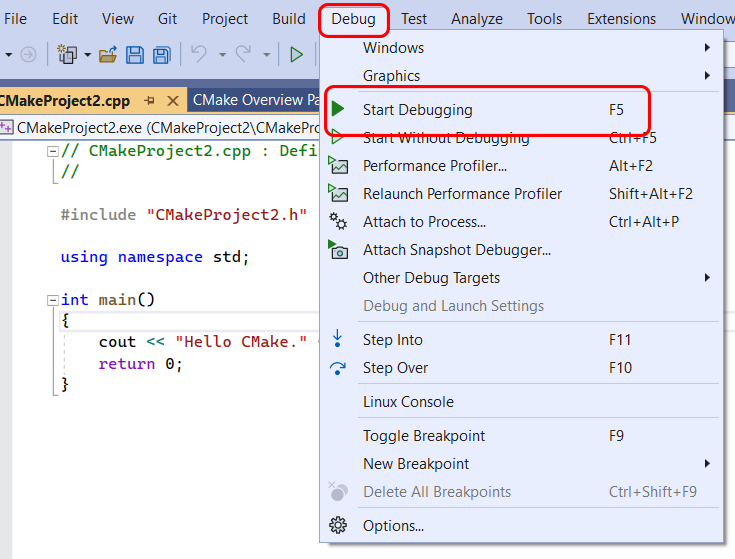
If any changes have been made since the last time you built the project, the debug command will build it first before the debugging can take place.
The launch.vs.json file can be used to customize your CMake debugging session. This file can be used to input any environment variables or command line arguments that you might want to pass into the program during debugging.
Conclusion
CMake is a versatile tool that aids in build automation, testing, packaging, and software installation. It integrates with many IDEs, giving developers the flexibility to stick with their preferred IDE. It ensures your application’s compatibility across any platform. While CMake isn’t for everyone, it can be a robust solution for the right developer or project.
And if you’re looking to optimize your builds further, you might want to give Earthly a shot for its efficient caching and straightforward syntax.
Earthly Lunar: Monitoring for your SDLC
Achieve Engineering Excellence with universal SDLC monitoring that works with every tech stack, microservice, and CI pipeline.
Get a Demo

CMake is a system to automate compilation tasks of code files created in C and C++.
On Unix type systems we can say that it is a “Makefile” generator. He is classified as a SCons.
We already made a brief introduction here on the blog about CMake, but it is also possible to generate Makefiles in Windows, although CMake also generates files for Visual Studio.
Today we will see how to install CMake on Windows.
Dependencies
As in this example we will use GCC, it is important that you have it installed on your Windows via MinGW, see here how to do it.
Now let’s go step by step!
Installation
01. Download CMake by clicking the button below:
Download CMake for Windows 64-bit
After downloading, double-click on the downloaded file: cmake-3.26.0-rc6-windows-x86_64.msi and give administrator permissions to start the installation setup.
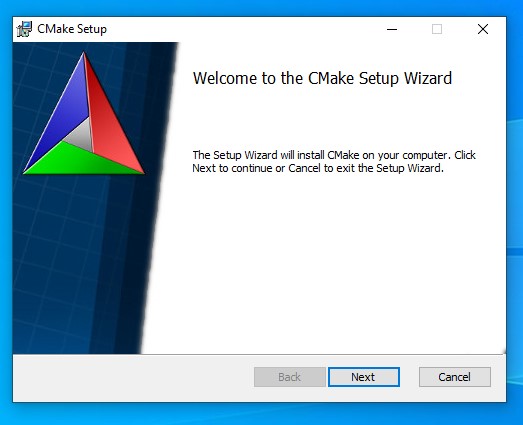
02. Setup presentation
Just click on
Next.
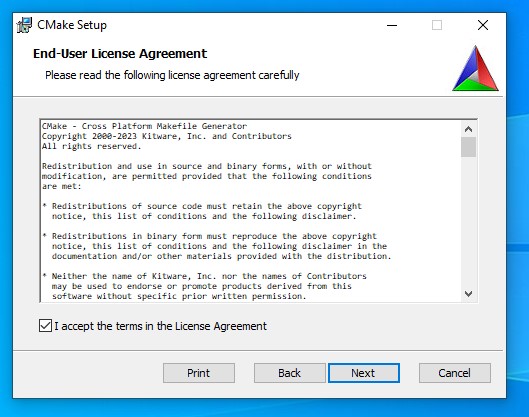
03. Accept the license terms
And then click
Next.
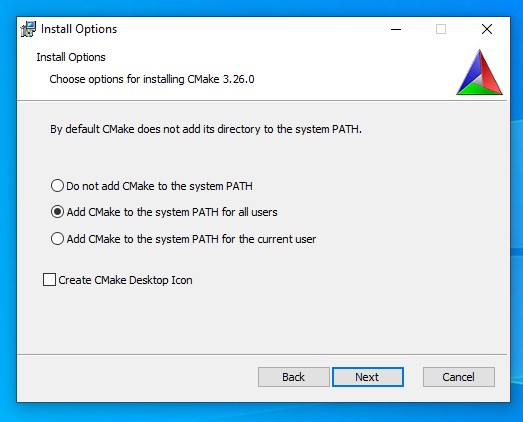
04. Add CMake to your PATH
Check the Add CMake to the system PATH for all users option for the command to be available to all system users. And then click on Next.
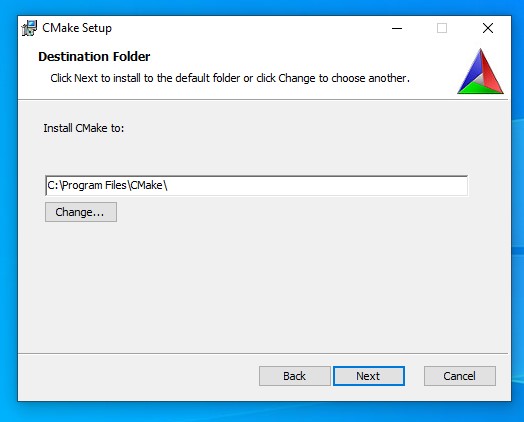
05. Select installation path
Hint: Keep what already appears and click
Next.
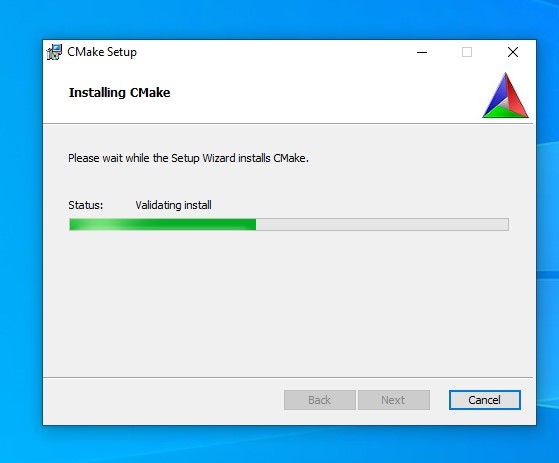
06. Start the installation
Click on Install and wait for the installation to finish.

Installing:

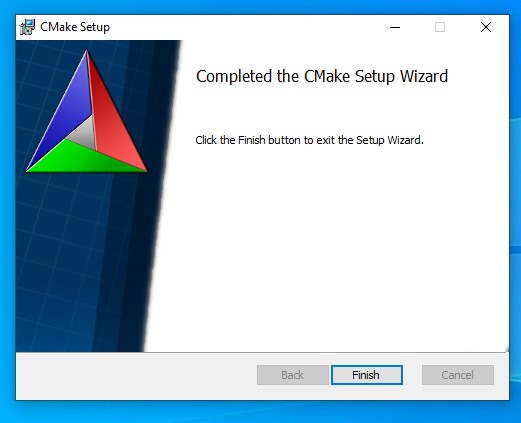
Once finished, click on
Finish:
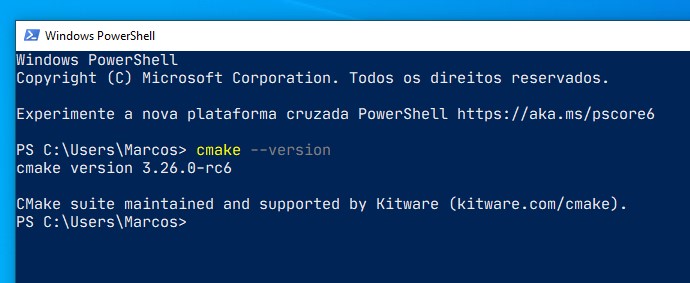
Testing CMake
Open PowerShell or CMD and type the command:
cmake --versionIf the output is similar to the image below, everything is right and installed perfectly:
Compiling with CMake
-
Create a folder, for example
MyProject, enter it (by CMD or PowerShell,cd MyProject) and inside it do: -
Create a file named
CMakeLists.txtwith your Preferred Code Editor or IDE and fill it with the code below:
cmake_minimum_required(VERSION 3.10)
project(HelloWorld)
add_executable(hello main.cpp)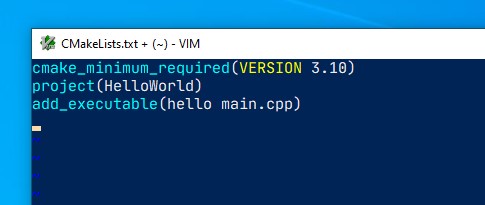
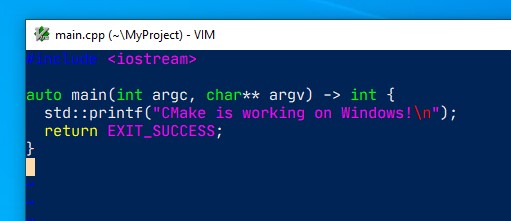
- Also create a
main.cppfile with a basic code, example:
#include <iostream>

auto main(int argc, char** argv) -> int {
   std::printf("CMake is working on Windows!\n");
   return EXIT_SUCCESS;
}
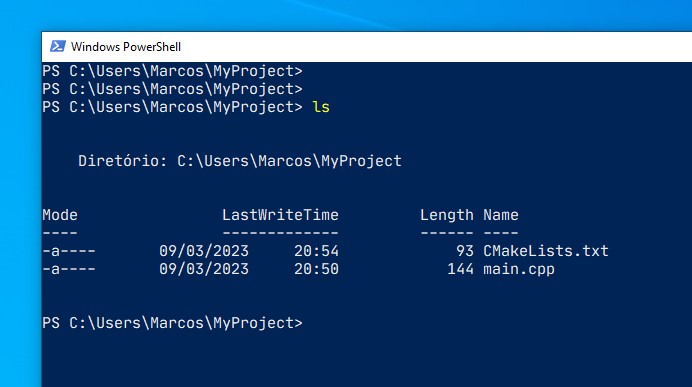
At the end your MyProject folder will have 2 files: CMakeLists.txt and main.cpp as shown in the image below:
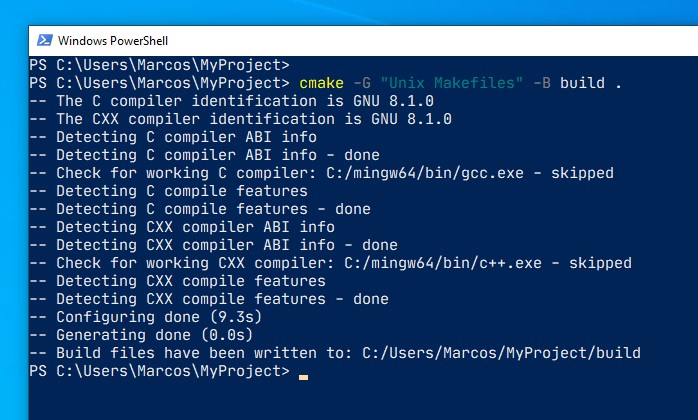
- Now run the command:
cmake -G "Unix Makefiles" -B buildIt will create a folder called
buildinside your project. If you don’t say-G "Unix Makefiles"it will prepare files for Visual Studio, in which case we want a Unix-like Makefile.
The output will be similar to the image below:
- Once finished, enter the build folder (
cd build) and run themakecommand (if this command does not exist, it is because you did not rename the MinGW file to that name as mentioned in the article about MinGW cited above, then most likely the command will bemingw32-make). And then run the final binary:hello:
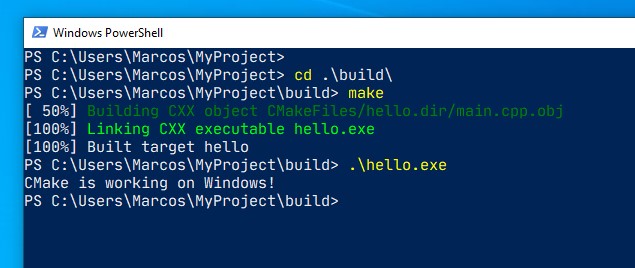
That’s it, now you can compile your C and C++ code with CMake!
Useful links
- https://cmake.org/
- https://cmake.org/download/
- https://github.com/Kitware/CMake/
cmake
windows
Related articles
Building is a fairly general term without strict definition; It usually refers to the whole process that outputing the final product (an executable or a library) from source materials. Depending on the requirements, building will involve several of the following: pre-processing, compiling, linking, converting data files, automatically testing, packaging.
Among the tools that defining the building behaviors for Platform Dependent products whose programming language usually be C or C++, CMake is the most popular one as it is open-source and cross-platform. The building process with CMake takes place in two stages:
- Given abstract,
platform and compiler independentbuilding procedures defined by developers, generating standardMakefileorProject Filesfor IDEs (Visual Studio, Xcode etc.) . - Invoke the desired
native build toolto undertake the actual building process.
Here we introduce the usage of CMake. The environment of this tutorial is Windows 10; The output of each command will be different from that running on Linux. For the syntax of CMake Language, you may visit CMake Syntax for details.
Hello World
The following is a good starting point for learning about CMake.
- Create a new folder
test. - Under the directory, create the source file
main.cpp.
1
2
3
4
5#include <stdio.h>
int main(){
printf("Hello World from test Main!\n");
return 0;
} - Create the CMake file named exactly
CMakeLists.txt
1
2
3cmake_minimum_required(VERSION 3.10)
project(Main)
add_executable(Main main.cpp) - Run
cmake .to generate nativeproject files. UnderWindows, CMake will generate aVisual Studioproject by default. When finished, lots of contents created in the directory:
1
2
3
4
5
6
7
8
9
10
11
12
│ ALL_BUILD.vcxproj
│ ALL_BUILD.vcxproj.filters
│ CMakeCache.txt
│ CMakeLists.txt
│ cmake_install.cmake
│ main.cpp
│ Main.sln
│ Main.vcxproj
│ Main.vcxproj.filters
│ ZERO_CHECK.vcxproj
│ ZERO_CHECK.vcxproj.filters
└─CMakeFiles/ - Run
cmake --build .to create executable. You could find theMain.exein<root-dir>/Debug.
1
2
3
4
5
6
7
8
9
10
11
12
13
14
15
16
17
18
│ ALL_BUILD.vcxproj
│ ALL_BUILD.vcxproj.filters
│ CMakeCache.txt
│ CMakeLists.txt
│ cmake_install.cmake
│ main.cpp
│ Main.sln
│ Main.vcxproj
│ Main.vcxproj.filters
│ ZERO_CHECK.vcxproj
│ ZERO_CHECK.vcxproj.filters
├─CMakeFiles/
├─Debug/
│ Main.exe
│ Main.ilk
│ Main.pdb
├─Main.dir/
└─x64/ - Run executable via
Debug\Main.exe
1
Hello World from test Main!
Explanation
Generate a Project Buildsystem
To generate a buildsystem with CMake, the following must be defined:
Source Tree: The top-level directory containing source files provided by the project. Then the generation will start withCMakeLists.txtunder this directory.Build Tree: The top-level directory where buildsystem files and output artifacts being placed. CMake will also create aCMakeCache.txthere to store persistent information.Generator: The type of buildsystem to generate. If not specified, CMake will choose the proper one automatically. When using one of the Command-Line Build Tool Generators CMake expects that the environment needed by the compiler toolchain is already configured in the shell. When using one of the IDE Build Tool Generators, no particular environment is needed.
You could run CMake with one of the following command signatures to specify them.
cmake [<options>] <path-to-source>: Then the current directory is the build tree,<path-to-source>is the source tree. Both absolute an relative path is valid. The source tree must contain aCMakeLists.txtfile and must not contain aCMakeCache.txtfile.cmake [<options>] <path-to-existing-build>: Then<path-to-existing-build>is the build tree which must contain aCMakeCache.txtfile because CMake will load the source tree from it.cmake [<options>] -S <path-to-source> -B <path-to-build>. Specify both<path-to-build>and<path-to-source>. The source tree must contain aCMakeLists.txtfile; The build tree will be created automatically if it does not already exist.
Options
For the full list of options please visit https://cmake.org/cmake/help/latest/manual/cmake.1.html#options or cmake --help
-C <initial-cache>: Pre-load a script that contains a list ofset()commands to initialize the cache values. The loaded entries take priority over the project’s default values.-D <var>:<type>=<value>or-D <var>=<value>: Create or update a CMake CACHE entry.-G <generator-name>Specify a build system generator. Runcmake --helpto get the name of supported generators--log-level=<ERROR|WARNING|NOTICE|STATUS|VERBOSE|DEBUG|TRACE>: Set the log level. Themessage()command will only output messages of the specified log level or higher. The default log level isSTATUS.
Build a Project
Use cmake --build <dir> [<options>] [-- <build-tool-options>] to build an already-generated project binary tree.
--build <dir>The binary directory when building.--parallel [<jobs>], -j [<jobs>]: Specify the maximum number of concurrent processes. If<jobs>is omitted, use the default number.--target <tgt>..., -t <tgt>...: Build specific<tgt>s .--config <cfg>: For multi-configuration tools, choose specific<cfg>.--clean-first: Clean existing built target and re-build it.-target clean: Clean existing built target only.
Output message
message([SEND_ERROR|STATUS|FATAL_ERROR|DEBUG|TRACE] "message text" ...)
CMake displays STATUS to TRACE messages on stdout with prefix --; All other message types are sent to stderr. FATAL_ERROR will terminate the process immediately whereas CMake Error stops generation only but continues processing.
Set Project Name
project(<PROJECT-NAME> [VERSION <major>[.<minor>[.<patch>[.<tweak>]]]])
This command will set the name of the project and store it in PROJECT_NAME. When called from the top-level CMakeLists.txt, it will also store the project name in CMAKE_PROJECT_NAME. Simultaneously, the variables PROJECT_SOURCE_DIR, <PROJECT-NAME>_SOURCE_DIR, PROJECT_BINARY_DIR, <PROJECT-NAME>_BINARY_DIR will be defined according to the absolute path of the corresponding directory.
Add Executable
add_executable(<name> [source1] [source2 ...])
This command will add an executable target called <name> to be built from the source files listed in the command invocation; The source files can also be added later using target_sources(). The <name> must be globally unique within a project. By default the executable will be created in the build tree directory with the name <name> or <name>.exe depending on the native platform.
In-Source and Out-of-Source Build
Some build trees created with GNU autotools have a make distclean command that removes Makefiles and others belonging to the generated build system. However, CMake has no way to track exactly which files are generated by itself. Therefore, it’s recommended to adopt the out-of-source build —- placing the build tree separately from the source tree. Then one can clean the build by clear or delete the build tree without affect the original source files.
A Better Hello World
Reorganize the Project Directory
- Create
src/to place source files - Create
CMakeLists.txtundersrc/ - Create
build/to place buildsystem
After that, the structure of our project will be
1 |
| CMakeLists.txt |
Config Source and Binary Directory
1 |
add_subdirectory(source_dir [binary_dir]) |
This command will add source_dir run its CMakeLists.txt; A relative path will be evaluated with respect to the current directory. The binary_dir specifies the directory in which to place the output files. Both relative path and absolute path are valid; A relative path it will be evaluated with respect to the current output directory. If binary_dir is not specified, the value of source_dir before expanding will be used.
In top-level CMakeLists.txt become:
1 |
cmake_minimum_required(VERSION 3.10) |
Config Source Directory
It’s tedious to list all source files manually, regardless of using
1 |
add_executable(project source1.c source2.c) |
or
1 |
set(DIR source1.c source2.c) |
aux_source_directory(<dir> <variable>) will collects the names of all the source files in <dir> and stores the list in the <variable>. Note that there is no way for the build system that knows when a new source file has been added; When a new source is just added to the directory, one would have to manually rerun CMake to generate a build system incorporating the new file.
In CMakeLists.txt of src/, add
1 |
aux_source_directory(. SRC_DIR) |
Config Binary Directory
In CMakeLists.txt of src/, add
1 |
aux_source_directory(. SRC_DIR) |
Specify the C++ Standard
In top-level CMakeLists.txt, add
1 |
set(CMAKE_CXX_STANDARD 11) |
Add a Version Number
Add the version number in project.
1 |
project(Main VERSION 1.0) |
Then the variables PROJECT_VERSION, <PROJECT-NAME>_VERSION, PROJECT_VERSION_MAJOR, <PROJECT-NAME>_VERSION_MAJOR, PROJECT_VERSION_MINOR, <PROJECT-NAME>_VERSION_MINOR, PROJECT_VERSION_PATCH, <PROJECT-NAME>_VERSION_PATCH, PROJECT_VERSION_TWEAK, <PROJECT-NAME>_VERSION_TWEAK will be defined accordingly.
It’s also valid to specify the version number directly in the source code,; Using CMakeLists.txt provides more flexibility. Under src/, create a new file config.h.in with the following content:
1 |
|
configure_file(<input> <output>) will copy the <input> to an <output> file with the evaulated values referenced as @VAR@ or ${VAR}. Each variable reference will be replaced with the current value of the variable, or the empty string if the variable is not defined.
The configured file will be written into the ${CMAKE_CURRENT_BINARY_DIR}; We must add that directory to the list of paths to search for include files. In src/CMakeLists.txt, add
1 |
configure_file(config.h.in config.h) |
target_include_directories(<target> <INTERFACE|PUBLIC|PRIVATE> [items1...]) [<INTERFACE|PUBLIC|PRIVATE> [items2...] ...]) specifies include directories to when compiling a given target. The named <target> must have been defined by such as add_executable() or add_library().
Finally, in main.cpp, let’s include the header file and print the version number.
1 |
#include <stdio.h> |
A Complex Hello World
Add Math Library
Create math/ under src/, add CMakeLists.txt, MathFunctions.cpp with MathFunctions.h
MathFunctions.h
1 |
extern double power(double base, int exponent); |
MathFunctions.cpp
1 |
#include "MathFunctions.h" |
src/math/CMakeLists.txt
1 |
aux_source_directory(. DIR_LIB_SRCS) |
After that, the structure will be
1 |
| CMakeLists.txt |
Build and Use Static Library
In src/math/CMakeLists.txt, add
1 |
set(LIBRARY_OUTPUT_PATH ${PROJECT_BINARY_DIR}/lib) |
add_library(<name> [STATIC | SHARED] [source1] [source2 ...]) will add a library target called <name>.
The top-level CMakeLists.txt become:
1 |
cmake_minimum_required(VERSION 3.10) |
The src/CMakeLists.txt become:
1 |
aux_source_directory(. SRC_DIR) |
The structure become
1 |
| CMakeLists.txt |
Build and use Dynamic Library
src/math/CMakeLists.txt become
1 |
aux_source_directory(. DIR_LIB_SRCS) |
MathFunctions.h become
1 |
extern __declspec( dllexport ) double power(double base, int exponent); |
src/CMakeLists.txt become:
1 |
aux_source_directory(. SRC_DIR) |
Then the structrue become
1 |
| CMakeLists.txt |
When running with dynamic-linked library, you should put the .dlls under the same folder of .exe.
https://cmake.org/cmake/help/latest/guide/tutorial/ https://cliutils.gitlab.io/modern-cmake/
Enhancing CMake development in VS Code.

Introduction
CMake Tools provides the native developer a full-featured, convenient, and powerful workflow for CMake-based projects in Visual Studio Code. It simplifies advanced configurations with support for CMake presets and enhances the development experience by supporting rich IntelliSense features, a built-in debugger for CMake scripts, and configurable CMake tasks. Its customizable interface allows for efficient tailored control of projects, while CTest integration ensures straightforward test execution and monitoring.
Features
Setup and Installation
Ensure CMake is available on your system. A couple of options are:
- Download CMake.
- Utilize the CMake that is bundled with a Visual Studio installation.
Install the CMake Tools extension from the Extensions pane within VS Code or from the VS Code Marketplace.
Ensure that either you’ve added your CMake executable to your PATH, or you’ve adjusted the cmake.cmakePath setting to point to your CMake executable.
Resources
- Docs for comprehensive documentation.
- Quick Start to get up and running fast.
- Github for source code, issues, and contributing.
Contributing
We encourage an open and collaborative development environment and welcome all contributions. Whether you’re fixing bugs, proposing new features, or improving our documentation — we invite you to join the CMake Tools community. Please review our contribution guidelines and adhere to our code of conduct.
You can file issues with us using one of our templates:
Bug Report: If you see an error message or encounter an issue while using the CMake Tools extension.
Feature Request: If you have a suggestion or need a feature that would enhance development.
Documentation Request: Requesting changes or additions to the CMake Tools documentation.
Microsoft Open Source Code of Conduct
This project has adopted the Microsoft Open Source Code of Conduct. For more information see the Code of Conduct FAQ or contact opencode@microsoft.com with any additional questions or comments.
Data/Telemetry
This extension collects usage data and sends it to Microsoft to help improve our products and services. Collection of telemetry is controlled via the same setting provided by Visual Studio Code: "telemetry.enableTelemetry". Read our privacy statement to learn more.
Credits
This project was started by @vector-of-bool and is now currently maintained by Microsoft.
Contributors