
-
Признаки ошибки
-
Причины неисправности
-
Советы по устранению
Столкнулись с ошибкой 0x000000EF CRITICAL_PROCESS_DIED в Windows 10? Как исправить и что делать при возникновении “синего экрана смерти” читайте в статье.
Признаки ошибки
Неисправность может проявлять себя в следующем:
- Появляется синий экран с ошибкой CRITICAL_PROCESS_DIED (завершение критического системного процесса) и активная программа прекращает работу.

- Периодическое проявление CRITICAL_PROCESS_DIED и автоматическая перезагрузка Windows.
- Зависание ОС на несколько секунд, выбивание окна с синим экраном и перезагрузка системы.
- Получение “синего экрана смерти” после запуска конкретной программы.
- Windows 10 с задержкой реагирует на команды, введенные с мыши и клавиатуры.

Важно отследить закономерность, после каких действий ОС проявилась неисправность. Этот анализ поможет в исправлении ошибки.
Причины неисправности
Stop-ошибки, к которым относится 0xEF, могут возникать из-за конфликтов оборудования с программным обеспечением или компонентов системы с драйвером. Распространенные причины:
- Драйвер для ОС был поврежден, устарел или неправильно сконфигурирован.
- Реестр Windows поврежден из-за вмешательства программ или вирусного ПО.
- Системные файлы были повреждены из-за вирусного ПО.
- Конфликт аппаратной части и установленного драйвера.
- Повреждение жесткого диска, обращение системы к битым секторам.
- Повреждение модуля оперативной памяти, невозможность чтения системой информации.
Советы по устранению
Выполните следующее:
- Войдите в безопасный режим.

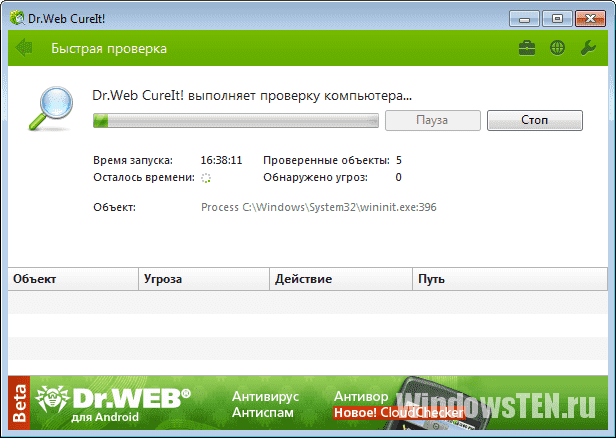
- Отключите программы из автозагрузки. Проведите сканирование системы на вирусы и вредоносное ПО. Если у вас нет антивируса, используйте бесплатное решение Dr.Web CureIt.

- Если ошибка появилась после обновления драйвера, удалите или откатите до предыдущей версии. Проверьте работу Windows 10.

- Откатите систему назад, до сохраненной точки восстановления, когда ОС работала стабильно.

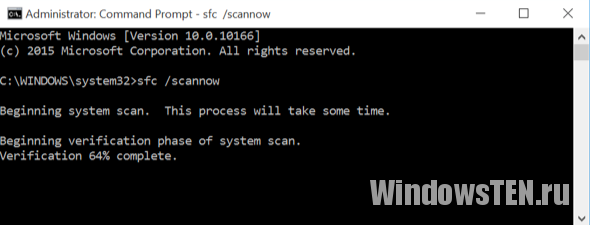
- Проведите сканирование и автоматическое восстановление поврежденных системный файлов Windows. Зайдите в Командная строка (администратор) и выполните команду
sfc /scannow

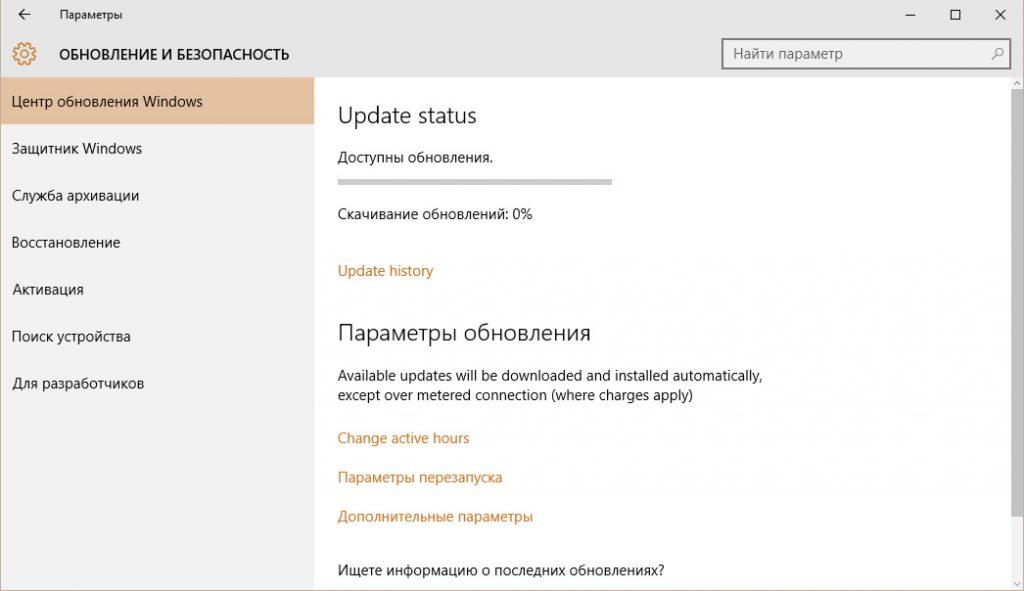
- Установите последние обновления Windows 10.

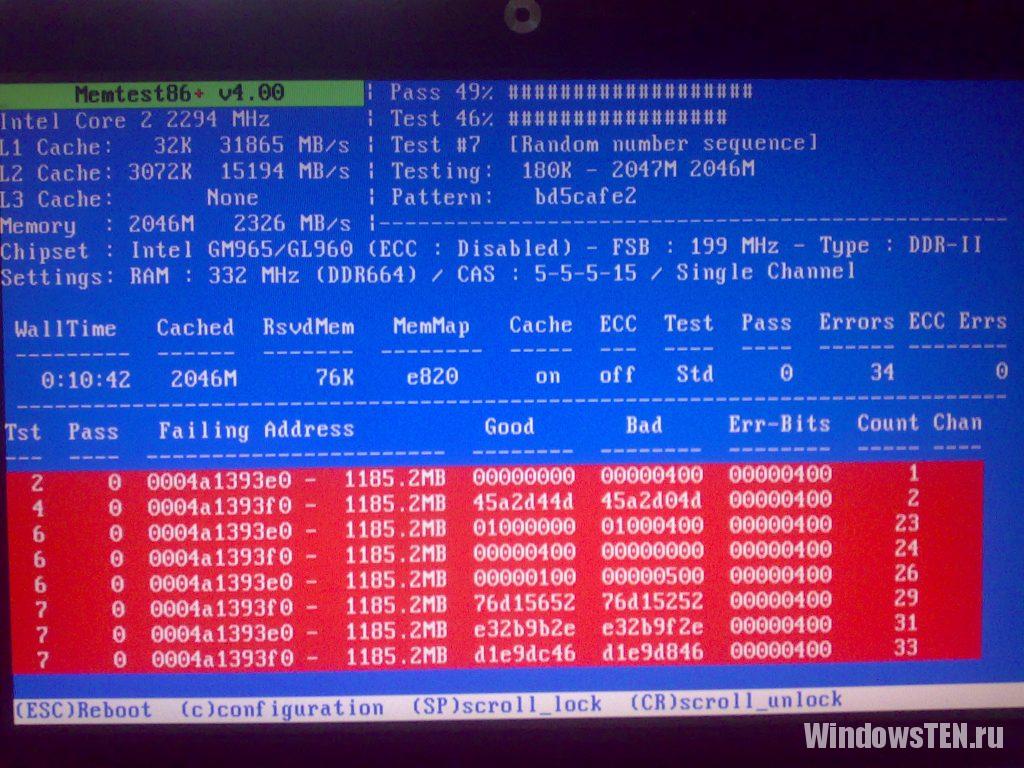
- Проведите сканирование жесткого диска на наличие битых секторов и сканируйте оперативную память на ошибки (программа memtest86).

- Если ошибка проявляется, создайте установочную флешку (или диск) Windows 10 и проведите восстановление или чистую установку ОС.
Возникли сложности с устранением ошибки? Напишите нам. Подробно распишите проблему, что вы уже сделали для ее решения, чтобы мы смогли помочь.
Синий экран смерти (дальше BSOD) с кодом 0x000000EF также связан с сообщением CRITICAL_PROCESS_DIED. Это означает, что критически важный для системы процесс был завершен в аварийном режиме, а без него Windows дальше работать не может. Учитывая тот факт, что проблема носит системный, а не программный характер, ваша главная цель будет заключаться в восстановлении операционной системы и ее файлов. Опять же, заниматься подобным имеет смысл только в том случае, если BSOD 0x000000EF появляется регулярно или постоянно. Часто это всего лишь одноразовая ошибка, которая не требует нашего вмешательства. Итак, что же можно сделать при ошибке 0x000000EF?
Все, что нужно знать о 0x000000EF CRITICAL_PROCESS_DIED
Не считая банальных советов, вроде обновления Windows и драйверов, у нас есть всего 2 эффективных решения данной проблемы. Обе процедуры направлены на восстановление файлов операционной системы. Один путь – запустить сканирование из операционной системы командами Dism /Online /Cleanup-Image /RestoreHealth и sfc /scannow. Более эффективное решение подразумевает использование специального режима восстановления.
Что нужно попробовать:
- Вводим в поиск «Параметры восстановления» и запускаем одноименный инструмент.
- В блоке «Особые варианты загрузки» выбираем «Перезагрузить сейчас».
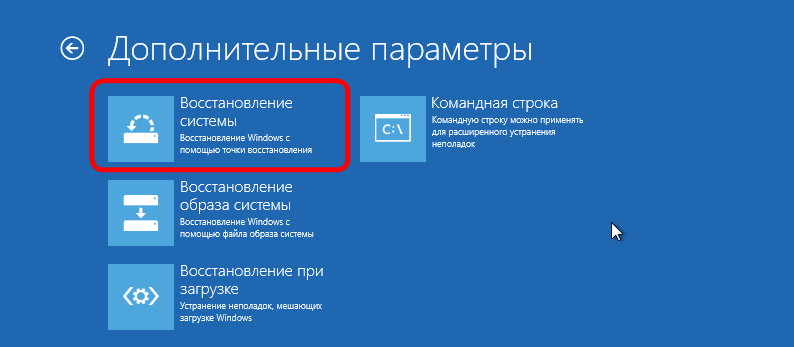
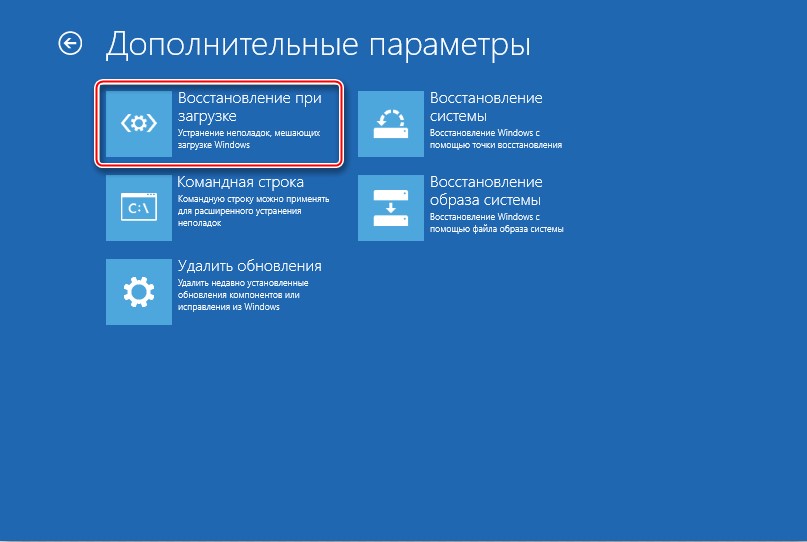
- После перезагрузки нажимаем на «Дополнительные параметры» и выбираем «Восстановление при загрузке».
В результате ожидания будет понятно, удалось исправить проблему или нет. Пока других эффективных решений ошибки не существует. Похоже, это и не нужно, так как 0x000000EF CRITICAL_PROCESS_DIED чаще всего является разовой ошибкой. Если у вас она появляется слишком часто, разумно будет переустановить операционную систему, сделать откат к предыдущей точке или сбросить к заводскому состоянию.
У вас есть некий опыт, касающийся 0x000000EF и CRITICAL_PROCESS_DIED? Пожалуйста, поделитесь им в комментариях, чтобы помочь другим читателям быстрее и эффективнее исправить свой синий экран смерти.
Blue screen of death or BSOD can crash your computer and hamper your work. It includes more than 500 Error codes, however, 0x000000EF or Critical Process Died is the most infamous one. BSOD errors are quite irritating and also pose a risk of losing data on which we are currently working. If you are facing a similar issue, then you need to act on it immediately. Let’s get started! First, let’s know what is the 0x000000EF error code.
Critical Process Died or 0x000000EF
Error code 0x000000EF is mostly the reason for BSODs. You get the error code 0x000000EF on a blue crash screen.
You must be wondering why it happens? Well, it happens as a background process on which Windows depends has been corrupted. It could incorrectly modify your data or stopped completely.
The reason behind this error code could be anything from memory error to corrupted drivers. The error usually comes up when you wake your machine from sleep, playing games or using a specific app.
Steps To Fix The Error Code 0x000000EF
There are a handful of troubleshooting steps you need to follow to get rid of Critical Process Died code on Windows.
Method 1: System File Checker
Now let’s proceed and run system file checker popularity known as SFC scan. It is known to solve a lot of Windows hidden issues by repairing incorrectly modified or corrupted system files.
It might not solve the issue, but it is safe to run the Scan to try and resolve the issue. However, it could really work with this error code 0x000000EF
Follow these steps to initiate the scan:
You need to run Command Prompt as Admin.
The scan will initiate, you need to be patient as the scan will take a while to finish.
Once the scan is done, you will get a list of issues along with the steps taken to fix the issue.
It is recommended to restart your computer.
Method 2: Run Antivirus Scan
If your computer is infected with malicious content or malware, it tends to get unstable. You can run a good antivirus such as Advanced System Protector which swiftly scans and detects viruses, malware, spyware and other malicious files. It cleans detected malware, unwanted adware, & the vexatious toolbars that get onto your computer without your permission.

Method 3. Run the DISM Tool
If you are still facing errors, then let’s move on to proceed to the next step. Go to the search bar and type in Deployment Imaging and Servicing Management (DISM) tool and press Enter. This tool helps in repairing corrupted system image
The tool comes with three switches: /ScanHealth, /CheckHealth and /RestoreHealth
For now, we only need /RestoreHealth switch. Follow these steps to use the switch:
This process usually takes time. So, please be patient and wait for the process to get completed.
Once the scan is complete, restart your computer.
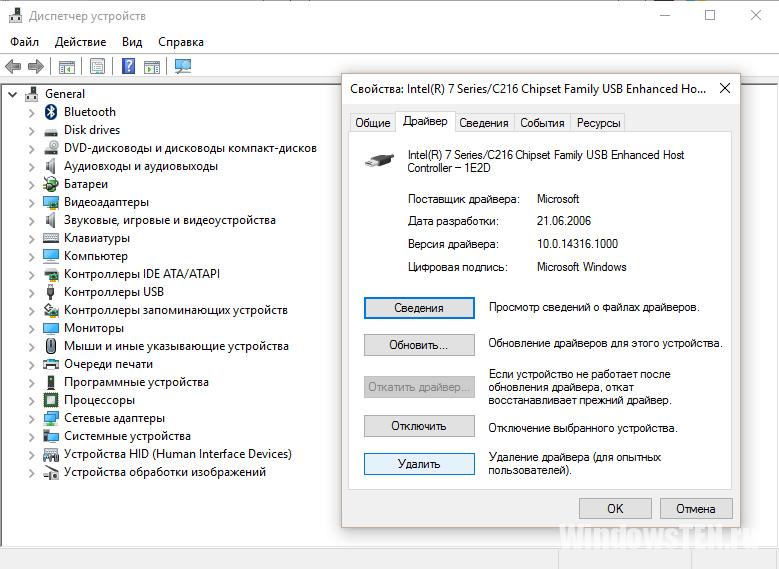
Method 4. Check Your Drivers For Update
Drivers on a computer could be the most recurrent reason for critical process died issue. So, you must check if any of the drivers need to be updated. For that, follow these steps:
Step 1: Press Windows and X to get the Context menu above the Start button.
Step 2: Locate and click Device Manager.
Step 3: Now check all the drivers present on your computer to see a yellow exclamation mark, this indicates that a driver needs an update.
Step 4: Once located, you can right-click on the driver to select Update Driver from the menu.

Well if you don’t want to waste your time in checking drivers or in future if you want to keep your drivers updated with you doing anything, then you always get Advanced Driver Updater. It keeps an eye on the installed drivers so that no driver is outdated, relieving you from the stress of updating them manually. It also takes a backup of all your drivers before installing an update.
Method 5. Uninstall Recent Windows Updates
Microsoft releases updates for Windows every now and then. It usually patches up security vulnerabilities or introduces new features. If the error code 0x000000EF has come up after a Windows update, uninstalling the recent Windows update could do the job.
Follow these steps to uninstall Windows update:
Step 1: Press Windows and I Key to get the Settings app.
Step 2: Navigate to Update & Security.

Step 3: Now on Update & Security window, click Windows Update.

Step 4: Locate and click View Update History, then click Uninstall Updates.

Step 5: Click on the update to select and hit Uninstall located at the upper side of the window.
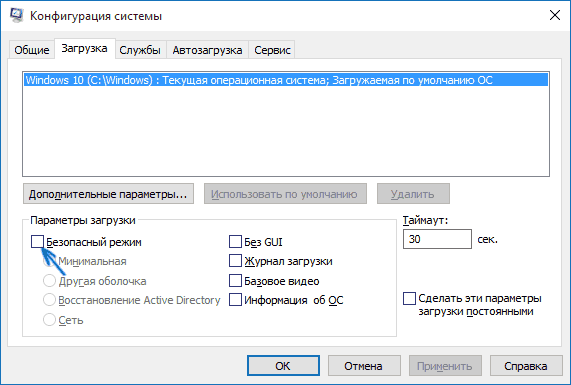
Method 6. Clean Boot
Clean boot is a startup mode which just requires essential files processes, drivers and programs. Clean boot is a troubleshooting method which detects and solves performance issues within the booting process for example error messages, software conflicts and others.
Follow these steps to clean boot your PC:
Step 1: Type System Configuration on the search bar and press Enter.

Note: Press Windows and R key to get Run window and type msconfig and press Enter to open System Configuration
Step 2: Click the Services tab.
Step 3: Locate Hide all Microsoft Services from the list.

Step 4: Click Disable All button.
Step 5: Select the Startup tab

Step 6: Go to Open Task Manager
Step 7: You will get Task Manager with the Startup Tab.
Step 8: Disable the items on the list.

Once done, restart your computer.
If nothing so far worked for you, then you can Reset your computer to start it fresh. To reset your PC, follow these steps:
Still, the issue appears on your computer, then it is better to get a fresh installation on your Windows PC to make sure the issue is resolved for good.
Following these steps can be exhausting, therefore, you need to be a bit patient while performing the steps
Liked the article? Please share your thoughts in the comments section below.
The occasional Blue Screen of Death (BSoD) has plagued us all over the years of Windows’ existence. BSoDs are STOP errors that are a part of the Windows operating system. These messages are displayed when a fatal system error happens, with the primary purpose being to inform the user about the cause of the error so they can figure out potential fixes. Typically, BSoDs occur due to faulty memory, overclocking, bad drivers, corrupted storage or even badly written software.
One such BSoD that often occurs when Windows 10 boots up is the ‘CRITICAL_PROCESS_DIED’ error. The critical process died error indicates that a program integral to the working of the operating system died due to some issue or error. In older versions of Window, the error is accompanied with the error code ‘0x000000EF’. This code is one of the 500+ known BSoD error codes and refers to the ‘CRITICAL_PROCESS_DIED’ error.
In Windows 10, the critical process died error is shown with a blue screen with an accompanying vague error message “Your PC ran into a problem and needs to restart. We’re just collecting some error info, and then we’ll restart for you. If you’d like to know more, you can search online later for this error: CRITICAL_PROCESS_DIED”. On restart, most cases end back at the dreaded blue screen with the same terrible error.

Why is this error message displayed on my computer?
The critical process died error happens when unauthorised accesses to data owned by a critical component are made during boot up. When Windows detects such a modification, then it immediately kills the process that was modified resulting in the Critical Process Died BSoD. In 90% of the cases, the problem arises due to a bad driver. If you recently installed or updated a driver for some hardware (printers, controllers, sound cards. etc) then chances are that’s the culprit. But sometimes the root cause of the issue isn’t as simple. People have reported the Critical Process Died error happening on brand new machines and devices. But worry not! We’ll discuss multiple methods that would cover most scenarios and possible issues.
The methods described are very simple and should be very easy to follow even if you are no computer expert. We recommend trying out every method one after the other and reboot to check if the BSoD still appears.
How do I fix the Critical Process Died error in Windows 10?
If you’re in a boot loop and your computer can’t seem to get out of the Blue Screen of Death, then the first step is to boot your computer in Safe Mode. In Safe Mode, Windows only starts with a limited set of files, programs and drivers. Startup programs don’t run and only basic drivers needed to run windows are installed.
Start your computer in Safe Mode
There are multiple ways to boot your computer into Safe Mode. Most computers detect the F8 key or the Shift + F8 keys pressed before startup to open the Advanced Boot Options Menu. To use this method, perform the following steps:
- Restart Windows 10.
- Press F8 or Shift+F8 before Windows 10 starts loading so that you enter recovery mode. (Pro tip: Keep pressing the keys until you arrive at the recovery. Try both F8 and Shift+F8 on separate restarts if one doesn’t work)
- Use the arrow keys to select the Advanced Boot Options and click Enter.
- Use the arrow keys to select Safe Mode and click Enter. You could also use Safe Mode with Networking but that isn’t recommended since your wifi chipset’s driver itself could be the culprit.

If your computer is one of the unfortunate devices that does not map F8 or Shift+F8 to recovery (my own personal laptop does not) do not give up just yet. There is another way to enter Safe Mode:
- If you have a Windows installation disc or a Windows recovery USB then you can insert it before startup to boot into WinRE. If you don’t have an installation disc or USB then just restart your pc several times to automatically boot into WinRE. WinRE is an inbuilt repair tool that allows you to troubleshoot if your operating system is facing problems.
- Once you’re in WinRE, click Troubleshoot.
- Then, click on Advanced Options.
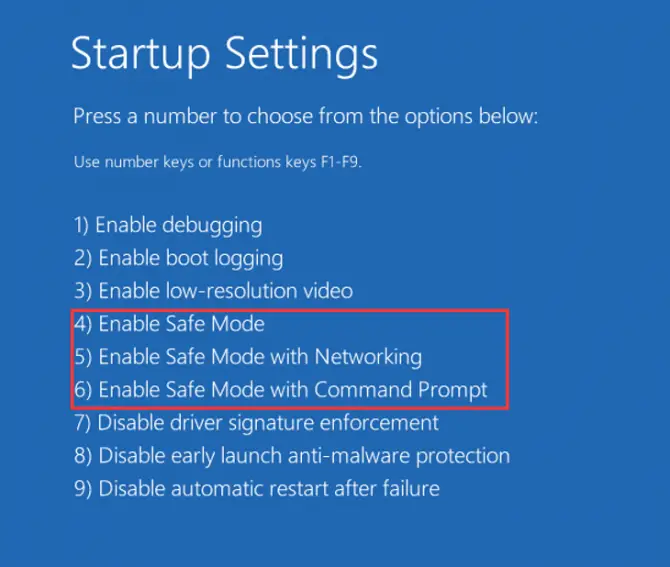
- Click on Startup Settings.
- And finally, click on Restart. Once your computer reboots, you will go back to WinRE. Navigate to the Startup Settings menu as we’d done in steps 2-4.
- Here, you’d find multiple restart options. Press the appropriate number key (4 in my case) to reboot into Safe Mode.
If you still can’t boot into your PC, then the underlying problem is very severe. You would have to reinstall Windows to fix the issue. If your computer boots and you’re able to log in to your account, then we now need to perform a Clean Boot. A clean boot is similar to booting with Safe Mode, but it provides you with much more control over which services and programs run at startup to help you isolate the root cause of the issue. A clean boot is also much simpler to perform and you wouldn’t have to keep entering recovery to do it unlike booting in Safe Mode.
Perform a Clean Boot
These steps may look convoluted at first glance, but following them, step-by-step would keep you in track to perform a clean boot.
- Sign in to the computer as an administrator.
- Click the search button next to the Windows icon in the taskbar. Type ‘msconfig’ and select System Configuration from the results shown.
- Click on the Services tab in the top bar, select Hide all Microsoft services, and then select Disable all.

- Then, click on the Startup tab and select Open Task Manager.

- Under Startup in Task Manager, for each startup item, select the item and then select Disable.

- Close the Task Manager, select OK in System Configuration and restart your computer.


Your computer should now boot successfully into Windows. From here, there are multiple things that you could do to find the root cause of the issue. If the problem started arising after a system update or a new driver installation and the system was working fine before this, the easiest solution to get rid of the Critical Process Died error is to restore your computer to a previous state. You could also manually remove the software or driver if you’re aware of what exactly caused the problem. If you aren’t then you could use System Restore to an automatically created backup that Windows created before every major update.
Perform a System Restore
A system restore is NOT a system reset. You would not lose any personal files such as documents, music, pictures, videos, etc. But some applications that you’d installed after the backup would no longer be present. A system restore is literally reverting your computer to a previous point in time.
To perform a system restore, you need to do the following steps in order:
- Click on the search icon next to the start button and search for “Create a restore point”.
- Click the top result to open System Properties.
- Click the System Restore button in System Properties.

- A new dialog box would open with the title “System Restore”. Click Next.
- Select the restore point that you want to use on the computer. You could also choose to Scan for affected programs to figure out which applications would no longer be present.

- Click the Next button.
- Click the Finish button.


Once you perform the steps mentioned, your computer would be returned to a previous working state. It should no longer have the ‘CRITICAL_PROCESS_DIED’ error and your computer should work normally. If a system restore didn’t work either, you’d need to redo the steps to boot into safe mode and clean boot. You could try restoring to an older point or you could perform a System Reset to have a clean, new working PC.
Use the System File Checker (SFC) to fix corrupted system files
The ‘CRITICAL_PROCESS_DIED’ error could also be caused due to corrupted system files. Fortunately for us, Windows ships with a System File Checker (SFC) tool that would allow users to scan for corrupted system files and restore them to their original state. The tool looks for all files that fall under Windows Resource Protection (WRP). WRP prevents the modification of files, folders and registers that are integral to the operating system.
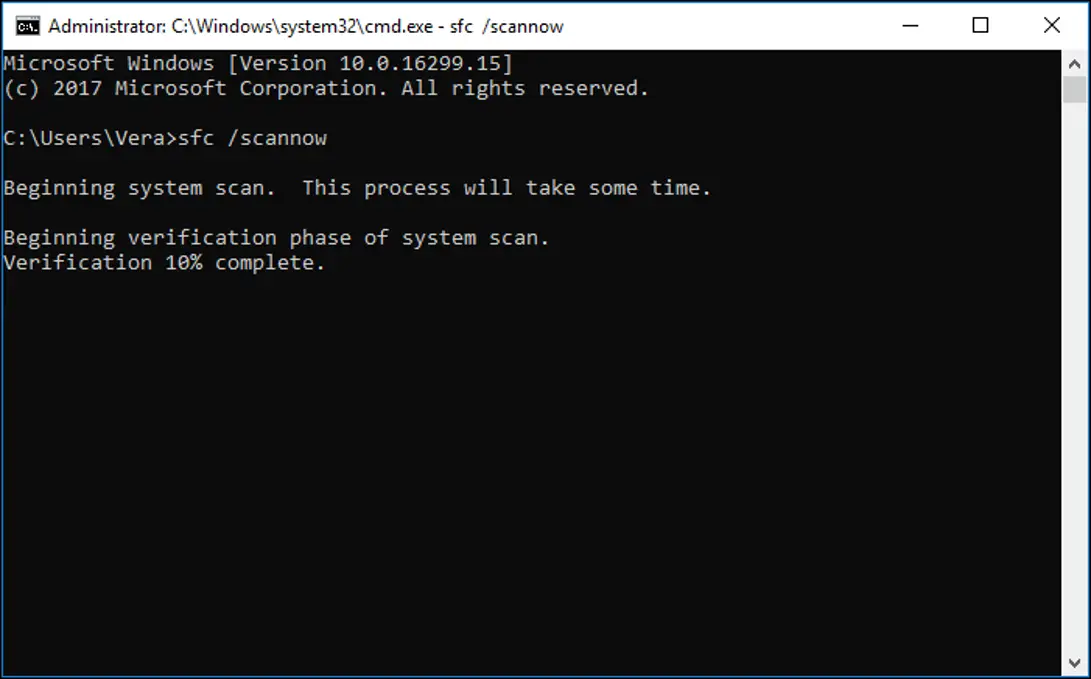
- Click on the search button next to the Windows icon and type “command prompt”. Then, right-click the Command Prompt result and select Run as administrator. This would open a new command window.
- In the command window, type ‘sfc /scannow’ without the quotes and press the enter key. The scan will take some time to run.

The SFC will automatically find any corrupted files and repair them. If it does perform any repairs you’ll get a message saying “Windows Resource Protection found corrupt files and successfully repaired them. Details are included in the CBS.Log windir\Logs\CBS\CBS.log. For example C:\Windows\Logs\CBS\CBS.log. Note that logging is currently not supported in offline servicing scenarios”.
- Restart your computer.
With that, you’ve successfully repaired your system files and your computer should work normally.
Note: If you run into an SFC /Scannow error when starting the scan, don’t worry. We have written dedicated articles on what to do if SFC scannow is not working, including:
- Windows Resource Protection Could Not Perform The Requested Operation
- Windows resource protection could not start the repair service
Conclusion
The above-described solutions should solve 99% of the cases of the ‘CRITICAL_PROCESS_DIED’ error in Windows 10. Rebooting into Safe Mode and Clean booting is a necessary step to troubleshooting your computer. You can perform a system restore or use the SFC tool to repair corrupted files to fix your system. Furthermore, the same methods could be used to solve many other Blue Screen of Death (BSoD) issues in Windows 10.