
A brightness slider is most needed in our day-to-day life, and there is no alternative to a brightness slider to get a better user experience on a device at home and out.
The brightness slider is a tool that was introduced in Windows 10. You may look for it on your Windows 11 Access panel and Settings, the brightness controller might be greyed out or not working.
Don’t worry. If you are messed up with this issue, you are in the right place.
As a tech enthusiast and specialist, I research a lot to find the reason for this issue since lots of users reported it. After a while, I can solve the brightness slider not working case on laptops or tablets.
I will walk you through five steps to resolve the brightness slider in Windows 11 missing problem in this post. Here, I will also discuss the possible reasons for this issue.
So, let’s jump into the deep without further delay.
Why Is Brightness Slider Not Working in Windows 11?
The brightness slider is missing on Windows 11 because of third-party applications, a corrupted or outdated monitor driver, or the monitor driver may be outdated or disabled on your device. Also, modifying or changing the Windows Registry value or Group Policy settings occurs the brightness slider missing issue.
In Windows 11, users suddenly face the brightness slider is grayed out, which means the brightness slider is not working or disabled.
In these circumstances, users are annoyed and frustrated when they need to control the brightness of their laptop or tablet devices.
There are some possible reasons to face the slider for brightness not working in Windows 11. I will try to find out the possible reasons for this issue, and now, I will discuss these issues.
Here are the possible reason for missing the brightness slider on Windows 11:
1. Third-party Application
Third-party applications are one of the major reasons for missing or not working the brightness slider on Windows 11 laptops or tablets.
Third-party applications such as TeamViewer and Malware detected software conflict with the monitor driver and created this issue.
2. Corrupted Monitor Drivers
Another possible reason to create the brightness slider not working on Windows 11 laptops or tablets is a corrupted driver for your monitor.
Viruses, bugs, or glitches are among the main culprits that corrupt the drivers or software files. When the monitor driver’s core files are corrupted by one of these culprits, the drivers are not functioning correctly and create various issues like brightness sliders not working.
Quickly check out our latest fix for Bluetooth Toggle Missing On Windows 11.
3. Outdated Monitor Drivers
Outdated monitor drivers are another reason for the missing brightness slider on laptops or tablets.
When monitor drivers are outdated, there is a chance the drivers are not working or functioning correctly with the system. For this reason, the brightness slider is not performing issue has occurred.
4. Disabled Monitor Drivers
Sometimes, it can be possible that your monitor drivers are disabled on your Windows 11 devices, and the monitor cannot work correctly with the system.
So, if your monitor drivers are disabled on your Windows 11 laptop or tablet, you might face the brightness slider not working issue.
The brightness slider is the most helpful feature to control brightness levels based on user necessities on your device.
Are you using an external monitor on your PC and looking for the brightness slider?
There won’t be a brightness slider if you’re using an external monitor. To adjust the screen brightness of an external display, you can use the monitor’s physical brightness button or a third-party brightness control software/application.
A control panel with the possibility to modify the brightness is frequently included with video drivers. Even if you use it to adjust the brightness, your external monitor’s brightness may not change.
Only built-in screens, such as those on a laptop or tablet, include a brightness slider. Only built-in displays allow you to adjust the brightness.
So, if the brightness slider is missing on your Windows 11 laptop or tablet, follow these ways to fix the brightness not working.
Check our exclusive tutorial on how to Fix the Blue Screen on Windows 11.
Here are the steps to fix the brightness slider missing on Windows 11:
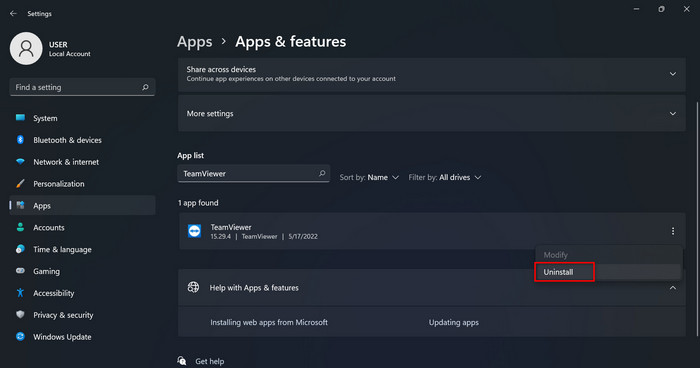
1. Uninstall the TeamViewer Application
If you have TeamViewer installed on your computer, it may conflict with your monitor drivers and cause the brightness in Windows not to work. The problem happens when TeamViewer handles the drivers for your monitor and makes your brightness controller not work properly.
So, if the brightness control is not working, remove this application from your device.
Here are the steps to remove the TeamViewer application:
- Open Windows 11 Settings app by pressing Win+I keys on your keyboard.
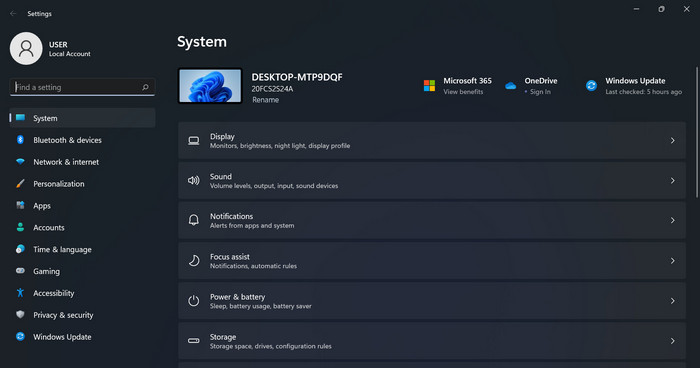
- Select the Apps menu.
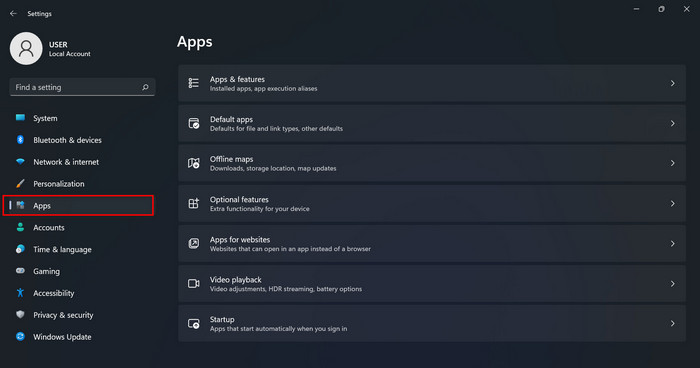
- Choose the Apps & features option on the right-side menu panel.

- Click on the search bar and type TeamViewer to find out the application.
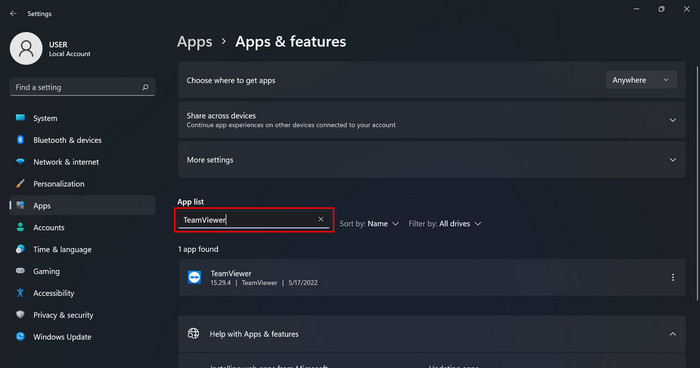
- Click on the three-dot icon next to the application.
- Select Uninstall.
After completing the uninstallation process, check if the brightness slider gets fixed.
Here’s a complete guide on how to install VLC and Make it Default on Windows 11.
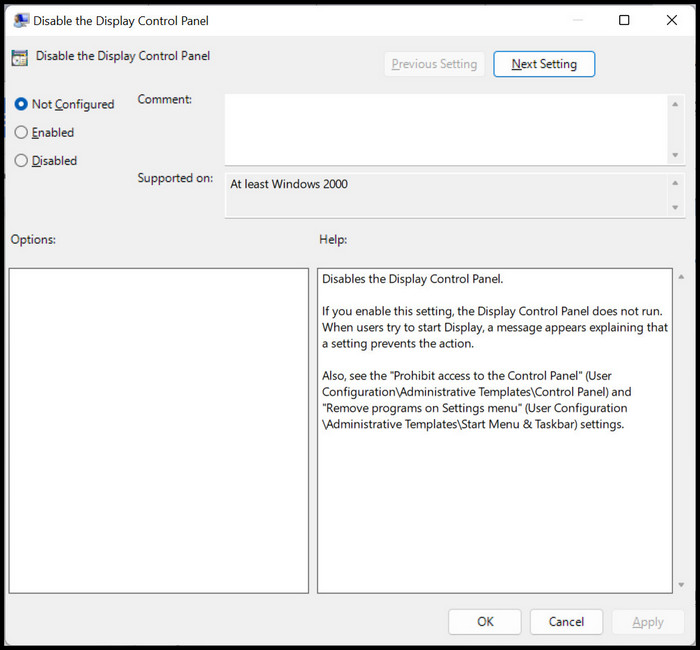
2. Check/Modify the Group Policy Settings
Windows has a setting called Disable the Display Control Panel under the Group Policy Editor to control the brightness option. If this setting is enabled, the brightness slider is not working on your Windows 11 device.
It is good to keep in mind that Group Policy Editor is not available on Windows 11 Home Edition.
By disabling the Disable Display Control Panel setting, you can resolve issues with the brightness controller.
Follow the steps to disable the setting on the Group Policy Editor:
- Choose Disabled and click on the Apply button to save the changes.
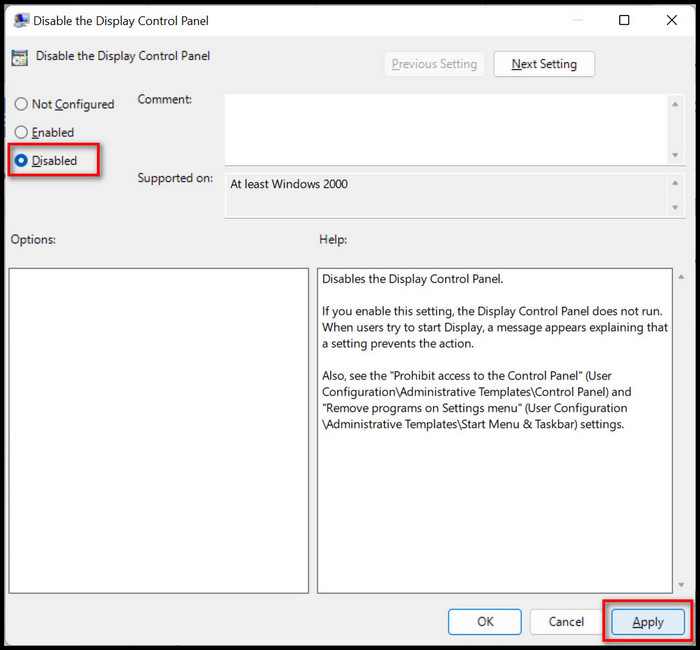
- Click on the OK to exit the window.
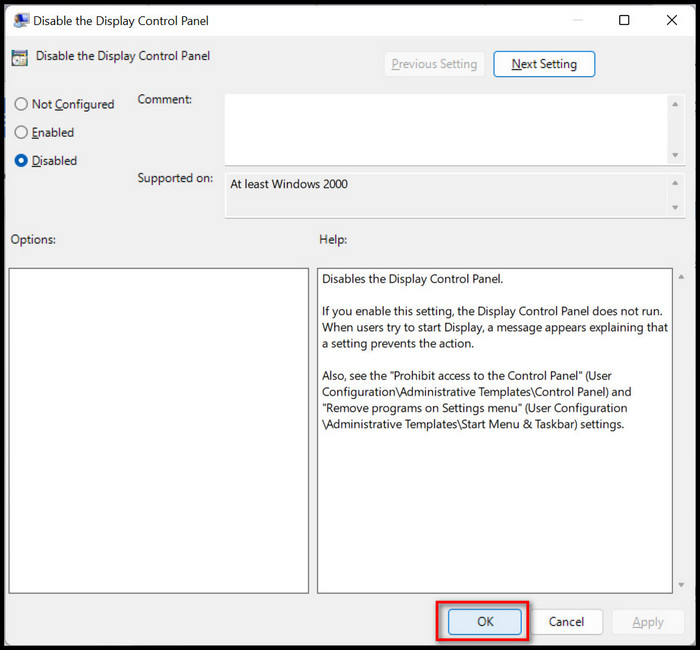
Now check to see whether you can change the brightness level or not. If not, follow the next solution.
3. Enable the Driver for Monitor Device
The monitor device is an essential part of a system to run the display perfectly. If your monitor device is disabled, you may have a missing Windows brightness controller.
To fix the issue, try to enable the monitor device on your Windows 11 computer.
Here are the steps to enable the monitor device:
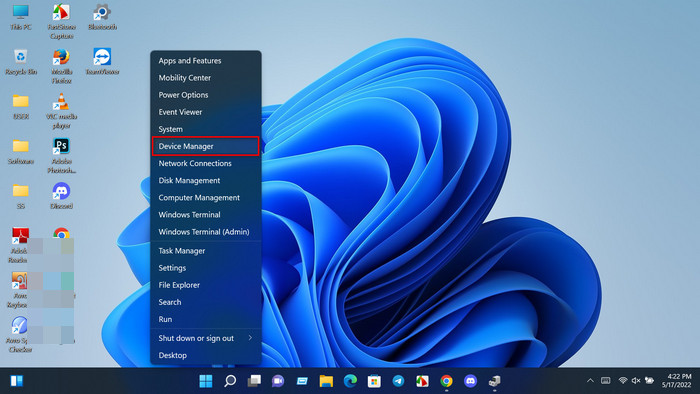
- Right-click on the Windows Start Menu icon and select Device Manager.
- Click on the Monitors section to see the available devices.

- Select and double-click on the Generic PnP Monitor to open its Properties.
- Select the Driver.
- Click on the Enable Device option to enable the monitor device if the device is disabled.
- Click OK to save the changes.
Enable the monitor driver and see if it solves your problem.
Check out our expert-recommended post on how to solve Error 0x00000001 in Game Pass on Windows 11.
4. Update Your Monitor Drivers
Drivers are the most crucial parts of running any system components without difficulty. So, monitor drivers are the main factors in running the monitor or display smoothly.
If your monitor drivers are outdated, you can try to update the drivers to resolve the brightness slider not working issue on your Windows 11 computer.
Here are the steps to update the monitor drivers:
- Right-click on the Windows Start Menu icon and select Device Manager.
- Click on the Monitors section to see the available devices.
- Select and double-click on the Generic PnP Monitor to open the Generic PnP Monitor Properties.
- Select the Driver.
- Click Update driver.
- Follow the on-screen instructions to complete the monitor driver update process.
Now see if you have brought the brightness slider back to its usual functionality. If you don’t see the brightness slider fixed, move on to the next solution.
5. Reinstall the Driver for Monitor Device
The last effective and proven method to solve the brightness slider not working issue is reinstalling the monitor device.
If you uninstall the driver, it helps you to remove the corrupted monitor driver’s files. After uninstalling the monitor device, reinstall the device to download and install fresh drivers and fix this issue.
Here are the steps to uninstall the monitor device:
- Right-click on the Windows Start Menu icon and select Device Manager.
- Click on the Monitors section to see the available devices.
- Select and double-click on the Generic PnP Monitor to open the Generic PnP Monitor Properties.
- Select the Driver.
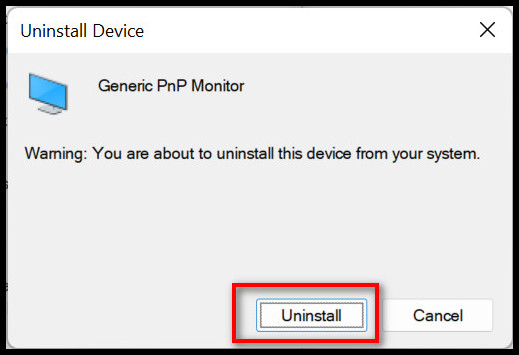
- Click on the Uninstall Device.
- Click on Uninstall to remove the device.
- Restart your device to reinstall the monitor device automatically.
- Check to see whether your problem is solved.
After having reinstalled the Generic PnP Monitor driver on your computer, check if can set the correct brightness again.
Frequently Asked Questions (FAQs)
Where to find the brightness slider on Windows 11?
To get the brightness slider on Windows 11 PCs, press the Win+A keys to open the Windows Access panel shortcut. The brightness slider is on top of the volume slider in this panel. For Windows 10 users, this is present in the Action Center.
Why does my PC not have a brightness slider?
If you use an external monitor, you can’t use the brightness slider on your Windows 11 system.
Only built-in screens, such as those on a laptop or tablet, include a brightness slider. Only built-in displays allow you to adjust the brightness.
Why can’t I change the brightness on Windows 11?
If your graphics and monitor drivers are outdated, you might face the brightness slider not working on Windows 11. Try to update the graphics driver and monitor the driver to solve the issue.
How do I get my brightness slider back?
To get your brightness slider back in Windows 10/11 device, follow the methods mentioned in this post. By following the procedures listed in this post, you can quickly get back your brightness slider.
Final Thoughts
The brightness slider on a device is a helpful tool to control the brightness level in different situations. The brightness controller not working is a common problem for many users. So, you don’t need to be upset.
But remember, If you’re using an external monitor, the brightness slider is not available. You can only use the brightness slider on built-in screens, such as laptops or tablets.
So, if you are facing the brightness slider not working or missing an issue on your built-in display, follow the mentioned methods and steps in this post. I hope you can fix the problem within a few minutes.
I hope you find this post helpful and insightful as well. If you like this post, share it with your friends to solve this particular problem also.
Thanks for staying with me till the end of this post. Stay safe and have a good day.
Eye strain is a common problem when using a computer for extended periods, often due to improper screen brightness. Adjusting the brightness slider in the display settings menu is a straightforward way to control screen brightness on Windows PCs. Additionally, using keyboard shortcuts, like the “Fn key” combined with “brightness control keys” (often symbolized by a sun), is another simple way to control brightness levels manually. (Don’t worry if your “Fn Brightness Key” is not working, we have some quick fixes for you to resolve the issue.)
However, for a more convenient and customizable experience, brightness control apps for PC are the ideal solution. In this article, we’ll explore some of the best desktop brightness control software for Windows 10/11 PCs. Whether you’re looking for a seamless user interface or advanced features, these apps will help you find the perfect brightness controller for your PC.
What Are Brightness Control Software & Who Uses It?
Brightness control software are specialized applications designed to give you complete control over the luminosity of your screen. These nifty tools empower users to adjust brightness levels according to their personal preferences, environmental conditions, and visual requirements.
Professionals, such as graphic designers, photographers, and video editors, rely on precise brightness control to ensure accurate color representation and optimal visual clarity. Students, gamers, and movie enthusiasts also find value in adjusting the brightness to enhance their viewing experience. In short, anyone who values visual comfort, productivity, and immersive visuals can benefit from using brightness control software.
You might be interested in reading: How To Fix Brightness Control Not Working in Windows 10?
Top 5 Monitor Brightness Adjustment Software For Immersive Viewing Experience (2023)
We understand the importance of providing our readers with the absolute best options available. That’s why we have gone the extra mile to conduct extensive app testing and meticulously examine numerous apps to control brightness on PC. Considering factors like usability, customization, reliability, performance, and additional features, we guarantee that the recommended apps in this article have been thoroughly vetted.
1. RedshiftGUI

RedshiftGUI is a reliable brightness controller and color temperature adjustment tool, designed for Windows 11/10 PC. It automatically adjusts the color temperature of your screen based on the time of day, reducing blue light emissions to prevent eye strain. The application provides both manual and auto-adjusting settings to control the brightness level. Besides Windows, this PC brightness control software works with Linux as well!
Download Here
2. CareUEyes

CareUEyes is another convenient brightness controller for PC that helps protect your eyes from strain caused by prolonged screen use. It offers features like a blue light filter, screen dimming, break reminders, and eye exercises to provide a more comfortable viewing experience. The best part of using CareUEyes is its ability to set up hotkeys to increase or decrease the brightness. Hence, you don’t need to open the app every time to control brightness.
Download Here
3. Twinkle Tray Brightness Slider

Twinkle Tray Brightness Slider is an exceptional monitor brightness control software to use for Windows 11 & other popular versions. Unlike other options mentioned here, the app offers a unique capability to manage brightness across multiple computers from a single interface. With its sleek interface and DDC/CI support for external displays, it stands out from the rest. It can synchronize levels with Link Level, and conserve energy by automatically turning off shows when not in use.
Download Here
4. f.lux

f.lux is a popular software that adjusts the color temperature of your screen according to the time of day. Users are even offered the ability to manually change the settings and screen brightness according to their needs and preferences. By reducing blue light during the evening and night, it aims to reduce eye strain. Besides this, it also provides three different white balance tones for sunrise, sunset & bedtime. You can easily customize these options and enjoy an effortless reading experience.
Download Here
5. iBrightness Tray
iBrightness Tray is a nifty utility that offers different functions for easy brightness control. With the horizontal slider, you can effortlessly adjust the brightness to your liking, making your screen more comfortable to view. Ability to manage screen saver, giving you a quick way to protect your screen when not in use. And, a dedicated power-off button to fully turn off your desktop screen, similar to sleep mode, preserving battery life while taking breaks from work.
Download Here
Elevating Your Viewing Experience with PC Brightness Control Software
In conclusion, the discussed brightness control software options provide valuable solutions for managing screen brightness and enhancing the viewing experience. These tools cater to different user preferences and environments, aiming to alleviate eye strain, improve visual comfort, and conserve energy. Whether you’re a professional, student, or avid screen user, incorporating these brightness control software options can greatly enhance your overall screen experience.
We recommend using RedshiftGUI and f.lux as they offer automatic color temperature adjustments based on the time of day, reducing eye strain by minimizing blue light emissions. If you know any other such brightness controller for PC, feel free to drop your suggestions in the comments section below!
People Also Ask:
Q1. When Should Brightness Controlling Programs Be Used?
Brightness control software should be used whenever you find yourself straining your eyes due to excessively bright or dim screens. It is especially important to utilize these tools in environments with poor lighting conditions, such as low-light rooms or bright outdoor settings. By adjusting the brightness levels to suit your surroundings, you can alleviate eye strain, reduce fatigue, and enhance overall visual comfort.
Q2. Does Brightness Control Software Consume A Significant Amount of System Resources?
Most brightness control software is designed to be lightweight and consumes minimal system resources, ensuring smooth operation without causing significant performance issues.
Q3. Are There Any Good Apps To Control Brightness On Mac & Linux?
For Mac:
- Shades: Lightweight and easy-to-use brightness control software with a convenient slider interface.
- Lunar: Advanced brightness control software for Mac, offering automatic adjustments based on ambient light and additional features like Dark Mode schedule.
For Linux:
- Redshift: Popular software that adjusts screen color temperature on Linux based on the time of day, reducing eye strain.
- Light: Command-line tool for Linux, providing a simple way to control screen brightness with customization options.
NEXT READ:
- 5 Best Apps to Control Screen Brightness on Android
- How To Reduce the Brightness Of Your iPhone Below The Minimum Level
Windows 11 offers users a sleek and modern interface, but like any operating system, it may encounter issues. One common problem faced by users is that the brightness control not working on Windows. It can be a frustrating problem, making it difficult to adjust the screen brightness. Various factors, including outdated display and monitor drivers, compatibility issues, and corrupted system files, can cause the brightness control issue on Windows 11.
In this guide, we will discuss several effective troubleshooting steps to get your brightness controls working again on your Windows system. By the end of this guide, you should be able to fix the brightness control not working on Windows 11. So, let’s get started.
Excessively bright monitors as well as dim displays can strain your eyes. Here, you’ll find a step-by-step explanation of the different methods to resolve the issue of the brightness control not working on your Windows system. So, let’s discuss them one by one:
1. Change Your Display Brightness
Firstly, try if you can adjust the brightness using Windows 11 Action Center. To do so, follow these steps:
1. On the bottom right corner of your home screen, click on the wifi, volume, and battery icon area to open the Action Center. Alternatively, you can also press Win + A on your keyboard to launch Action Center (Quick Settings).

2. Check if you can adjust the brightness by moving the brightness slider left and right.

Sometimes, brightness control may not work directly from the keyboard but can be adjusted using the Action Center. Or, you can check out our guide on; how to change display brightness on Windows 11.
2. Disable Auto Brightness
If you find that the brightness on your Windows 11 device automatically adjusts without your input, the Auto-Brightness feature might be enabled. You can easily disable it from the Windows settings.
To disable it, you can follow these steps:
1. Open system settings by pressing the Win + I button together.
2. Now, select Display from System settings.

3. Inside Display settings look for the Change brightness based on content option. To find it, you can expand the Brightness option.
4. If this option is set to Always or On Battery Only; turn it to Off from the drop-down menu. This way you will disable auto brightness on your Windows 11 PC.

Once Auto Brightness is disabled, you should have full control over adjusting the brightness level according to your preference. You can try to change the display brightness level from the action center.
3. Reboot Your Device
If, despite following the above-mentioned steps, you are still unable to resolve the issue, there’s a simple yet effective solution to consider. Many times, a simple restart can resolve minor software glitches causing the brightness control issue. Restart your PC and check if the problem persists.
To do so, follow these steps:
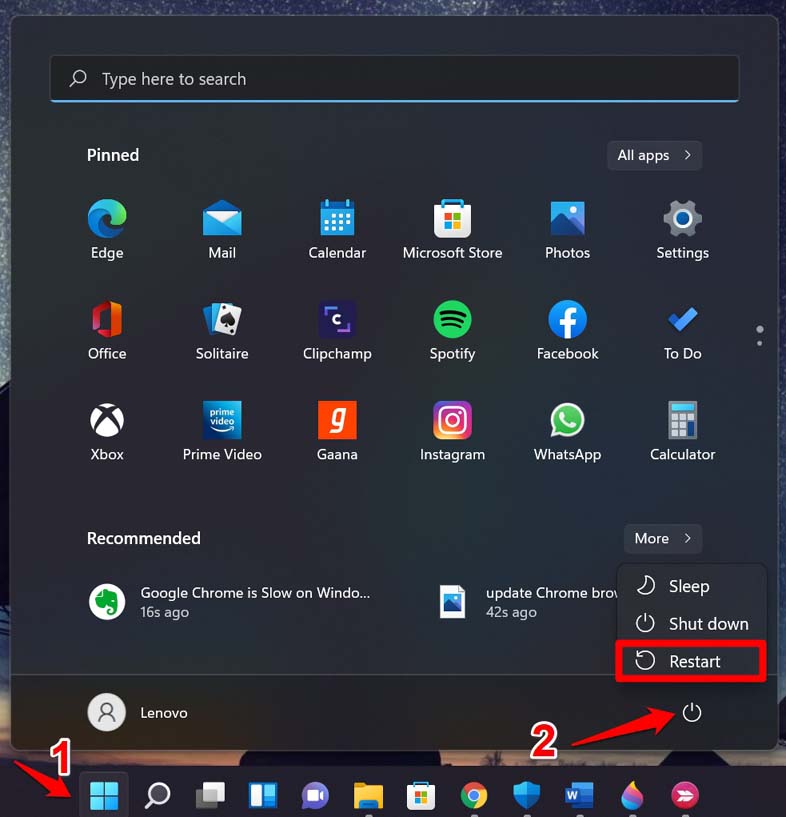
1. Click on the Windows button to open the search menu.
2. Here, locate the Power button and click on it.

3. After clicking on the Power button you will see some options. Click on Restart and your PC will now restart.

4. Recharge Your Device
If you are using a laptop and find that the brightness control is not working, it could be related to the battery level. In some cases, if the battery charge is less for your laptop, it might dim the screen brightness and prevent you from changing it.
This happens to increase the usage time of your system. It can be easily fixed by charging your laptop. Once you’ve ensured that your laptop is sufficiently charged and not in any power-saving mode that could restrict brightness control, attempt adjusting the brightness. If the issue persists, proceed to the next troubleshooting step.
5. Update Display Driver
Sometimes, if you are using an outdated display driver can cause issues. Updating the display drivers can often resolve issues with brightness control not working.
Here’s how you can update your display drivers:
1. Press the Windows key to launch the search menu and search for Device Manager. From the search results, click the Open option to access the Device Manager settings.

2. In the Device Manager window, expand the Display adapters category to see your graphics card.
3. Right-click on your Graphics card (In our case, it’s AMD Radeon Graphics). Now, choose Update driver from the context menu.

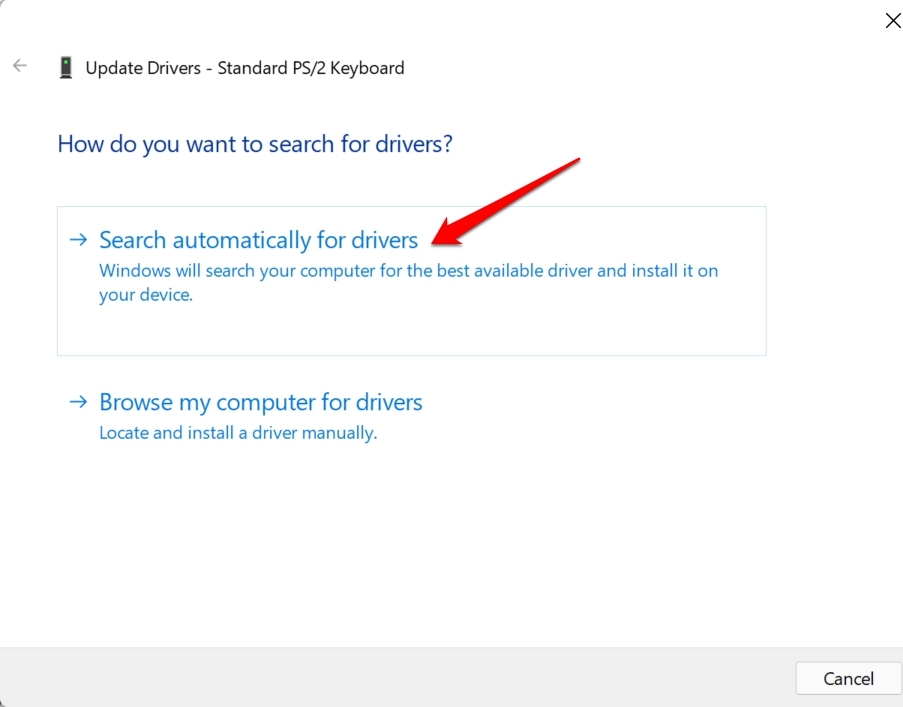
4. On the next screen select the Search automatically for drivers option.
5. Windows will now search online for the latest drivers for your graphics card. If it finds a newer version, it will automatically download and install it.

6. Once it is done updating, you will get the following screen. Simply, click on the Close button and restart your PC to apply the changes.
7. After the restart, check if the brightness control is now functioning correctly.

6. Update Monitor Driver
If you are using any external monitors, you also need to update the monitor’s driver to the latest version. For that, in the same Device Manager window, you will find an option to update it. To do so, follow these steps:
1. Open the Device Manager option.
2. Expand the Monitor category and right-click on the monitor driver.
3. Next, click on the Update driver option from the context menu.

4. On the next screen, select the Search automatically for drivers option, and it will automatically install the latest monitor driver on your system. After that, restart your system.

7. Performing CheckDisk and SFC scan
Performing a CheckDisk (CHKDSK) scan and a System File Checker (SFC) scan can help identify and fix potential issues with your Windows 11 operating system that may be affecting the brightness control.
Here’s how to perform these scans:
1. Search for the Command prompt in the search menu. Then click on the Run as administrator option to access it with admin authority.

2. Now, on the command prompt, run the following command and press the [Enter] key. This command will run the CHKDSK scan.
chkdsk

3. After that, type this command and hit Enter:
prompt

4. Execute these two commands one after the other and then hit Enter after each. This will scan and fix issues with the ieframe.dll file on your system.
sfc /scanfile=c:\windows\system32\ieframe.dll
sfc /verifyfile=c:\windows\system32\ieframe.dll

5. Now, run the following command:
assoc

6. At last run the scannow command and hit Enter key to check the system files.
sfc /scannow

Once you have run all the above-mentioned commands, restart your PC again and check if the brightness controls are working.
8. Updating Windows 11
Updating Windows 11 to the latest version can fix many system-related issues, as the new updates on Windows operating systems come with bug fixes and security updates. Updates can also include fixes for brightness control issues.
Here’s how you can update your Windows 11 OS to the latest:
1. Press the Win + I to open the settings menu.
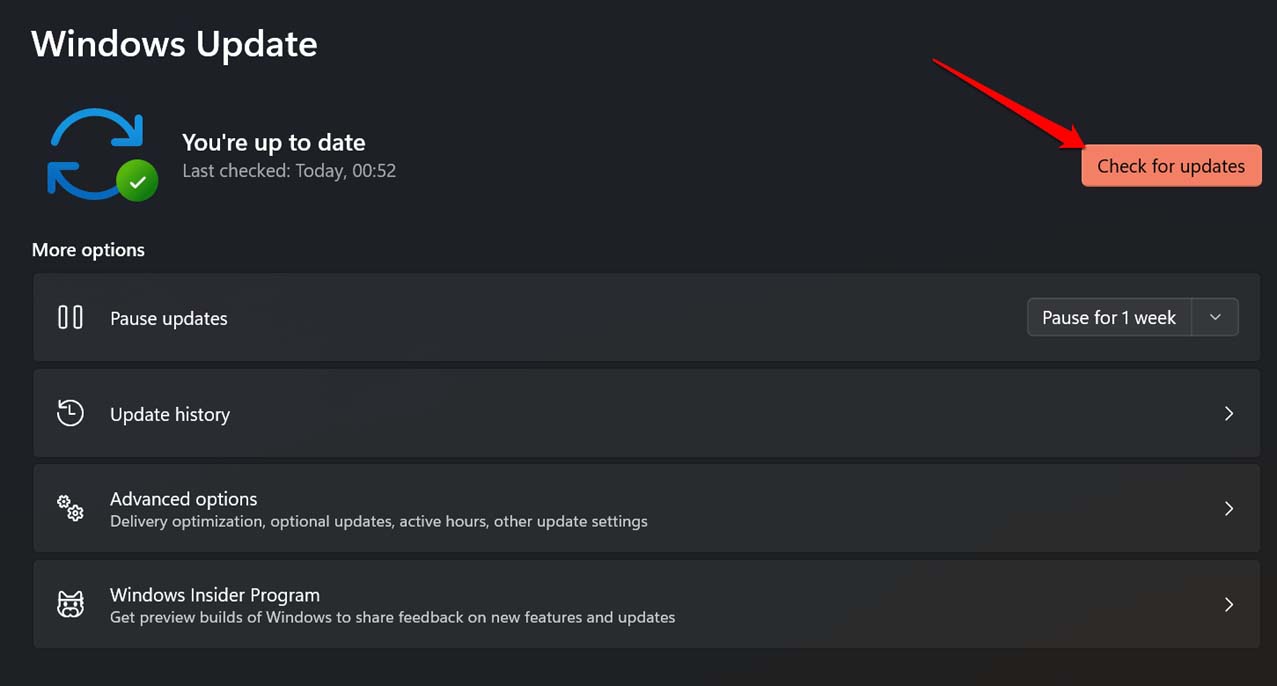
2. Click on Windows Update present on the left sidebar.

3. In the Windows Update menu click on the Check for updates button. Windows will now look for the latest updates online for your PC.

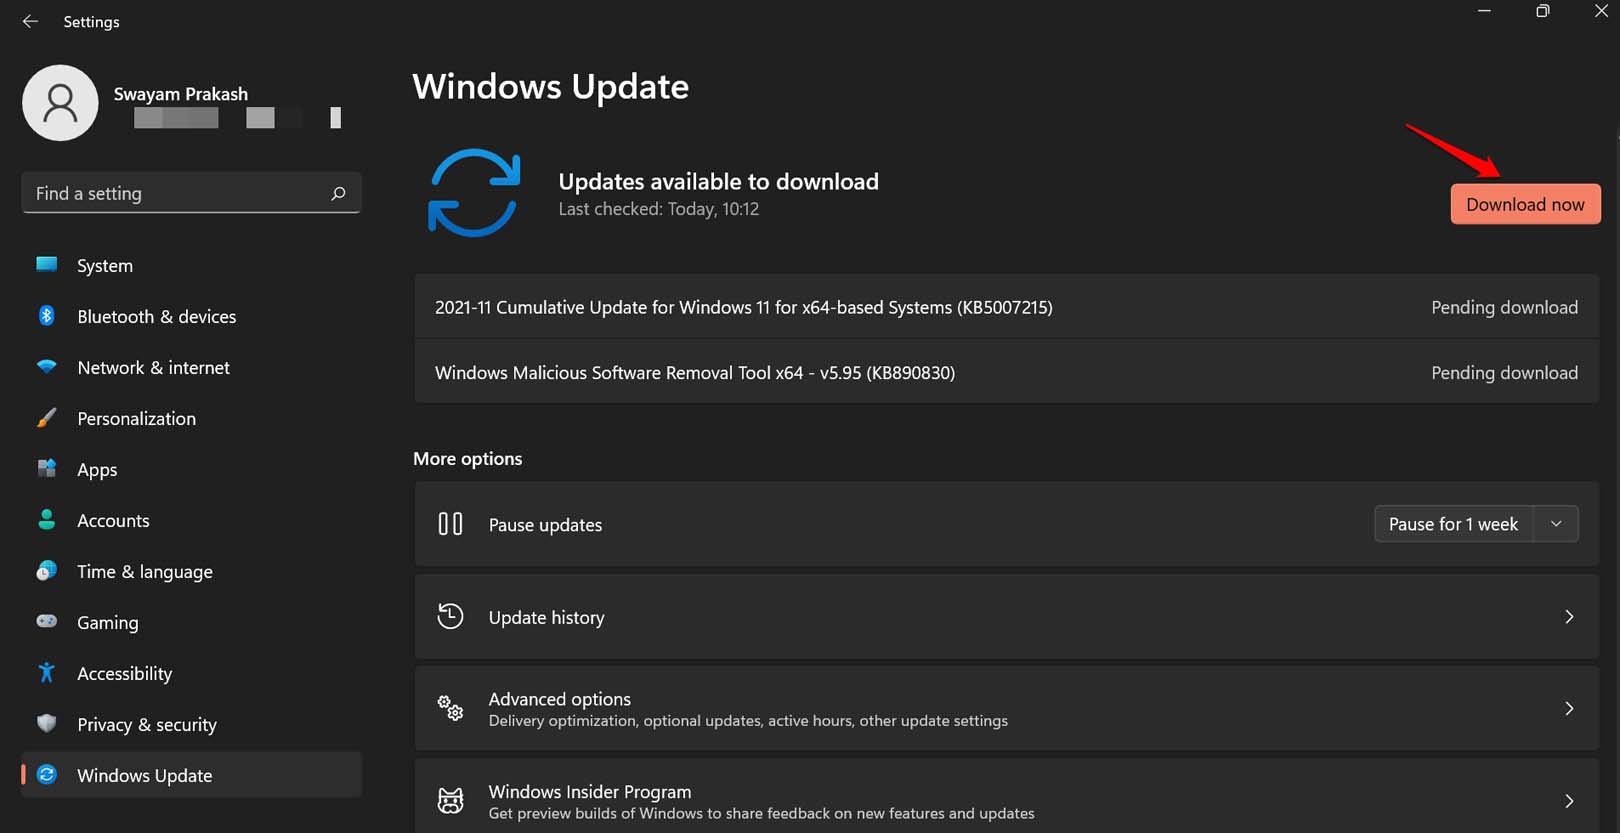
4. If there are any updates available for your Windows 11 PC, they will appear here. Simply click on Download & Install All and wait for some time.
5. Windows will now automatically download and install the updates in your system.
Windows updates can take some time to install, depending on the size and number of updates available. Make sure your computer is connected to a stable internet connection and plugged into a power source during the update process.

6. After updating Windows 11, restart your PC and check if the brightness control issue is resolved.
9. Performing System Restore
After following all the mentioned methods and still facing the same problem, performing a System Restore can help revert your Windows 11 system to a previous state when the brightness control was functioning correctly.
Here’s how you can do it:
1. Click on the Windows key to open the Start menu. Type System Restore in the search bar and then click on Create a restore point from the search results.

2. This will open the System Properties window with the System Protection tab selected. Now, click on the System Restore button.

3. The System Restore wizard will open. Here, click Next to continue.

4. You will see a list of available restore points. Choose a restore point that was created when your brightness control was working correctly. If you don’t see a suitable restore point, check the Show More Restore Points box to view additional options.
5. After that, click Next when you are done selecting the restore point.

6. Click Finish to confirm your chosen restore point.

7. Before the System Restore begins, your computer will display a warning about potential data loss and changes that will be undone. Review the information, and if you’re ready to proceed, click Yes to start the restoration process.
8. Your computer will now restart and begin the System Restore process. It may take some time to complete, so be patient and let it finish.

Performing a System Restore will undo any system changes made after the selected restore point, including software installations, updates, and settings changes. It’s suggested to back up any important files and data before proceeding with System Restore.
Conclusion
The brightness control not working issue on Windows 11 can be a frustrating problem for users. However, by following the solutions outlined in this guide, you can easily fix this issue and adjust the screen brightness according to your preferences. Updating display drivers, restoring corrupted system files, and using Command Prompt are all effective solutions to fix the brightness control issue on Windows 11.
It’s important to keep your device up-to-date and maintain it regularly to avoid any such issues. We hope this article has helped you resolve the brightness control issue on your Windows 11 PC. If you have any other suggestions or solutions, feel free to share them in the comments below.
The brand new edition of Windows family has received a thrilling success from users around the globe as it welcomed the users of Windows 7, 8.1, and 10 without any charge. But a substantial number of users who upgraded to Windows 11 from their prevailing installation of Windows discover themselves in awkward conditions as they encounter mess when they try to adjust brightness whether they have laptop or desktop. See – Fix Screen Brightness Resets to minimum in Windows 10 Automatically.
Let us throw some light on the type of issues detected – a few machine’s brightness slider refuses to get adjusted; in some PCs, the brightness control went missing whereas there were computers whose hotkeys failed to regulate the brightness level and many more such cases distressed the users a lot as you can not change the value. Thus focusing on these troubles, their workarounds are represented below.
Methods list
Way-1: If the problem appears after upgrade
Way-2: Unable to Adjust Brightness after AMD updates
Brightness Control Not Working in Windows 11 or 10
Here is how to fix Brightness Control Windows 11 or 10 Not Working and Missing –
Way-1: If the problem appears after upgrade
- Press – Win + X.
- Click – Device Manager.
- Go to Display adapters and double click on it.
- Right-click on Intel(R) HD Graphics Family. If yours is different then right click on that one.
- Select “Update driver” or “Update driver software” whichever is showing.
- Select – Search automatically for updated driver software.
- After the updating is completed, restart your PC.
Now, if the above steps fail to rescue you from the trouble, it is probable that the manufacturer of the card has not administered any updates yet, worry not, apply this alternative repair –
- Press – Windows and X.
- Select – Device Manager.
- Double-click on – Display adapters.
- Right click on Intel(R) HD Graphics Family or the one which is showing.
- Click on – Browse my computer for driver software.
- Select – Let me pick from a list of drivers on the computer.
- Click on Microsoft Basic Display Adapter to select it.
- Click – Next.
- Soon Windows will install the needful driver and your world of brightness will be rolled to its regular nature.
This can help – How to update drivers in Windows 11 (Best ways).
Way-2: Fixes for –
a. Brightness Control Windows 11 or 10 missing,
b. Unable to Adjust Brightness after AMD updates
c. Brightness Hotkeys Not Working in Windows 11 or 10
In this section of the post, we will focus on three yet significant disturbances for Brightness Control Windows 10 or 11 Not Working and Missing. All three are covered under one heading because the solution for all of them are same. A considerable amount of users noted that the brightness slider got lost whereas few were totally unable to adjust screen brightness immediately upon AMD updates were installed and lastly in some machine the brightness hotkeys declined to obey the user to increase or decrease the brightness.
- Right-click on Start.
- Select – Device Manager.
- Double click on Monitors from Device Manager.
- Right click on Generic PnP Monitor.
- Select – Enable.
- This will trigger the Generic PnP Monitor to turn on and thus puts an end to all your brightness troubles.
Causes of Brightness Issues
The culprits of these issues were deeply dug inside the OS. Let us see them –
- It was discovered that if Team Viewer was operating on your machine, it installs a PnP-Monitor (Standard) driver which in result havoc in the condition.
- Secondly, the AMD drivers installed on the machine might be unmatchable or unsuited to Windows 11 or 10.
- Thirdly, if successful AMD drivers were installed, they immediately turn off the Generic PnP Monitor which results in creating trouble for your eyes by not permitting you to regulate the brightness of the display.
- When the upgrade is thoroughly accomplished, the system drivers get wiped off, and thus arises difficulty in discovering the graphics hardware in the brand new promising OS leads to prompt Brightness Control Windows 10 or 11 Not Working and missing an obstacle.
Are Brightness Control Function Keys Not Working on Windows PC. Here is the Simple Guide to Fix Brightness Keys Not Working in Windows 11.
Is the brightness control function keys not working in Windows 11? I have compiled a few troubleshooting tips to help you fix the problem quickly. Every laptop or PC keyboard comes with dedicated buttons to increase and decrease brightness. Sometimes, the brightness would not drop or rise when you press these buttons.
The issue may be with your PC keyboard. It may have an internal fault, or some dirt or grime may have been deposited in the brightness keys. Also, if the Fn key is disabled or faulty, the brightness keys won’t work.
There may be an issue with the current version of Windows OS running on your PC, which is causing a bug affecting the PC’s brightness. If the keyboard driver has some bug, then some of the keys may not work.
Top Ways to Fix Brightness Function Keys Not Working on PC
Now that we know the possible reasons why the brightness control function keys not working, let us resolve the issue.
1. Update Keyboard Driver
Usually, keyboard drivers update on their own when your PC is connected to the web. You can also install updates manually to eliminate any possibility of technical shortcomings in the driver that may cause the PC keyboard to show issues.
- Go to the Device Manager by pressing Windows + X.
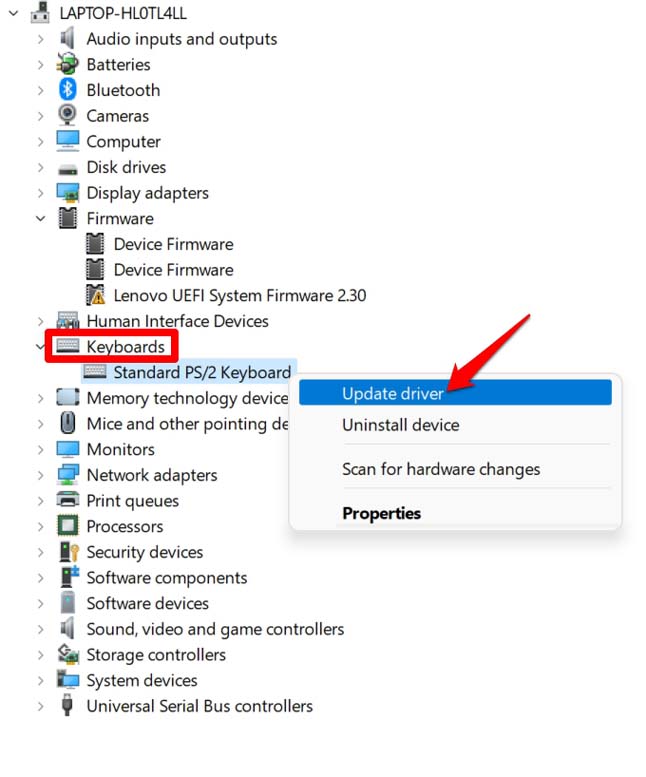
- Scroll to the Keyboard installed on the PC—Right-click on it.
- Select Update Driver.

- Then click on Search Automatically for Drivers when the pop-up prompt appears.

- The device will search for the appropriate driver for the Keyboard and install the same on your PC.
Restart the PC after installing the keyboard driver and check whether the brightness keys are working.
There is a second method that you can use. You can visit the official website of the PC brand you use. Once you land on the website, you can look for a repository that stores all the necessary drivers for various models of PCs the OEM sells. As per your PC model, download the necessary driver and install it by following the instructions from the website.
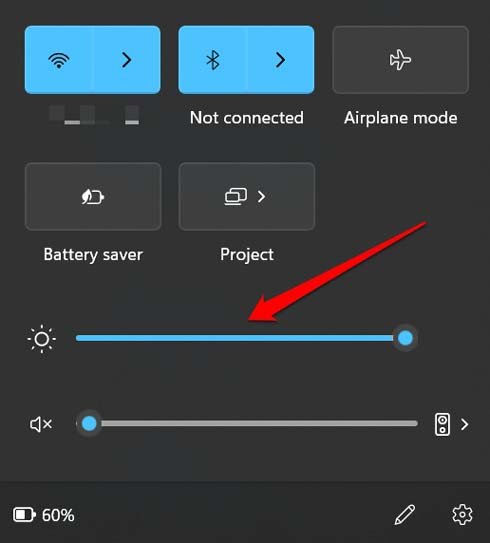
2. Use the Brightness Control from Taskbar
If the brightness keys on the Keyboard are not working, then you can use the brightness adjustment feature in the System tray in the taskbar.
- Click the section on your PC desktop where you see the battery and sound icons.
- You will see the brightness adjustment slider in the pop-up system tray extension.
- Drag the slight around to lessen or increase the brightness as per your need.

3. Update Windows 11
To fix bugs in the current version of Windows, you can search for the latest updates. Here is how to go about it.
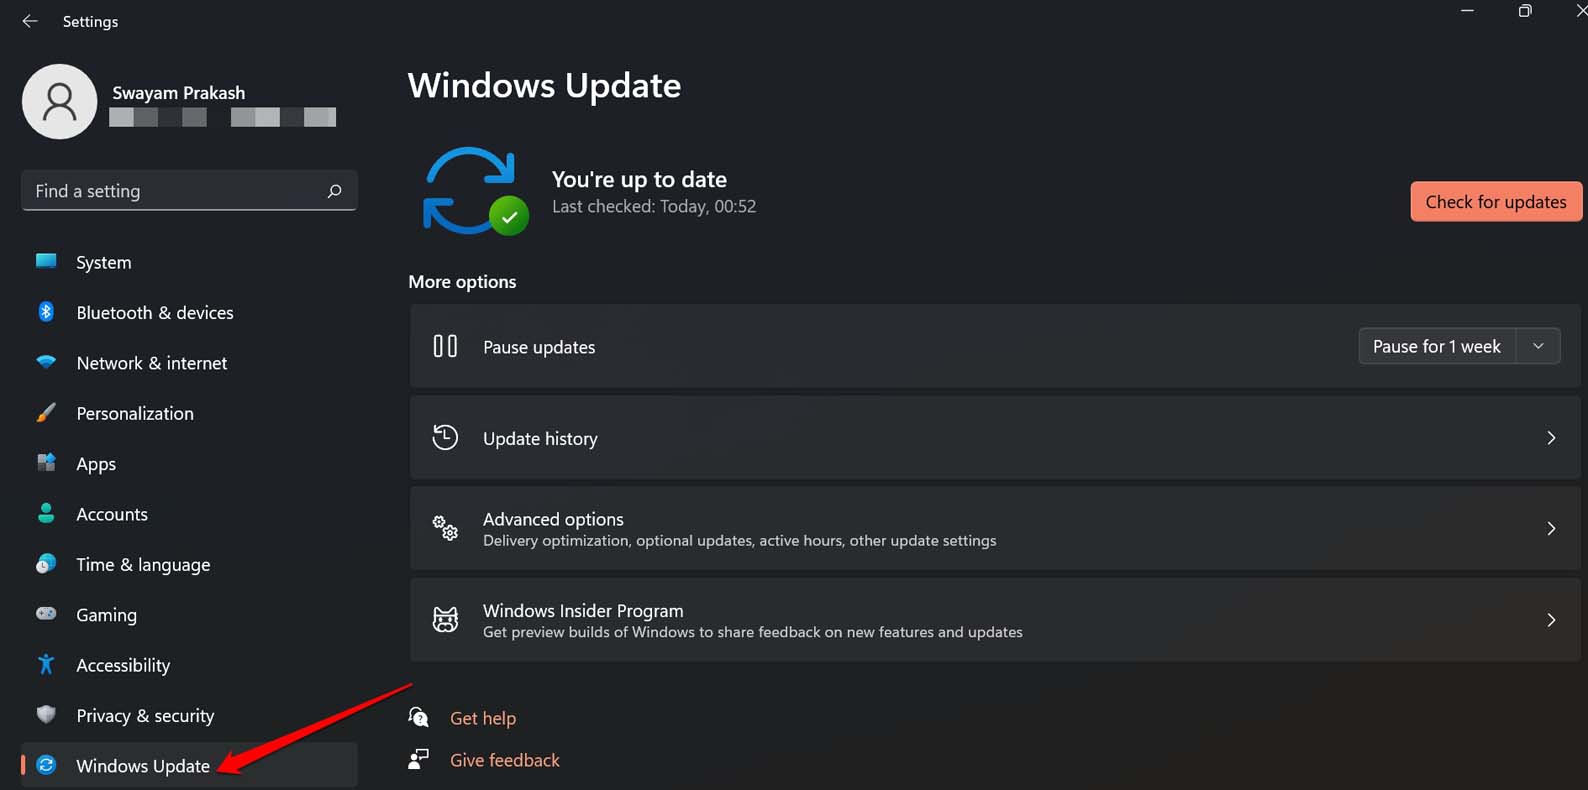
- Press Windows+ I to go to the device settings.
- Next, on the left-hand panel, click on Windows Update.

- On the next screen, click on Check for Updates.

- The device will look for new software updates and notify you if an update is available.
- Next, you will see an option, Download Now to grab the software update. Click on it.

4. Restart the PC
Try restarting the computer if you have already upgraded Windows 11 to the latest build. If it is just a random glitch that is causing the brightness control function keys not to work, rebooting may help fix that.
- Press the Windows key to bring up the search box.
- At the right corner of the search console, click on the power icon.
- From the small menu that shows up, click on Restart.

Once the PC restarts, log in to your account and try pressing the brightness keys. It should work had it been an arbitrary bug stopping the brightness function from working.
5. Uninstall Current Windows Update
Contrary to updating Windows OS, you have another option as well. That requires you to downgrade from the current Windows OS. Uninstall the latest update that you have installed on your PC. This solution is pretty much the same as upgrading the Windows OS to fix bugs on the PC.
The aim is to get rid of the random glitch that may have some connection to the faulty build of the operating system installed on your device.
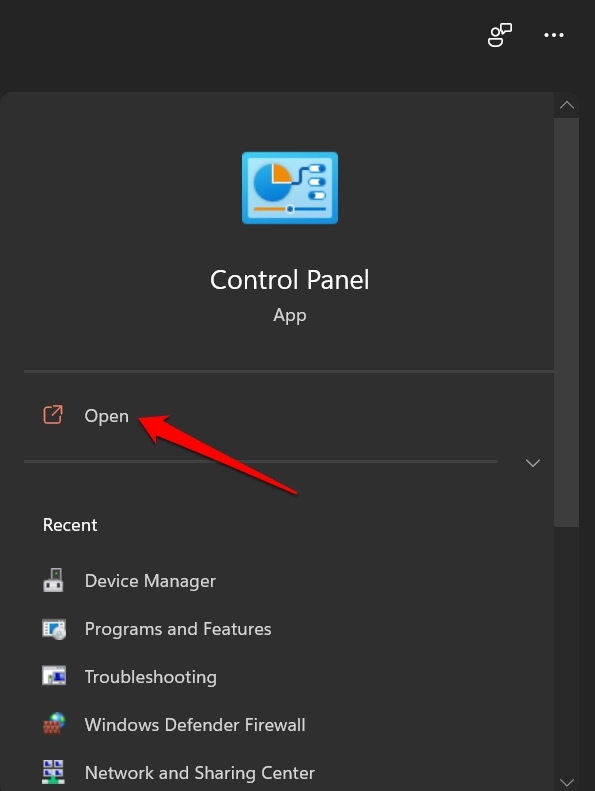
- Launch the Control Panel.

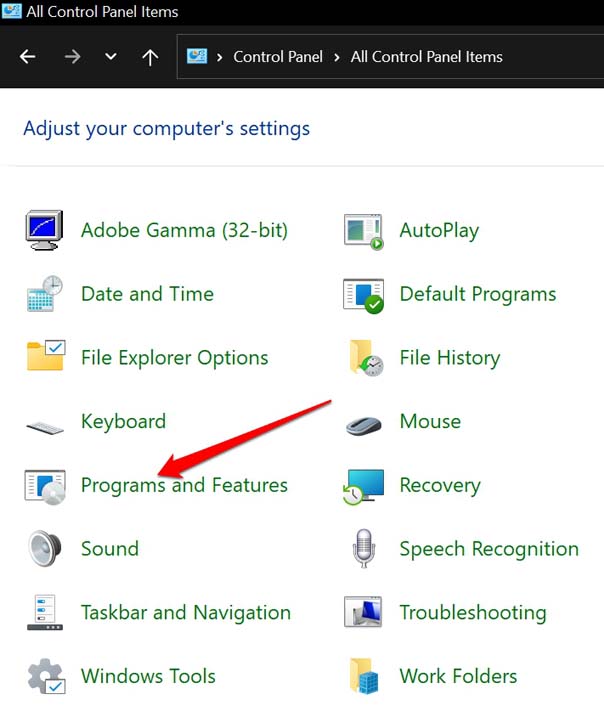
- Click on Programs and Features.

- On the next screen, click the option View Installed Updates on the left-hand panel.
- You will find your way to the Windows Update settings, where you will encounter the latest build of Windows OS that has been installed now.
- Click on Uninstall beside all the software versions that you see.


6. Check if the Fn key is Disabled on the Keyboard
On several models of computers, the working of brightness keys and other function keys are associated with the Fn key on the Keyboard. If the Fn key is disabled, then the associated functions keys for brightness, audio, and Flight Mode won’t work.
If you have pressed Esc + Fn key together, the Fn key gets locked. To unlock the Fn key, you can tap on the same key combination Esc + Fn. Then try to press the brightness control keys to adjust the brightness, and it should work just fine.
7. Check for Hardware Issues on the Keyboard
You can take the Keyboard to the official repair centers of the brand whose PC/laptop you are using. If it has any defects, the technicians will fix them or replace them. Also, if there is any dirt or grime issue in the spaces under the keypads, they will clean up for you.
Conclusion
If you have vision issues, you would want to adjust the computer display brightness as per your visual comfort. It will discomfort your eyes if you cannot set the brightness. So, follow the tips and tricks in this guide to fix the brightness function keys on your Windows computer.
If you’ve any thoughts on How to Fix Brightness Control Function Keys Not Working in Windows 11?, then feel free to drop in below comment box. Also, please subscribe to our DigitBin YouTube channel for videos tutorials. Cheers!