Drivers are the most crucial and emergent software component to running any operating system correctly or smoothly.
Without the right Windows support driver on your system, you must encounter error issues while using Windows OS on your Mac because drivers let the operating system and a device communicate to execute the command correctly.
Using the Boot Camp Assistant tool to download the Windows drivers is one of the best effective ways. If you are looking for a step-by-step guide to downloading the Boot Camp drivers, you’re landed in the right place.
By following this guide, you can learn how to download the Boot Camp drivers. You will also learn to install and update the Boot Camp drivers.
So, without further delay, deep dive into the main discussion.
Check out our separate post on upgrade to Windows 11 on Mac using Boot Camp.
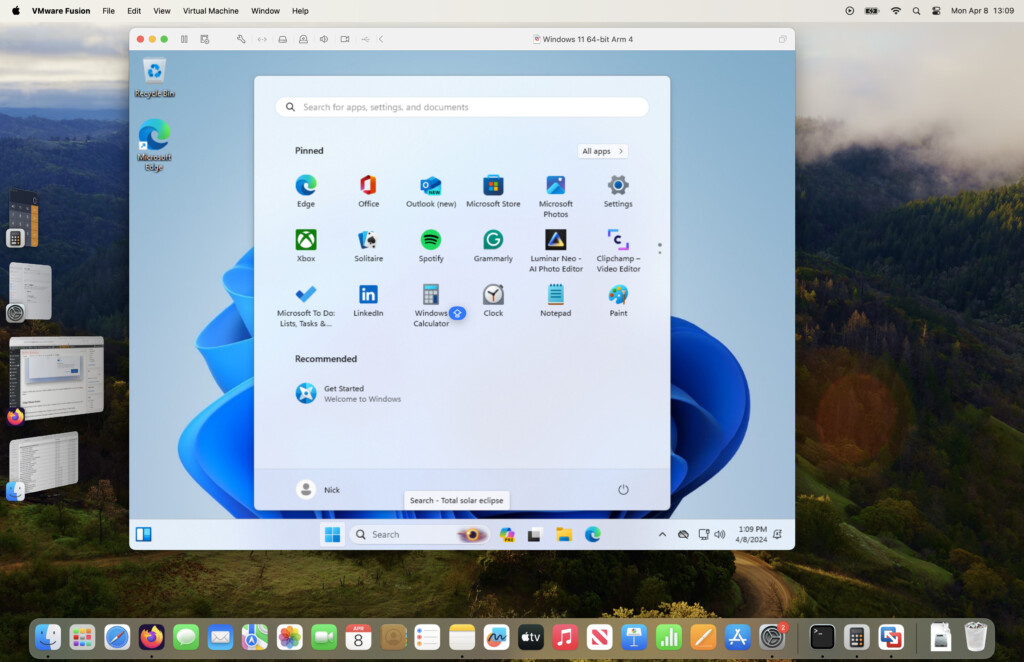
Boot Camp Assistant is a multi-boot software with macOS that lets users install Microsoft Windows operating systems on Intel-based Macs. When you restart your Mac, Boot Camp allows you to choose between macOS and Windows.
After installing the Windows OS with Boot Camp on your Mac, you need to download and install the Boot Camp drivers or Windows support software to run the Windows properly,
So, let’s see how to download the Boot Camp drivers for Windows 11 on your Mac.
Here are the steps to download the Boot Camp drivers for Windows 11:
1. Install the Latest macOS Updates
To download the Boot Camp drivers or Windows support drivers on your Mac, you must install the latest macOS updates.
The latest macOS updates help you minimize the chances of running into any Boot Camp Assistant error. So, before starting to download the Boot Camp drivers, install the latest macOS updates.
Here are the steps to install the latest macOS updates:
Here’s a complete guide on how to fix secure Boot error to update to Windows 11.
2. Format a USB Flash Drive
At first, you need to format a USB flash drive to download and install the Windows support software on your macOS.
You need at least 16GB or more extensive USB flash drive. The USB flash drive must be formatted as FAT or exFAT.
Here are the steps to format a USB flash drive:
- Boot your Mac on macOS.
- Plugin the USB flash drive into your Mac.
- Open the Disk Utility.
- Select View and choose to Show all Devices.
- Select the USB flash drive from the Disk Utility sidebar.
- Enter the name of your USB flash drive, choose the format type MS-DOS (FAT), and choose the Scheme type as Master Boot Record.
- Click the Erase button to format the USB flash drive.
- Exist the Window after completing the process.
After completing the USB flash drive formatting process, you can start the Boot Camp driver downloading process.
So, let’s jump into the next section.
3. Download the Boot Camp/Windows Support Driver
Downloading the Boot Camp driver or Windows support software is a straightforward process. You can download the Boot Camp driver or Windows support software following simple steps.
Now, you are ready to download the Boot Camp driver, or Windows support software for Windows 11.
Here are the steps to download the Boot Camp drivers or Windows support software:
Before downloading the Boot Camp driver, make sure your Mac device is connected to the internet and has a stable network connection speed.
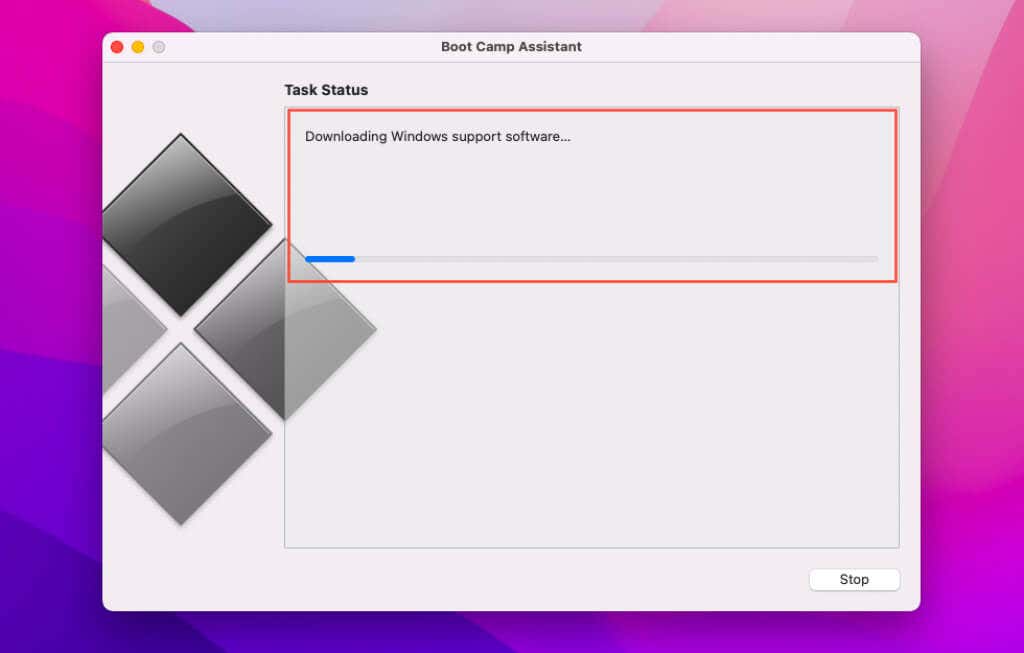
- Run Boot Camp Assistant from your Applications folder.
- Go to Action > Download Windows Support Software.
- Select your USB flash drive to save the downloaded file.
- Wait until the downloading process is complete.
- Exist the Boot Camp Assistant after completing the download process.
Check out the easiest way to fix PC won’t Boot to BIOS.
How to Install Boot Camp Drivers for Windows 11
After completing the Boot Camp drivers download process, it’s time to install the Boot Camp drivers or Windows support drivers on your Mac.
Follow the steps below to install the Boot Camp drivers or Windows support drivers.
Here are the steps to install the Boot Camp drivers or Windows support software:
- Boot your Mac on Windows 11.
- Make sure to plug the USB flash drive into your Mac.
- Open the Windows File Explorer
- Open the USB flash drive.
- Double click on the exe file from the Boot Camp folder or Windows support folder.
- Click on the Yes to permit Boot Camp to make changes to your Mac device.
- Hit the Repair button to start the Windows support driver installation process.
- Select Continue Anyway to prevent any kind of alert.
- Wait for a while to complete the installation process.
- Click the Finish button after completing the Boot Camp driver’s installation.
- Allow your computer to restart by clicking the Yes.
How to Update Boot Camp Drivers for Windows 11
In Windows, both Windows Update and the Apple Software Update app give Boot Camp support software upgrades.
Install the updates supplied by these programs to ensure you have the most recent Boot Camp support software.
Here are the steps to update the Boot Camp drivers for Windows 11:
1. Use the Windows 11 Update app
Using the Windows Update app, you can update Windows support software/driver in your Windows 11 on your Mac.
Here are the steps to update the Boot Camp drivers using the Windows Update app:
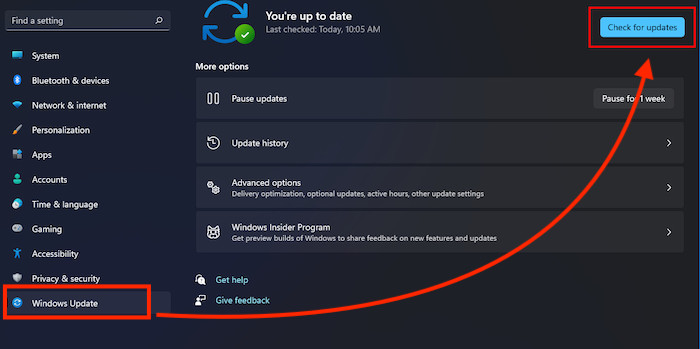
- Click on the Windows Start menu on the left side Windows taskbar.
- Select the Settings app under the App section.
- Select Windows Update tab.
- Click on the Check for updates button to check for the latest updates on your Windows 11.

- Wait for the download and install the updates if available.
Quickly check out our epic guide on can’t Boot Windows 11 after enabling Hyper-V.
2. Use the Apple Software Update app
Another effective method to update Boot Camp drivers or Windows support software in your Windows 11 is to use the Apple Software Update app.
Here are the steps to update the Boot Camp drivers using the Apple Software Update app:
- Click on the Windows Start
- Select and open the Apple Software Update app
- Choose the driver that needs to install if the updates are available.
- Click on the Install button and follow the onscreen instructions to update the drivers.
How to Download Boot Camp Drivers for Windows 11 Without Boot Camp Assistant
Want to download and install the Boot Camp drivers for Windows 11 without Boot Camp Assistant?
Brigadier is a free utility that helps you download the latest Boot Camp drivers or Windows support software from the direct Apple server. If your use the Brigadier tool, you don’t need to use the Boot Camp Assistant.
Though the Brigadier tool is a third-party tool, you don’t need to worry about security issues, and it’s completely secure. You can download both Windows 10 and 11 Boot Camp drivers using this tool.
The Brigadier tool can detect the Mac device model and download the correct ESD files like the Boot Camp Assistant from the Apple server. This tool automatically extracts the ESD files by using the 7-Zip software.
However, if the 7-Zip software is not available on your device, the Brigadier tool will automatically download the 7-Zip software and extract the ESD files.
Check out the easiest way to Fix cFosSpeed Driver Preventing Windows 11
Here are the steps to download and install the Boot Camp drivers for Windows 11 without Boot Camp Assistant:
Final Thoughts
Experiencing the error issue is a common issue without using the Windows support drivers or Boot Camp drivers in Windows 11 on your Mac.
Downloading and installing the Boot Camp drivers is not tricky on Mac. You can effortlessly download and install the Windows support drivers or Boot Camp drivers on your Mac using the Boot Camp Assistant.
This post describes downloading, installing, and updating the Boot Camp drivers process. I also describe the Boot Camp drivers process without using the Boot Camp Assistant tool.
That’s it. Plenty of solutions to consider.
Until next time, stay safe and have a nice day.
When we think about running Windows on a Mac, Boot Camp is the first thing that comes to mind for many of us. This utility has made it possible for Mac users to enjoy the full performance of their hardware while running Windows natively. With the release of Windows 11, obtaining and installing the right Boot Camp drivers has become crucial for ensuring that all components of your Mac work seamlessly in the Windows environment.

Our experience tells us that drivers are essential for the computer’s operating system to communicate effectively with its hardware. Without the correct drivers, crucial elements of your Mac might not function correctly under Windows. Therefore, installing the latest Windows support software through Boot Camp is not just recommended; it’s necessary for a successful and efficient Windows 11 experience on Mac machines.
Key Points:
- Boot Camp is essential for running Windows 11 on Macs.
- Proper drivers ensure hardware compatibility and performance.
- Windows support software must be up to date for the best user experience.
To get these drivers, we typically rely on Boot Camp Assistant, which simplifies the process of creating a new partition and installing Windows. However, after installing Windows 11, we may need to manually download the latest support software. This includes not just general drivers, but also those specific to graphics cards and other unique hardware components in various Mac models. Finding the correct drivers can be challenging, but with the right resources and guidance, the process becomes straightforward.
Contents
- 1 Understanding Boot Camp and its Requirements
- 1.1 What Is Boot Camp?
- 1.2 System and Hardware Requirements
- 2 Downloading and Installing Boot Camp Drivers
- 2.1 Locating the Boot Camp Drivers
- 2.2 Using Boot Camp Assistant for Installation
- 2.3 Manual Installation Steps
- 3 Troubleshooting and Updating Drivers
- 3.1 Common Installation Issues and Fixes
- 3.2 Updating Boot Camp Drivers
- 4 Optimizing Windows 11 on Mac
- 4.1 Configuring Windows Settings
- 4.2 Enhancing Hardware Compatibility
Understanding Boot Camp and its Requirements
In this section, we’ll cover the core aspects of the Boot Camp utility and the prerequisites needed for running Windows 11 on Mac computers.

What Is Boot Camp?
Boot Camp is an Apple utility that allows Mac users to install and run Windows as a second operating system in a dual-boot configuration. Essentially, it provides the best of both worlds for those who love MacOS but require access to Windows for certain applications or games that are only available on the Windows platform.
Mac computers with Intel processors are capable of using Boot Camp to install an operating system like Windows 11, seamlessly switching between MacOS and Windows as needed.
System and Hardware Requirements
To install Windows 11 on a Mac using Boot Camp, specific system and hardware criteria must be met. These include:
| Requirement | Details | Note |
| Supported Mac Model | Apple Mac with an Intel processor | Macs with Apple Silicon chips are not supported. |
| Operating System | Latest MacOS version | Ensures compatibility with Boot Camp. |
| Windows Version | Windows 11 ISO file | Official Microsoft release recommended. |
| Additional Software | Boot Camp drivers for Windows | Installed after Windows setup. |
| Storage Space | Adequate partition size | At least 64 GB is recommended for Windows 11. |
We ensure our Mac meets these requirements before proceeding to download and install Boot Camp drivers for compatibility with Windows 11. Following these steps correctly, we can enjoy the flexibility of dual-booting between MacOS and Windows on our Mac.
Downloading and Installing Boot Camp Drivers
Installing Boot Camp drivers is essential for running Windows 11 on your Mac, ensuring all hardware components work correctly. We’ll walk through locating these drivers, using the Boot Camp Assistant, and manual installation methods.
Locating the Boot Camp Drivers
First, to download Boot Camp drivers, we need to identify the correct Windows support software. Apple provides this through their Boot Camp Assistant, which is part of macOS, and also via direct download for certain macOS versions. Ensure you’re downloading the correct software version compatible with Windows 11 and your specific Mac model.
Tip: For the latest drivers, keep your macOS updated as Apple frequently releases updated Boot Camp support software through Apple Software Update.
Using Boot Camp Assistant for Installation
The Boot Camp Assistant guides us through partitioning the drive, downloading the necessary Windows support software, and creating a bootable USB flash drive if needed. Follow the directions carefully:
- Open Boot Camp Assistant from the Utilities folder.
- Follow the on-screen instructions to partition your hard drive and download the support software.
Remember, the Boot Camp Assistant typically requires a USB flash drive to store the downloaded drivers if you’re installing Windows afresh.
Manual Installation Steps
If we prefer a hands-on approach or need to reinstall drivers, manual installation is possible. After locating and downloading the necessary Boot Camp Windows support software:
- Copy the software to a USB flash drive or the Boot Camp partition.
- Boot into Windows, navigate to the USB drive or Boot Camp partition, and run the Boot Camp Installer.
| Step | Action | Result |
| 1 | Run Setup.exe from Boot Camp folder | Installer starts |
| 2 | Follow the installer prompts | Drivers installed |
| 3 | Restart your Mac | Complete the driver setup |
Ensure all prompts are followed, and approve any permissions the Boot Camp installer requests. After installation, we recommend running Apple Software Update from within Windows to ensure all drivers are up to date.
Troubleshooting and Updating Drivers
When working with Boot Camp to install Windows 11 on a Mac, encountering issues with driver installation or noticing the need for an update isn’t uncommon. We’ll guide you through these situations to ensure your system runs smoothly.
Common Installation Issues and Fixes
Sometimes, we face hiccups when installing Boot Camp drivers. Here are common problems and their respective solutions:
Error Messages During Installation:
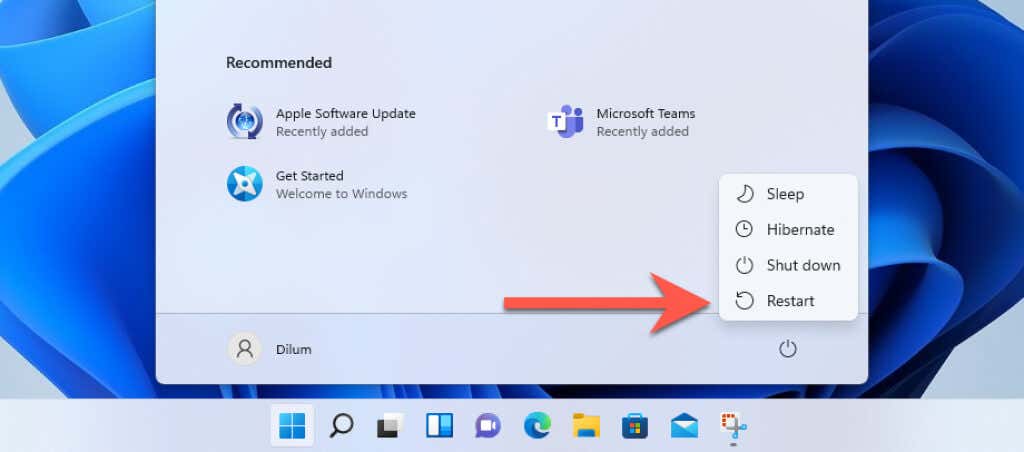
If you see an error message during the install, an initial step we recommend is to reboot your Mac and try the installation again.
| Issue | Fix |
| Inability to Download Boot Camp Drivers | Run Boot Camp Assistant in macOS and select “Action” from the menu to download the Windows support software. |
| Graphic Card Driver Issues | Check Microsoft’s or the hardware manufacturer’s website for the specific driver compatible with Windows 11. |
| Drivers Not Installing | Make sure you’re using an administrator account and have disabled antivirus software temporarily during the install process. |
Updating Boot Camp Drivers
Keeping Boot Camp drivers up-to-date is crucial. To update:
Manual Update:
We suggest visiting the Apple support website for the latest Boot Camp drivers. Also, remember to check Microsoft for updates specific to Windows 11 that may be needed for optimal performance.
For automatic updates:
Apple Software Update Tool:
Within Windows, use this Apple utility to automatically find and install the latest drivers. Make sure to reboot after updates to complete the installation process properly.
Our experience tells us that keeping your drivers updated can save you from potential compatibility issues. Regularly checking for updates ensures that your Mac and Windows 11 will continue to work harmoniously.
Optimizing Windows 11 on Mac
When installing Windows 11 on a Mac, ensuring that all hardware components work seamlessly with the new operating system is crucial for a smooth experience. From configuring Windows settings for optimal performance to enhancing hardware compatibility, we’ll navigate through each step to make the most out of your Mac’s capabilities while running Windows 11.
Configuring Windows Settings
Our first move is to tailor the Windows settings to play nice with our Mac hardware. Starting with the audio and microphone settings ensures clear sound and voice communication, fundamental for daily activities and virtual meetings. Through the Windows Control Panel, we adjust the settings to recognize our input and output devices properly.
For an optimal visual experience, the display settings should be tweaked so that resolution and scaling settings align with the Mac’s screen specifications. This can be done by right-clicking on the desktop and selecting “Display settings.” Here, we can manage the screen resolution to match our Mac display for crisp and vibrant visuals.
Enhancing Hardware Compatibility
To tackle hardware compatibility, we focus on installing the appropriate Windows drivers for our Mac’s chipset, be it AMD or otherwise, which is essential for the graphics card, Bluetooth, and USB connections. Firmware updates from Apple’s Boot Camp Assistant can aid in this process, offering support for various components.
In some instances, Mac users may find challenges with certain functionalities such as camera and keyboard integration. Here, ensuring that Windows 11 has all the necessary drivers, often obtainable via Apple’s Boot Camp, can address such concerns. Virtualization features could also require additional setup within Windows to fully harness the Mac’s hardware for various applications.
Windows 11’s compatibility checks for Secure Boot and TPM 2.0 don’t translate well on Intel Mac hardware. So, for example, if you try to use the official Windows 11 ISO from Microsoft in macOS 12 Monterey, the Boot Camp Assistant will fail to procure the necessary drivers or stall at Windows Setup.
Thankfully, you can install Windows 11 in macOS Monterey using Boot Camp with a workaround. It requires upgrading a standard Windows 10 Boot Camp installation to Windows 11 with an automated batch script that bypasses the operating system’s stringent system requirements.

The following method is also secure and less complicated than alternative ways of installing Windows 11 on Mac that you may have read about (such as those involving a modified ISO or bootable USB drive).
Note: If you already have Windows 10 set up on your Intel MacBook Air, MacBook Pro, iMac, or Mac mini, skip to the section that focuses on upgrading it to Windows 11.
Update Your Mac
You can use the instructions in this tutorial to run Windows 11 on all macOS Monterey-compatible Intel Macs. However, to minimize the chances of running into any Boot Camp Assistant errors, we recommend that you install all available macOS Monterey point updates before you begin.
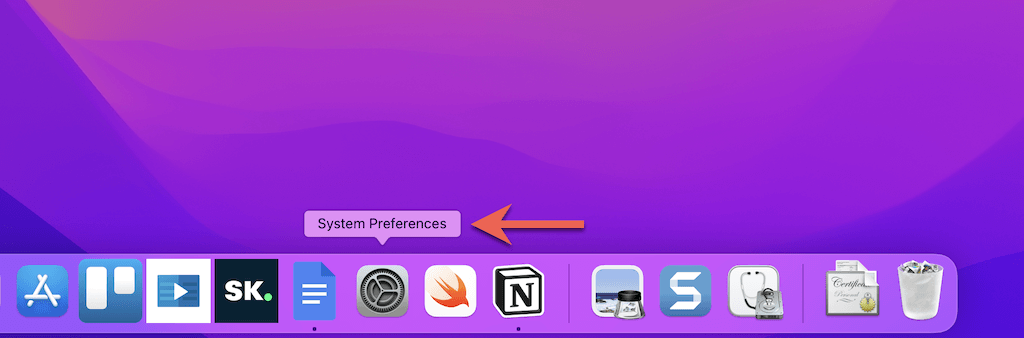
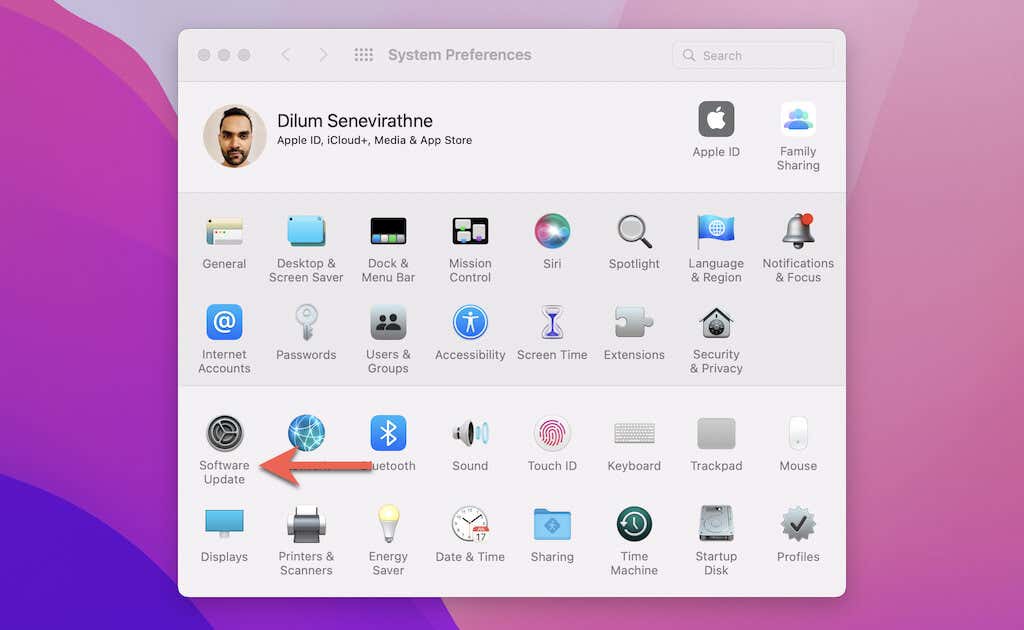
1. Open the System Preferences app.
2. Select Software Update.
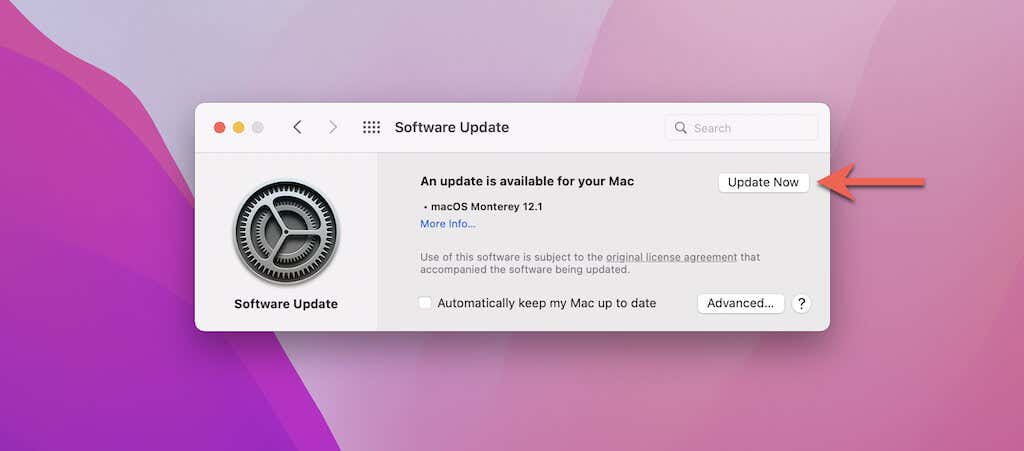
3. Select Update Now to update your Mac to the latest version of macOS Monterey.
Download Windows 10 ISO
Since you must install Windows 10 on your Mac first, the next step involves downloading an up-to-date copy of a 64-bit Windows 10 ISO image file from Microsoft.
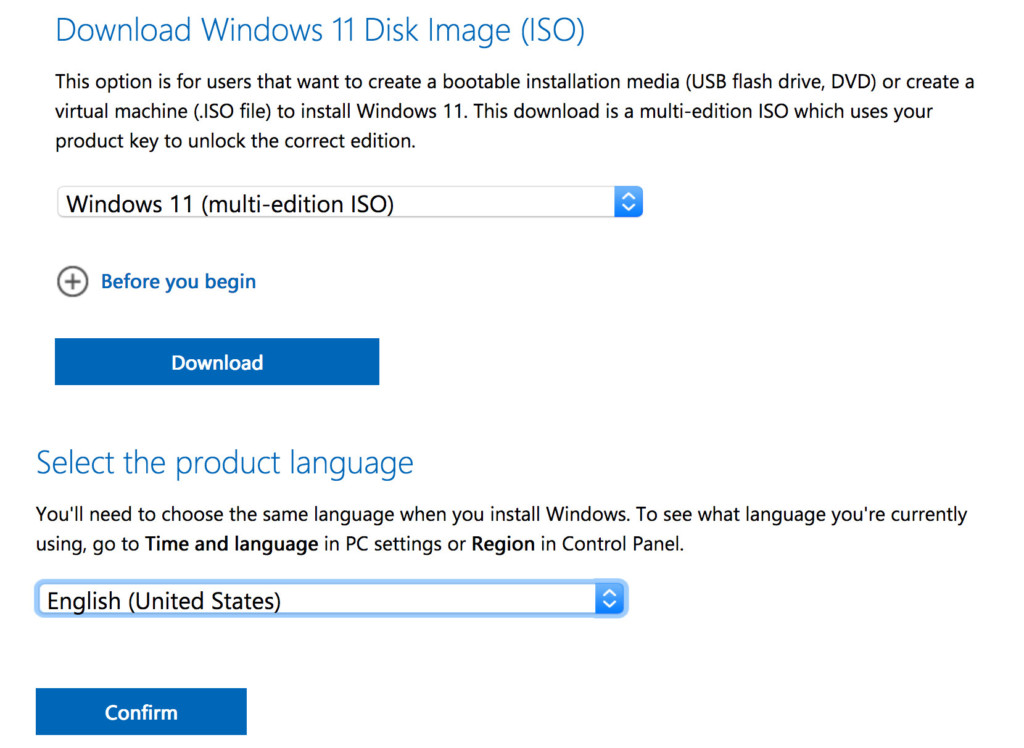
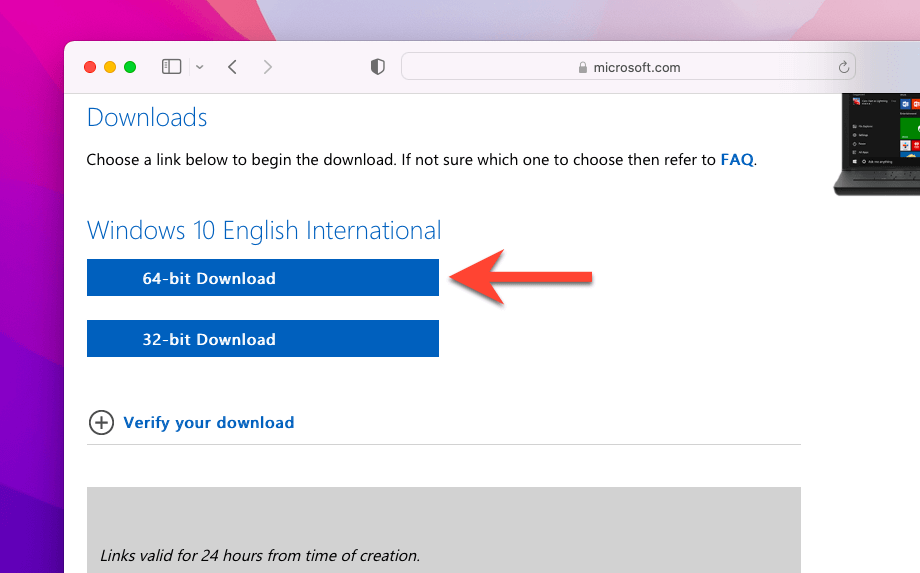
1. Visit the Download Windows 10 Disc Image (ISO File) page on the Microsoft website using Safari or another web browser.
2. Pick the latest version of Windows 10, choose a language (e.g., English or English International), and select Confirm.
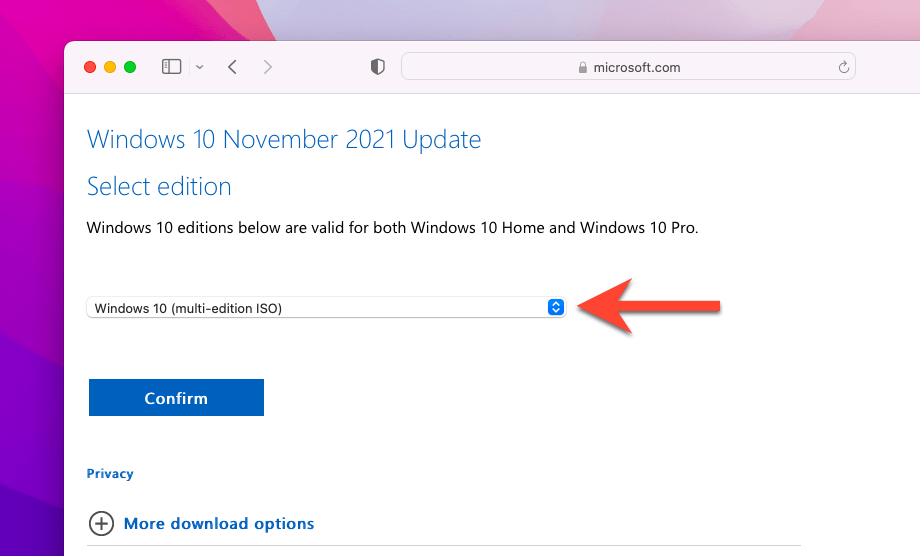
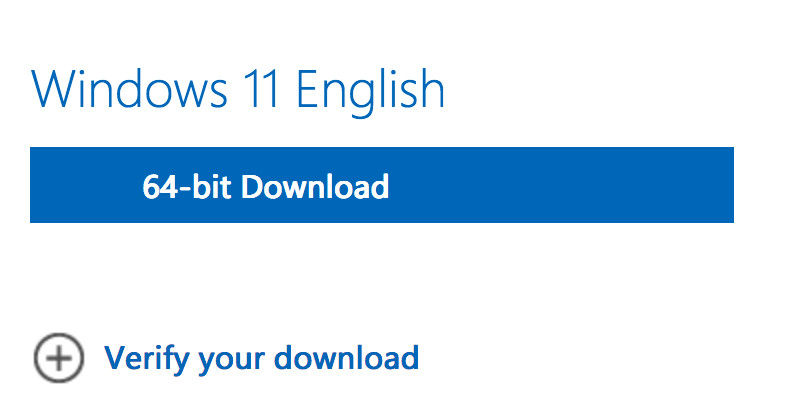
3. Select 64-bit Download and wait until your web browser downloads the ISO file to your Mac.
After downloading the ISO file, you can start installing Windows 10 on your Mac. Just make sure to have at least 50 gigabytes of free space before you begin.
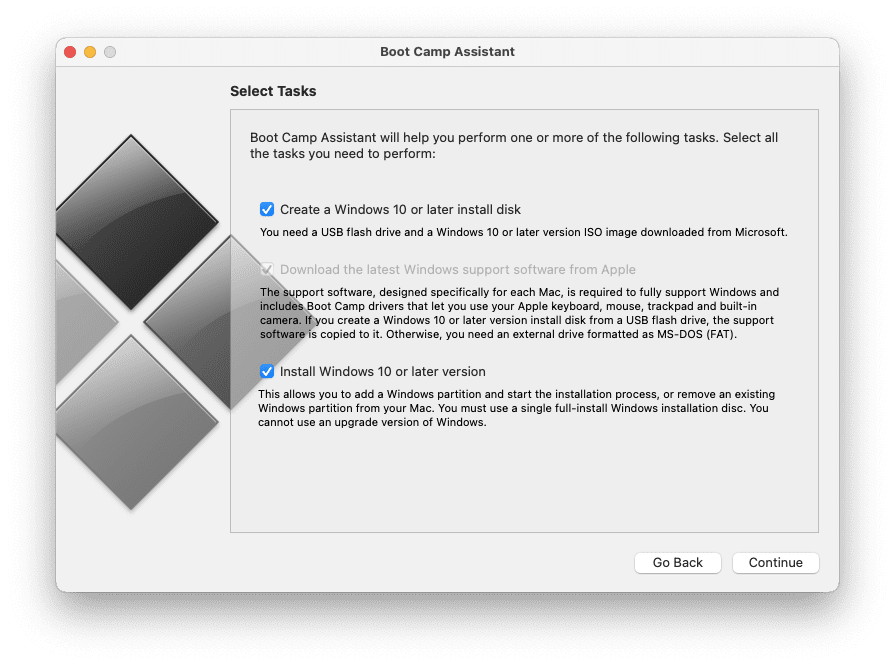
1. Open Boot Camp Assistant via the Mac’s Launchpad.
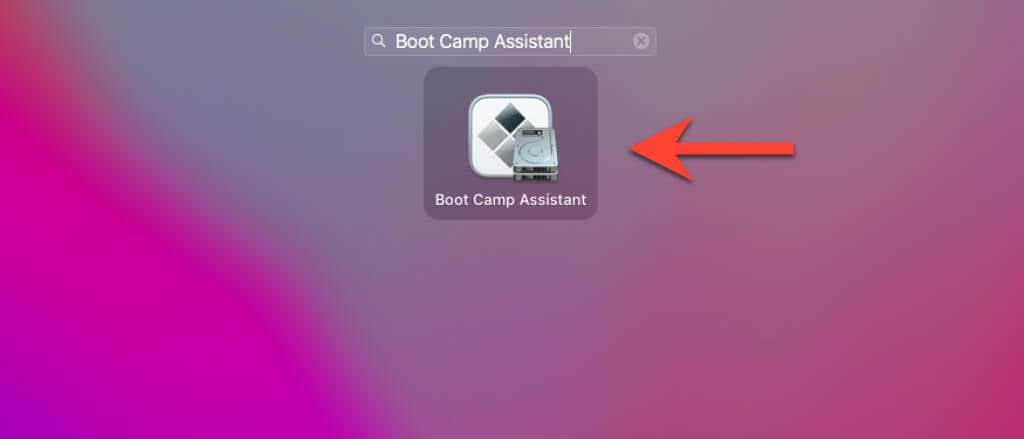
Note: Boot Camp Assistant is only available on Intel-based Macs. If you use an Apple Silicon M1 Mac, you can’t install Windows via Boot Camp.
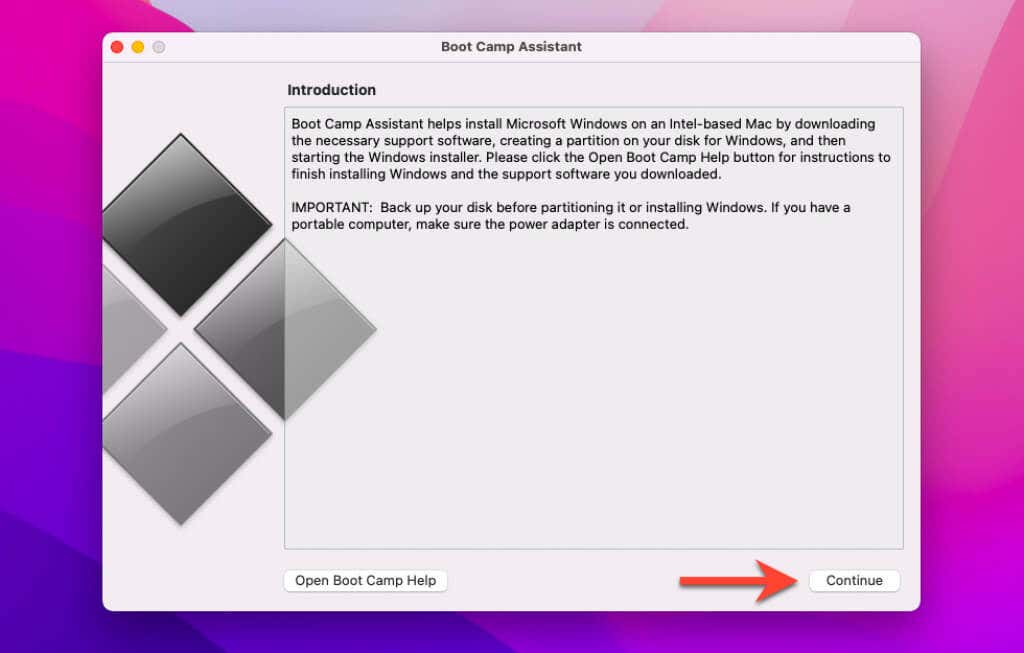
2. Select Continue.
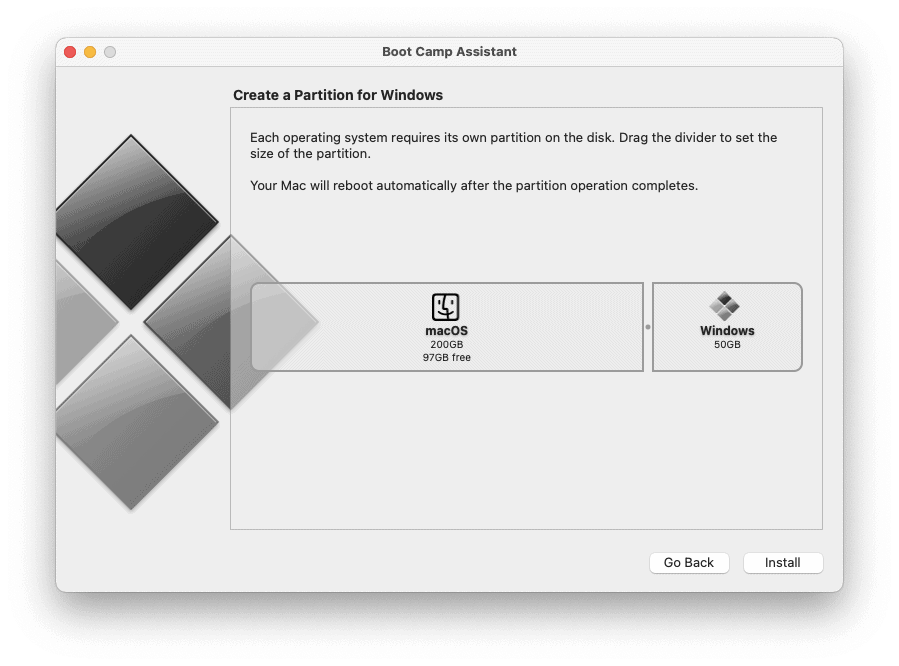
3. Pick the downloaded ISO file from your Mac’s Downloads folder and specify a size for the Windows partition. Then, select Install.
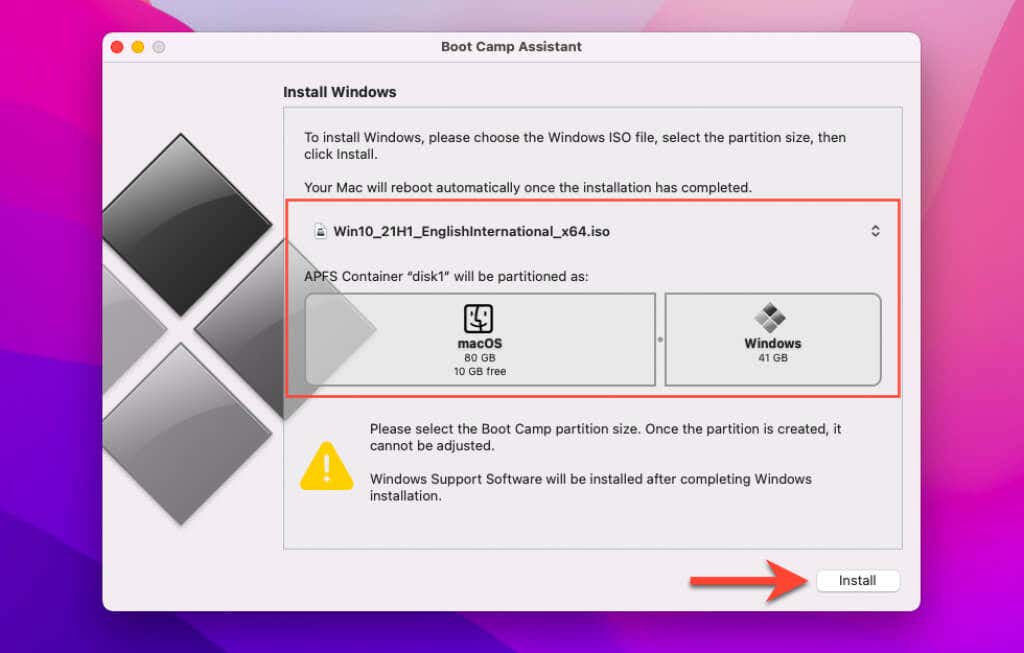
4. Boot Camp Assistant will begin to download Windows support software. Once that finishes, it will create a Windows OS partition and boot your Mac into the Windows Installer.
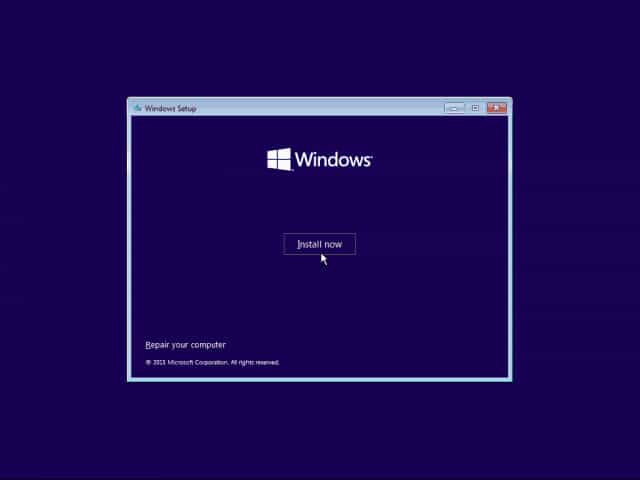
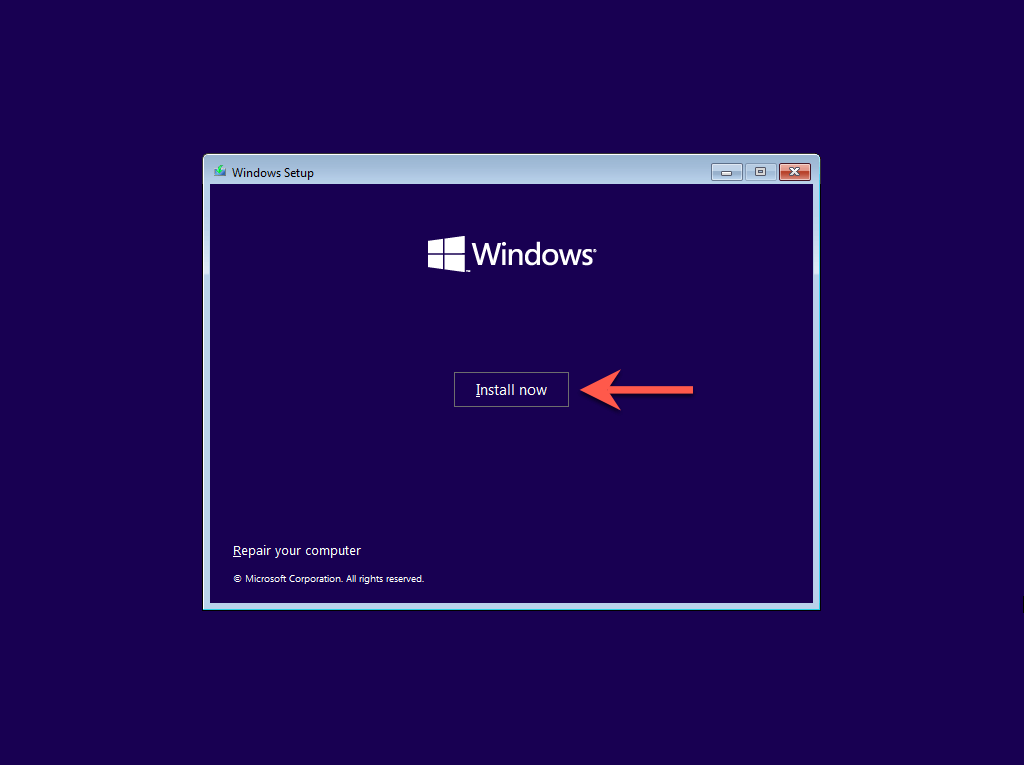
5. Select Install now on the Windows Setup screen.
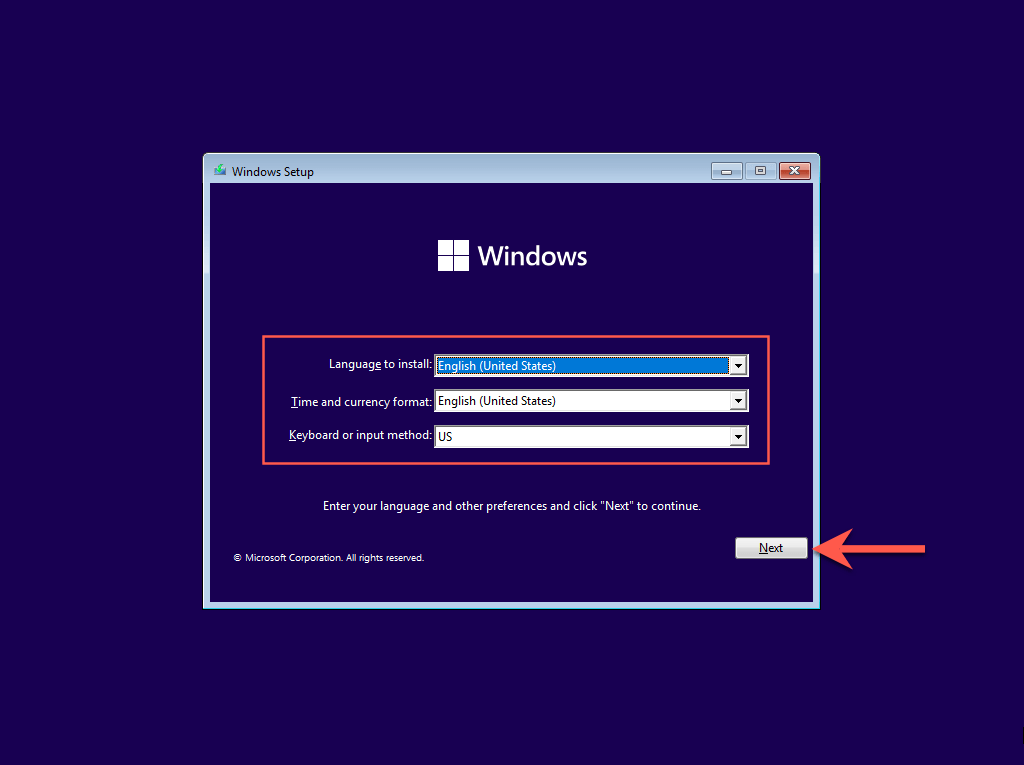
6. Select your language, time and currency format, and keyboard layout. Then, select Next.
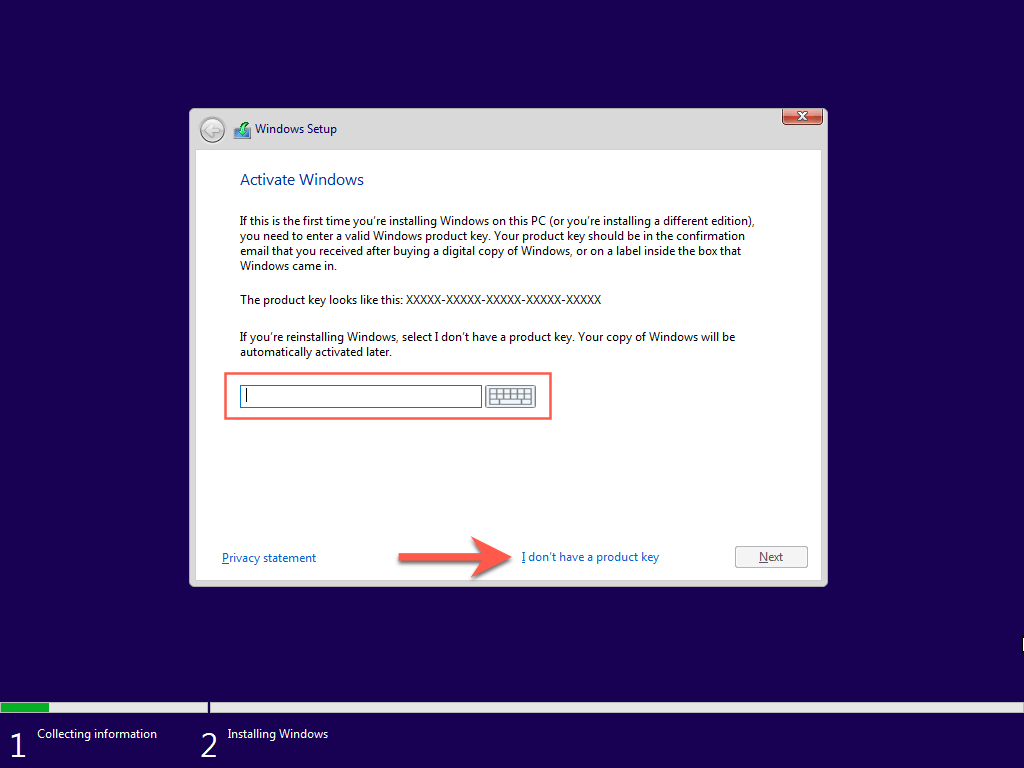
7. Enter your Windows product key. If you don’t have one, select I don’t have a product key.
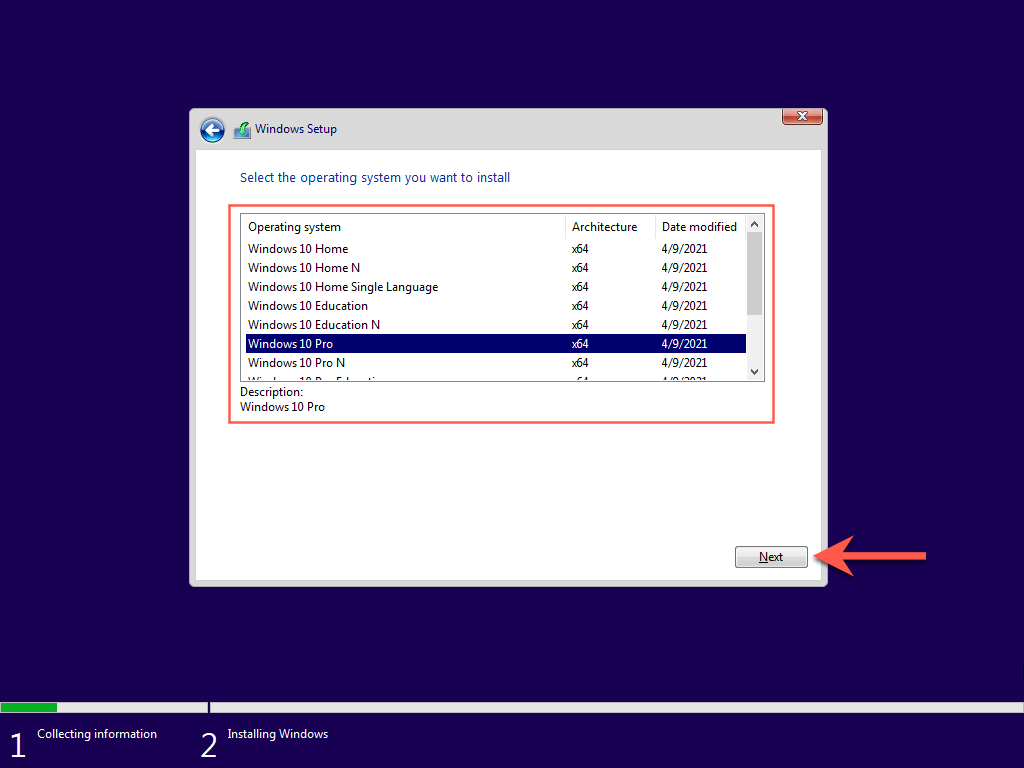
8. Pick the edition of Windows you want to install—Windows 10 Home or Windows 10 Pro—and select Next.
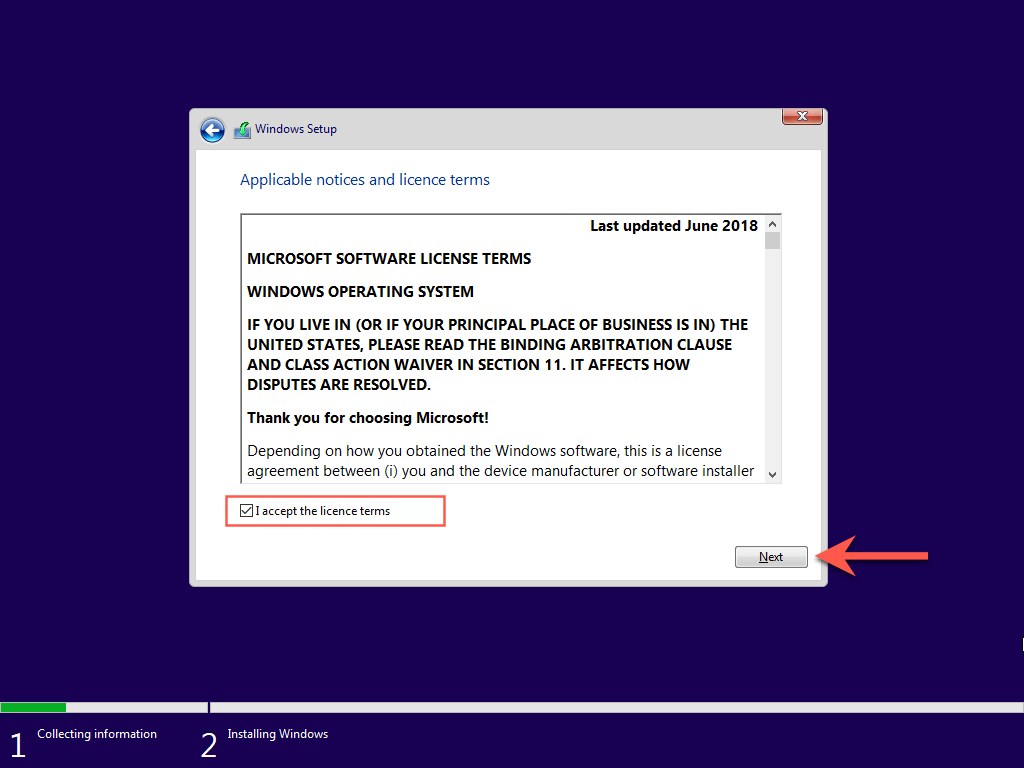
9. Agree to the Microsoft software license terms and select Next.
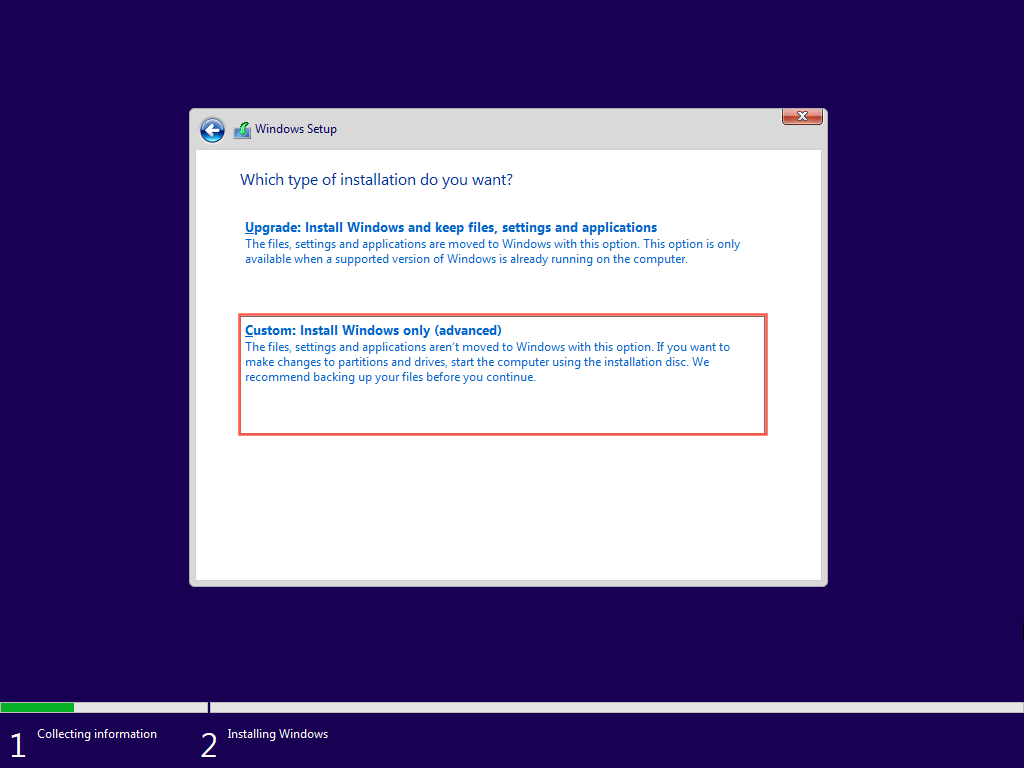
10. Select Custom: Install Windows only (advanced).
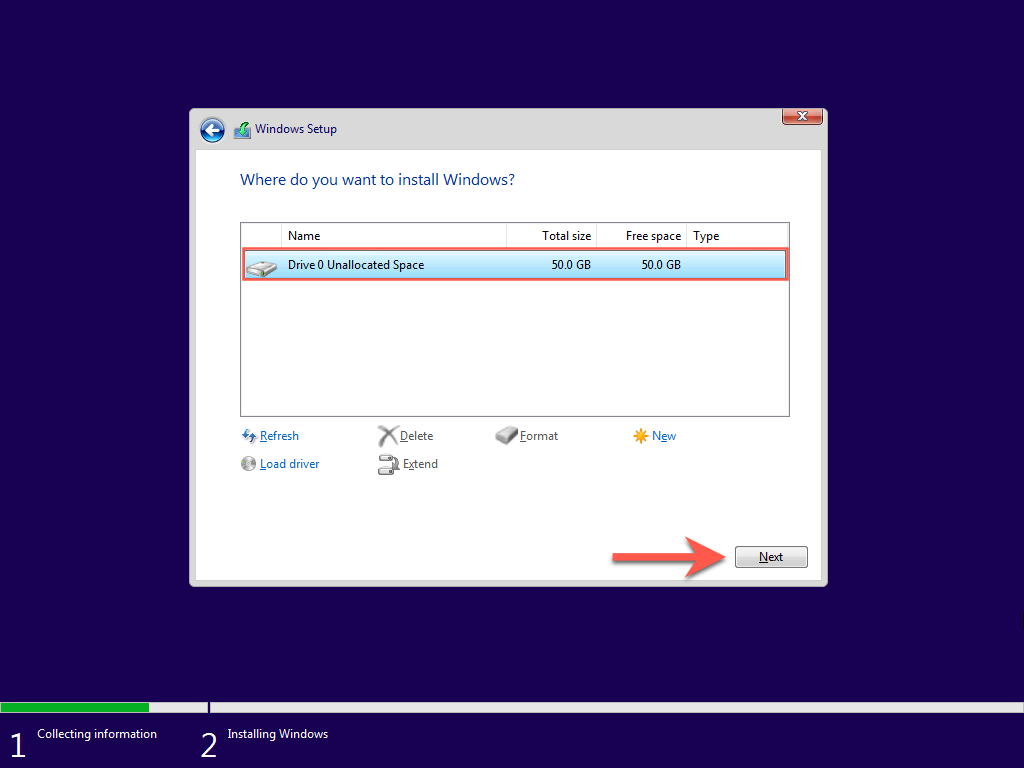
11. Pick your BOOTCAMP (Windows) partition and select Next.
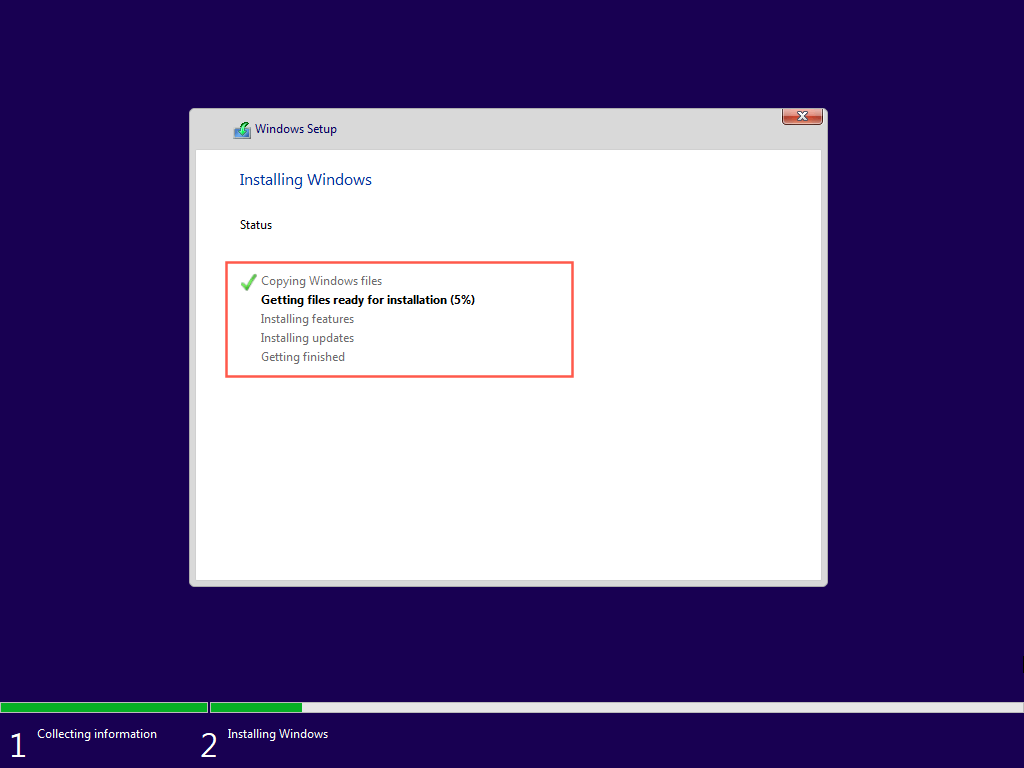
12. Wait until the Windows Setup finishes installing Windows 10 on your Mac.
Set Up Windows 10 on Mac
Once the Windows Setup finishes installing Windows 10, you must specify your language, keyboard, and privacy preferences. You must also create a Windows user account.
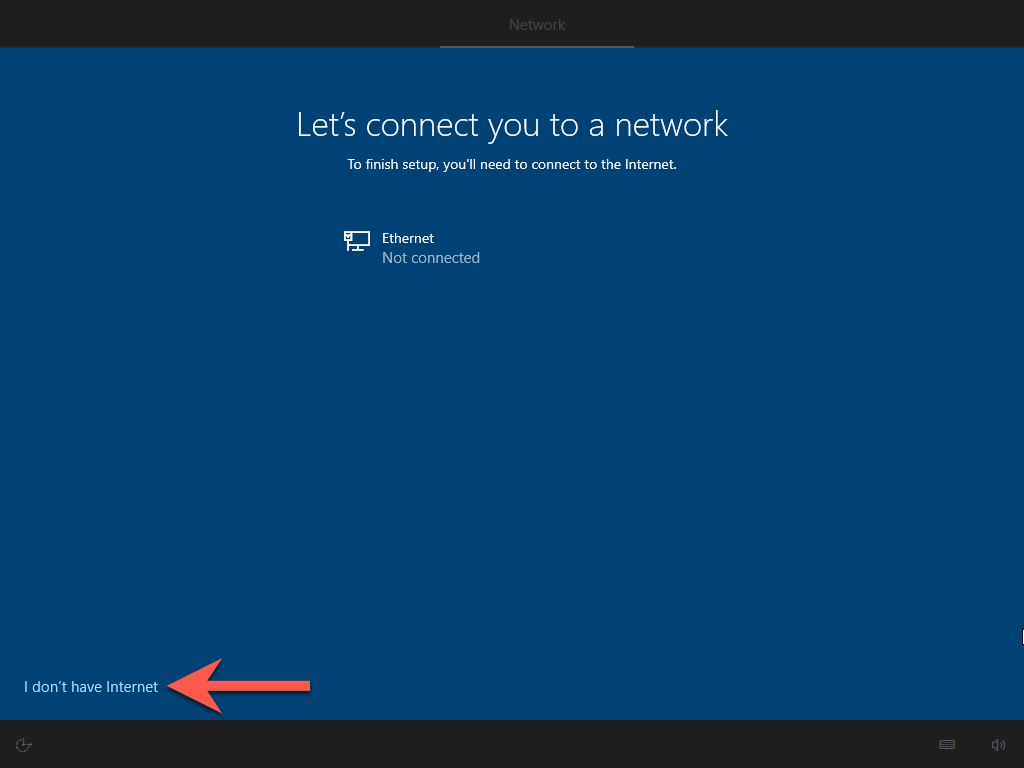
Note: Windows Setup will not connect to the internet due to missing network drivers. You can restore online connectivity after reaching the Windows 10 desktop.
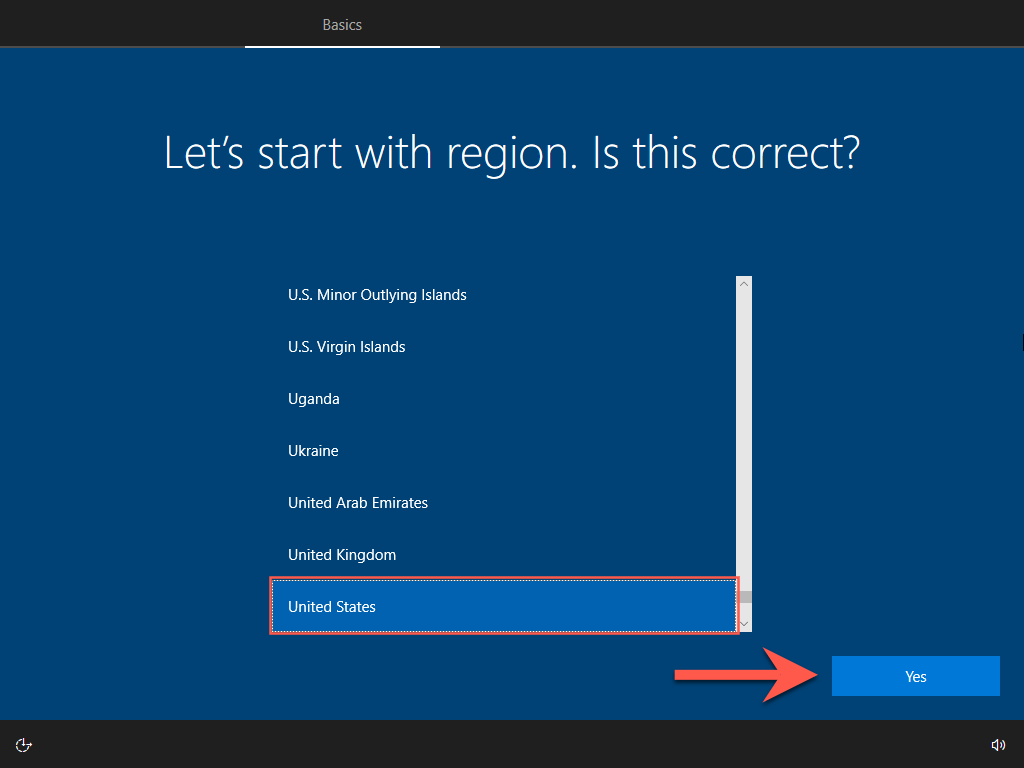
1. Choose a region and select Yes.
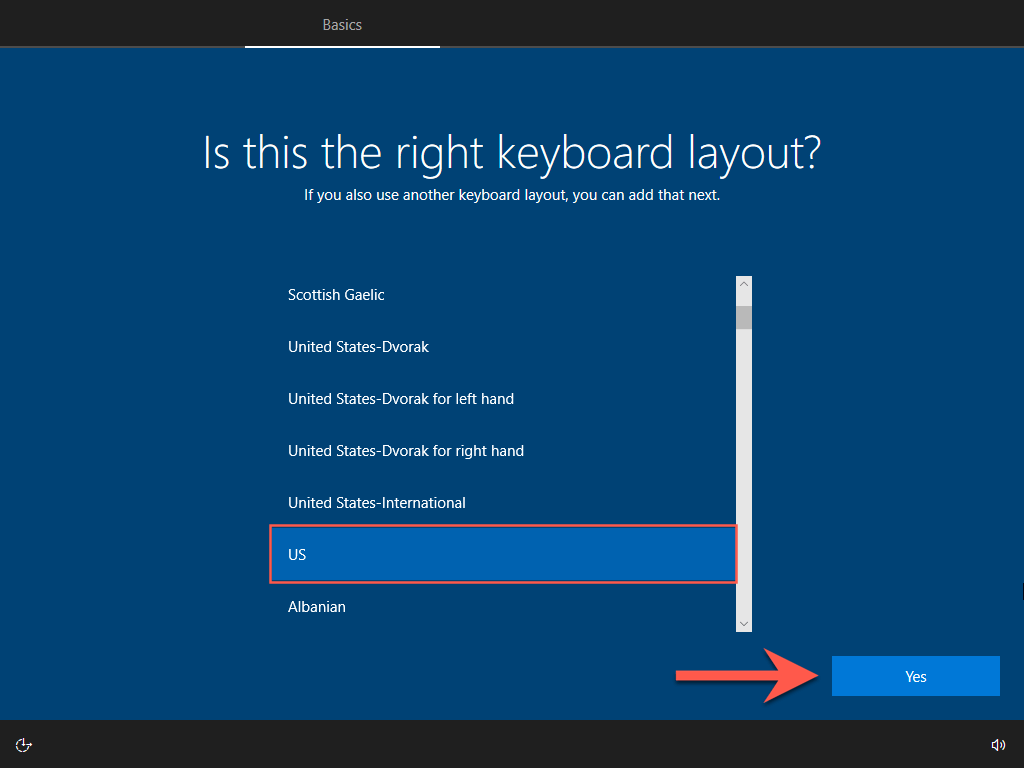
2. Pick a keyboard layout and select Yes.
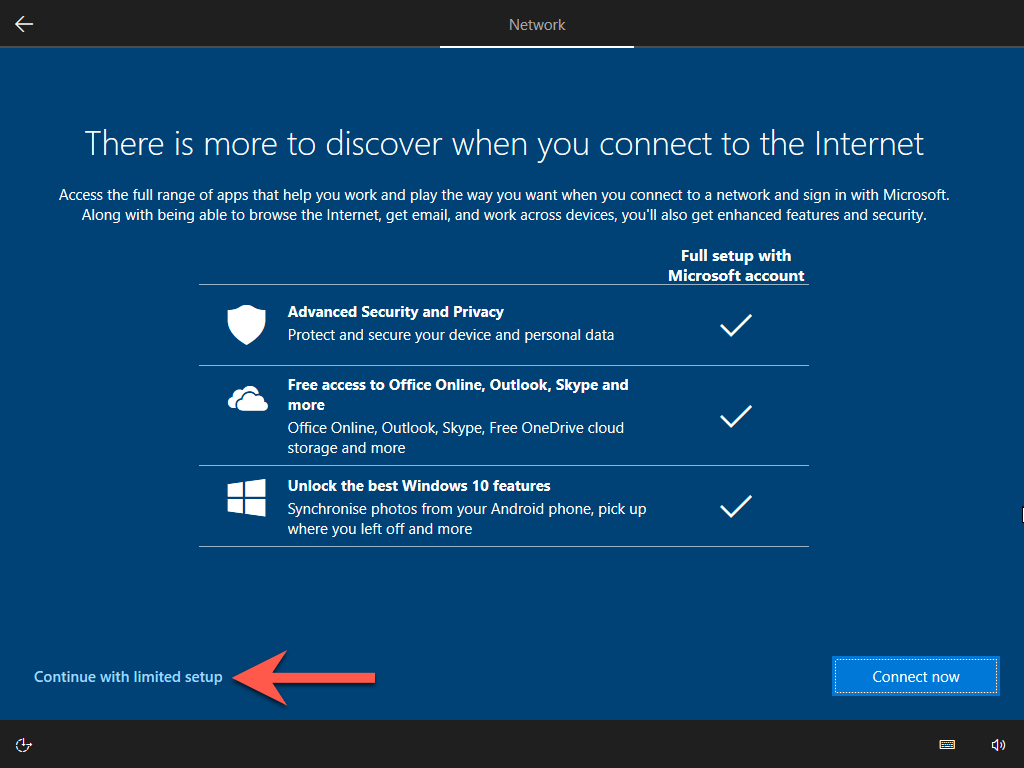
3. Select I don’t have internet.
4. Select Continue with limited setup.
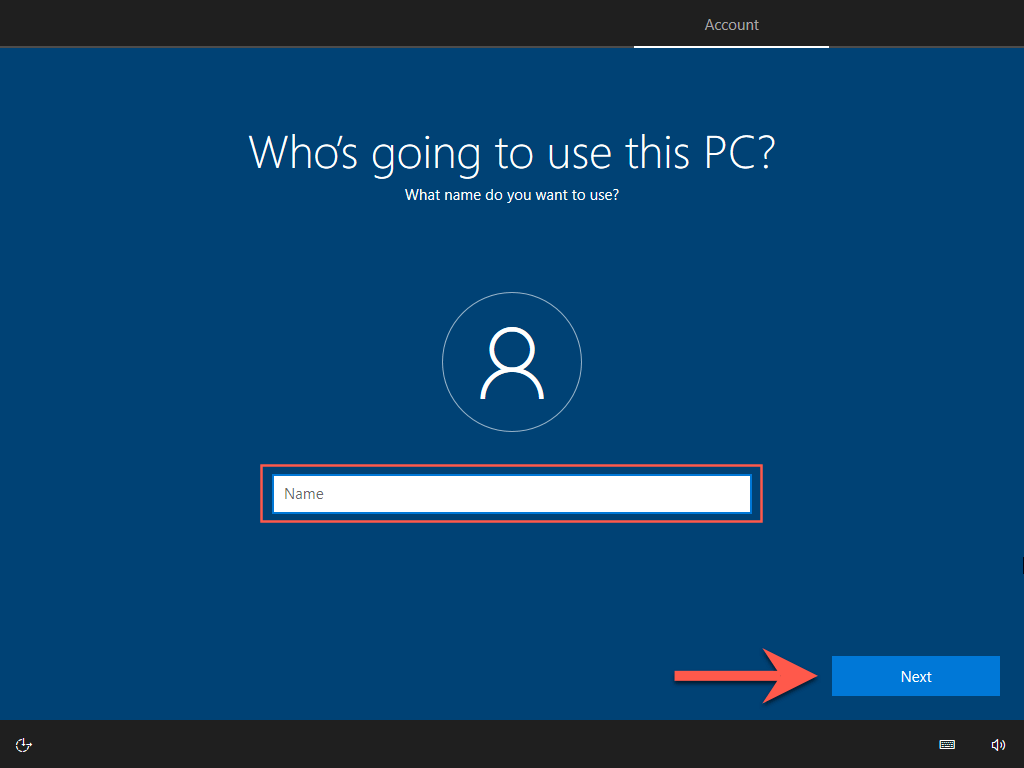
5. Enter your name and select Next to create a local account.
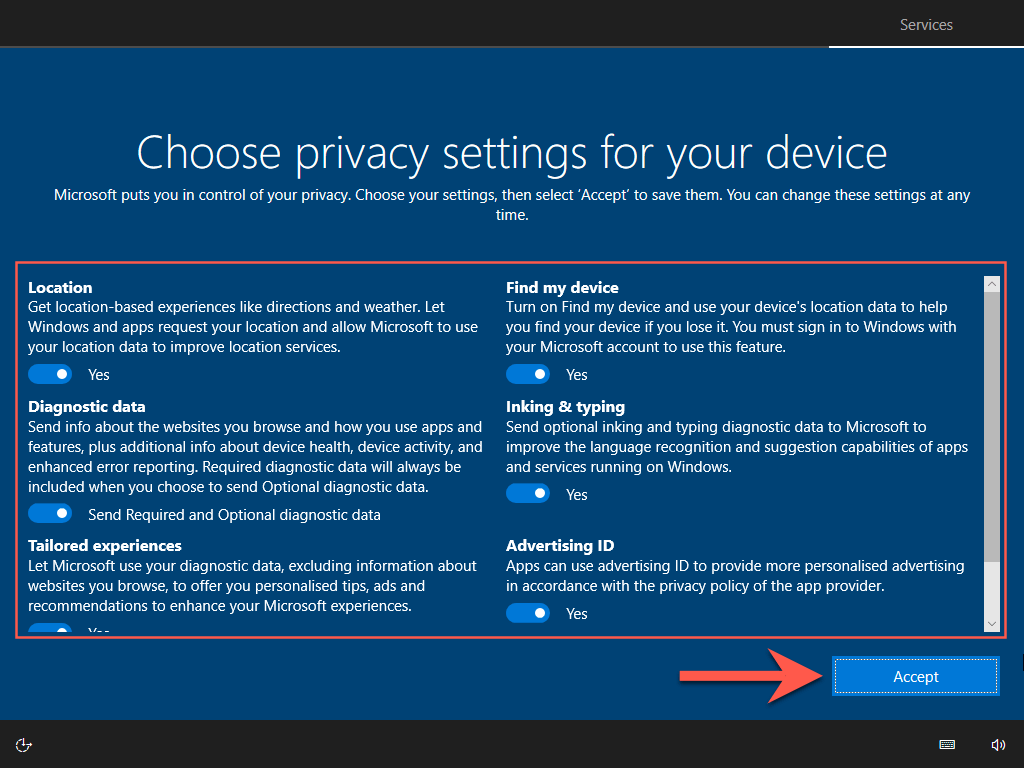
6. Review your privacy settings—e.g., Location, Diagnostic data, and Advertising ID. Disable anything if needed and select Accept.
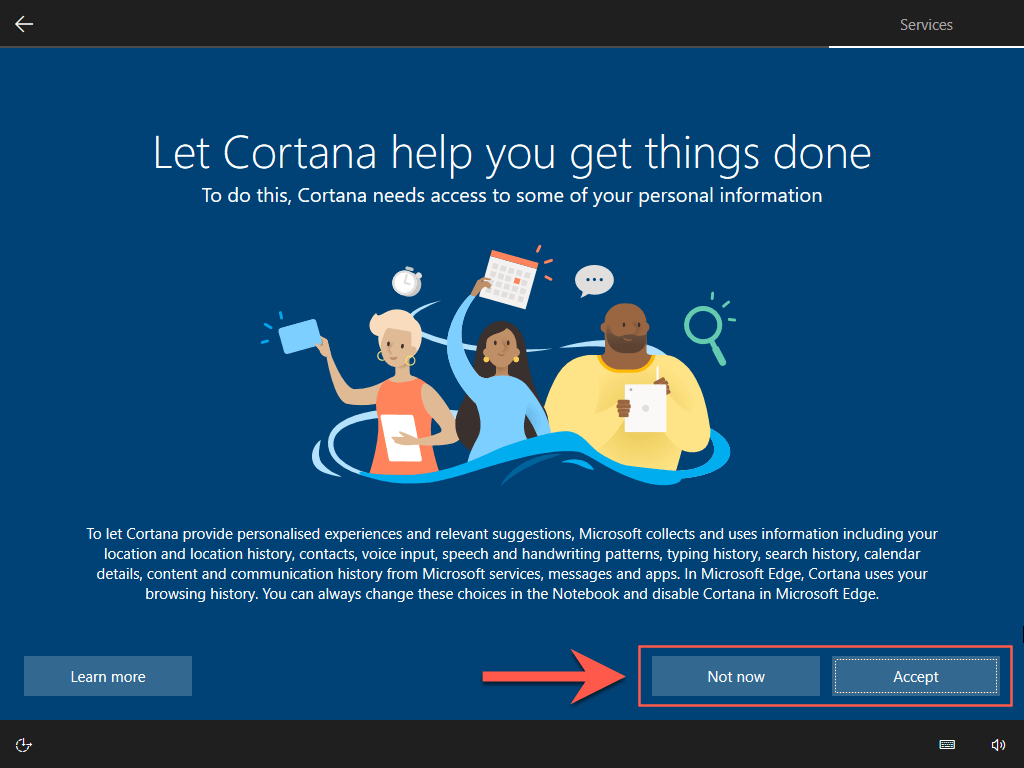
7. Set up Cortana or select Now Now to do that later.
8. Wait for the Windows Setup to finalize the installation.

9. Your Mac will boot into the Windows 10 desktop momentarily. You are halfway there!
Update Windows 10 on Mac
Now that you’ve finished installing Windows 10 on Mac, you must install the hardware drivers, support software, and system updates required to get it working correctly. That also ensures a smooth upgrade to Windows 11.
Run Boot Camp Installer
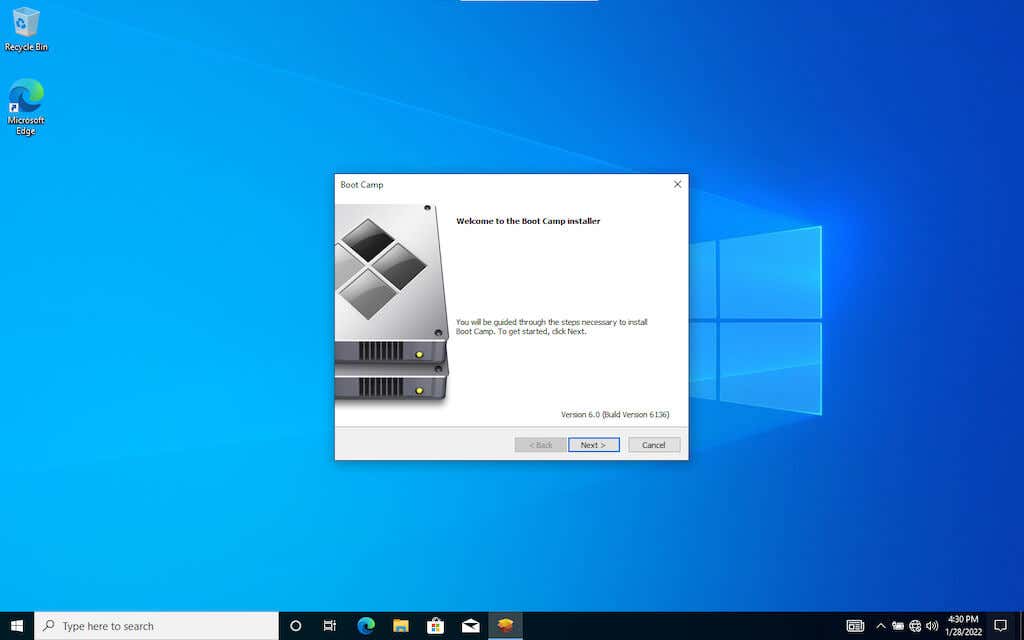
The Boot Camp installer shows up automatically after your Mac boots into Windows 10 for the first time. It contains critical drivers that you must install right away.
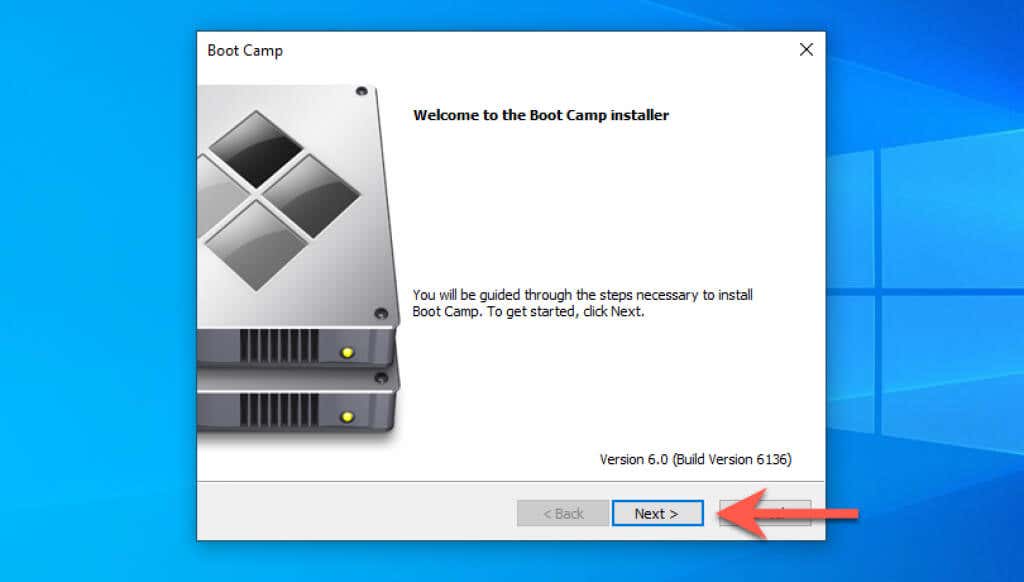
1. Select Next.
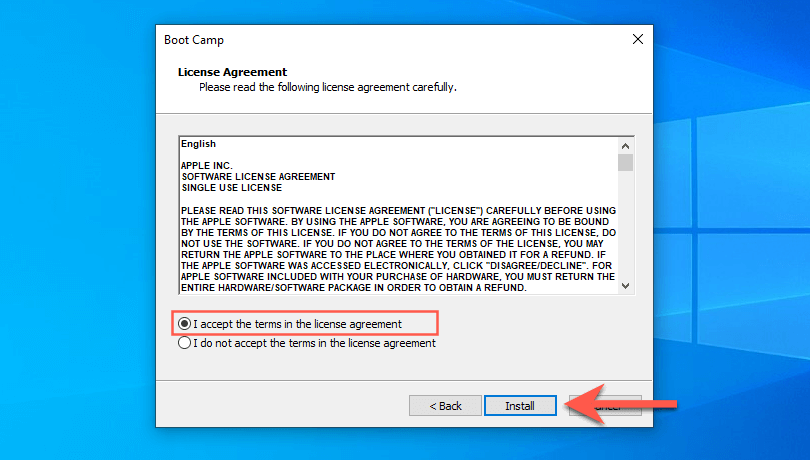
2. Accept the Boot Camp license agreement and select Install.
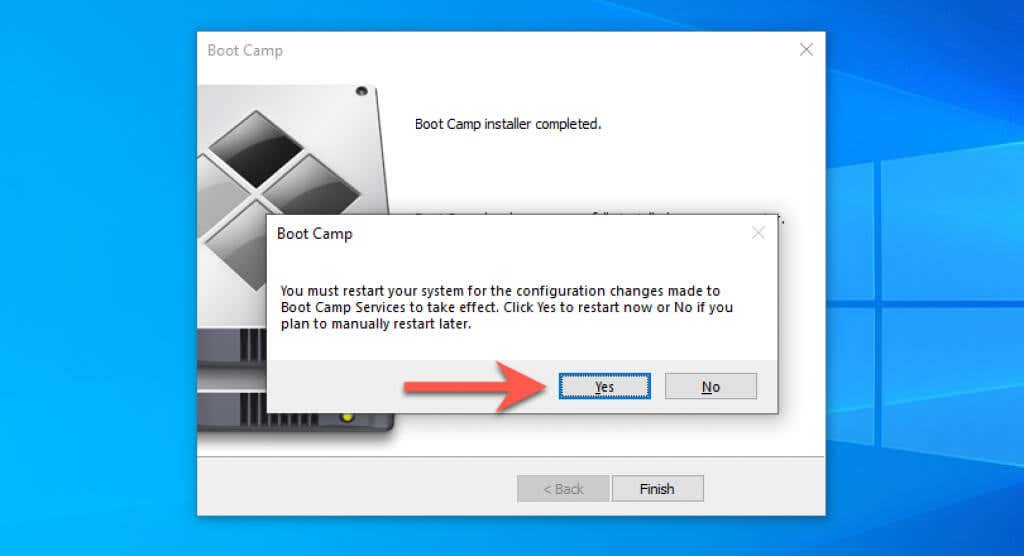
3. Wait for the Boot Camp installer to finish installing all drivers. Then, select Yes to restart your Mac.
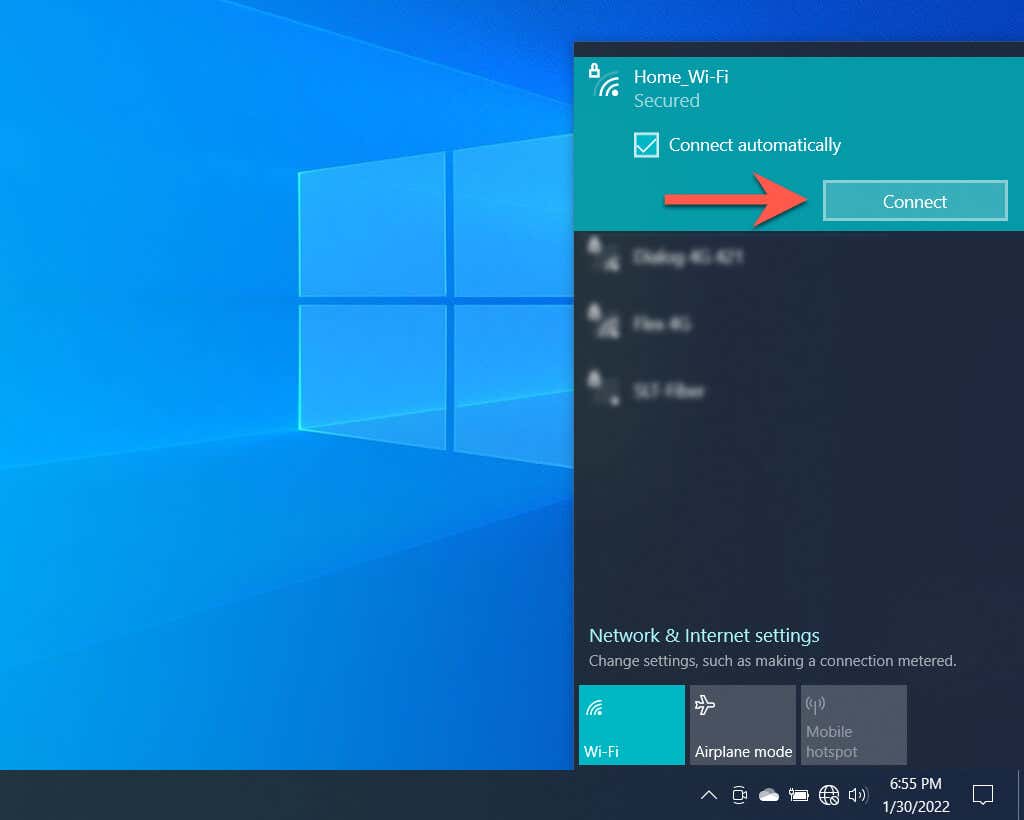
Connect to a Wi-Fi Network
The Boot Camp installer should’ve restored online connectivity in Windows 10. If you don’t use Ethernet, you can connect to Wi-Fi instead. Just select the Globe icon on the system tray (right-corner of the taskbar), pick an available Wi-Fi network, enter its password, and select Connect.
Install Apple Software Update
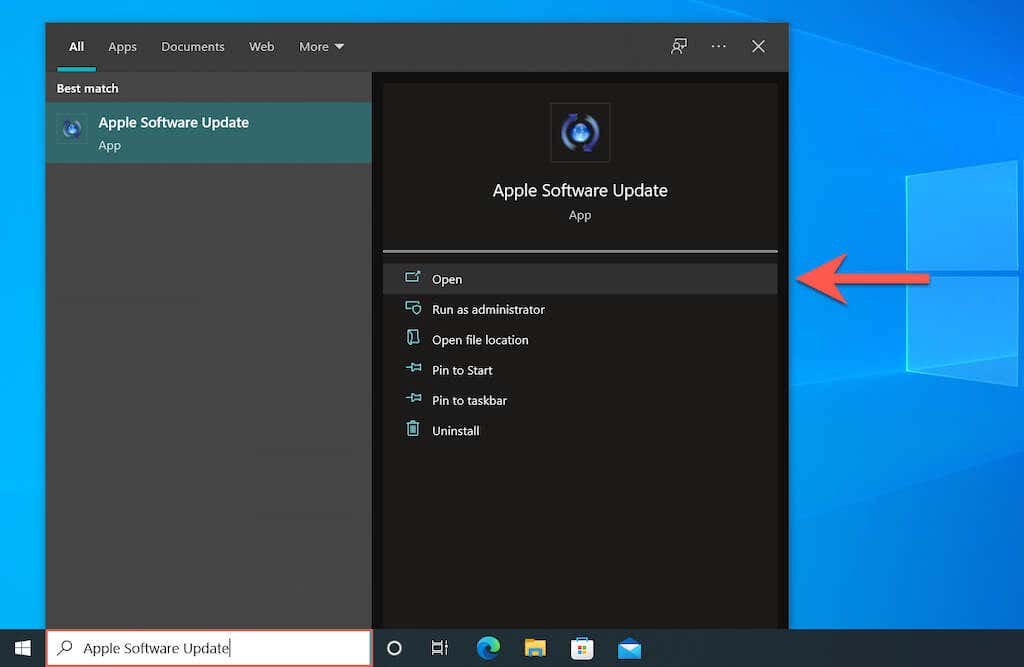
Next, use the Apple Software Update app to install additional Boot Camp driver updates.
1. Type Apple Software Update into the taskbar and select Open.
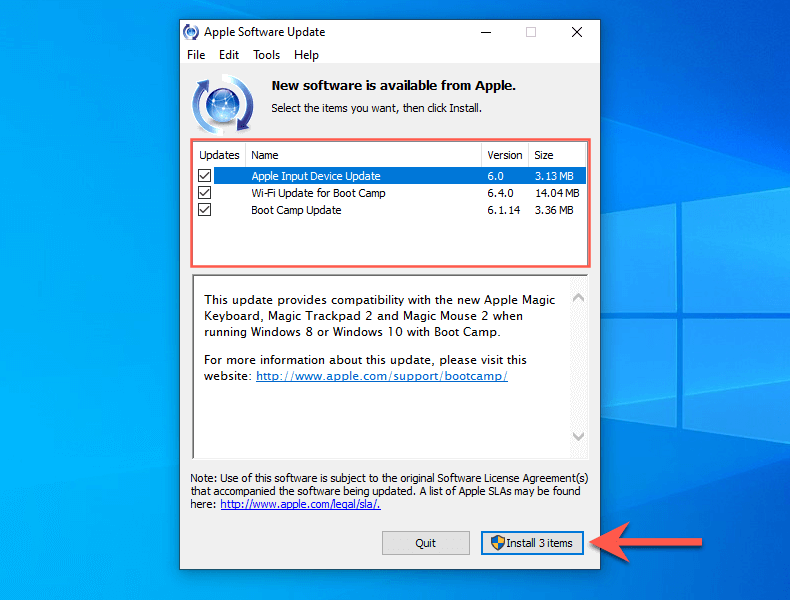
2. Check the boxes next to all available Apple software updates and select Install.
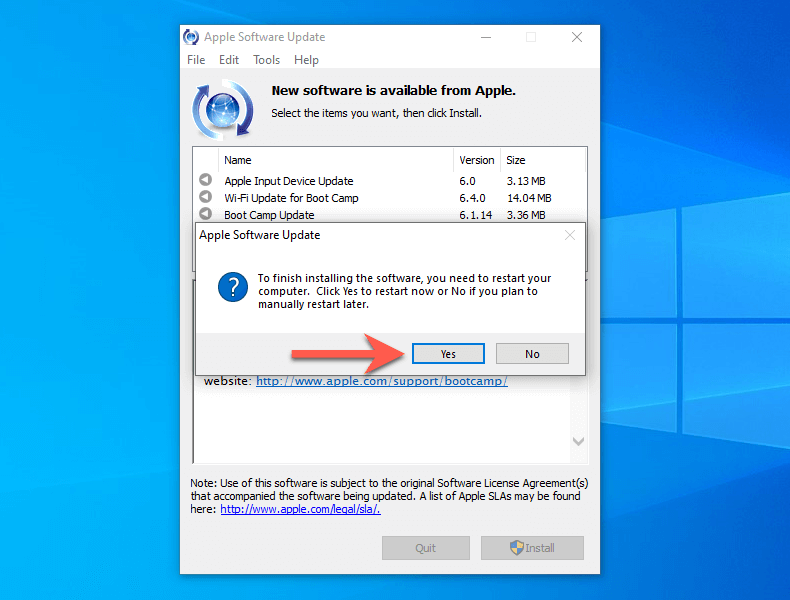
3. Select Yes to restart your PC.
Install Windows Drivers & Updates.
Finally, you must install all Microsoft-verified drivers via Windows Update.
1. Type Windows Update into the taskbar and select Open.
2. Select Check for Updates > View all optional updates.
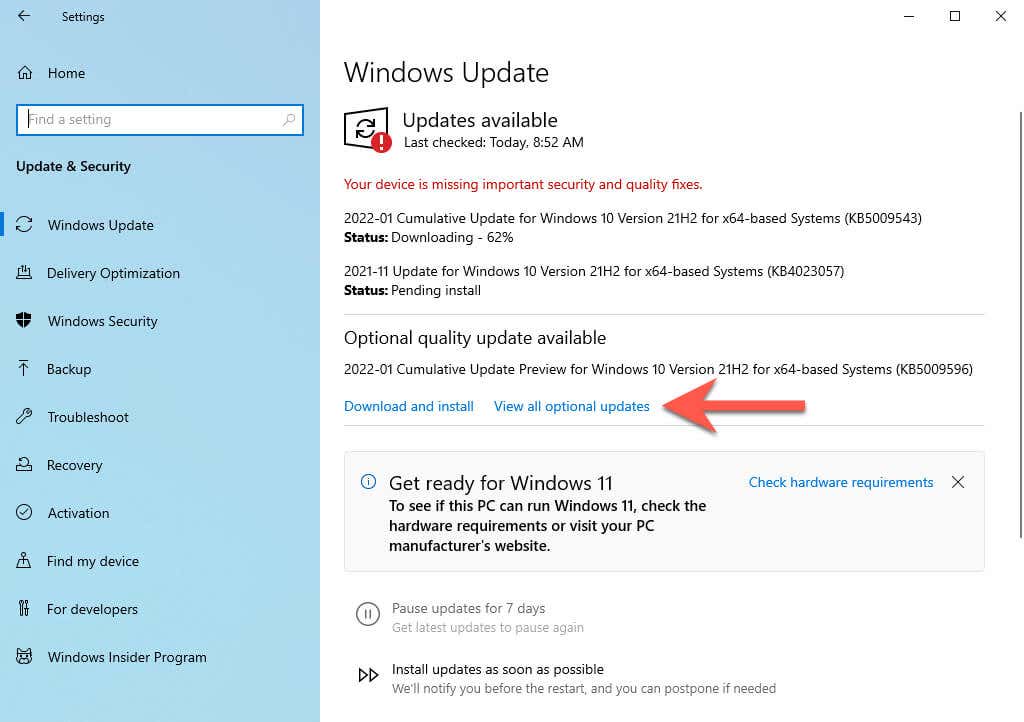
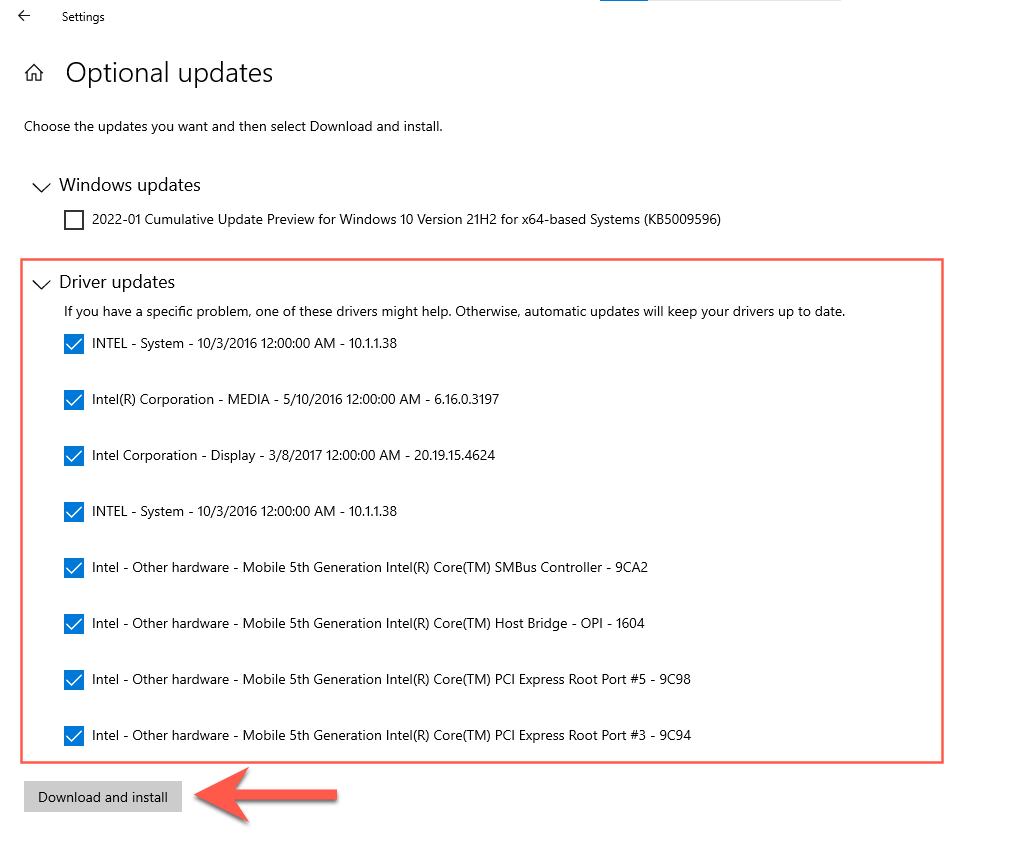
3. Expand Driver updates. Then, check the boxes next to all driver updates and select Download and install.
4. Head back to the previous screen and install the latest Windows 10 updates.
5. Select Restart now.

Download the MediaCreationTool GitHub Script
You’re now ready to make the upgrade to Windows 11. To begin, you must download MediaCreationTool (MCT) from GitHub. It’s an automated script that downloads Windows 11 from the official Microsoft servers and installs it by skipping all compatibility checks.
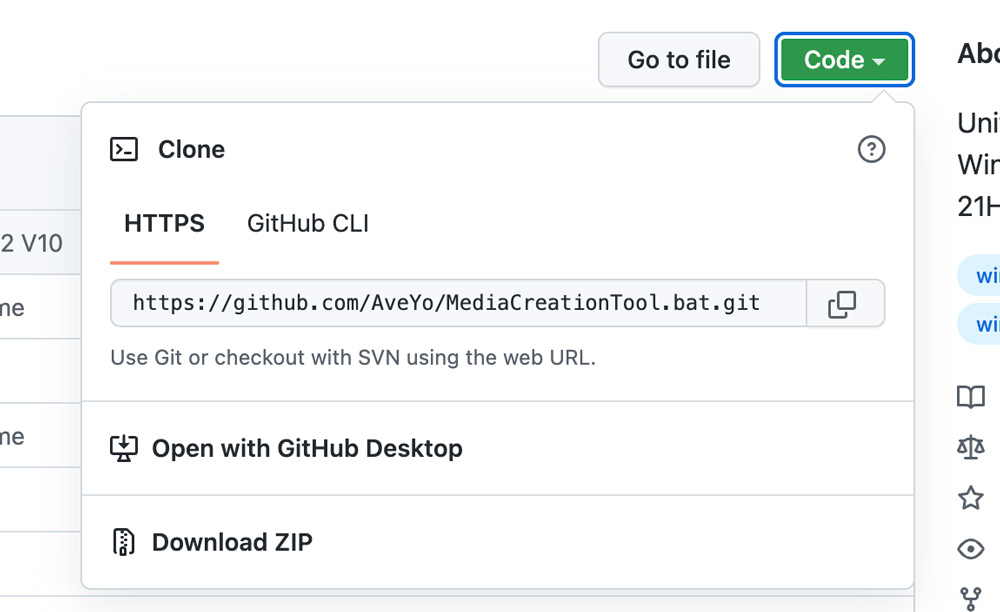
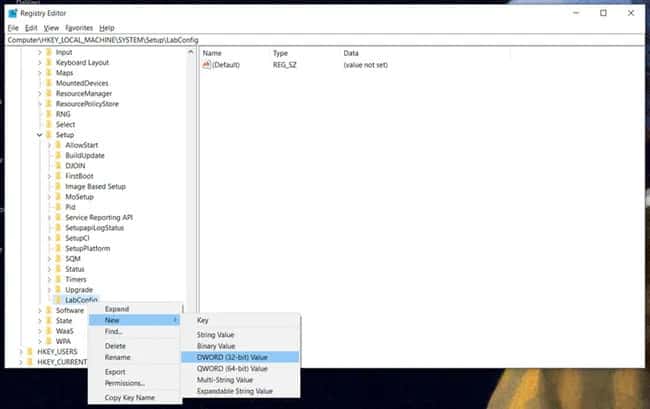
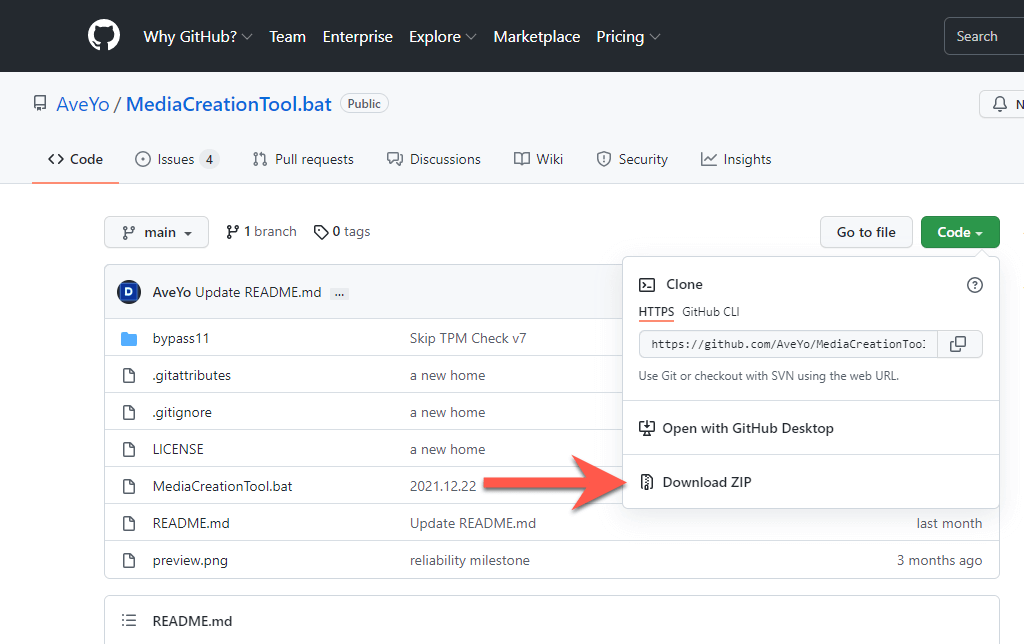
1. Open Microsoft Edge from the Windows 10 taskbar and head over to AveYo’s MediaCreationTool page on GitHub.
2. Select Code and pick the option labeled Download ZIP to download the batch script in ZIP format.
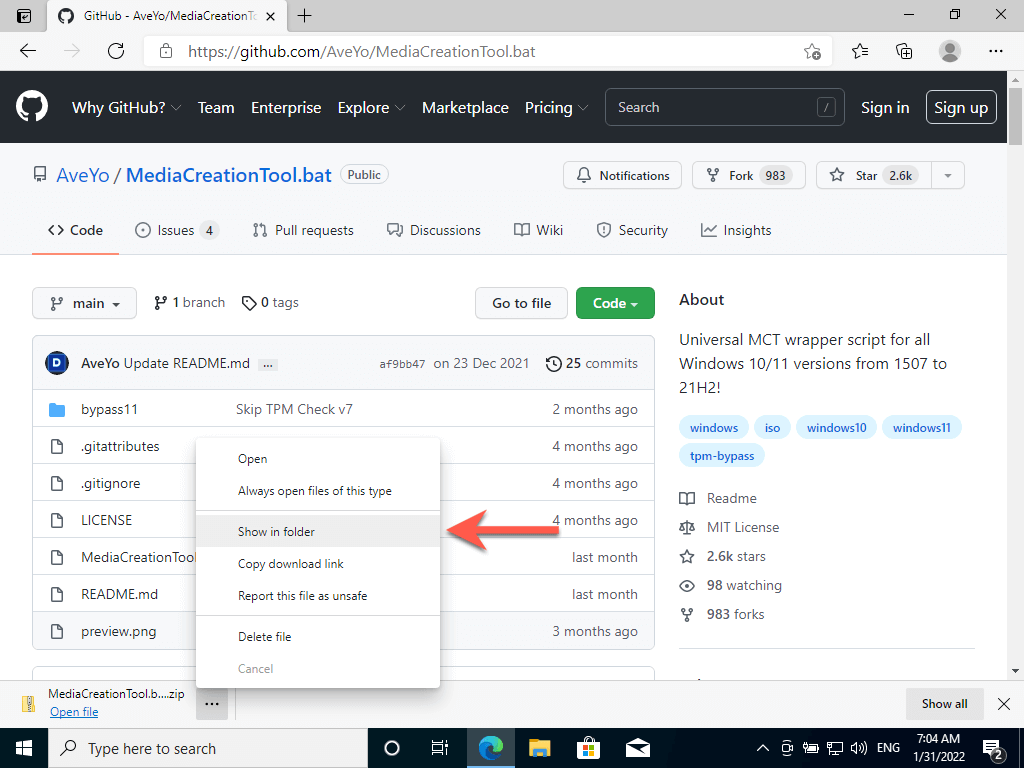
3. Select the More icon (three dots) on the download shelf and choose Show in Folder.
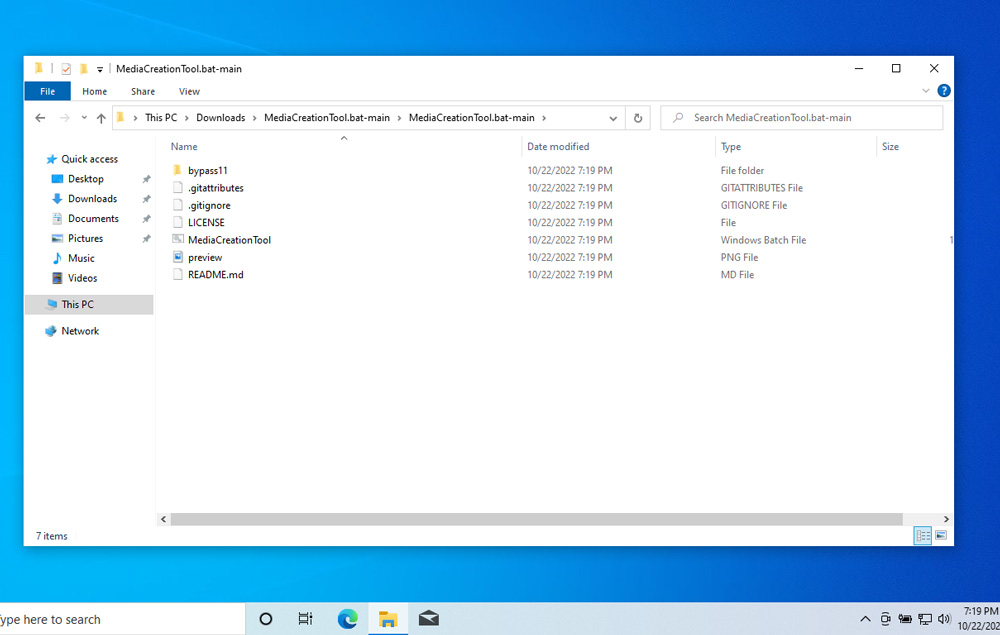
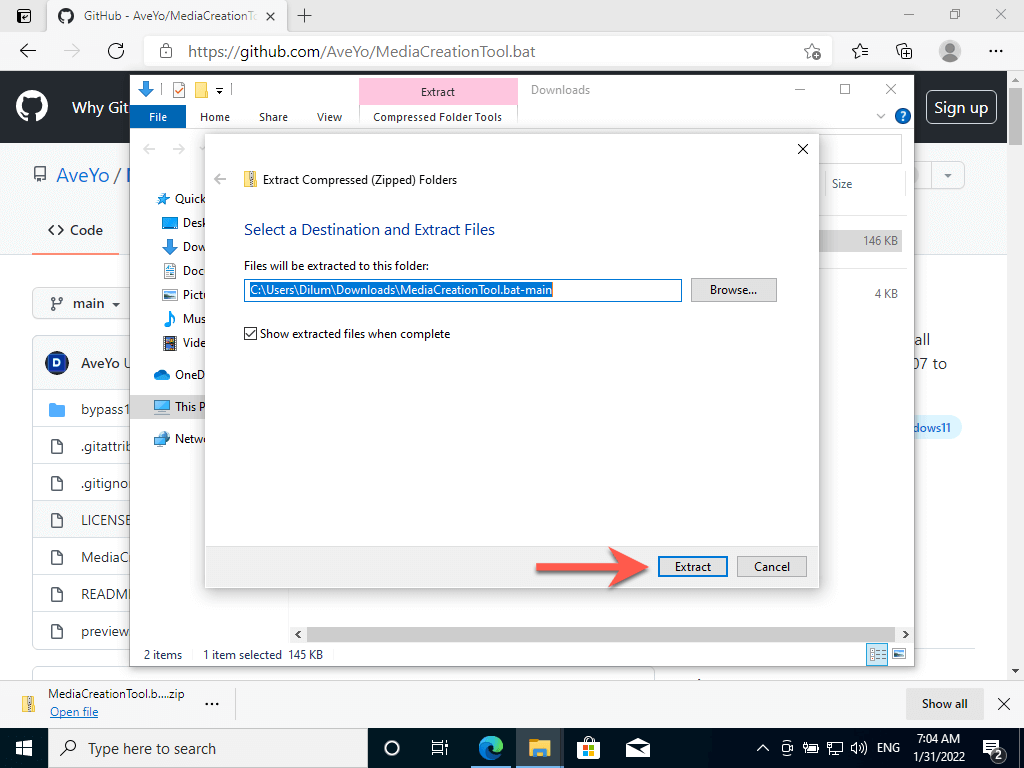
4. Right-click the downloaded ZIP file and select Extract Files. Then, choose Extract. The extracted folder will show up automatically.
Upgrade Windows 10 Installation to Windows 11
Running the batch script will upgrade Windows 10 to Windows 11. If you’re upgrading a previous Windows 10 installation, create a backup of your data before proceeding.
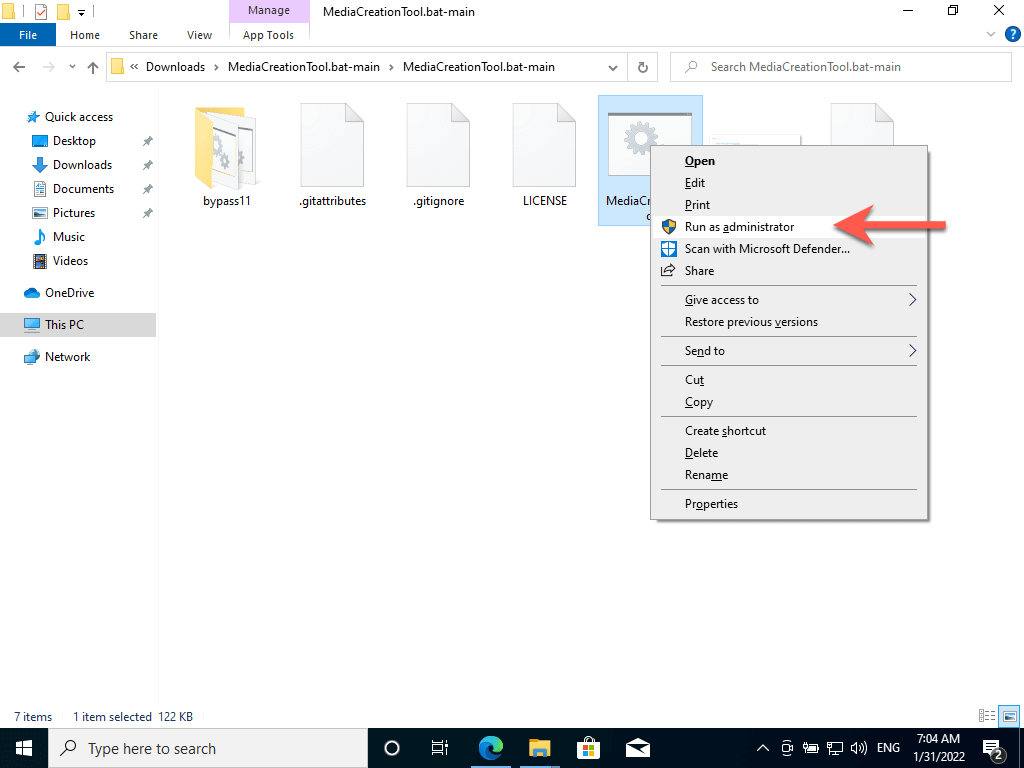
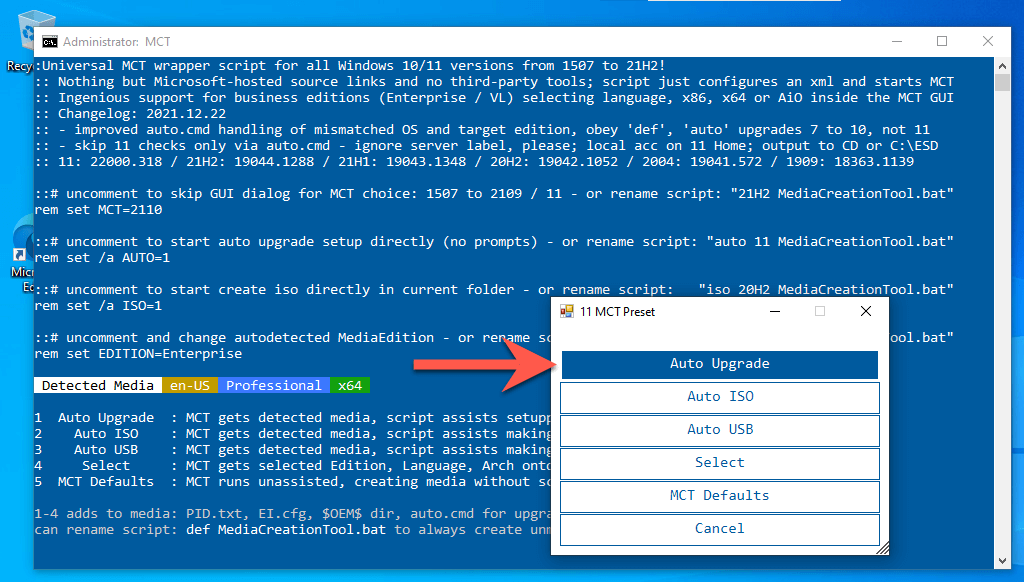
1. Right-click the MediaCreationTool.bat file and select Run as an administrator.
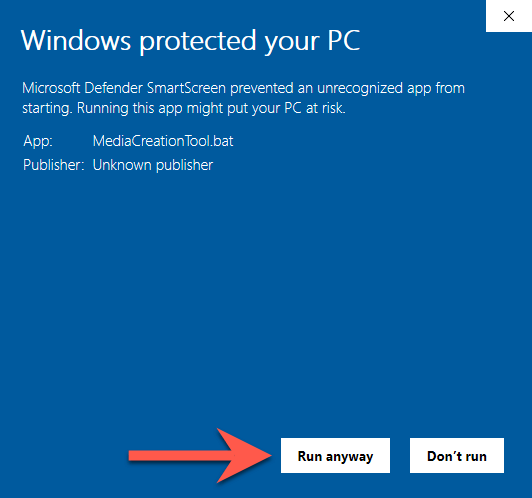
2. Select More info > Run anyway on the Windows SmartScreen pop-up.
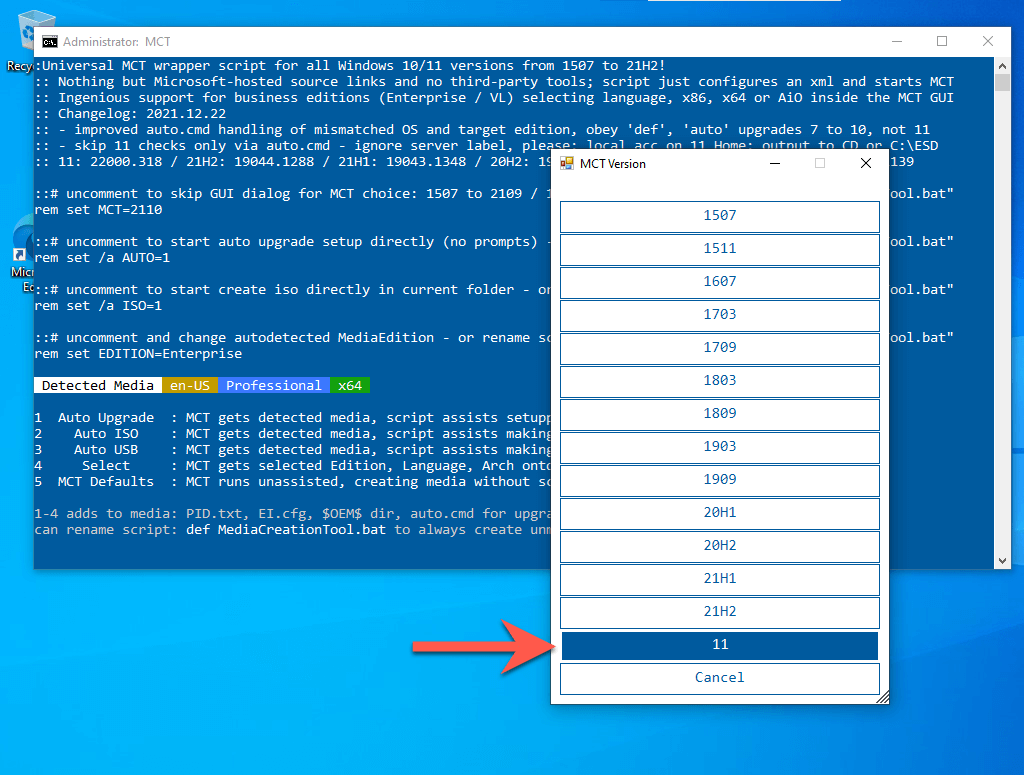
3. Select 11.
4. Select Auto Upgrade.
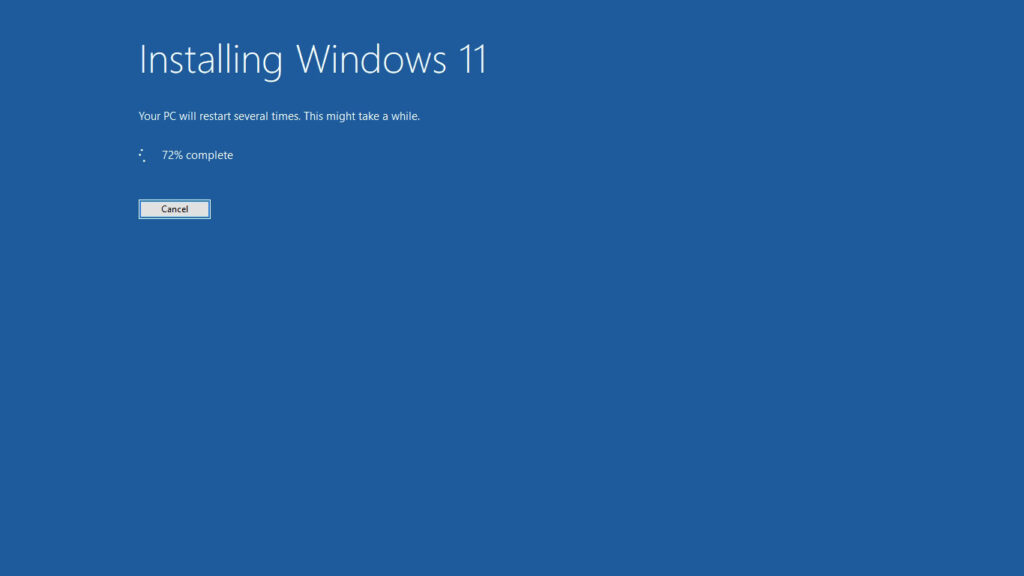
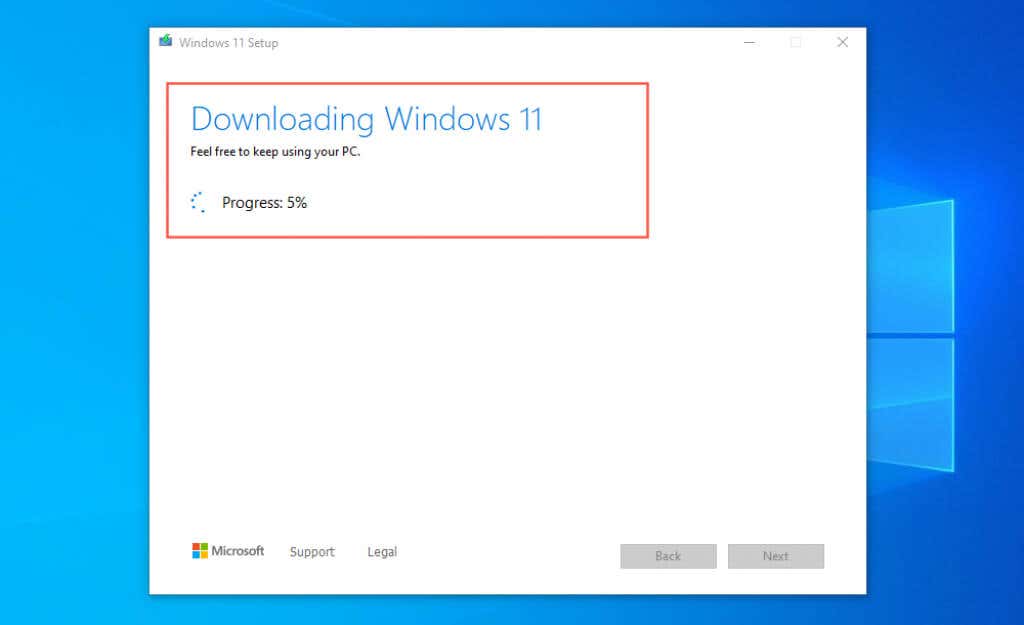
5. Wait until the MediaCreationTool script downloads Windows 11 onto your PC. You don’t have to do anything from this point onward.
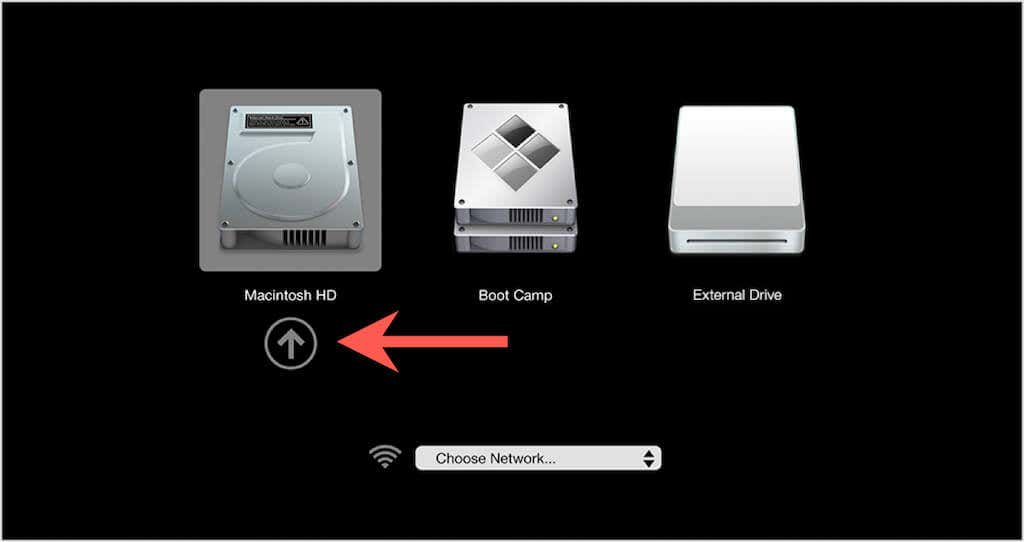
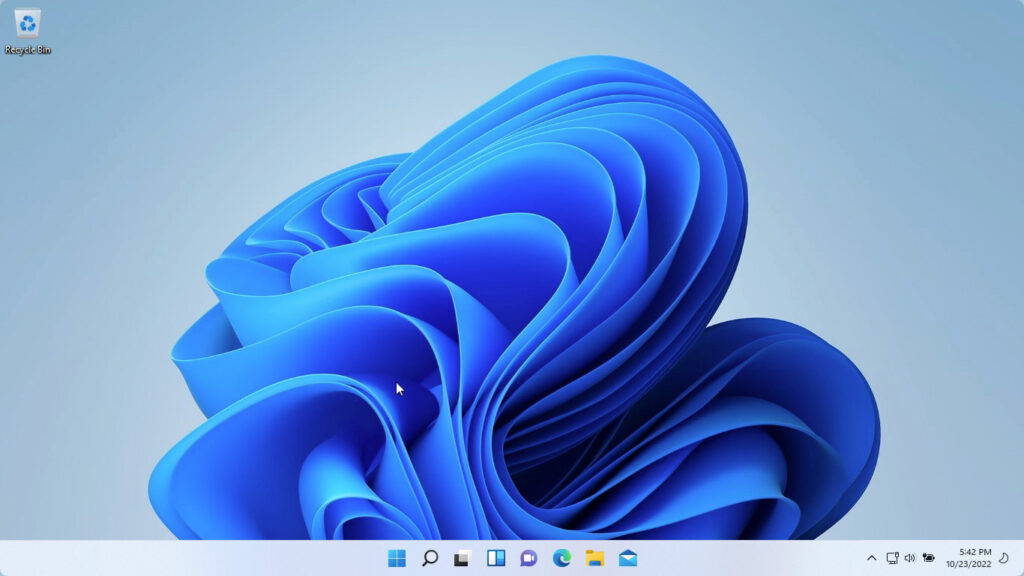
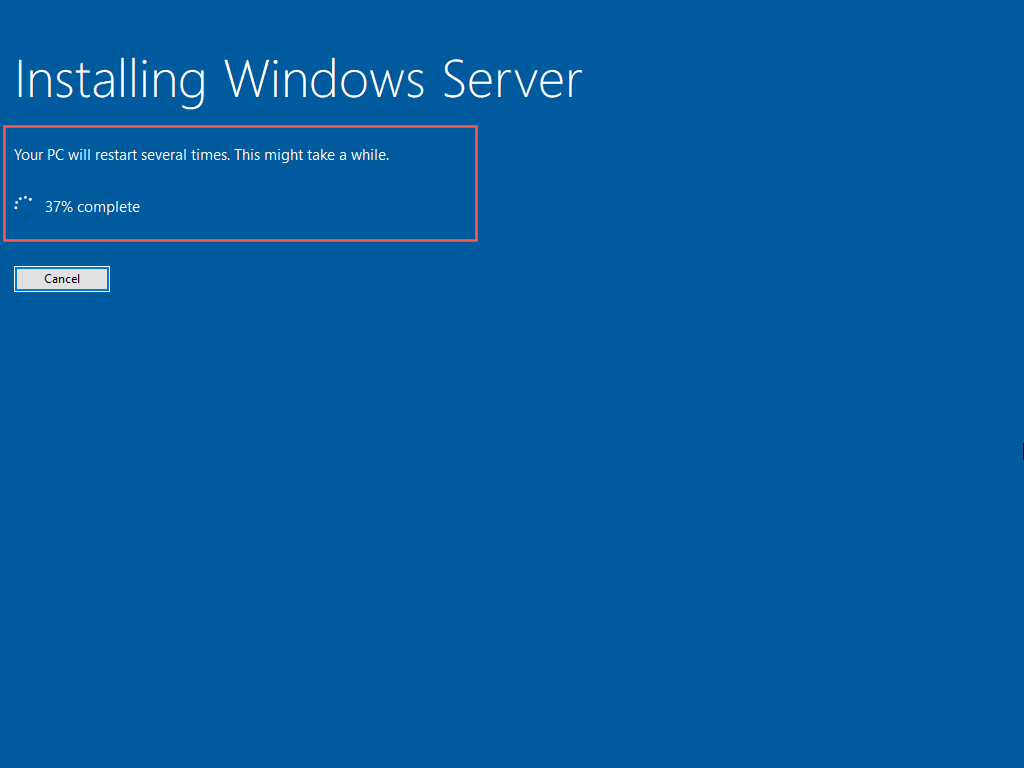
6. The MediaCreationTool will reboot your Mac and begin installing Windows 11. The procedure may take up to an hour or more to complete.
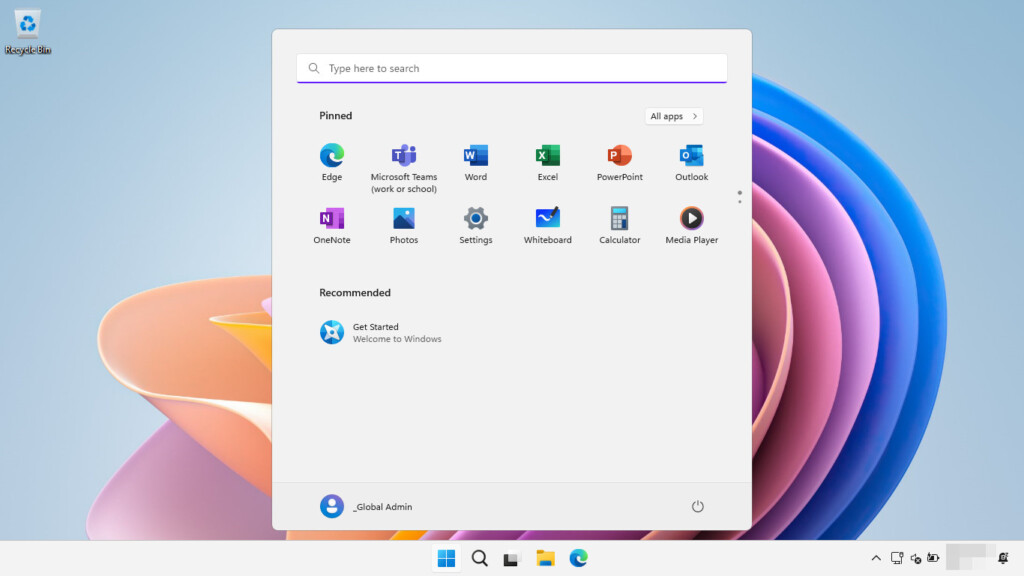
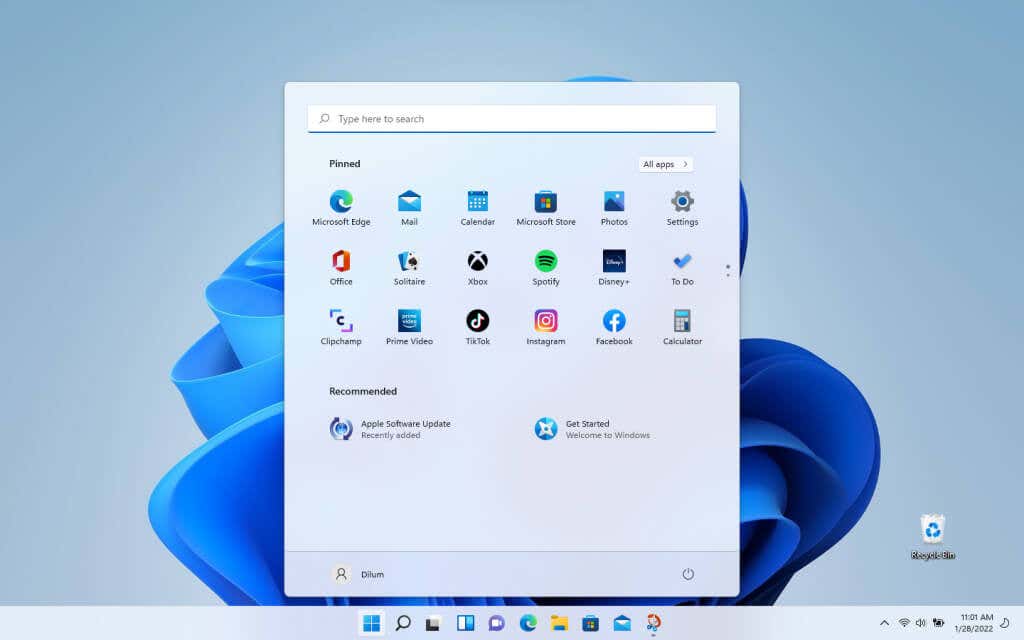
7. Your Mac will boot into the Windows 11 desktop after the upgrade. Congratulations!
Optional: Sign Into Microsoft Account
You’ve finished setting up Windows 11 on your Mac. You can begin using it immediately since you installed all drivers and updates in Windows 10.
You can also sign into Windows 11 with a Microsoft Account to unlock additional features—such as the ability to sync PC settings and download age-restricted content from the Microsoft Store—or activate Windows if it’s linked with a digital license.
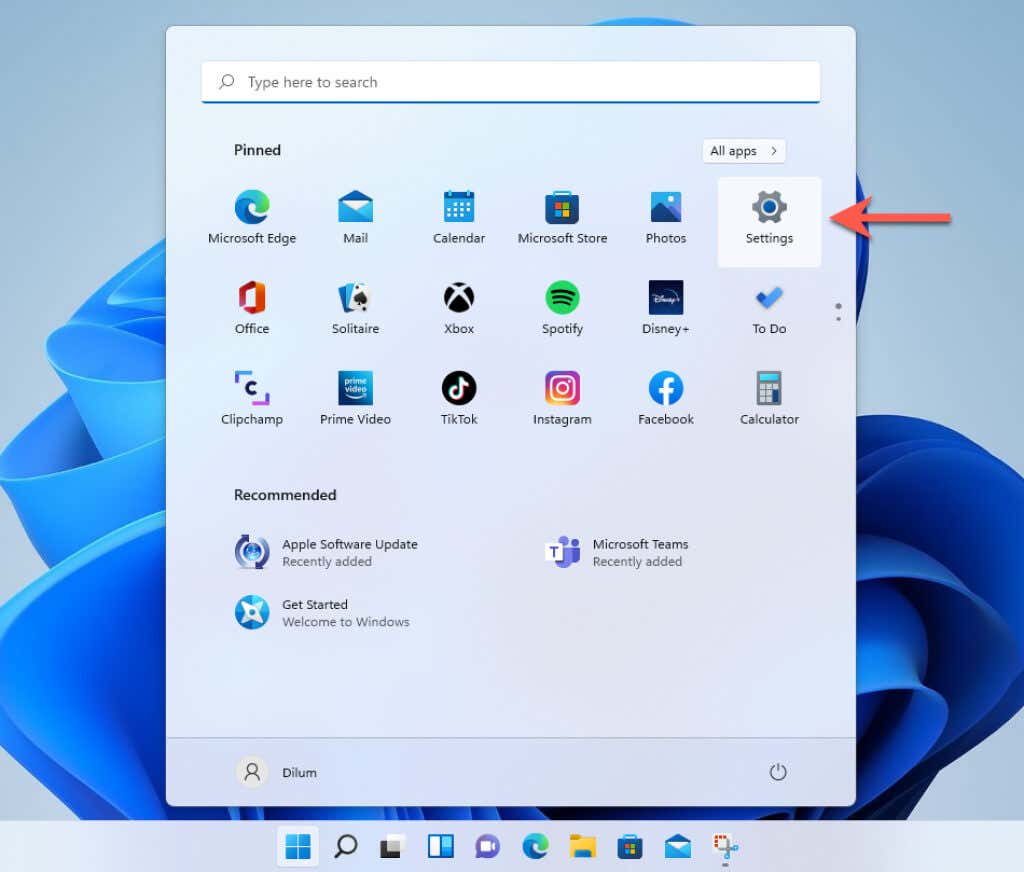
1. Open the Start menu and select Settings.
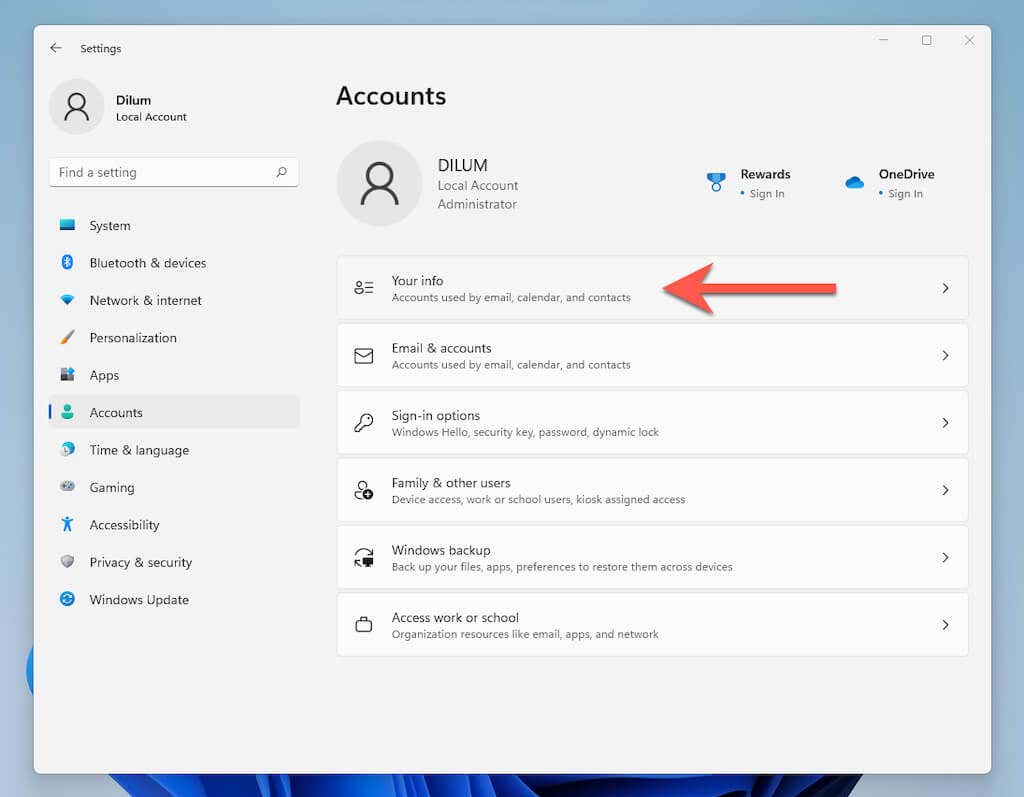
2. Select Accounts > Your info.
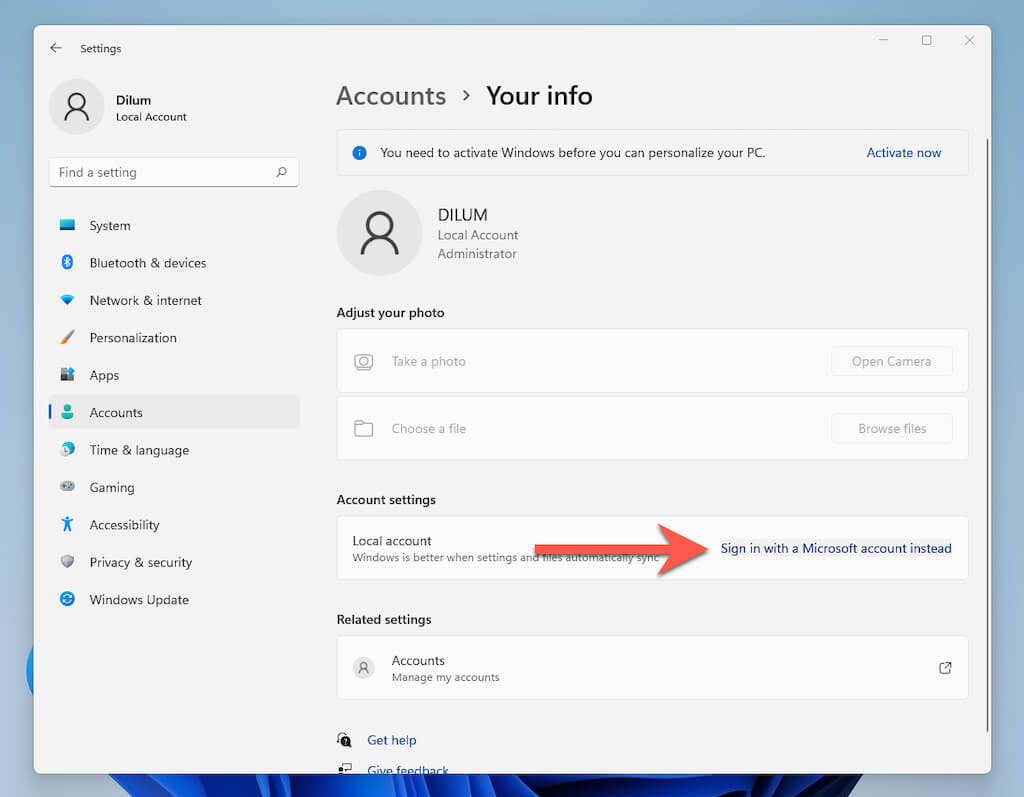
3. Select Sign in with a Microsoft Account instead.
4. Enter your Microsoft Account credentials (or choose to create one) and sign in to Windows 10.
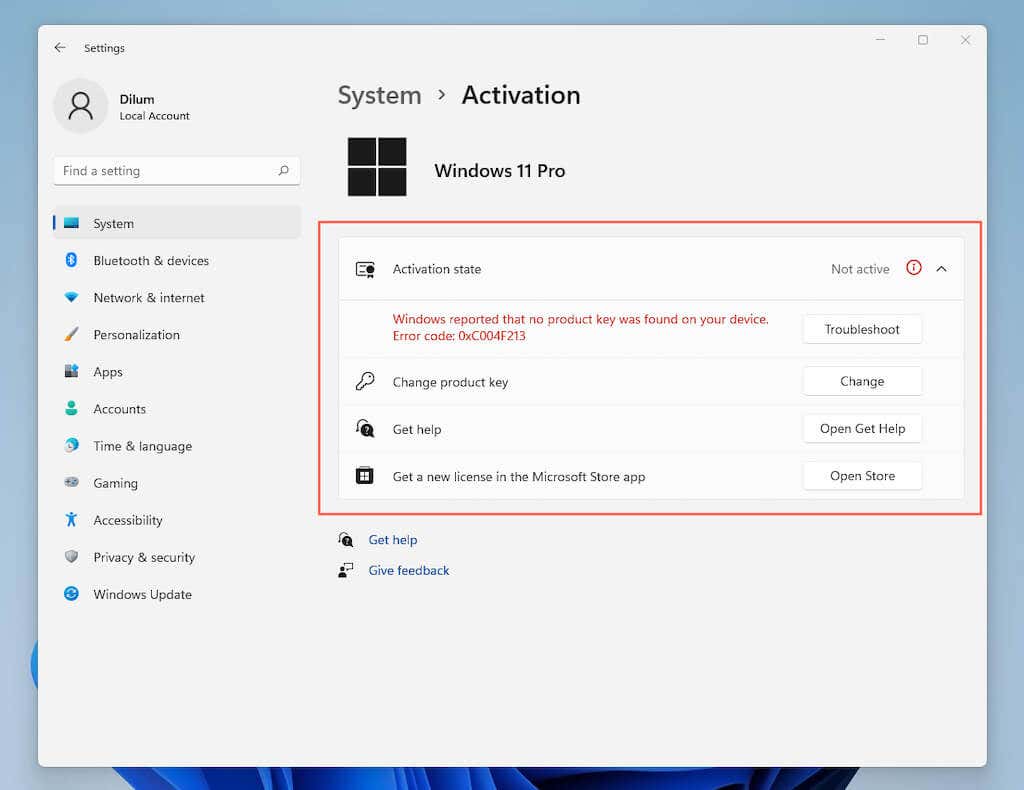
Activate Windows 11 on Mac
You don’t have to activate Windows 11 to keep using it on your Mac, but you will lose the ability to customize your desktop. Regardless, you can check your activation status and enter/purchase a product key by heading to Start > Settings >System > Activation.