
Процедура отключения шифрования BitLocker может отличаться в зависимости от того, заблокирован или разблокирован раздел в данный момент.
Способ 1: Штатный апплет
Удобнее всего для отключения шифрования БитЛокер использовать средства штатного одноименного компонента.
- Запустите апплет «Шифрование диска BitLocker», для чего выполните команду
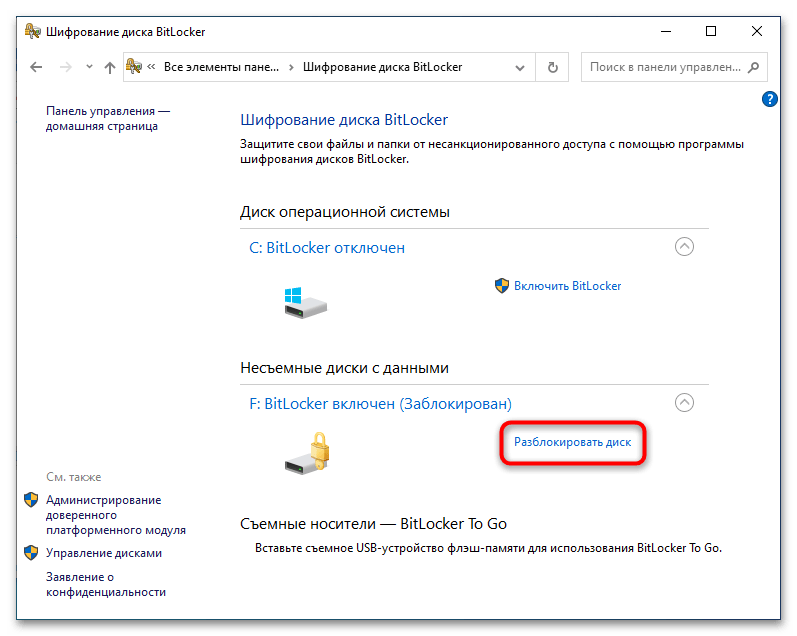
control /name Microsoft.BitLockerDriveEncryptionв вызванном нажатием клавиш Win + R диалоговом окошке быстрого запуска приложений. - Выберите зашифрованный диск. Если он заблокирован, доступна будет только одна опция – «Разблокировать диск». Кликните по ней.
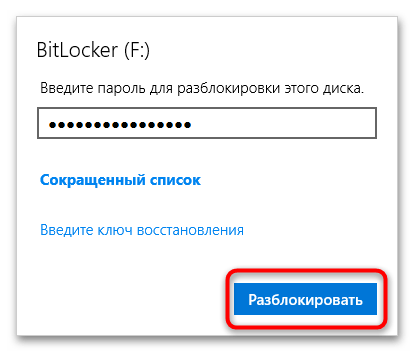
- Введите пароль БитЛокера или 48-значный код разблокировки, если пароль утерян.
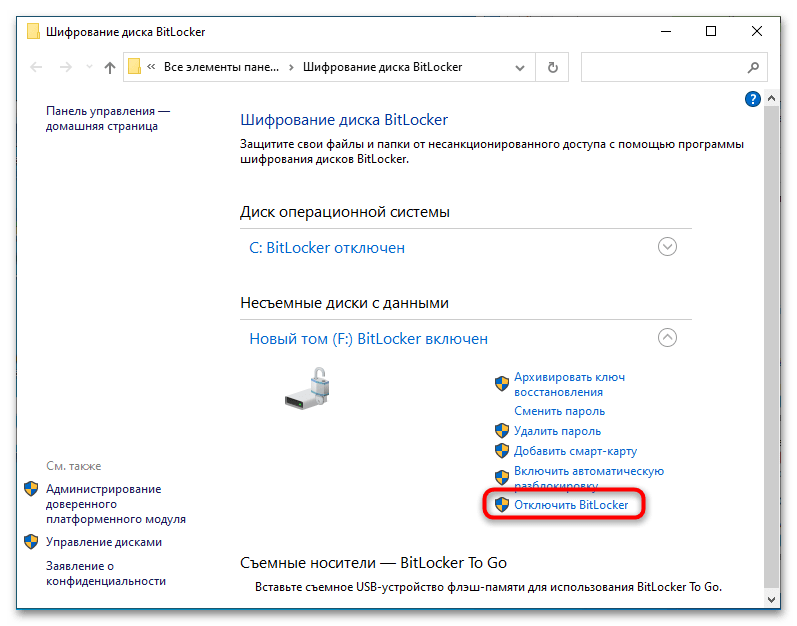
- После этого в окне апплета станут доступны и другие опции. Выберите «Отключить BitLocker» и подтвердите деактивацию функции в диалоговом окошке.

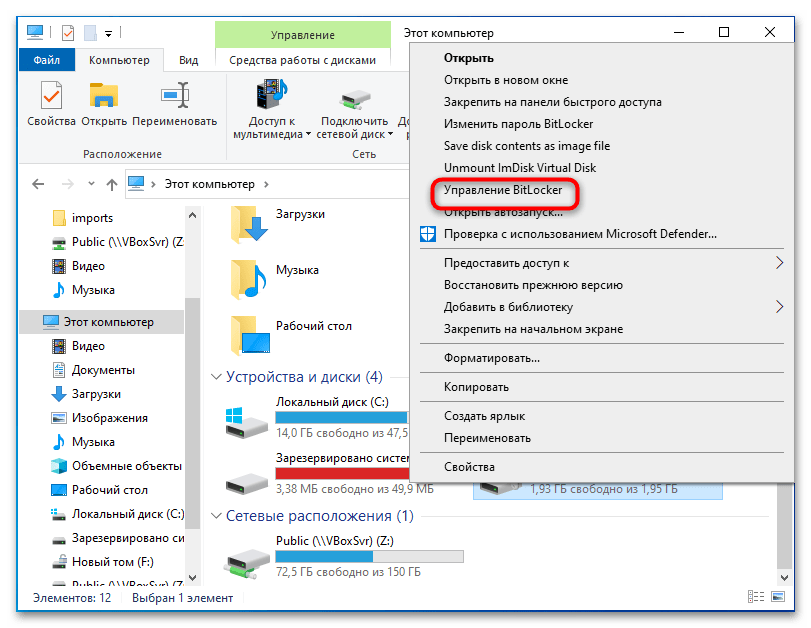
Если диск уже разблокирован, опция «Отключить BitLocker» будет доступна сразу после запуска апплета. В этом случае перейти к настройкам БитЛокера можно будет также непосредственно из контекстного меню диска.
Процедура расшифровки диска займет некоторое время. Ее продолжительность будет зависеть от объема диска, его типа (SSD или HDD), метода шифрования и количества записанных данных.
Способ 2: «Командная строка»
Для отключения шифрования БитЛокер также можно использовать средства классической «Командной строки» или «PowerShell».
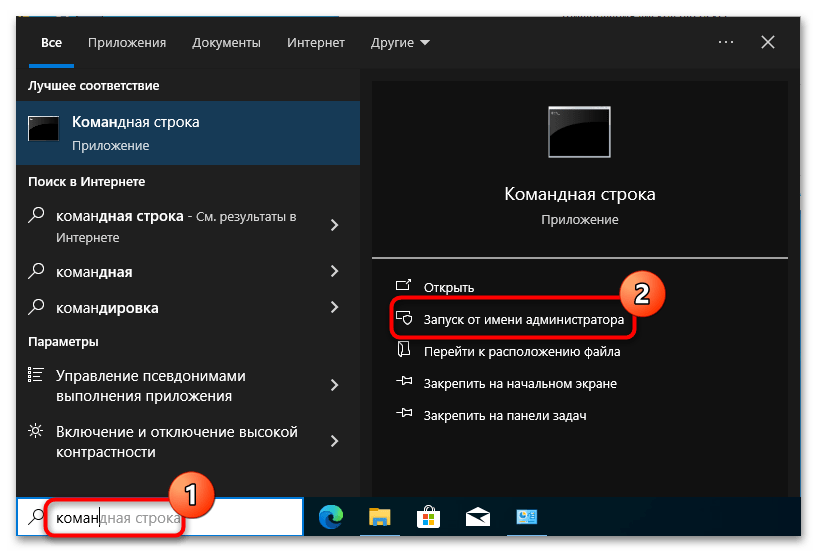
- Откройте «Командную строку» либо «PowerShell» с правами администратора из поиска Windows или другим известным способом.
- Выполните команду
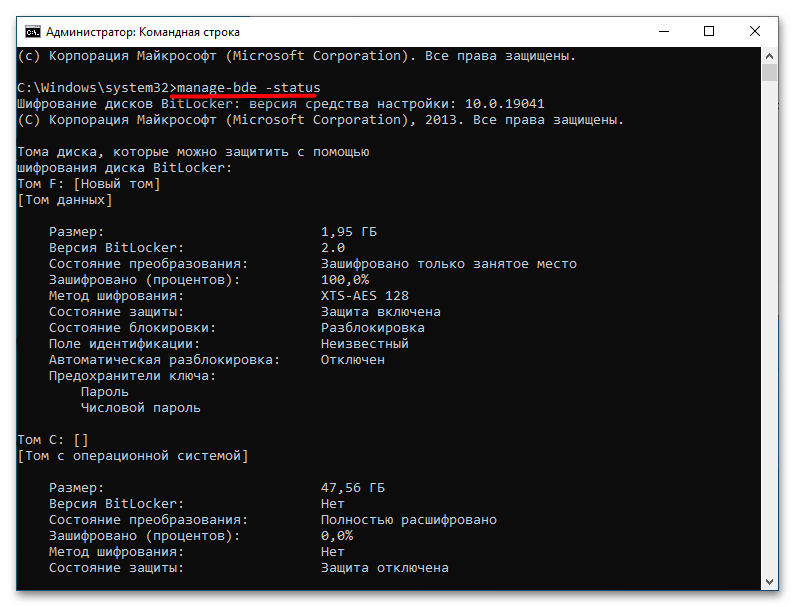
manage-bde -status, чтобы получить список всех зашифрованных томов. - Если диск заблокирован, используйте команду следующего вида:
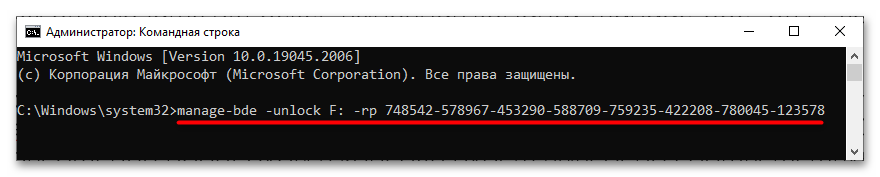
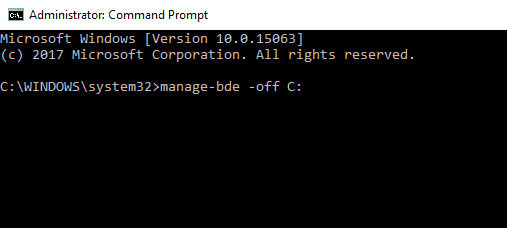
manage-bde -unlock F: -rp key, где F – это буква диска, а key – 48-значный ключ разблокировки. - Далее, чтобы отключить BitLocker, воспользуйтесь командой
manage-bde -off F:, где F – буква диска.
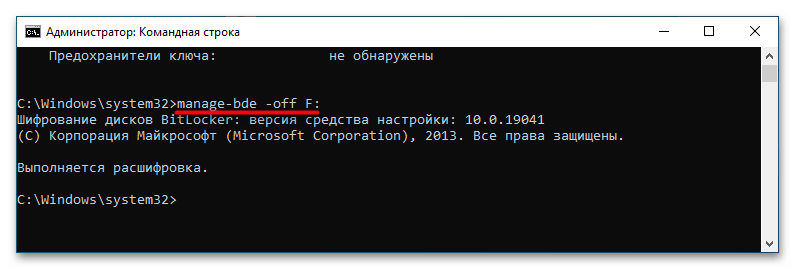
Если диск уже разблокирован, для отключения БитЛокера достаточно одной команды manage-bde -off F:. Начнется процедура расшифровки данных, которая займет некоторое время. По завершении в консоли будет выведено соответствующее уведомление.
Способ 3: «PowerShell»
С тем же успехом для отключения шифрования разделов в Windows можно использовать консоль «PowerShell». Ниже приведен способ отключения шифрования для уже разблокированного диска.
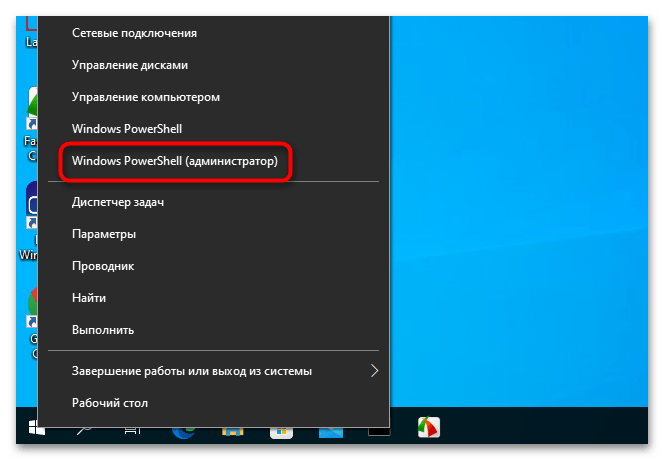
- Запустите «PowerShell» с правами администратора из контекстного меню кнопки «Пуск».
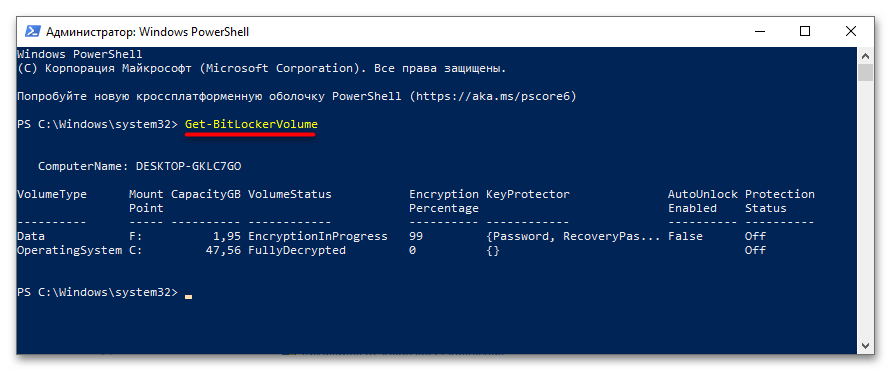
- Получите список дисков с указанием их статуса шифрования, для чего введите команду
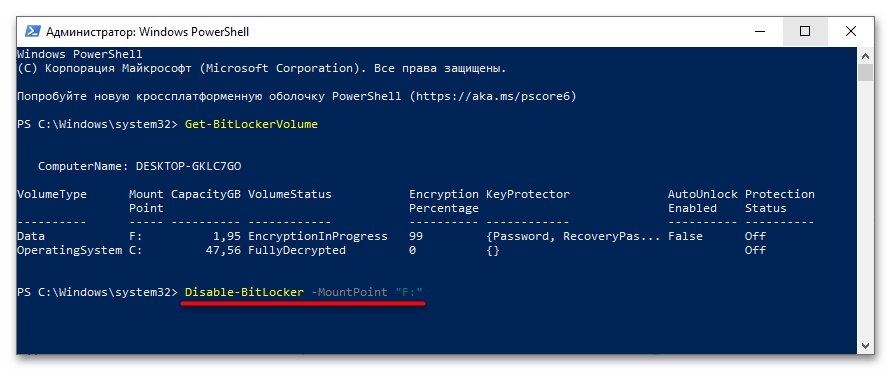
Get-BitLockerVolume. - Чтобы отключить шифрование выбранного раздела, выполните команду
Disable-BitLocker -MountPoint "F:", где F – его буква. Подтвердите действие вводом Y и нажатием клавиши Enter.
Если диск заблокирован, используйте для его разблокировки те же команды, что и в Способе 2. Как и в приведенных выше примерах, на расшифровку данных потребуется некоторое время.
Наша группа в TelegramПолезные советы и помощь
Updated on Apr 28, 2025
BitLocker is a built-in encryption feature in Windows that protects data by encrypting entire volumes. Users may choose to turn off BitLocker encryption due to system performance maintenance, software compatibility issues, or operational flexibility. In this article, EaseUS will discuss disabling Bitlocker encryption using the Command Prompt (CMD). Additionally, we will introduce an easy alternative tool — EaseUS Partition Master — to help novices and beginners smoothly turn off Bitlocker encryption.
| Comparison | One-click to Disable Bitlocker | Disable Bitlocker Manually |
|---|---|---|
| 🛠️Tool |
EaseUS Partition Master |
Command Prompt |
| ⏱️Time duration | About 1 minute | About 10 minutes |
| 🧩Complexity | Easy👍🏻 | Difficult |
| 🪜Features |
|
|
Free Alternative to Turn Off Bitlocker
While using CMD is effective, some users may prefer a more intuitive method without needing to remember commands or navigate through technical settings. EaseUS Partition Master Free offers an excellent alternative for managing disk partitions and disabling BitLocker with ease. It simplifies not only disabling BitLocker but also offers various disk management functionalities that enhance the overall user experience.
Step 1. Open EaseUS Partition Master and right-click on the BitLocker-encrypted drive.
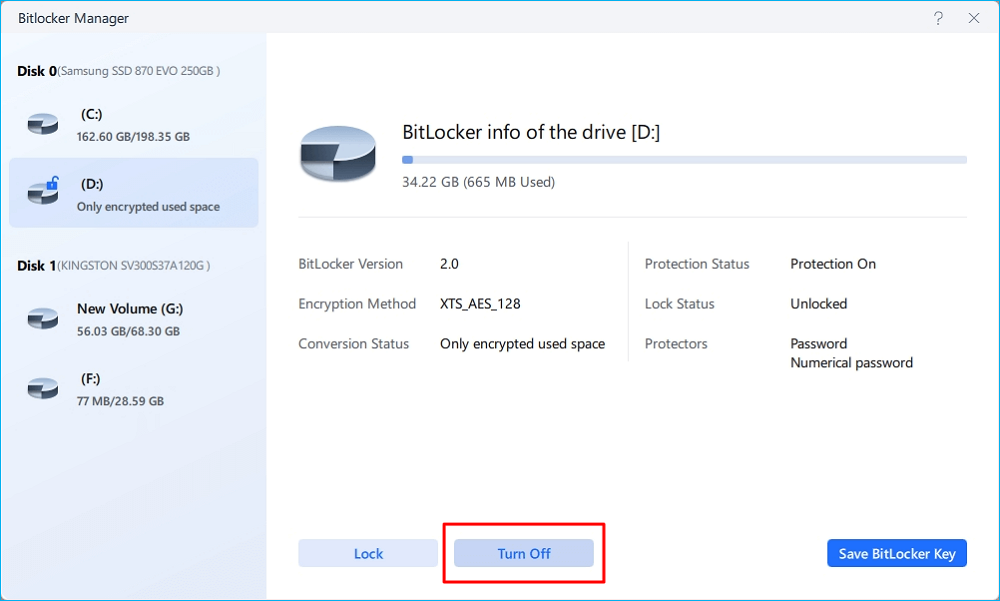
Step 2. Select «BitLocker Manager,» and you will see a new window that allows you to perform BitLocker-relevant ops.

Step 3. Click on «Turn Off» for your target drive and wait patiently till it’s done.
Other Prominent Features of EaseUS Partition Master
- Remove BitLocker from the external hard drive
- Solve no option to turn off BitLocker Windows 11
- Unlock the BitLocker drive Without a Recovery Key and Password
Now, install this tool and effectively manage your Bitlocker:
The new release of this tool is coming soon, which enables users to turn off and manage the Bitlocker encryption for free. Learn more at:
How to Disable Bitlocker Using Command Line
If you need to disable BitLocker, running CMD is a common option. However, it requires administrative privileges and a higher skill level. Before jumping into the specific steps, you should pay attention to:
- Backup Your Data: Before disabling BitLocker, ensure you have backed up your important data.
- Security Risks: Disabling BitLocker exposes your data to potential unauthorized access. Ensure that your system is secure before proceeding with this operation.
Stick to the guide below and be careful when typing commands:
Option 1. Manage CMD
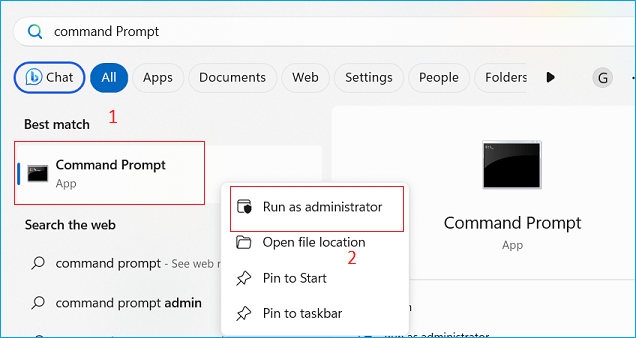
Step 1. In the Windows Search box, type cmd or Command Prompt.
Step 2. Right-click on Command Prompt and select Run as administrator.
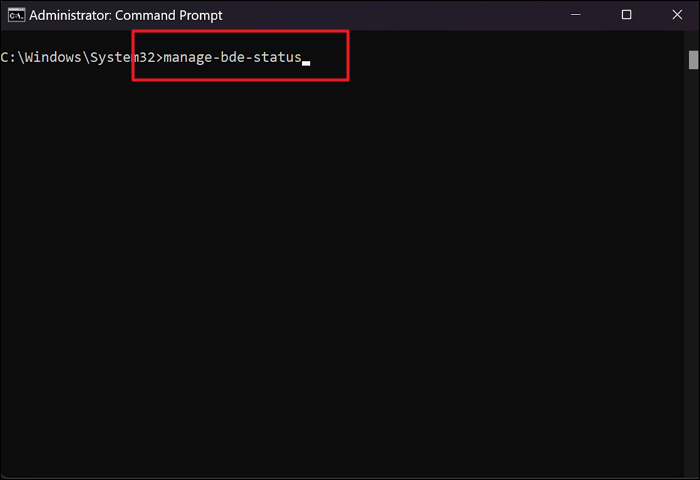
Step 3. Before turning off BitLocker, you can check its status by typing the command and hit «Enter»:
- manage-bde -status
Step 4. If your Bitlocker is turn on, use this command and press «Enter» to disable it:
manage-bde -off X(Replace X with your drive letter)

Step 5. Verify the Bitlocker encryption using the manage-bde -status command again. You should see that the encryption status for the specified drive is now marked as «Fully decrypted.»
Option 2. Format CMD
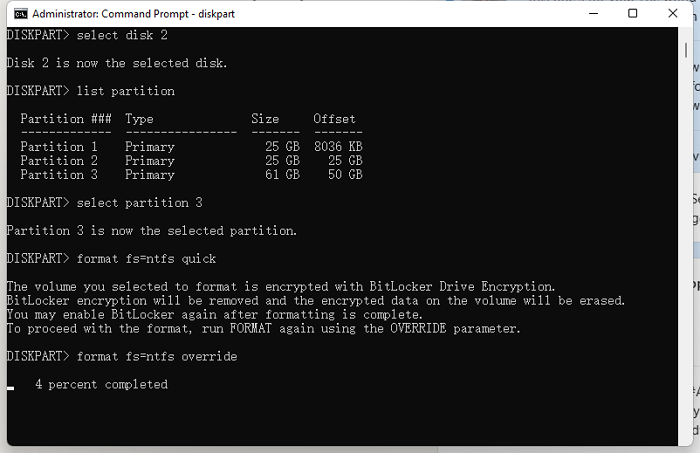
Step 1. Run Command Prompt as administrator.
Step 2. Type diskpart > list disk > select disk > list partition > select partition > format fs=ntfs quick
(you can replace NTFS with other file system)
Conclusion
While it provides robust security for protecting sensitive data, disabling Bitlocker encryption can be necessary in certain situations. Using the Command Prompt is one way to accomplish this task. However, if you are looking for a solid alternative tool to turn off Bitlocker encryption, EaseUS Partition Master Free easily is a great option. With its user-friendly interface and comprehensive disk management features, EaseUS Partition Master Free makes it easy to disable Bitlocker encryption on your computer. Try it today and make managing your hard drives and partitions a breeze.
FAQs of How to Disable Bitlocker Encryption in CMD
1. How do I disable BitLocker in BIOS?
To disable BitLocker in BIOS, follow these steps:
- Power off your computer and then turn it back on.
- As the manufacturer’s logo appears, press the appropriate key (often F1, F2, F10, or Del) to enter the BIOS setup.
- Use the arrow keys to find the «Security» menu.
- Locate the option «BitLocker Drive Encryption.»
- Select this option and choose «Suspend Protection» to disable BitLocker temporarily.
2. Is Bitlocker safe to use?
BitLocker is generally considered a safe and robust encryption solution for protecting data on Windows devices. Here are some key points regarding its safety:
- Strong Encryption: BitLocker uses advanced encryption standards (AES) with either 128-bit or 256-bit keys, making it difficult for unauthorized users to access encrypted data without the proper credentials.
- TPM Dependency: BitLocker relies on a Trusted Platform Module (TPM) for secure key storage. While this enhances security, it can also introduce vulnerabilities if the TPM is compromised.
3. How do you check BitLocker status in Windows 11?
To check the status of BitLocker in Windows 11, follow these steps:
- Click on the Start Menu and select Settings.
- In the left sidebar, select Privacy & security.
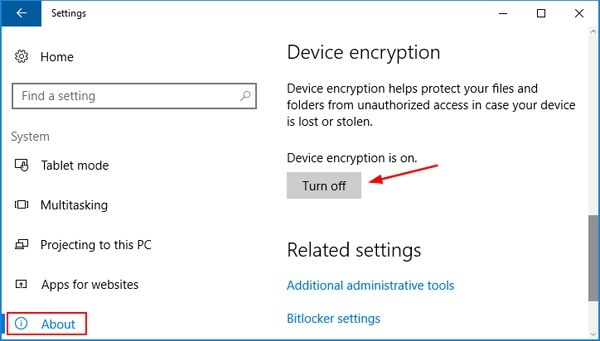
- Scroll down and find the Device encryption option. If you do not see this option, your device may not support it or enable it.
- Here, you can see if BitLocker is turned on or off for your device.
Alternatively, you can use Command Prompt to check the status:
- Open Command Prompt as an administrator.
- Type the following command: manage-bde -status (This command will display detailed information about all drives and their encryption status)
BitLocker is a Windows security program that comes pre-installed on Windows Vista and later Windows versions. It encrypts a drive and you have to input a password to access files therein. One of the major pitfalls of BitLocker is that a drive encrypted in Windows 7 is incompatible with Windows 8.1 and cannot be used. Here is how to turn off BitLocker in Windows 10/8/7.
Switching off BitLocker can circumvent drive encryption problems and allow access to previously locked data. Here are two methods on how to disable BitLocker on Windows 10.
Disable from Control Panel
If you can remember your BitLocker password, you can disable it from the Control Panel. Follow these steps.
- 1. Open the Start menu. In the Cortana search box, enter Manage BitLocker and click Manage BitLocker to open the program.
- 2. On the BitLocker window, the hard drive partitions are displayed with the option to disable or suspend the feature.
Unlock using Command Prompt
It is possible to remove BitLocker encryption in Windows 10 using command prompt. Here are the steps;
- 1. Press Windows key + X and select Command Prompt (Admin) from the menu.
- 2. Once in the Command Prompt window, enter the text manage-bde –off X: and hit Enter to run the command.
- 3. Wait for the process to finish.
Part 2: Disable BitLocker on Windows 8 and 8.1
Are you stuck on how to turn off BitLocker drive encryption on Windows 8/ 8.1? The processes described for Windows 10 are very similar to those for Windows 8.
Disable from Control Panel
Use Windows PowerShell
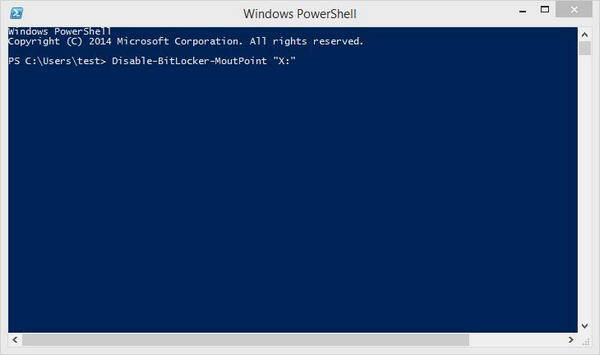
- 1. From the Start menu, search for power shell or press Windows key + S. Right-click and choose Run as administrator.
- 2. In the Windows PowerShell window, type the following command: Disable-BitLocker –MountPoint “X:” and press Enter to run the command.
- 3. Wait a few minutes for the process to complete.
Part 3: BitLocker Deactivation on Windows 7
You can disable Bitlocker on your Windows 7 drive before moving it to a Windows 8 PC or for any other reason. Follow these steps to disable BitLocker drive encryption service on Window 7 and access a locked drive.
Control Panel Method
- 1. Tap the Start button and select Control Panel from the menu.
- 2. Open the BitLocker Drive Encryption or locate it under System and Security.
- 3. All the hard disk drives will be listed. Choose the one that has BitLocker enabled and select Turn Off Bitlocker.
- 4. Click Decrypt Drive on the pop-up window and wait for the process to finish.
Disable BitLocker Service
- 1. Use the Windows + R shortcut to open the Run window.
- 2. Type in services.msc and click OK to run.
- 3. On the services window, look for BitLocker Drive Encryption Service and double click.
- 4. On the next window, click the drop-down menu and set Startup Type as disabled.
- 5. Click OK and apply the changes and completely remove BitLocker on Windows 7.
Dealing with Lost Windows Password
Now you should be able to turn off BitLocker by using one of mentioned solutions. In terms of password protection, if losing your Windows login password and become unable to access the computer, majority of users will reset their PC or use a recovery disc at this point. However, there is another option. Windows Password Recovery Tool is a remarkable tool used to reset or recover forgotten Windows 10/8/7 password.
Here to check how to remove password from Windows PC.
Free Try Windows Password Recovery Tool
World’s 1st Windows Password Recovery Software to Reset Windows Administrator & User Password.
Free Download
Free Download
BitLocker is a built-in tool in Windows used to encrypt your data and keep it secure. We have already discussed how to enable, disable, and manage BitLocker using the Graphical User Interface (GUI) in Windows. In this post, we shall be discussing how you can achieve the same using just the Command Line Interface (CLI).
Table of Contents
There are many options that the command line offers while managing BitLocker which the BitLocker Drive Encryption manager (in the Control Panel) does not offer. Therefore, managing BitLocker using Command Prompt can prove useful, especially for system administrators.
This post discusses how you can enable and disable BitLocker encryption on the operating system (boot) drives as well as fixed drives, set passwords, and create a USB Recovery Key for unlocking. All this is done using the manage-bde.exe command-line tool designed to manage BitLocker on the local machine.
Note that all commands in this post are executed in Command Prompt with elevated privileges, unless told otherwise.
How to Check BitLocker Encryption Status using Command Line
We will start by checking the current status of BitLocker, where we will get its version, encryption state, percentage of the partition encrypted (if any), and whether the volume is currently locked or unlocked.
To know the current encryption status for all volumes on the device, paste the following command in Command Prompt:
manage-bde -status
You will now see the status of each volume on your computer, as in the image below.
 1")
You can now continue to the steps below to enable and manage your BitLocker encryption.
How to Enable BitLocker using Command Line
There are 2 types of volume partition on a computer: a volume that contains the operating system (usually labeled C:) and the non-boot drives/volumes. When configuring BitLocker on a boot drive, you do not need to enable the auto-unlocking feature as it unlocks automatically using either the Recovery Key or the pre-boot password.
Whereas in the case of a non-boot drive, the auto-unlocking feature can be enabled (but is not mandatory) so you do not have to unlock it separately after you have logged into your system. This is discussed in detail further down the article.
Furthermore, you can choose whether to unlock BitLocker encryption using just the Recovery Key (can also be saved on a USB flash drive to be used as a key), or configure a PIN/password, or use both.
Enable BitLocker with Only Recovery Key
If you want to use only the Recovery Key, you need a secondary partition (which is not locked) where you can store the Recovery Key having the .bek file extension. You can also use a USB flash drive to store that key, which will then act as the unlocking key for your PC.
The complete syntax for enabling BitLocker is as follows:
manage-bde -on c:
In the command above, we have enabled BitLocker on volume label C.
However, this can be combined with certain parameters that will generate a random 48-digit Recovery Key and store it to a location of our choice. In the example below, the command will enable BitLocker on the C drive, create a random Recovery Key, and save it to the D drive:
manage-bde -on c: -recoverykey d: -recoverypassword
 2")
Since the Recovery Key is a hidden file, you will not be able to see it using the default File Explorer settings. So do not worry if you are unable to find the Recovery Key in the USB drive or any volume for that matter.
The system now needs to run a hardware test to start the encryption process. Restart the computer using the following command:
shutdown /r /t 1
This will reboot your computer after one second. When it boots up again, keep the USB/volume connected to your system to unlock the OS drive. When you log in, you can see that your OS drive is being encrypted.
 3")
Enable BitLocker with PIN Authentication and Recovery Key
You can also set a PIN or a password on your drive to unlock it with or without a Recovery Key. We must warn you that in case you lose or forget your PIN/password and do not create a Recovery Key, accessing/recovering the encrypted data would be very difficult.
Before we proceed with configuring BitLocker with a PIN or a password, we must enable pre-boot password and Personal Identification Number (PIN) support for BitLocker.
The process of enabling PIN authentication requires the configuration of a Group Policy which we have discussed here. You may click this link to learn how to configure it using the Windows GUI.
Alternatively, you may download and execute the Windows Registry file (valid for Windows 10 and Windows 11) to automate the process for you given below. Here is how to run the .reg file successfully:
Wrongful manipulation of the Windows Registry can cause harm to your operating system. Therefore, we recommend that you create a system restore point before proceeding forward.
- Download the compressed file by clicking on the given link:
Enable Pin for Bitlocker (Registry) (unknown, 1,578 hits)
- Right-click on the downloaded file and extract it.
 5")
- Now navigate to the extracted folder and double-click the EnablePinForBitLocker file to run it.
- On the UAC prompt, click Yes.
 6")
- On the confirmation dialog box, click Yes again.
 7")
- On the next popup, click Ok.
 8")
- Now restart your computer for the changes to take effect.
 5")
 6")
 7")
 8")
After the computer reboots, you may proceed to configure BitLocker with only a PIN or password authentication. Enter the following command while replacing “C:” with the letter of the drive that you want to encrypt.
manage-bde -protectors -add C: -pw
 9")
You will now need to enter the password that you want to set and then reconfirm it. Press Enter each time after entering the password. If added successfully, you will see the message “Key protectors added.”
 10")
Now use the following command to enable BitLocker on the drive while saving the Recovery Key in another volume, just as we did in the previous section of this article:
manage-bde -on c: -recoverykey d: -recoverypassword
 11")
Note: You can also use only the first half of the command above (manage-bde -on c:) to enable BitLocker but not create a Recovery Key.
Now restart your computer using the command below.
shutdown /r /t 1
As the computer reboots, you will be asked to enter the PIN/password (if the OS drive has been encrypted). Enter your credentials to unlock the drive and boot in.
 12")
When you log in, you can see that the remainder of your volume is being encrypted. Allow the process to be completed.
 13")
How to Enable BitLocker Auto-Unlock Feature using Command Line
If you have enabled BitLocker on non-OS volume(s), then those will need to be unlocked manually after you have logged into your system, unless the auto-unlock feature is enabled. If not, you will see the volume locked, as in the image below, and will need to either provide the Recovery Key or enter the PIN/Password when trying to access it.
 14")
The auto-unlock feature will only unlock the non-OS drives automatically if the OS drive is initially unlocked using the BitLocker PIN/password or the Recovery Key.
Follow the steps below to enable BitLocker while configuring the auto-unlock feature on a volume:
Note that this feature does not need to be enabled on boot drives as they are automatically unlocked when the credentials are provided as the system is booting.
- Start by downloading the .reg file, extract it, and then run it.
Enable Pin for Bitlocker (Registry) (unknown, 1,578 hits)
- Now open Command Prompt with administrative privileges and use the following command to configure a PIN or a password. Replace “D:” with the drive letter of the volume that you want to encrypt:
manage-bde -protectors -add D: pw 16")
- Then enter your password and reconfirm it. Hit Enter each time. You will see the message “Key Protectors Added” if the password has been configured successfully.
- Now enter the following command to enable the auto-unlock feature while replacing “D:” with the same drive letter:
manage-bde -autounock -enable D: 18")
- Now enable BitLocker on the same drive by using the command below. You can add to the command to also create a Recovery Key, the same as we did in the previous section of this post.
manage-bde -on D: 19")
 16")
 17")
 18")
 19")
The volume will now begin encryption. Using this technique, the non-OS volume(s) will automatically be accessible without any special authentication as soon as you log in using the Recovery Key or PIN/password for the boot drive upon startup.
How to Disable BitLocker Auto-Unlock Feature using Command Line
If you want to disable a drive’s auto-unlock feature, it needs to be first unlocked. Only then will you be able to remove the feature. If your drive is already unlocked, continue down to the next section.
Unlock BitLocker Drive using Command Line
- In the Command Prompt, enter the following command while replacing “D:” with the drive letter of the volume that you want to unlock:
manage-bde -unlock D: -pw 20")
- Now enter the PIN/password for the drive and hit Enter.
 21")
 20")
 21")
Alternatively, you can also use the command below to provide the Recovery Key instead of the password to unlock the drive:
manage-bde -unlock D: -recoverykey "PathToRecoveryKey"
Your drive will now be unlocked. You may now move onto the next section to disable the auto-unlocking feature.
Disable BitLocker Auto-Unlock using Command Line
Once you have ensured that the drive is unlocked, use the given command while replacing “D:” with the drive letter that you want to disable the feature on:
manage-bde -autounlock -disable D:
 22")
Automatic unlocking of the drive will now be disabled.
How to Turn Off BitLocker using Command Line
To turn off the BitLocker encryption on your drive, you first need to ensure that it is unlocked using the steps given above. You may then proceed to enter the following command in Command Prompt to disable BitLocker while replacing “D:” with your respective drive letter.
manage-bde -off D:
 23")
Manage-bde Syntax, Switches, and Parameters
As we mentioned before, manage-bde.exe provides a lot of other features to BitLocker which are not accessible through the GUI. Below is a list of the parameters of manage-bde and what they do:
| Parameter | Description |
|---|---|
| manage-bde -status | Provides information about all drives on the computer, whether or not they are BitLocker-protected. |
| manage-bde -on | Encrypts the drive and turns on BitLocker. |
| manage-bde -off | Decrypts the drive and turns off BitLocker. All key protectors are removed when decryption is complete. |
| manage-bde -pause | Pauses encryption or decryption. |
| manage-bde -resume | Resumes encryption or decryption. |
| manage-bde -lock | Prevents access to BitLocker-protected data. |
| manage-bde -unlock | Allows access to BitLocker-protected data with a recovery password or a recovery key. |
| manage-bde -autounlock | Manages automatic unlocking of data drives. |
| manage-bde -protectors | Manages protection methods for the encryption key. |
| manage-bde -tpm | Configures the computer’s Trusted Platform Module (TPM). This command isn’t supported on computers running Windows 8 or win8_server_2. To manage the TPM on these computers, use either the TPM Management MMC snap-in or the TPM Management cmdlets for Windows PowerShell. |
| manage-bde -setidentifier | Sets the drive identifier field on the drive to the value specified in the Provide the unique identifiers for your organization Group Policy setting. |
| manage-bde -ForceRecovery | Forces a BitLocker-protected drive into recovery mode on restart. This command deletes all TPM-related key protectors from the drive. When the computer restarts, only a recovery password or recovery key can be used to unlock the drive. |
| manage-bde -changepassword | Modifies the password for a data drive. |
| manage-bde -changepin | Modifies the PIN for an operating system drive. |
| manage-bde -changekey | Modifies the startup key for an operating system drive. |
| manage-bde -KeyPackage | Generates a key package for a drive. |
| manage-bde -upgrade | Upgrades the BitLocker version. |
| manage-bde -WipeFreeSpace | Wipes the free space on a drive. |
If stuck with these parameters, concatenate “/?” in front of the command and parameters in the Command Prompt to get more help. To learn more about these parameters, read Microsoft’s support page.
Similarly, the manage-bde protectors also have quite a few switches. Here’s a list:
| Parameter | Description |
|---|---|
| -get | Displays all the key protection methods enabled on the drive and provides their type and identifier (ID). |
| -add | Adds key protection methods as specified by using additional -add parameters. |
| -delete | Deletes key protection methods used by BitLocker. All key protectors will be removed from a drive unless the optional -delete parameters are used to specify which protectors to delete. When the last protector on a drive is deleted, BitLocker protection of the drive is disabled to ensure that access to data is not lost inadvertently. |
| -disable | Disables protection, which will allow anyone to access encrypted data by making the encryption key available unsecured on the drive. No key protectors are removed. Protection will be resumed the next time Windows is booted unless the optional -disable parameters are used to specify the reboot count. |
| -enable | Enables protection by removing the unsecured encryption key from the drive. All configured key protectors on the drive will be enforced. |
| -adbackup | Backs up recovery information for the drive specified to Active Directory Domain Services (AD DS). Append the -id parameter and specify the ID of a specific recovery key to back up. -id parameter is required. |
| -aadbackup | Backs up all recovery information for the drive specified to Azure Active Directory (Azure AD). Append the -id parameter and specify the ID of a specific recovery key to back up. -id parameter is required. |
<drive> |
Represents a drive letter followed by a colon. |
| -computername | Specifies that manage-bde.exe will be used to modify BitLocker protection on a different computer. You can also use -cn as an abbreviated version of this command. |
<name> |
Represents the name of the computer on which to modify BitLocker protection. Accepted values include the computer’s NetBIOS name and the computer’s IP address. |
Final Thoughts
There are quite a few things you can do just from the Command Prompt alone for BitLocker. We started this post with the most basic commands and what they do, then worked our way up so that it is easier for you to understand BitLocker through the command line.
There are similar tools also available in Windows to manage-bde, such as repair-bde, which you can use to recover lost encrypted data due to damaged hard disks.
If you are using an operating system that does not have BitLocker, you can try out these alternatives to keep your data safe.