
Если вы видите это сообщение, значит, произошла проблема с загрузкой файлов в стилей (CSS) нашего сайта. Попробуйте сбросить кэш браузера (Ctrl+F5).
Если это не поможет, а вы находитесь в регионе, где возможны ограничения интернет-трафика с российских серверов — воспользуйтесь VPN.
|
Зависание системы при обновлении возможно по многим причинам. Это может быть вызвано разрывом интернет-соединения, сбоем на сервере, сбоем в самом компьютере, недостаточным объемом свободного места на жестком диске. Не исключено и наличие вируса, не разрешающего определенные действия. Вероятно, придется отменить обновление, перезагрузив компьютер с помощью кнопки «резет» или просто отключив питание. Перед повторной попыткой обновления тщательно изучить инструкцию, удостовериться, что никаких проблем нет. Произвести очистку диска, и после этого повторить попытку обновления. Если это опять не удастся, то обратиться в службу поддержки. Разумеется, это возможно при наличии лицензионной версии ОС. система выбрала этот ответ лучшим KONGL 7 лет назад Ждать двое суток в таком случае вовсе не обязательно. Очевидно, что произошел сбой и ваш компьютер завис. Теперь необходимо привести его в порядок. Для этого попробуйте перезагрузить компьютер используя стандартное сочетание клавиш: Ctrl-Alt-Del. (Зажимаете все три клавиши одновременно). Если это не помогает и компьютер не реагирует, то при наличии кнопки «Reset» жмём её. Если такой кнопки нет, щёлкаем выключатель на блоке питания, либо снимаем аккумулятор, если у вас ноутбук. Если после указанных процедур ваш компьютер загрузится корректно, то можно повторить операцию обновления. Если же и в дальнейшем ваш компьютер будет зависать, то вам придется обратиться в службу поддержки. дольф 7 лет назад было у меня дело, зависла система на обновлении, ни одна кнопка не реагировала. Уже давно мне говорили, в подобных случаях, нужно отключить питание ноутбука, нажала на выключение, ноутбук не реагирует. Нашла совет, нужно держать кнопку выключения 10 секунд, и да, ноутбук вырубился. Ждать, что Виндоус сама справится с обновлением не стоит, система затупила и загрузку обновления можно прервать механическим путем. А потом посмотреть загрузки и если это важное обновление, загрузить его с сайта разработчика. Если оно не указано в важных обновлениях, тогда не обязательно, но потом Виндоус может затупить в в воспроизведении видео и тут уж точно надо разбираться с загруженными обновлениями. Если обновление Windows не завершается долгое время, необходимо перезагрузить компьютер. Если компьютер «висит на заставке», надо принудительно выключить его кнопкой питания. Кнопку надо удерживать несколько секунд, пока не погаснет индикатор питания. В случае с ноутбуком иногда приходится снимать аккумуляторную батарею. После этого надо включить компьютер. Если через 30 минут работы картинка на экране не меняется, обновление не завершается, выключайте компьютер еще раз и включайте, удерживая кнопки клавиатуры SHIFT и F8. Появившееся меню подскажет дальнейшие действия. Если все манипуляции ни к чему не привели, вызывайте компьютерного специалиста. [поль 7 лет назад У меня в прошлом году такое же было. Перезагружала раз пять, нажимая на Ctrl+Alt+Del. После этого комп запустился. Я сразу же просканировала его на вирусы двумя антивирусниками и опять перезагрузила. Стараюсь больше не соглашаться на обновления. Peres 7 лет назад Эта проблема очень актуальная у многих пользователей и поэтому вообще нежелательно обновлять комп или другой гаджет через центр обновления. Многие жалуются, что происходит зависание, и он может обновляться не одни сутки. Попробуйте принудительно перезагрузить комп и потом восстановить его до состояния накануне. Это делается через опцию восстановление системы через оставленные точки. И еще так может реагировать антивирусная программа, ее сразу нужно отключать. Есть папка обновлений и ее нужно сразу удалить после того, как вы перезагрузите комп. Далее почистить все куки и потом проверить на вирусы. Иначе можно потерять все данные и потребуется переустановление ОС. snuch 7 лет назад Скорее всего при установке обновления возникла одна из ошибок,каких именно-вам никто скорее всего не скажет(если нет так называемого синего экрана смерти).Выключите компьютер,это сбросит процесс обновления и откатит его.Если при последующих попытках возникнет то же самое-отключите автообновления виндовс.На 10-й они абсолютно бесполезны и весят десятки гигов. Ёжик в туман 7 лет назад Лучше всего не использовать обновление, которое производится через Центр обновления Windows, так как оно бывает не доводит обновления до конца. Помню, ко мне звонит друг и говорит, что компьютер не может закончить обновление системы уже как два дня. После этого случая, я ему посоветовал просто взять и перезагрузить компьютер. Обновление может зависнуть из-за загрузки Центрального Процессора. Такое частенько бывает, потому что при обновлении системы, данная служба потребляет много ресурсов компьютера, из-за чего может зависнуть обновление системы и не отвечать на ваши клики. Время плати 5 лет назад Такое зависание бывает, когда обновления начинают устанавливаться некорректно, то есть возможно пропал интернет и система просто зависла. Тут нужно просто выключить или перезагрузить компьютер с помощью кнопок на Системном блоке. Если после перезагрузки операционная система вернется в прежнее состояние это хорошо, но бывает что после перезагрузки появляется черный экран. Здесь понадобится откат системы. Windows 10 не совсем совершенная операционная система и очень часто обновления приводят к сбоям. Поэтому лучше при возможности пользоваться Windows 7 или Windows 8.1. Вы сами же на свой вопрос и ответили. Здесь ключевое слово «висит». Ну раз компьютер висит, значит его надо перезагружать. Если удастся, то правильными способами, но скорей всего, придется просто грубо отключать компьютер от питания, если ноутбук, то и изъятием батарей. Но а потом как получится, или попытаться продолжить обновление или восстановить систему, до предыдущего состояния. Или крайний вариант — придется переустанавливать систему с потерей всех данных. Хотя при желании большинство данных все же можно будет спасти, если уж очень надо, но это другая тема. storu 7 лет назад Если обновление зависло, то компьютер нужно перезагрузить. Далее служба поддержки Майкрософт рекомендует сделать следующее: 1) Отключите от компьютера все устройства, которые подключены к нему через USB-порты. 2) Удалите антивирус, часто проблемы возникают из-за конфликтов с ним. 3)Удалите содержимое следующей папки «$Windows.~BT». 4) Удалите все программы, которые связаны с изменением интерфейса, тем. 5) Осуществите «чистую загрузку системы» и попытайтесь повторно обновить Windows. Для чистой загрузки винды нужно выполнить следующие действия: А причин зависания может быть несколько. Например, недостаток места, мало памяти. Другая причина — проблема с антивирусом или драйверами. Первое что можно и нужно сделать — перезапустить компьютер, потом можно почистить диск, проверить на вирусы и заново запустить обновление. Знаете ответ? |
Все способы:
- Способ 1: Настройка дополнительных параметров
- Способ 2: Запуск средства устранения неполадок
- Способ 3: Перезапуск службы Центра обновления
- Способ 4: Проверка системного времени
- Способ 5: Очистка диска
- Способ 6: Подключение к стабильной сети
- Способ 7: Ручная установка обновлений
- Способ 8: Проверка компьютера на наличие вирусов
- Вопросы и ответы: 0
Проверка обновлений в Windows 10 часто занимает довольно много времени, что может быть связано с объемом загружаемых файлов, быстродействием компьютера и скоростью интернета. Однако иногда проверка не заканчивается даже спустя несколько часов, что уже вызывает подозрения у некоторых пользователей. В большинстве случаев такое положение вещей является проблемой, которую нужно решить.
Способ 1: Настройка дополнительных параметров
Сперва хотим затронуть тему дополнительных параметров обновлений. В них присутствует два важных пункта, отвечающих за поиск обновлений для приложений Microsoft и загрузку при лимитных подключениях. Эти два параметра необходимо отредактировать следующим образом:
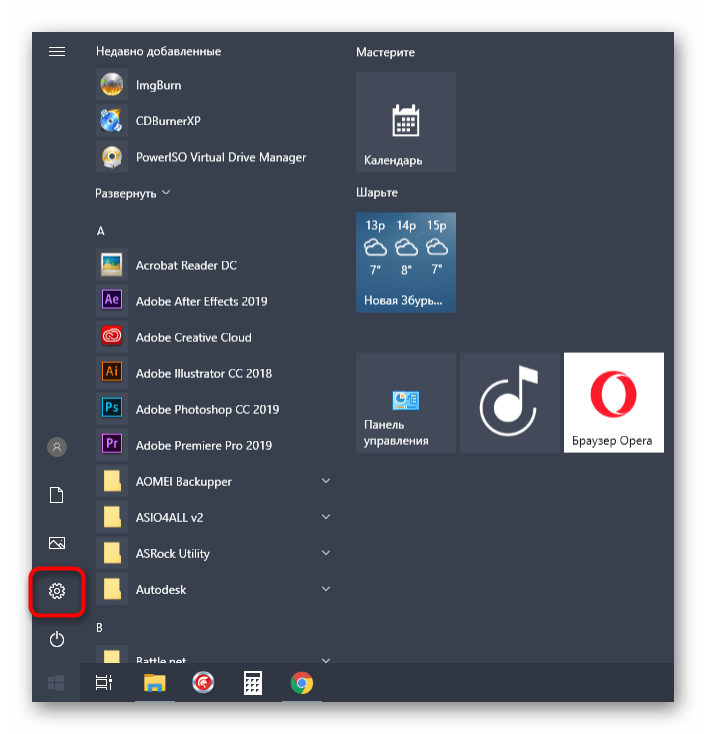
- Откройте «Пуск» и перейдите в «Параметры».
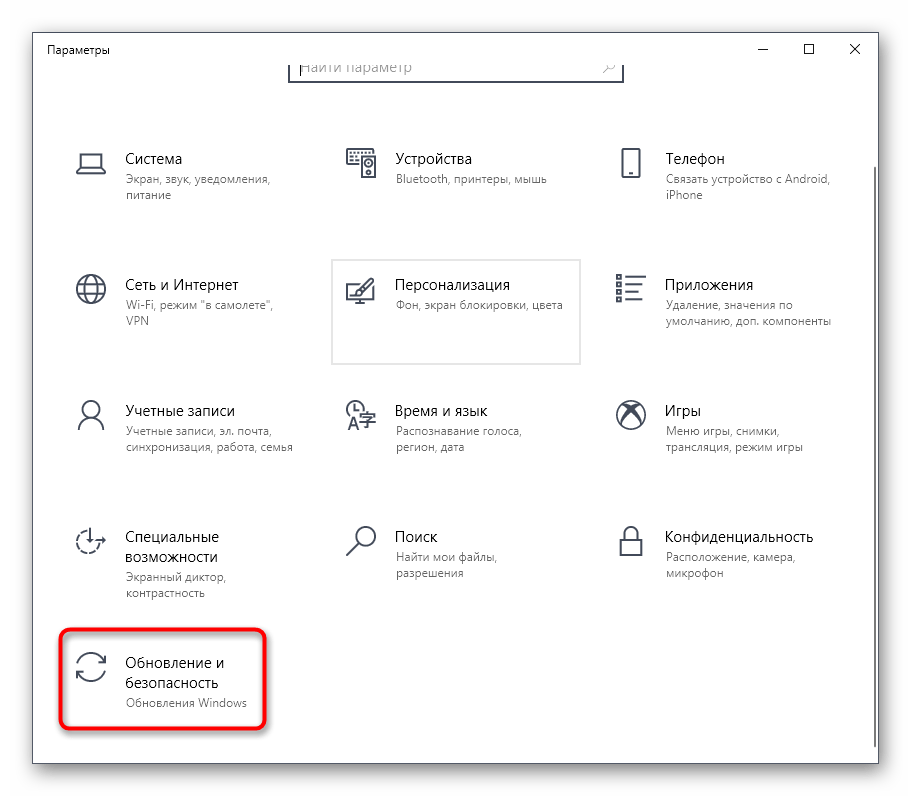
- Там выберите раздел «Обновление и безопасность».
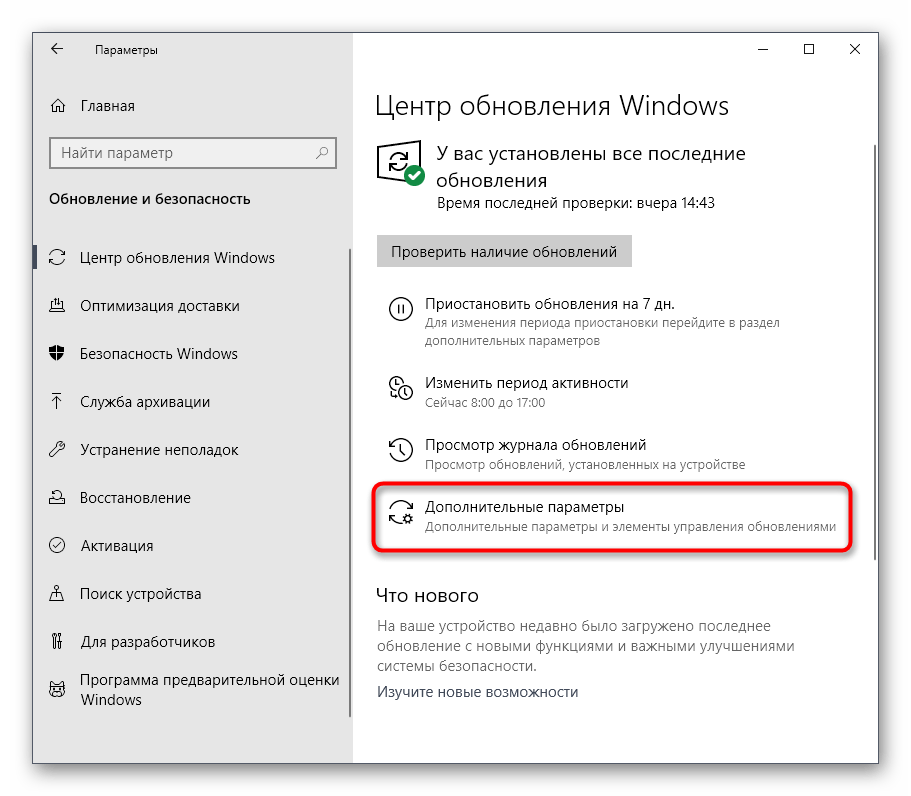
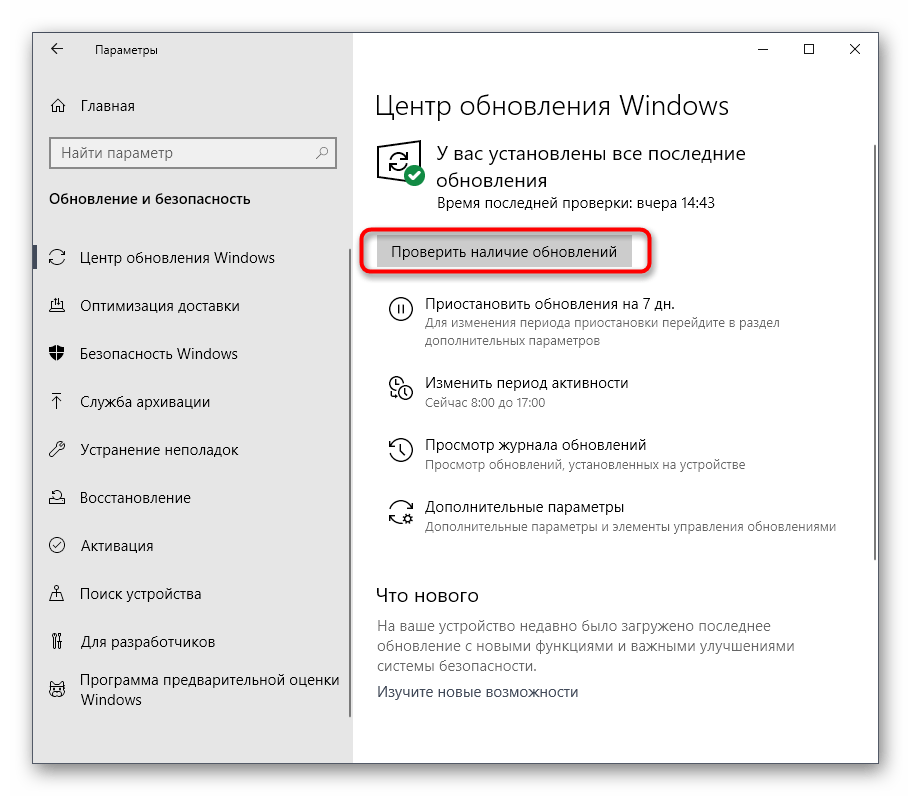
- В первой же категории Центра обновления кликните по кнопке «Дополнительные параметры».
- Отключите опцию «При обновлении Windows получать обновления для других продуктов Майкрософт», а вторую строку «Скачивать обновления через лимитные подключения данных» активируйте.
- После этого вернитесь на шаг и повторно запустите ручную проверку апдейтов.
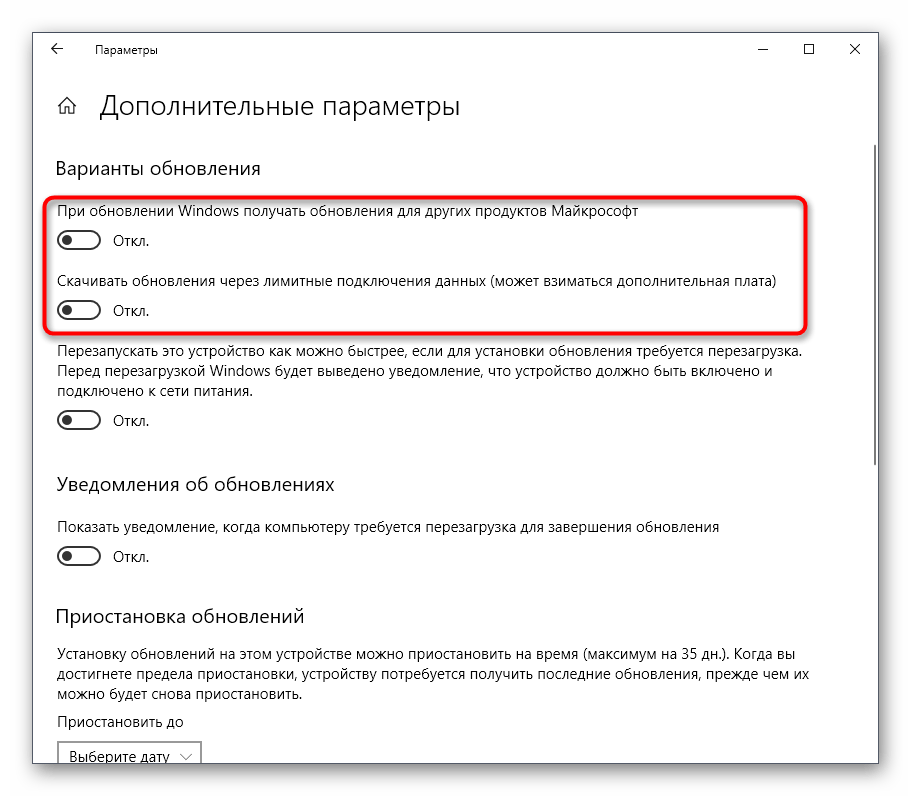

В будущем вы сможете восстановить эти параметры в исходное положение, если это понадобится. Для этого выполняются точно такие же действия, которые мы рассмотрели выше, меняется только положение ползунков.
Способ 2: Запуск средства устранения неполадок
В Windows 10 имеется отдельная опция, позволяющая быстро найти возможные причины различных системных проблем и исправить их. Этот метод далеко не всегда оказывается эффективным, однако реализовать его проще всего, ведь практически все действия выполняются средством устранения неполадок автоматически, а от пользователя требуется только запустить его.
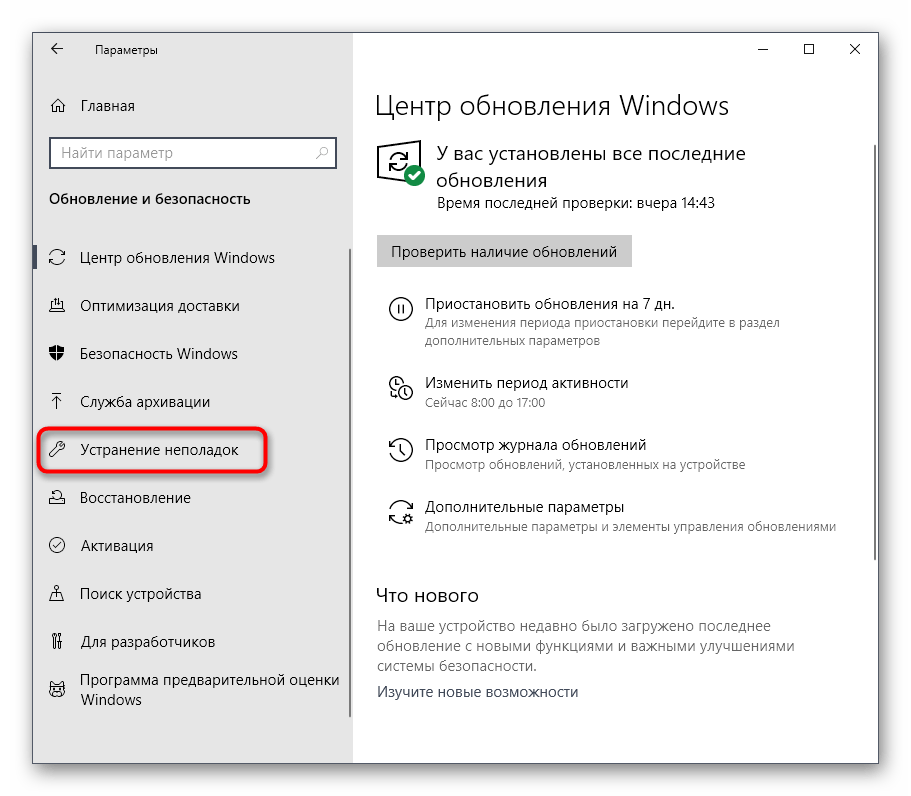
- Снова через Параметры перейдите в раздел «Обновление и безопасность».
- Там выберите категорию «Устранение неполадок».
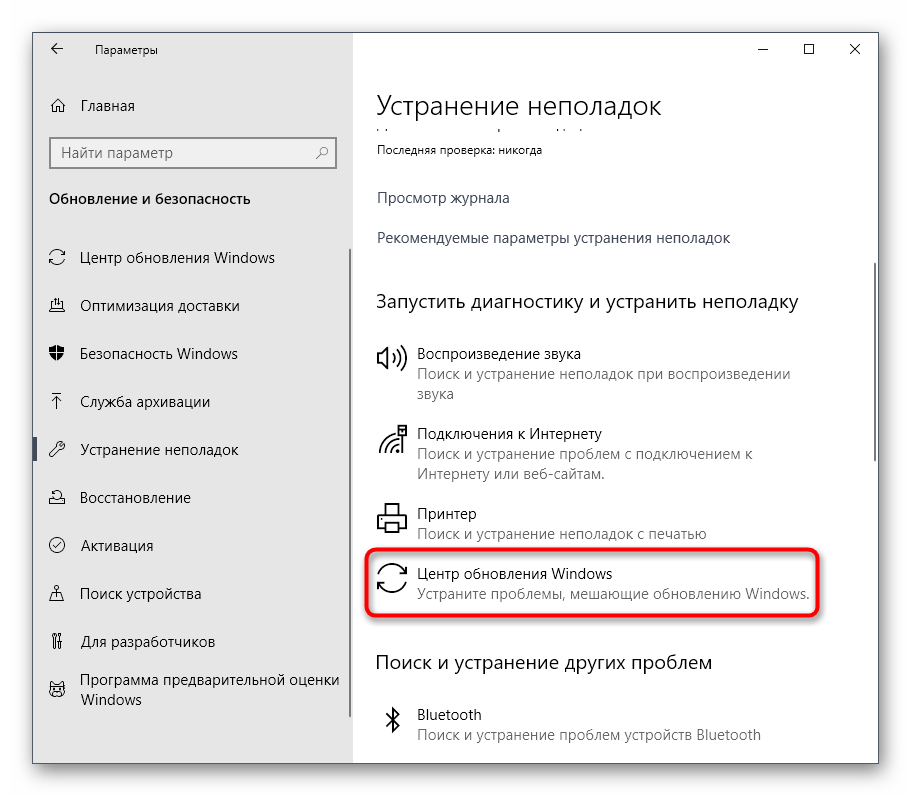
- В списке «Запустить диагностику и устранить неполадку» кликните по «Центр обновления Windows».
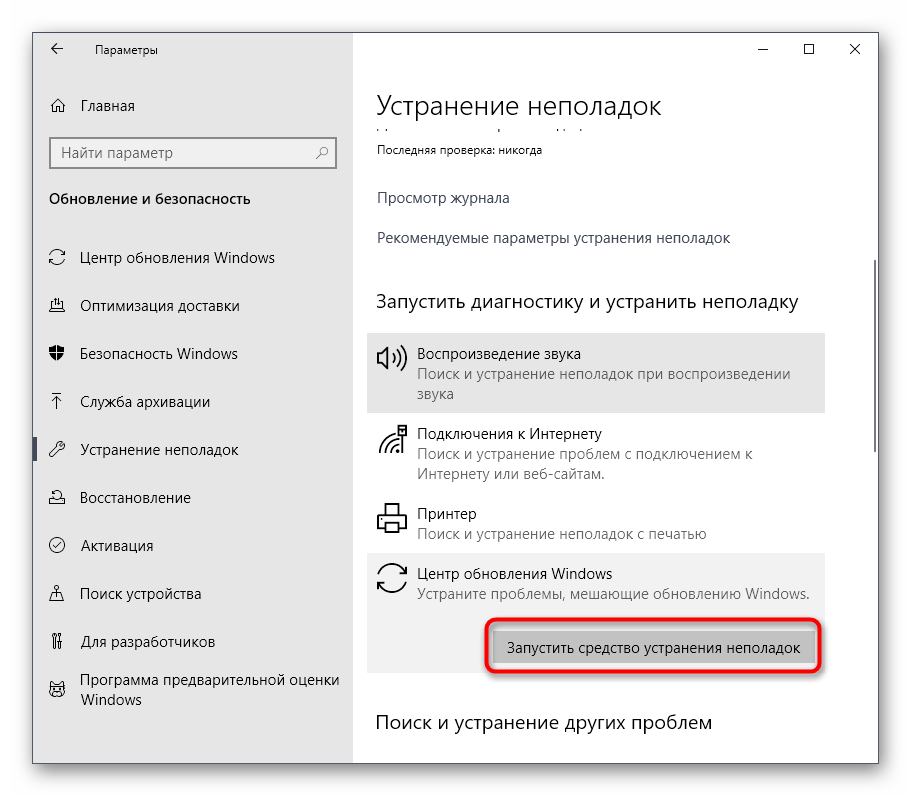
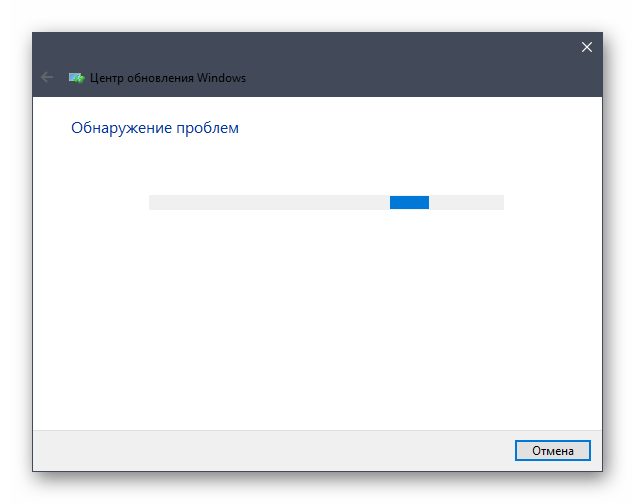
- Дополнительно щелкните по специально отведенной кнопке, чтобы начать сканирование.
- Ожидайте завершения обнаружения проблем. Этот процесс не займет много времени, а после на экране появится уведомление.
- Если неисправности были обнаружены, они решатся автоматически или в окне отобразятся руководства по их ручному исправлению.

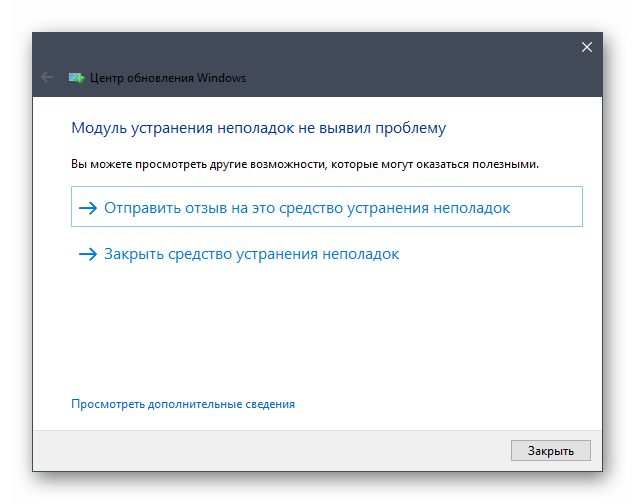
В случае, когда средство исправления неполадок не выявило никаких проблем, просто переходите к следующему методу сегодняшнего материала.
Способ 3: Перезапуск службы Центра обновления
Иногда долгий или неудачный поиск апдейтов происходит из-за мелких системных сбоев, вследствие чего служба Центра обновления отказывается работать корректно. Мы предлагаем отключить ее, перезапустить ПК и только потом активировать снова, что происходит так:
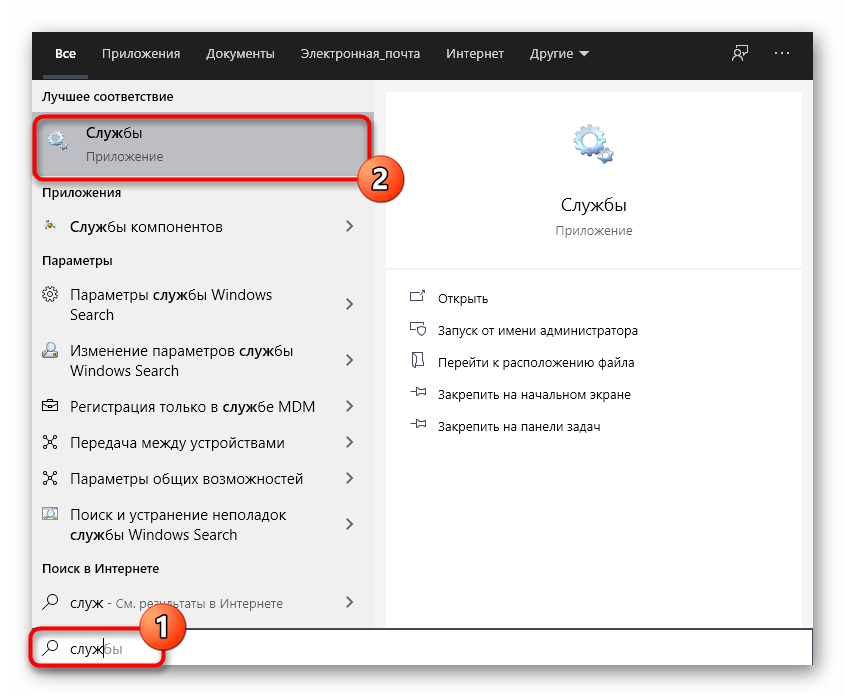
- Откройте «Пуск» и через поиск отыщите приложение «Службы».
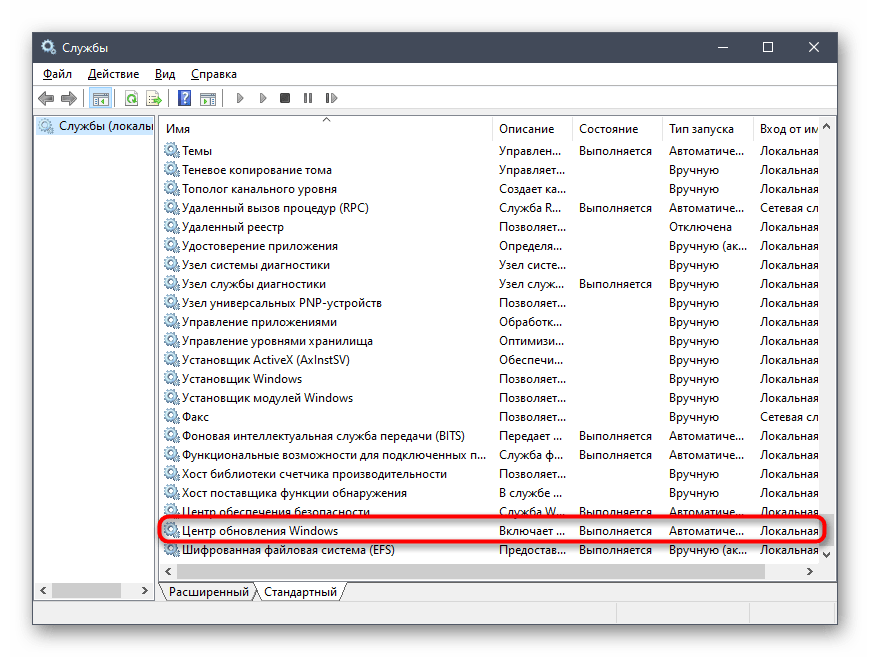
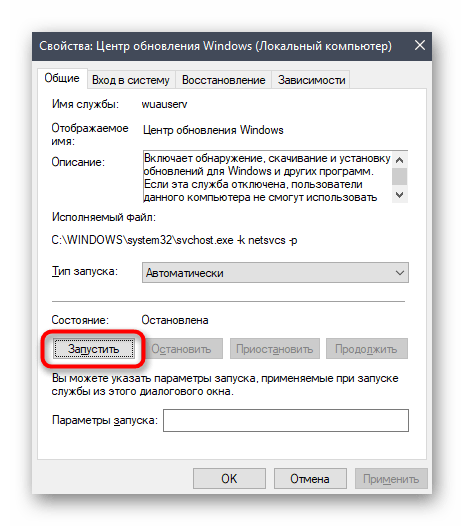
- В конце списка найдите строку «Центр обновления Windows» и дважды кликните по ней левой кнопкой мыши.
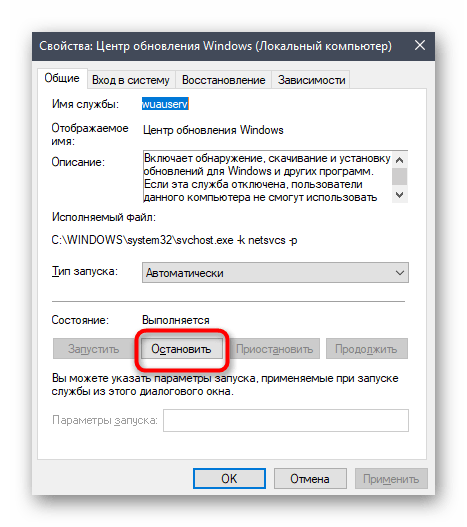
- После открытия окна свойств вам следует щелкнуть по кнопке «Остановить».
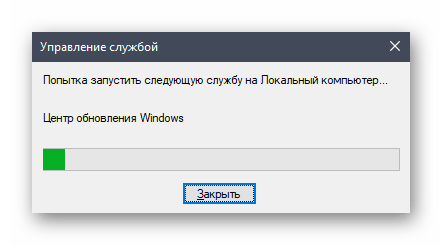
- При появлении окна «Управление службой» ожидайте его закрытия.
- После перезагрузки компьютера вернитесь в это же меню и нажмите по кнопке «Запустить».
- Осталось только вручную начать новую проверку апдейтов, чтобы удостовериться в успешном решении неполадки.
Способ 4: Проверка системного времени
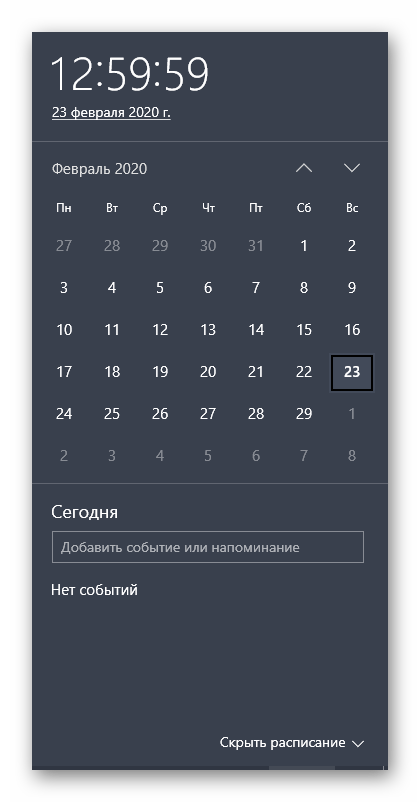
Как известно, поиск обновлений Windows 10 осуществляется через интернет, и при этом задействованы фирменные сервера Майкрософт. Некоторые файлы напрямую связаны с установленной в компьютере датой и временем, а если эти параметры не соответствуют сетевым, апдейты могут быть недоступными. Из-за этого мы рекомендуем проверить настройки даты и времени и установить их правильное значение, воспользовавшись отдельной инструкцией на нашем сайте.
Подробнее: Изменения времени в ОС Windows 10
Способ 5: Очистка диска
Системный раздел жесткого диска, куда загружаются все необходимые элементы обновлений, может быть засорен различным мусором, в частности, ненужными файлами оптимизации доставки, которые уже давно устарели и только мешают корректной замене объектов. Иногда это вызывает проблемы с поиском апдейтов, поэтому мы рекомендуем очистить оптимизацию доставки, что осуществляется буквально в несколько кликов.
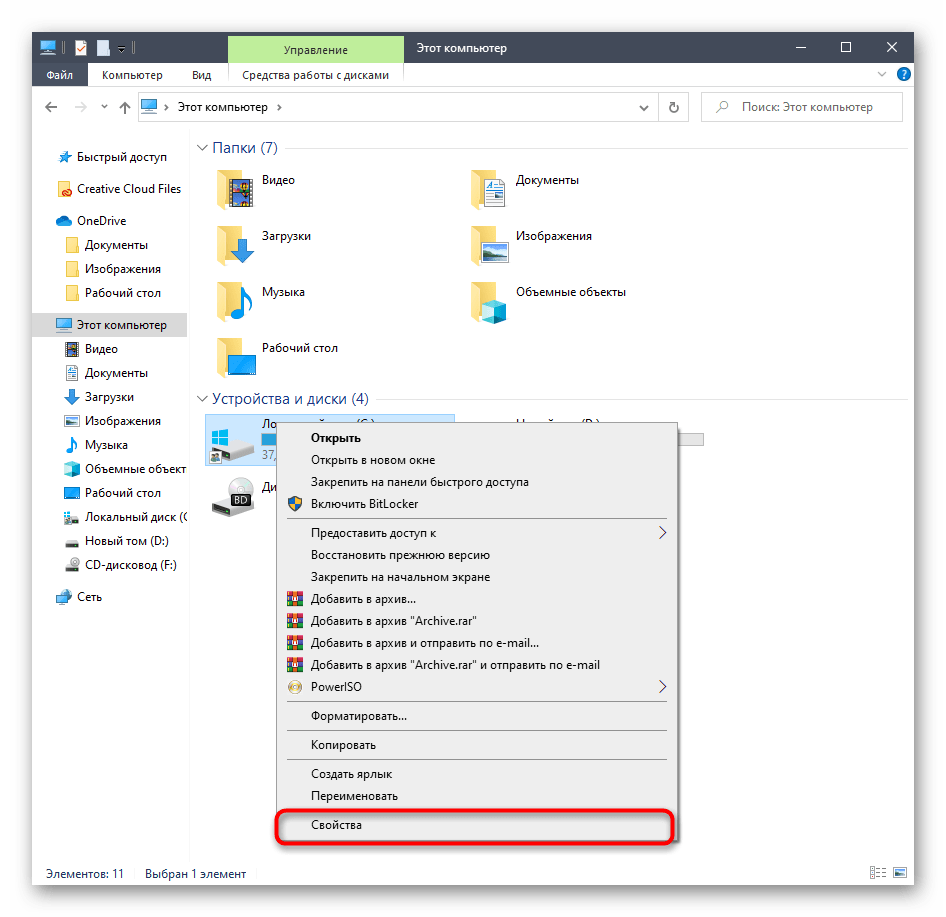
- Откройте окно Проводника в разделе «Этот компьютер», отыщите строку системного логического раздела и щелкните по ней правой кнопкой мыши. В появившемся контекстном меню выберите «Свойства».
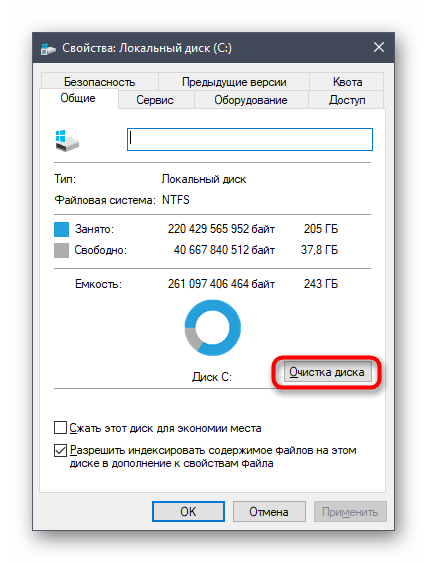
- На первой же вкладке «Общие» используйте пункт «Очистка диска».
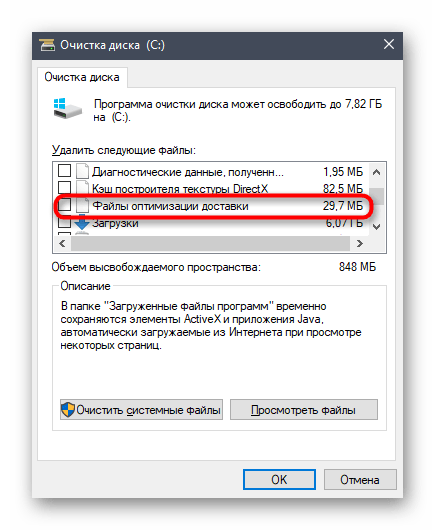
- Отметьте галочкой параметр «Файлы оптимизации доставки» и начните очистку.
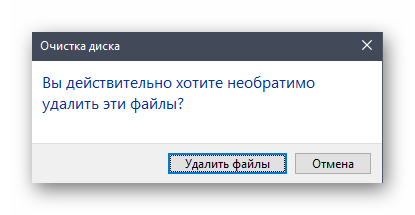
- Подтвердите удаление файлов.
Удаление не займет много времени, а по окончании этого процесса вы получите соответствующее уведомление. Теперь рекомендуется перезагрузить ПК, чтобы сбросить все параметры доставки, а уже после этого можно пытаться снова запускать проверку системных апдейтов.
Способ 6: Подключение к стабильной сети
Вы уже знаете, что некоторые обновления Виндовс занимают много места, а для их обнаружения и загрузки может потребоваться огромное количество времени, если сеть, к которой подключен компьютер, передает информацию медленно. Это тоже может стать причиной того, что апдейты никак не находятся, ведь процессу препятствует медленная скорость загрузки. Мы советуем подыскать более надежный источник интернета, если вы не уверены в своем, и повторить поиск обновлений.

Способ 7: Ручная установка обновлений
Перейдем к самым радикальным способам. Первый из них заключается в ручной установке недостающих обновлений, если это требуется, а системный поиск никак не завершается. Вполне вероятна такая ситуация, что сам загружаемый апдейт обладает какими-то ошибками, которые не позволяют инсталлировать его на компьютер через соответствующий Центр. После ручной установки эта трудность должна исчезнуть. Более детальную информацию по реализации поставленной цели читайте в другом материале на нашем сайте, кликнув по расположившемуся далее заголовку.
Подробнее: Устанавливаем обновления для Windows 10 вручную
Способ 8: Проверка компьютера на наличие вирусов
Последний метод заключается в проверке ПК на наличие вирусов. Прибегать к этому варианту следует в тех ситуациях, когда ни один из перечисленных выше не принес должного результата, да и профилактика устройства тоже не помешает. Дело в том, что некоторые угрозы могут блокировать выполнение системных функций, что относится и к обновлениям, поэтому вирусы тоже попадают под подозрение. Проверка ПК на наличие вредоносных файлов осуществляется при помощи любого специализированного программного обеспечения. Если какие-то вирусы все же были найдены, удалите их и повторите попытку поиска апдейтов.
Подробнее: Борьба с компьютерными вирусами
В завершение отметим: возникновение сложностей с поиском обновлений сразу же после установки Windows 10, которая была скачана со сторонних ресурсов, а не приобретена на официальном сайте, может быть связано с тем, что сборщик самостоятельно вырезал эту опцию или сам образ функционирует с ошибками. Ознакомьтесь с информацией об этой сборке на сайте, откуда она была скачана, и при необходимости произведите переустановку, выбрав другой репак.
Читайте также:
Решение проблем с работоспособностью Центра обновлений Windows 10
Устранение проблем с установкой обновлений в Windows 10
Наша группа в TelegramПолезные советы и помощь
If you see the message “Working on updates, 100% complete. Don’t turn off your computer” when performing a Windows update, don’t worry!
Although it’s incredibly frustrating, you’re not the only person to experience this issue. Thousands of Windows users have recently reported the very same issue. More importantly, you should be able to fix it pretty easily…
Try these fixes
Here’s a list of fixes that have resolved this problem for other Windows users. You don’t have to try them all. Just work your way through the list until you find the one that does the trick for you.
- Remove any USB peripherals and wait for the update process to finish
- Force restart your PC
- Run Windows Update troubleshooter
- Reset Windows Update components
- Download updates from Microsoft Update Catalog manually
- Pro tip: Want us to fix the problem for you?
Fix 1: Remove any USB peripherals and wait for the update process to finish
If you seldom check for Windows updates, it may take a long time for Windows to complete the update process. Maybe your PC is not “stuck” at Windows update, and Windows is just configuring and installing update packages.
If you temporarily don’t need to use your PC, you can just wait for 2 to 3 hours to see if the update process can be completed. If there are any USB devices (like printers, USB flash drives, etc.) connected to your PC, you can try removing them from your PC. Some Windows users reported that after they disconnect all the USB peripherals from their PCs, the update process completes quickly.
See if this issue persists after you wait for 2 to 3 hours. If it persists, try the next fix below to force restart your PC.
Fix 2: Force restart your PC
If Your PC gets stuck at 100% when you’re performing a Windows update, you need to force restart your PC first. If you don’t know how to do it, you can follow the instructions below:
- Press and keep holding the power button on your computer case until your PC shuts down.
- Disconnect any external power supply or remove the battery from your laptop.
- Hold down the power button for about 15 seconds.
- Wait a few minutes and then plug in your PC or connect the battery to your laptop.
- Press the power button again to reboot your system.
- Select the option to boot normally if you get a notice that the computer shuts down improperly.
If you still cannot access the desktop, you can try starting your PC in safe mode with the network. When you sign into your Windows system in safe mode with the network, try the next fix below to run the Windows Update troubleshooter.
Fix 3: Run Windows Update troubleshooter
Windows Update troubleshooter is a built-in tool that can help you analyze and resolve issues related to Windows updates. Try running Windows Update troubleshooter to see if you can resolve this issue. Here is how to do it:
If you’re on Windows 10:
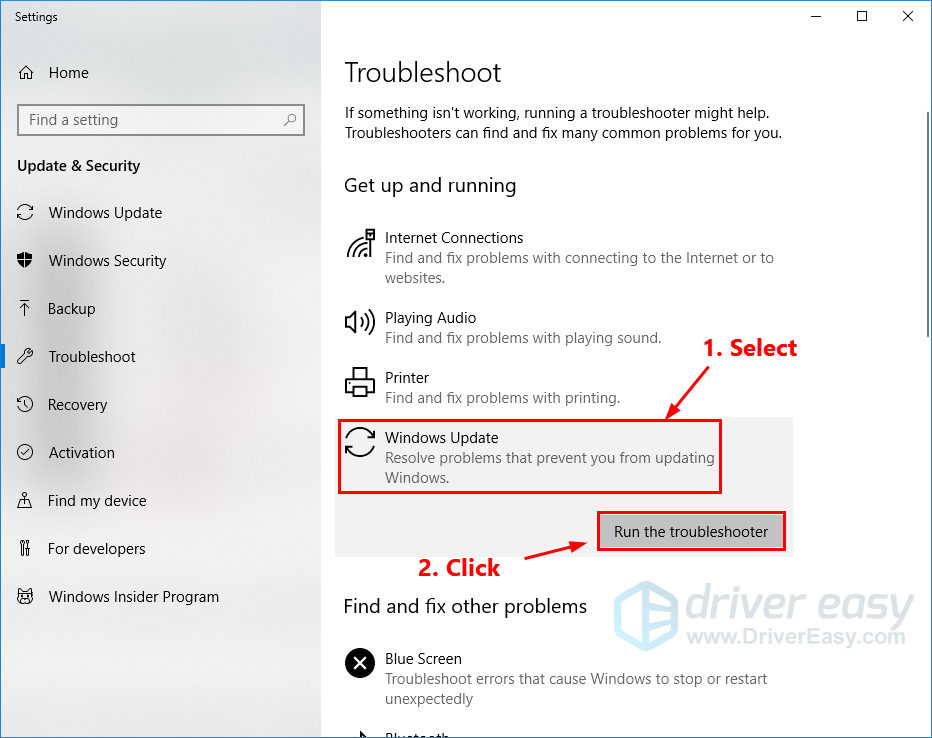
- On your keyboard, press the Windows logo key and type troubleshoot. In the list of search results, select Troubleshoot.
- In the pop-up window, select Windows Update and click Run the troubleshooter. You’ll be prompted for permission. Click Yes to run Windows Update troubleshooter.

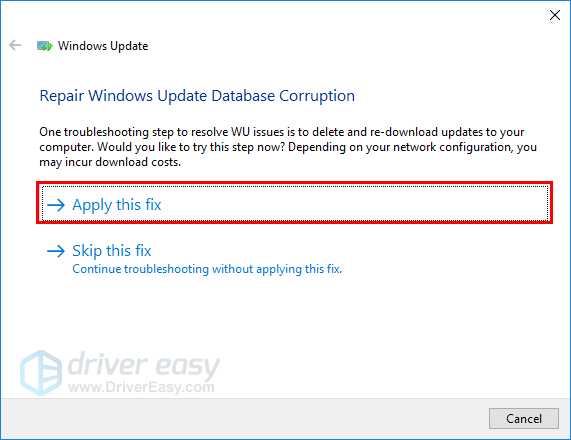
- Click Apply this fix to continue.

- Follow the on-screen instructions to troubleshoot this issue.
If you’re using Windows 11:
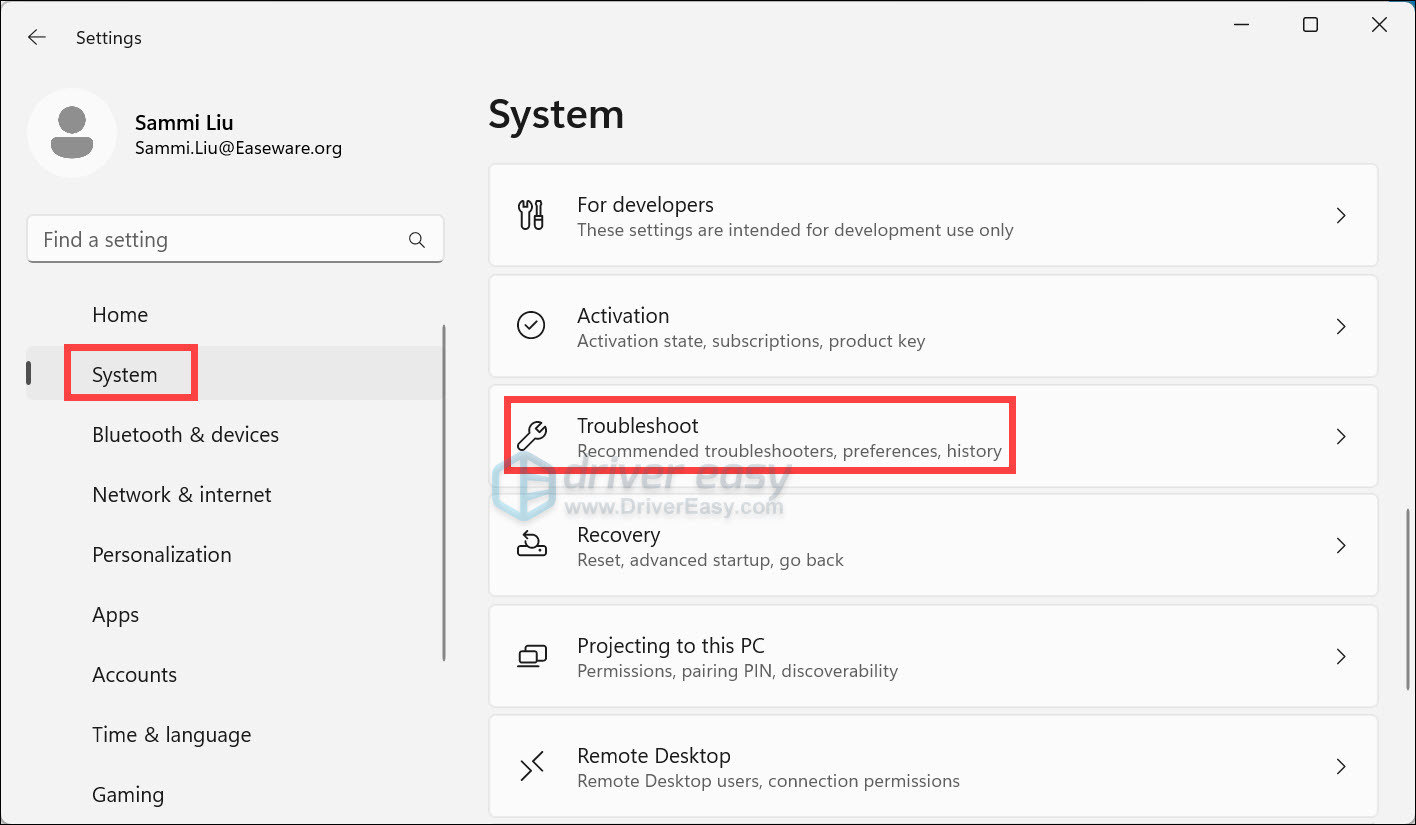
- On your keyboard, press the Windows logo + I keys simultaneously to open Settings.
- From the left navigation panel, select System. Find Troubleshoot and click on it.

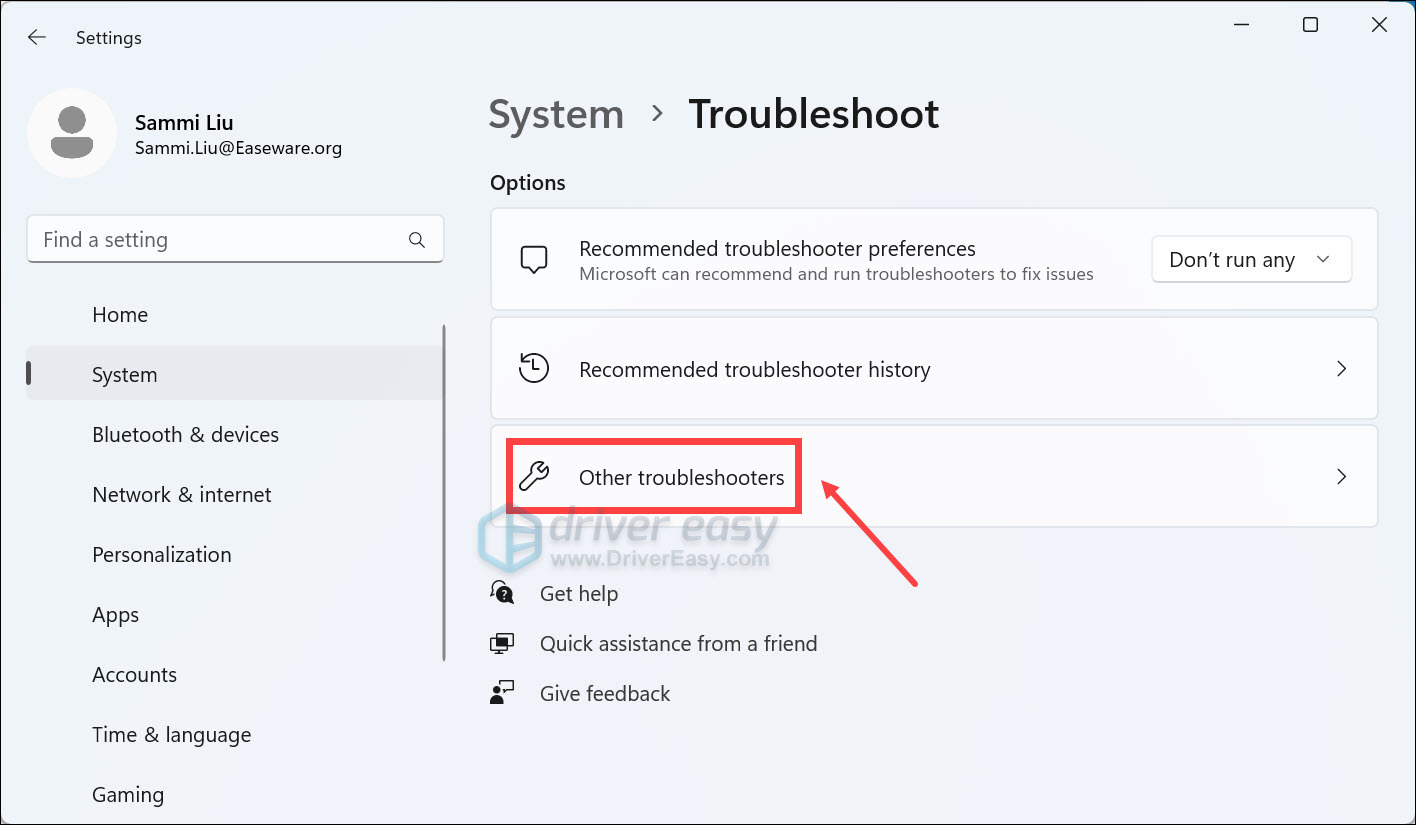
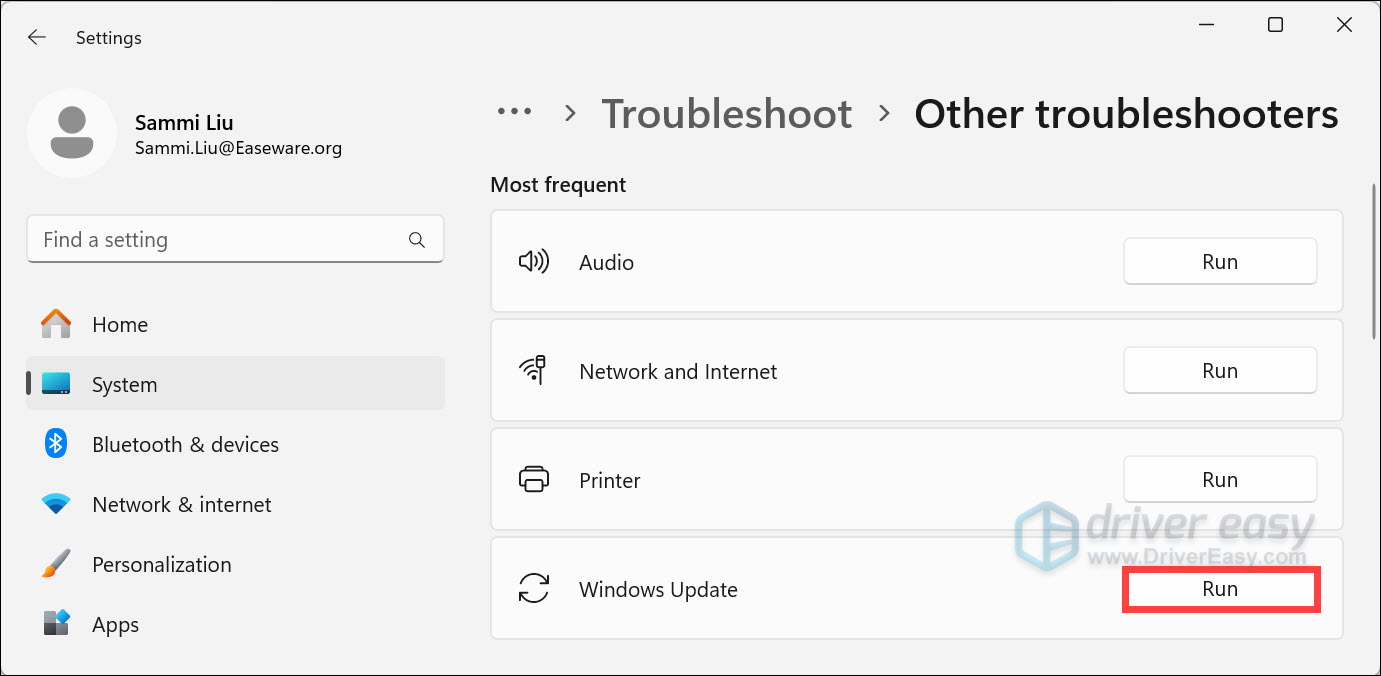
- Click Other troubleshooters.
- Click on the Run button next to Windows Update. Then wait for it to troubleshoot your issues.

Perform a Windows update again to see if you can install the update. If this issue reappears, try the next fix, below.
Fix 4: Reset Windows Update components
If Windows Update components are corrupted, Windows Update may not work properly. Maybe that’s the reason behind this issue. To resolve it, try resetting Windows Update components. Here is how to do it:
- On your keyboard, press the Windows logo key and R at the same time to invoke the Run dialog. Type cmd and press Ctrl, Shift and Enter at the same time to run Command Prompt as administrator. You’ll be prompted for permission. Click Yes to open the Command Prompt.
- In Command Prompt, type the command lines below and press Enter on your keyboard after typing each:
net stop bits
net stop wuauserv
net stop appidsvc
net stop cryptsvcNote: The Windows Update-related system services will be stopped after executing the command lines above.
- In Command Prompt, type the following command lines and press Enter after typing each:
ren %systemroot%\SoftwareDistribution SoftwareDistribution.old
ren %systemroot%\system32\catroot2 catroot2.oldNote: You will rename the SoftwareDistribution and catroot2 folder as SoftwareDistribution.old and catroot2.old after you run these two command lines. These two folders are used by Windows Update to save temporary update files.
By renaming these two folders, Windows will think these two folders are missing, and Windows will create new ones to store Windows update files. By doing that, you can avoid many Windows Update issues caused by the old corrupted temporary files in these two folders.
- In Command Prompt, type the following command lines and press Enter after each:
net start bits
net start wuauserv
net start appidsvc
net start cryptsvcNote: After you execute the command lines above, you start the Windows Update-related system services.
Check to see if this resolves your Windows Update problem. Hopefully, it did. But if not, try the next fix, below.
Fix 5: Download updates from Microsoft Update Catalog manually
Microsoft Update Catalog offers updates for Windows 2000 SP3 and later versions of the Windows operating system. You can try downloading the updates you failed to install from the Microsoft Update Catalog and install them manually to see if you can fix this issue.
Before you download updates, you need to check the system type of your Windows OS. If you don’t know how to do it, follow the instructions below to view your system type:
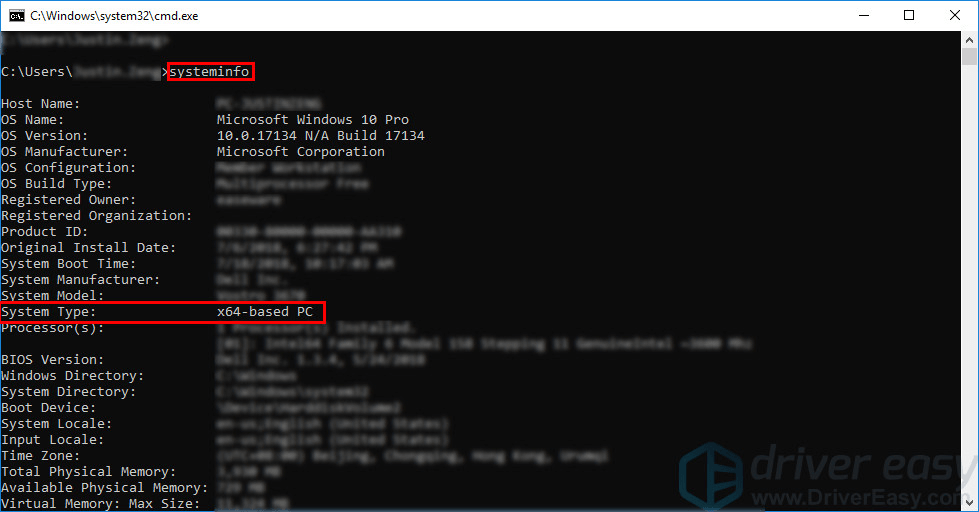
- On your keyboard, press the Windows Logo key and R at the same time to open the Run dialog. Type cmd and press Enter to open Command Prompt.
- Type the command line systeminfo and press Enter to view your system type.

Note: “X64-based PC” indicates that your Windows OS is 64-bit; “X86-based PC” means that your Windows OS is 32-bit.
Now, you can follow the steps below to download Windows updates manually:
- On your keyboard, press the Windows logo key and type windows update, then press Enter to open Windows Update.
- Click View update history to check the updates you failed to install. For example, if you fail to install update KB3006137, you can download that update and install it manually.
- Visit Microsoft Update Catalog.
- Type the update number that you want to download. In this example, type KB3006137 and then click Search.

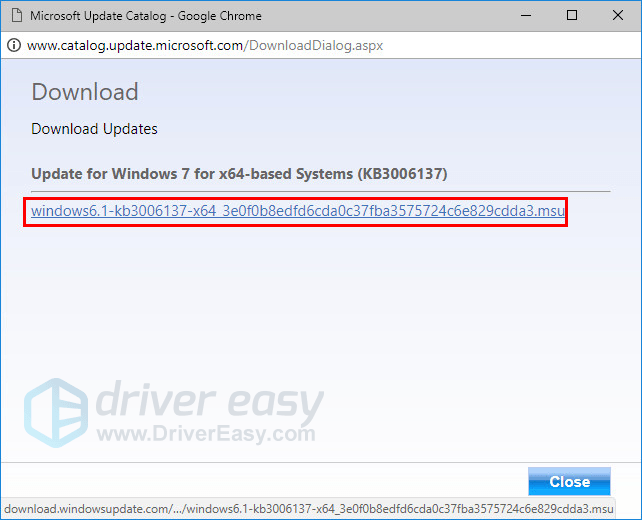
- In the list of search results, select the correct update for your operating system and click Download.
Note: If your Windows OS is 64-bit, you should download the update whose name contains “x64-based”.

- In the pop-up window, click the link to start downloading the updates.

- Double-click the downloaded file and follow the on-screen instructions to install the update.


Restart your PC to see if this issue persists. If not, congratulations! You’ve resolved this annoying issue! But if this issue reappears, you can try the last fix, below.
Pro tip: Want us to fix the problem for you?
If none of the fixes above worked, or you just don’t have the time or confidence to troubleshoot the problem for yourself, get us to fix it for you. All you need to do is buy a 1-year subscription to Driver Easy (just $29.95) and you get free technical support as part of your purchase. This means you can contact our computer technicians directly and explain your problem, and they’ll investigate to see if they can resolve it remotely.
IMPORTANT: Please attach the URL of this article when you contact us, so we can help you resolve the problem ASAP. You can expect us to respond within two working days.
You can contact us easily via the Driver Easy Feedback tool. To learn how to use this tool, please visit this link:
https://www.drivereasy.com/help55/feedback/.
50
50 people found this helpful
Many people have recently reported the very same issue — Windows update stuck at 100. If you are one of them and trying to find some efficient methods to get rid of this issue, then this post written by MiniTool can help you.
Windows Updates Stuck at 100
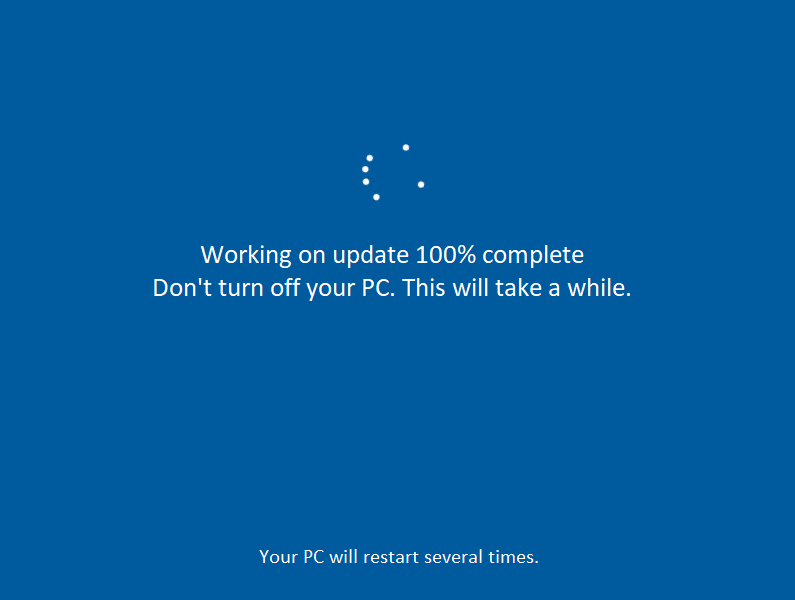
Windows Update is a key part of the system to ensure smooth system performance. Windows 11/10 automatically downloads and installs important updates from Microsoft Server, but sometimes update installations get stuck or freeze when processing updates on Startup.
You may see the following message: “Working on update 100% complete. Don’t turn off your PC. This will take a while.” and you will be stuck on the Windows update screen. There are many reasons for the issue, but most of the time it caused by the conflicts with software or drivers.
Now, it’s time to see how to actually fix the “Windows update stuck at 100” issue with the below-listed troubleshooting guide.
How to Fix the “Windows Updates Stuck at 100” Issue
- Remove any USB peripherals
- Run Windows Update Troubleshooter
- Rename SoftwareDistribution Folder
- Perform a Clean Boot
- Uninstall the Particular Update
- Run DISM in Safe Mode
- Run Automatic Repair
- Perform System Restore in WinRE
It’s frustrating to encounter the “Windows stuck on update” error frustrating, but you should notice that your update probably isn’t stuck, and you’ll just have to wait for a while to complete the installation. If it is still stuck at the interface, you can try the methods below.
Method 1: Remove Any USB Peripherals
If your Windows update stuck at 100, the first thing you can try is to remove any external device connected to PC and make sure you also disconnect any device connected via USB like pen drives, mouse or keyboard, portable hard disk, etc.
Once you have successfully removed any USB peripherals, try to update the Windows again and check if the issue has been fixed or not.
Method 2: Run Windows Update Troubleshooter
If you are still stuck on the screen, then you should restart your computer in Safe Mode before you do any operations. You can use Windows 11/10 recovery bootable media like a DVD/USB bootable drive to enter WinRE to enter into Safe Mode. Here are the steps:
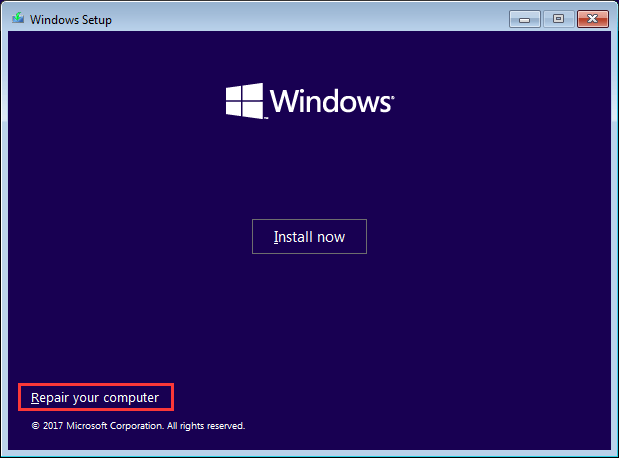
Step 1: Insert your Windows installation CD/DVD or USB bootable drive to your computer, and start the computer.
Step 2: Enter the BIOS.
Step 3: Choose the DVD or USB flash drive as the first boot device and boot the Windows 11/10 PC from the device.
Step 4: Click Repair your computer to enter into WinRE successfully.
Now, you can continue to enter Safe Mode.
Step 1: From the Choose an option screen, click the Troubleshoot option. Next, click Advanced options.
Step 2: Click the Startup Settings option.
Step 3: Click the Restart button.
Step 4: Then you will see multiple options for startup. Press the F4 key to enable Safe Mode.
Tip: You should try Method 2 to 6 in Safe Mode. Try 7 to 8 in WinRE (Windows Recovery Environment ).
Now your PC will restart in Safe Mode. Then running Windows Update Troubleshooter is the easiest and fastest method to fix the “Windows update stuck at 100” error. Windows Update Troubleshooter is a built-in feature designed to fix Windows update errors.
Now you can follow the instructions step by step below to run Windows Update Troubleshooter:
Step 1: Type Settings in the Search box to open it.
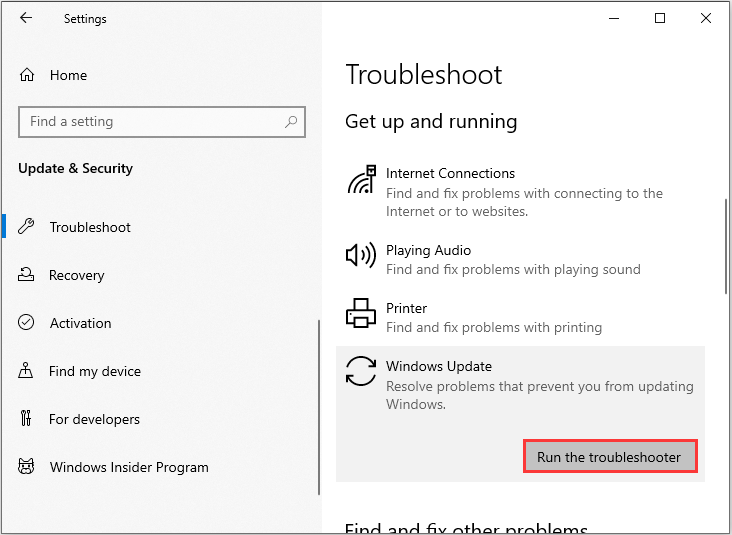
Step 2: Choose Update & Security and then select Troubleshoot in the left panel.
Step 3: Click Windows Update under the Get up and running section in the right panel and then click Run the troubleshooter.
Step 4: It will start to detect the existing problems and you just need to wait for the process finished. Then click Apply this fix.
Step 5: Follow the on-screen instructions to finish the repair process.
Restart your computer and then check if the “working on updates 100 complete” issue still exists. If this method cannot fix the error, try the next methods.
Method 3: Rename SoftwareDistribution Folder
The next method for you is to rename the SoftwareDistribution folder. Here is how to do that:
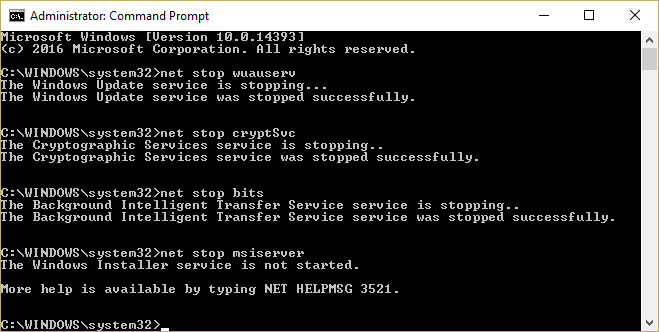
Step 1: Type Command Prompt in the Search box, then right-click the first result to choose Run as administrator.
Step 2: Now type the following commands to stop Windows Update Services and then press Enter after each one:
net stop wuauserv
net stop cryptSvc
net stop bits
net stop msiserver
Step 3: Next, type the following command to rename SoftwareDistribution Folder and then press Enter:
ren C:\Windows\SoftwareDistribution SoftwareDistribution.old
Step 4: Finally, type the following commands to start Windows Update Services and press Enter after each one:
net start wuauserv
net start cryptSvc
net start bits
net start msiserver
Reboot your PC and check if the “working on updates 100” issue has gone.
Tip: To learn more information about renaming or deleting SoftwareDistribution Folder, this post – How to Rename or Delete Software Distribution Folder on Windows is what you need.
Method 4: Perform a Clean Boot
Performing a clean boot can help you start Windows through a minimal set of drivers and startup programs, which can avoid software conflicts while installing Windows updates. In order to perform a clean boot, you need to do:
Step 1: Type msconfig in the Run box(pressing the Windows +R keys), and press Enter.
Step 2: Then go to the Services tab. Check the Hide All Microsoft Services box.
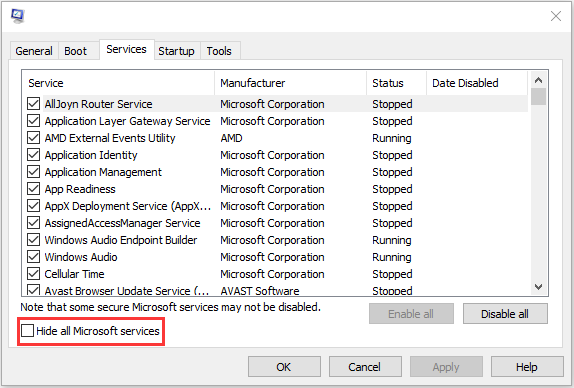
Step 3: Now, click the Disable all button, and click Apply to save the change.
Step 4: Navigate to the Startup tab and click Open Task Manager.
Step 5: In the Task Manager tab, select the first enabled application and click Disable. Here you need to disable all enabled applications one by one. After disabling all programs, close Task Manager and click OK.
Afterward, you can restart the computer to update Windows again. If the “working on updates 100% complete” error doesn’t occur when in a clean boot state, then it indicates that one of the programs was causing the error.
Method 5: Uninstall the Particular Update Causing the Issue
If the error still occurs, you can also try uninstalling the particular update that causes the issue. The steps are as follows:
Step 1: Open Control Panel. Click the Programs and Features section.
Step 2: From the left-hand menu, click View installed updates.
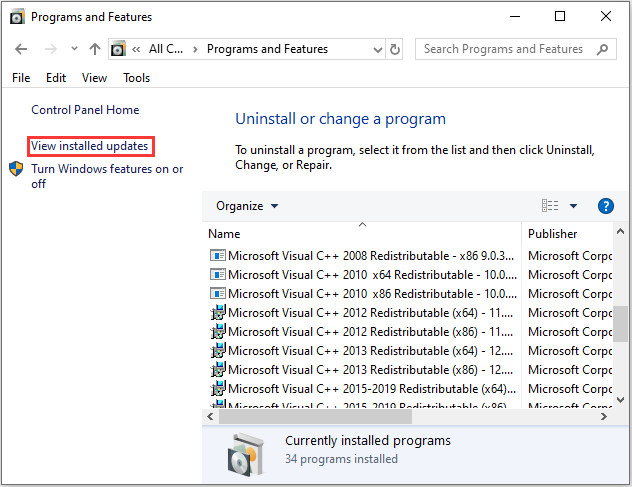
Step 3: Now right-click the particular update which is causing this problem and select Uninstall.
Restart your PC and the “Windows update stuck at 100” issue should be fixed.
Method 6: Run DISM in Safe Mode
You can also try running DISM, which allows you to repair corrupted system files. Please refer to the following steps:
Step 1: Type cmd in the Search box, then right-click the first result to choose Run as administrator.
Step 2: Type the following commands and press Enter after each one:
Dism /Online /Cleanup-Image /CheckHealth
Dism /Online /Cleanup-Image /ScanHealth
Dism /Online /Cleanup-Image /RestoreHealth
Step 3: Let the DISM command run and wait for it to finish. If the above commands won’t work, then try the commands below:
Dism /Image:C:\offline /Cleanup-Image /RestoreHealth /Source:c:\test\mount\windows
Dism /Online /Cleanup-Image /RestoreHealth /Source:c:\test\mount\windows /LimitAccess
Reboot your PC and this should fix the “Windows stuck on update“ issue.
Method 7: Run Automatic Repair
If the working on updates 100 complete issue still occurs, you have to run Automatic Repair. I will show you how to run it step by step.
Step 1: Click Repair your computer in the bottom-left corner to enter WinRE.
Step 2: You need to click Troubleshoot in the popup window to continue.
Step 3: Click Advanced options to go to the next page.
Step 4: Choose the Startup Repair in the Advanced options screen and wait for the process to be completed.
Now, when the process is finished, you can restart your computer and run Windows update to check whether the working on updates 100 is solved.
Tip: If you find that Windows Automatic Repair is not working, this post – How To Fix “Windows Automatic Repair Not Working” can help you fix this issue.
Method 8: Perform System Restore in WinRE
If the previous methods don’t work, you should perform a system restore via WinRE. Here is how to do that:
Tip: Only if you have created a restore point in advance, you can try this method.
Step 1: Enter WinRE.
Step 2: You should click Troubleshoot in Choose an option, and then choose Advanced options.
Step 3: Choose System Restore in Advanced options.
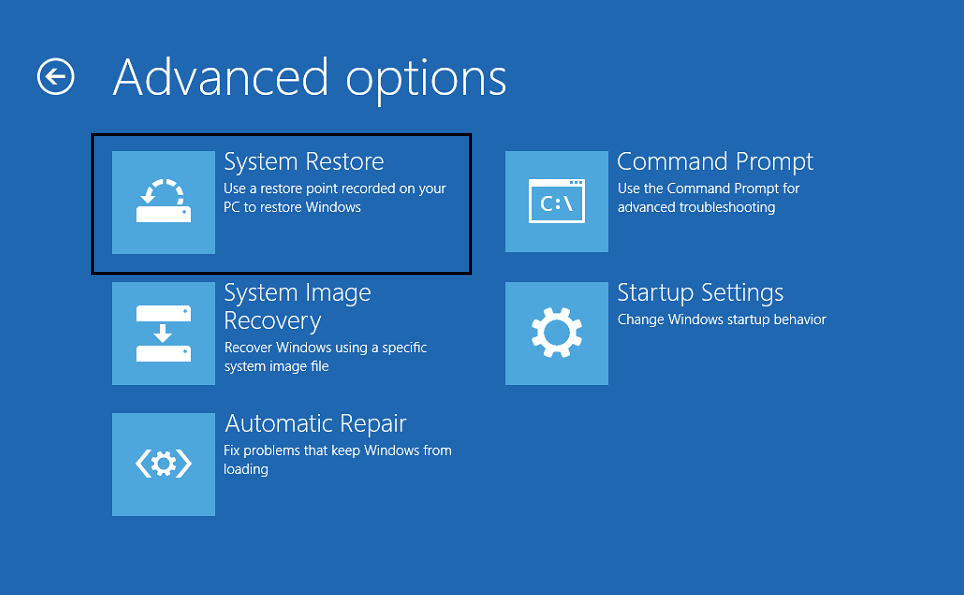
Step 4: Follow the on-screen instructions to complete the restore.
Now, try to run Windows update and the issue should be fixed.
More useful solutions you can find by watching this video:
My Windows update was stuck at 100 and I didn’t know how to fix it. Thanks to this post, it helped me solve the issue. I’d like to share it with more friends.Click to Tweet
What to Do After Solving Windows Update Stuck at 100?
After solving the problem of Windows update stuck at 100%, you had better create a system image to restore your system when it crashes.
Referring to create a system image, it is highly recommended you to use MiniTool ShadowMaker – a piece of fantastic and professional backup software. It is pretty easy and safe to back up and restore your system.
In addition to backing up your operating system, you can also use MiniTool ShadowMaker to back up files and folders, disks and partitions. What’s better, you can use it for free within 30 days, so just download it and have a try.
MiniTool ShadowMaker TrialClick to Download100%Clean & Safe
Here are the instructions to create a system image with MiniTool ShadowMaker:
Step 1: Launch MiniTool ShadowMaker, then click Keep Trial.
Step 2: MiniTool ShadowMaker selects the source by default. Thus, you just need to choose the backup destination.
Step 3: Go to the Backup page. Click Back Up Now to start creating a system image.
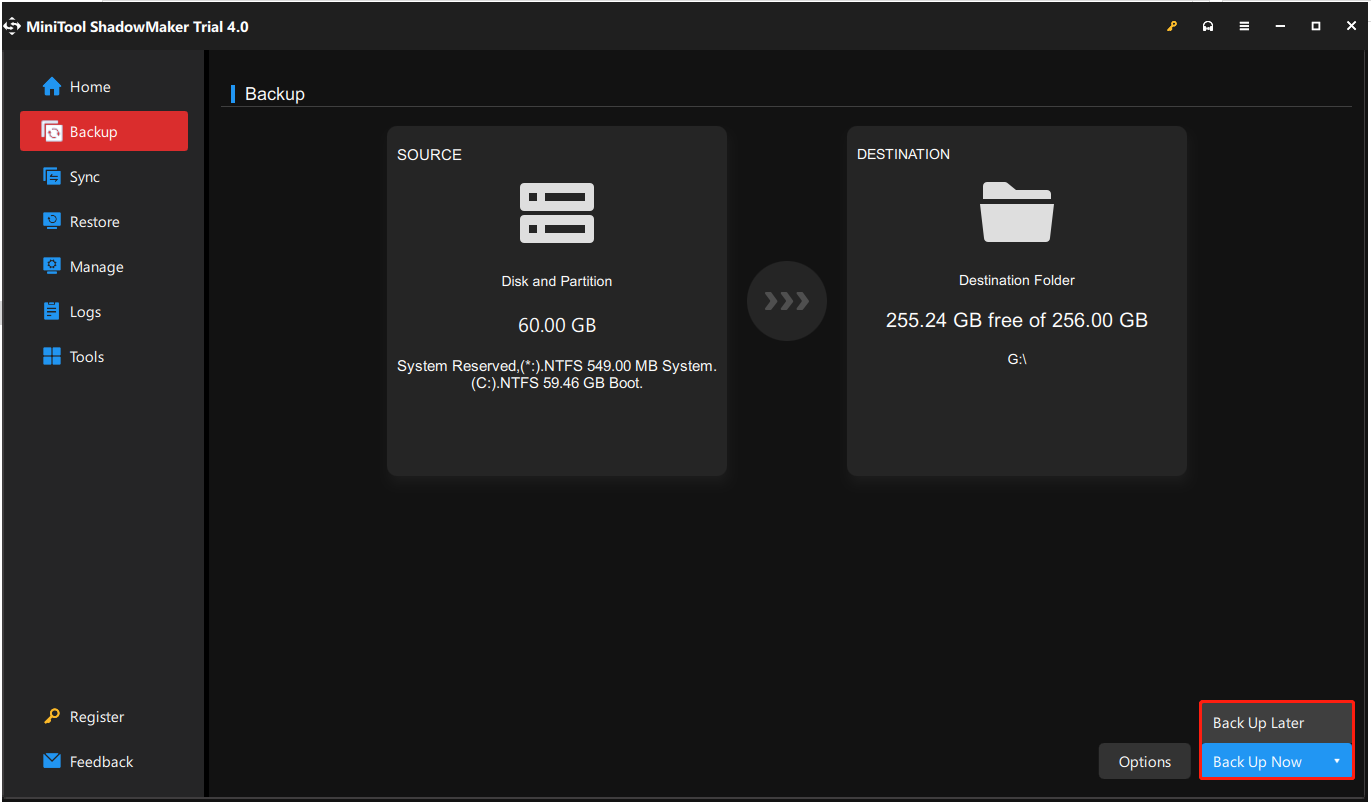
Tip: If you click Back Up Later, then you can click Back up Now to begin the backup task on the Manage page.
Step 4: Wait for MiniTool ShadowMaker to finish backing up the operating system.
In order to keep my system safe, I make a backup of it successfully with MiniTool ShadowMaker. It helps me a lot!Click to Tweet
Final Words
To sum up, this post has introduced what causes the error of Windows update stuck at 100 and shown 8 solutions to fix it. If you come across the same issue, try these solutions. If you have any better solution to fix the issue, you can share it in the comment zone.
After fixing this problem, it is recommended you create a system image. If you have any problem when using MiniTool program, please feel free to contact us via the email [email protected] and we will reply to you as soon as possible.
Windows Updates Stuck at 100 FAQ
How long should Windows update take?
In general, the update should be between 10 and 30 minutes on a computer. However, if you install your Windows on a conventional hard drive, the process will take a while. You can schedule the installation within the next five days, but you cannot delay it indefinitely.
Can I stop a Windows update in progress?
- Search for Control Panel in the Windows 10 Search box and select the relevant result.
- Select Security and Maintainance from the list of menu options.
- Click Maintenance, select Stop Maintenance.
What happens if I shut down during the Windows update?
Your PC will be seriously damaged if you shut down in the middle of the update installation. If the PC shuts down because of power failure, you need to wait for some time and then restart the computer to install the updates one more time. Your computer is likely to become bricked.
Can you fix a bricked computer?
Bricked devices cannot be powered on and function properly. Bricked devices cannot be fixed by conventional methods. For example, if Windows fails to start on your computer, your computer is not “bricked” because another operating system can be installed on it.