
-
Что это за ошибка?
-
Причины возникновения
-
Советы по исправлению
Ошибки синего экрана смерти (BSoD) являются самыми распространенными в ОС Windows. Не стала исключением и BSoD-ошибка BAD_POOL_HEADER Windows 10. Как исправить ее и из-за чего возникает, расскажу в этой статье.
Что это за ошибка?
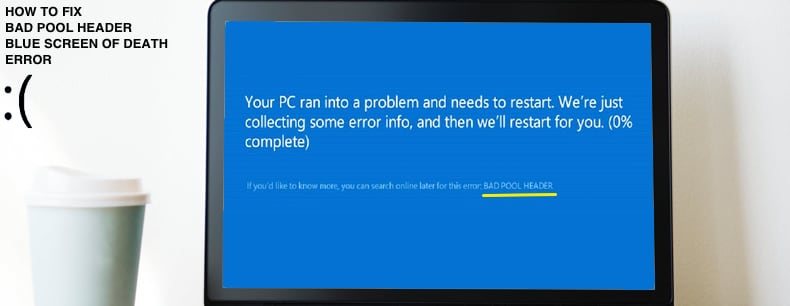
0x00000019 BAD_POOL_HEADER – BSoD-ошибка, недопустимый заголовок пула, которая проявляется из-за того, что ОС не выделяет нужный объем виртуальной или физической памяти для работы программного или аппаратного компонента. Она может проявится при обновлении системы или переустановке Windows.

Причины возникновения
Возникновению BAD_POOL_HEADER может служить как один из указанных компонентов, так и взаимодействие целого их ряда. Это может быть из-за:
- Нехватки места на жестком диске.
- Битых секторов и бэдов на винчестере.
- Повреждения или конфликта драйверов с оборудованием.
- Повреждения системных файлов и реестра Windows вирусным ПО.
- Блокировки процессов обновления антивирусным ПО.
- Ошибки или повреждения платы оперативной памяти.
Советы по исправлению
Важно! Предварительно отключите периферийные устройства от ПК (принтеры, сканеры, подключенные по USB смартфоны и т.д.)
Чтобы устранить неисправность, понадобится диск или флешка c установочными файлами Windows 10:
- Подключите флешку к ПК, поменяйте приоритет загрузки в BIOS или в boot режиме выполните загрузку с флешки.
- В окне “Установить” нажмите в левом нижнем углу “Восстановление системы”. Следуя инструкции, включите безопасный режим и войдите в него.
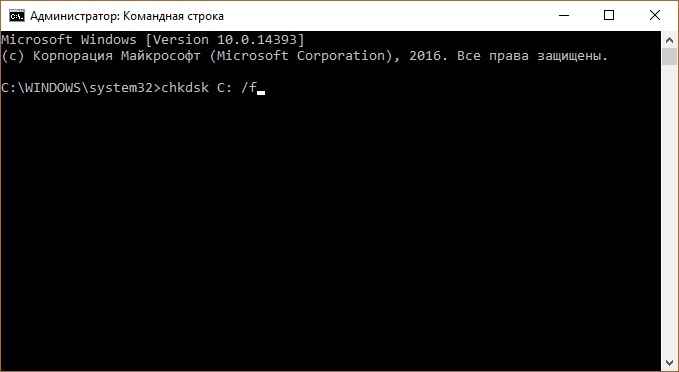
- Нажмите правой кнопкой мыши по Пуск и войдите в “командная строка (Администратор)”. Выполните команду проверки и устранения ошибок Windows
chkdsk C: /f
C: – это диск с ОС. Если у вас Windows 10 на другом диске, вместо C: укажите свой.

- После проверки и исправления ошибок перезапустите систему. Отключите безопасный режим и проверьте работу системы.
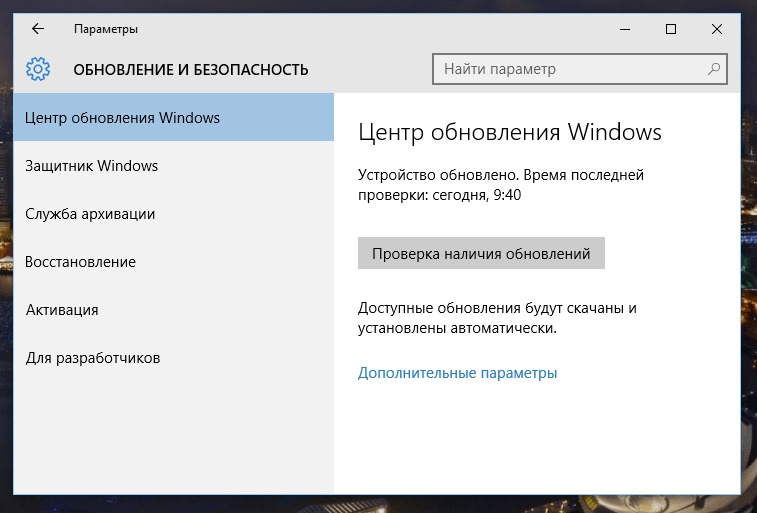
- Также, проверьте наличие последних обновлений и установите их.

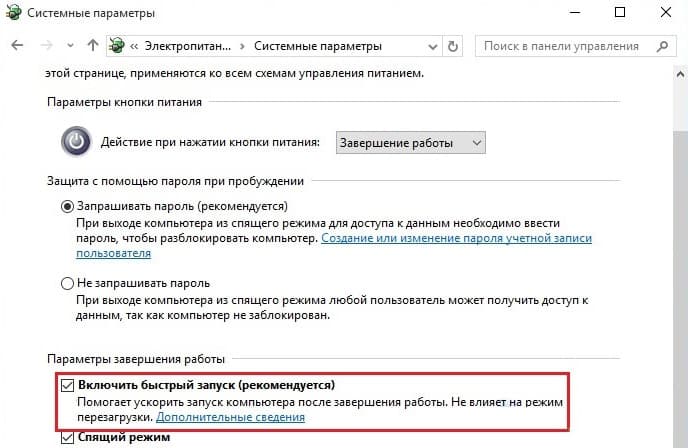
- Зайдите в “Управление электропитанием” → “Действие кнопок питания” → “Изменение параметров, которые сейчас не доступны” → снимите галку с “Включить быстрый запуск”. Перезагрузите ПК.

- Просканируйте систему на вирусы с помощью бесплатных утилит Dr.Web CureIt! или Kaspersky Virus Removal Tool. Удалите последние установленные программы, переустановите драйвера.
- Если ошибка не устранена, возможно дело в аппаратной части. Проверьте оперативную память программой memtest86 и жесткий диск на бэды, ошибки и битые сектора.
Остались вопросы после прочтения статьи? Задавайте их в комментариях или используйте специальную форму.
Популярное за неделю
Как установить гаджеты для Windows 10
Операционная система Windows 7 очень полюбилась пользователям. Она совмещала в себе новые элементы дизайна и малые требования к ресурсам компьютера. С приходом Windows 8, а…
Не работает мышка от компьютера: основные проблемы и их решения
Мышка в компьютере — замечательное и почти что гениальное устройство, которое инженеры изобрели еще на самой заре зарождения автоматических вычислительных машин — почти в…
Как восстановить доступ к удаленному аккаунту на Yandex.ru: пошаговая инструкция
Существуют жизненные обстоятельства, из-за которых люди удаляют аккаунты в социальных сетях и почтовых серверах.
Но со временем возникает потребность в восстановлении личных кабинетов: часть друзей, знакомых…
Table of contents
- What Does ‘Bad Pool Header’ Mean?
- Why Does the Bad Pool Header Error Come Up?
- How to Fix Bad Pool Header in Windows 10?
- Fix 1: Unplug your external devices
- Fix 2: Undo recent changes
- Fix 3: Temporarily disable your third-party antivirus
- Fix 4: Make Use of the Windows Update
- Fix 5: Update your drivers
- Fix 6: Check your hard disk drive
- Fix 7: Diagnose your RAM
- Fix 8: Disable indexing service or Windows search
- Fix 9: Perform a clean Windows boot
- Fix 10: Clean Windows registry
- Fix 11: Use system restore
- Fix 12: Run a complete system checkup
- Fix 13: Reset your PC
- Conclusion
- FAQ
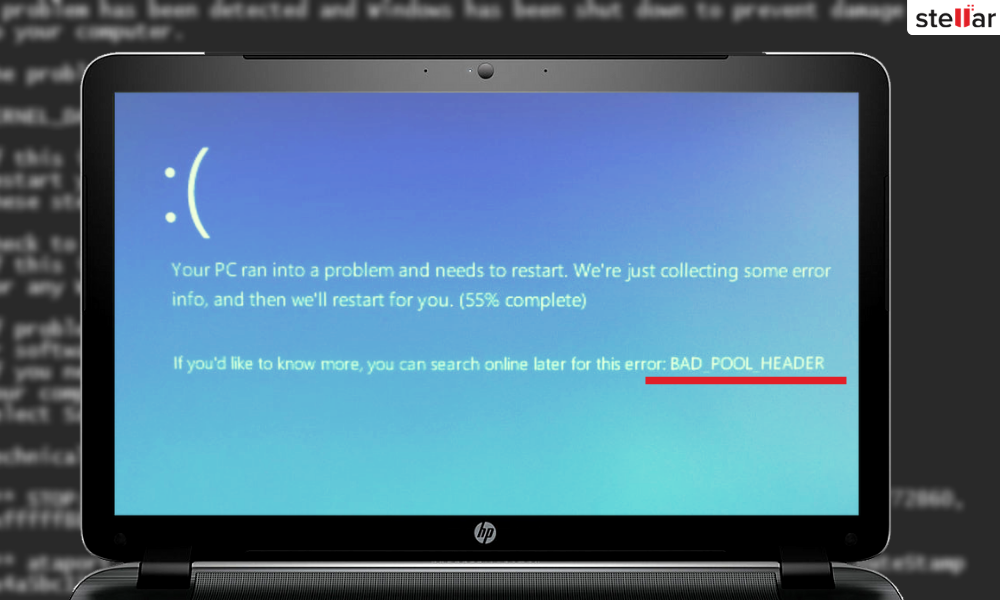
The bad pool header error (the “0x00000019” code) is one of those scary blue screen of death (BSOD) issues that can give you the creeps and force you to think that your computer is all but at death’s door.
The good news is it isn’t, as the problem is proven fixable. We’ll show you how to fix it in this guide.
Let’s make the ‘BAD_POOL_HEADER’ error a bit more meaningful by analyzing its anatomy. ‘POOL’ is the memory pool your OS uses to allocate memory. The ‘HEADER’ part ensures that the Windows API (application programming interface) is properly addressed. As such, the ‘BAD_POOL_HEADER’ error message signifies your PC is having memory management issues.
The issue in question appears when the memory pool becomes corrupt. The most common reasons for this adversity are driver issues, disk-related problems, RAM malfunction, software conflicts, and hardware failure. The next section will discuss fixing the bad pool header blue screen error.
Also Read: How to Run Hard Drive Diagnostics on Windows PC?
The issue in question is hugely annoying: it makes your system crash, causes you to lose your progress, and leads to permanent data loss, which, in fact, is a huge spanner in the works. To make a long story short, you should fix the stop code bad pool header to make your OS usable again. Here are the steps to do it:
Fix 1: Unplug your external devices
The first fix to be carried out implies disconnecting all your external pieces of hardware: any USB ports, flash drives, external hard drives, webcams, etc., should be removed. Then, check if the BSOD bad pool header has been resolved.
Fix 2: Undo recent changes
Now, it is time for you to take a few steps back. For example,
- Remove newly installed hardware and software.
- Revert recent system changes.
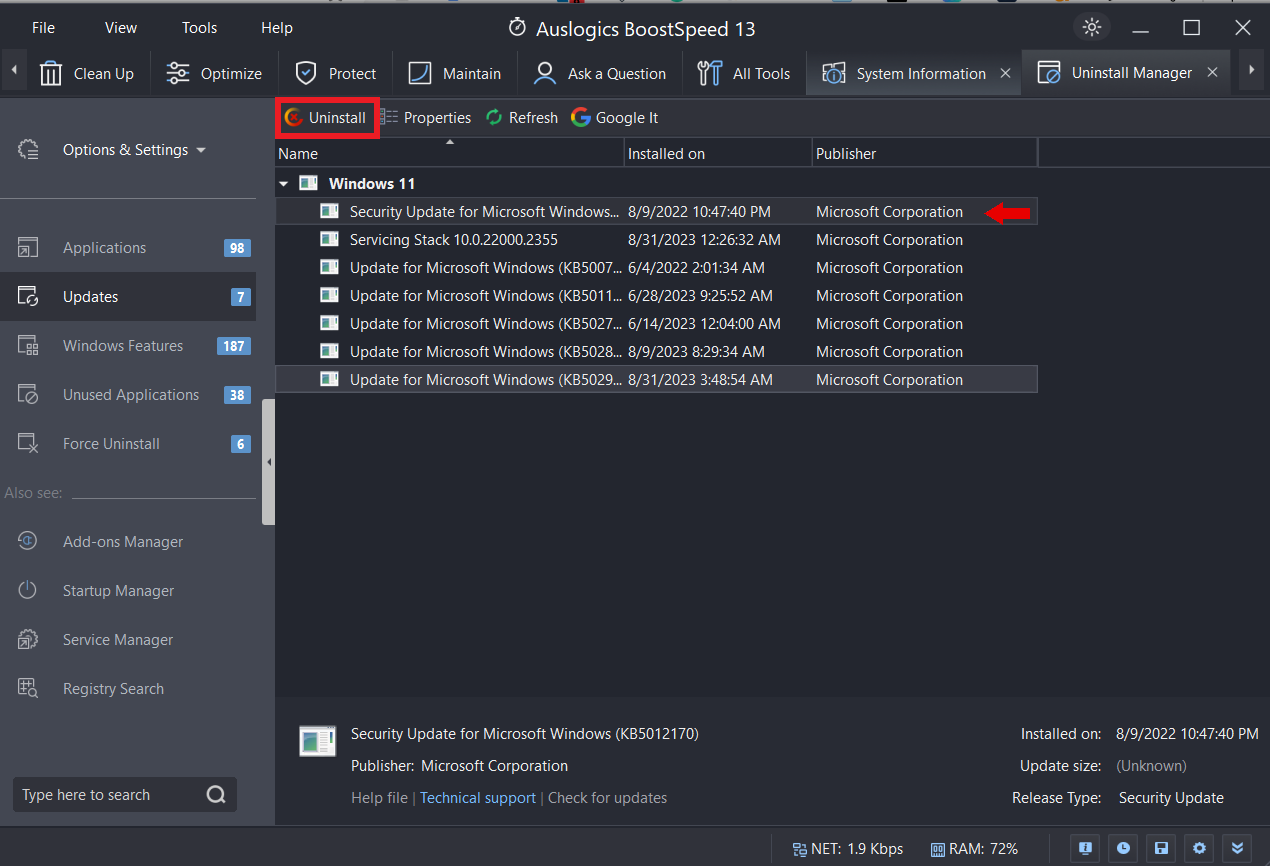
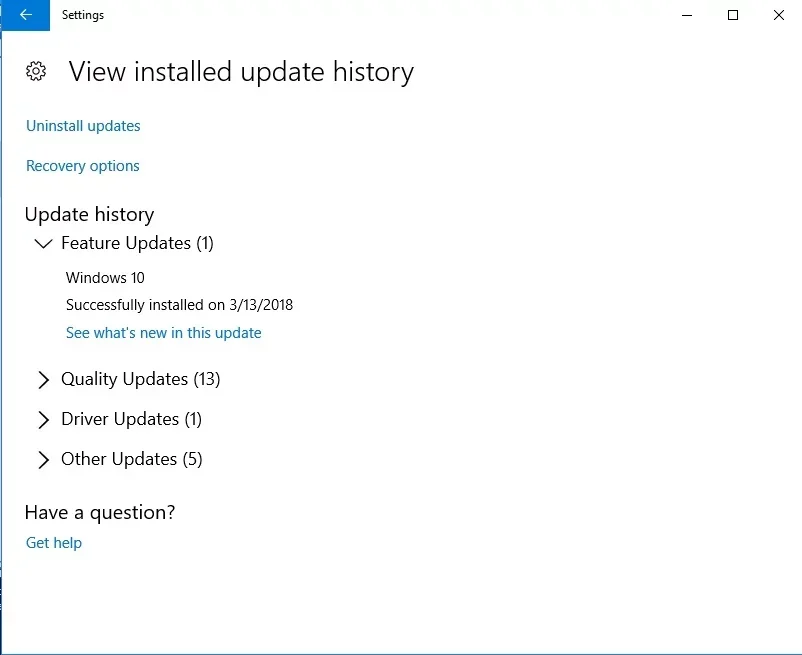
- Uninstall the latest updates.
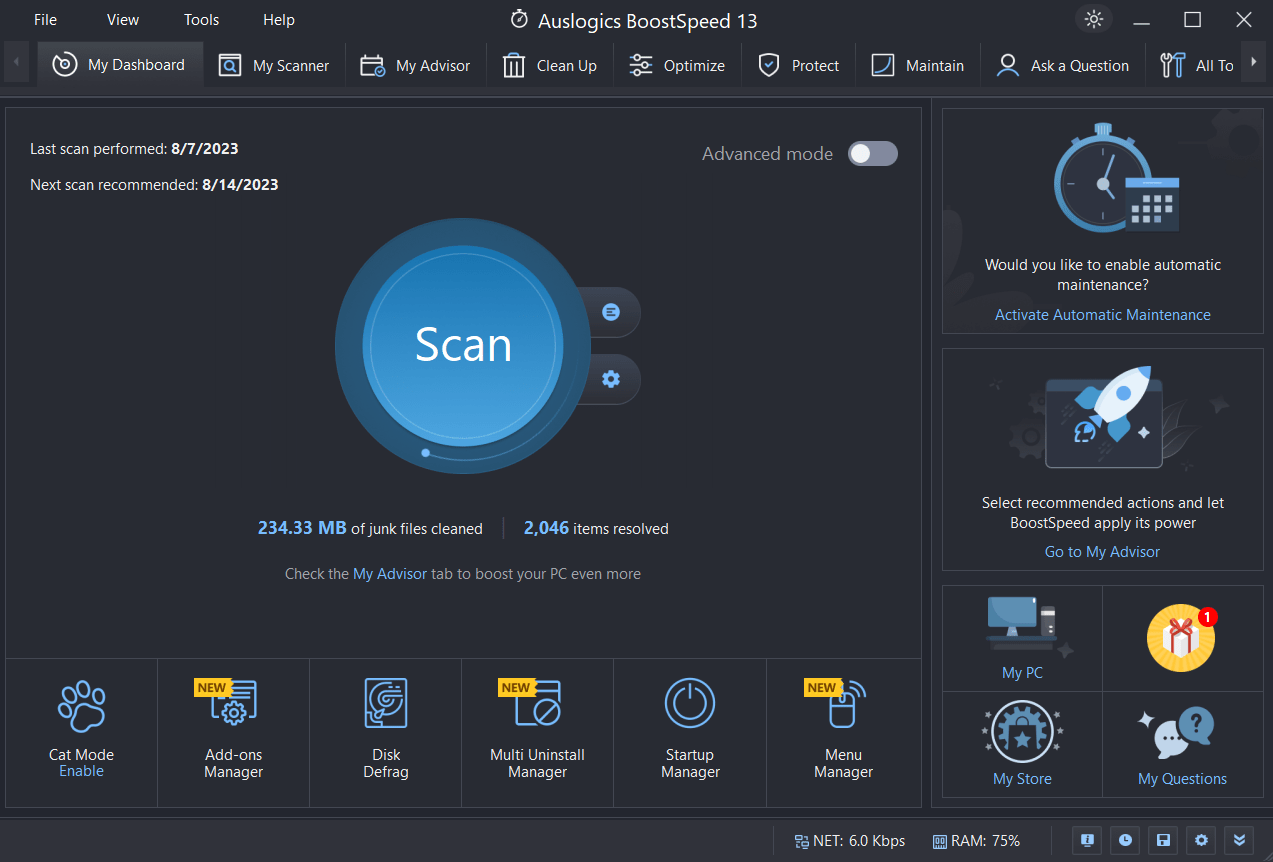
To summarize, you should undo any changes responsible for the current memory malfunction. You can use Auslogics BoostSpeed to uninstall any recent updates. It’s the easiest and fastest way to manage everything that happens on your computer.
Fix 3: Temporarily disable your third-party antivirus
The point is your non-Microsoft security solution might conflict with your Windows 10. Thus, feel free to disable it to check if it is the culprit.
Note
There is no need to worry about your Win 10 PC’s safety, as it has the built-in Windows Defender guard to keep malware at bay if you have no other antivirus software installed.
Related:[EXPLAINED] Does Windows 10 Need Antivirus?
Fix 4: Make Use of the Windows Update
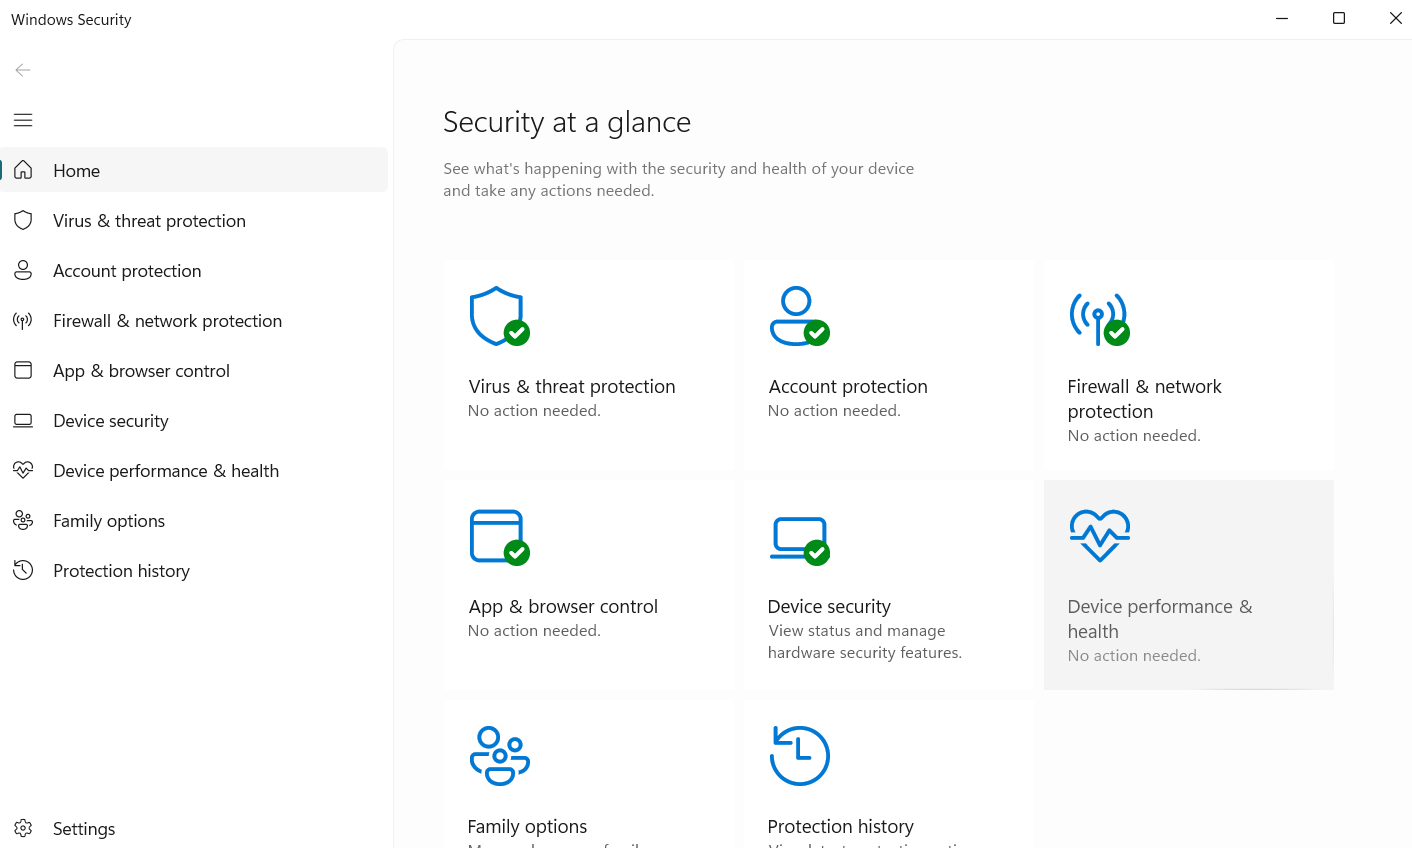
If the ‘BAD_POOL_HEADER’ error persists, you should check your Windows Update for any new updates. Just click on Start, then on Settings. After, click on Update & Security and Windows Update.
Finally, click Update Status to check for new updates.
If there’s any update, click on it and restart your computer after the updates are completed. Check to to see if the error is resolved. If not, follow the next step.
Related:Ultimate Guide: How to Manually Check and Install Windows Updates
Fix 5: Update your drivers
Outdated drivers are certainly not an issue to turn a blind eye to. They make your operating system turbulent and bring about various problems, such as the BSOD bad pool header.
Here are 3 easy ways to update your drivers in Windows 10:
Use Device Manager
Your OS is quite a resourceful thing. For instance, it has an embedded Device Manager tool, which can fix your driver issues automatically. Just follow the instructions below to let it do its job:
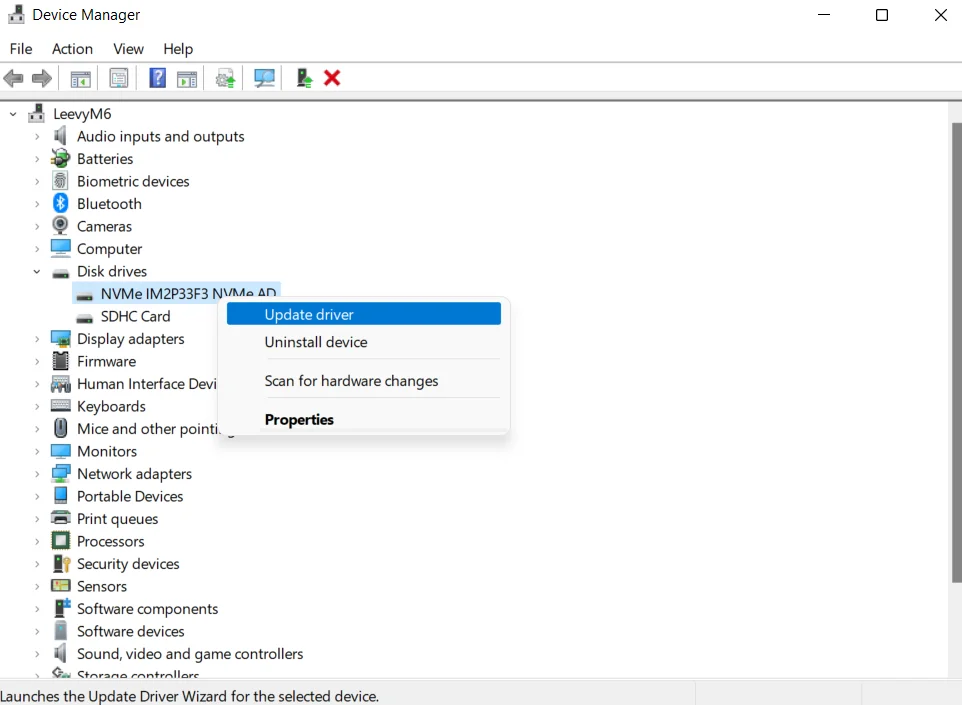
- Press the
Windows logo + Xand click Device Manager. - Select the device whose driver is out of date and right-click on it. Then, select the Update driver option.
- Next, click Search for drivers automatically to update the drivers.
You can constantly update the drivers manually by checking the manufacturer’s site for the latest driver software for your device models and installing it on your PC.
Use Auslogics Driver Updater
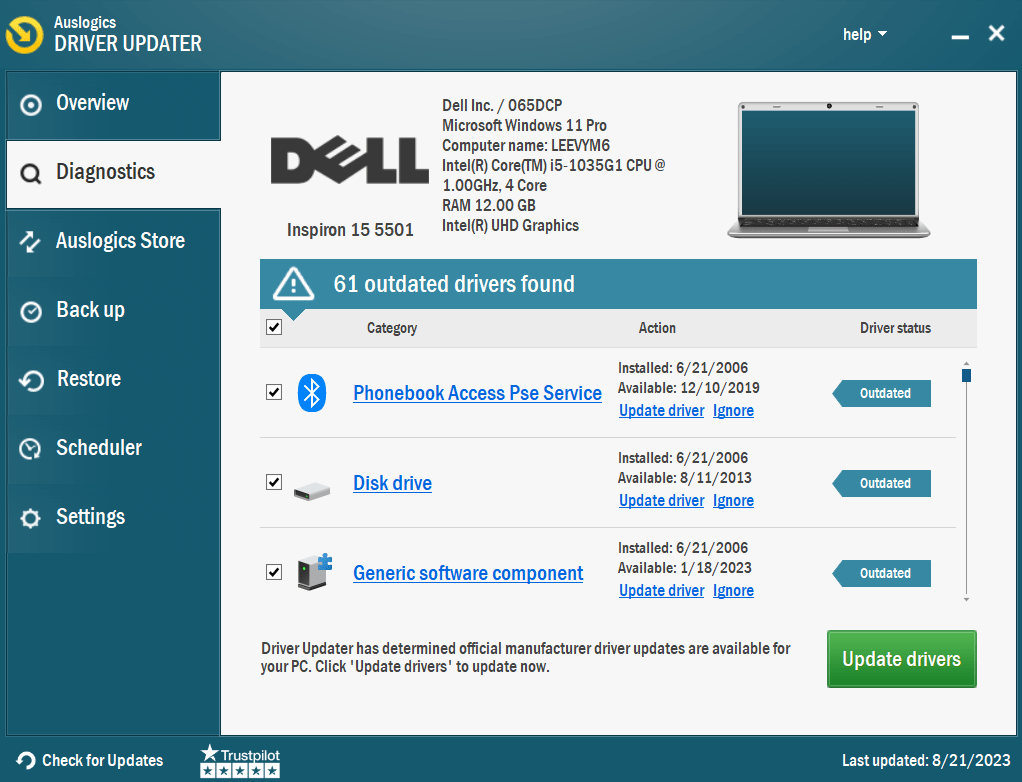
If you do not have time to update your drivers one by one, you can update all of them at once by using Auslogics Driver Updater.
The program checks your computer for any outdated or missing drivers and automatically updates them using the drivers’ manufacturer’s recommended updates.
Auslogics Driver Updater also allows you to back up your data before installing new drivers.
This allows you to revert the changes if you don’t like the updates or if the new updates conflict with other programs on the PC.
Related: Auslogics Driver Updater: New Drivers in One Click!
Fix 6: Check your hard disk drive
If the fixes above to resolve the bad pool header blue screen haven’t worked, thoroughly examine your hard disk. It may be the culprit. Here’s how to check your
hard disk drive:
- Press the
Windows Key + Sand typecmd. Then, right-click on it and click on Run as administrator.
- Type
chkdsk.exe /f /rand pressEnter. Then, typeY.
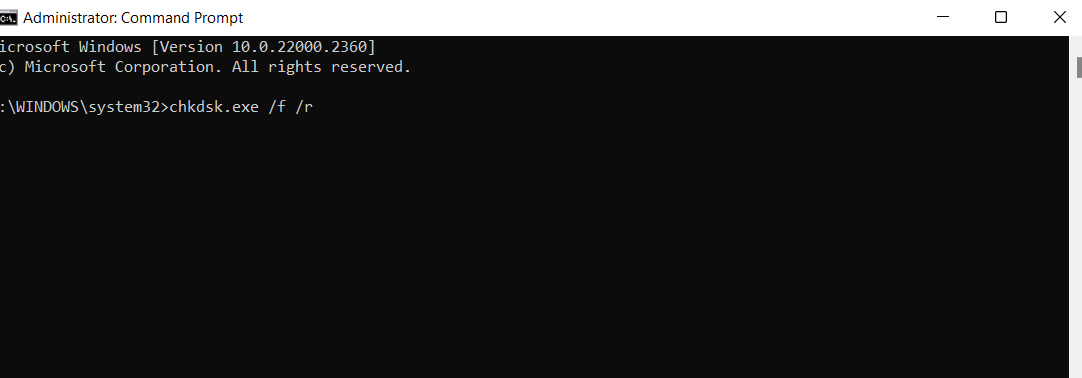
- The program will scan your computer for any errors and repair them, if any.
- Save your work, close your apps, and restart your PC. Then, check if the ‘BAD_POOL_HEADER’ error on Windows 10 has been resolved .
Fix this issue quickly
You can try using a safe and totally free tool developed by the Auslogics team of experts.
A few simple steps to troubleshoot the issue:
Download the tiny Auslogics TroubleShooter tool.
Run the application (no installation is needed).
The app will check for the issue mentioned in the article. When the scan is done, check that this is the issue you were looking to solve and click ‘Apply now’ to apply the recommended fix.
You can use the app to troubleshoot other malfunctions for free by simply typing in a brief description of the issue your PC is experiencing. Or you can scan your PC for performance issues using the My Scanner tab.
Fix 7: Diagnose your RAM
The stop code bad pool header error might mean your Random Access Memory (RAM) is playing up. Follow the below instructions to check if your RAM has any issues:
- Press the
Windows key + Rto open the Run dialog box. - Type
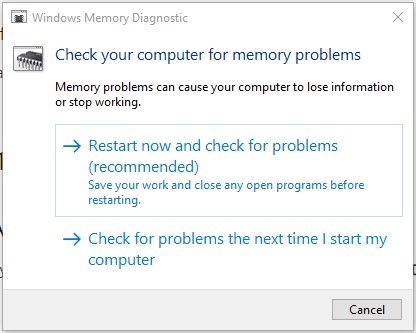
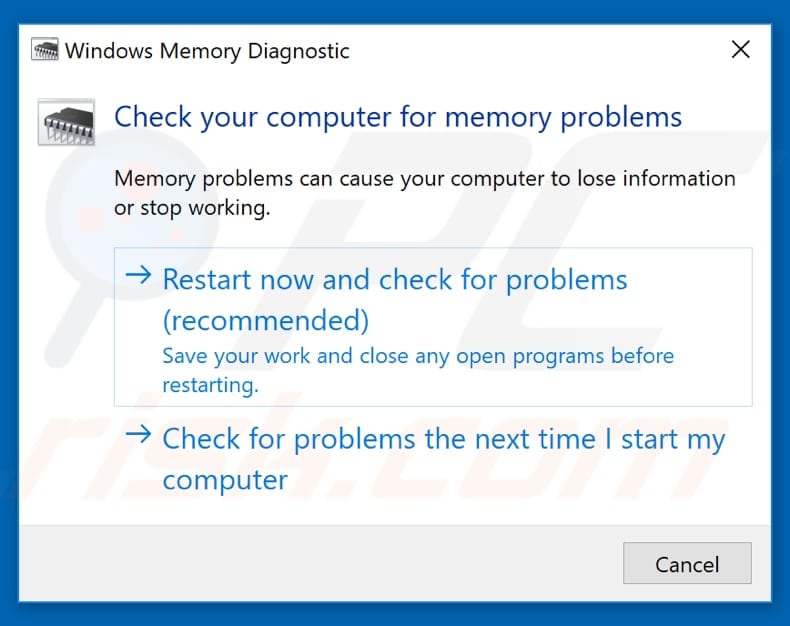
mdsched.exeand pressEnter. - Click on Restart now and check for problems (recommended).
- The program will test the RAM for any issues. During this time, you won’t be able to use the PC. After the test and restarting your computer, right-click the Start button and select Event Viewer.
- Double-click on Windows Logs, then System, and Find.
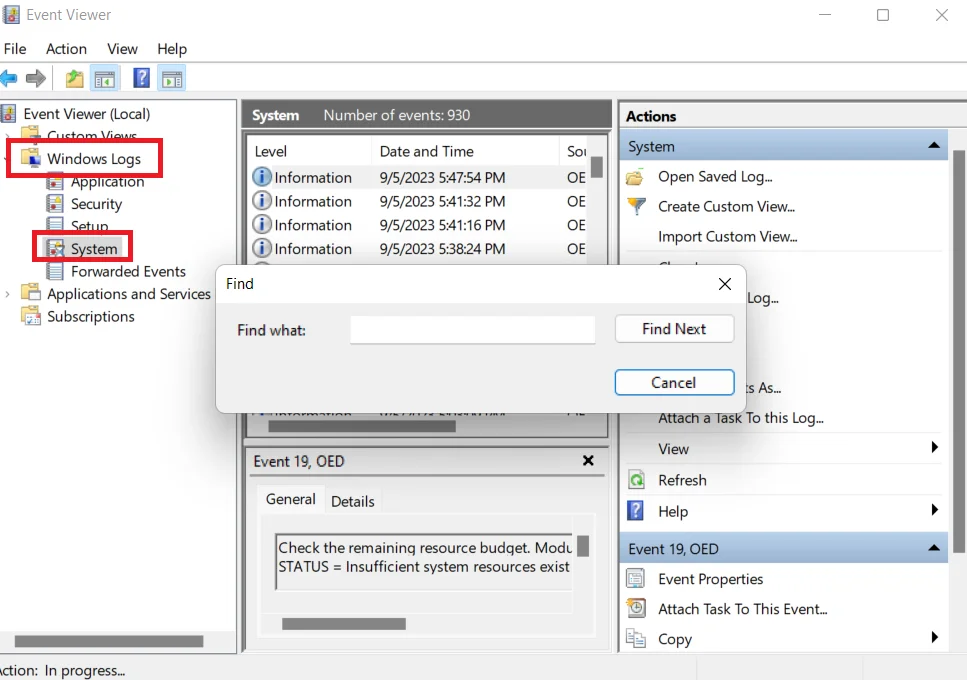
- Type
MemoryDiagnosticinto the Find box. Then click on Find Next. You will be presented with the memory diagnostics results.
Fix 8: Disable indexing service or Windows search
Try turning off the indexing service on your PC to fix the bad pool header blue screen problem. Take a few steps below to check if this method works:
- Type the
Windows key + Rto open the Run dialog box. - Type
services.mscinto the Run box. - Double-click on the Indexing service or Windows Search.
- Change its startup type to Disabled or Manual.
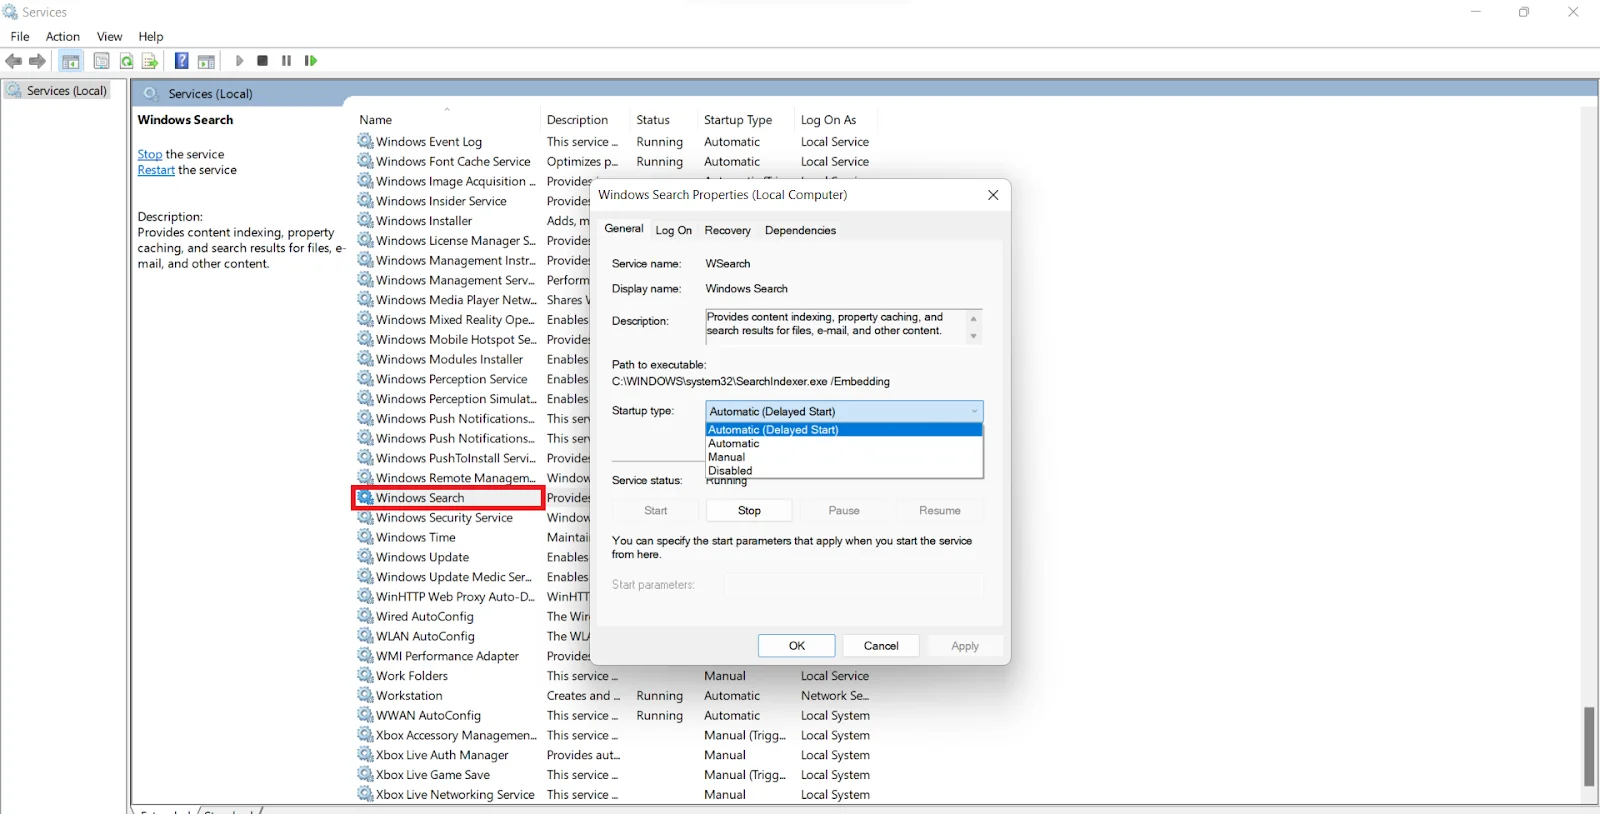
After, check to see if the bad pool header has been resolved.
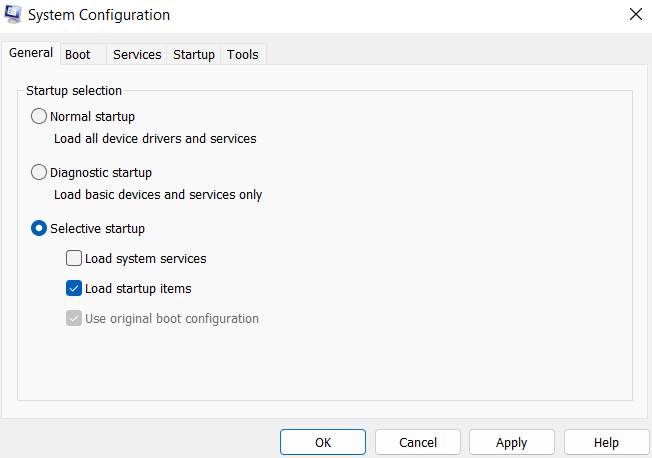
Fix 9: Perform a clean Windows boot
Clean booting your Windows 10 may help to repair your bad pool header. Here’s how to do it:
- Press the
Windows logo + S, and typemsconfiginto the Search box and then pressEnter. - Under General, check the Selective startup and Clear the Load startup items boxes.
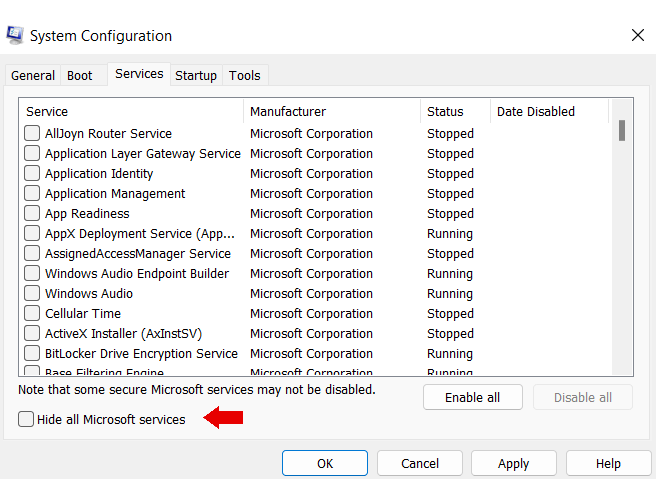
- Next, go to the Services tab and disable all the items in the Hide all Microsoft services box.
- Click OK to save your changes and restart your PC.
See if the BSOD bad pool header problem is present. If it isn’t, the issue in question was caused by one of the disabled programs or services. Enable them one at a time to locate the issue.
Fix 10: Clean Windows registry
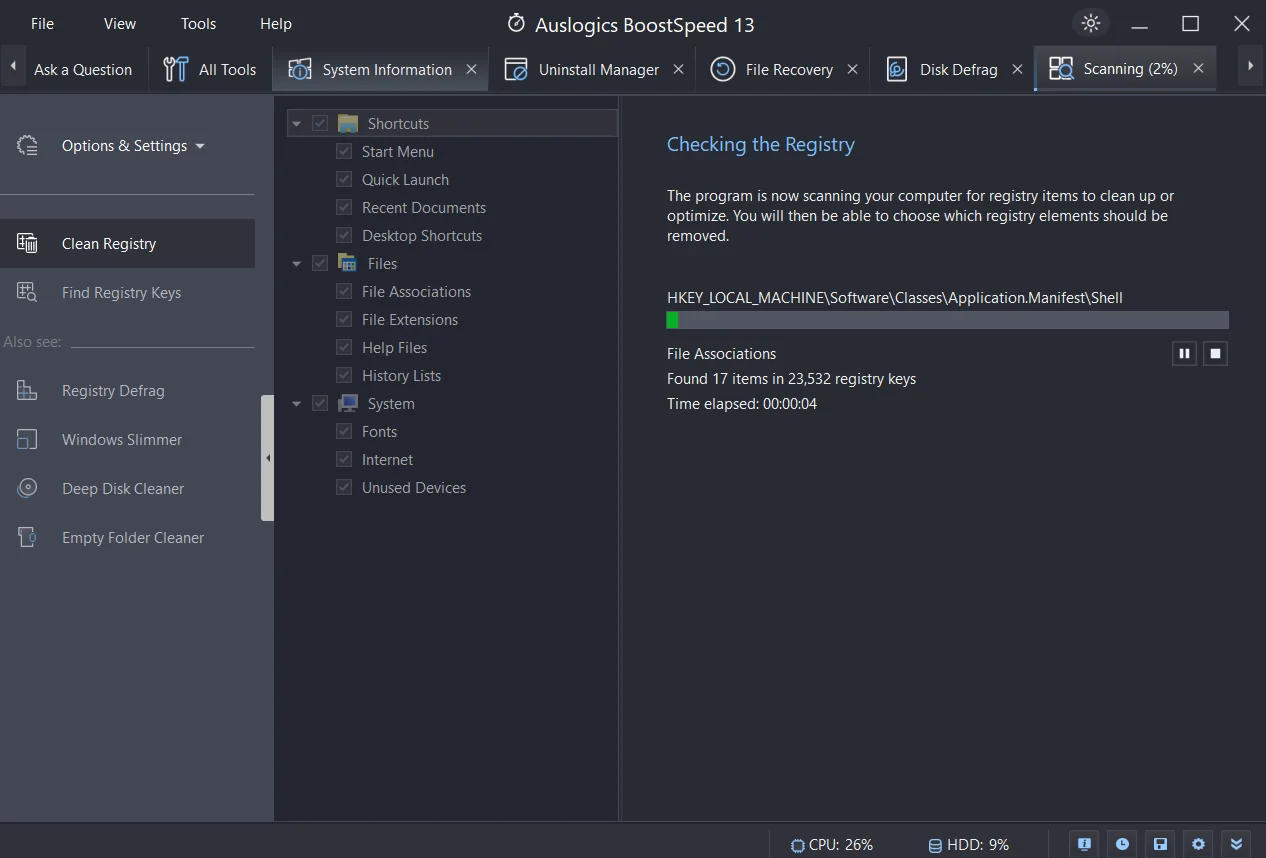
The bad pool header screen might signify that your registry is corrupt and needs fixing. Please remember that editing is a procedure to be carried out only by an advanced user.
The thing is, you may damage your system beyond repair.
We strongly advise you to use special software to modify your Windows Registry. To get it in tip-top shape, use Auslogics Registry Cleaner . This software ensures that your PC’s registry is clean and error-free.
This helps optimize your computer for better performance and improve your PC’s speed if the problem comes from the registry.
Related: Auslogics Registry Cleaner
Fix 11: Use system restore
If the System Restore feature is enabled on your PC, you can configure your system to an earlier state. This trick will get your Win 10 back to when there was no ‘BAD_POOL_HEADER’ to mess things up. Here is how you can use System Restore to your advantage:
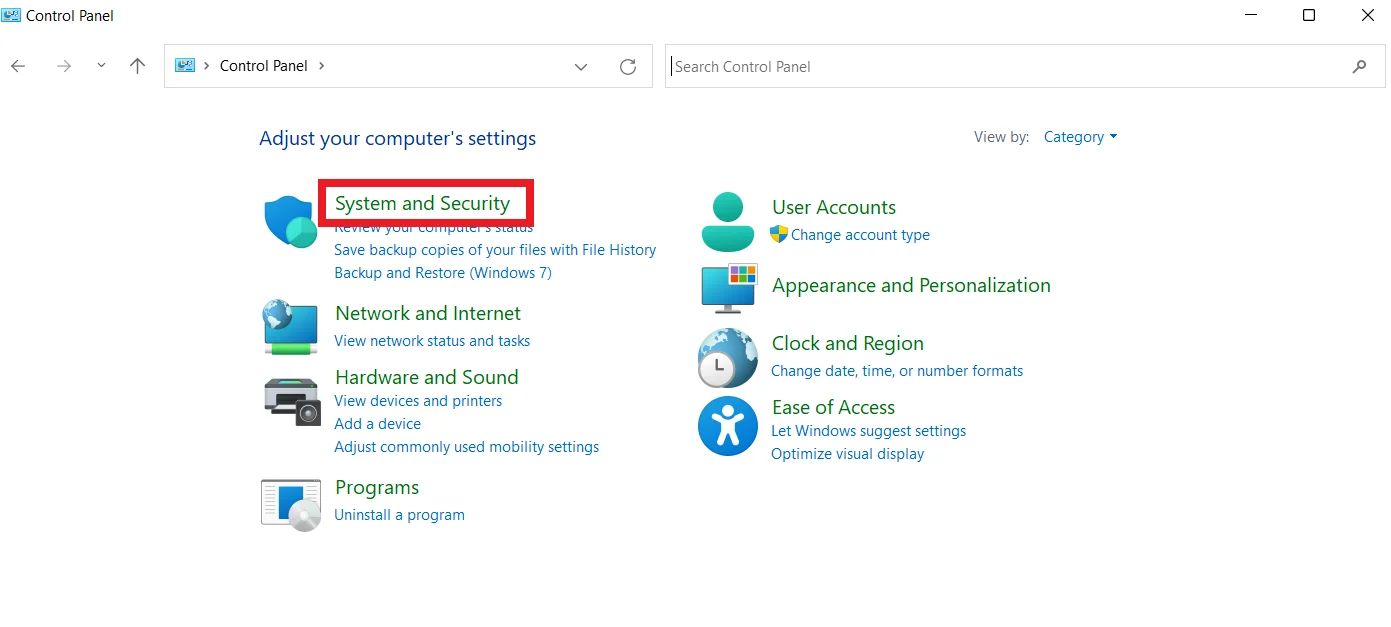
- Go to your Start menu and enter
Control Panel. Then, go to the System and Security section.
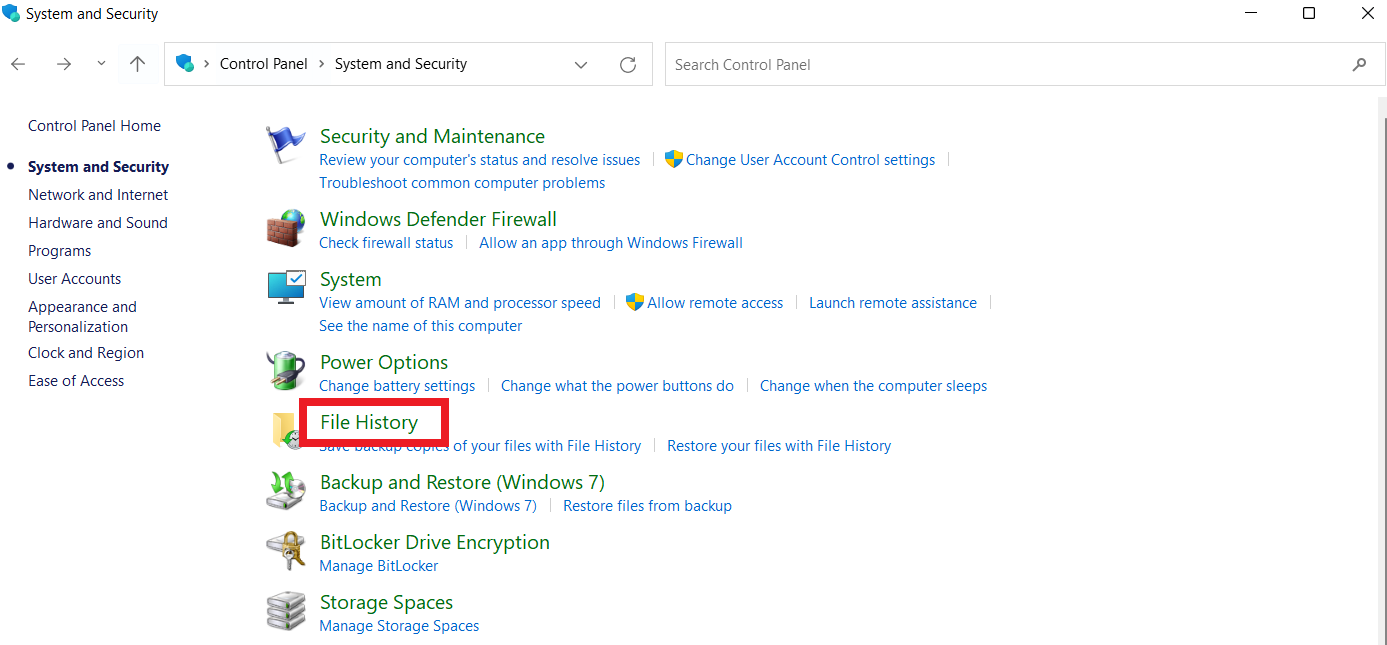
- Next, select File History, go to Recovery, and select Open System Restore. After, click Next.
- Select the restore point where you wish to roll your PC back, click Next, then Finish, and provide your confirmation.
Related: [FIXED] System Restore Not Working in Windows 10
Fix 12: Run a complete system checkup
If none of the fixes above has saved your day, you should scan your system for junk, corrupt, or missing system files, incorrect settings, and other issues that can affect its running – this kind of crusade may rid you of the persistent ‘BAD_POOL_HEADER’ error on Windows 10 .
Examining your computer thoroughly requires a lot of time and effort, so you have to learn patience. Or you can use an acknowledged tool to get the work done.
For example, Auslogics BoostSpeed will leave no stone unturned to examine every nook and cranny of your OS and improve its performance.
Related: Speed Up Slow Computer: Auslogics BoostSpeed 13
Fix 13: Reset your PC
Your operating system might need a fresh start to overcome the Bad Pool Header challenge. Here is how you can perform the necessary maneuver using the built-in reset options in Windows 10:
- Press the
Windows logo + Ito open the Settings window. Then go to Update & security. - Navigate to the Reset this PC option and click Get started.
- Choose to keep your files, remove everything, or restore factory settings.
Remember that the last two options imply wiping your files off your PC, which means you should back up your important data beforehand.
Fix this issue quickly
You can try using a safe and totally free tool developed by the Auslogics team of experts.
A few simple steps to troubleshoot the issue:
Download the tiny Auslogics TroubleShooter tool.
Run the application (no installation is needed).
The app will check for the issue mentioned in the article. When the scan is done, check that this is the issue you were looking to solve and click ‘Apply now’ to apply the recommended fix.
You can use the app to troubleshoot other malfunctions for free by simply typing in a brief description of the issue your PC is experiencing. Or you can scan your PC for performance issues using the My Scanner tab.
Conclusion
Windows 10’s bad pool header error is a frequent problem brought on by memory management issues.
It can be fixed by performing several steps, such as unplugging external devices, undoing recent changes, temporarily turning off third-party antivirus, etc.
These fixes can assist in fixing the BSOD bad pool header issue and restoring your computer’s functionality. You can review the guide and find the one that best fixes the problem.
FAQ
What is the Bad Pool Caller error?
A Windows Blue Screen of Death (BSOD) error is the “Bad Pool Caller” issue. It typically happens when there is a problem with the system’s memory allocation, frequently brought on by malfunctioning hardware or device drivers.
Where are BSOD logs stored?
The BSOD logs are stored in Windows’ “C:WindowsMinidump” folder. You can access these logs to analyze and resolve system crashes.
What causes the Bad Pool Header error in Windows 10?
Windows 10’s “Bad Pool Header” error usually occurs when there are issues with RAM, device drivers, or incompatible hardware.
It occurs when the OS experiences a memory pool header error.
The BAD_POOL_HEADER Stop Error in Windows 11/10/8/7 signified with the error code 0x00000019 indicates that the pool header is corrupted. A Bad Pool Header issue is caused due to problems with Windows memory allocation. This error usually occurs after you’ve installed new hardware or software – usually the antivirus software – that doesn’t work with your Windows computer. However, faulty drivers and routers, bad sectors or other disk write issues could also cause this Blue Screen.

Fix BAD_POOL_HEADER Blue Screen on Windows
If you are unable to start Windows in Normal mode, try booting in Safe Mode. That will help as you work through a resolution. You can try the procedures listed below to resolve this issue. Go through the entire list of suggestions first and then decide which one or more of these you would like to try out.
1] Uninstall recently installed software
If you recently installed any software, uninstall it and see if that makes the error go away. Most of the time, third-party antivirus applications are responsible for the error. In case you have installed antivirus software products on your system, you can try uninstalling them temporarily. If this resolves the problem, you can replace them with other applications. In the Control Panel window, click on “Programs and Features” to open the list of programs installed on the system and uninstall the antivirus program – or the recently installed software.
2] Uninstall recently installed hardware
If you recently installed any hardware, open Devices Manager, find the hardware driver, right-click on it and select Uninstall. Restart your computer and see.
3] Disconnect external devices
Another cause of the error might be external devices that are interfering with the system. To isolate this cause, disconnect all peripherals and external devices except for the keyboard and mouse and restart your machine. Check if it resolves the issue. If it works, one or more of the previously connected external hardware devices might be faulty and need to be replaced. If this does not resolve the issue, you can try the next steps.
4] Disable Fast Startup feature
Disable Fast Startup feature and see. It is enabled by default in Windows. At times, it can interfere with the system and cause pool header corruption.
5] Update Device Drivers
Faulty drivers may cause issues. Though Windows Update updates all drivers, they can be manually updated as well if the former step doesn’t work.
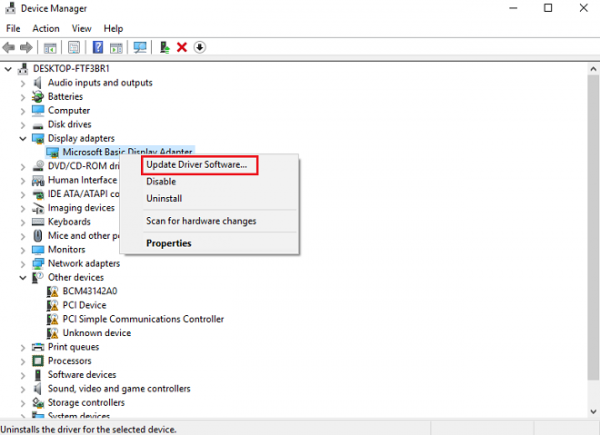
To update device drivers, press Win + R and open the Run window. Type devmgmt.msc to open the device manager. In the list of drivers, right-click on individual drivers and select “Update Driver Software” for each driver. Update all of them one by one.
You could also use Driver Verifier Manager to examine the behavior of bad drivers.
6] Perform a Clean Boot
Perform a Clean Boot and check if it resolves the problem. If you face no issues, it means that some non-Microsoft process is causing this stop error. You will have to manually try and identify the offender.
7] Perform Hardware Clean Boot
A Hardware Clean Boot is different from the usual Clean Boot State. The hardware components that are not necessary for a system to run are disabled in the Device Manager.
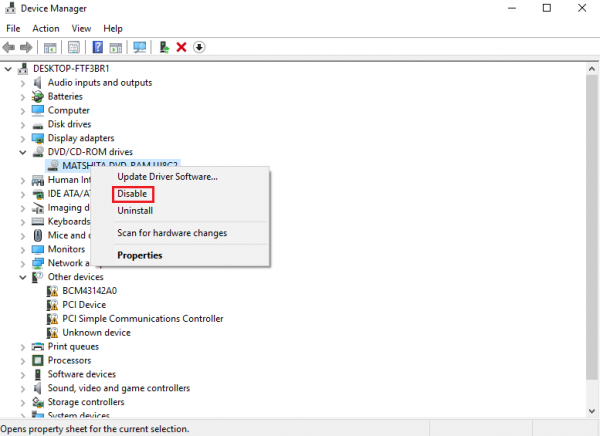
Press Win+R to open the Run window. Type devmgmt.msc and press Enter to open the Device Manager. You may disable the drivers for the following devices by right-clicking them and selecting the option to disable them.
- Display Adapters.
- DVD/CD-ROM drives.
- Sound, video and game controllers.
- Network Adapters.
- Modems
- Ports
- USB Devices and controller – provided you are NOT using USB/Wireless Mouse or Keyboard.
Restart the system and verify if this fixes the error. If it does, then it means that one of these devices is the cause. Again you will have to try and identify the device manually by trial and error method.
8] Run Windows Memory Diagnostics Tool
You could also run the built-in Windows Memory Diagnostics Tool. Open the tool and click Diagnose your computer’s memory problems.? Once the run is completed, you may open the Event Viewer and look for the results in the MemoryDiagnostics-Results entry.
9] Check your RAM
This is usually done by a hardware expert, but it has been reported that the issue could be with the RAM. Therefore, it should be verified.
Hope something helps!
If you are an advanced user, you may visit Microsoft for more on this stop error.
See this post if you receive a BAD_POOL_CALLER error.
BAD POOL HEADER with error code 0x00000019 is one of the many Blue Screen of Death (BSOD) or Stop Errors that occur when Windows experience a problem with memory allocation due to failing storage drive, corrupt device driver, bad sectors, and other hard drive issues. It may also occur due to RAM errors.
A Blue Screen of Death (BSOD) or Stop Error is a protection measure by the OS to safeguard the system from severe damage due to a hardware or software failure. It occurs without any prior warning signs. BAD POOL HEADER 0x00000019 is a BSOD error that occurs when Windows experience a hardware problem with your system hard drive that contains the Windows OS. This hardware problem can occur due to aging or damaged system components such as hard drive and RAM, corrupt device drivers, and missing system files.
And when it happens, it usually turns out fatal for the file you are working on – it could be a video project, some important document, or presentation, etc.
Sometimes the file gets corrupt while many times the file goes missing or the changes made are not available. It also leads to file system error and drive corruption.
Follow the steps mentioned in the video to get back files safely and avoid further damage to lost data:
Below are some common cause for BAD POOL HEADER error and their fixes.
1. Disconnect External Drives and Devices
After the crash, unplug all USB devices from the system except Mouse and Keyboard and then turn on the PC. Use it normally. If the problem was the external device, the system should stop displaying the BAD POOL HEADER BSOD error.
Connect USB devices – one at a time – to check which peripheral device is causing the error. Replace the damaged peripheral device immediately once you find it.
2. Check Drive SMART Data
Self-Monitoring Analysis and Reporting Technology (SMART) is a feature that comes with all modern hard drives and SSD storage drives. The SMART monitors a storage drive for critical parameters such as Reallocated Sector Count and Current Pending Sector Count that can lead to BAD POOL HEADER.
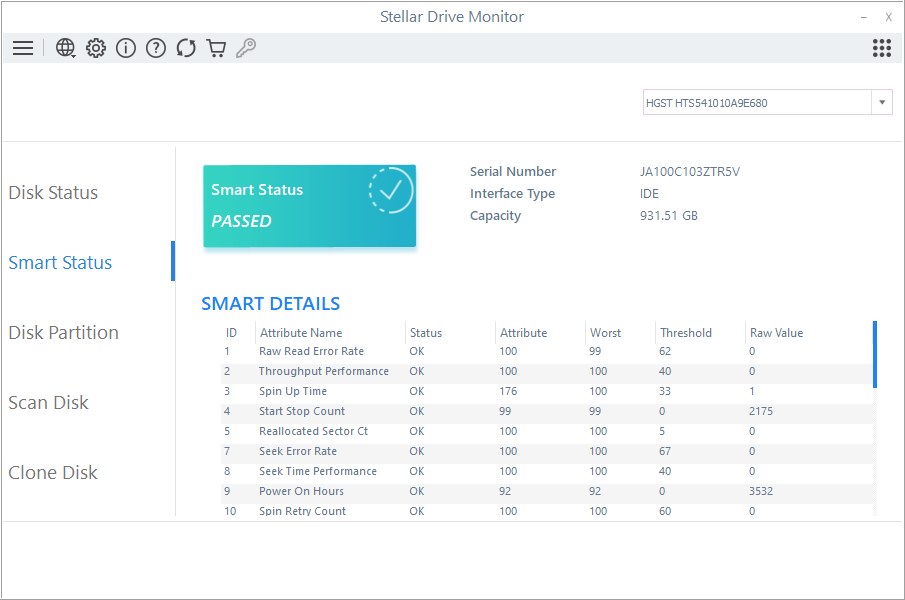
You can use utilities such as Drive Monitor or CrystalDiskInfo to check the SMART status of your hard drive. The utility displays the current drive condition based on the parameter attributes RAW value.
3. Scan Disk for Bad Sectors
Bad sectors are a common reason for the BAD POOL HEADER error. While checking the SMART status of the drive, check if there is any warning sign beside ‘Reallocated Sector Count’ attribute. If there is a warning sign, your drive needs replacement as it may fail anytime due to unavailability of spare sectors, which is used to reallocate the bad sectors.
In case there is no warning, you can still scan the drive for bad sectors to know the drive condition better visually. For this, you need to run Drive Monitor utility.
Follow these steps:
- Install and run Stellar Data Recover Professional software.
- Click ‘Monitor Drive’ and then click ‘Scan Disk.’
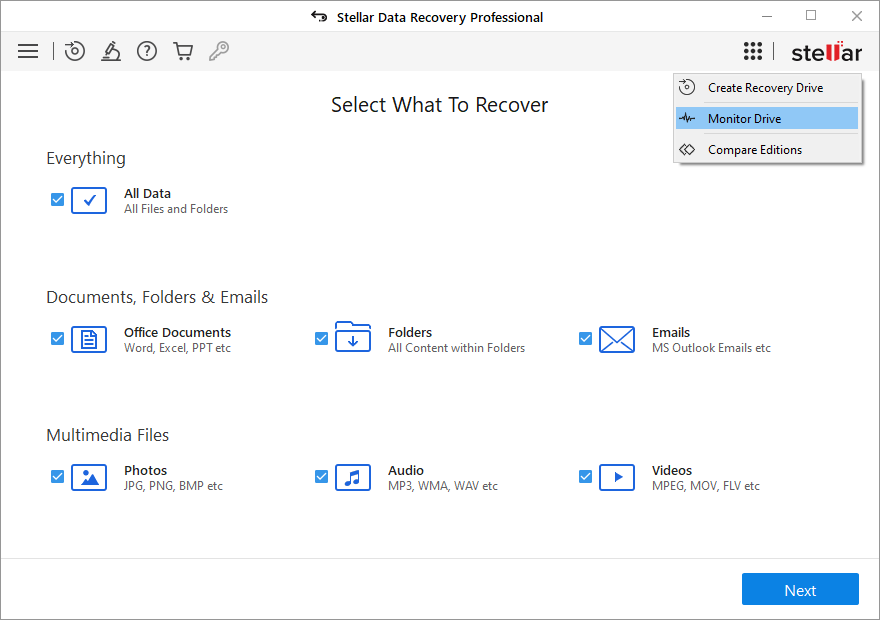
- Select the hard drive from the drop-down at the top right and click ‘Scan.’
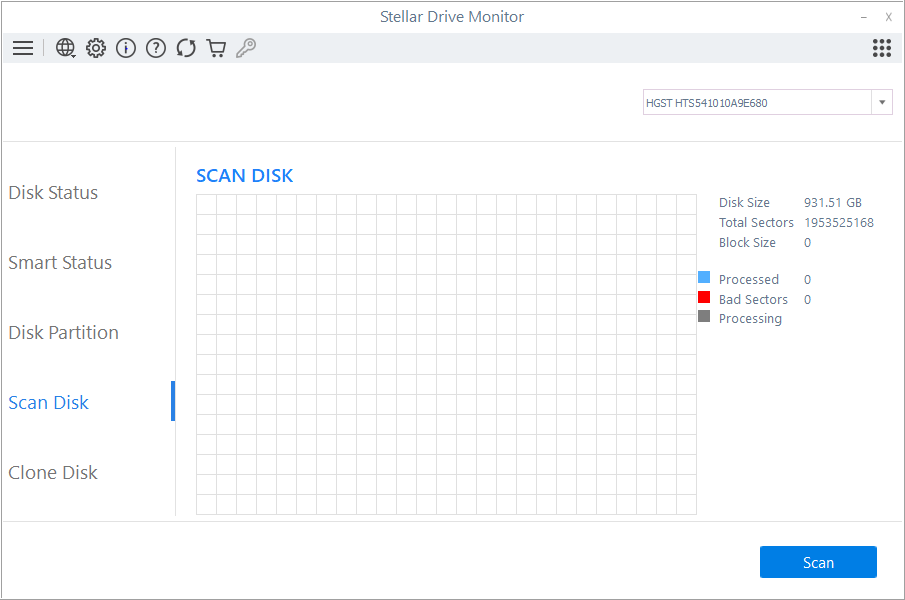
- After the scan, if you see too many red blocks, then you need to replace the hard drive to fix the error. The steps to safely replace the drive without losing data or your OS configuration are given in Step 8.
Alternatively, you can try a low-level format to reassess the bad sectors.
4. Test RAM
A faulty RAM could be the culprit behind BAD POOL HEADER 0x00000019 error. You can test RAM of your PC by using Windows RAM Diagnostic tool or a third party standalone RAM testing tool such as MemTest86.
To check RAM with Windows Memory Diagnostic Tool, follow these steps:
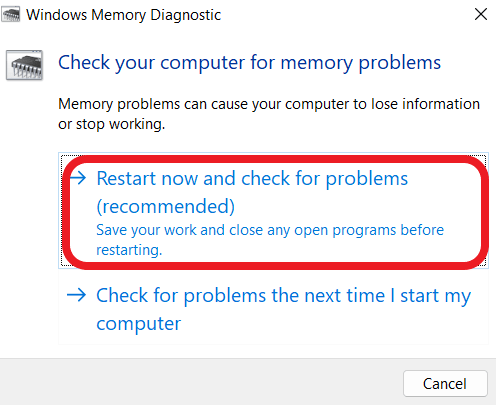
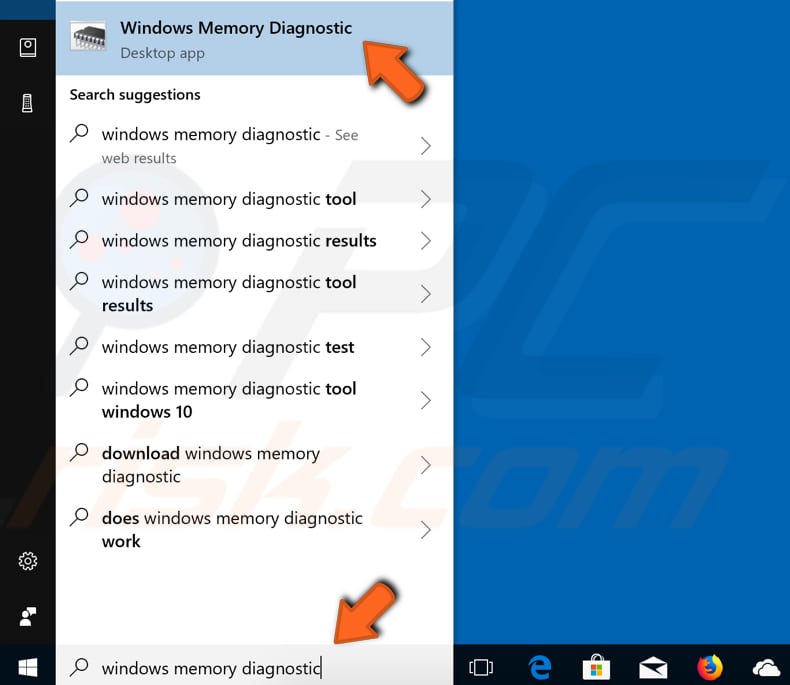
- Press Windows + S and type Memory Diagnostic.
- Click Windows Memory Diagnostic.
- Close all the program and then click ‘Restart now and check for problems (recommended)’.
To fix RAM errors, you can try swapping the RAM to different slot on your PC motherboard.
If no error is found, head to the next fix.
5. Check and Update Device Drivers
An outdated, corrupt, or damaged device drive can cause hardware errors. Drivers are a bridge between the hardware and the OS. If OS is not able to communicate with the hardware due to damaged drivers, it may crash to protect other vital components of the system.
Follow these steps to update or Reinstall the device driver:
- Turn on the system (preferably in Safe Mode) and open Device Manager.
- Right-click on Disk Drive and choose Uninstall Driver.
- Restart system and the drivers will be reinstalled from Windows updates.
- Alternatively, you can choose to update drivers manually. Just right-click on the drive in Device Manager and choose Update Drive.

- Choose the driver update or click “Search and install automatically.”
- You may also visit your hard drive manufacturer website to download the hard drive drivers and install them on your PC.
6. Check System File Integrity
Boot PC in Safe Mode and follow the steps given below to run a System File Checker (SFC) scan.
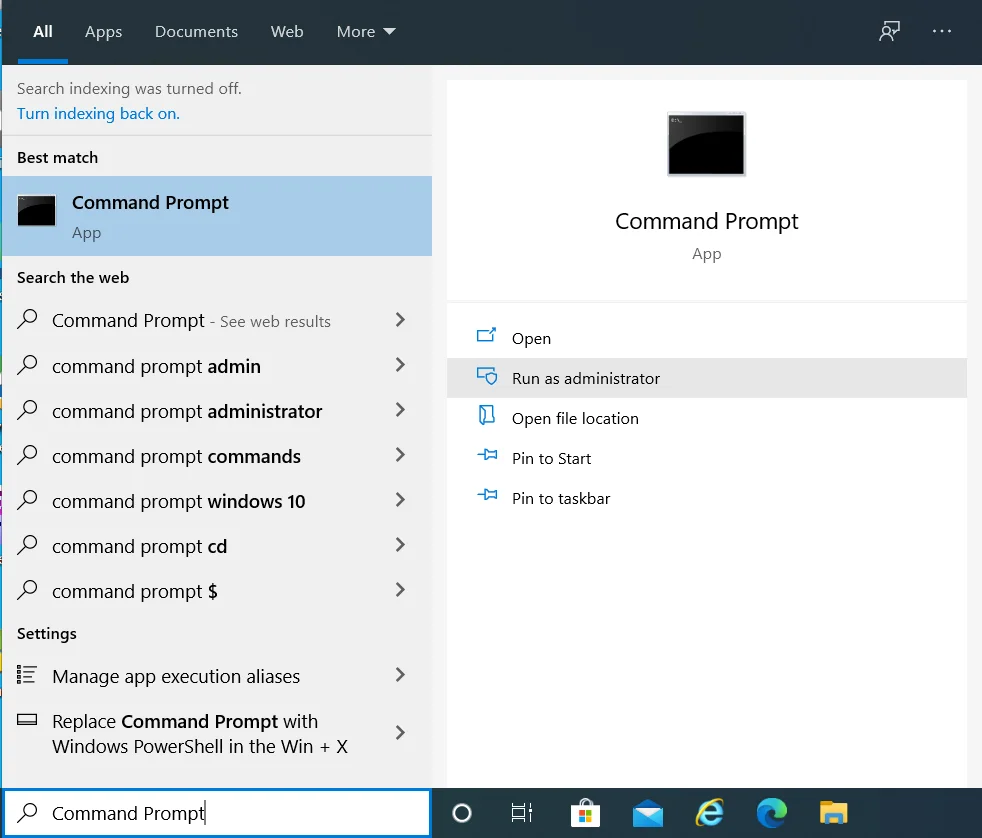
- Press Windows+S and type Command Prompt.
- Right click ‘Command Prompt‘ and choose ‘Run as administrator.’
- Now type SFC /scannow.
- Press Enter to begin the scan process.
The SFC scan will check system files for integrity, and if it finds a damaged (or missing) system file, it automatically replaces it with a new copy from the cache.
7. System Restore
System Restore can help you revert all recent changes made to your system that may have led to the BAD POOL HEADER crash error. To use System Restore option, follow these steps:
- Press Windows+S and type System Restore.
- Click System Restore and then click ‘System Restore’ button.
- Select the restore point from the given list and click ‘Next.’
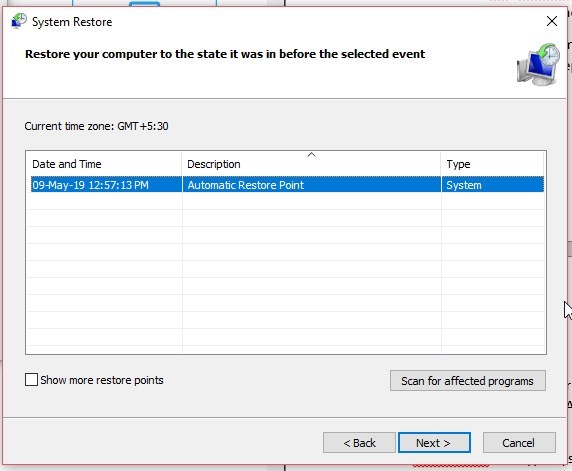
- Follow the System Restore wizard atom restore your PC to a previous stable state.
Any program, including malicious programs that you may have installed unintentionally, will be removed from the system after the system restore.
8. Replace Hardware
If nothing helps, go for drive replacement. Changing drive should ideally fix the BAD POOL HEADER stop error. Buy a new hard drive or SSD and clone the existing drive so that the data remains intact. Also, you won’t have to install Windows since disk cloning creates a mirror copy of your hard drive with all partitions.
To clone a drive, connect a new drive to your PC:
- Run Stellar Data recovery Premium and click ‘Monitor Drive.’
- Select disks in Source and Target section.
- Click Clone Disk and accept the warning to begin the cloning process.
- Once cloning is done, turn off PC and replace the older hard drive with the new cloned hard drive or SSD storage.
Turn on the system and use normally, without worrying about the BAD POOL HEADER error.
Conclusion
Blue Screen error is essentially a protection measure by Windows OS to prevent serious damage due to critical hardware or software error. It safeguards other hardware and software components of the system from getting damaged. However, BSODs are sudden and may occur without any signs. Thus, it often results in a data loss situation.
To prevent BSOD error such as BAD POOL HEADER 0x00000019, one must actively monitor disk health, update Windows OS and drivers, and optimize the drive once in a while for better performance.
And to avoid data loss due to such errors, create at least two backups – one local on an external drive and another on the cloud storage. Use a data recovery software such as Stellar Data Recovery Professional to get back files that are not available in backup or lost due to BAD POOL HEADER 0x00000019 error.
Was this article helpful?
YES1
NO
How to Fix BAD_POOL_HEADER Blue Screen of Death Error in Windows 10
BAD_POOL_HEADER is a Blue Screen of Death (BSoD) error that appears when Windows encounters a critical problem from which it cannot recover. In this article, we describe tried and tested fixes to address this error.
The BAD_POOL_HEADER error is related to Windows memory allocation. However, the error can also occur due to other issues. RAM problems are usually the cause of the error, but problems with device drivers, bad disk sectors, and other disk write issues are also known to be common reasons for this error.
Fixing the BAD_POOL_HEADER error might require you to run the memory diagnostics tool, disable the Fast Startup feature, update drivers, temporarily disable installed third-party antivirus software, and other actions.
Note: If BAD_POOL_HEADER prevents you from starting Windows, you need to boot Windows into Safe Mode with Networking. Read this guide and use the «Interrupt Windows Boot Process» method. Then start Windows in Safe Mode with Networking from there.
Table of Contents:
- Introduction
- Temporarily Disable Your Antivirus
- Disconnect External Devices
- Run Windows Memory Diagnostic Tool
- Disable Fast Startup
- Update Your Drivers
- Perform a Clean Boot
- Check Your RAM
- Restore Your System Using Restore Points
- Video Showing How to Fix BAD POOL HEADER Error
Download Computer Malware Repair Tool
It is recommended to run a free scan with Combo Cleaner — a tool to detect viruses and malware on your device. You will need to purchase the full version to remove infections. Free trial available. Combo Cleaner is owned and operated by Rcs Lt, the parent company of PCRisk.com read more.
Temporarily Disable Your Antivirus
If you recently installed antivirus software, this may be causing this BAD POOL HEADER error — many users have reported that temporarily disabling (or uninstalling) their antivirus software fixed the problem.
We recommend that you try this method even if you have been using your antivirus software for some time. If this solves the problem, contact the antivirus software developers and ask them if they can prevent their software from causing the BAD POOL HEADER error.
Read this guide if you are not sure how to disable your antivirus software. The article contains detailed instructions on how to disable some of the most popular antivirus programs.
[Back to Table of Contents]
Disconnect External Devices
Disconnecting external devices might fix the BAD POOL HEADER error. Connected external devices/peripherals might be interfering with the operating system. Disconnect all peripherals and external devices, and leave only the mouse and keyboard connected. Then restart the computer. Check if you still receive the BAD POOL HEADER error.
If the problem is resolved, one of the peripherals or external devices might be damaged or faulty, thus causing the problem. In this case, replace the peripheral or external device.
[Back to Table of Contents]
Run Windows Memory Diagnostic Tool
If there are problems with RAM (Random Access Memory), run the Windows Memory Diagnostic, a comprehensive memory test tool and easy to use.
To launch it, type «windows memory diagnostic» or «mdsched» in Search and click the «Windows Memory Diagnostic» result.
To run diagnostics, restart the computer. You will be asked if you want to restart now or run it the next time you start the computer.
When you restart the computer, Windows Memory Diagnostic Tool will start automatically. The testing process and results are displayed on the screen.
[Back to Table of Contents]
Disable Fast Startup
Fast startup is a useful Windows 10 feature that provides faster boot times on startup. Leaving fast startup enabled could be the reason for the BAD POOL HEADER error.
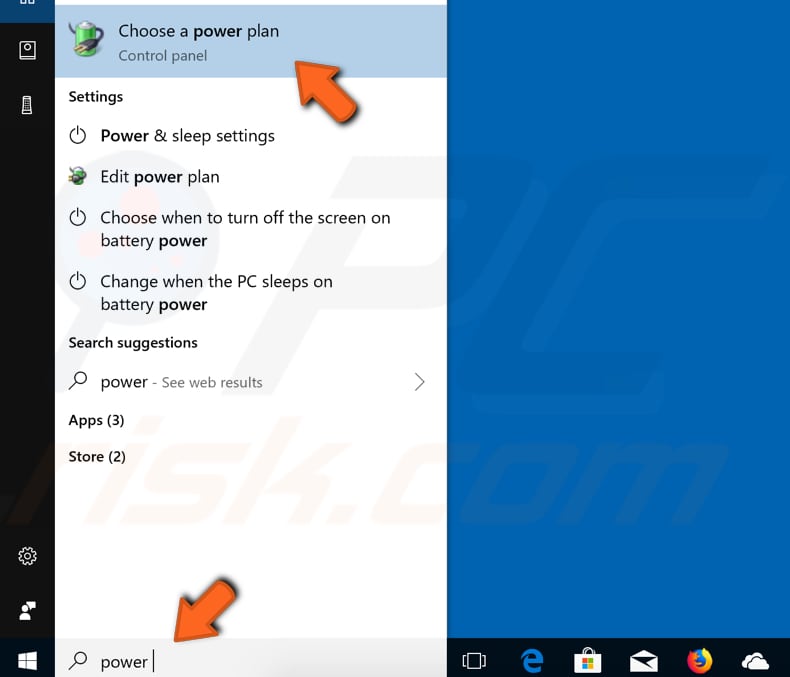
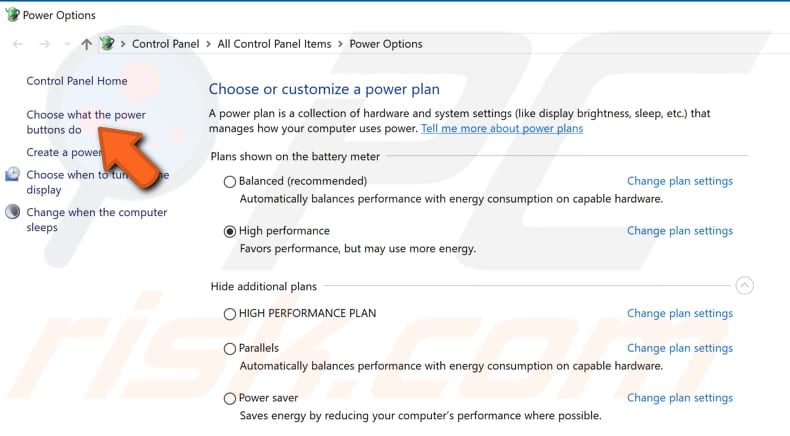
To fix the problem, you could disable this feature. Go to Search and type «power». Click the «Choose power plan» result to open it.
In the Power Options window, click «Choose what the power button do».
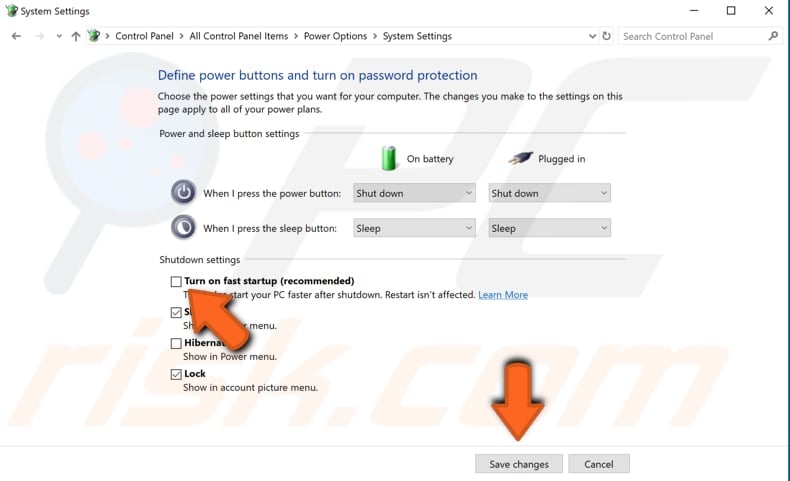
Click «Change settings that are currently unavailable» and then uncheck the «Turn on fast startup (recommended)» option (if it is enabled).
Click «Save changes» to save the changes made and see if this fixes the BAD POOL HEADER error.
[Back to Table of Contents]
Update Your Drivers
A device driver is software that informs the operating system and other software how to interact with particular hardware. If the appropriate driver is not installed, the device might not function properly (if at all) and deliver various blue screen of death errors, including BAD POOL HEADER.
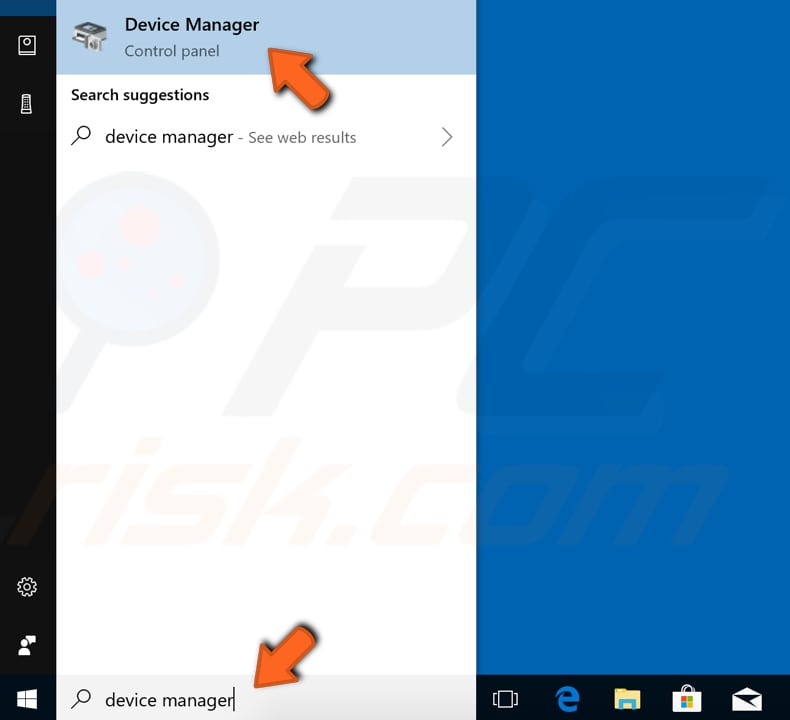
To update drivers, open Device Manager by right-clicking the Start button and selecting the «Device Manager» result from the contextual menu, or type «device manager» in Search and click the «Device Manager» result.
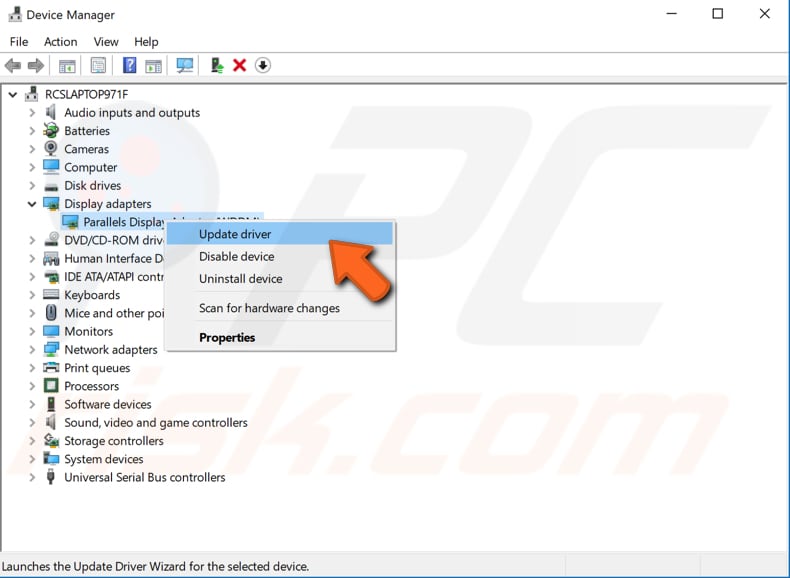
In Device Manager, you will see a list of devices connected to your computer. Since it is difficult to ascertain which driver is causing the problem, you will have to update them all unless you have noticed particular circumstances under which the BAD POOL HEADER occurred.
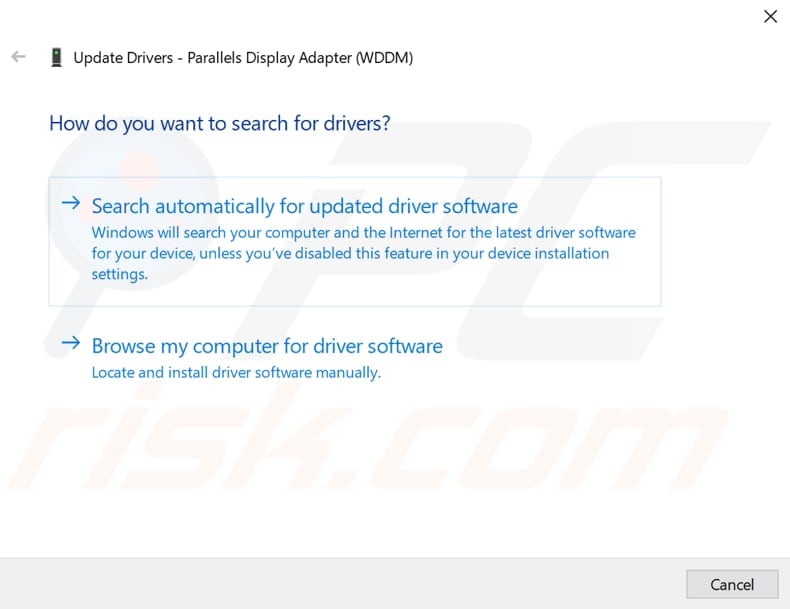
For example, if the error occurs when you connect to the Internet, start with updating the Network adapter drivers. Right-click the device and select «Update driver» from the drop-down menu.
You will be asked to search for updated driver software automatically or to browse your computer for driver software. If you select the first option, Windows will search the computer and Internet for the latest driver software for the device.
If you select the second option, you must locate and install drivers manually. Using this option requires having previously downloaded drivers on your computer or USB flash drive — this is a long process since you will have to manually download all the latest drivers for all the devices by visiting device manufacturers’ official websites.
We recommend you select the first option and follow the instructions. Apply the steps to all devices.
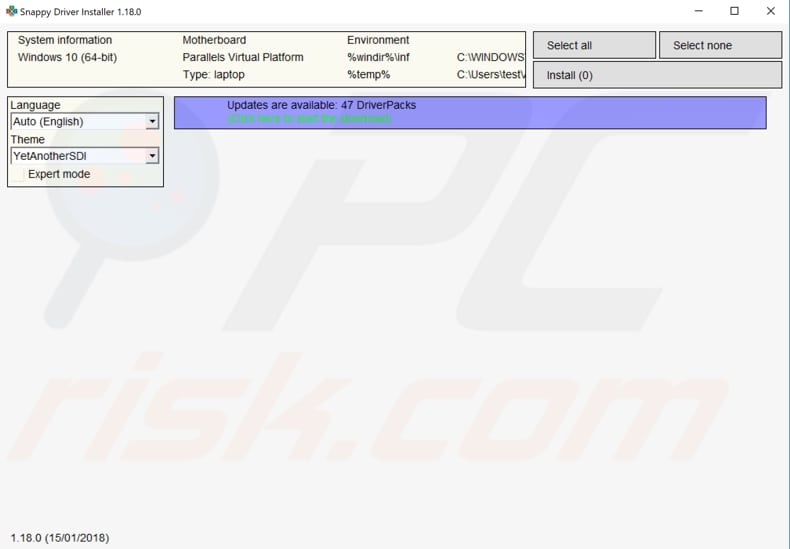
Snappy Driver Installer (SDI) is a powerful free driver updater for Windows. Drivers are downloaded through Snappy Driver Installer in ‘driverpacks’, which are simply collections (packs) of drivers for various hardware such as sound devices, video cards, network adapters, etc.
It can also show duplicate drivers and invalid drivers. It separates the updates that require you to restart your computer so that they are easier to distinguish. You can download Snappy Driver Installer from here.
Alternatively, look for other automated driver updaters online to update all drivers.
[Back to Table of Contents]
Perform a Clean Boot
You can also fix this problem by performing a clean boot of the Windows 10 operating system. A clean boot starts Windows by using a minimal set of drivers and startup programs. This helps to eliminate software conflicts when you install a program or an update or run a program in Windows. Therefore, you must disable all third-party applications and services to ascertain if any of these applications are causing the BAD POOL HEADER error.
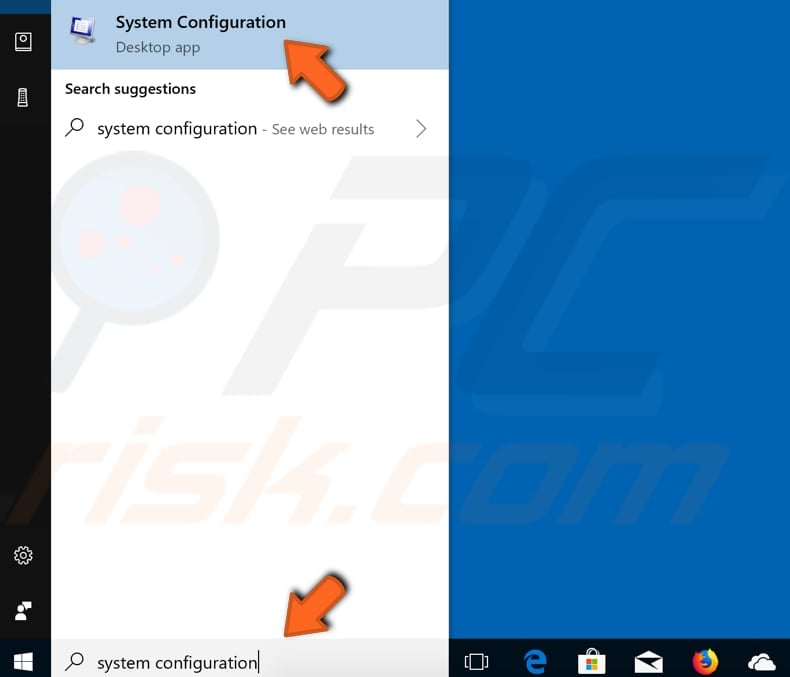
To perform a clean boot, type «system configuration» in Search and open the System Configuration desktop app.
Another way to access System Configuration is to type «run» in Search, open it, type «msconfig» and click OK to run it.
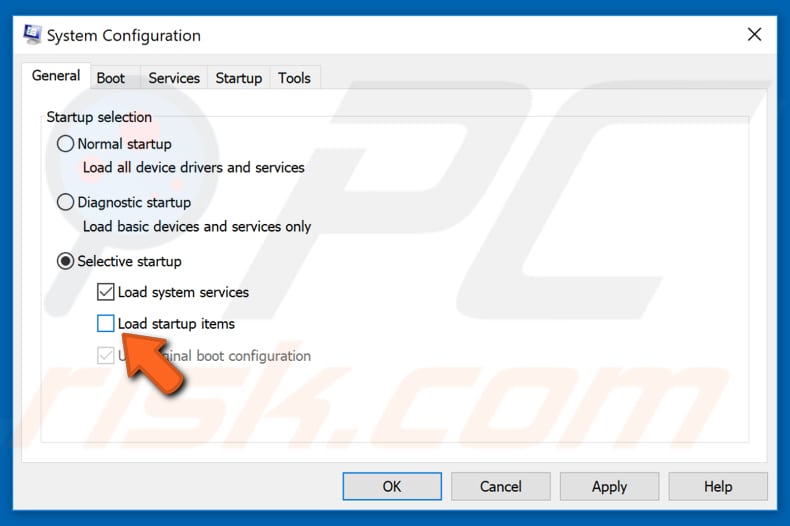
When System Configuration is opened, select «Selective startup» so you can make changes and unmark «Load startup items».
Then, go to the «Services» tab and mark the «Hide all Microsoft services» checkbox. This will hide Microsoft apps and services (because we need to disable only third-party applications). In our example, only two services remain. Click «Disable all».
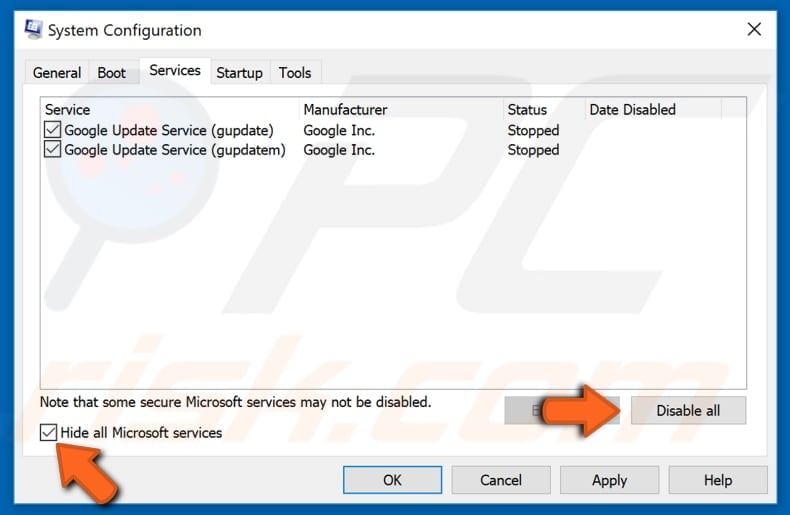
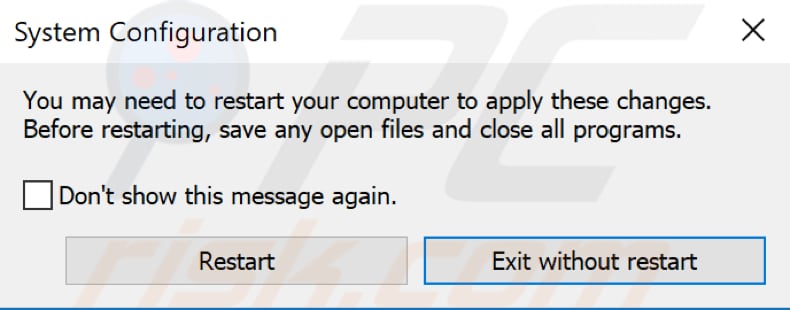
Click «Apply» and «OK» to save the changes and exit the System Configuration window. It will inform you that you need to restart the computer to apply the changes. Choose if you want to restart now or manually later.
If this fixes the problem, you know that one installed third-party program is causing the problem. Finding which particular program is causing BAD POOL HEADER could be a long process since you must disable the programs one by one.
Additionally, if you wish to boot Windows normally, you will have to undo the changes to enable a Normal startup rather that Selective startup in System Configuration.
[Back to Table of Contents]
Check Your RAM
As mentioned in our introduction, the BAD POOL HEADER error can be caused by Random Access Memory (RAM) problems. It is possible that the RAM chip is not connected correctly or the slot (or chip) is dusty. If you know how to detach the RAM and reconnect it, we recommend trying this. Remove the RAM chip, ensure it is not dusty, and return it.
Do not do this when your computer is turned on. When you have finished, turn the computer back on and see if you still receive the BAD POOL HEADER error.
[Back to Table of Contents]
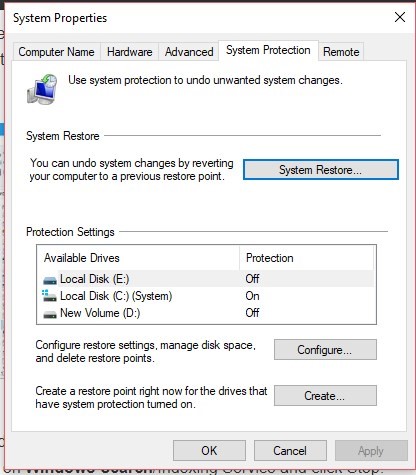
Restore Your System Using Restore Points
Finally, we would recommend you run System Restore using restore points. A restore point is a collection of important system files stored by System Restore on a given date and time.
To use this tool, you must have created restore points. With a created restore point, this feature will bring your system back to the previous working state, without affecting your files and data. If you have any system restore points created before the BAD POOL HEADER error started to occur, you might be able to fix it by simply restoring your system to a previous state.
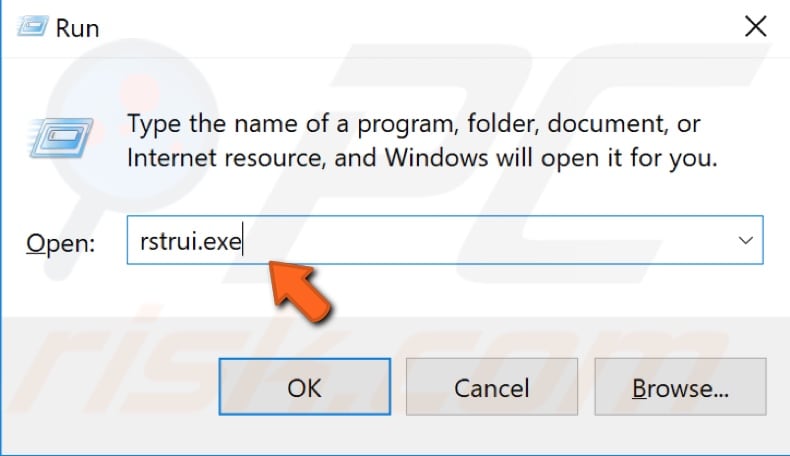
To run System Restore, press the Windows Key + R and type «rstrui.exe». In the Run dialog box, press Enter or click «OK». Another way to open the Run dialog box is to right-click Start and select «Run» from the contextual menu.
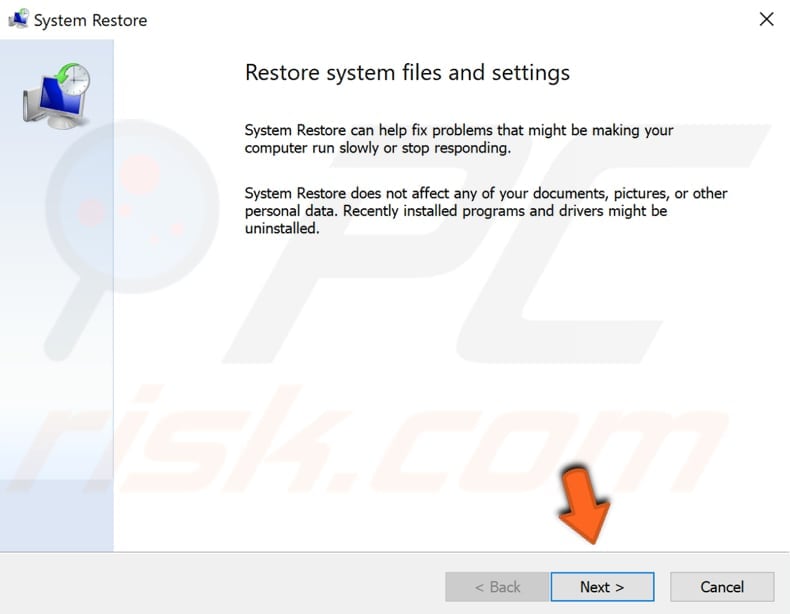
The System Restore introduction window will appear. Click «Next» to proceed.
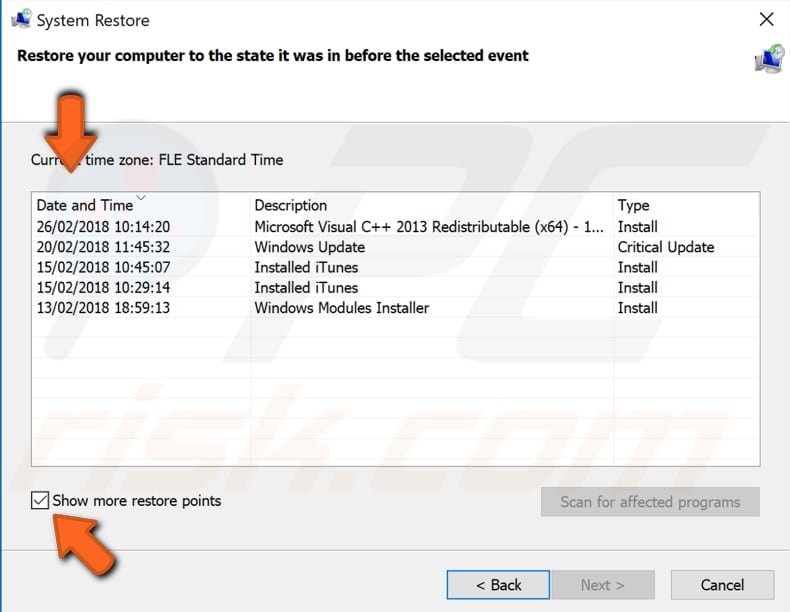
If there are restore points created, you will see a list of them. Mark the «Show more restore points» checkbox, which should display more restore points. Select the most appropriate restore point (depending on time created, etc.) and click «Next». Ensure that you do not select a restore point when the BAD POOL HEADER error was already present.
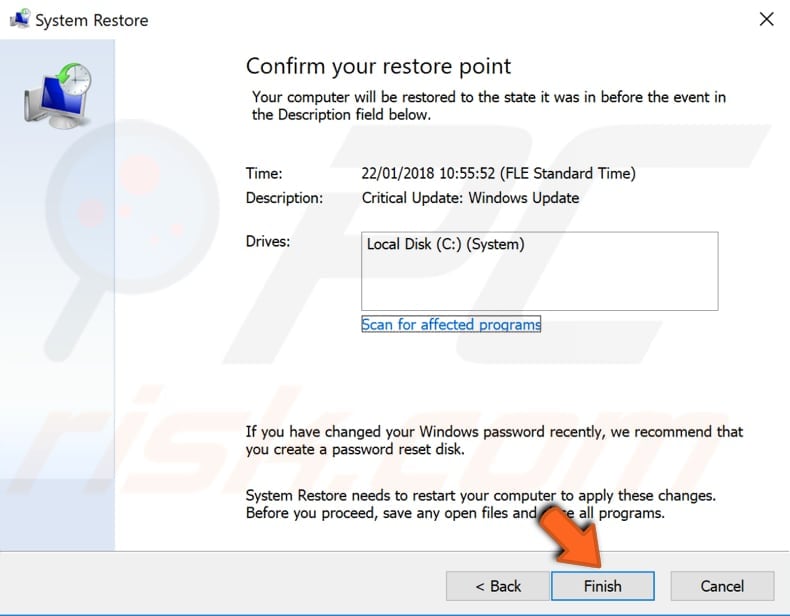
Confirm the restore point. Your computer will be restored to the state before the event detailed in the «Description» field. If you are happy with your choice, click «Finish» and begin the system restore process.
We hope that one of the above solutions fixed the BAD POOL HEADER error.
[Back to Top]