
aws-cli
This package provides a unified command line interface to Amazon Web
Services.
Jump to:
- Getting Started
- Getting Help
- More Resources
Getting Started
This README is for the AWS CLI version 1. If you are looking for
information about the AWS CLI version 2, please visit the v2
branch.
Requirements
The aws-cli package works on Python versions:
- 3.9.x and greater
- 3.10.x and greater
- 3.11.x and greater
- 3.12.x and greater
Notices
On 2025-04-22, support for Python 3.8 ended for the AWS CLI. This follows the
Python Software Foundation end of support
for the runtime which occurred on 2024-10-07.
For more information, see this blog post.
Attention!
We recommend that all customers regularly monitor the Amazon Web
Services Security Bulletins
website for
any important security bulletins related to aws-cli.
Maintenance and Support for CLI Major Versions
The AWS CLI version 1 was made generally available on 09/02/2013 and is currently in the full support phase of the availability life cycle.
For information about maintenance and support for SDK major versions and their underlying dependencies, see the Maintenance Policy section in the AWS SDKs and Tools Shared Configuration and Credentials Reference Guide.
Installation
Installation of the AWS CLI and its dependencies use a range of packaging
features provided by pip and setuptools. To ensure smooth installation,
it’s recommended to use:
pip: 9.0.2 or greatersetuptools: 36.2.0 or greater
The safest way to install the AWS CLI is to use
pip in a virtualenv:
$ python -m pip install awscli
or, if you are not installing in a virtualenv, to install globally:
$ sudo python -m pip install awscli
or for your user:
$ python -m pip install --user awscli
If you have the aws-cli package installed and want to upgrade to the
latest version, you can run:
$ python -m pip install --upgrade awscli
This will install the aws-cli package as well as all dependencies.
Note
On macOS, if you see an error regarding the version of six that
came with distutils in El Capitan, use the --ignore-installed
option:
$ sudo python -m pip install awscli --ignore-installed six
On Linux and Mac OS, the AWS CLI can be installed using a bundled
installer.
The AWS CLI can also be installed on Windows via an MSI
Installer.
If you want to run the develop branch of the AWS CLI, see the
Development Version section of
the contributing guide.
See the
installation
section of the AWS CLI User Guide for more information.
Configuration
Before using the AWS CLI, you need to configure your AWS credentials.
You can do this in several ways:
- Configuration command
- Environment variables
- Shared credentials file
- Config file
- IAM Role
The quickest way to get started is to run the aws configure command:
$ aws configure
AWS Access Key ID: MYACCESSKEY
AWS Secret Access Key: MYSECRETKEY
Default region name [us-west-2]: us-west-2
Default output format [None]: json
To use environment variables, do the following:
$ export AWS_ACCESS_KEY_ID=<access_key>
$ export AWS_SECRET_ACCESS_KEY=<secret_key>
To use the shared credentials file, create an INI formatted file like
this:
[default]
aws_access_key_id=MYACCESSKEY
aws_secret_access_key=MYSECRETKEY

[testing]
aws_access_key_id=MYACCESSKEY
aws_secret_access_key=MYSECRETKEY
and place it in ~/.aws/credentials (or in
%UserProfile%\.aws/credentials on Windows). If you wish to place the
shared credentials file in a different location than the one specified
above, you need to tell aws-cli where to find it. Do this by setting the
appropriate environment variable:
$ export AWS_SHARED_CREDENTIALS_FILE=/path/to/shared_credentials_file
To use a config file, create an INI formatted file like this:
[default]
aws_access_key_id=<default access key>
aws_secret_access_key=<default secret key>
# Optional, to define default region for this profile.
region=us-west-1

[profile testing]
aws_access_key_id=<testing access key>
aws_secret_access_key=<testing secret key>
region=us-west-2
and place it in ~/.aws/config (or in %UserProfile%\.aws\config
on Windows). If you wish to place the config file in a different
location than the one specified above, you need to tell the AWS CLI
where to find it. Do this by setting the appropriate environment
variable:
$ export AWS_CONFIG_FILE=/path/to/config_file
As you can see, you can have multiple profiles defined in both the
shared credentials file and the configuration file. You can then specify
which profile to use by using the --profile option. If no profile is
specified the default profile is used.
In the config file, except for the default profile, you must prefix
each config section of a profile group with profile. For example, if
you have a profile named «testing» the section header would be
[profile testing].
The final option for credentials is highly recommended if you are using
the AWS CLI on an EC2 instance. IAM
Roles
are a great way to have credentials installed automatically on your
instance. If you are using IAM Roles, the AWS CLI will find and use them
automatically.
In addition to credentials, a number of other variables can be
configured either with environment variables, configuration file
entries, or both. See the AWS Tools and SDKs Shared Configuration and
Credentials Reference
Guide
for more information.
For more information about configuration options, please refer to the
AWS CLI Configuration Variables
topic.
You can access this topic from the AWS CLI as well by running
aws help config-vars.
Basic Commands
An AWS CLI command has the following structure:
$ aws <command> <subcommand> [options and parameters]
For example, to list S3 buckets, the command would be:
$ aws s3 ls
To view help documentation, use one of the following:
$ aws help
$ aws <command> help
$ aws <command> <subcommand> help
To get the version of the AWS CLI:
$ aws --version
To turn on debugging output:
$ aws --debug <command> <subcommand>
You can read more information on the Using the AWS
CLI
chapter of the AWS CLI User Guide.
Command Completion
The aws-cli package includes a command completion feature for Unix-like
systems. This feature is not automatically installed so you need to
configure it manually. To learn more, read the AWS CLI Command
completion
topic.
Getting Help
The best way to interact with our team is through GitHub. You can open
an issue and
choose from one of our templates for guidance, bug reports, or feature
requests.
You may find help from the community on Stack
Overflow with the tag
aws-cli or on
the AWS Discussion Forum for
CLI. If you
have a support plan with AWS Support, you can also create
a new support case.
Please check for open similar
issues before opening
another one.
The AWS CLI implements AWS service APIs. For general issues regarding
the services or their limitations, you may find the Amazon Web Services
Discussion Forums helpful.
More Resources
- Changelog
- AWS CLI
Documentation - AWS CLI User
Guide - AWS CLI Command
Reference - Amazon Web Services Discussion
Forums - AWS Support
The AWS Command Line Interface (AWS CLI) is a unified tool to manage your AWS services. With just one tool to download and configure, you can control multiple AWS services from the command line and automate them through scripts.
Prerequisites Before We Begin
✅ Create an IAM user in your AWS account.
✅ Assign AdministratorAccess permissions to this user.
✅ Generate an Access Key and Secret Access Key for this IAM user.

These credentials will come in handy once we complete the CLI setup. We'll use them to log in via the terminal and run our first command:

𝐚𝐰𝐬 𝐢𝐚𝐦 𝐥𝐢𝐬𝐭-𝐮𝐬𝐞𝐫𝐬

If everything's set up correctly, this command will return a list of users in your AWS account right in your CLI.
A Step-by-Step guide on installing AWS CLI on Windows:
Step 1: Visit the AWS Documentation website to download the installer.
https://docs.aws.amazon.com/cli/latest/userguide/getting-started-install.html

Step 2: Choose your operating system; in this case, I am selecting Windows.
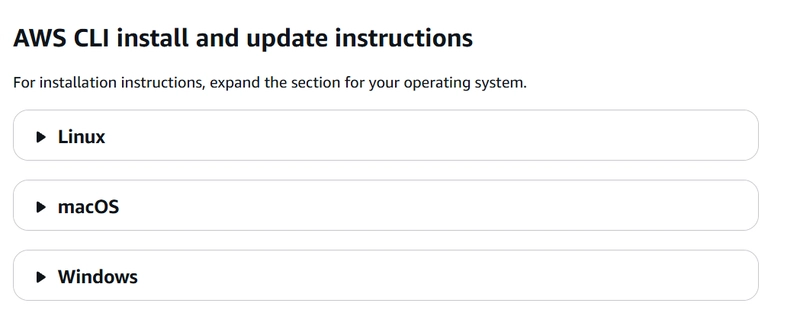
Step 3: Click to download the AWS CLI MSI installer for Windows (64-bit).
https://awscli.amazonaws.com/AWSCLIV2.msi

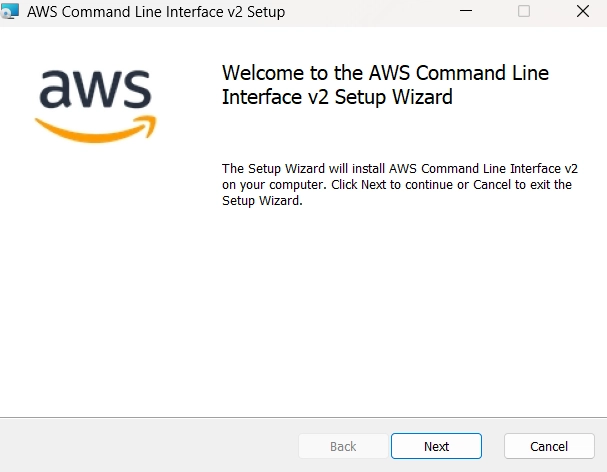
Step 4: The setup process will take a minute or two.


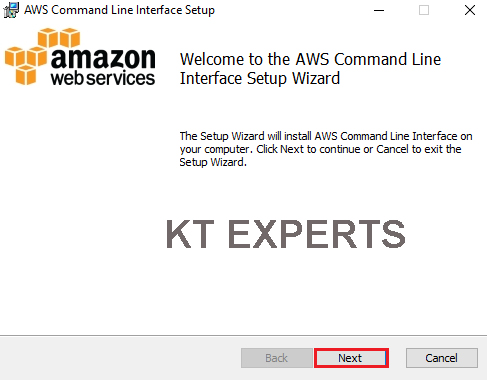
Step 5: Once the setup is complete, click «Next.»
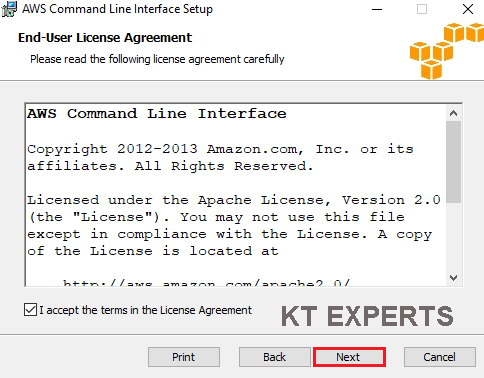
Step 6: Accept the license agreement and click «Next.»

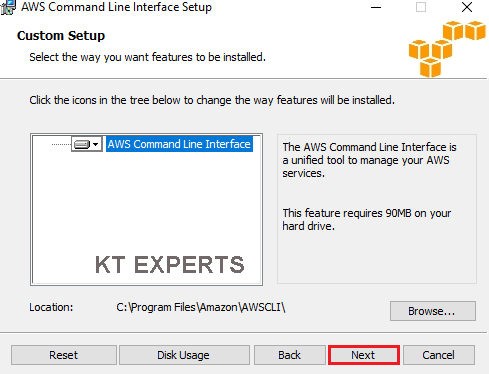
Step 7: Click «Next» on the Custom Setup screen.

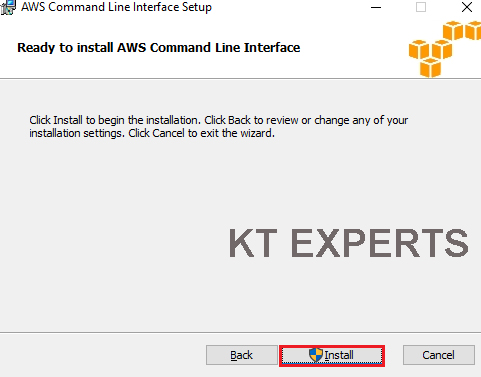
Step 8: Finally, click «Install.»

Step 9: After a few minutes, the installation will be complete.

Step 10: Open the Search menu and type «Command» to find the Command Prompt or Terminal.

Step 11: Open the Command Prompt or Terminal.

Step 12: Input 𝐚𝐰𝐬 --𝐯𝐞𝐫𝐬𝐢𝐨𝐧 to check the successful installation and to see the AWS version.


Step 13: Now, configure AWS in your Command Prompt.

Step 14: Enter your access key and secret key.

Step 15: Enter the region you want to use (I am entering Stockholm, which corresponds to eu-north-1).

Step 16: For the default output format, just hit Enter.

Step 17: To test the CLI, input 𝐚𝐰𝐬 𝐢𝐚𝐦 𝐥𝐢𝐬𝐭-𝐮𝐬𝐞𝐫𝐬, and you will see the IAM users you created in the Management Console.

Conclusion
In this guide, we walked through the process of installing and configuring the AWS Command Line Interface (CLI) on a Windows system. With the setup complete and the CLI verified, you are now equipped to begin managing AWS services directly from your terminal.
Connect with me on Linkedin, let’s spark new ideas together!

Working with Command Line can be painful specially if you are on Windows.
It doesn’t have to be anymore.
You will learn:
- How to download and install AWS CLI V2 in your Windows OS.
- How to create an IAM user for AWS CLI
- How to create access key and secret for IAM user
- How to configure AWS CLI using
aws configure
Let’s start with installing the CLI
The easy way using chocolatey:
Install chocolatey if you don’t have it already:
- Open PowerShell in Admin (Run as Administrator)
- Run the command below to install chocolatey
Set-ExecutionPolicy Bypass -Scope Process -Force; [System.Net.ServicePointManager]::SecurityProtocol = [System.Net.ServicePointManager]::SecurityProtocol -bor 3072; iex ((New-Object System.Net.WebClient).DownloadString('https://community.chocolatey.org/install.ps1'))
Finally install AWS CLI using choco
choco install awscli

Install manually using the MSI installer
Click to show installation instructions
Simply download the msi from [awscli.amazonaws.com/AWSCLIV2.msi](https://awscli.amazonaws.com/AWSCLIV2.msi)
Open the installer.

Click on **Next**, accept the license agreement, then click Next again.
Now all you need to do is click on Install.

In few minutes your AWS CLI will be installed in your Windows operating system.

Let’s create an IAM user for our AWS CLI!
Login to your AWS Console with admin access.
Go to your IAM User console.
Click on the Add Users button on the top-right of the Console.

Enter a username, e.g. my-cli-user.
Don’t use your existing IAM user, creating a sepaarate IAM user for CLI will
help you pinpoint your activity logs in CloudTrail. Another article will be
what happens when you accidentally make your Access Key public.

Click Next.
On the next screen, from the three options, select “Attach Policies Directly”.
From the “Permissions’ Policies” tab, check the option AdministratorAccess.
Scroll down and click Next.

To finish things off, on the Review and Create screen, simply click on Create
User.
We see that our new user my-cli-user has been created successfully.

Generating Access Key and Secret for the CLI user
Click on my-cli-user.
Visit the Security credentials tab.
Scroll down and go to the Access Keys section, and click on Create Access Key button.

Select the Command Line Interface (CLI) option.
Scroll down and check the box for I understand the above recommendation and
want to proceed to create an access key and hit Next.
Setting description tag is optional. Go ahead and click on Create Access Key.

Your access key has been created. You can simply download the .CSV file if you
want to reuse it.
It won’t be shown again.

Configuring AWS CLI
To configure AWS CLI in our computer, run the following command.
aws configure --profile cli-user
INFO: You can omit the
--profile cli-userpart if you don’t plan on using
multiple users.
It will ask for the following:
- Access Key
- Secret Access Key
- Region (e.g.
us-east-1) - Output Format (
jsonoryaml)
This is how it should look:
AWS Access Key ID [None]: AKIAS75KUR6WAVS3L3NE
AWS Secret Access Key [None]: aPklnUwaOMHTm/nVEvVXV6ZZyH2u/BHKOWFeKJk5
Default region name [None]: us-east-1
Default output format [None]: json
Now you are all set.

Testing your AWS CLI
Run the following command to know your IAM identity:
aws sts get-caller-identity --profile cli-user
You will see your user Id and ARN:
{
  "UserId": "AIDAS75KUR6WHT3V6PS25",
  "Account": "205979422636",
  "Arn": "arn:aws:iam::205979422636:user/my-cli-user"
}
This means you have set up everything properly and you can use AWS CLI to its full potential.
From here you can take your productivity to the next level.
Here are the list of things you can do with AWS CLI:
- Copy files from S3 to your local computer, or another bucket.
- Get real-time CloudWatch logs in your terminal.
- Run DynamoDB queries from your terminal.
- Easily update and delete secrets in SSM / Secrets Manager.
- Invoke Lambdas from AWS CLI
The possibilities are endless, you just have to think about it.
I hope you enjoyed reading this article and I solved your problem. If not, feel free to reach out to us, we’ll be happy to help.
Post Views:
0
Dear Readers,
In this article, we will see the following Connect to Amazon EC2 Instance Using Putty.

What is AWS CLI?
The AWS CLI is a unified tool to manage your AWS services from a terminal session on your own client.
With just one tool to download and configure, you can control multiple AWS services from the command line and automate them through scripts.
Steps to Follow :
- Download AWS CLI
- Install AWS CLI
- Generate Access key ID and Secret Access Key from IAM
- Configure AWS CLI by using Access Key ID and Secret Access Key
The machine/laptop can’t configure directly in cmd prompt.
If you try to configure AWS CLI it throws an error.
We can get error like this ” aws is not recognized as an internal or external command.”

To configure AWS CLI , we do have AWS Command Line Interface Package.
So we need to download and install AWS CLI then configure by using credentials.
1. Download AWS CLI
Download the software by using below link.
https://docs.aws.amazon.com/cli/latest/userguide/install-windows.html#install-msi-on-windows
click on Download AWS CLI MSI installer for windows(64bit).
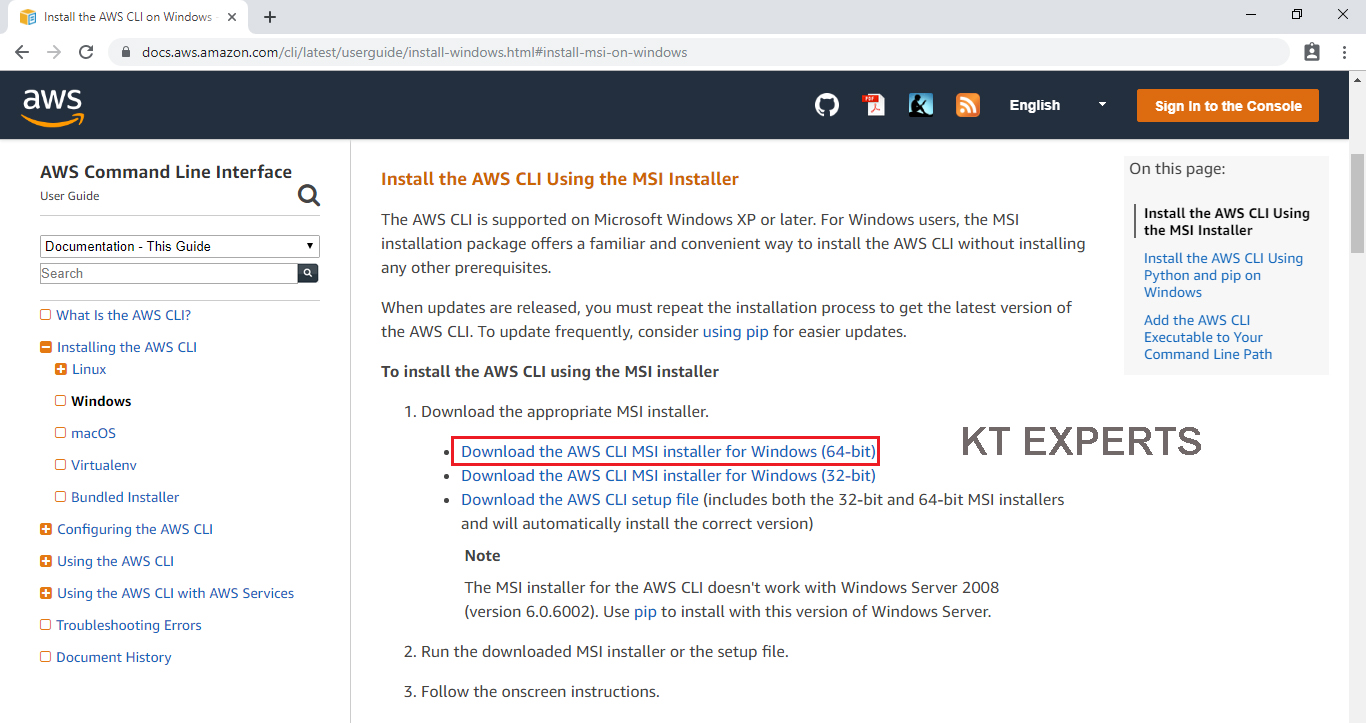
The software has been downloaded successfully.
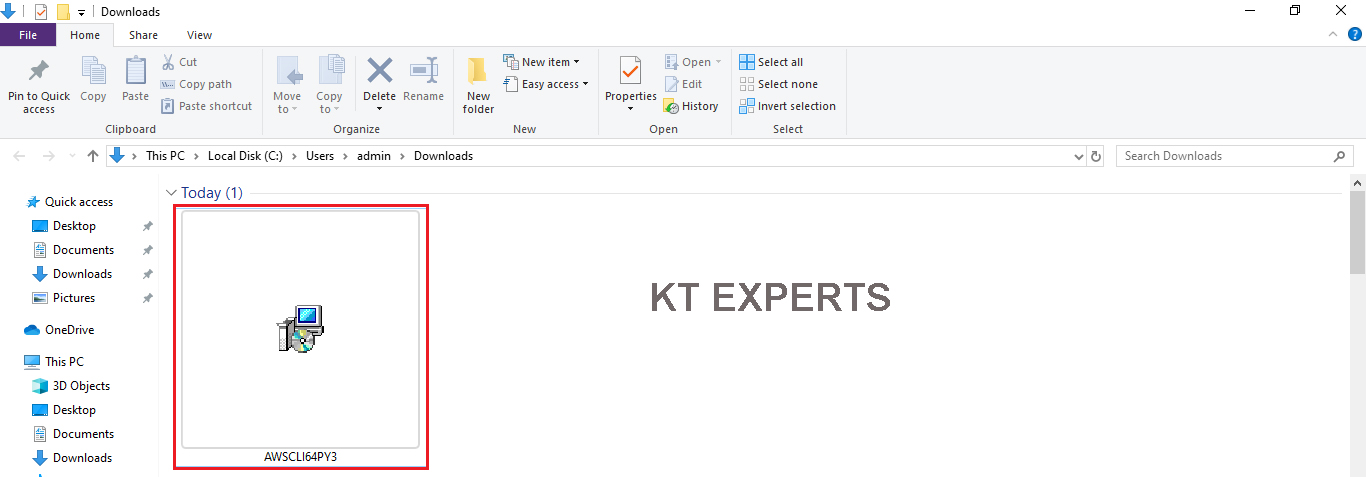
2. Install AWS CLI
Go to physical location and double click on the downloaded software.
Click on Next.
Accept license Agreement and click on Next.
Click on Next.
Click on Install.
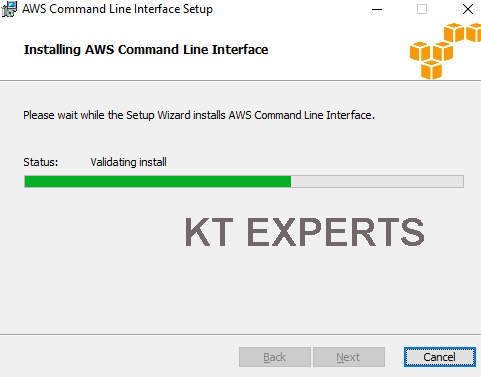
It’s processing it will take some time to complete.
Click on Finish.
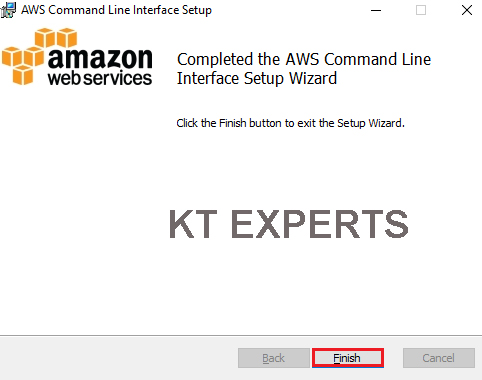
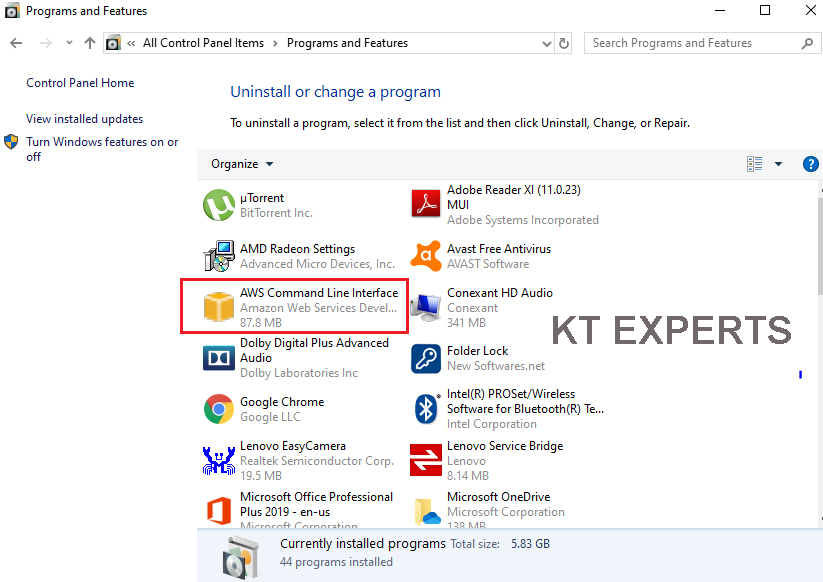
The software has been installed successfully , we can check in control panel.
Now, onwards the machine/laptop will accept to run AWS commands in cmd prompt.
If you want to enter credentials we need to run one command “aws configure” then only it will ask the credentials.
|
C:\Windows\system32>aws configure AWS Access Key ID [None]: |
3. Generate Access key ID and Secret Access Key
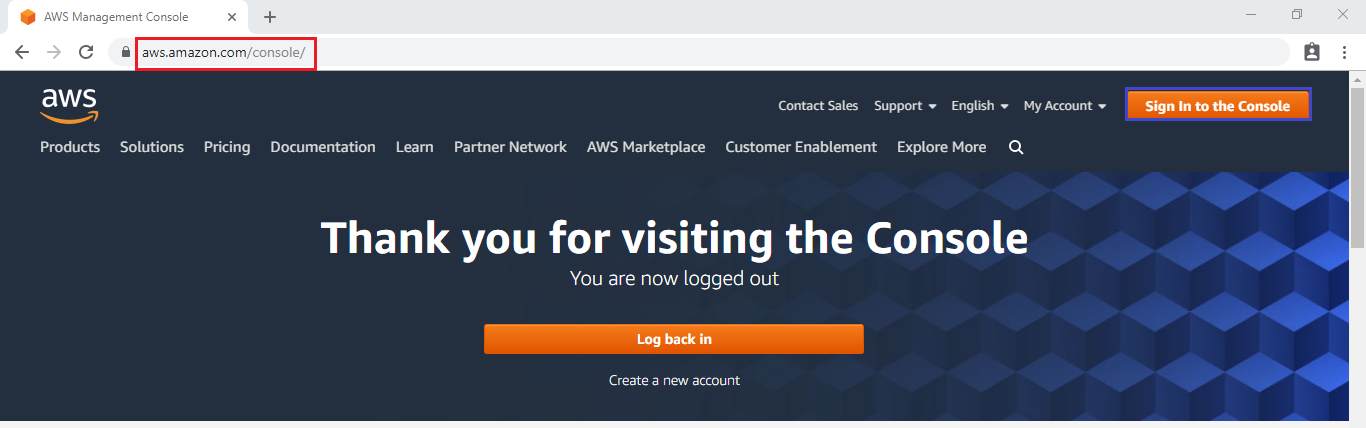
Logging to AWS Account
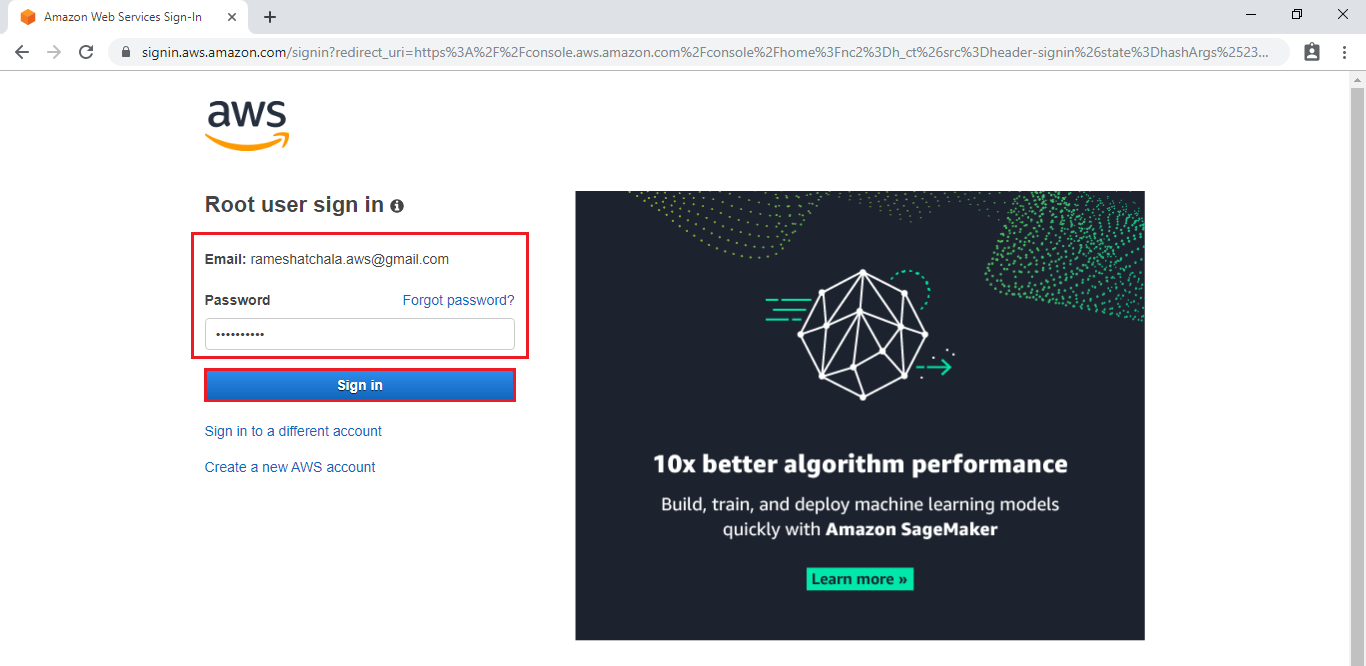
First, we need to AWS Console page by using below link.
https://aws.amazon.com/console/
Click on sign in to Console button.
Logging to aws account
Login using username & password and click on sign in.
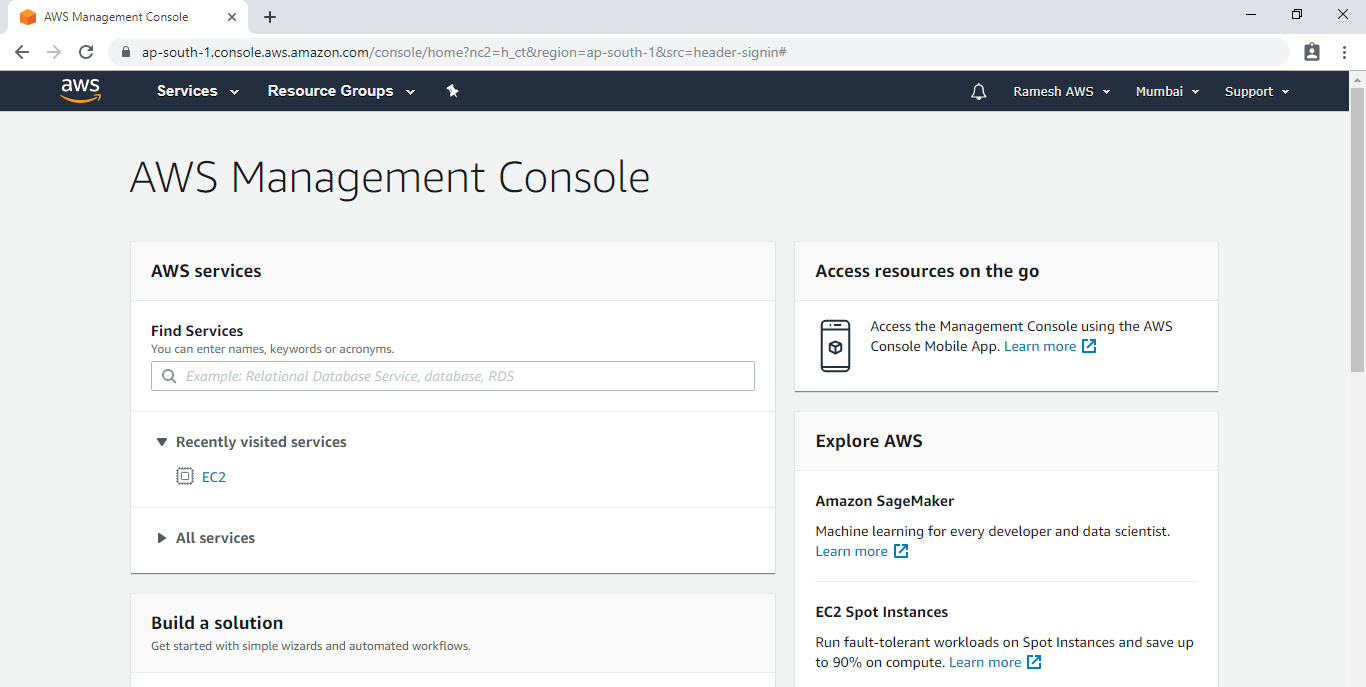
Enter to AWS Management Console
We can see the AWS Management Console Dashboard.
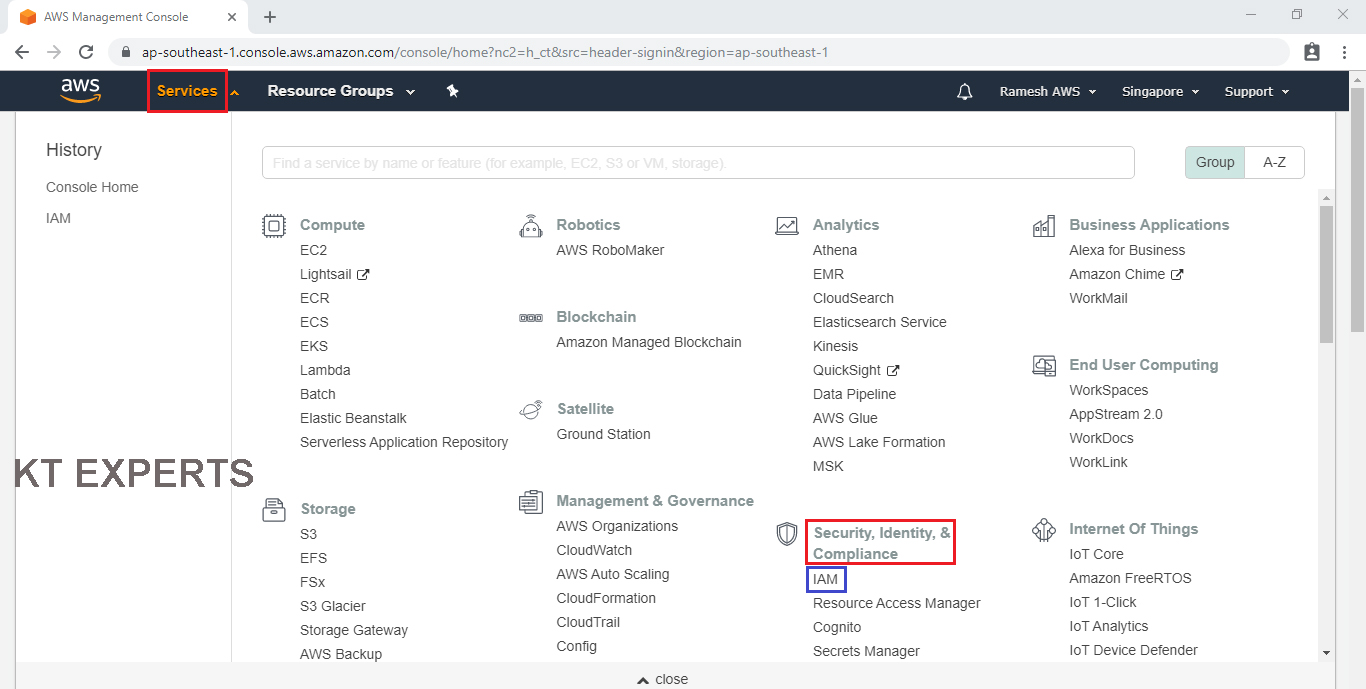
Go to services and click on IAM under security, identity & Compliance.
Go to IAM Dashborad,click on My access key.
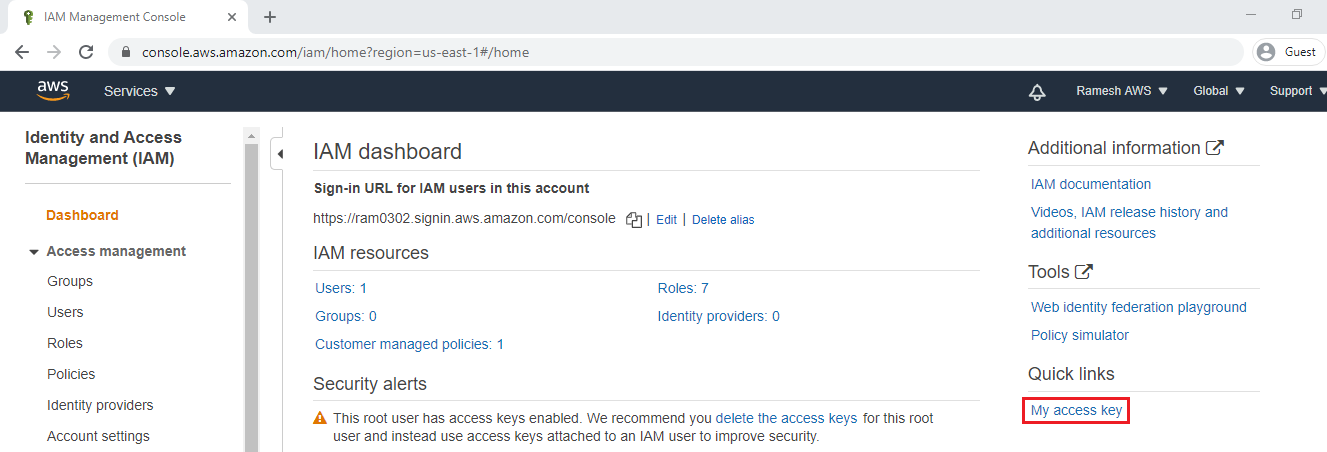
Click on Create New Access Key.
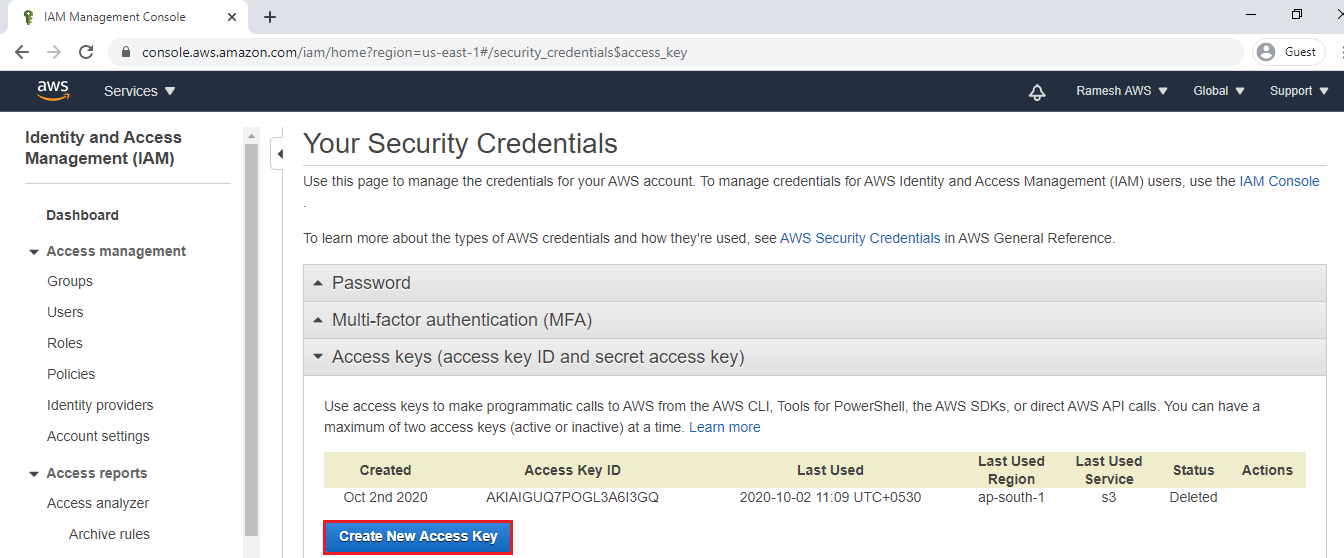
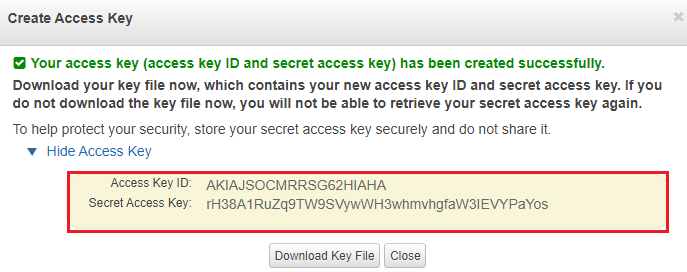
We can see the Generated Access Key ID and Secret Access Key.
These keys are necessary to access the CLI.
4. Configure AWS CLI by using Access Key ID and Secret Access Key
Verify the version of AWS CLI
|
C:\Users\user>aws —version aws—cli/1.18.151 Python/3.6.0 Windows/10 botocore/1.18.10 |
Specify required credentials, region and output format for connect to AWS CLI
|
C:\Users\user>aws configure AWS Access Key ID [None]: AKIAIGUQ7POGL3A6I3GQ AWS Secret Access Key [None]: 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 Default region name [None]: ap—south—1 Default output format [None]: table |
Verify S3 Buckets
|
C:\Users\user>aws s3 ls 2020—10—02 11:27:04 ktexpertsmigration |
Thank you for giving your valuable time to read the above information.
Follow us on
Website : www.ktexperts.com
Facebook Page : KTexperts
Linkedin Page : KT EXPERTS
Follow Me
Ramesh’s Linkedin : Ramesh Atchala
Note: Please test scripts in Non Prod before trying in Production.
Loading…
Are you new to AWS Cloud or tired of managing your AWS Cloud infrastructure using manual steps back and forth? If yes, you should consider installing AWS Command Line Interface (AWS CLI ) and managing infrastructure using it?
In this tutorial, you will learn how to install AWS CLI Version 2 and set up AWS credentials in the AWS CLI tool.
Let’s dive into it.
Join 70 other subscribers
Table of Content
- What is AWS CLI?
- Installing AWS CLI Version 2 on windows machine
- Creating an IAM user in AWS account with programmatic access
- Configure AWS credentials using aws configure
- Verify aws configure from AWS CLI by running a simple commands
- Configuring AWS credentials using Named profile.
- Verify Named profile from AWS CLI by running a simple commands.
- Configuring AWS credentials using environment variable
- Conclusion
What is AWS CLI?
AWS CLI enables you to interact and provides direct access to the public APIs of AWS services of various AWS accounts using the command-line shells from your local environment or remotely.
You can control multiple AWS services from the AWS CLI and automate them through scripts. You can run AWS CLI commands from a Linux shell such as bash, zsh, tcsh, and from a Windows machine, you can use command prompt or PowerShell to execute AWS CLI commands.
The AWS CLI is available in two versions, and the installation is exactly the same for both versions but in this tutorial, let’s learn how to install AWS CLI version 2.
Installing AWS CLI Version 2 on windows machine
Now that you have a basic idea about AWS CLI and connecting to AWS services using various command prompt and shells. Further in this section, let’s learn how to install AWS CLI Version 2 on a windows machine.
- First open your favorite browser and download the AWS CLI on windows machine from here

- Next, select the I accept the terms and Licence Agreement and then click on the next button.

- Further, on Custom setup page provide the location of installation path and then click on Next button.

- Now, click on the Install button to install AWS CLI version 2.

- Finally click on Finish button as shown below.

- Verify the AWS version by going to command prompt and run the below command.
As you can see below, the AWS CLI version 2 is successfully installed on a windows machine.

Creating an IAM user in AWS account with programmatic access
There are two ways to connect to an AWS account, the first is providing a username and password on the AWS login page and another is configuring the Access key ID and secret keys of IAM users in AWS CLI to connect programmatically.
Earlier, you installed AWS CLI successfully on a Windows machine, but you will need an IAM user with programmatic access to run commands from it.
Let’s learn how to create an IAM user in an AWS account with programmatic access, Access key ID, and secret keys.
- Open your favorite web browser and navigate to the AWS Management Console and log in.
- While in the Console, click on the search bar at the top, search for ‘IAM’, and click on the IAM menu item.

- To Create a user click on Users→ Add user and provide the name of the user
myuserand make sure to tick the Programmatic access checkbox in Access type which enables an access key ID and secret access key and then hit the Permissions button.

- Now select the “Attach existing policies directly” option in the set permissions and look for the “Administrator” policy using filter policies in the search box. This policy will allow
myuserto have full access to AWS services.

- Finally click on Create user.
- Now, the user is created successfully and you will see an option to download a .csv file. Download this file which contains IAM users i.e.
myuserAccess key ID and Secret access key which you will use later in the tutorial to connect to AWS service from your local machine.

Configure AWS credentials using aws configure in AWS CLI
You are an IAM user with Access key ID and secret keys, but AWS CLI cannot perform anything unless you configure AWS credentials. Once you configure the credentials, AWS CLI allows you to connect to the AWS account and execute commands.
- Configure AWS Credentials by running the aws configure command on command prompt.
- Enter the details such as AWS Access key ID, Secret Access Key, region. You can skip the output format as default or text or json .

- Once AWS is configured successfully , verify by navigating to C:\Users\YOUR_USER\.aws and see if two file credentials and config are present.

- Now open both the files and verify and you can see below you’re AWS credentials are configured successfully using
aws configure.


Verify aws configure from AWS CLI by running a simple commands
Now, you can test if AWS Access key ID, Secret Access Key, region you configured in AWS CLI is working fine by going to command prompt and running the following commands.
aws ec2 describe-instances

- You can also verify the AWS CLI by listing the buckets in your acount by running the below command.
Configuring AWS credentials using Named profile.
Another method to configure AWS credentials that are mostly used is configuring the Named profile. A named profile is a collection of settings and credentials that you can apply to an AWS CLI command. When you specify a profile to run a command, the settings and credentials are used to run that command. Let’s learn how to store named profiles.
- Open credentials files which got created earlier using aws configure and if not then create a file named credentails in C:\Users\your_profile\.aws directory of your windows machine.
- Add all the Access key ID and Secret access key into the credentials file in the below format and save. By defining the Named profile allows you to connect with different AWS account easily and avoiding confusion while connecting to specific AWS accounts.

- Similarly, create another file config in the
C:\Users\your_profile\.awsdirectory. - Next, add the “region” into the config file and make sure to add the name of the profile which you provided in the credentials file, and save the file. This file allows you to work with a specific region.
- For Linux and mac machine the location of credential file is
~/.aws/credentialsand~/.aws/config. - For windows machine the location of config file is
%USERPROFILE%\.aws\credentialsand%USERPROFILE%\.aws\configrrespectively.
Verifying Named profile from AWS CLI
Previously you configured the Named profile on your machine, but let’s verify the Named profile from AWS CLI by running a simple command. Let’s open the command prompt and run the below command to verify the sandbox profile that you created earlier.
aws ec2 describe-instances --profile sandbox
As you can see below, the instance is described properly using the command with Named profile shows Named profile is configured successfully.

Configuring AWS credentials using the environment variable
Finally, the last Configuring AWS credentials using the environment variables works well. Let’s check out quickly.
- Open the command prompt and set the AWS secret key and access key using the environmental variable using
set. The enviornment variables doesnt changes the value until the end of the current command prompt session, or until you set the variable to a different value

AWS CLI Error (ImportError: cannot import name ‘docevents’ from ‘botocore.docs.bcdoc’) and Solution
If you face any issues in AWS CLI related to python or any file then use the below command.
pip3 install --upgrade awscli

Conclusion
In this tutorial, you learned What is AWS CLI, how to install AWS CLI version 2, and various methods that allow you to configure AWS credentials and then work with AWS CLI.
So which method are you going to use while using AWS CLI to connect and manage AWS infrastructure?