
Время на прочтение4 мин
Количество просмотров146K
Анализируя поступающие заявки наших клиентов в службу технической поддержки и обращения к консультантам, мы заметили, что множество наших клиентов сталкиваются с такой проблемой как «автовыход», не понимая, что это и как с ней бороться.
Любой сервер в том числе и виртуальный сервер должен работать в постоянном режиме 24 х 7 х 365. И соответственно пользователь, который запускает программы на выполнение на сервере, рассчитывает, что они будут работать в таком же режиме. Именно на это и рассчитывают наши клиенты. Однако устанавливая на VPS сервер различного рода десктопное программное обеспечение, которое разрабатывалось «умельцами» без мысли, что существуют компьютеры, не имеющие мониторов, отключившись от сервера через какое-то время замечают, что его программа перестала работать должным образом, при том что сервер активен и доступен. Замечают это как правило при следующем подключении к серверу для анализа данных с как подразумевалось работавшего ПО. Проблема, очевидно в том, что данное ПО что-то пытается брать со свойств экрана (разрешение, позиция курсора и т.д.) при том, что ни экрана, ни курсора при отключенном сеансе нет.
Данная проблема является частным случаем ограничения работы сеансов по времени, за которую отвечает узел групповой политики «Службы удаленных рабочих столов» с одноименным названием «Ограничение сеансов по времени». Он позволяет гибким образом настраивать время работы запущенных сеансов или Ваших сотрудников на сервере при организации рабочих мест, что позволяет Вам более оптимально использовать ресурсы арендуемого сервера Windows VDS.
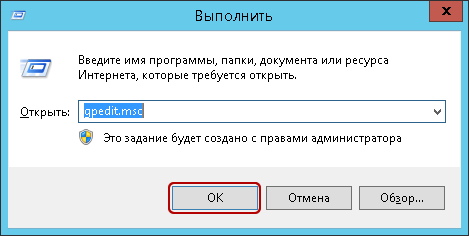
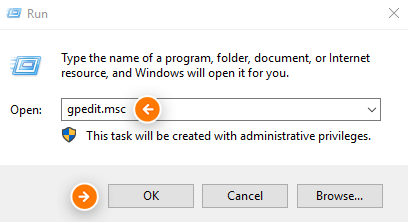
Запустим на сервере редактор «Локальной групповой политики» нажав сочетание клавиш Win+R и Набрав команду GPEDIT.MSC
Далее необходимо перейти по следующему пути в ветке «Конфигурация пользователя», если Вы хотите произвести настройки для текущего пользователя или в ветке «Конфигурация компьютера», если Вы хотите настроить для всех пользователей сервера.
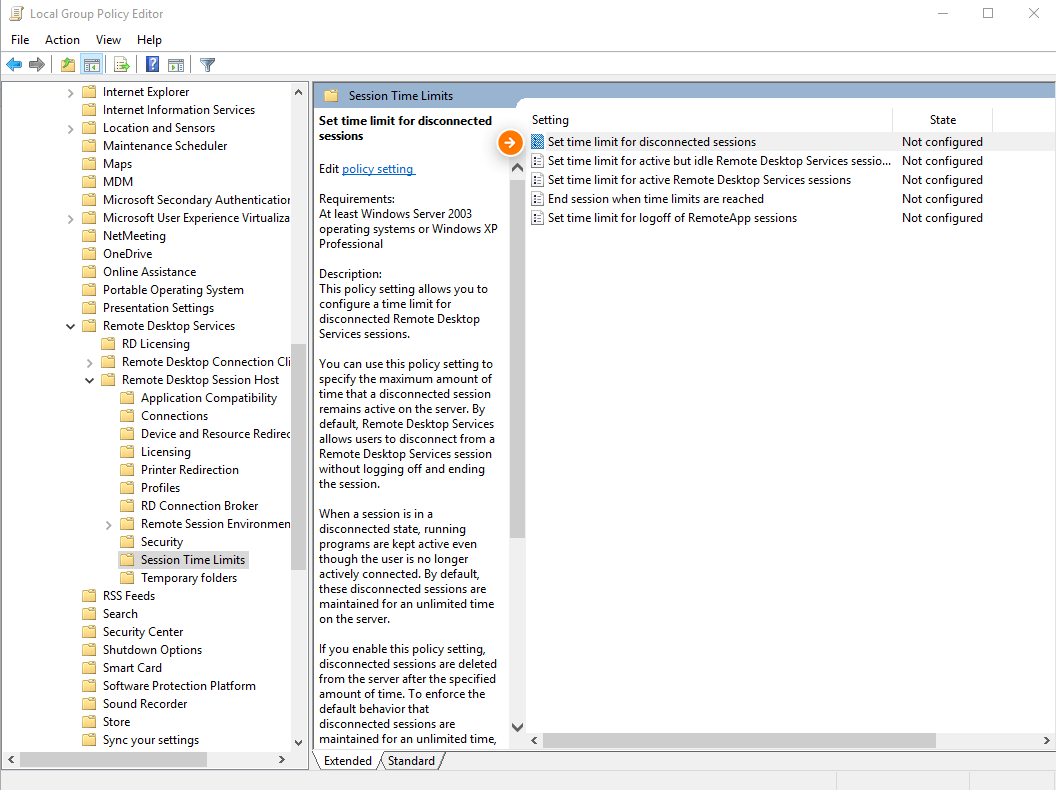
Административные шаблоны -> Компоненты Windows -> Службы удаленных рабочих столов -> Узел сеансов удаленных рабочих столов -> Ограничение сеансов по времени.

Видим, что параметры ограничения по времени не заданы явным образом и настраивать их можно для следующих ситуаций:
- Для отключенных сеансов
- Для активных, но бездействующих сеансов
- Для активных сеансов
- Сеанс RemoteApp
Рассмотрим каждый из них несколько подробнее.
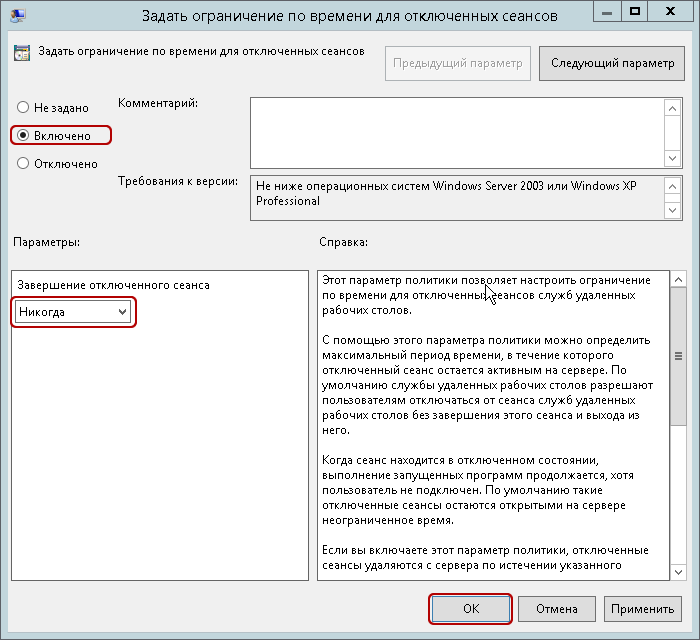
1.«Задать ограничение по времени для отключенных сеансов»
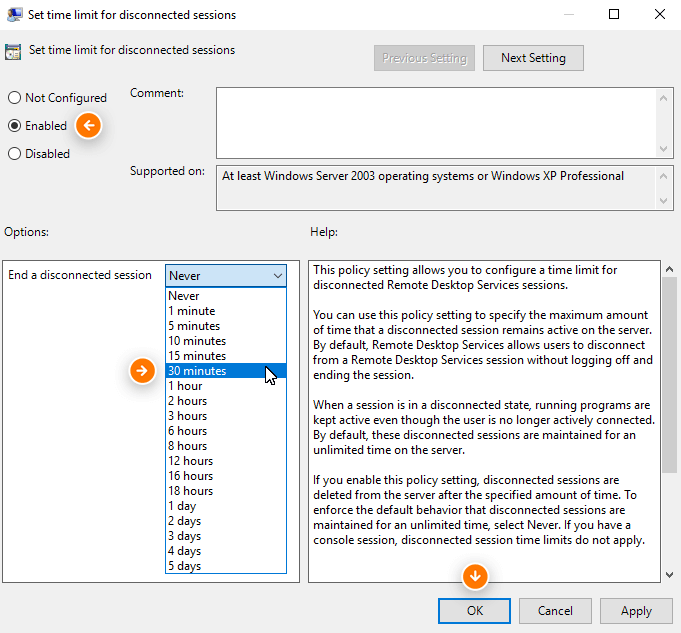
При помощи этого параметра Вы можете указать промежуток времени в минутах, часах или днях, на протяжении которого открытые программы будут продолжать работать после отключения от сервера.
Если Вы хотите, чтобы Ваша программа работала на сервере в постоянном режиме и не происходило «автовыхода» при отключении, то данный параметр следует указать как Включен и выбрать Никогда. Что является решение выше описанной ситуации.
Данный параметр можно так же использовать в моменты, когда рабочий день сотрудника закончен, но на выполнение некоторых автономных процессов, которые не требуют вмешательства пользователя, нужно еще дополнительное время, в таком случае можно указать Включено и указать необходимо количество времени.
2.«Задать ограничение по времени для активных, но бездействующих сеансов служб удалённых рабочих столов»
Бездействующим сеансом считается тот сеанс, когда удаленный рабочий стол начинает простаивать без каких-либо операций ввода, со стороны пользователя. Сотрудник может подключиться к удаленному рабочему столу сервера, а затем по завершении рабочего дня попросту забыть отключиться от сервера и уйти домой. В таком случае сеанс активен, но простаивает и ресурсы выделяемые сервером и зарезервированные для этого пользователя, простаивают и соответственно расходуются не эффективно. В таком случае можно указать Включено и указать необходимо количество времени, после которого при простое, сеанс будет завершен.

3.«Задать ограничение по времени для активных сеансов служб удалённых рабочих столов»
Данный параметр отвечает за завершение даже активного сеанса, скажем если политикой Вашей компании является достаточно строгий контроль рабочего времени и не допускаются переработки. То Вы можете установить это параметр на Включено и указать максимальный период рабочего времени. Соответственно по завершению рабочего дня, сеанс даже активного пользователя будет завершен, но за две минуты до отключения, пользователю будет предоставлено предупреждающее сообщение, чтобы он смог сохранить все выполненные за время подключения изменения и открытые рабочие документы.

Во втором и третьем случае обязательно включение параметра «Завершать сеанс при достижении ограничения по времени». Включение данного параметра указывает, чтобы производилось именно завершение сеанса пользователя, в противном случае будет производится только отключение сеанса, но не его завершение.


4.«Задать предел времени для выхода из сеансов RemoteApp»
Данный параметр позволяет Вам, завершать сеанс в момент, когда Вы не производили подключение к удаленному рабочему столу сервера, но подключение к серверу было установлено при помощи сторонних программ. При закрытии программы, если параметр «Не задан», то сеанс отключается, но не завершается. Для завершения сеанса необходимо указать Включено и установить время, так же доступен параметр «Немедленно».


4 февраля 2022 г.

3804
При работе пользователей через RDP чаще всего они отключаются по нажатию крестика вверху экрана. Таким образом происходит отключение от удаленного рабочего стола, но на сервере пользователь остается активным, можно сделать автоматическое завершение неактивного сеанса пользователя через определенное время.
Это осуществляется через Редактор локальной групповой политики, для его открытия нужно в Выполнить (Win + R) набрать gpedit.msc и по пути
Конфигурация компьютера
  Административные шаблоны
    Компоненты Windows
      Службы удаленных рабочих столов
        Узел сеансов удаленных рабочих столов
          Ограничение сеансов по времени
Включить политику
Задать ограничение по времени для отключенных сеансов
И указать время, через которое будет завершаться сеанс.
Many times users connect to remote Windows systems, do work, and close the remote session without properly logging off the account. In that case, multiple applications, which are still running with that login session use system resources. Sometimes it causes a slow response of our servers and creates pain for us. So this will be good to auto log off disconnected sessions from the Windows system.
This tutorial will help you to log all the disconnected remote sessions on the Windows system. This tutorial has been tested with Windows Server 2019.
Setup Auto Log Off Disconnected Sessions
We are making changes in the Local group policy of systems. So be careful with the changes.
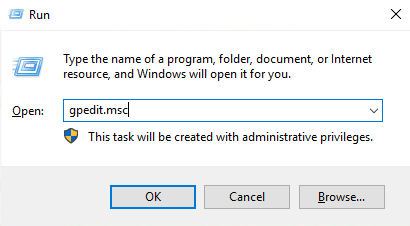
First of all, open the ‘Group Policy Editor‘ on your server. Start run window by pressing “Win + R” and type gpedit.msc on run window.
The local group policy editor will be opened on your system. Then navigate to the following location as the below-given instructions:
  Local Computer Policy
   =>  Computer Configuration
     =>  Administrative Templates
	=>  Windows Components
          =>  Remote Desktop Services
            =>  Remote Desktop Session Host
              =>  Session Time Limits
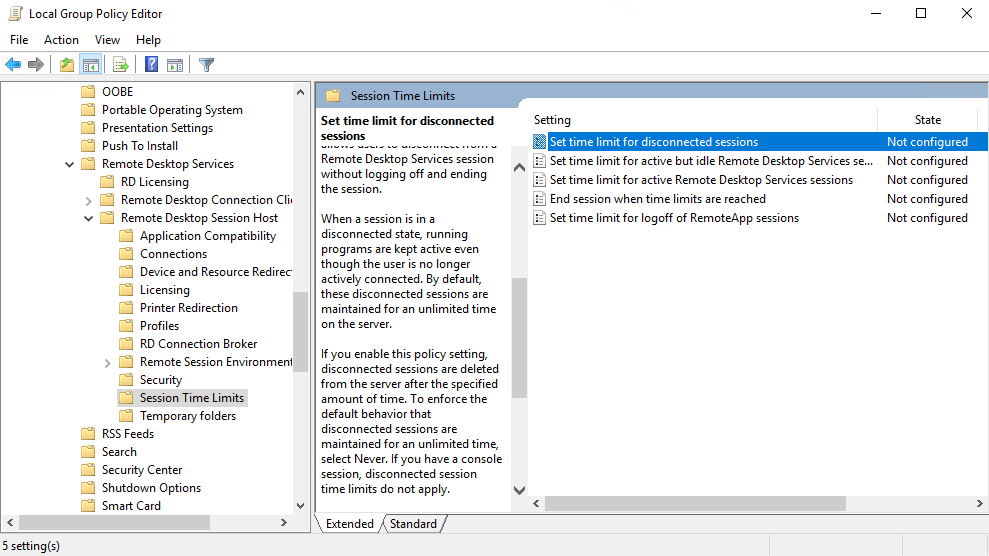
You will find a list of options on the right side. Then Double click on “Set time limit for disconnected sessions” to open it.
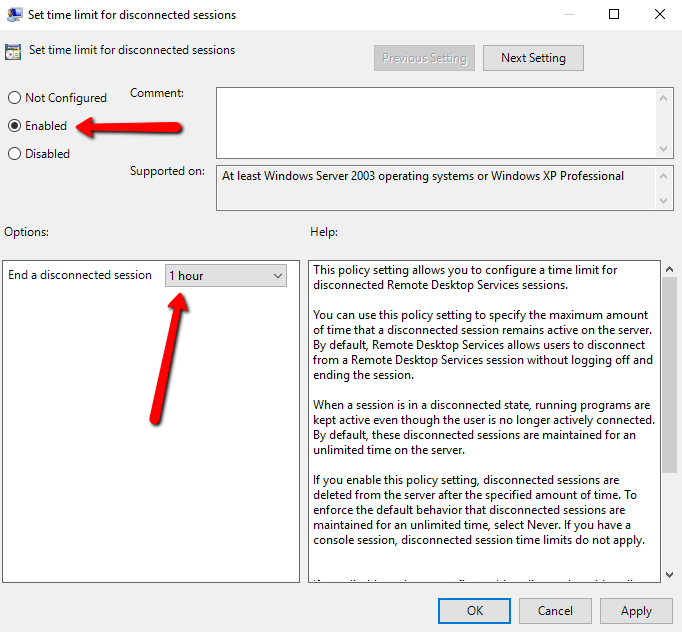
By default, it is set to the ‘Not configured’. Change this to ‘Enabled’. Now you will see the option “End a disconnected session” on the lower-left side. Set this value to the desired time. I have set this to 1 hour, so any disconnected user is logged off after 1 hour.
Conclusion
In this tutorial, you have learned to configure your Windows system to auto log out disconnected remote sessions.
Idle user sessions can be a hidden drain on your system’s performance and become a potential security risk.
When a session remains active after a user disconnects, it leaves the system vulnerable to unauthorized access. This is especially critical in shared or remote environments, where unattended sessions can expose sensitive data.
The solution? Automatically logging off idle users after a set period of inactivity. This simple configuration helps you free up system resources while safeguarding your computer from unauthorized access.
A word of caution: Unsaved work will be lost if users are logged out automatically. Encourage users to save their progress frequently to avoid data loss.
In this guide, you’ll learn how to set up automatic logoff in Windows to protect your system and enhance its performance.
IN THIS GUIDE
Why You Should Enable Automatic Logout After Inactivity
Configuring Auto Log Off for Idle Users in Windows
Common Questions About Automatic Logout in Windows
Streamline User Management with V2 Cloud
WordPress Table of Contents by Topic
Why You Should Enable Automatic Logout After Inactivity
Enabling automatic logout after inactivity offers several benefits, especially in shared or remote desktop environments. Here’s why this feature is essential:
1. Enhanced Security
Idle sessions can be a gateway for unauthorized access, especially if users forget to log out. By configuring automatic logoff, you can reduce the risk of sensitive data being accessed or misused by others.
This is particularly important for businesses handling confidential information or operating in regulated industries.
2. Optimized System Performance
When idle sessions remain active, they continue consuming system resources like memory (RAM) and processing power. Over time, this can slow down the system, especially in environments with multiple users.
Automatically logging off idle users clears these sessions, freeing up resources for active tasks and improving overall performance.
3. Simplified IT Management
For IT administrators, managing multiple user sessions can be challenging. Automatic logout ensures that inactive sessions don’t pile up, reducing the need for manual intervention.
This feature makes resource allocation and session monitoring more efficient, especially in virtualized or cloud-based setups.
Configuring Auto Log Off for Idle Users in Windows
Follow these detailed instructions to set up automatic logoff for idle users. This process uses the Local Group Policy Editor, a built-in Windows tool for managing advanced system configurations.
Step 1: Open the Local Group Policy Editor
- Access the Run Dialog:
- Press the Windows Key + R on your keyboard. This will open the Run dialog box.

- Press the Windows Key + R on your keyboard. This will open the Run dialog box.
- Open the Editor:
- Type gpedit.msc in the text field and click OK or press Enter.
- This action will launch the Local Group Policy Editor.
Step 2: Navigate to the Correct Configuration
- Expand the Hierarchy:
- In the Local Group Policy Editor window, expand the following folders in order:
- Computer Configuration
- Administrative Templates
- Windows Components
- Remote Desktop Services
- Remote Desktop Session Host
- Session Time Limits
- In the Local Group Policy Editor window, expand the following folders in order:
- Locate the Setting:
- Under “Session Time Limits,» find the policy labeled Set time limit for disconnected sessions.
- Under “Session Time Limits,» find the policy labeled Set time limit for disconnected sessions.
Step 3: Configure the Setting
- Open the Policy:
- Double-click on Set time limit for disconnected sessions to open the policy configuration window.
- Enable the Policy:
- In the configuration window, select Enabled to activate the policy.
- In the configuration window, select Enabled to activate the policy.
- Set the Time Limit:
- Use the dropdown menu to select an appropriate time limit for idle sessions (e.g., 15 minutes, 1 hour).
- Choose a time limit that balances security and convenience based on your needs.
- Save the Changes:
- Click OK or Apply to confirm and save the settings.
Step 4: Restart the Cloud Computer
- Why Restart?
- Restarting the computer is necessary to ensure that the changes take effect system-wide.
- Perform the Restart:
- Close the Local Group Policy Editor and restart your system.
Common Questions About Automatic Logout in Windows
1. What happens to unsaved work when a user is logged off automatically?
If a user is automatically logged off due to inactivity, any unsaved work will be lost. To prevent data loss, it’s important to remind users to save their work regularly, especially before leaving their sessions idle.
2. Can I configure different time limits for different users?
The Local Group Policy Editor applies settings globally, meaning all users on the system will follow the same time limit for inactivity. For more granular control, you might need to use scripting or third-party tools to customize settings for specific users.
3. Is it possible to disable the automatic logout feature later?
Yes, the feature can be disabled at any time. Simply follow the same steps to navigate to Set time limit for disconnected sessions in the Local Group Policy Editor and choose Disabled or Not Configured.
4. Will this setting work on all versions of Windows?
The Local Group Policy Editor is available in Professional, Enterprise, and Education editions of Windows. It is not included in Home editions. For those using Home editions, similar changes can be made by modifying the Windows Registry, though this requires advanced technical knowledge.
5. Does this apply to both local and remote users?
This setting is specifically designed for remote desktop sessions. However, similar policies can be configured for local users through other settings in the Group Policy Editor.
Streamline User Management with V2 Cloud
Implementing automatic logout after inactivity is a great step toward optimizing system performance and security, but managing multiple user sessions can still be a challenge—especially in cloud-based environments.
That’s where V2 Cloud makes a difference. Here’s how we will help you:
- 1. Simplified Session Management: V2 Cloud’s virtual desktop solution allows you to easily monitor and manage user sessions. With built-in tools, you can set session timeouts, enforce idle logout policies, and ensure that resources are allocated effectively without relying on manual configuration.
- 2. Enhanced Security for Remote Work: With V2 Cloud, idle sessions are securely handled, reducing the risk of unauthorized access. The platform is designed with advanced security features, including encrypted connections, multi-factor authentication, and automatic session disconnection after inactivity.
- 3. Seamless Performance Optimization: Unlike traditional setups, V2 Cloud dynamically allocates resources based on user activity. Automatic session disconnection works hand-in-hand with the platform’s performance optimization features, ensuring a smooth and lag-free experience for active users.
With V2 Cloud, you can simplify user management, enhance security, and improve system performance—all without the hassle of manual configuration.
Ready to streamline your IT operations? Talk to a Cloud Expert Now and take your user management to the next level.
This simple method has worked for me in Windows Server versions 2012 R2 through 2022. Create a new .reg file with the contents below, adjusting the USERNAME, PASSWORD strings as appropriate. Then run it to add to the registry
Windows Registry Editor Version 5.00

[HKEY_LOCAL_MACHINE\SOFTWARE\Microsoft\Windows NT\CurrentVersion\Winlogon]
"DefaultUserName"="USERNAME"
"DefaultPassword"="PASSWORD"
"AutoAdminLogon"="1"
If it is a domain joined machine, then add this line and modify the DOMAIN string.
"DefaultDomainName"="DOMAIN"
Sourced from:
https://community.spiceworks.com/topic/1911274-autologin-autologon-sysinternals-with-windows-10-issue#entry-6360895
More information on this method:
https://docs.microsoft.com/en-us/troubleshoot/windows-server/user-profiles-and-logon/turn-on-automatic-logon
This entry was posted in Uncategorized. Bookmark the permalink.