
Выберите вариант загрузки:
- скачать с сервера SoftPortal (установочный exe-файл)
- скачать с официального сайта (установочный exe-файл)
GeForce Experience — бесплатная утилита для автоматического обновления драйверов для видеокарт NVIDIA. Также обладает инструментами для установки оптимальных настроек графики для игр, записи лучших моментов игры при помощи фирменной технологии ShadowPlay (полное описание…)

Рекомендуем популярное
CCleaner 6.35.11488
CCleaner — популярное приложение для оптимизации ПК, чистки реестра и удаления различного…
MSI Afterburner 4.6.5
MSI Afterburner — настоящая находка для истинного оверклокера, с помощью которой можно…
Process Hacker 2.39.124
Process Hacker — мощное приложение для полного контроля над задачами, процессами и службами, с…
Mem Reduct 3.5
Mem Reduct — небольшая портативная утилита, которая позволяет высвободить до 25% используемой…
CCleaner Portable 6.35.11488
CCleaner Portable — портативная (переносная, не требующая инсталляции на компьютер) версия утилиты CCleaner для чистки системного мусора…
Все способы:
- Обновление драйверов NVIDIA
- Способ 1: GeForce Experience
- Способ 2: «Диспетчер устройств»
- Способ 3: ручное обновление
- Вопросы и ответы: 5
Обновление драйверов для видеокарты NVIDIA – дело добровольное и не всегда обязательное, но с выходом новых редакций ПО мы можем получить дополнительные «плюшки» в виде лучшей оптимизации, увеличения производительности в некоторых играх и приложениях. Кроме того, в свежих версиях исправляются различные ошибки и недочеты в коде.
Обновление драйверов NVIDIA
В данной статье рассмотрим несколько способов обновления драйверов. Все они являются «правильными» и приводят к одинаковым результатам. Если не сработал один, а такое случается, то можно попробовать другой.
Способ 1: GeForce Experience
GeForce Experience входит в состав ПО NVIDIA и устанавливается вместе с драйвером при ручной инсталляции скачанного с официального сайта пакета. Функций у софта много, в том числе и отслеживание выхода новых версий программного обеспечения.
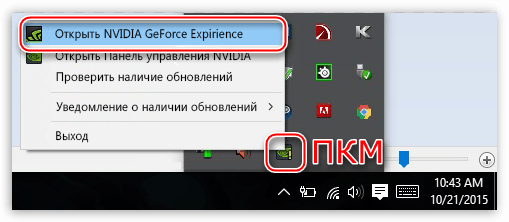
Получить доступ к программе можно из системного трея либо из папки, в которую она была установлена по умолчанию.
- Системный трей.
Здесь все просто: нужно открыть лоток и найти в нем соответствующий значок. Желтый восклицательный знак говорит о том, что в сети имеется новая версия драйвера или другого ПО NVIDIA. Для того, чтобы открыть программу, нужно кликнуть правой кнопкой мыши по иконке и выбрать пункт «Открыть NVIDIA GeForce Experience».

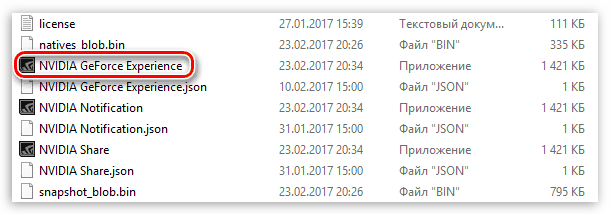
- Папка на жестком диске.
Данное программное обеспечение по умолчанию устанавливается в папку «Program Files (x86)» на системном диске, то есть на том, где находится папка «Windows». Путь такой:
C:\Program Files (x86)\NVIDIA Corporation\NVIDIA GeForce ExperienceЕсли Вы пользуетесь 32-разрядной операционной системой, то папка будет другая, без приписки «х86»:
C:\Program Files\NVIDIA Corporation\NVIDIA GeForce ExperienceЗдесь необходимо найти исполняемый файл программы и запустить его.

Процесс инсталляции происходит следующим образом:
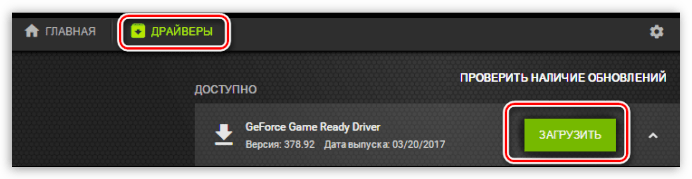
- После запуска программы переходим на вкладку «Драйверы» и нажимаем зеленую кнопку «Загрузить».

- Далее необходимо дождаться завершения загрузки пакета.

- После окончания процесса нужно выбрать тип установки. Если нет уверенности в том, какие компоненты требуется установить, то доверяемся софту и выбираем «Экспресс».

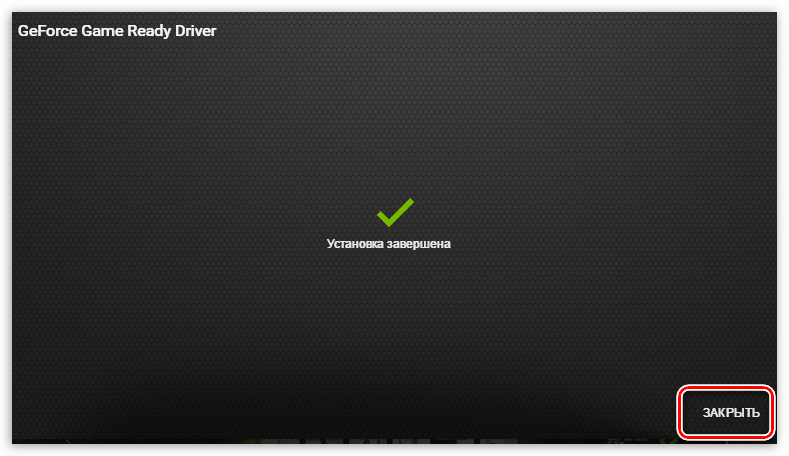
- По завершению успешного обновления программного обеспечения следует закрыть GeForce Experience и перезагрузить компьютер.


Способ 2: «Диспетчер устройств»
В операционной системе Windows имеется функция автоматического поиска и обновления драйверов для всех устройств, в том числе и видеокарты. Для того, чтобы ею воспользоваться, нужно добраться до «Диспетчера устройств».
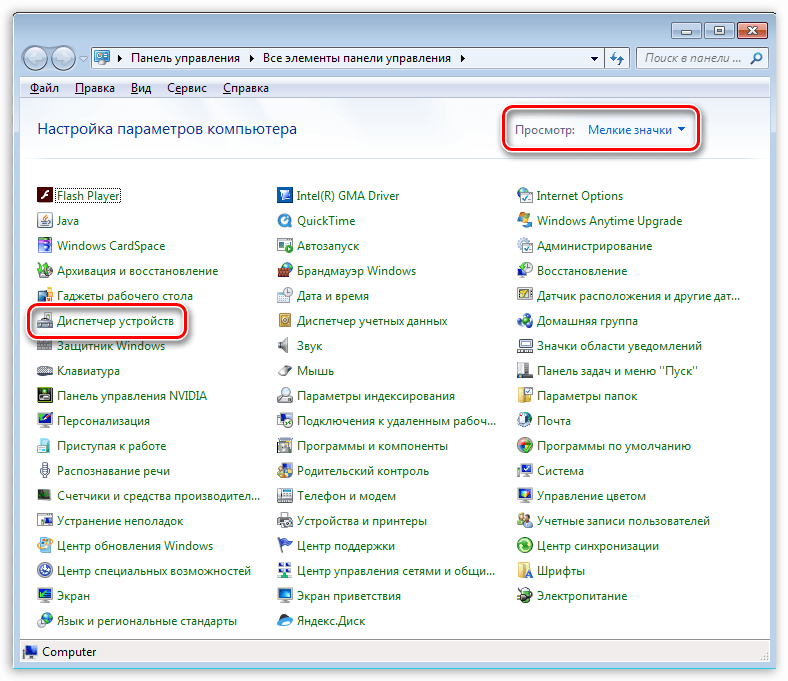
- Вызываем «Панель управления» Windows, переключаемся в режим просмотра «Мелкие значки» и находим нужный пункт.

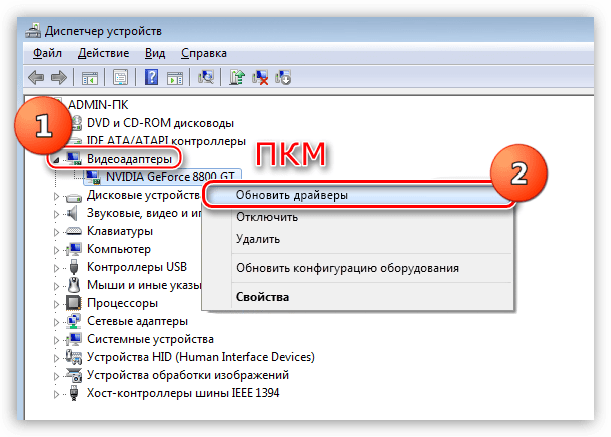
- Далее в блоке с видеоадаптерами находим свою видеокарту NVIDIA, нажимаем на нее правой кнопкой мыши и в открывшемся контекстном меню выбираем пункт «Обновить драйверы».

- После совершенных выше действий мы получим доступ непосредственно к самой функции. Здесь нам нужно выбрать «Автоматический поиск обновленных драйверов».

- Теперь Windows сама осуществит все операции по поиску ПО в интернете и его установке, нам останется только наблюдать, а затем закрыть все окна и выполнить перезагрузку.

Способ 3: ручное обновление
Ручное обновление драйверов подразумевает самостоятельный их поиск на сайте NVIDA. Этим способом можно воспользоваться в том случае, если все другие не принесли результата, то есть, возникли какие-либо ошибки или неполадки.
Читайте также: Почему не устанавливаются драйвера на видеокарту
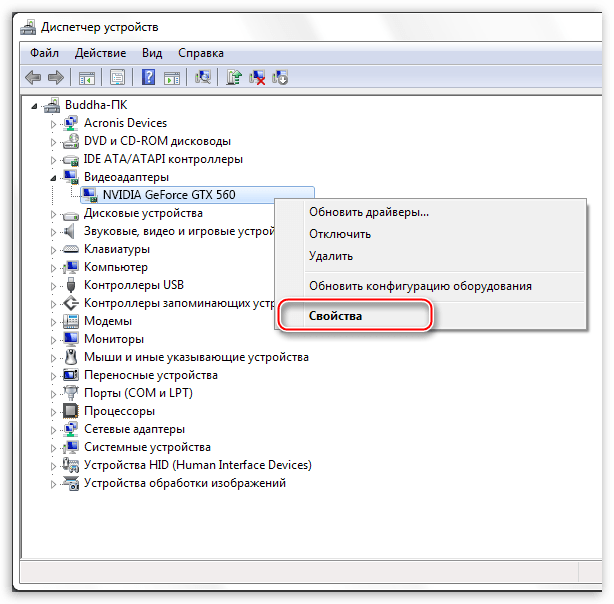
Прежде чем устанавливать скачанный драйвер, необходимо убедиться в том, что на сайте производителя лежит более новое ПО, чем то, которое инсталлировано в Вашей системе. Сделать это можно, перейдя в «Диспетчер устройств», где следует найти свой видеоадаптер (см. выше), кликнуть по нему ПКМ и выбрать пункт «Свойства».
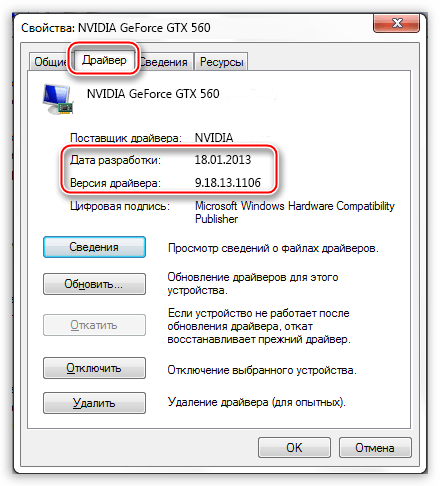
Здесь, на вкладке «Драйвер» мы видим версию программного обеспечения и дату разработки. Именно дата нас и интересует. Теперь можно заняться поиском.
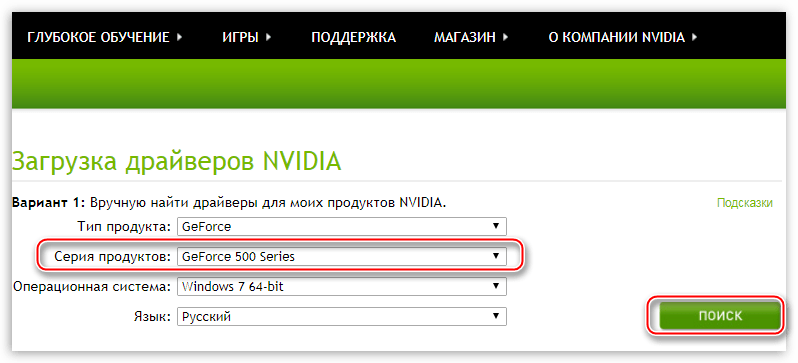
- Идем на официальный сайт NVIDIA, в раздел загрузки драйверов.
Страница загрузки
- Здесь нам нужно выбрать серию и модель видеокарты. У нас серия адаптера 500 (GTX 560). В данном случае нет необходимости выбирать семейство, то есть, непосредственно название модели. Затем нажимаем «Поиск».
Читайте также: Как узнать серию продукта видеокарты Nvidia

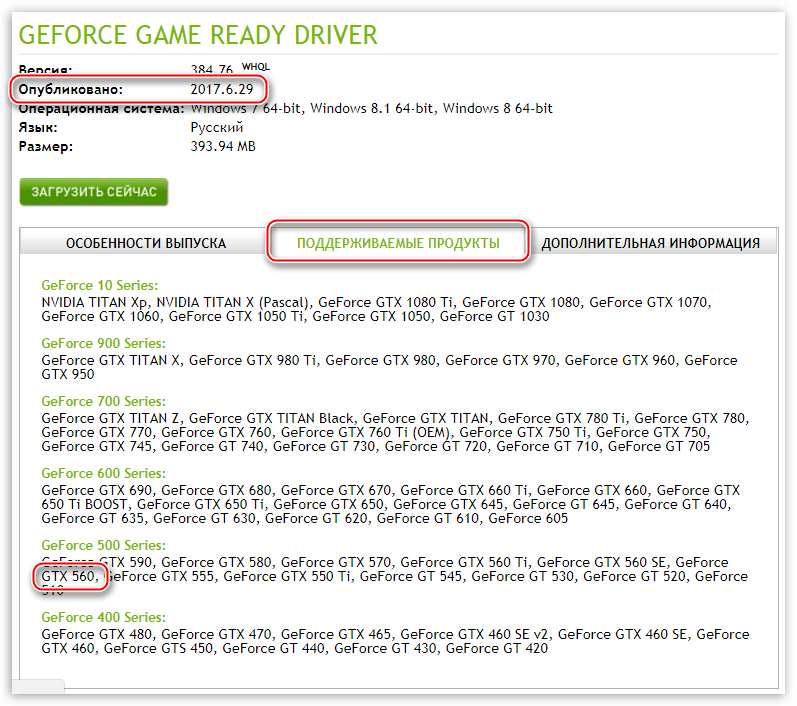
- Следующая страница несет информацию о редакции программного обеспечения. Нас интересует дата релиза. Для надежности, на вкладке «Поддерживаемые продукты» можно проверить, совместим ли драйвер с нашим оборудованием.

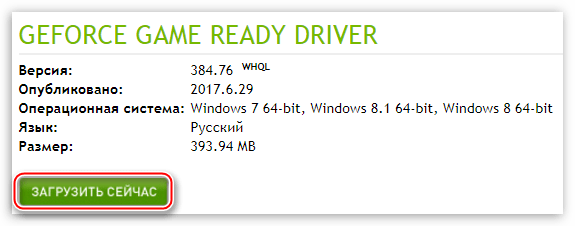
- Как видим, дата выпуска драйвера в «Диспетчере устройств» и на сайте отличаются (на сайте новее), значит, можно обновиться до новой версии. Жмем «Загрузить сейчас».

- После перехода на следующую страницу нажимаем «Принять и скачать».


По завершению скачивания можно переходить к инсталляции, предварительно закрыв все программы – они могут помешать нормальной установке драйвера.
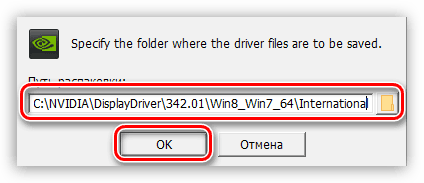
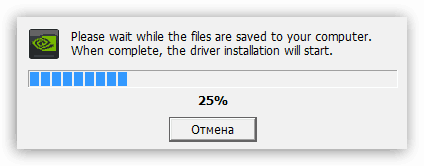
- Запускаем установщик. В первом окне нам будет предложено поменять путь распаковки. Если не уверены в правильности своих действий, то ничего не трогаем, просто жмем ОК.

- Дожидаемся завершения копирования установочных файлов.

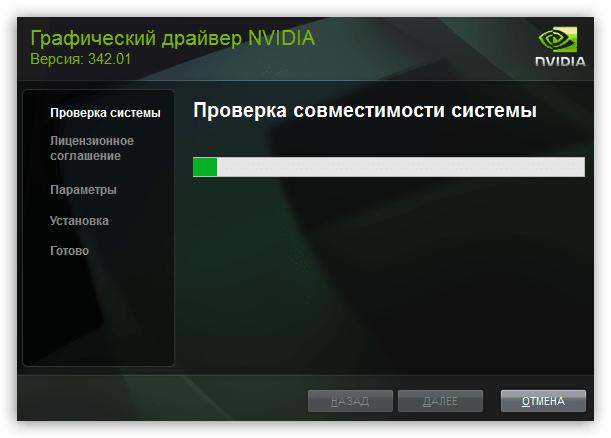
- Далее Мастер установки осуществит проверку системы на наличие необходимого оборудования (видеокарты), которое совместимо с данной редакцией.

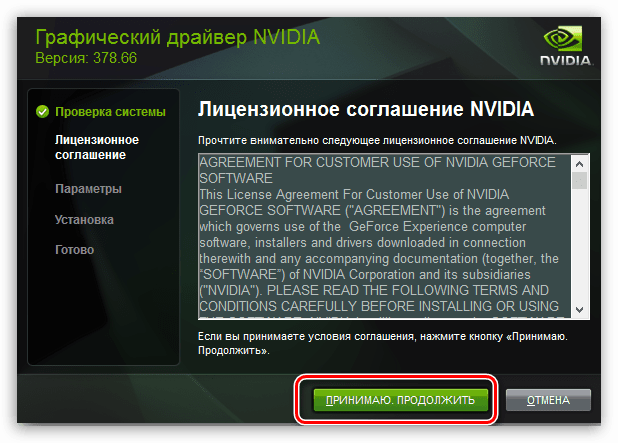
- Следующее окно установщика содержит лицензионное соглашение, которое нужно принять, нажав кнопку «Принимаю, продолжить».

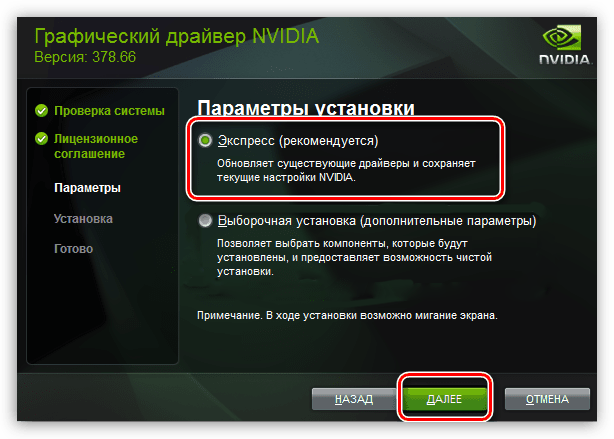
- Следующий шаг – выбор типа установки. Здесь также оставляем параметр по умолчанию и продолжаем, нажав «Далее».

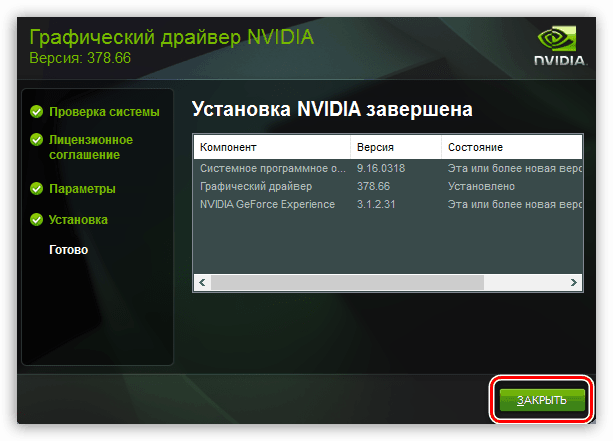
- Больше от нас ничего не требуется, программа сама выполнит все необходимые действия и перезагрузит систему. После ребута мы увидим сообщение об успешной установке.

На этом варианты обновления драйверов для видеокарты NVIDIA исчерпаны. Совершать данную операцию можно 1 раз в 2 — 3 месяца, следя за появлением свежего программного обеспечения на официальном сайте либо в программе GeForce Experience.
Наша группа в TelegramПолезные советы и помощь

Share Your Greatest Moments
Now you can record and share gameplay videos and livestreams on YouTube, Twitch, and Facebook. NVIDIA ShadowPlay™ technology lets you broadcast with minimal performance overhead, so you never miss a beat in your games. The GeForce Experience in-game overlay makes it fast and easy.
- Broadcast to Facebook Live: Watch Video >
- Automatically record with NVIDIA Highlights: Watch Video >
Take Amazing In-Game Photographs with NVIDIA Ansel
The powerful
NVIDIA Ansel photo mode makes it easy to capture professional-grade photographs of your games and share them directly to Facebook, Google Photos, and Imgur. You can choose from super-resolution, 360, HDR, and stereo photographs in supported games
Learn more >
Personalize Your Gameplay with Freestyle Game Filters
NVIDIA Freestyle game filter allows you to apply post-processing filters on your games while you play. Change the look and mood of your game with tweaks to color or saturation, or apply dramatic post-process filters like HDR. Freestyle is integrated at the driver level for seamless compatibility with supported games.
Optimise Your Game Settings
GeForce Experience takes the hassle out of PC gaming by configuring your game’s graphics settings for you. Don’t know what texture filtering level to set in Overwatch? Not to worry. NVIDIA taps into the power of the NVIDIA cloud data center to test thousands of PC hardware configurations and find the best balance of performance and image quality. Then it automatically configures personalised graphics settings based on your PC’s GPU, CPU, and display.

GeForce Experience Support
Updated by Cici on Apr 15, 2025
NVIDIA graphic cards correspond to great display results and support for the computer. For convenient processing, NVIDIA drivers need to be updated regularly.
This article provides insight into utilizing the NVIDIA Drivers Auto Detect tools for updating the drivers without inconvenience.
If your computer or laptop holds an NVIDIA graphic card for providing high-resolutio n graphics while playing games or operating software, you will require them to be updated. For updating the NVIDIA drivers, users prefer having the option of updating their drivers automatically. Luckily, the NVIDIA drivers panel provides this, giving the users a chance to have their drivers updated automatically.
NVIDIA offers the NVIDIA GeForce Experience tool to detect drivers automatically. This tool can update your drivers frequently and tweak your game settings. And then, you can enjoy maximum performance and reliability for games.
Next, let’s look at the pros and cons of this NVIDIA Drivers Auto Detect tool and see how to use the tools to update drivers automatically.
NVIDIA Drivers Auto Detect: Pros and Cons
We will now shift our discussion to whether it is great to have NVIDIA drivers auto-detect for your computer. Let’s find out more about this contention through a comprehensive overview of the advantages and disadvantages of having this function active on your device:
Pros
- Time-Efficient: The use of automatic updates for NVIDIA drivers can save time.
- Enhancing User Performance Instantly: To improve your user experience, it is best to activate automatic updates for the drivers.
- Determining the Compatibility: Instead of overwriting the existing drivers and bringing out some issues, using the automatic updates feature helps you determine the compatibility of the drivers.
Cons
- You’re Not in Control: You might not know the updates and the time they were executed. This, at times, can get quite problematic as different configuration settings might change during the process.
- Cause Problems in Computer: For a specific update, there is a chance that the device might malfunction due to bugs in the driver update.
- No Internet, No Updates: If there is no internet connection on your computer, no updates will be updated. Instead, the computer will annoy you with prompts to update your drivers, which can disrupt your user experience.
If you are not satisfied with the operations of the NVIDIA drivers auto-detect feature on your computer, there can be other ways to try. Several third-party products provide faster features to detect drivers. Such an example comes in the shape of EaseUS DriverHandy for updating drivers and fixing issues within them.
How to Use NVIDIA Drivers Auto Detect to Update Drivers
As you have learned about NVIDIA drivers and the auto-detect feature for updating drivers, it is time to shift to learning some probable methods. This will help you execute the process without putting yourselves or your device in difficulty:
Guide 1: Use NVIDIA Drivers Auto Detect Alternative
To update your NVIDIA drivers, you can try using EaseUS DriverHandy as an excellent alternative to automatic detection and upgradation. The platform uses a catalog of 5 million drivers to detect your device’s correct driver automatically. This can be a great option in situations where you seek to resolve hardware problems in your computer.
EaseUS DriverHandy provides certified drivers to enhance your user experience on your computing device. While it resolves all prevailing concerns related to software and drivers, it also prevents using drivers that will put the computer at a security risk.
With an overview of EaseUS DriverHandy, we will transition into discussing the steps for updating NVIDIA graphic drivers automatically on your computer:
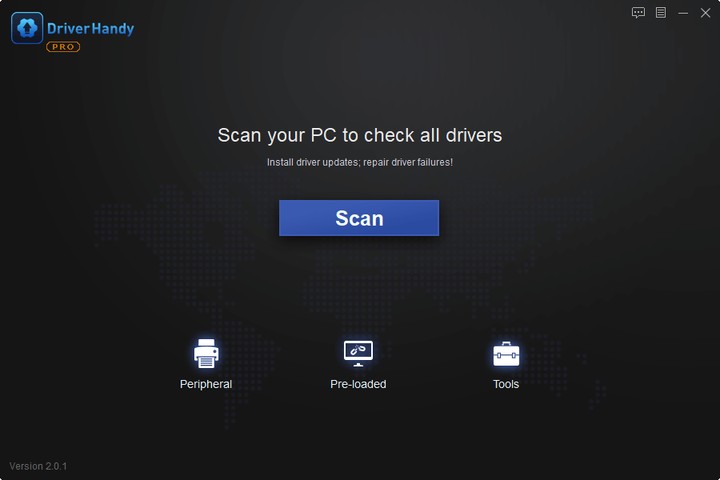
Step 1. Launch EaseUS DriverHandy and click the «Scan» button.
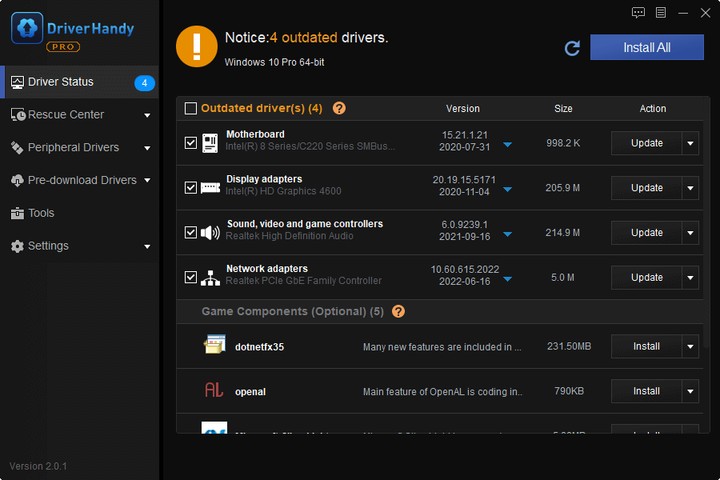
Step 2. Choose the drivers and click «Install All» in the upper right corner to update all drivers. Or you can select the single Motherboard, Sound, or Graphisc drivers and click «Update» on the right side.
As one of the best free driver updater, you can find EaseUS DriverHandy has a clearer interface and it is easy to use. Besides that, some prominent vital features make EaseUS DriverHandy a great alternative to NVIDIA drivers’ auto-detection:
- It promises 70% less crashing and freezing of the computer in comparison to the problems that occur due to updating drivers through conventional means.
- You can experience sharper graphic results from the drivers updated through this platform.
- Quickly resolve basic driver issues occurring on your computer in no time.
Guide 2: Use NVIDIA Drivers Auto Detect
If you wish to continue with the conventional techniques of updating drivers on your computer, NVIDIA Control Panel provides a complete system of executing the process. Follow the directions displayed in the steps to use the NVIDIA GeForce Experience. You will be able to update your drivers and activate the automatic option for updating the drivers without going through this process repeatedly:
Step 1: Get the NVIDIA GeForce Experience download. Run the installer right now and follow the instructions to install GeForce Experience on your computer.

Step 2: To automatically check for the most recent driver update options, launch the software and select the «Drivers» tab.
Step 3: To download the driver, click the «Download Driver» button and wait. You’ll see the «Express Installation» button after the process is finished.
Step 4: Click «Express Installation» and install/update your latest NVIDIA GPU drivers.
Conclusion
This article has presented a comprehensive overview of how users can automatically download NVIDIA drivers on their computers. While a proper explanation of the NVIDIA drivers auto-detect feature has been covered, the article has also focused on giving a great alternative to the readers in the form of EaseUS DriverHandy.
Consider downloading this tool to experience a seamless flow of updating NVIDIA drivers on the computer.
FAQs About NVIDIA Drivers Auto Detect
We have outlined some essential questions a reader might have while reading about NVIDIA drivers’ auto-detection. Look through these questions and their corresponding answers to know more about the function:
1. Do NVIDIA drivers update automatically?
NVIDIA drivers can be updated automatically with the NVIDIA drivers auto-detect feature. This can be accessed through the NVIDIA Control Panel present in the computer. Conversely, if you seek a better experience in updating drivers, you can try using EaseUS DriverHandy for effective results.
2. How to automatically detect and install the latest NVIDIA drivers?
The technique of automatically detecting and installing the latest NVIDIA drivers is quite simple. While the article above explains this in detail, you can try carrying out the process to understand the process in a better way.
3. How do I fix NVIDIA not detected?
It might be hidden if you face issues detecting NVIDIA graphics drivers on your computer. For that, you will have to perform the following instructions on your system:
Step 1: Open the Run program with the «Windows + R» shortcut and type «devmgmt.msc» to open the Device Manager.
Step 2: As it opens, click on the «View» tab on the top and proceed to select «Show hidden devices.» Continue to the «Action» tab and select «Scan for hardware changes.»
Step 3: If you observe the NVIDIA graphics driver under the «Display adapters,» they have been detected successfully by your computer.