
AVRDUDE for Windows
This is a fork of AVRDUDE from https://github.com/avrdudes/avrdude.
The purpose of this fork is to add better support for Windows to bring it on par with the Linux version of AVRDUDE.
Noteable changes include:
- Support Atmel AVR programmers out of the box
- Support Micronucleus bootloader
- Support Teensy HalfKay bootloader
- Support COM port discovery via USB VID/PID
- Support Arduino Leonardo bootloader auto-reset
- Support WinUSB devices via custom libusb
- Support FTDI devices via custom libftdi
- Support HID devices via libhidapi
- Support Visual Studio
- Miscellaneous bug-fixes and patches
The original AVRDUDE project homepage can be found here https://github.com/avrdudes/avrdude.
Documentation
Documentation for current and previous releases is on Github Pages.
Download
To get the latest version of AVRDUDE for Windows, go to the releases folder:
https://github.com/mariusgreuel/avrdude/releases
Feature Details
Support Atmel AVR programmers out of the box
This build contains support for Atmel AVR programmers, such as
- Atmel-ICE (Part Number: ATATMEL-ICE)
- Atmel AVRISP mkII (Part Number: ATAVRISP2)
This build does not rely on libusb drivers. Instead the default Atmel drivers can be used, allowing you to use AVRDUDE and Atmel Studio 7 side-by-side, without switching drivers.
If you previously changed the driver of your programmer to libusb, you should use Windows Device Manager to uninstall the device, and then reinstall using the default Windows drivers.
Support Micronucleus bootloader
This build adds support for the Micronucleus bootloader, so you do no longer need a separate command-line utility when working with devices that use the Micronucleus bootloader.
The Micronucleus bootloader is typically used on small ATtiny boards, such as Digispark (ATtiny85), Digispark Pro (ATtiny167), and the respective clones.
By default, it uses the USB VID/PID 16D0:0753 (MCS Digistump).
Since this bootloader is optimized for size, it implements writing to flash memory only.
As it does not support reading, you need to use the -V option to prevent AVRDUDE from verifing the flash memory. To have AVRDUDE wait for the device to be connected, use the extended option ‘-x wait’.
Example: Flashing a Micronucleus bootloader device
avrdude -c micronucleus -p t85 -x wait -V -U flash:w:main.hex:i
Support Teensy HalfKay bootloader
This build adds support for the Teensy HalfKay bootloader, so you do no longer need a the Teensy Loader tool when working with Teensy devices.
Since this bootloader is optimized for size, it implements writing to flash memory only.
As it does not support reading, you need to use the -V option to prevent AVRDUDE from verifing the flash memory. To have AVRDUDE wait for the device to be connected, use the extended option ‘-x wait’.
Supported devices are:
- Teensy 1.0 (AT90USB162)
- Teensy 2.0 (ATmega32U4)
- Teensy++ 1.0 (AT90USB646)
- Teensy++ 2.0 (AT90USB1286)
Example: Flashing a Teensy 2.0 device
avrdude -c teensy -p m32u4 -x wait -V -U flash:w:main.hex:i
Support COM port discovery via USB VID/PID
Most Arduino boards use a USB-based virtual COM port, which is connected to some sort of bootloader. Since COM port numbers (COM1, COM2, …) are determined by Windows, you first need to use Windows device manager to figure out the COM port before you can use AVRDUDE to flash the board. Alternatively, you may use Windows device manager to assign a COM port of your choice to the USB device. Additionally, the COM port of your Arduino board may change over time, for instance if you plug the device in a different USB port.
To simplify the discovery of your Arduino board, I provided the possibility to specify the USB vendor and product ID instead of the COM port.
For instance, to connect to an Arduino Leonardo, use the following command:
avrdude -c avr109 -P usb:2341:0036 -p m32u4
Since the USB vendor and device ID 2341:0036 is the identical for all Leonardo boards, the command above will work regardless of which COM port was actually assigned to your board.
Note that can cannot use this method if you have more than one device of the same type (i.e. that share the same USB VID/PID) plugged into your computer. Also, some devices ship various versions of firmwares using different VID/PID.
To figure out the USB VID and PID, you may use Windows devices manager (see the Hardware IDs of the Details tab of the USB device), or look it up in the official list of Arduino devices:
https://github.com/arduino/ArduinoCore-avr/blob/master/boards.txt
USB VID/PID pairs for some popular boards and the respective commands are:
- Arduino Uno Rev 3: 2A03:0043 ->
avrdude -c arduino -P usb:2A03:0043 -p m328p - Arduino Micro: 2341:0037 ->
avrdude -c avr109 -P usb:2341:0037 -p m32u4 - Arduino Leonardo: 2341:0036 ->
avrdude -c avr109 -P usb:2341:0036 -p m32u4 - Sparkfun Pro Micro (5V): 1B4F:9205 ->
avrdude -c avr109 -P usb:1B4F:9205 -p m32u4 - Sparkfun Pro Micro (3.3V): 1B4F:9203 ->
avrdude -c avr109 -P usb:1B4F:9203 -p m32u4 - Adafruit Circuit Playground: 239A:0011 ->
avrdude -c avr109 -P usb:239A:0011 -p m32u4
Support Arduino Leonardo bootloader auto-reset
Before any Arduino board may be flashed via the bootloader, you need to kick it into bootloader mode first. This can done manually by pressing the reset button, or automatically via an special auto-reset mechanism: For boards with a USB to serial converter chip (such as Arduino Uno or Nano), the tool needs to pull the DTR signal to low, which will briefly pull the RESET pin of the microcontroller to low. For boards with a direct USB connection (such as Arduino Leonardo or Micro), the sketch typically implements a serial port via a USB composite device with a virtual COM port. To perform the auto-reset, the sketch implements a hack that resets the device into bootloader mode when the COM port is opened with a baudrate of 1200bps. To make matters even more complicated, the bootloader COM port has a different USB VID:PID pair than the sketch COM port, which causes the COM port to change while performing the reset.
To simplify the process of auto-resetting the board, this version will auto-reset the device when AVRDUDE detects that the device is running in sketch mode. Note that the sketch is required to implement a USB composite device with a virtual COM port with a matching USB VID:PID, which is implemented in the Arduino core software.
Support WinUSB devices via custom libusb
Since AVRDUDE originated from Unix, the USB support in AVRDUDE is built upon the Unix-based USB library libusb. In order to support Windows, libusb has been ported to Windows libusb-win32.
The downside of using libusb-win32 is that it requires the user to manually install a kernel-mode driver (libusb0.sys or libusbk.sys) instead of the manufacturer supplied Windows driver. There are several hacks to accomplish this, such as the Zadig driver installation utility, which installs a self-signed root certificate in the Windows driver store due to the lack of proper driver installation packages.
This build contains a custom library called libwinusb, which implements a sub-set of the libusb-win32 API. The libwinusb implementation supports both the winusb.sys driver, and the libusb0.sys driver as well. This patch has a number of advantages, such as
- Many USB devices that ship with WinUSB drivers, such as Atmel programmer, will run out of the box.
- Works with both WinUSB and libusb: You can use either Windows built-in WinUSB driver to access your USB devices, or keep using the libusb drivers if you have them installed already.
- No static dependency to libusb0.dll: You cannot run the original version AVRDUDE, unless you previously installed libusb. On systems where libusb is not installed, this build eliminates the error «The code execution cannot proceed because libusb0.dll was not found. Reinstalling the program may fix this problem».
Microsoft OS descriptors and firmware examples
Windows provides a mechanism to automatically load the built-in WinUSB driver without providing a driver installation package (INF file). The automatic WinUSB driver installation is triggered via a special Microsoft OS descriptor that must be present in the firmware of the USB device.
To demonstrate how this works, I added Microsoft OS descriptors to the following projects:
-
USBasp — USB programmer for Atmel AVR controllers: https://github.com/mariusgreuel/USBasp
-
FabISP a.k.a USBtinyISP — A fab-able in-system programmer: https://github.com/mariusgreuel/FabISP
-
Micronucleus — ATtiny USB bootloader with a strong emphasis on bootloader compactness: https://github.com/mariusgreuel/micronucleus
Support FTDI devices via custom libftdi
In order to support FTDI devices, AVRDUDE uses the Unix-based library libftdi1. Similar to libusb, the libftdi1 library does not play nice on Windows: On Windows, FTDI devices load the manufacturer supplied driver via plug-and-play. The FTDI drivers implement an API via the FTDI D2XX DLLs. However, libftdi1 cannot use the D2XX interface, so it will not work with the plug-and-play drivers.
This build contains a patches library of libftdi. The patches load the D2XX DLLs to support FTDI devices, so FTDI devices will just work.
Support HID devices via libhidapi
This build include the WIN32 version of libhidapi, and some patches, to allow HID devices to work out of the box.
Support Visual Studio
This build adds support for Microsoft Visual Studio. Building AVRDUDE with Microsoft Visual C/C++ will give you the best user and debugging experience while working on Windows.
Miscellaneous bug-fixes and patches
-
This build fixes bug #54159: Buffer overflow in usbtiny.c, which causes AVRDUDE to crash when using the USBtiny programmer.
-
Support new microcontroller: ATtiny167
Releases
You can find the latest releases of AVRDUDE for Windows here:
https://github.com/mariusgreuel/avrdude/releases
Users manual
You can find the original users manual (does not contain AVRDUDE for Windows extras) of AVRDUDE here:
https://www.nongnu.org/avrdude/user-manual/avrdude.html
Build
The build instructions have been moved here:
https://github.com/avrdudes/avrdude/wiki
Building AVRDUDE for Windows using MSVC
Windows Prerequisites
In order to build AVRDUDE on Windows, you need:
- Flex and Bison installed, for instance via Chocolatey
- Microsoft Visual Studio 2019 with Desktop development with C++ and CMake enabled
Windows Build Instructions
To build AVRDUDE on Windows, do the following:
git clone --branch windows https://github.com/mariusgreuel/avrdude- Open the folder avrdude using the menu item File->Open->Folder
- Build the project using the menu item Build->Build All
Linux udev rules
If you intent to use either the Micronucleus or Teensy bootloader, you should edit the udev rules so that you can run AVRDUDE without root.
For instance, if you are on Ubuntu and you installed the avrdude package, you would edit /lib/udev/rules.d/60-avrdude.rules and add the following rules:
# Micronucleus Bootloader
SUBSYSTEM=="usb", ATTR{idVendor}=="16d0", ATTR{idProduct}=="0753", TAG+="uaccess"
# Teensy Bootloader
SUBSYSTEM=="usb", ATTR{idVendor}=="16c0", ATTR{idProduct}=="0478", TAG+="uaccess"
Troubleshooting Tips & Tricks
Atmel DFU Device driver broken
The current version of the Atmel DFU drivers that are distributed via the Windows Update are goofed up (@Atmel: It might have something to do with the fact that you commented out the CopyFiles sections!).
Symptoms are:
- You cannot use AVRDUDE to connect to an Atmel DFU device, and you get the error message «No matching USB device found».
- When installing the drivers via Windows Update, you get the error message «Windows encountered a problem installing the drivers for your device» and «A service installation section in this INF is invalid.»
- In Windows Device Manager, the Atmel DFU device shows up as an unknown device.
You should use an older driver package that does not contain this bug.
Outdated libusb0 driver
The most current version of libusb0.sys is 1.2.6.0, signed on 12/17/2012 by Travis Lee Robinson. If you are using an older version (check with Windows Device Manager), you may not be able to connect to your USB devices using the libusb0 driver.
AVRDUDE is software for programming Atmel AVR Microcontrollers
Command Line
Download Links For Version 8.0
Download Links For Version 7.3
Download Links For Version 7.1
Download Links For Version 7.2
Info
last updated 8/24/2024 12:00:00 AM
Publisher:
AVR Dudes
License:
GPL-2.0
Dependencies
No dependency information
Share
По умолчанию поддерживаемые МК (список МК постоянно расширяется, см. форум):
AT90CAN128, AT90CAN32, AT90CAN64, ATmega128, ATmega1280, ATmega1281, ATmega1284p, ATmega128RFA1, ATmega16, ATmega162, ATmega164p, ATmega168, ATmega169, ATmega2560, ATmega2561, ATmega32, ATmega324p, ATmega325, ATmega3250, ATmega328p, ATmega329, ATmega3290, ATmega329p, ATmega3290p, ATmega32U4, ATmega48, ATmega8, ATmega8515, ATmega8535, ATmega88, ATtiny13, ATtiny2313, ATtiny261.
По умолчанию поддерживаемые программаторы (список программаторов можно самостоятельно расширить, либо скачать с форума):
USBasp, USBtiny, AVR ISP mkII,SI-Prog, AVR910, AVR910, STK200, STK500, STK500 2.X, JTAG ICE mkII, JTAG ICE mkII ISP, JTAG ICE mkII PDI.
Основные отличия от аналогичных программ :
1. Возможность самостоятельного добавления программаторов, настройки скорости программирования и т.п;
2. Возможность самостоятельного добавления МК;
3. Редактирования и настройка отображения Fuses битов;
4. Выбор инверсных или прямых Fuses битов;
5. Окна вывода значений Fuses битов в HEX формате;
6. Сохранение настроек программирования при закрытии программы, т.е. при последующем открытии все настройки восстановятся;
7. «дублирование кнопки» — данная функция выводит на экран кнопку «Программировать», которая является полным функциональным аналогом кнопки «Программировать всё» и всегда будет находиться по верх всех окон. Кнопку можно переместить в удобную для вас зону монитора, свернув AVRDUDE_PROG. Удобна при многочисленном перепрограммировании МК.
Установка.
Разархивируйте файл usbprog.rar в любую удобную папку. Поместите ярлык программы «AVRDUDE_PROG» на рабочий стол. Установка завершена. Можно работать.
Возможности программы.
Настройки оболочки «AVRDUDE_PROG» реализованы в «ini» файлах. Что такое «ini» файлы можно посмотреть тут.
Теперь возможно самостоятельно добавлять и редактировать список микроконтроллеров, программаторов, портов, Fuses бит, добавить различные языки и пр.
Список контроллеров и состояний Fuses бит, редактируется в файле «atmel.ini», список программаторов и портов в файле «programm.ini», список поддерживаемых языков в файле «language.ini».
В файле «atmel.ini», все значения введены по умолчанию в соответствии с datasheet на МК, можете изменить по Вашему усмотрению. Никаких инверсий не требуется, значение по умолчанию вводиться в соответствии с datasheet на МК. В том случае, если МК нет в списке, или при выборе МК во вкладке Fuses везде «error», то Вам необходимо самостоятельно ввести значения в файл «atmel.ini» в соответствии с datasheet и приведённым ниже примером. Либо посмотреть на форуме. Файл «atmel.ini» находится в корневой папке программы.
В файле «programm.ini», введены значения программаторов для командной строки avrdude. В том случае, если используемый Вами программатор отсутствует в списке, либо необходимо изменить какие-либо параметры установленные по умолчанию, то необходимо ввести/редактировать его значения самостоятельно в соответствии с приведённым ниже примером. Либо посмотреть на форуме. Файл «programm.ini» находится в корневой папке программы.
В файле «language.ini», возможно отредактировать на «свой вкус» текстовую информацию оболочки, либо добавить язык программы AVRDUDE_PROG. Тут расписывать ничего не буду, думаю в файле «language.ini» всё понятно.
Добавление/редактирование списка МК. Работа с файлом «atmel.ini».
Окройте в любом текстовом редакторе (рекомендую Notepad++) файл «atmel.ini». Посмотрите как реализован ввод параметров МК, фузе битов и пр. Ниже привожу пример и описание парметров.
Пример на мк AT90CAN128
Заголовок раздела
[AT90CAN128] — имя МК которое появиться в выпадающем списке, «[» и «]» обязательны. В данном случае «AT90CAN128».
Параметр для типа МК
mcuavrdude=c128 // тип мк в avrdude
Значение и описание параметров раздела для Fuse битов
Lock байт
lockbytebit*enabled=0 // «*» — номер бита в Lock байте, «**enabled=0» — невозможно изменение состояния бита, «**enabled=1» — возможно изменение состояния бита. В данном случае изменение бита невозможно. Изменение бита будет недоступно.
lockbytebit*name=NOT USED // «*» — номер бита в Lock байте, «**name = NOT USED» — бит не используется. Если бит используется, вводиться его имя в соответствии с datasheet.
lockbytebit*def=1 // «*» — номер бита в Lock байте, «**def=» — если имя бит бита = «NOT USED», то значение вводится в соответствии с datasheet. В данном случае «1».
High байт
highbytebit*enabled=1 // «*» — номер бита в High байте, «**enabled=0» — невозможно изменение состояния бита, «**enabled=1» — возможно изменение состояния бита. В данном случае изменение бита возможно. Изменение бита будет доступно.
highbytebit*name=OCDEN // «*» — номер бита в High байте, «**name = OCDEN» — имя бита в соответствии с datasheet.
highbytebit*def=1 // «*» — номер бита в High байте, «**def=1» — значение бита по умолчанию, вводиться в соответствии с datasheet. В данном случае значение по умолчанию «1».
Low байт
lowbytebit*enabled=1 // «*» — номер бита в Low байте, «**enabled=0» — невозможно изменение состояния бита, «**enabled=1» — возможно изменение состояния бита. В данном случае изменение бита возможно. Изменение бита будет доступно.
lowbytebit*name=CKDIV8 // «*» — номер бита в Low байте, «**name = CKDIV8» — имя бита в соответствии с datasheet.
lowbytebit*def=0 //»*» — номер бита в Low байте, «**def=0» — значение бита по умолчанию, вводиться в соответствии с datasheet. В данном случае значение по умолчанию «0».
Extended/Fuse/Fuse байт
extendedbytebit*enabled=0 // «*» — номер бита в Extended/Fuse/Fuse байте, «enabled=0» — невозможно изменение состояния бита, «enabled=1» — возможно изменение состояния бита. В данном случае изменение бита невозможно. Изменение бита будет недоступно.
extendedbytebit*name=NOT USED //»*» — номер бита в Extended/Fuse/Fuse байте, «name = NOT USED» — бит не используется. Если бит используется, вводиться его имя в соответствии с datasheet.
extendedbytebit*def=1 // «*» — номер бита в Lock байте, «**def=» — если имя бит бита = «NOT USED», то значение вводится в соответствии с datasheet. В данном случае «1».
Добавление/редактирование списка программаторов. Работа с файлом «programm.ini».
Откройте в любом текстовом редакторе (рекомендую Notepad++) файл «programm.ini». Посмотрите как реализован ввод параметров программаторов. Ниже привожу пример и описание парметров.
Описание переменных файла.
[Name programmator] – имя программатора а выпадающем списке
progisp – программатор для командной строки avrdude
portprog – порт программатора для командной строки avrdude (Usb, com, lpt и пр.)
portenabled – окно изменение порта «1»-доступно, «0» — недоступно
Программатор AVR STK200 с поддержкой LPT.
Для добавления программатора AVR STK200 с поддержкой LPT в файл «programm.ini» можно добавить следующее:
[STK200LPT]
progisp=stk200
portprog=lpt1
portenabled=0
Сохраните файл «programm.ini»
В выпадающем списке «Настройки» -> «Программатор» появиться программатор « STK200LPT » с работой от lpt1 порта.
Всё работает аналогично для других параметров и программаторов, поддерживаемых avrdude.
AVRDUDE_PROG 3.3 (22.01.2021)
ВНИМАНИЕ!!! Обновлена версия avrdude 6.3 (22.01.2021)
Драйвера USBAsp
Основные отличия от предыдущей версии:
— добавлено куча контроллеров, исправлены ошибки файлов «atmel.ini»,»avrdude.conf» — огромное спасибо модератору форума dmibr за проделанную работу!
— исправлены мелкие ошибки.
Если у Вас установлена программа версии 3.1 и выше, то достаточно заменить файл — «AVRDUDEPROG.exe»,»avrdude.exe»,»avrdude.conf»,»atmel.ini» . В этом случае все ранее сохранённые настройки в файлах «ini» не изменяться.
Размер файла: 690КБ
Статус программы: бесплатная
ОС: Windows NT/2000/XP/VISTA/7/10
Интерфейс: русский, english
Разработчик: yourdevice
Версия: 3.3 (22.01.2021)
AVRDUDE_PROG 3.2
ВНИМАНИЕ!!! Актуально для версии 3.2 — ссылка на форум
Основные отличия от предыдущей версии:
— исправлено зависание программы в некоторых случая;
— исправлена ширина выпадающего списка программаторов;
— в диалоговом окне программы состояние avrdude выводиться в режиме онлайн, а не в конце программирования;
— исправлены мелкие ошибки.
Если у Вас установлена программа версии 3.1, то достаточно заменить только «exe» файл. В этом случае все ранее сохранённые настройки в файлах «ini» не изменяться.
Размер файла: 558КБ
Статус программы: бесплатная
ОС: Windows NT/2000/XP/VISTA/WINDOWS 7
Интерфейс: русский, english
Разработчик: yourdevice
Версия: 3.2 (03.08.2013)
Скачать.
AVRDUDE_PROG 3.1
Размер файла: 558КБ
Статус программы: бесплатная
ОС: Windows NT/2000/XP/VISTA/WINDOWS 7
Интерфейс: русский, english
Разработчик: yourdevice
Версия: 3.1 (18.10.2012)
Скачать.
AVRDUDE_PROG 3.0
Размер файла: 558КБ
Статус программы: бесплатная
ОС: Windows NT/2000/XP/VISTA/WINDOWS 7
Интерфейс: русский
Разработчик: yourdevice
Версия: 3.0
Скачать.
Overview
This guide will help you get your environment set up to build projects on the Atmel AVR chips (e.g. ATmega328, ATtiny85, etc.) projects on Windows using Windows-based tools.
Summary:
- Prep
- Install AVR toolchain (to build the code)
- Install AVR Dude (to flash the chip)
- Install GnuWin32 (for supporting build tools like Make)
- Configure PATH (to make tools available)
- Testing the AVR toolchain
- Next Steps
- Troubleshooting
Tutorial Versions
I have written 3 different versions of this tutorial that cover the following different setups:
Windows-based AVR toolchain (this guide)
This options primarily uses Windows-based tools and has two variations depending on how you run make
- Windows + GnuWin32
- Windows + WSL
WSL-based AVR toolchain
This options primarily uses WSL-based linux tools and has two variations depending on how you program the chip – either WSL-based avrdude using usbip to access the USB programmer or Windows-based avrdude to natively access the USB programmer
- WSL + usbip
- WSL + Windows
Linux-based AVR toolchain
This option uses all native linux-based tools on a native Linux installation.
You can see a summary of how the versions differ in the table below:
Version avr toolchain make avrdude usb access Windows+GnuWin32 windows gnuwin32 windows — Windows+WSL windows WSL windows — WSL+usbip WSL WSL WSL usbip WSL+Windows WSL WSL windows — Linux linux linux linux —
Prep
Start by creating a folder to hold all your dev tools (e.g. C:\Tools\AVR or C:\Users<user>\AVR). I will be using C:\AVR in this guide.
Download
The first step is to download the AVR toolchain from the Microchip website. The toolchain can be downloaded as part of the Atmel Studio IDE or standalone. For this guide we will use the standalone toolchain and use VS Code as the IDE.
- Browse to toolchain download page at:
- https://www.microchip.com/en-us/tools-resources/develop/microchip-studio/gcc-compilers
- From the downloads list, find and download the appropriate toolchain for your chip and dev OS. For this guide we will download the toolchain for AVR 8-bit chips (like ATmega328 or ATtiny) that runs on Windows. At the time of writing that was AVR 8-bit Toolchain v3.62 – Windows. NOTE: You will have to sign up for a free account to complete the download
- At the time of writing the main download page wasn’t working, so alternatively you can download the prior version (3.6.1) release from the archives at: https://www.microchip.com/en-us/tools-resources/archives/avr-sam-mcus#AVR and Arm-Based MCU Toolchains
-
I also recommend downloading the Release Notes for your toolchain (if any). They should be available on the same downloads page. (e.g. AVR 8-bit Toolchain 3.6.1 — Release Note). The release notes can contain important installation instructions (like the fact that you may need to download chip packs)
- [Optional] IF the chip you are using isn’t supported out-of-the-box by the main toolchain, browse to: http://packs.download.atmel.com/ to find and download the appropriate chip packs. Note: most of the popular chips should already be supported).
- Even if you don’t NEED the chip packs, there is additional documentation in them that you might find valuable to read.
- The chip pack files end in .atpack, but are actually .zip archive files and needs to be expanded to be used.
- If you need to use a chip pack, you will need to reference the directory via -B and -I options when compiling. For example:
avr-gcc -mmcu=atmega328pb -B /home/packs/Atmel.ATmega_DFP.1.0.86/gcc/dev/atmega328pb/ -I /home/packs/Atmel.ATmega_DFP.1.0.86/include/
Install
Unzip the downloaded toolchain archive (e.g. avr8-gnu-toolchain-3.6.1.1752-win32.any.x86.zip) into the tools folder you created earlier. You should now have a directory named avr8-gnu-toolchain-win32_x86 in your tools folder. My preference is to rename the directory to remove any platform specific names (e.g. win32_x86) to make any scripts I create platform agnostic and more portable (e.g. avr8-gnu-toolchain).
Tools directory so far:
1 2 3 4 5 6 |
C:\AVR
└───avr8-gnu-toolchain
    ├───avr
    ├───bin
    ├───doc
    └───...
|
[Optional] If you choose to download the chi ppacks as well, I recommend unzipping those into a separate directory for chip packs with each chip pack in a separate subfolder.
Tools directory so far:
1 2 3 4 5 6 7 8 |
C:\AVR ├───avr-device-packs │ ├───Atmel.ATmega_DFP.2.0.401 │ │ ├───gcc │ │ ├───include │ │ └───... │ └───Atmel.ATtiny_DFP.2.0.368 └───avr8-gnu-toolchain |
Test
To test the installation of the avr-gcc toolchain, run avr-gcc --version in the avr8-gnu-toolchain\bin directory. The output should look something this:
1 2 3 4 5 |
C:\AVR\avr8-gnu-toolchain\bin>avr-gcc --version avr-gcc (AVR_8_bit_GNU_Toolchain_3.6.2_1778) 5.4.0 Copyright (C) 2015 Free Software Foundation, Inc. This is free software; see the source for copying conditions. There is NO warranty; not even for MERCHANTABILITY or FITNESS FOR A PARTICULAR PURPOSE. |
Install AVR Dude
Download
- Browse to the AVR Dude releases directory on GitHub: https://github.com/avrdudes/avrdude/releases
- Download the latest version for your OS (e.g. avrdude-v7.0-windows-x86.zip).
If you’re looking for older versions such as v6.4 or prior, they are can be found at their old site: http://download.savannah.gnu.org/releases/avrdude/ (e.g avrdude-6.4-mingw32.zip)
Install
Unzip the downloaded archive (e.g. avrdude-v7.0-windows-x86.zip) into the tools folder into a directory named “avrdude”. This will keep it version and platform agnostic.
Tools directory so far:
1 2 3 4 5 |
C:\AVR
├───avr8-gnu-toolchain
└───avrdude
    ├───avrdude.exe
    └───...
|
Test
To test the installation of avrdude, run avrdude in the avrdude directory. The output should look something this:
1 2 3 4 5 6 7 8 9 10 11 12 13 14 15 16 17 18 19 20 21 22 23 24 25 26 27 28 29 |
C:\DEV\AVR\avrdude>avrdude.exe
Usage: avrdude.exe [options]
Options:
  -p <partno>                Required. Specify AVR device.
  -b <baudrate>              Override RS-232 baud rate.
  -B <bitclock>              Specify JTAG/STK500v2 bit clock period (us).
  -C <config-file>           Specify location of configuration file.
  -c <programmer>            Specify programmer type.
  -D                         Disable auto erase for flash memory
  -i <delay>                 ISP Clock Delay [in microseconds]
  -P <port>                  Specify connection port.
  -F                         Override invalid signature check.
  -e                         Perform a chip erase.
  -O                         Perform RC oscillator calibration (see AVR053).
  -U <memtype>:r|w|v:<filename>[:format]
                             Memory operation specification.
                             Multiple -U options are allowed, each request
                             is performed in the order specified.
  -n                         Do not write anything to the device.
  -V                         Do not verify.
  -t                         Enter terminal mode.
  -E <exitspec>[,<exitspec>] List programmer exit specifications.
  -x <extended_param>        Pass <extended_param> to programmer.
  -v                         Verbose output. -v -v for more.
  -q                         Quell progress output. -q -q for less.
  -l logfile                 Use logfile rather than stderr for diagnostics.
  -?                         Display this usage.

avrdude version 7.0, URL: <https://github.com/avrdudes/avrdude>
|
Install GnuWin32
The GnuWin32 project provides ports of GNU tools to Windows. For our purposes, the main tool we’ll need from GnuWin32 is make. You can download and install just make, but my preferences is to download and install the full tool suite because there are lots of additional useful tools in there, and that’s what we’ll do in this guide.
Download
- Browse to https://sourceforge.net/projects/getgnuwin32/files/getgnuwin32/0.6.30/ and download GetGnuWin32-0.6.3.exe.
- If for some reason that link doesn’t work, you can start back on the project site and navigate to the downloads folder from there.
- Save that file to a temporary location such as C:\temp or your Downloads folder.
Install
- Run the executable you downloaded (e.g GetGnuWin32-0.6.3.exe).
- When presented, Accept the licence.
- You will be presented with a summary of installation instructions which should align to the steps below.
- Click the Install button. This will create a new folder in the same location the executable was located (e.g. C:\temp)
- Open a Command Prompt as Administrator to ensure the next steps have permission necessary to install.
- Change directory to the new folder created when you ran the installer. (e.g. C:\temp\GetGnuWin32)
1
C:\> cd \temp\GetGnuWin32
- Run download.bat. This will download all the packages necessary for gnuwin32. You will be prompted to press a key a few times before downloads start. The downloads can take a while even with a fast internet connection.
1
C:\temp\GetGnuWin32> download.bat
- If there any failed downloads, run the download.bat again until they are all successfull.
- Once all the packages have been downloaded successfully, run the install.bat and pass it the target directory where gnuwin32 should be installed. If your tools directory is C:\AVR, then you would pass C:\AVR\gnuwin32 as in the example below.
1
C:\temp\GetGnuWin32> install.bat C:\AVR\gnuwin32
- You will be prompted about installing updated versions of several components. When prompted, just hit Enter to accept the default responses to install these updated components.
Tools directory so far:
1 2 3 4 5 6 7 8 |
C:\AVR
├───avr8-gnu-toolchain
├───avrdude
└───gnuwin32
    ├───bin
    ├───contrib
    ├───doc
    └───...
|
Test
To test the installation of gnuwin32, run make -v in the gnuwin32\bin directory. The output should look something this:
1 2 3 4 5 6 7 8 |
C:\DEV\gnuwin32\bin\>make -v GNU Make 3.81 Copyright (C) 2006 Free Software Foundation, Inc. This is free software; see the source for copying conditions. There is NO warranty; not even for MERCHANTABILITY or FITNESS FOR A PARTICULAR PURPOSE. This program built for i386-pc-mingw32 |
Configure PATH
At this point all the tools are installed, but we still need to make them available on the PATH. Since some of the GnuWin32 tools can conflict with built-in Windows tools of the same name, we’ll only add these tools to the PATH when we need them via a batch file.
Here is a summary of what you’ve done so far:
| Zip | Target Location | Install |
|---|---|---|
| avr8-gnu-toolchain-3.6.2.1778-win32.any.x86.zip | C:\AVR\avr8-gnu-toolchain | Unzip to target |
| avrdude-v7.0-windows-x86.zip | C:\AVR\avrdude | Unzip to target |
| GetGnuWin32-0.6.3.exe | C:\AVR\gnuwin32 | Installer, download.bat, install.bat C:\AVR\gnuwin32 |
| Chip packs (*.atpack) | C:\AVR\avr8-dvp | Unzip to target |
We’ll create two separate batch files – one for setting the paths, and another for opening a command prompt with the paths set. This way if you want to just add the paths to an existing console session you can run the first, but if you want a brand new session you can run the second.
Create a new file in your tools directory named set_avr_paths.cmd, and paste in the following:
1 2 3 4 5 6 7 |
@ECHO OFF ECHO Setting AVR tool paths SET TOOLS_DIR=C:\AVR SET PATH=%PATH%;%TOOLS_DIR%\avr8-gnu-toolchain\bin SET PATH=%PATH%;%TOOLS_DIR%\avrdude SET PATH=%PATH%;%TOOLS_DIR%\gnuwin32\bin |
Create another new file in your tools directory named avr_dev_prompt.cmd, and paste in the following:
1 2 |
@TITLE AVR Dev Command Prompt @%comspec% /k " cd \ & "%~dp0set_avr_paths.cmd" " |
To test that everything is working correctly, let’s try building a sample program and writing it to an Arduino. If you don’t have an Arduino handy, you can either skip the avrdude step or adjust the program and commands to fit your scenario.
In a new directory, create a new file named blink.c and paste the following program into it. This is a AVR implementation of the classic Arduino Blink sketch. If you load this to an Arduino it will make the built-in LED (pin 13/LED_BUILTIN) flash on and off every 500ms.
1 2 3 4 5 6 7 8 9 10 11 12 13 14 15 |
#include <avr/io.h> #include <util/delay.h> int main() { // Set built-in LED pin as output DDRB |= (1 << DDB5); while (1) { PORTB |= (1 << PB5); // LED on _delay_ms(500); PORTB &= ~(1 << PB5); // LED off _delay_ms(500); } return 0; } |
Double-click the avr_dev_prompt.cmd batch file you created above to prepare a console session with tools on the PATH.
In the directory you created the file, run the following commands. Make sure you plug in your Arduino before running avrdude and update the COM port to match the one assigned to your Arduino.
1 2 3 |
avr-gcc blink.c -o blink.elf -mmcu=atmega328 -DF_CPU=16000000UL -Os avr-objcopy blink.elf -O ihex blink.hex avrdude -c arduino -p atmega328p -U flash:w:"blink.hex":a -P COM4 |
If everything is working you should see something like.
1 2 3 4 5 6 7 8 9 10 11 12 13 14 15 16 17 18 19 20 21 22 23 24 25 26 27 28 29 |
C:\temp\blink>avr-gcc blink.c -o blink.elf -mmcu=atmega328p -DF_CPU=16000000UL -Os

C:\temp\blink>avr-objcopy blink.elf -O ihex blink.hex

C:\temp\blink>avrdude -c arduino -p atmega328p -U flash:w:"blink.hex":a -P COM4

avrdude: AVR device initialized and ready to accept instructions

Reading | ################################################## | 100% 0.00s

avrdude: Device signature = 0x1e950f (probably m328p)
avrdude: NOTE: "flash" memory has been specified, an erase cycle will be performed
         To disable this feature, specify the -D option.
avrdude: erasing chip
avrdude: reading input file "blink.hex"
avrdude: input file blink.hex auto detected as Intel Hex
avrdude: writing flash (176 bytes):

Writing | ################################################## | 100% 0.04s

avrdude: 176 bytes of flash written
avrdude: verifying flash memory against blink.hex:
avrdude: input file blink.hex auto detected as Intel Hex

Reading | ################################################## | 100% 0.03s

avrdude: 176 bytes of flash verified

avrdude done.  Thank you.
|
Next Steps
That’s all there is to it. To continue setting up your development environment check out my other posts on building projects with a Makefile and configuring VS Code:
- Building AVR projects with make
- Use VS Code with the AVR toolchain
Troubleshooting
- How do I find out what COM port my Arduino is using?
- Open Device Manager. Expand Ports (COM & LPT). You should see an entry named something like “Arduino Uno (COM4)”. The COM port is in parentheses.
Для внутрисхемной прошивки AVR микроконтроллеров чаще всего применяют специализированный AVR программатор: он прекрасно работает с любыми контроллерами AVR серии ATmega, ATtiny и AT, имеющими SPI интерфейс в режиме внутрисистемного программирования или ISP (In System Programming).
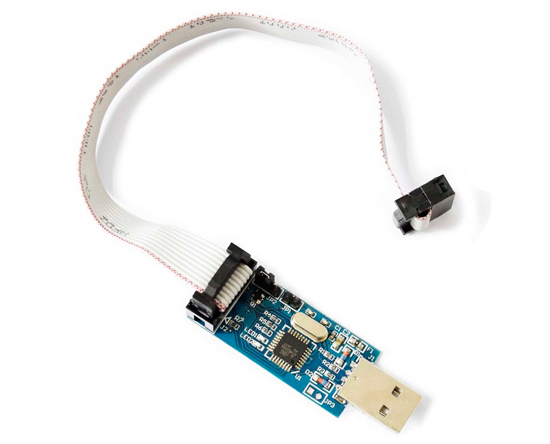
USBASP программатор даёт возможность программировать устройства в собранном виде без отключения от питания, а также существенно упрощает отладку программного обеспечения. Программирование можно осуществлять многократно.
Драйверы для USBASP доступны под различные ОС:
- Windows
- Linux
- Mac OS
Как установить драйвер USBASP на компьютер?
Установка драйвера USBASP производится в несколько простых шагов:
- Скачиваем драйвера по ссылкам выше
- Распаковываем архив с установочными файлами
- Запускаем исполняемый файл (SETUP)
- В открывшимся окне соглашаемся с установкой
- Перезагружаем компьютер для корректного обновления данных в реестре
После установки драйвера заново подключаем контроллер и смотрим, чтобы плата корректно отобразилась в списке диспетчера устройств.