This tutorial will guide you through the installation and setup of the AVR GCC Toolchain under Microsoft Windows. You’ll also learn how to install some additional and useful tools that will help you write easier your first microcontroller programs.
Prerequisites
What do we need to complete this guide?
- Computer with Microsoft Windows – version 7, 8, or 10.
- Administrative access to Windows.
- One USB port – available for use.
- ISP programmer – type USBasp is recommended.
- AVR-powered microcontroller board – we use, as always, a Tinusaur board.
NOTE: It takes about 2 hours for an inexperienced person to do it.
1. What is AVR GCC Toolchain?
The AVR GCC Toolchain is a collection of tools and libraries used to compile your code for the AVR microcontrollers. This collection includes a compiler, assembler, linker, and some libraries.
Most of the tools are based on efforts from the GNU community (GCC stands for GNU Compiler Collection), and some others are developed by Microchip.
2. What is WINAVR?
WINAVR is a great project or rather was.

It was an installation package for Windows that contained everything you needed to compile your C or C++ code for AVR microcontroller under Windows and most importantly, for people like me, it allowed us to do it in the text console.
The most “recent” WINAVR files are from 2010-01-20. 🙂 In other words, it is outdated.
There are many projects that attempted to replace it but none of them (AFAIK) is extremely popular.
This guide will walk you through the steps on how to setup everything manually. There is no installation package that you could run and that will do everything for you.
3. AVR GCC Toolchain – Setup for Windows
To setup and use AVR GCC Toolchain we need 3 essential components:
- AVR GCC – Windows Binary
- GNU Make – on Windows
- AVRDUDE – on Windows
All the suggested downloads, folders, and file names are based on our own setup and some of them could be changed according to your preferences.
AVR GCC – Windows Binary
Let’s start with the AVR GCC. Let’s download it from the Microchip website.
Toolchains for AVR® Microcontrollers (MCUs):
- https://www.microchip.com/en-us/tools-resources/develop/microchip-studio/gcc-compilers/
On the page, look for “AVR 8-bit Toolchain v3.62 – Windows” or similar.
You will need an account (free registration) to download the ZIP archive. It is debatable if this Free and Open Source software should be put behind a registration wall, but it is rather an ethical issue than legal.
Create a “Programs” folder (if it does not exist already) for the various programs that we’re going to install. The name and location are up to you, those given here are just an example.
C:\Users\MY_USER_NAME\Programs\
Extract the contents of the ZIP file in the “Programs” folder. All the folders and files should be in an “avr8-gnu-toolchain-win32_x86” folder”. Let’s rename that to “avr8-gnu-toolchain” just to simplify thong – it is not required.
The Toolchain is now at:
C:\Users\MY_USER_NAME\Programs\avr8-gnu-toolchain\
The sub-folders should look something like this: avr, bin, doc, i686-w64-mingw32, include, info, lib, libexec, man, share.
Do not add anything to your Windows Environment PATH variable.
Alternatives
There is a very interesting project that you could use as an alternative:
AVR-GCC 11.1.0 for Windows 32 and 64 bit
https://blog.zakkemble.net/avr-gcc-builds/
The AVRGCCStart.cmd Script
It would’ve been very convenient if there was a command that would start the console development environment for us. So, let’s create a short command prompt script that will setup everything for us. Let’s call it AVR GCC Toolchain STARTER.
Instead of adding the file system Path of the Toolchain to the system PATH (in the environment variables) we are going to create that simple command prompt script that will do this only for the command prompt that we will open with that script. The advantage of doing it this way is that we’re not going to “contaminate” the system PATH variable with too many executables and libraries. Doing otherwise might cause issues with some other already installed development environments.
How to create the AVRGCCStart.cmd file?
- Open the Windows Notepad application.
- Press CTRL + S (to save).
- Type in the name “AVRGCCStart.cmd”.
Choose a folder where to save the file – the “Programs” folder is a good choice.
Add the following lines to the AVRGCCStart.cmd file:
set Path=%Path%;C:\Users\MY_USER_NAME\Programs\avr8-gnu-toolchain\bin
set Path=%Path%;C:\Users\MY_USER_NAME\Programs\avr8-gnu-toolchain\avr\bin

start cmd
That will add what is necessary to the Path and will open a command prompt window.
IMPORTANT: Don’t forget to replace MY_USER_NAME with your username.
Testing
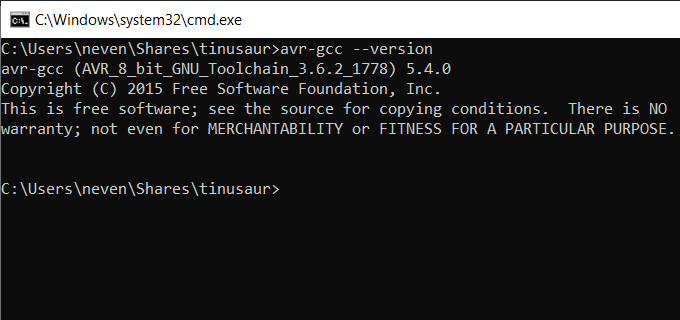
Start the AVRGCCStart.cmd script.
In the command prompt execute:
avr-gcc --version
That should output the version of the AVR GCC compiler. Something like this:
avr-gcc (AVR_8_bit_GNU_Toolchain_3.6.2_1778) 5.4.0
That also means that everything is correctly installed and setup up to this point.
GNU Make – on Windows
In order to package all the compiled C or C++ source code into a HEX file in a convenient way, i.e. by using the so-called Makefile, we need the GNU Make program.
There are many bundles for Windows that contain the GNU Make – we are going to use the GnuWin Packages located at http://gnuwin32.sourceforge.net/packages.html. They are part of the GnuWin (also known as gnuwin32) project at http://gnuwin32.sourceforge.net/.
In the “Programs” folder create a “gnuwin32” sub-folder for the gnuwin32 packages.
Download the Make packages from: http://gnuwin32.sourceforge.net/packages/make.htm
- Locate the Binaries ZIP file. This should be something like “make-3.81-bin.zip”. Download it to your computer.
- Extract the contents in the gnuwin32 folder.
The sub-folders and files should look like: bin, contrib, man, manifest, share.
The make.exe requires some additional libraries, so we should download also the Dependencies (a file like “make-3.81-dep.zip”) from the same page and extract them at the same location.
Optionally, you could download and extract the Documentation.
NOTE: If the GnuWin32 web page does not work for some reason, you can go directly to https://sourceforge.net/projects/gnuwin32/files/make/3.81/ and download the “make-3.81-bin.zip” file.
Update AVRGCCStart
Edit the AVRGCCStart.cmd script – add the following line (before the “start cmd” line):
set Path=%Path%;C:\Users\MY_USER_NAME\Programs\gnuwin32\bin
Don’t forget to replace MY_USER_NAME with your username.
IMPORTANT: Every time you update the content of the AVRGCCStart.cmd script – close its open windows (if there are any) and relaunch the script again, so the changes will take effect.
Testing
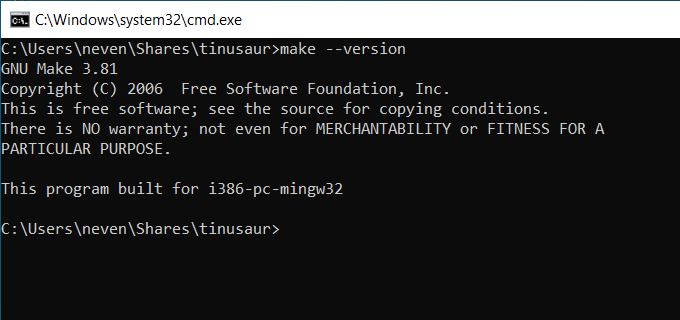
In the command prompt execute:
make --version
That should output the version of the GNU Make. Something like this:
GNU Make 3.81
That also means that everything is correctly installed and setup up t this point.
GNU CoreUtils for Windows

Some Makefile files (like ls, rm, mv, mkdir, etc. – those we are going to use later) might need other GNU tools that are part of the GNU CoreUtils.
Download the CoreUtils package: http://gnuwin32.sourceforge.net/packages/coreutils.htm
- Locate the Binaries ZIP file. This should be something like “coreutils-5.3.0-bin.zip”.
- Extract the contents in the gnuwin32 folder.
- Download and extract Dependencies.
- Optionally, download and extract the Documentation.
NOTE: Some of the files in the Dependencies package might already exist in the gnuwin32 folder – it’s OK to override (or skip) them.
Recommended Packages
Grep for Windows: http://gnuwin32.sourceforge.net/packages/grep.htm
Alternatives
- The GNU Make could also be downloaded from the Steve.fi (Steve Kemp) website:
https://steve.fi/software/make/
Please, note that those are quite old.
- Another alternative is the Gow (Gnu On Windows) project – a lightweight alternative to Cygwin.
https://github.com/bmatzelle/gow
Please, note that those are quite old.
Testing
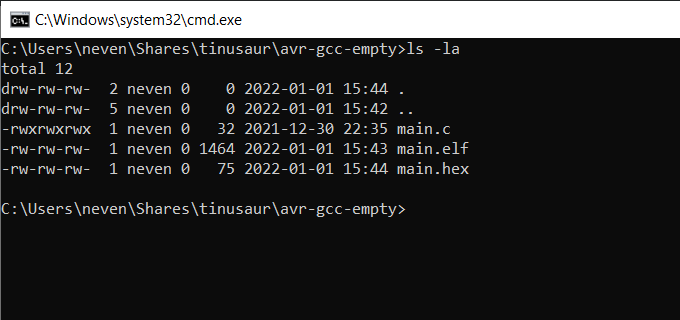
In the command prompt execute:
ls -la
That should list the files in the current folder. Something like this:
total 20
drw-rw-rw-   2 neven 0     0 2021-12-28 17:09 .
drw-rw-rw-  32 neven 0 12288 2021-12-28 15:52 ..
-rwxrwxrwx   1 neven 0   205 2021-12-28 17:37 AVRGCCStart.cmd
That also means that everything is correctly installed and setup up to this point.
AVRDUDE on Windows

When we start compiling our programs and packaging them as HEX files we are going to need a program to upload them to the microcontroller. One such and very popular program is the AVRDUDE. And yes, there is, of course, a build for Windows.
In the “Programs” folder create an “avrdude-mingw32” sub-folder for the AVRDUDE package.
Go to download.savannah.gnu.org/releases/avrdude/ and locate the mingw32 ZIP file.
At the time of writing this guide, the most recent version that works out of the box without the need to install additional libraries and/or packages is 6.3.
Download the AVRDUDE package: download.savannah.gnu.org/releases/avrdude/avrdude-6.3-mingw32.zip
- Locate the Binaries ZIP file. This should be something like “avrdude-6.3-mingw32.zip”.
- Extract the contents in the avrdude-mingw32 folder.
NOTE: The 6.4 version of the AVRDUDE requires the “libhidapi-0.dll” library that might not be available on your computer.
The libusb0.dll problem
This is important!
The avrdude program requires the libusb library located in the libusb0.dll file. Note that this file is not part of the AVRDUDE ZIP package.
The issue could get a bit more complicated because the driver installation procedure described in one of the sections below uses the Zadig (which is a great program). That will place a libusb0.dll file in the “C:\Windows\System32” folder, but that file might not be compatible with our AVRDUDE package.
Here is a short description of the problem. The libusb0.dll comes in 2 flavors – one to be used in the 32-bit and another one for 64-bit software. The AVRDUDE needs the 32bit version while Zadig comes with the 64-bit version.
Here is a solution to the problem. We will get a 32-bit flavor of the libusb0.dll and will put it in the same folder where AVRDUDE is.
Getting the libusb0.dll
The libusb0.dll file that is part of the libusbK project (located at https://sf.net/p/libusbk) is what we need.
The latest suitable release is 3.1.0.0 located at:
https://sourceforge.net/projects/libusbk/files/libusbK-release/3.1.0.0/
Download the libusbK-3.1.0.0-bin.7z file and extract its contents in a temporary location.
Locate the \libusbK-3.1.0.0-bin\bin\dll\x86 folder and the libusb0.dll file.
Check file properties, the “Digital Signature” tab and make sure that it is valid:
Travis Lee Robinson – Tuesday, 17 January, 2012 19:40:19
Copy the libusb0.dll file over to our AVRDUDE folder – avrdude-mingw32.
Alternatives
- There is AVRDUDE (by mariusgreuel) located at https://github.com/mariusgreuel/avrdude. It includes all the necessary libraries in the binary.
NOTE: Might not work on 32-bit Windows.
Update AVRGCCStart
Add the following line to the AVRGCCStart.cmd script (before the “start cmd” line):
set Path=%Path%;C:\Users\MY_USER_NAME\Programs\avrdude-mingw32
Testing
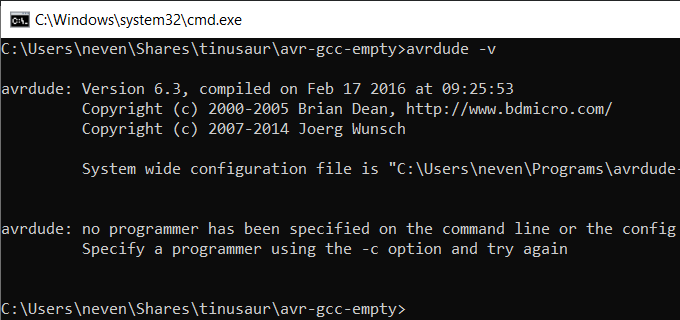
In the command prompt execute:
avrdude -v
That should output the version of the AVRDUDE . Something like this:
avrdude: Version 6.3, compiled on Feb 17 2016 at 09:25:53
That also means that everything is correctly installed and setup up to this point.
USB Programmer Drivers
To upload the compiled and packaged binary code (in the form of a HEX file) into the microcontroller we will need a Programmer. In most cases that is a USB device. A very popular device is the USBasp programmer. Under Windows such devices require an additional driver to be installed for them to work properly.
One of the best and easiest ways to install a driver for that kind of Programmer is to use the Zadig program.
- Download the latest EXE file from https://zadig.akeo.ie.
- Insert your USBasp programmer into the USB of your computer.
- Run the program. You may need to click on some warning buttons that Windows will show you.
- Choose the correct driver which is the “libusbK”.
Note: on 32-bit WIndows you need to choose libusb-win32. - Press the “Install” button.
You might need to wait a minute or two.
Check on Windows Device Manager if the driver was installed correctly.
Testing
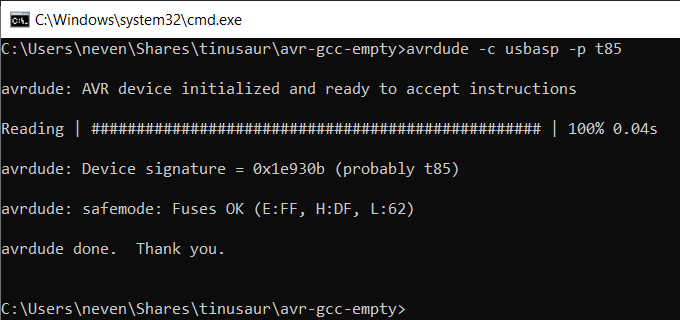
Let’s now check if the USBasp programmer could communicate with our microcontroller (ATtiny85). First, make sure that the USBasp programmer is inserted in the USB and connected to the microcontroller board. Execute this command:
avrdude -c usbasp -p t85
The result should be something like this:
avrdude: AVR device initialized and ready to accept instructions
Reading | ################################################## | 100% 0.09s
avrdude: Device signature = 0x1e930b (probably t85)
avrdude: safemode: Fuses OK (E:FF, H:DF, L:62)
avrdude done.  Thank you.
If we have a microcontroller different than the one specified in the command (ATtiny85) the avrdude will suggest what it might be.
Other Useful Tools
Those were the minimum tools that we will need to compile our source code for the AVR platform.
The following are recommended but not required additional tools.
Shell – BASH

It will be convenient to have a console that is a bit better than the Windows Command Prompt. A good alternative is the BASH shell. Developed as part of the GNU Project it is now used on many other operating systems including Linux, Android, Mac OS, and of course – Windows.
OPTION-1
We have put together an archive that consists of the bash.exe and a few other necessary .dll files. It is located at our GitLab repository:
- https://gitlab.com/tinusaur/bash-mingw/-/releases,
and also at our GitHub repository - https://github.com/tinusaur/bash-mingw/releases
Download the ZIP archive and extract it at a temporary location.
Copy the “bash-mingw” sub-folder to the “Programs” folder.
The BASH executable will be located in the “Programs\bash-mingw\bin“ folder.
OPTION-2
At Steve.fi – (Steve Kemp’s website) there is a Windows binary for download. It is quite old but still works.
In the “Programs” folder create a “bash” sub-folder for the bash package.
Go to the website: https://steve.fi/software/bash/
- Locate the download link: https://steve.fi/software/bash/bash-203.zip
- Download and save the ZIP file.
- Extract the contents into a temporary location. There will be a bash-2.03 folder.
- From the bash-2.03 folder, copy 2 files: bash.exe and bash.dll, into the “Programs/bash” folder.
- Optionally, you could also copy the .bash.rc file in your home folder:
C:\Users\MY_USER_NAME\
Edit it – if you know how it functions.
NOTE: The executables are really old – some of them date back to 1998, 1999.
Alternatives
- win-bash – A stand-alone bash for Windows
http://win-bash.sourceforge.net - How To Install Bash On Windows 10
https://hackernoon.com/how-to-install-bash-on-windows-10-lqb73yj3
Update AVRGCCStart
Add the following line to the AVRGCCStart.cmd script (before the “start cmd” line):
set Path=%Path%;C:\Users\MY_USER_NAME\Programs\bash-mingw\bin
Replace the line:
start cmd
With:
set HOME=%USERPROFILE%
start bash
Testing
Start the AVRGCCStart script.
It should look like this:
bash-3.1$_
Note: You might see some warning messages about a missing “tmp” folder.
Text editor – nano
A console-based text editor will be (optional) a nice finish!
The nano text editor is very popular and is available even for Windows.
GNU nano for Windows is a good option and it is located at:
https://github.com/lhmouse/nano-win
The package could be downloaded from this page:
https://files.lhmouse.com/nano-win/
Look for the latest build at the bottom. Should be something like “nano-win_9732_v5.9-10-ga2d202368.7z”. Download it and extract it into a temporary location. It should look like this:
pkg_i686-w64-mingw32 (this is the 32-bit version)
pkg_x86_64-w64-mingw32 (this is the 64-bit version)
.nanorc
In the “Programs” folder create a “nano” sub-folder for the nano package.
Pick a folder for a 32 or 64 bit version, depending on your computer, and copy its contents (something like bin, share, etc.) to the “nano” sub-folder.
Optionally, copy the .nanorc file to your home folder.C:\Users\MY_USER_NAME\
Alternatives
- nano for Windows
https://sourceforge.net/projects/nano-for-windows/
Note: this is a version of the one above. - nano – Text editor / win32-support
https://nano-editor.org/dist/win32-support/
Note: might not work on a 32-bit Windows.
Update AVRGCCStart
Add the following line to the AVRGCCStart.cmd script (before the “start cmd” or “start bash” line):
set Path=%Path%;C:\Users\MY_USER_NAME\Programs\nano\bin
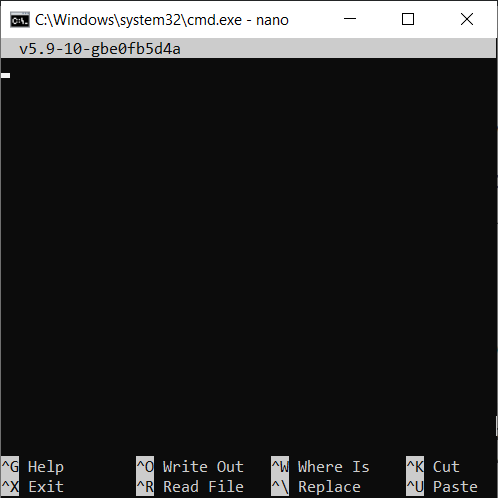
Testing
- In the command prompt execute:
nano --version
That should output the version of the nano. Something like this:
GNU nano from git, v5.9-10-gbe0fb5d4a
- In the command prompt execute:
nano
That should start the nano editor.
To exit the editor press CTRL + X.
The “^” symbol in the menu means that you have to press the “CTRL” key.
Update AVRGCCStart
Before we start the command prompt with either “cmd” or “bash”, we could go to the Home or other folder (let’s say our projects folder).
Add a line to the script before the “start bash” line:
cd %HOME%
At this point the contents of the AVRGCCStart.cmd file should be something like this:
set Path=%Path%;C:\Users\MY_USER_NAME\Programs\avr8-gnu-toolchain\bin
set Path=%Path%;C:\Users\MY_USER_NAME\Programs\avr8-gnu-toolchain\avr\bin
set Path=%Path%;C:\Users\MY_USER_NAME\Programs\gnuwin32\bin
set Path=%Path%;C:\Users\MY_USER_NAME\Programs\avrdude-mingw32
set Path=%Path%;C:\Users\MY_USER_NAME\Programs\bash-mingw\bin
set Path=%Path%;C:\Users\MY_USER_NAME\Programs\nano\bin

set HOME=%USERPROFILE%
cd %HOME%
start bash
4. AVR GCC “Hello, World!”
Let’s now write our first program – the “Hello, World!”.
In the world of microcontrollers, this is the Blinking LED program.
But, before that let’s see if we can write, compile, package, and upload any program.
AVR GCC – The “Empty” Program
Let’s first create a folder (if it doesn’t already exist) where we will put all our projects.
mkdir Projects
cd Projects
Let’s now create a working folder. Let’s call it “avr-gcc-empty”.
mkdir avr-gcc-empty
cd avr-gcc-empty
Let’s write just a few lines of code in a “main.c” file.
Start the nano with a new file – main.c:
nano main.c
Enter the code:
int main(void) {
    return 0;
}
- Compile the source code:
avr-gcc main.c -o main.elf
Note: the result will be an ELF file – main.elf.
We need to convert it to a HEX file,
- Convert to HEX:
avr-objcopy main.elf -O ihex main.hex
The result is a main.hex file.
Let’s see what’s inside of the file:
cat main.hex
The result should look li this:
:10000000CF93DF93CDB7DEB780E090E0DF91CF9163
:02001000089551
:00000001FF
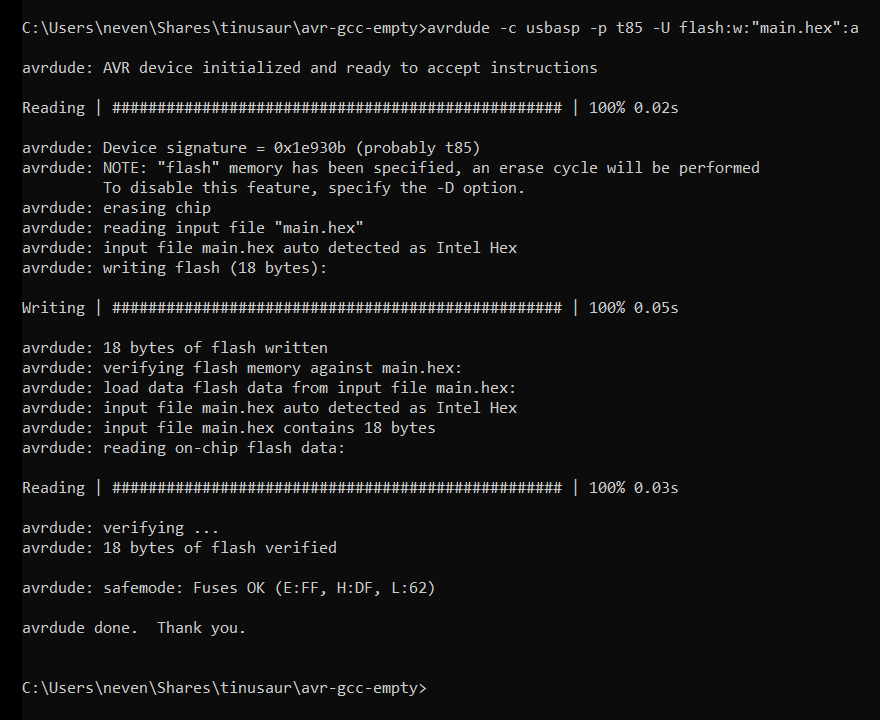
Now, with the AVRDUDE we could upload that file into the microcontroller:
- Upload the HEX:
avrdude -c usbasp -p t85 -U flash:w:"main.hex":a
In this example “-p t85” specifies that the microcontroller is an ATtiny85.
NOTE that this program does not do anything. It is just an example of checking our setup.
We could also take a look at the assembly instructions of our program:
avr-objdump main.elf -d
The result should look li this:
   0:   cf 93           push    r28
   2:   df 93           push    r29
   4:   cd b7           in      r28, 0x3d       ; 61
   6:   de b7           in      r29, 0x3e       ; 62
   8:   80 e0           ldi     r24, 0x00       ; 0
   a:   90 e0           ldi     r25, 0x00       ; 0
   c:   df 91           pop     r29
   e:   cf 91           pop     r28
  10:   08 95           ret
If we add the “-Os” the compilation will be performed and optimized for smaller code sizes. Let’s try this:
avr-gcc main.c -Os -o main.elf
Then, check the assembly instructions:
avr-objdump main.elf -d
The result will be something like that:
   0:   80 e0           ldi     r24, 0x00       ; 0
   2:   90 e0           ldi     r25, 0x00       ; 0
   4:   08 95           ret
It is really obvious that the code size is much smaller.
The real “Hello, World!” program
For how to write a real “Hello, World!” program that actually does Blinking LED look at the “AVR GCC Hello World” tutorial. (COMING SOON)
The following toolchain releases are available:
| Binutils | GCC | Newlib | GDB | Download link |
|---|---|---|---|---|
| 7.3.0 | 7.3.0 | avr-libc | 7.8 | avr-gcc7.3.0.exe (24 MB) |
| 2.25 | 5.3.0 | 2.0.0 | 7.11 | avr-gcc5.3.0.exe (20 MB) |
Recommended Tools
For optimal development experience, try
VisualGDB — our Visual Studio extension for advanced cross-platform
development that supports advanced code and memory analysis, easy integrated debugging, powerful custom actions and
much more:

Download
Read more
This is where I’ll be uploading builds of AVR-GCC for Windows 32 and 64 bit, which will also include Binutils, AVR-LibC, AVRDUDE, Make and GDB. I’ll be trying to keep the builds up to date with the latest tool releases when I can.
The binaries are built from source on a Debian virtual machine with MinGW (GCC 9.1.0 and older were built on an Arch Linux VM), apart from AVRDUDE where the pre-built binaries are obtained from the official download area. Both 32 bit and 64 bit Windows binaries are provided. There’s probably no benefit from using the 64 bit stuff, but all the cool kids are doing it so why not.
A bash script for building AVR-GCC, AVR-Binutils, AVR-LibC and AVR-GDB from source is also provided below, making it super easy to build these tools for yourself.
This has been moved over to GitHub
Build Script
This build script will install the required packages, create directories and build the tools from source and should work on Debian and Ubuntu.
Overview
This guide will help you get your environment set up to build projects on the Atmel AVR chips (e.g. ATmega328, ATtiny85, etc.) projects on Windows using Windows-based tools.
Summary:
- Prep
- Install AVR toolchain (to build the code)
- Install AVR Dude (to flash the chip)
- Install GnuWin32 (for supporting build tools like Make)
- Configure PATH (to make tools available)
- Testing the AVR toolchain
- Next Steps
- Troubleshooting
Tutorial Versions
I have written 3 different versions of this tutorial that cover the following different setups:
Windows-based AVR toolchain (this guide)
This options primarily uses Windows-based tools and has two variations depending on how you run make
- Windows + GnuWin32
- Windows + WSL
WSL-based AVR toolchain
This options primarily uses WSL-based linux tools and has two variations depending on how you program the chip – either WSL-based avrdude using usbip to access the USB programmer or Windows-based avrdude to natively access the USB programmer
- WSL + usbip
- WSL + Windows
Linux-based AVR toolchain
This option uses all native linux-based tools on a native Linux installation.
You can see a summary of how the versions differ in the table below:
Version avr toolchain make avrdude usb access Windows+GnuWin32 windows gnuwin32 windows — Windows+WSL windows WSL windows — WSL+usbip WSL WSL WSL usbip WSL+Windows WSL WSL windows — Linux linux linux linux —
Prep
Start by creating a folder to hold all your dev tools (e.g. C:\Tools\AVR or C:\Users<user>\AVR). I will be using C:\AVR in this guide.
Download
The first step is to download the AVR toolchain from the Microchip website. The toolchain can be downloaded as part of the Atmel Studio IDE or standalone. For this guide we will use the standalone toolchain and use VS Code as the IDE.
- Browse to toolchain download page at:
- https://www.microchip.com/en-us/tools-resources/develop/microchip-studio/gcc-compilers
- From the downloads list, find and download the appropriate toolchain for your chip and dev OS. For this guide we will download the toolchain for AVR 8-bit chips (like ATmega328 or ATtiny) that runs on Windows. At the time of writing that was AVR 8-bit Toolchain v3.62 – Windows. NOTE: You will have to sign up for a free account to complete the download
- At the time of writing the main download page wasn’t working, so alternatively you can download the prior version (3.6.1) release from the archives at: https://www.microchip.com/en-us/tools-resources/archives/avr-sam-mcus#AVR and Arm-Based MCU Toolchains
-
I also recommend downloading the Release Notes for your toolchain (if any). They should be available on the same downloads page. (e.g. AVR 8-bit Toolchain 3.6.1 — Release Note). The release notes can contain important installation instructions (like the fact that you may need to download chip packs)
- [Optional] IF the chip you are using isn’t supported out-of-the-box by the main toolchain, browse to: http://packs.download.atmel.com/ to find and download the appropriate chip packs. Note: most of the popular chips should already be supported).
- Even if you don’t NEED the chip packs, there is additional documentation in them that you might find valuable to read.
- The chip pack files end in .atpack, but are actually .zip archive files and needs to be expanded to be used.
- If you need to use a chip pack, you will need to reference the directory via -B and -I options when compiling. For example:
avr-gcc -mmcu=atmega328pb -B /home/packs/Atmel.ATmega_DFP.1.0.86/gcc/dev/atmega328pb/ -I /home/packs/Atmel.ATmega_DFP.1.0.86/include/
Install
Unzip the downloaded toolchain archive (e.g. avr8-gnu-toolchain-3.6.1.1752-win32.any.x86.zip) into the tools folder you created earlier. You should now have a directory named avr8-gnu-toolchain-win32_x86 in your tools folder. My preference is to rename the directory to remove any platform specific names (e.g. win32_x86) to make any scripts I create platform agnostic and more portable (e.g. avr8-gnu-toolchain).
Tools directory so far:
1 2 3 4 5 6 |
C:\AVR
└───avr8-gnu-toolchain
    ├───avr
    ├───bin
    ├───doc
    └───...
|
[Optional] If you choose to download the chi ppacks as well, I recommend unzipping those into a separate directory for chip packs with each chip pack in a separate subfolder.
Tools directory so far:
1 2 3 4 5 6 7 8 |
C:\AVR ├───avr-device-packs │ ├───Atmel.ATmega_DFP.2.0.401 │ │ ├───gcc │ │ ├───include │ │ └───... │ └───Atmel.ATtiny_DFP.2.0.368 └───avr8-gnu-toolchain |
Test
To test the installation of the avr-gcc toolchain, run avr-gcc --version in the avr8-gnu-toolchain\bin directory. The output should look something this:
1 2 3 4 5 |
C:\AVR\avr8-gnu-toolchain\bin>avr-gcc --version avr-gcc (AVR_8_bit_GNU_Toolchain_3.6.2_1778) 5.4.0 Copyright (C) 2015 Free Software Foundation, Inc. This is free software; see the source for copying conditions. There is NO warranty; not even for MERCHANTABILITY or FITNESS FOR A PARTICULAR PURPOSE. |
Install AVR Dude
Download
- Browse to the AVR Dude releases directory on GitHub: https://github.com/avrdudes/avrdude/releases
- Download the latest version for your OS (e.g. avrdude-v7.0-windows-x86.zip).
If you’re looking for older versions such as v6.4 or prior, they are can be found at their old site: http://download.savannah.gnu.org/releases/avrdude/ (e.g avrdude-6.4-mingw32.zip)
Install
Unzip the downloaded archive (e.g. avrdude-v7.0-windows-x86.zip) into the tools folder into a directory named “avrdude”. This will keep it version and platform agnostic.
Tools directory so far:
1 2 3 4 5 |
C:\AVR
├───avr8-gnu-toolchain
└───avrdude
    ├───avrdude.exe
    └───...
|
Test
To test the installation of avrdude, run avrdude in the avrdude directory. The output should look something this:
1 2 3 4 5 6 7 8 9 10 11 12 13 14 15 16 17 18 19 20 21 22 23 24 25 26 27 28 29 |
C:\DEV\AVR\avrdude>avrdude.exe
Usage: avrdude.exe [options]
Options:
  -p <partno>                Required. Specify AVR device.
  -b <baudrate>              Override RS-232 baud rate.
  -B <bitclock>              Specify JTAG/STK500v2 bit clock period (us).
  -C <config-file>           Specify location of configuration file.
  -c <programmer>            Specify programmer type.
  -D                         Disable auto erase for flash memory
  -i <delay>                 ISP Clock Delay [in microseconds]
  -P <port>                  Specify connection port.
  -F                         Override invalid signature check.
  -e                         Perform a chip erase.
  -O                         Perform RC oscillator calibration (see AVR053).
  -U <memtype>:r|w|v:<filename>[:format]
                             Memory operation specification.
                             Multiple -U options are allowed, each request
                             is performed in the order specified.
  -n                         Do not write anything to the device.
  -V                         Do not verify.
  -t                         Enter terminal mode.
  -E <exitspec>[,<exitspec>] List programmer exit specifications.
  -x <extended_param>        Pass <extended_param> to programmer.
  -v                         Verbose output. -v -v for more.
  -q                         Quell progress output. -q -q for less.
  -l logfile                 Use logfile rather than stderr for diagnostics.
  -?                         Display this usage.

avrdude version 7.0, URL: <https://github.com/avrdudes/avrdude>
|
Install GnuWin32
The GnuWin32 project provides ports of GNU tools to Windows. For our purposes, the main tool we’ll need from GnuWin32 is make. You can download and install just make, but my preferences is to download and install the full tool suite because there are lots of additional useful tools in there, and that’s what we’ll do in this guide.
Download
- Browse to https://sourceforge.net/projects/getgnuwin32/files/getgnuwin32/0.6.30/ and download GetGnuWin32-0.6.3.exe.
- If for some reason that link doesn’t work, you can start back on the project site and navigate to the downloads folder from there.
- Save that file to a temporary location such as C:\temp or your Downloads folder.
Install
- Run the executable you downloaded (e.g GetGnuWin32-0.6.3.exe).
- When presented, Accept the licence.
- You will be presented with a summary of installation instructions which should align to the steps below.
- Click the Install button. This will create a new folder in the same location the executable was located (e.g. C:\temp)
- Open a Command Prompt as Administrator to ensure the next steps have permission necessary to install.
- Change directory to the new folder created when you ran the installer. (e.g. C:\temp\GetGnuWin32)
1
C:\> cd \temp\GetGnuWin32
- Run download.bat. This will download all the packages necessary for gnuwin32. You will be prompted to press a key a few times before downloads start. The downloads can take a while even with a fast internet connection.
1
C:\temp\GetGnuWin32> download.bat
- If there any failed downloads, run the download.bat again until they are all successfull.
- Once all the packages have been downloaded successfully, run the install.bat and pass it the target directory where gnuwin32 should be installed. If your tools directory is C:\AVR, then you would pass C:\AVR\gnuwin32 as in the example below.
1
C:\temp\GetGnuWin32> install.bat C:\AVR\gnuwin32
- You will be prompted about installing updated versions of several components. When prompted, just hit Enter to accept the default responses to install these updated components.
Tools directory so far:
1 2 3 4 5 6 7 8 |
C:\AVR
├───avr8-gnu-toolchain
├───avrdude
└───gnuwin32
    ├───bin
    ├───contrib
    ├───doc
    └───...
|
Test
To test the installation of gnuwin32, run make -v in the gnuwin32\bin directory. The output should look something this:
1 2 3 4 5 6 7 8 |
C:\DEV\gnuwin32\bin\>make -v GNU Make 3.81 Copyright (C) 2006 Free Software Foundation, Inc. This is free software; see the source for copying conditions. There is NO warranty; not even for MERCHANTABILITY or FITNESS FOR A PARTICULAR PURPOSE. This program built for i386-pc-mingw32 |
Configure PATH
At this point all the tools are installed, but we still need to make them available on the PATH. Since some of the GnuWin32 tools can conflict with built-in Windows tools of the same name, we’ll only add these tools to the PATH when we need them via a batch file.
Here is a summary of what you’ve done so far:
| Zip | Target Location | Install |
|---|---|---|
| avr8-gnu-toolchain-3.6.2.1778-win32.any.x86.zip | C:\AVR\avr8-gnu-toolchain | Unzip to target |
| avrdude-v7.0-windows-x86.zip | C:\AVR\avrdude | Unzip to target |
| GetGnuWin32-0.6.3.exe | C:\AVR\gnuwin32 | Installer, download.bat, install.bat C:\AVR\gnuwin32 |
| Chip packs (*.atpack) | C:\AVR\avr8-dvp | Unzip to target |
We’ll create two separate batch files – one for setting the paths, and another for opening a command prompt with the paths set. This way if you want to just add the paths to an existing console session you can run the first, but if you want a brand new session you can run the second.
Create a new file in your tools directory named set_avr_paths.cmd, and paste in the following:
1 2 3 4 5 6 7 |
@ECHO OFF ECHO Setting AVR tool paths SET TOOLS_DIR=C:\AVR SET PATH=%PATH%;%TOOLS_DIR%\avr8-gnu-toolchain\bin SET PATH=%PATH%;%TOOLS_DIR%\avrdude SET PATH=%PATH%;%TOOLS_DIR%\gnuwin32\bin |
Create another new file in your tools directory named avr_dev_prompt.cmd, and paste in the following:
1 2 |
@TITLE AVR Dev Command Prompt @%comspec% /k " cd \ & "%~dp0set_avr_paths.cmd" " |
To test that everything is working correctly, let’s try building a sample program and writing it to an Arduino. If you don’t have an Arduino handy, you can either skip the avrdude step or adjust the program and commands to fit your scenario.
In a new directory, create a new file named blink.c and paste the following program into it. This is a AVR implementation of the classic Arduino Blink sketch. If you load this to an Arduino it will make the built-in LED (pin 13/LED_BUILTIN) flash on and off every 500ms.
1 2 3 4 5 6 7 8 9 10 11 12 13 14 15 |
#include <avr/io.h> #include <util/delay.h> int main() { // Set built-in LED pin as output DDRB |= (1 << DDB5); while (1) { PORTB |= (1 << PB5); // LED on _delay_ms(500); PORTB &= ~(1 << PB5); // LED off _delay_ms(500); } return 0; } |
Double-click the avr_dev_prompt.cmd batch file you created above to prepare a console session with tools on the PATH.
In the directory you created the file, run the following commands. Make sure you plug in your Arduino before running avrdude and update the COM port to match the one assigned to your Arduino.
1 2 3 |
avr-gcc blink.c -o blink.elf -mmcu=atmega328 -DF_CPU=16000000UL -Os avr-objcopy blink.elf -O ihex blink.hex avrdude -c arduino -p atmega328p -U flash:w:"blink.hex":a -P COM4 |
If everything is working you should see something like.
1 2 3 4 5 6 7 8 9 10 11 12 13 14 15 16 17 18 19 20 21 22 23 24 25 26 27 28 29 |
C:\temp\blink>avr-gcc blink.c -o blink.elf -mmcu=atmega328p -DF_CPU=16000000UL -Os

C:\temp\blink>avr-objcopy blink.elf -O ihex blink.hex

C:\temp\blink>avrdude -c arduino -p atmega328p -U flash:w:"blink.hex":a -P COM4

avrdude: AVR device initialized and ready to accept instructions

Reading | ################################################## | 100% 0.00s

avrdude: Device signature = 0x1e950f (probably m328p)
avrdude: NOTE: "flash" memory has been specified, an erase cycle will be performed
         To disable this feature, specify the -D option.
avrdude: erasing chip
avrdude: reading input file "blink.hex"
avrdude: input file blink.hex auto detected as Intel Hex
avrdude: writing flash (176 bytes):

Writing | ################################################## | 100% 0.04s

avrdude: 176 bytes of flash written
avrdude: verifying flash memory against blink.hex:
avrdude: input file blink.hex auto detected as Intel Hex

Reading | ################################################## | 100% 0.03s

avrdude: 176 bytes of flash verified

avrdude done.  Thank you.
|
Next Steps
That’s all there is to it. To continue setting up your development environment check out my other posts on building projects with a Makefile and configuring VS Code:
- Building AVR projects with make
- Use VS Code with the AVR toolchain
Troubleshooting
- How do I find out what COM port my Arduino is using?
- Open Device Manager. Expand Ports (COM & LPT). You should see an entry named something like “Arduino Uno (COM4)”. The COM port is in parentheses.
If you are a developer working with AVR microcontrollers and programming in C or C++, using the AVR-GCC compiler on Windows can significantly simplify your workflow. AVR-GCC is an open-source toolchain that allows you to compile and flash code onto AVR microcontrollers. In this guide, we will show you how to install and set up AVR-GCC on your Windows machine.
Step 1: Download AVR-GCC Toolchain for Windows
The first step is to download the AVR-GCC toolchain for Windows. You can find the latest version of AVR-GCC on the official website or on GitHub. Make sure to choose the version that is compatible with your Windows operating system (32-bit or 64-bit).
Step 2: Install WinAVR
Once you have downloaded the AVR-GCC toolchain, the next step is to install WinAVR, which is a Windows port of the AVR-GCC toolchain. WinAVR includes AVR-GCC, AVR Libc, and other tools necessary for AVR development. Follow the installation instructions provided with the WinAVR package.
Step 3: Set Up System Path
After installing WinAVR, you need to add the AVR-GCC binaries to your system path. This allows you to run AVR-GCC commands from any directory in the command prompt. To set up the system path, go to Control Panel > System and Security > System > Advanced system settings > Environment Variables. Add the path to the AVR-GCC binaries (usually C:\WinAVR\bin) to the PATH variable.
Step 4: Verify Installation
To verify that AVR-GCC is installed correctly, open a command prompt and type the following command:
avr-gcc --version
If AVR-GCC is installed correctly, you should see the version information displayed in the command prompt.
Step 5: Write and Compile Your AVR Code
Now that you have set up AVR-GCC on your Windows machine, you can start writing and compiling code for your AVR microcontroller projects. Create a new C or C++ file using a text editor or an integrated development environment (IDE) and save it with a .c or .cpp extension.
Compile your code using the AVR-GCC compiler. Here is an example command to compile a C file:
avr-gcc -mmcu=atmega328p -Wall -Os -o output.elf input.c
This command compiles the input.c file for the ATmega328P microcontroller and generates an output file named output.elf.
Step 6: Flash Code onto AVR Microcontroller
Once you have compiled your code, you can flash it onto your AVR microcontroller using a programmer such as AVRISP or USBASP. Connect the programmer to your AVR development board and use a programming software like AVRDUDE to flash the compiled code onto the microcontroller.
With AVR-GCC installed on your Windows machine, you can easily develop and program AVR microcontroller projects using the C or C++ programming language. Enjoy the flexibility and power of AVR-GCC for your embedded development needs!
For more AVR-GCC related tutorials and guides, visit our website.
#AVR #GCC #Windows #AVR_GCC #Microcontrollers #Programming
#C #C++
#WinAVR #AVR_Libc #AVR_Development #AVR
_Compiler
