
Avast Clear
для Windows
Avast Clear — утилита для удаления приложений avast, когда стандартным путём из панели управления Windows (например Вы забыли пароль, которым защитили настройки антивируса) удалить невозможно.
Как деинсталлировать ПО при помощи этого инструмента:
- Зайти в Windows в безопасном режиме.
- Запустить утилиту.
- Если вы установили avast! в папку не по умолчанию — выберите данную папку (Внимательно! Все файлы из данной папки будут удалены).
- Нажмите Uninstall.
- Перегрузите компьютер.
Удаляет следующие продукты:
- Avast Free Antivirus
- Avast Pro Antivirus
- Avast Internet Security
- Avast Premier
- Avast Business Security
ТОП-сегодня раздела «Деинсталяторы»
Uninstall Tool 3.7.1
Uninstall Tool — компактная и удобная в эксплуатации утилита, позволяющая полноценно заменить…
Revo Uninstaller Pro 5.3.4
Revo Uninstaller — мощная утилита для удаления и деинсталляции программ без остатков, следов и хвостов на вашем ПК…
Отзывы о программе Avast Clear
Сергей про Avast Clear 22.6.7355 [22-07-2022]
Хорошая вычищалка Погани на компьютере, спасибо!
6 | 9 | Ответить
Елена про Avast Clear 2021 (21.9.6698) [12-11-2021]
реально занудная вешь аваст, убрать просто невозмжно, непонимаю как теперь его убрать…
5 | 12 | Ответить
Борис про Avast Clear 18.5.2342 (18.5.3931) [19-07-2018]
Спасибо за ваш труд.
9 | 10 | Ответить
Div про Avast Clear 17.9.3761 [17-01-2018]
В «былые времена», когда на просторах СССР правил бал Нортон!!! Не было и в помине борьбы с «наркомафией»…куда катиться мир?!!
11 | 15 | Ответить
Валерий . про avast! Uninstall Utility 10.0.2202 [07-01-2015]
Антивирус придуманный для борьбы с вирусами , сам в последствии как ВИРУС.Невозможно удалить обычным способом .
14 | 16 | Ответить
Avast Free Antivirus — один из лучших бесплатных антивирусов для Windows 10, 8.1 и Windows 7, но и его иногда бывает нужно удалить. Причем сделать это так, чтобы в системе не осталось следов, которые мешали бы установке другого антивирусного ПО.
В этой инструкции подробно о том, как полностью удалить Avast Free Antivirus с компьютера или ноутбука и дополнительно безопасно очистить систему от некоторых оставшихся папок и разделов в реестре, а также видео, где весь процесс продемонстрирован наглядно. Также может быть интересно: Лучший бесплатный антивирус.
Способы удаления Avast
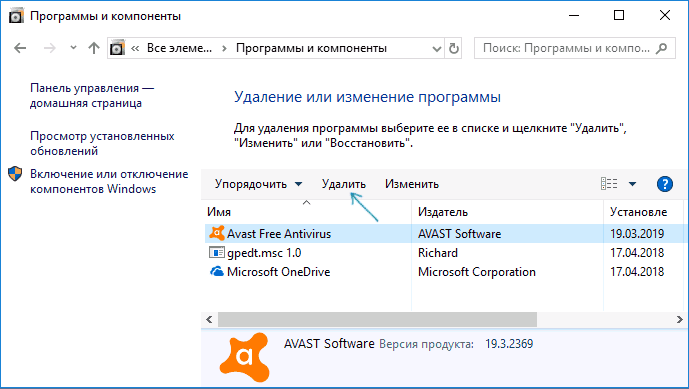
Как и почти любой другой антивирус Avast Free Antivirus может быть удален двумя способами: с помощью удаления в «Панель управления» — «Программы и компоненты» (как любую другую программу в Windows) или с помощью специальной утилиты на официальном сайте. А вот пробовать удалять папку антивируса вручную, предоставляя себе необходимые права на доступ — это не тот метод, который следует использовать.
Несмотря на то, что первый способ может быть проще, я рекомендую сразу начать со второго, поскольку удаление с помощью деинсталлятора в панели управления не всегда работает исправно.
Как удалить Avast Free Antivirus с помощью утилиты удаления AvastClear
Для того, чтобы использовать официальную утилиту для полного удаления бесплатного антивируса Avast с компьютера, используйте следующие шаги:
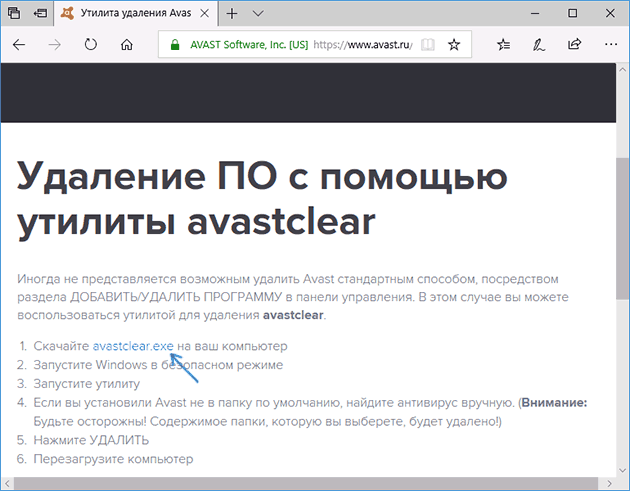
- Загрузите утилиту avastclear.exe с официальной страницы https://www.avast.ru/uninstall-utility

- Перезагрузите компьютер в безопасном режиме (см. Безопасный режим Windows 10).
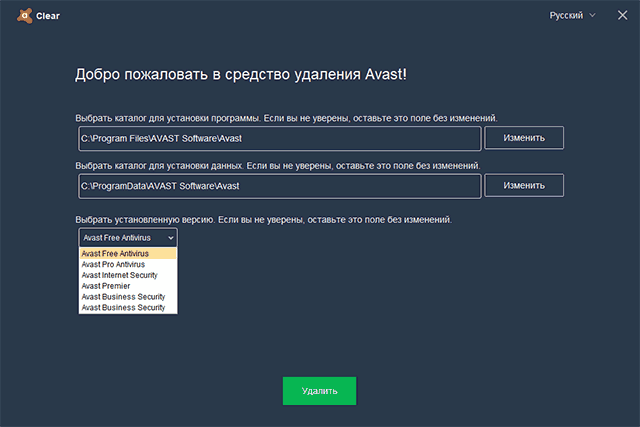
- Запустите утилиту удаления Avast. В большинстве случаев никаких параметров в ней менять не требуется: там уже по умолчанию указан Avast Free Antivirus и его папки. Если же вы устанавливали другой антивирусный продукт или в другое расположение, вручную укажите путь к нему. Нажмите кнопку «Удалить».

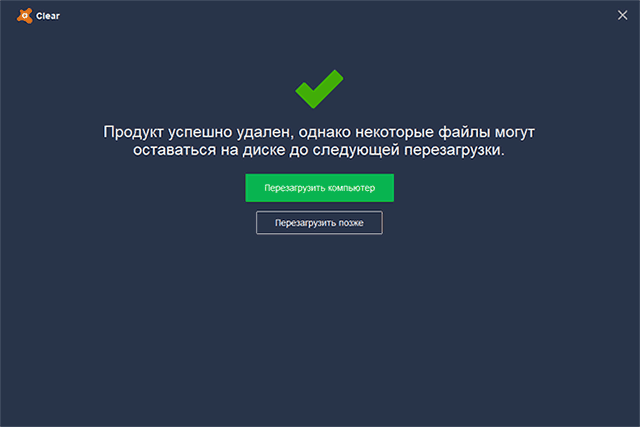
- Дождитесь завершения процесса удаления, а затем перезагрузите компьютер.
После перезагрузки антивирус работать не будет, а другие антивирусы при установке не станут сообщать об ошибках, связанных с наличием еще одного антивируса в системе.
Удаление остатков Avast
Некоторые оставшиеся следы Avast можно дополнительно удалить вручную (они не очищаются утилитой, но и не играют никакой роли):
А вот остальные параметры реестра, которые вы можете найти в реестре по ключевому слову «Avast» я бы не рекомендовал трогать: часть из них не имеет отношения к антивирусу (а относятся к его сайту, который вы посещали), удаление другой части теоретически может привести к ненужным последствиям.
Также иногда в браузере может остаться расширение от Avast — его вы легко сможете отключить и удалить в параметрах расширений самого браузера. На этом Avast Free Antivirus полностью удален с вашего компьютера.
Видео инструкция по удалению Avast Free Antivirus
Надеюсь, удаление прошло успешно, а каких-либо остатков от антивируса не осталось.
Все способы:
- Методы полного удаления Аваст из Windows 10
- Способ 1: Специализированное приложение
- Способ 2: Встроенная утилита ОС
- Вопросы и ответы: 0
Изо дня в день развивается и совершенствуется не только полезный софт, но и вредоносное ПО. Именно поэтому пользователи прибегают к помощи антивирусов. Их, как и любые другие приложения, время от времени тоже приходится переустанавливать. В сегодняшней статье мы хотели бы рассказать вам о том, как полностью удалить антивирус Avast из операционной системы Windows 10.
Мы выделили два основных действенных способа деинсталляции упомянутого антивируса – с помощью специализированного стороннего софта и штатными средствами ОС. Оба они весьма эффективны, поэтому можете использовать любой, предварительно ознакомившись с подробной информацией о каждом из них.
Способ 1: Специализированное приложение
В одной из предыдущих статей мы рассказывали о программах, которые специализируются на очистке операционной системы от мусора, с которой и рекомендуем ознакомиться ознакомиться.
Подробнее: 6 лучших решений для полного удаления программ
В случае с удалением Avast хотелось бы выделить одно из таких приложений — Revo Uninstaller. Оно имеет весь необходимый функционал даже в бесплатной версии, к тому же мало «весит» и весьма быстро справляется с поставленными задачами.
Скачать Revo Uninstaller
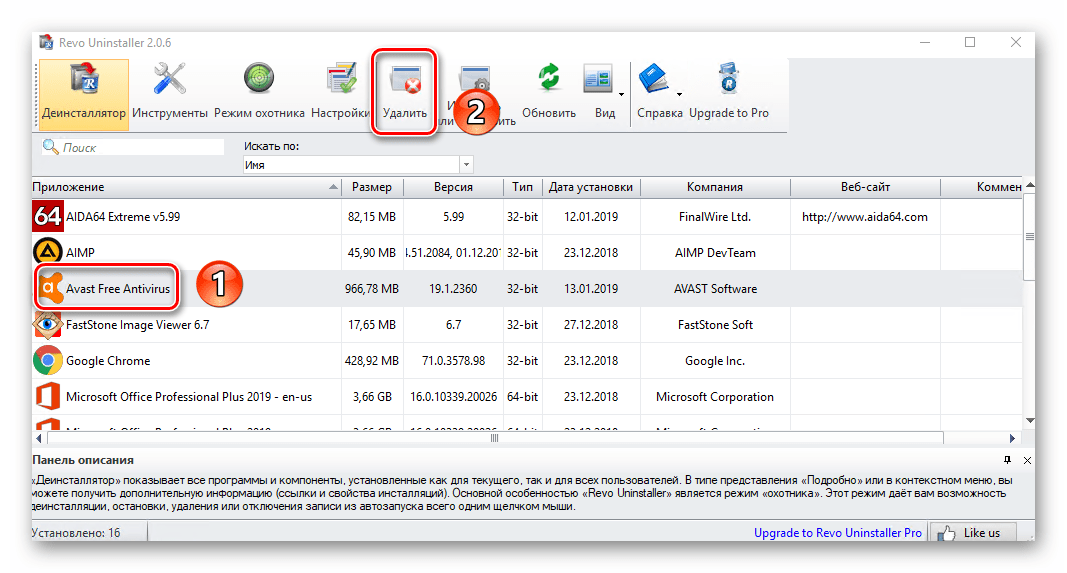
- Запустите Revo Uninstaller. В главном окне сразу же будет отображен список программ, которые установлены в системе. Найдите среди них Avast и выделите одиночным нажатием левой кнопки мыши. После этого нажмите кнопку «Удалить» на панели управления в верхней части окна.
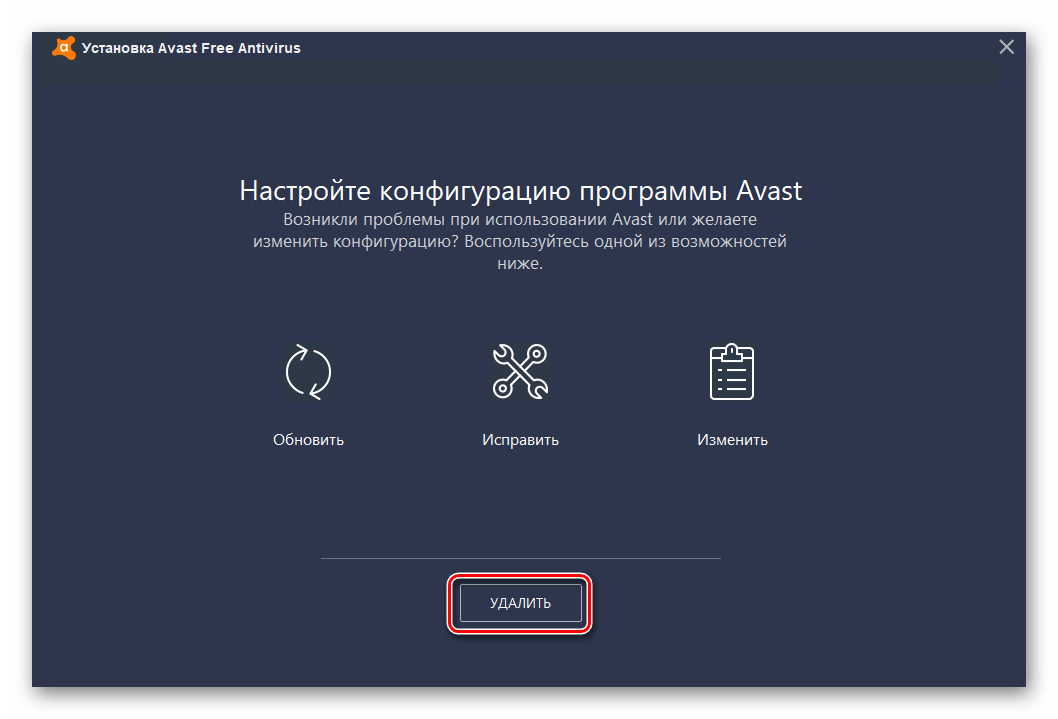
- Вы увидите на экране окно с доступными действиями. Нажмите в самом низу кнопку «Удалить».
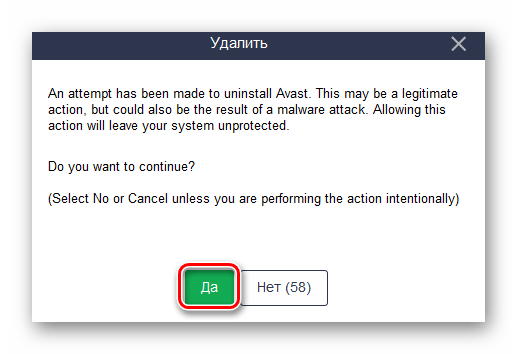
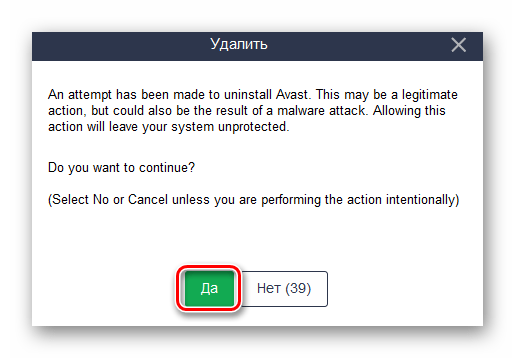
- Защитный механизм антивируса выведет запрос на подтверждение удаления. Это сделано для того, чтобы вирусы не смогли самостоятельно деинсталлировать приложение. Нажмите «Да» в течение минуты, иначе окно закроется и операция будет отменена.
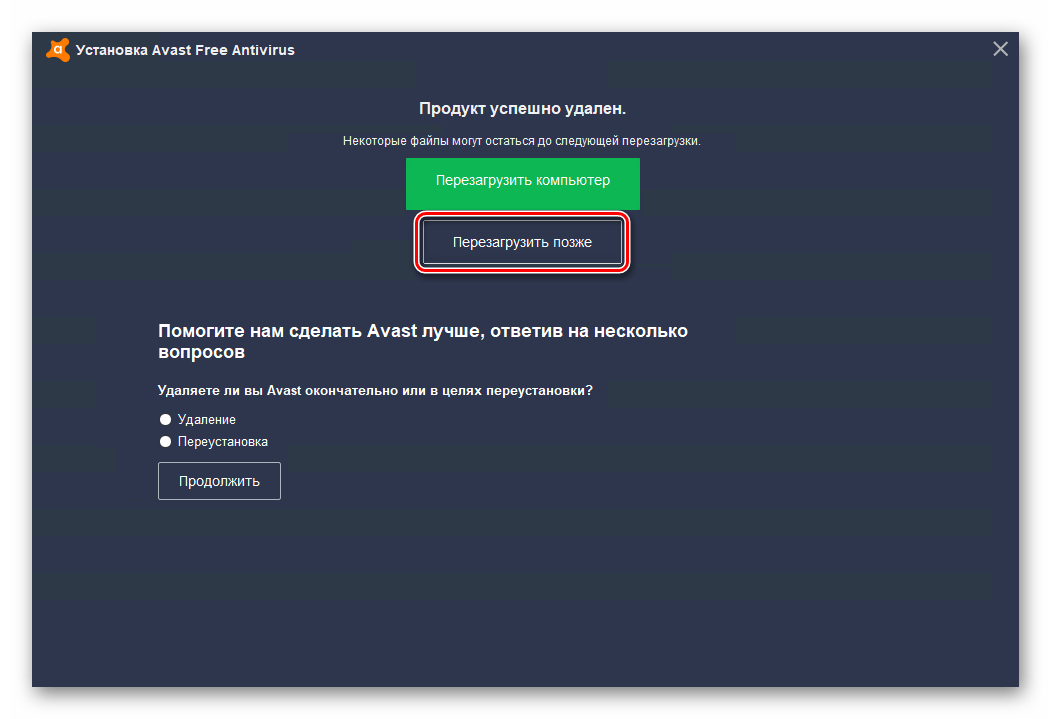
- Начнется процесс деинсталляции Avast. Дождитесь, пока на экране не появится окно с предложением перезагрузить компьютер. Не делайте этого. Просто нажмите кнопку «Перезагрузить позже».
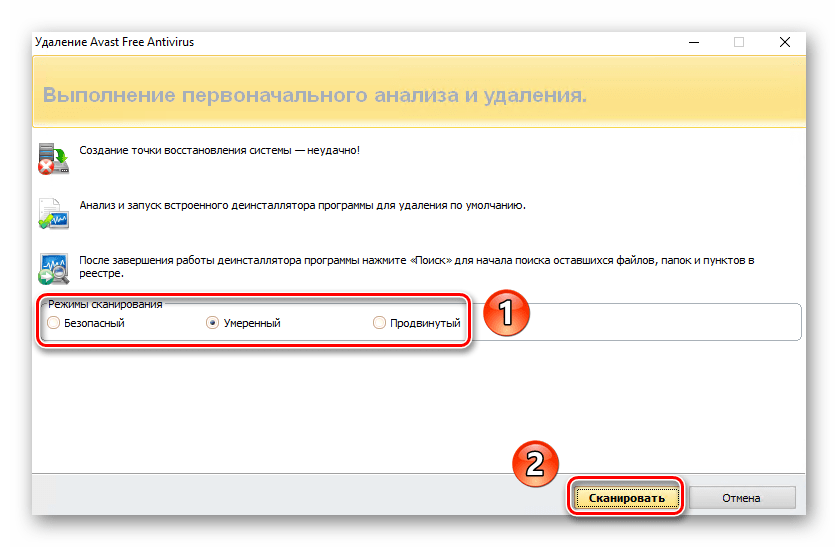
- Закройте окно программы удаления и перейдите снова в Revo Uninstaller. С этого момента станет активной кнопка «Сканировать». Нажмите ее. Предварительно вы можете выбрать один из трех режимов сканирования – «Безопасный», «Умеренный» и «Продвинутый». Отметьте второй пункт.
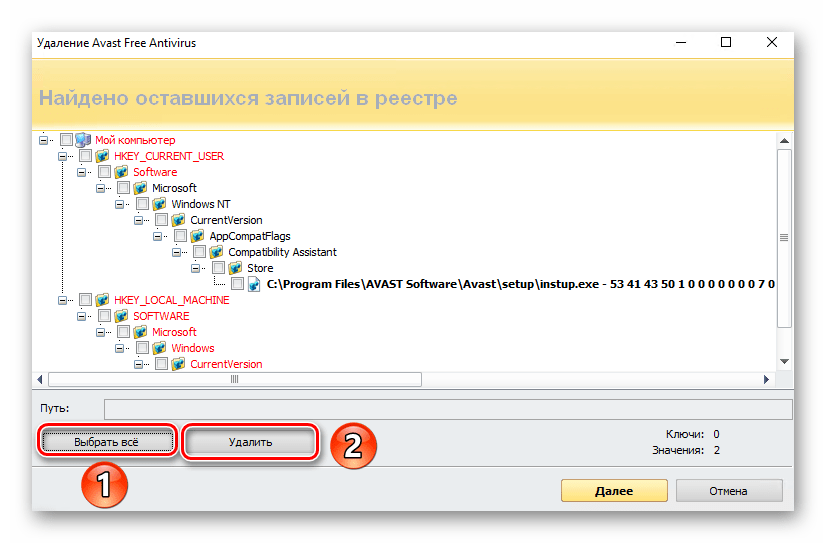
- Запустится операция поиска оставшихся файлов в реестре. Спустя какое-то время вы увидите их перечень в новом окне. В нем следует нажать кнопку «Выбрать все» для выделения элементов, а затем «Удалить» для их затирания.
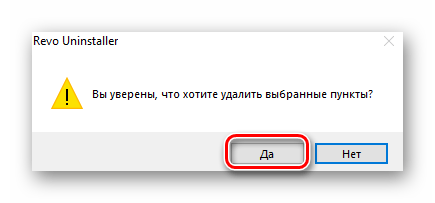
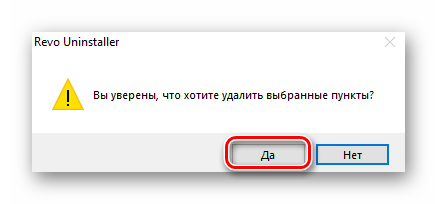
- Перед удалением отобразится запрос на подтверждение операции. Нажмите «Да».
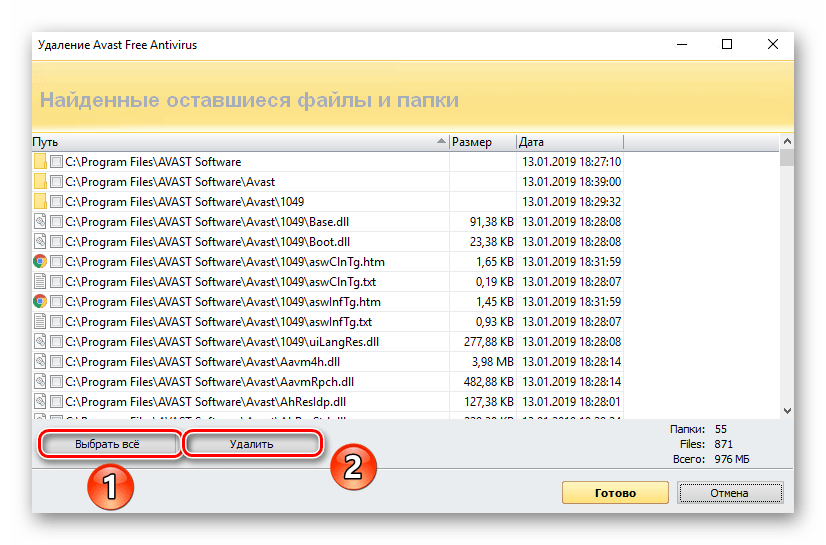
- После этого появится похожее окно. На этот раз в нем будут показаны остаточные файлы антивируса на жестком диске. Поступаем так же, как и с файлами реестра – жмем кнопку «Выбрать все», а затем «Удалить».
- На запрос об удалении снова отвечаем «Да».
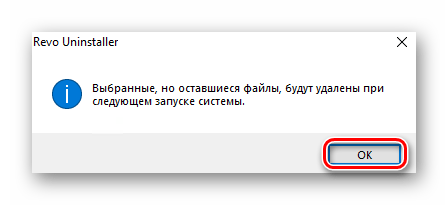
- В завершении появится окно с информацией о том, что есть еще остаточные файлы в системе. Но они будут стерты в процессе последующего перезапуска системы. Жмем кнопку «OK» для окончания операции.
На этом удаление Avast завершено. Нужно лишь закрыть все открытые окна и перезапустить систему. После очередного входа в Windows от антивируса не останется и следа. Кроме того, компьютер можно попросту выключить и включить снова.
Подробнее: Выключение системы Windows 10
Способ 2: Встроенная утилита ОС
Если вы не хотите инсталлировать в систему дополнительный софт, для удаления Avast можете использовать штатное средство Windows 10. Оно способно также качественно очистить компьютер от антивируса и его остаточных файлов. Реализуется это следующим образом:
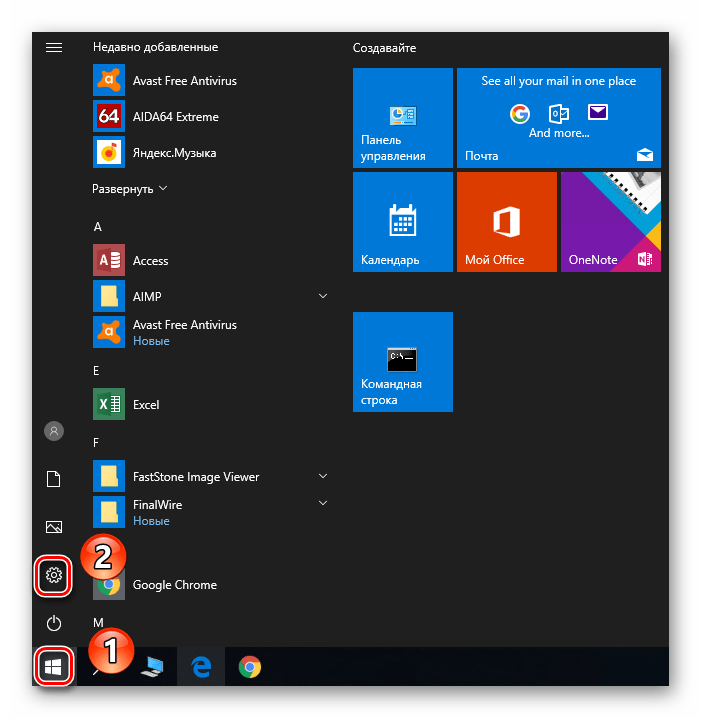
- Откройте меню «Пуск» путем нажатия ЛКМ по кнопке с таким же названием. В нем кликните по иконке в виде шестеренки.
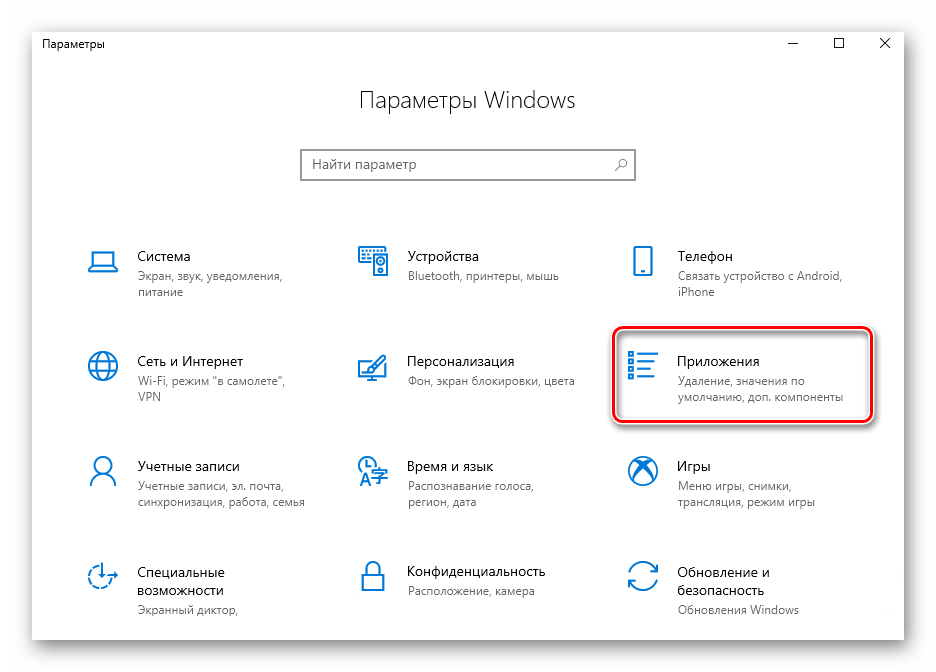
- В открывшемся окне найдите раздел «Приложения» и зайдите в него.
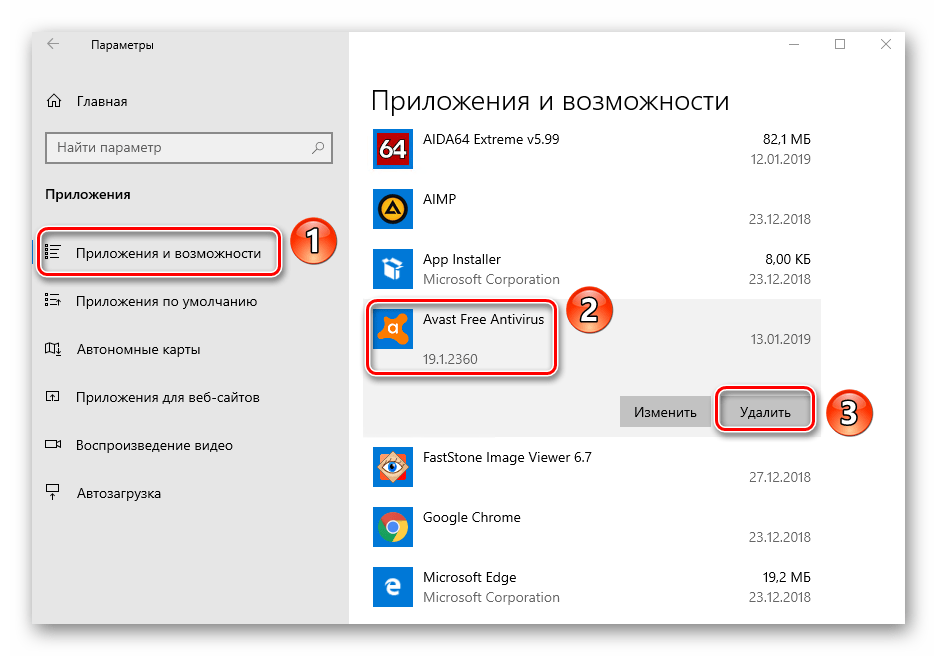
- Автоматически будет выбран нужный подраздел «Приложения и возможности» в левой половине окна. Вам же необходимо прокрутить вниз правую его часть. В самом низу находится список установленного ПО. Найдите среди него антивирус Avast и кликните по его названию. Появится выдвигающееся меню, в котором следует нажать кнопку «Удалить».
- Рядом с ним появится еще одно окошечко. В нем снова нажимаем единственную кнопку «Удалить».
- Запустится программа удаления, которая очень схожа с ранее описываемой. Разница лишь в том, что штатное средство Windows 10 автоматически запускает сценарии, которые удаляют остаточные файлы. В появившемся окне антивируса нажмите кнопку «Удалить».
- Подтверждаем намерение деинсталляции путем нажатия на кнопку «Да».
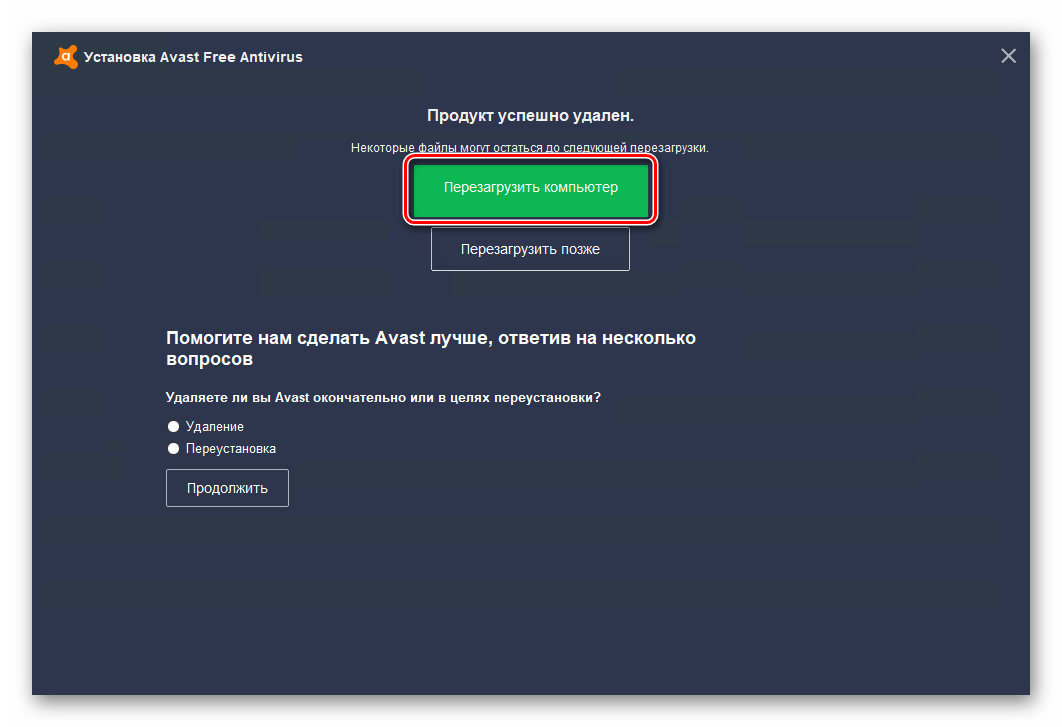
- Далее нужно немного подождать, пока система выполнит полную очистку. В завершении появится сообщение об успешном окончании операции и предложение перезагрузить Windows. Выполняем это, нажав на кнопку «Перезагрузить компьютер».

После повторного запуска системы Avast будет отсутствовать на компьютере/ноутбуке.
На этом данная статья завершена. В качестве заключения мы хотели бы отметить, что иногда в процессе могут возникнуть непредвиденные ситуации, например, различные ошибки и возможные последствия пагубного влияния вирусов, которые не дадут корректно удалить Avast. В таком случае лучше всего прибегнуть к принудительной деинсталляции.
Наша группа в TelegramПолезные советы и помощь
If you’re looking to remove Avast Antivirus from your Windows 10 computer completely, you’ve come to the right place. Uninstalling antivirus software can sometimes be a bit more involved than a standard application removal, as it’s designed to protect your system thoroughly. In this guide, we’ll walk you through the step-by-step process to completely uninstall Avast Antivirus from your Windows 10 PC, ensuring that no traces of the software remain behind. Whether you’re switching to a different antivirus program or troubleshooting issues, follow these instructions to ensure a clean and thorough uninstallation.
In this article, you will find five different methods to completely uninstall Avast Free Antivirus from your Windows 10 computer.

Table of Contents
5 Ways to Remove Avast Antivirus from Windows 10 PC
Now, if you have already uninstalled Avast and are looking for ways to remove its residual files, skip to method 3,4, and 5. On the other hand, follow methods 1 or 2 to start executing the correct removal procedure for Avast.
Method 1: Disable Avast Self-Defense and then Uninstall Avast
As mentioned earlier, Avast includes a Self-Defense module to deter malware from removing it. If malware tries to uninstall Avast, the Self-Defense module displays a pop-up informing the user that an uninstall attempt has been made. The uninstallation process will only begin if the user clicks on the Yes button. To altogether remove Avast, you first need to disable Self-Defense in Avast settings and then proceed to uninstallation.
1. Double-click on Avast’s shortcut icon on your desktop to open it. If you do not have a shortcut icon in place, search for Avast in the start search bar (Windows key + S) and click on Open.
2. When the application interface opens up, click on the hamburger icon (three horizontally dashes) present at the top-right corner, from the menu that slides in, select Settings.
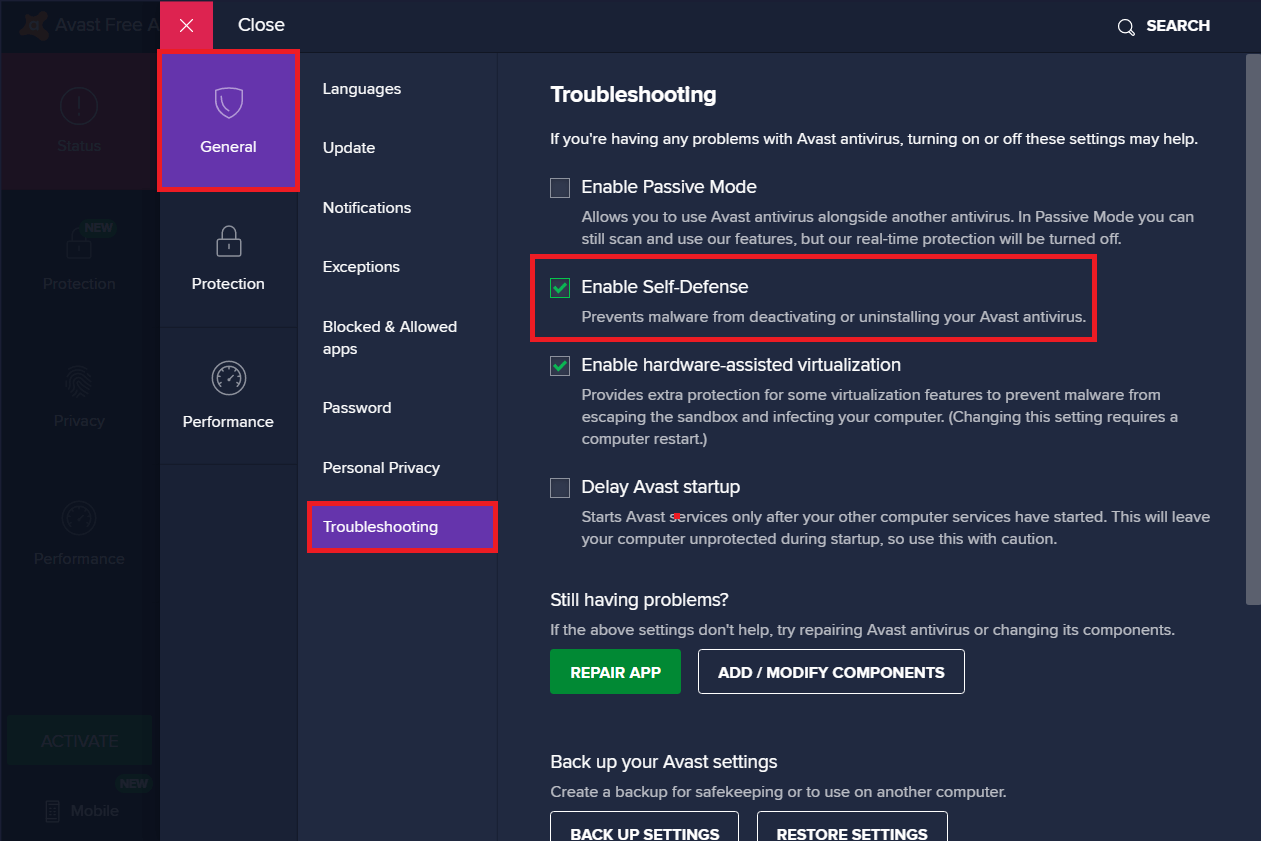
3. In the following Settings window, switch to the General tab using the left navigation menu and then click on Troubleshooting.
4. Finally, disable Self-Defense by unticking the box next to ‘Enable Self-Defense’.
5. A pop-up message alerting you of an attempt to disable Self-Defense will appear. Click on Ok to confirm the action.
6. Now that we have turned off the Self-Defense module, we can move forward to uninstalling Avast itself.
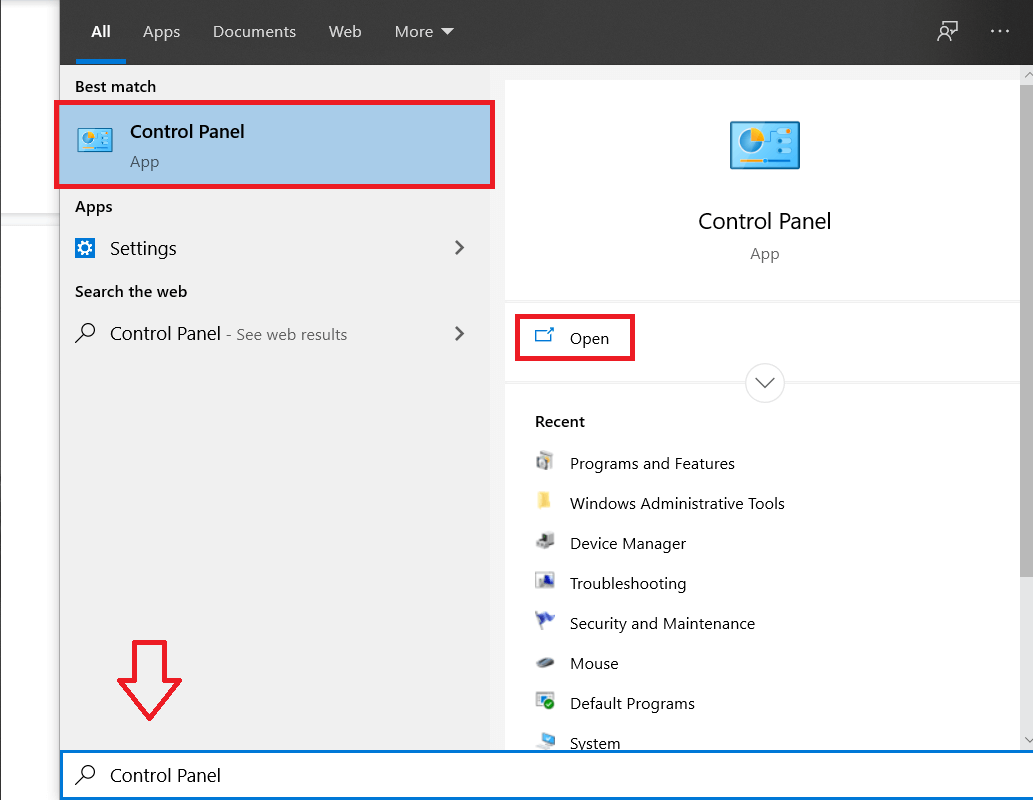
7. Press the Windows key and start typing Control Panel, click on Open when search results arrive.
8. Click on Programs and Features. You can change the icon size to large or small using the View by the option on the top-right to make looking for the required item easier.

9. Locate Avast Free Antivirus in the following window, right-click on it and select Uninstall.

10. Avast Antivirus Setup window will appear when you click on Uninstall. The setup window lets you update, repair, or modify the application. An uninstall button can also be found at the bottom of the window. Click on it to continue.

11. You will again receive a pop-up requesting for confirmation; click on Yes to start the uninstallation process.
12. The uninstallation process will take a few minutes to finish. Upon completion, you will receive a confirmation message that reads, ‘The product was successfully uninstalled’ with options to Restart your computer now or later to remove all Avast files.
We recommend restarting immediately after uninstalling Avast but if you are in the middle of some critical work, continuing later does the job.
Method 2: Use Avast’s Uninstall Utility
Most antivirus companies have started rolling out special utility tools to remove their security programs properly. Similarly, Avastclear is an uninstall utility by Avast themselves to remove any of their applications from Windows 10 PC. The tool is pretty simple to use but requires you to boot the system in safe mode. So, sort out any immediate work before using Avastclear.
Also, some users, while using Avastclear, might encounter a pop-up that reads ‘Self-Defense module is preventing uninstallation’, follow steps 1 through 5 of the above method to disable the Self-Defense module and complete uninstallation.
1. Head over to Uninstall Utility for Avast Removal and click on the avastcleaner.exe hyperlink to download the tool.

2. Open the Downloads folder (or the location where you saved the file), right-click on avastcleaner.exe, and select Run As Administrator.

Note: Click on Yes in the following User Account Control pop-up to grant the necessary permission.
3. You will receive a message recommending you to run the tool in Windows Safe Mode. Click on Yes to boot into Safe Mode.

4. Once your computer boots in Safe Mode, find the file again and run it.
5. In the following window, click on Change to select the Avast installation folder. The removal tool automatically selects the default installation path, but if you have Avast installed in a custom folder, navigate to it and select the Avast version you have installed using the drop-down list.
6. Finally, click on Uninstall to get rid of Avast and its associated files.

After the residual files have been removed and the computer restarts, uninstall Avast Clear as well since you do not need it anymore.
Also Read: How to completely uninstall McAfee from Windows 10
Method 3: Remove Avast OS
Avast Antivirus installs a temporary Avast OS during its uninstallation. The OS is installed to assist in the removal of associated files. Although, once the files are removed, the Avast OS doesn’t uninstall itself. While the OS removes the residual Avast files, it gets set as the default OS for the computer and, therefore, isn’t automatically removed/deleted.
To stop receiving the Avast pop-ups, you will first need to re-select Windows as the default OS and then delete Avast OS manually.
1. Launch the Run Command box by pressing Windows key + R, type sysdm.cpl, and press enter to open the System Properties window.
2. Switch to the Advanced tab and click on the Settings button under the Startup and Recovery section.

3. In the following window, ensure the Default operating system is set as Windows 10. If it is not, expand the drop-down list and select Windows 10. Click on OK to exit.

4. One can also set Windows as the default operating system from the boot selection menu. To access the selection menu, repeatedly press Esc or F12 when your computer boots on.
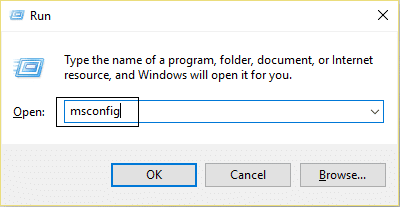
5. Once again, open the Run command box, type msconfig, and press enter.
6. Move to the Boot tab of the following System Configuration window.
7. Select the Avast Operating System and click on the Delete button. Approve any confirmation messages you might receive.

Method 4: Use a third-party remover software
The internet is flooded with various residual file removal programs. A few popular remover tools for Windows are CCleaner and Revo Uninstaller. ESET AV Remover is a remover tool specially designed to remove antivirus & anti-malware programs and can entirely remove every available security program. In this case, we will use ESET AV Remover to completely uninstall Avast antivirus in Windows 10:
1. Visit Download ESET AV Remover and download the installation file suitable for your system architecture (32 bit or 64 bit).

2. Click on the .exe file to launch the installation wizard. Follow all the on-screen instructions to install ESET AV Remover.
3. Once installed, open ESET AV Remover and click on Continue followed by Accept to let the application scan your computer for traces of any previously installed antivirus program.

4. Select Avast and all related programs from the scan list and click on Remove.
5. Click on Remove again in the confirmation/warning pop-up.
Check the Programs and Features list to ensure there are no Avast programs left behind on your PC. You can go ahead and also get rid of ESET AV Remover as it serves no purpose anymore.
Method 5: Delete all Avast related files manually
Ultimately, if none of the above methods get rid of the Avast pop-ups, it is time to take matters into our own hands and delete all Avast files manually. All antivirus files are protected and can only be deleted/removed by a trusted installer. For Avast files, the trusted installer is Avast itself. Using this method, we will be upgrading our access status and then delete every Avast residual file manually.
1. Press Windows Key + E to open Windows File Explorer and copy-paste the following location in the address bar.
C:\ProgramData\AVAST Software\Avast\
2. Find the files you wish to delete, right-click on one of them, and select Properties.
3. Move to the Security tab and click on the Advanced button.
4. In the following window, click on the Change hyperlink to set yourself as the owner.
5. Set your account or an administrator account as the Owner and click on OK to save & exit. Close all the windows.
6. Right-click on the file with the changed properties and select Delete.
Repeat the above steps for all the files and folders you wish to delete. Some Avast files can also be found at %windir%\WinSxS\ and %windir%\WinSxS\Manifests\. Change their ownership as well and delete them. Be wary of what files you are deleting, as trusted installer files should not be messed with.
Next, you may also want to check the Windows Registry Editor for residual Avast files.
1. Type regedit in the Run command box and press enter.
2. Copy-paste the below path in the address bar or navigate your way there using the navigation menu on the left.
Computer\HKEY_CURRENT_USER\SOFTWARE\AVAST Software
3. Right-click on the Avast Software folder and select Delete.
4. Also delete the folder present at Computer\HKEY_LOCAL_MACHINE\SOFTWARE\Avast Software
Recommended:
- How to completely uninstall Norton from Windows 10
- Uninstall Microsoft Security Essentials in Windows 10
So those were five different methods that you could use to completely uninstall Avast Antivirus in Windows 10. Let us know which one of the five worked for you in the comments section. If you are facing any trouble following any of the methods, get in touch with us below.