
Все способы:
- Процесс atieclxx.exe
- Основные задачи
- Расположение
- «Диспетчер задач»
- Отключение службы
- Заражение вирусами
- Заключение
- Вопросы и ответы: 0
В операционной системе Windows нередко можно встретить процесс atieclxx.exe, работающий в фоновом режиме и в некоторых случаях потребляющий большое количество ресурсов. Данный файл не имеет отношения к ОС и по необходимости может быть удален стандартными средствами.
Процесс atieclxx.exe
Рассматриваемый процесс, хотя и не является системным, относится к преимущественно безопасным файлам и связан с программным обеспечением от компании AMD. Выполняется он в тех случаях, когда в вашем компьютере установлена видеокарта от AMD и соответствующие ей программы.
Основные задачи
Процесс atieclxx.exe и вместе с тем служба «AMD External Events Client Module» при правильной работе должны запускаться исключительно во время максимальной загруженности видеокарты, когда стандартная графическая память заканчивается. Данный файл входит в библиотеку драйвера и позволяет видеоадаптеру дополнительно использовать оперативную память.
В запущенном состоянии он может потреблять большое количество ресурсов компьютера, но лишь при работе многих приложений одновременно. Иначе же причиной является заражение вирусами.
Расположение
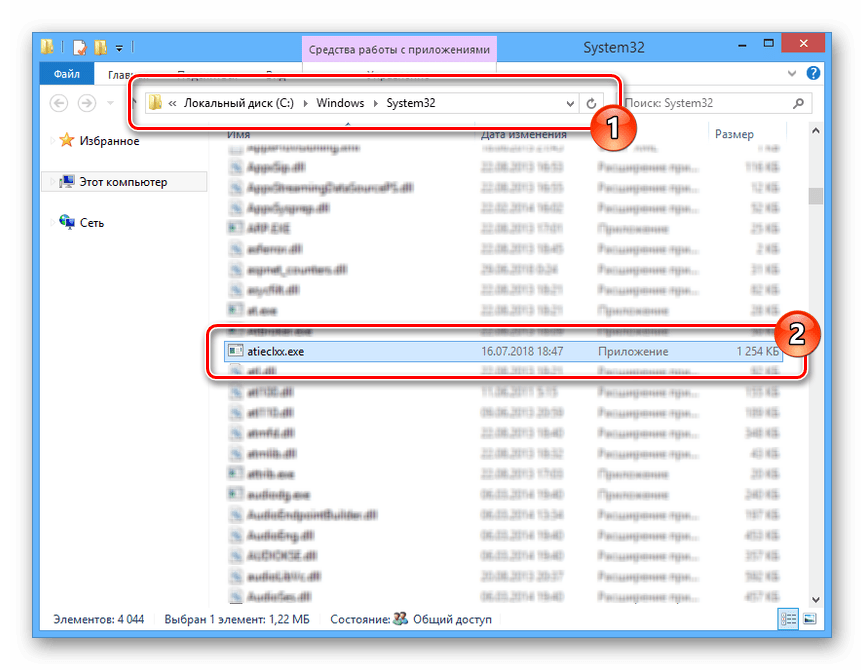
Как и большинство других процессов, atieclxx.exe можно найти на компьютере в виде файла. Для этого достаточно воспользоваться стандартным поиском в ОС Windows.
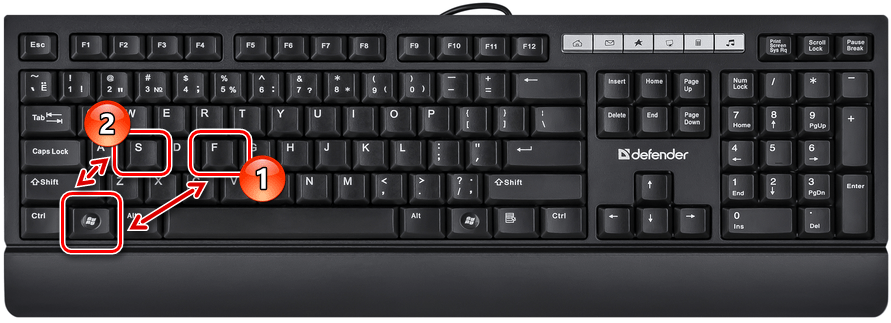
- На клавиатуре нажмите сочетание клавиш «Win+F». В Windows 10 необходимо воспользоваться комбинацией «Win+S».
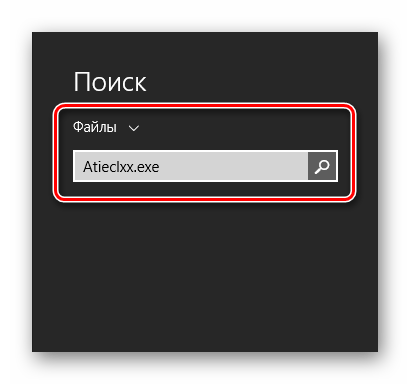
- Введите в текстовую графу название рассматриваемого процесса и нажмите клавишу «Enter».
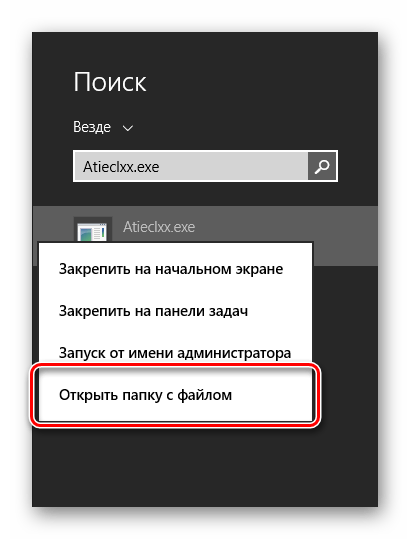
- Кликните правой кнопкой мыши по файлу и выберите пункт «Открыть расположение файла». Также данная строка может отображаться иначе, например, в Windows 8.1 нужно выбрать «Открыть папку с файлом».
- Теперь должна открыться системная папка Виндовс «System32». Если файл находится в любом другом месте на ПК, его следует удалить, так как это наверняка вирус.
C:\Windows\System32
Если вам все же необходимо избавиться от файла, сделать это лучше через «Программы и компоненты», выполнив удаление программы Advanced Micro Devices или AMD External Events.
Читайте также: Как удалить драйвера видеокарты
«Диспетчер задач»
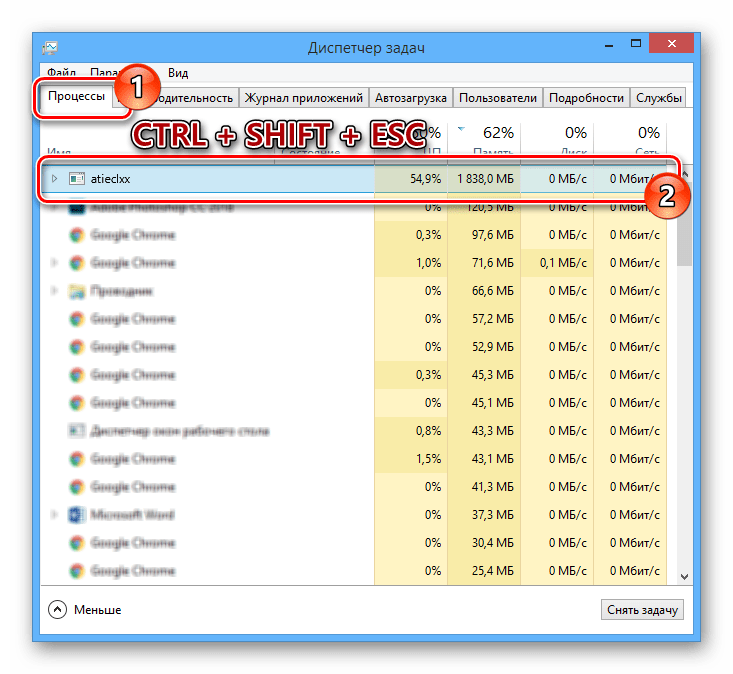
По необходимости можно приостановить выполнение atieclxx.exe через «Диспетчер задач», а также удалить его из автозагрузки при старте системы.
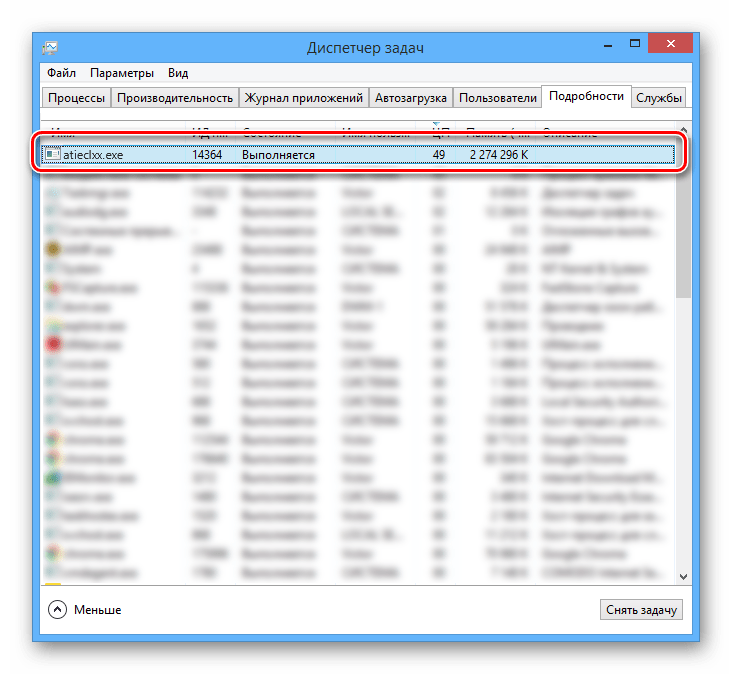
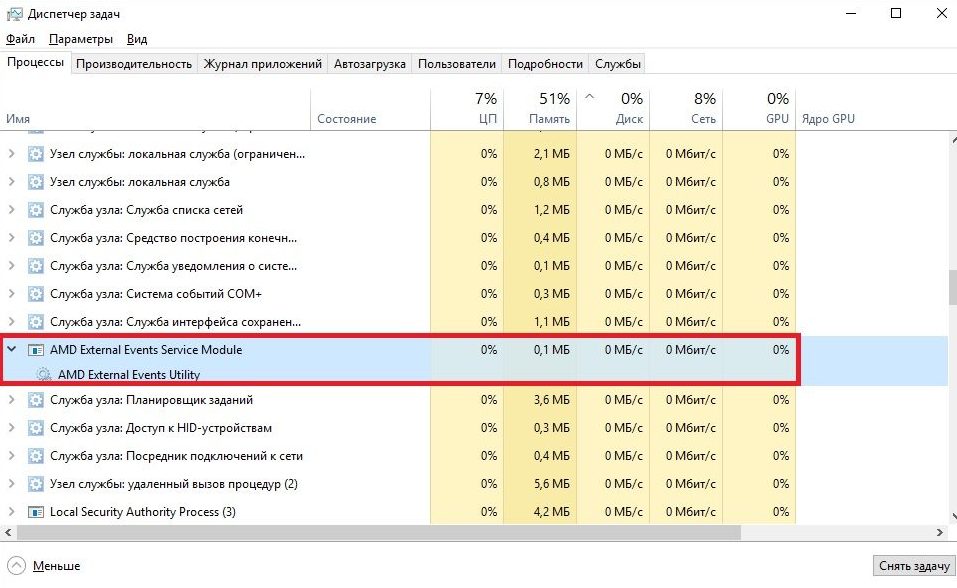
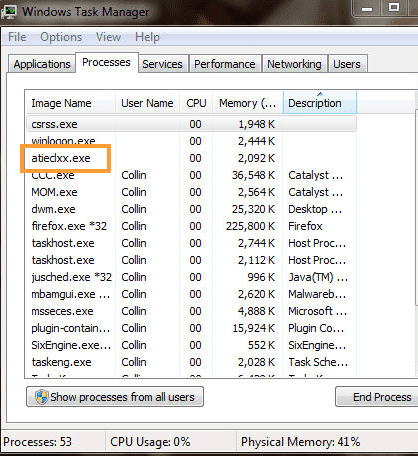
- На клавиатуре нажмите сочетание клавиш «Ctrl+Shift+Esc» и, находясь на вкладке «Процессы», найдите пункт «atieclxx.exe».
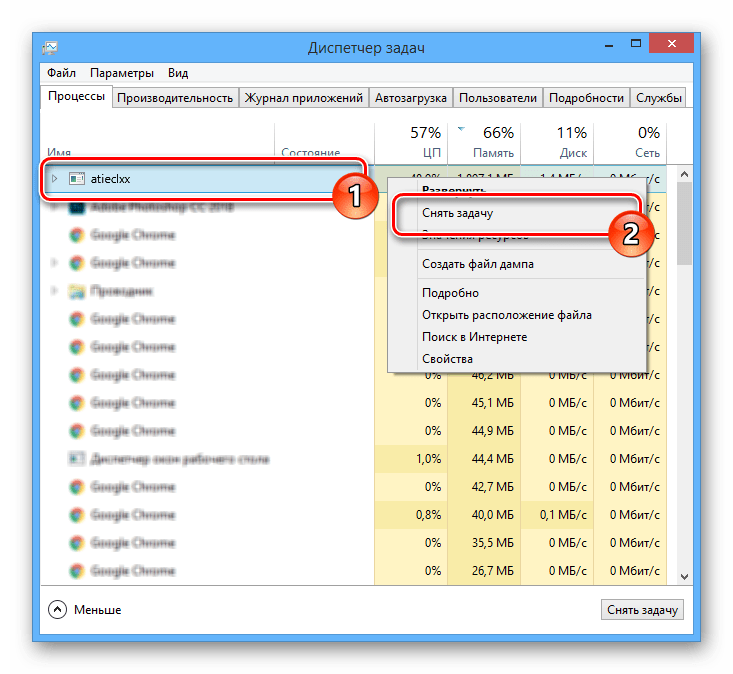
- Кликните по найденной строке правой кнопкой мыши и выберите пункт «Снять задачу».

По необходимости подтвердите отключение через всплывающее окно.
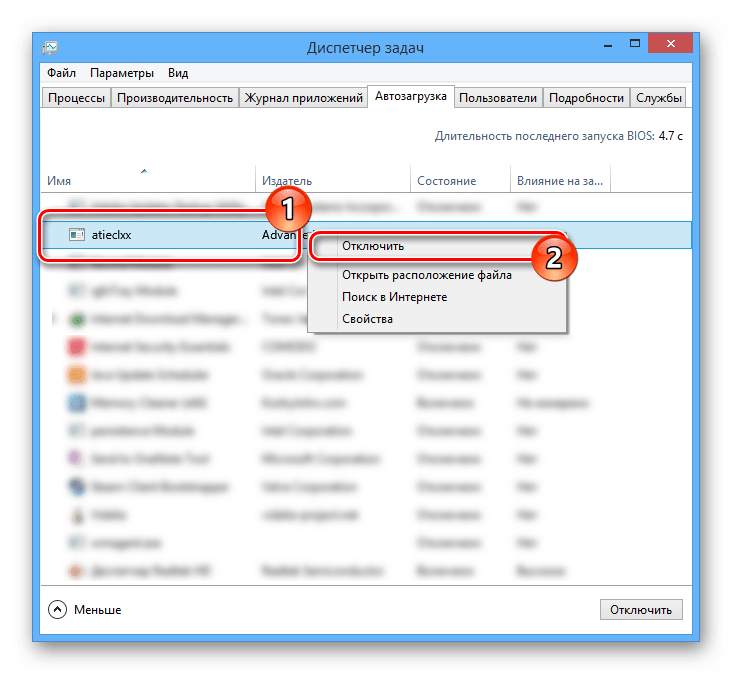
- Перейдите на вкладку «Автозагрузка» и найдите строку «atieclxx.exe». В некоторых случаях пункт может отсутствовать.
- Нажмите правую кнопку мыши и кликните по строке «Отключить».
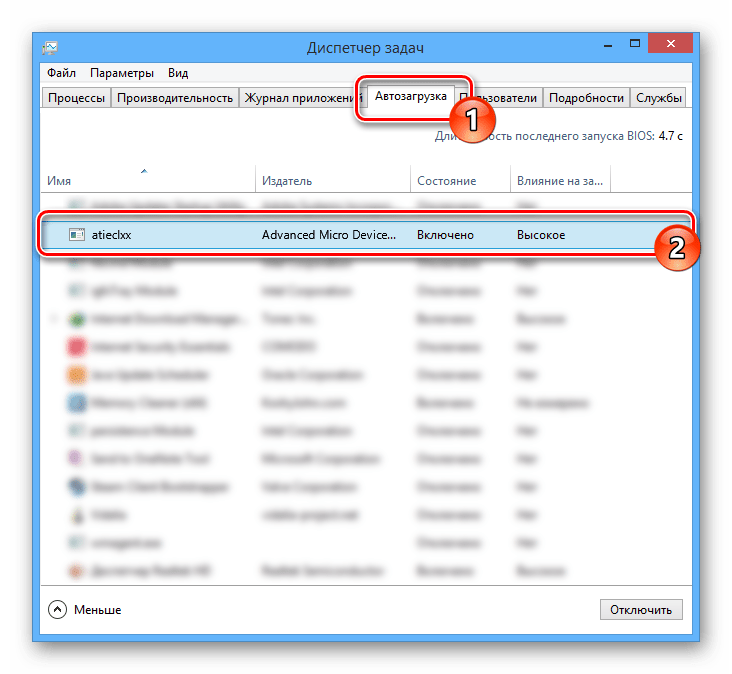
После проделанных действий приложения, потребляющие большое количество памяти, будут закрыты.
Отключение службы
Помимо отключения процесса в «Диспетчере задач», необходимо сделать то же самое со специальной службой.
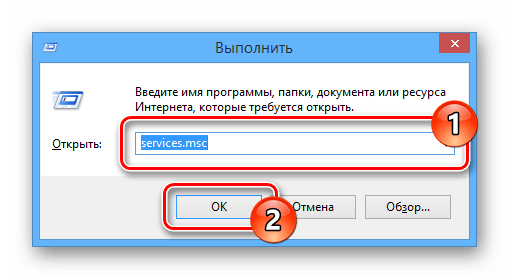
- На клавиатуре воспользуйтесь сочетанием клавиш «Win+R», в открывшееся окно вставьте представленный ниже запрос и нажмите «Enter».
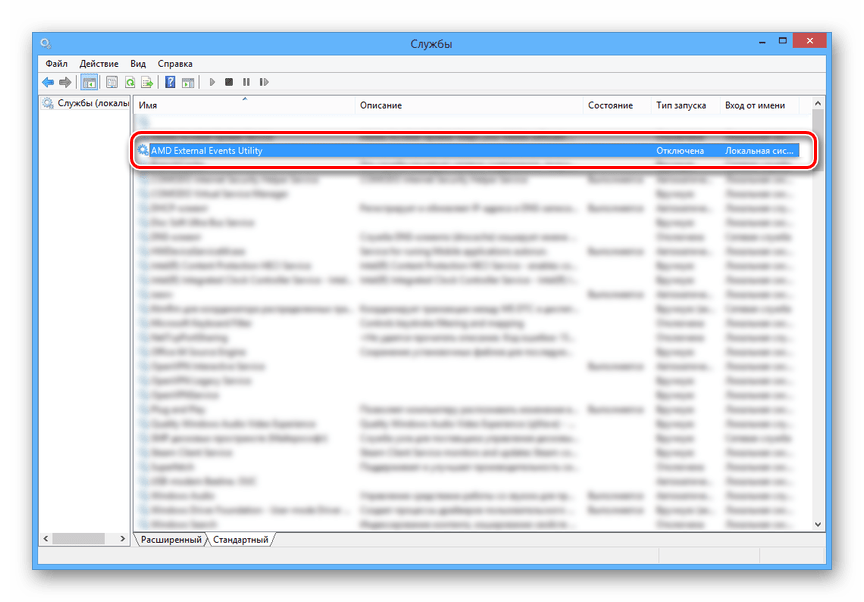
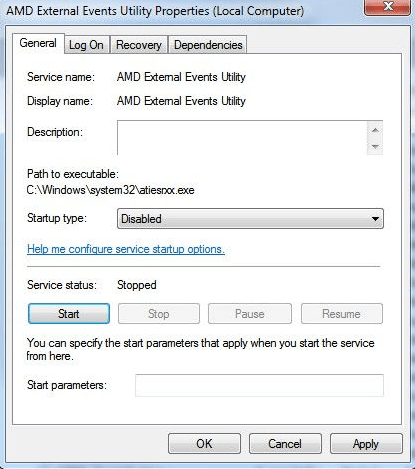
services.msc - Найдите пункт «AMD External Events Utility» и дважды кликните по нему.
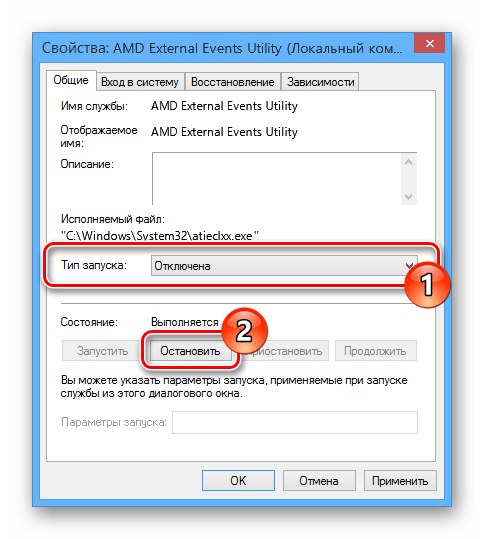
- Установите значение «Отключена» в блоке «Тип запуска» и остановите службу с помощью соответствующей кнопки.
- Сохранить настройки можно с помощью кнопки «ОК».
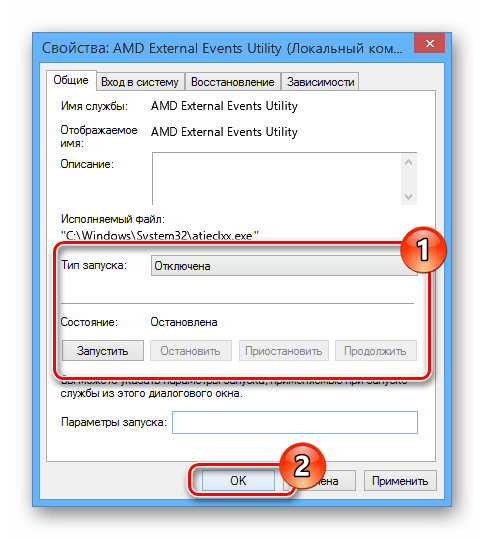
После этого служба будет отключена.
Заражение вирусами
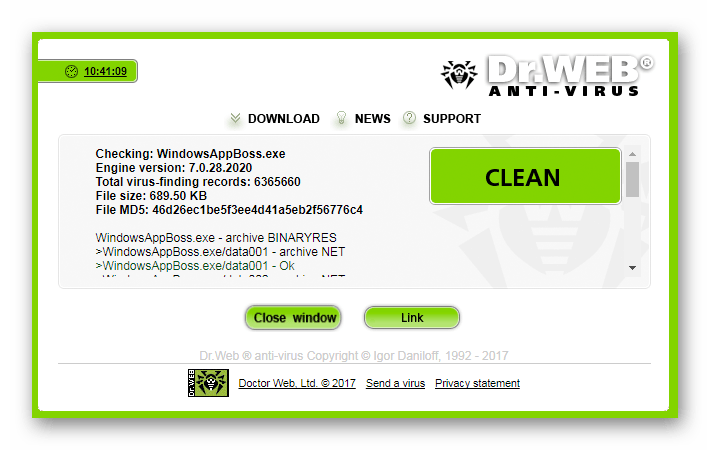
Если вами используется видеокарта NVIDIA или Intel, рассматриваемый процесс наверняка является вирусом. В таком случае лучшим вариантом будет использование антивирусной программы и проверка ПК на предмет заражения.
Подробнее:
Проверка компьютера на вирусы без антивируса
Онлайн-проверка компьютера на наличие вирусов
Желательно также выполнить очистку системы от мусора с помощью программы CCleaner. В особенности это важно по отношению к записям в реестре.
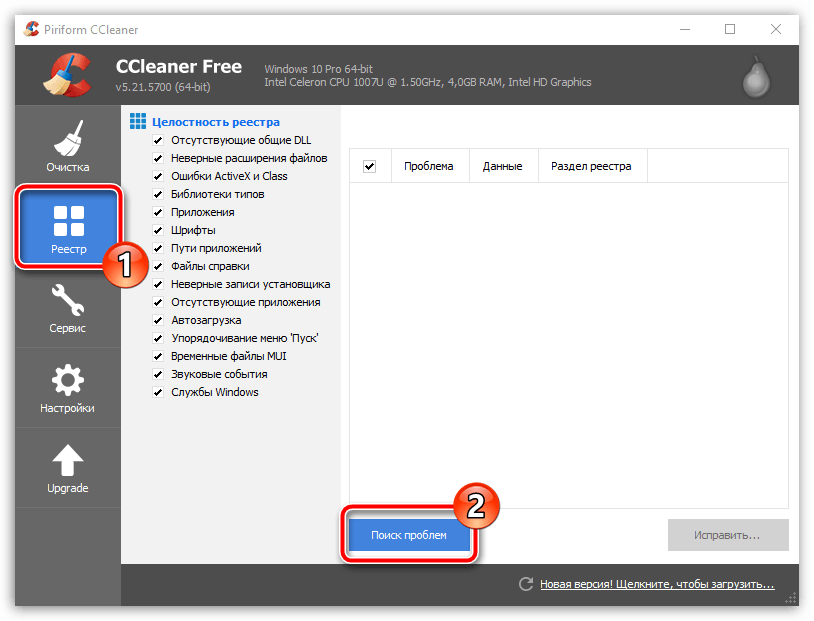
Подробнее: Очистка системы от мусора с помощью CCleaner
Заключение
Процесс atieclxx.exe, как и соответствующая ему служба, полностью безопасны и в большинстве случаев можно обойтись их отключением через «Диспетчер задач».
Наша группа в TelegramПолезные советы и помощь
Atieclxx.exe is one of those legitimate Windows processes that are often mistaken as a virus or malware. However, it is possible for a virus or malware to disguise itself as atieclxx.exe to infect your computer.
Some Windows users who experienced lags when streaming videos or playing games have reported seeing the atieclxx.exe process in the Task Manager but couldn’t get rid of it.
Before you try to delete atieclxx.exe, it is important to understand first what this process is, what it does, how to determine if it’s a virus or not, and how to deal with a computer infected with atieclxx.exe.
What Is Atieclxx.exe?
Atieclxx.exe is a genuine file component of AMD External Events by Advanced Micro Devices (AMD). ATI was bought by AMD in 2006, hence their products often support each other.
Atieclxx.exe is an executable file needed to run the ATI External Event Utility Client Module, a tool that handles the ATI Hotkey feature. Atieclxx.exe is used by one or more processes, but it is not an essential Windows system file. It is also known to take up resources, so you might notice your computer becoming sluggish whenever the process is running.
Even though atieclxx.exe is a Microsoft-signed file, it is not a Windows system file and it is not visible. It is usually located in the C:\Windows\System32 or C:\Program Files folder. It has an overall security rating of 17 percent, so it is not much of a threat.
Is Atieclxx.exe a Virus or Not?
To determine whether Atieclxx.exe is a virus or not, you must first determine if you’re using any ATI hardware such as graphics card or motherboard. If you are, then it is definitely part of the hardware driver. Uninstalling atieclxx.exe will affect the performance of your ATI hardware or will cause it not to work at all.
But if you have no ATI hardware on your computer and you notice an atieclxx.exe process running, then your device might have an atieclxx.exe infection.
You should also take note of the location of the atieclxx.exe file. If it is within the two folders mentioned above, then it’s a legitimate file. But if it is found in some other subfolders, it’s probably malicious and you need to get rid of it.
How to Fix an Atieclxx.exe Infection
Dealing with Atieclxx.exe depends on what type of process it is. If it is a legitimate Windows process but you want to stop it anyway because it’s causing problems for your computer, just disable AMD External Events Utility to get rid of it.
To do this:
- Click Start and type in services.msc in the search box.
- Click on Service Manager in the search results.
- In Service Manager, find AMD External Events Utility, right-click on it, and choose Properties.
- Click Stop to terminate the process, then choose Disabled under the Startup Type. This will prevent the process from launching during startup.
- Click Apply, then OK.
- Reboot your computer and check via Task Manager whether atieclxx.exe is still running.
If you still see atieclxx.exe even after you’ve restarted, it is highly possible that it is a virus. Here are some ways to completely get rid of atieclxx.exe infection on your computer:
Method 1: Run a Virus Scan.
The first step in getting rid of an atieclxx.exe infection is scanning your computer using your antivirus software. If your antivirus program was not able to detect the virus, try another one until you find one that works. Delete the virus completely from your system, along with all the files that were infected.
Method 2: Clean Up Your Computer.
To make sure that all the infected files have been completely deleted, clean up your device with an app such as Outbyte PC Repair. This tool deletes all junk files on your computer, including the files in the Recycle Bin, temporary and corrupted files, and other trash you might not even be aware of.
Method 3: Run System File Checker.
Some viruses such as atieclxx.exe disguise themselves as Windows system files and damage your system. The System File Checker or SFC tool scans your Windows system for corrupted files and attempts to restore them.
To run the SFC utility, follow the steps below:
- Press the Windows + Q keys together.
- Type in cmd to search for Command Prompt.
- Press Ctrl + Shift + Enter to run Command Prompt as an administrator.
- Type in sfc /scannow, then hit Enter.
- Wait for the process to complete.
Method 4: Check Your Startup Programs.
Some programs and services, such as atieclxx.exe, are designed to launch at startup. If you notice that Windows takes a long time to load, check what programs and services load at startup and disable some of them.
To run msconfig, follow the instructions below:
- Press Windows + Q.
- Type in cmd in the search box to search for Command Prompt.
- Press Ctrl + Shift + Enter to run Command Prompt as an administrator.
- Type in msconfig and press Enter.
- Choose which services and programs you don’t need at startup and disable them.
However, be careful when disabling services at startup because some of them are crucial for Windows to run efficiently.
Method 5: Run the DISM Tool.
Windows 8 and Windows 10/11 systems are equipped with a built-in tool designed to repair Windows components, called the Deployment Image Servicing and Management or DISM utility. This will save you from installing third-party repair tools or even reinstalling Windows just to repair Windows files that have been damaged by viruses such as atieclxx.exe.
Follow the steps below to use the DISM tool:
- Press the Windows key + Q.
- Enter cmd in the search box to look for Command Prompt.
- Hit Ctrl + Shift + Enter to run the app as an administrator.
- Type in the following command: DISM.exe /Online /Cleanup-image /Restorehealth.
- Press Enter and wait for the process to finish.
Summary
The crucial part of dealing with atieclxx.exe is figuring out whether it is a legitimate Windows file or a virus. A lot of viruses imitate genuine Windows system files to infiltrate your computer, so you need to be able to differentiate between the two. Once you know what type of process it is, you can use the appropriate methods listed above to get rid of it.
Give us some love and rate our post!
Многие пользователи с видеокартами от AMD натыкаются на своих ПК на процесс atieclxx.exe. Знайте, что этот исполнительный файл является частью программного обеспечения AMD — переживать на его счет определенно не стоит!
atieclxx exe — часть подпрограммы AMD ATI External Events Client Module, которая отвечает за вывод уведомлений о конфигурации видеоадаптера и недостатке видеопамяти. Проще говоря, довольно полезная штуковина. atieclxx автоматически устанавливается вместе с драйвером для видеокарты AMD. Кроме того, этот файл довольно часто получает для себя обновления и не занимает много места на компьютере — от 470 КБ до 1 МБ. Располагается он в C:\Windows\System32.
Могу ли я отключить atieclxx exe?
Обычно, atieclxx exe потребляет минимальное количество системных ресурсов и не представляет каких бы то ни было проблем для пользователя. Тем не менее если вы все-таки хотите отключить этот процесс, то вам нужно сделать следующее:
- нажмите Win+R;
- пропишите services.msc и нажмите Enter;
- найдите в списке службу «AMD External Events Utility» и дважды кликните на нее ЛКМ;
- выставьте в типе запуска значение «Отключена» и нажмите кнопку «Остановить»;
- перезагрузите компьютер.
atieclxx exe теперь отключена на вашем компьютере. Знайте, что после отключения этой службы вы можете потерять доступ к некоторому функционалу программного обеспечение AMD. Включить обратно atieclxx можно в свойствах службы.
What is Atieclxx.exe?
Atieclxx.exe is a process associated with the ATI External Events Client Module, which is a component of AMD Catalyst Control Center software. This process is responsible for handling communication between the AMD Catalyst Control Center and graphics hardware on a Windows system.
The Atieclxx.exe process runs in the background on a Windows system and is required for several functions, including monitoring graphics card performance and handling hotkey events.
If you use an AMD graphics card and associated Catalyst Control Center software on a Windows computer, the Atieclxx.exe process is an essential component of the software. However, if you do not use AMD graphics hardware or software, the process may not be necessary and can be disabled to free up system resources.
It is worth noting that some malware programs may use a similar file name to Atieclxx.exe to disguise themselves as legitimate software. Therefore, it is important to ensure that the file is located in the correct AMD Catalyst Control Center folder and is not flagged as malicious by an antivirus program before allowing it to run on your system.
Is Atieclxx.exe malware?
No, Atieclxx.exe is not malware. Atieclxx.exe is a legitimate file, however, it can be targeted by malware that attempts to disguise itself as a legitimate file.
Should you be uncertain as to whether Atieclxx.exe is malicious or a false positive detection, you can submit the affected file to VirusTotal to be scanned with multiple antivirus engines.
If you suspect that Atieclxx.exe is infected with malware, you can follow the below free malware removal guide to clean up your device.
Remove malware from your Windows device
The below malware removal instructions are for Windows users, however, we also have an Android Guide and a Mac Guide which should help clean up your device.
This malware removal guide may appear overwhelming due to the number of steps and numerous programs that are being used. We have only written it this way to provide clear, detailed, and easy-to-understand instructions that anyone can use to remove malware for free.
Please perform all the steps in the correct order. If you have any questions or doubts at any point, stop and ask for our assistance.
To remove the Atieclxx.exe Trojan and other malware from your computer, follow these steps:
- STEP 1: Uninstall malicious programs from Windows
- STEP 2: Reset browsers back to default settings
- STEP 3: Use Rkill to terminate suspicious programs
- STEP 4: Use Malwarebytes to remove for Trojans and Unwanted Programs
- STEP 5: Use HitmanPro to remove Rootkits and other Malware
- STEP 6: Use AdwCleaner to remove Malicious Browser Policies and Adware
- STEP 7: Perform a final check with ESET Online Scanner
STEP 1: Uninstall malicious programs from Windows
In this first step, we will manually check if any unknown or malicious programs are installed on the computer. Sometimes adware and browser hijackers can have a usable Uninstall entry that can be used to remove them.
Windows 11Windows 10Windows 8Windows 7
-
Press the Windows key + I on your keyboard to open the Settings app.
First, open Windows Settings by pressing Windows+I on your keyboard. You can also right-click your Start button and select “Settings” from the list.

-
In the Settings app, click on “Apps” and then “Apps & features”.
When Settings opens, click “Apps” in the sidebar, then select “Apps & Features”.

-
Find the malicious program in the list of installed apps and uninstall it.
In Apps & Features settings, scroll down to the app list and search for unknown or suspicious programs. To make things easier, you can sort all installed programs by their installation date. To do this, click “Sort by” and select “Install date”.
Look out for any suspicious program that could be behind all the drama – anything you don’t remember downloading or that doesn’t sound like a genuine program. When you find a malicious program, click the three dots button beside it and select “Uninstall” in the menu that appears.
If you have checked your computer for malicious programs and did not find any, you can proceed with the next step in this guide.
-
Follow the prompts to uninstall the program.
In the next message box, confirm the uninstall process by clicking on Uninstall, then follow the prompts to uninstall the malicious program.
Make sure to read all of the prompts carefully, because some malicious programs try to sneak things in hoping that you won’t read them closely.


-
Press the Windows key + I on your keyboard to open the Settings app.
Press the Windows key + I on your keyboard to open the Settings app. You can also ope the Settings app by clicking the Start button on the taskbar, then select “Settings” (gear icon).

-
In the Settings app, click on “Apps”.
When the “Windows Settings” window opens, click on “Apps“. By default, it should open “Apps and Features” but if it doesn’t, select it from the list on the left.

-
Find the malicious program in the list of installed apps and uninstall it.
In Apps & Features settings, scroll down to the app list and search for unknown or suspicious programs. To make things easier, you can sort all installed programs by their installation date. To do this, click “Sort by” and select “Install date”.
Look out for any suspicious program that could be behind all the drama – anything you don’t remember downloading or that doesn’t sound like a genuine program. When you find a malicious program, click on it and select “Uninstall” in the menu that appears.
If you have checked your computer for malicious programs and did not find any, you can proceed with the next step in this guide.
-
Follow the prompts to uninstall the program.
In the next message box, confirm the uninstall process by clicking on Uninstall, then follow the prompts to uninstall the malicious program.
Make sure to read all of the prompts carefully, because some malicious programs try to sneak things in hoping that you won’t read closely.


-
Go to “Program and Features”.
Right-click on the Start button in the taskbar, then select “Programs and Features”. This will take you directly to your list of installed programs.

-
Search for malicious program and uninstall it.
The “Programs and Features” screen will be displayed with a list of all the programs installed on your computer. Scroll through the list until you find any unknown or suspicious program, then click to highlight it, then click the “Uninstall” button.
Look out for any suspicious program that could be behind all the drama – anything you don’t remember downloading or that doesn’t sound like a genuine program.
If you have checked your computer for malicious programs and did not find any, you can proceed with the next step in this guide.

-
Follow the on-screen prompts to uninstall malicious program.
In the next message box, confirm the uninstall process by clicking on Yes, then follow the prompts to uninstall malicious program. Make sure to read all of the prompts carefully, because some malicious programs try to sneak things in hoping that you won’t read closely.


-
Open the “Control Panel”.
Click on the “Start” button, then click on “Control Panel“.
-
Click on “Uninstall a Program”.
When the “Control Panel” appears, click on “Uninstall a Program” from the Programs category.

-
Search for malicious programs and uninstall them.
The “Programs and Features” screen will be displayed with a list of all the programs installed on your computer. Scroll through the list until you find any suspicious or unknown program, then click to highlight it, then click the “Uninstall” button.
Look out for any suspicious program that could be behind all the drama – anything you don’t remember downloading or that doesn’t sound like a genuine program.If you have checked your computer for malicious programs and did not find any, you can proceed with the next step in this guide.

-
Follow the on-screen prompts to uninstall malicious program.
In the next message box, confirm the uninstall process by clicking on Yes, then follow the prompts to uninstall malicious program. Make sure to read all of the prompts carefully, because some malicious programs try to sneak things in hoping that you won’t read closely.


If you are experiencing difficulty while attempting to uninstall a program, you can use Revo Uninstaller to completely remove the unwanted program from your computer.
Now that the malicious programs have been removed from your computer, we can proceed with the next step in this guide.
STEP 2: Reset browsers back to default settings
In this step, we will remove spam notifications, malicious extensions, and change to default any settings that might have been changed by malware.
Please note that this method will remove all extensions, toolbars, and other customizations but will leave your bookmarks and favorites intact. For each browser that you have installed on your computer, please click on the browsers tab below and follow the displayed steps to reset that browser.
ChromeFirefoxMicrosoft EdgeInternet Explorer
Reset Chrome for Windows to default settings
We will now reset your Chrome browser settings to their original defaults. This will reset your startup page, new tab page, search engine, and pinned tabs. It will also disable all extensions and clear temporary data like cookies. Your favorites, history, and saved passwords will not be cleared.
-
Click the three dots in the top-right corner and then click on “Settings”.
Open Chrome and click on the menu button (represented by three vertical dots) in the top right corner of the window. In the dropdown menu that opens, click “Settings“.

-
Click “Advanced”.
Chrome’s “Settings” should now be displayed in a new tab or window, depending on your configuration. In the left sidebar, click on the “Advanced” link.

-
Click “Reset and clean up”.
In the left sidebar, under the “Advanced” section, click on “Reset and clean up“.

-
Click “Reset settings to their original defaults”.
In the main window, the “Reset and clean up” section is visible, as shown in the screenshot below. Click on “Reset settings to their original defaults“.
-
Click “Reset settings”.
A confirmation dialog will now be displayed, detailing the components that will be restored to their default state should you continue with the reset process. To complete the restoration process, click on the “Reset settings” button.

-
(Optional) Reset Chrome Data Sync.
In case a malicious extension reinstalls itself even after performing a browser reset, you have an additional option to reset the data sync for your browser. To do this, navigate to chrome.google.com/sync and click on the Clear Data button.


Reset Firefox for Windows to default settings
We will now reset your Firefox browser settings to their default. The reset feature fixes many issues by restoring Firefox to its factory default state while saving your essential information like bookmarks, passwords, web form auto-fill information, browsing history, and open tabs.
-
Click the three horizontal lines in the top-right corner and then click on “Help”.
Click on Firefox’s main menu button, represented by three horizontal lines. When the drop-down menu appears, select the option labeled “Help“.

-
Click “More troubleshooting information”.
From the Help menu, click on “More troubleshooting information“.

-
Click on “Refresh Firefox”
When the “Troubleshooting Information” page opens, click on the “Refresh Firefox” button.

-
Confirm that you want to reset your browser settings.
To finish the reset process, click on the “Refresh Firefox” button in the new confirmation window that opens.
-
Click “Finish”.
Firefox will now close itself and will revert to its default settings. When it’s done, a window will list the information that was imported. Click on “Finish“.
Your old Firefox profile will be placed on your desktop in a folder named “Old Firefox Data“. If the reset didn’t fix your problem you can restore some of the information not saved by copying files to the new profile that was created. If you don’t need this folder any longer, you should delete it as it contains sensitive information.


Reset Microsoft Edge to default settings
We will now reset your Microsoft Edge browser settings to their default. This will reset your startup page, new tab page, search engine, and pinned tabs. It will also disable all extensions and clear temporary data like cookies. Your favorites, history, and saved passwords will not be cleared.
-
Click the three dots in the top-right corner and then click on “Settings”.
In the top right corner, click on Microsoft Edge’s main menu button, represented by three horizontal dots. When the drop-down menu appears, click on “Settings“.

-
Click on “Reset Settings”.
On the left side of the window, click on “Reset Settings“.
-
Click on “Restore settings to their default values”.
In the main window, click on “Restore settings to their default values“.

-
Click “Reset”.
A confirmation dialog should now be displayed, detailing the components that will be restored to their default state should you continue with the reset process. To complete the restoration process, click on the “Reset” button.
Microsoft Edge will now erase all your personal data, browsing history, and disable all installed extensions. Your bookmarks, though, will remain intact and still be accessible.


Reset Internet Explorer to default settings
We will now reset your Internet Explorer browser settings to their default. You can reset Internet Explorer settings to return them to the state they were in when Internet Explorer was first installed on your computer.
-
Go to “Internet Options”.
Open Internet Explorer, click on the gear icon in the upper-right part of your browser, then select “Internet Options“.
-
Select the “Advanced” tab, then click “Reset”
In the “Internet Options” dialog box, select the “Advanced” tab, then click on the “Reset” button.
-
Click on “Reset”.
In the “Reset Internet Explorer settings” section, select the “Delete personal settings” checkbox, then click on the “Reset” button.
-
Click on “Close”.
When Internet Explorer has completed its task, click on the “Close” button in the confirmation dialogue box.
Close your browser and then you can open Internet Explorer again.
STEP 3: Use Rkill to terminate suspicious programs.
In this thrid step, we will download and run Rkill to terminate suspicious programs that may be running on your computer.
RKill is a program that was developed at BleepingComputer.com that attempts to terminate known malware processes so that your normal security software can then run and clean your computer of infections. When RKill runs it will kill malware processes and then removes incorrect executable associations and fixes policies that stop us from using certain tools.
-
Download Rkill.
You can download RKill to your computer from the below link. When at the download page, click on the Download Now button labeled iExplore.exe. We are downloading a renamed version of Rkill (iExplore.exe) because some malware will not allow processes to run unless they have a certain filename.
-
Run RKill.
After downloading, double-click the iExplore.exe icon to kill malicious processes. In most cases, downloaded files are saved to the Downloads folder.
The program may take some time to search for and end various malware programs.
When it is finished, the black window will close automatically and a log file will open. Do not restart your computer. Proceed to the next step in this guide.

STEP 4: Use Malwarebytes to remove for Trojans and Unwanted Programs
In this next step, we will we will install Malwarebytes to scan and remove any infections, adware, or potentially unwanted programs that may be present on your computer.
Malwarebytes stands out as one of the leading and widely-used anti-malware solutions for Windows, and for good reason. It effectively eradicates various types of malware that other programs often overlook, all at no cost to you. When it comes to disinfecting an infected device, Malwarebytes has consistently been a free and indispensable tool in the battle against malware. We highly recommend it for maintaining a clean and secure system.
-
Download Malwarebytes for Windows
You can download Malwarebytes by clicking the link below.
-
Install Malwarebytes
After the download is complete, locate the MBSetup file, typically found in your Downloads folder. Double-click on the MBSetup file to begin the installation of Malwarebytes on your computer. If a User Account Control pop-up appears, click “Yes” to continue the Malwarebytes installation.

-
Follow the On-Screen Prompts to Install Malwarebytes
When the Malwarebytes installation begins, the setup wizard will guide you through the process.
-
You’ll first be prompted to choose the type of computer you’re installing the program on—select either “Personal Computer” or “Work Computer” as appropriate, then click on Next.

-
Malwarebytes will now begin the installation process on your device.

-
When the Malwarebytes installation is complete, the program will automatically open to the “Welcome to Malwarebytes” screen.

-
On the final screen, simply click on the Open Malwarebytes option to start the program.

-
-
Enable “Rootkit scanning”.
Malwarebytes Anti-Malware will now start, and you will see the main screen as shown below. To maximize Malwarebytes’ ability to detect malware and unwanted programs, we need to enable rootkit scanning. Click on the “Settings” gear icon located on the left of the screen to access the general settings section.

In the settings menu, enable the “Scan for rootkits” option by clicking the toggle switch until it turns blue.

Now that you have enabled rootkit scanning, click on the “Dashboard” button in the left pane to get back to the main screen.
-
Perform a Scan with Malwarebytes.
To start a scan, click the Scan button. Malwarebytes will automatically update its antivirus database and begin scanning your computer for malicious programs.

-
Wait for the Malwarebytes scan to complete.
Malwarebytes will now scan your computer for browser hijackers and other malicious programs. This process can take a few minutes, so we suggest you do something else and periodically check the status of the scan to see when it is finished.
-
Quarantine detected malware
Once the Malwarebytes scan is complete, it will display a list of detected malware, adware, and potentially unwanted programs. To effectively remove these threats, click the “Quarantine” button.

Malwarebytes will now delete all of the files and registry keys and add them to the program’s quarantine.
-
Restart your computer.
When removing files, Malwarebytes may require a reboot to fully eliminate some threats. If you see a message indicating that a reboot is needed, please allow it. Once your computer has restarted and you are logged back in, you can continue with the remaining steps.


STEP 5: Use HitmanPro to remove Rootkits and other Malware
In this fifth step, while the computer is in normal back, we will download and run a scan with HitmanPro to remove Trojans, rootkits, and other malicious programs.
HitmanPro is a second-opinion scanner that takes a unique cloud-based approach to malware scanning. HitmanPro scans the behavior of active files and also files in locations where malware normally resides for suspicious activity. If it finds a suspicious file that’s not already known, HitmanPro sends it to its clouds to be scanned by two of the best antivirus engines today, which are Bitdefender and Kaspersky.
Although HitmanPro is shareware and costs $24.95 for 1 year on 1 PC, there is no limit on scanning. The limitation only kicks in when there is a need to remove or quarantine detected malware by HitmanPro on your system and by then, you can activate the one-time 30-days trial to enable the cleanup.
-
Download HitmanPro.
You can download HitmanPro by clicking the link below.
HITMANPRO DOWNLOAD LINK
(The above link will open a new web page from where you can download HitmanPro) -
Install HitmanPro.
When HitmanPro has finished downloading, double-click on “hitmanpro.exe” (for 32-bit versions of Windows) or “hitmanpro_x64.exe” (for 64-bit versions of Windows) to install this program on your computer. In most cases, downloaded files are saved to the Downloads folder.

You may be presented with a User Account Control pop-up asking if you want to allow HitmanPro to make changes to your device. If this happens, you should click “Yes” to continue with the installation.

-
Follow the on-screen prompts.
When HitmanPro starts you will be presented with the start screen as shown below. Click on the “Next” button to perform a system scan.


-
Wait for the HitmanPro scan to complete.
HitmanPro will now begin to scan your computer for malicious programs.
-
Click on “Next”.
When HitmanPro has finished the scan, it will display a list of all the malware that it has found. Click on the “Next” button to have HitmanPro remove the detected items.

-
Click on “Activate free license”.
HitmanPro may now require to activate the free 30-days trial to remove the malicious files. To do this, click on the “Activate free license” button to begin the free 30 days trial and remove all the malicious files from your computer.

When the malware removal process is complete, it will display a screen that shows the status of the various programs that were removed. At this screen, you should click on the Next button and then if prompted you should click on the Reboot button. If HitmanPro does not prompt you to reboot, please just click on the Close button.


STEP 6: Use AdwCleaner to remove Malicious Browser Policies and Adware
In this next step, we will use AdwCleaner to remove malicious browser policies and unwanted browser extensions from your computer.
AdwCleaner is a free popular on-demand scanner that can detect and remove malware that even the most well-known anti-virus and anti-malware applications fail to find. This on-demand scanner includes a lot of tools that can be used to fix the side effects of adware. browser hijackers and other malware.
-
Download AdwCleaner.
You can download AdwCleaner by clicking the link below.
-
Double-click on the setup file.
Double-click on the file named “adwcleaner_x.x.x.exe” to start AdwCleaner. In most cases, downloaded files are saved to the Downloads folder.

AdwCleaner program will now open and you will be presented with the program’s license agreement. After you read it, click on the I agree button if you wish to continue. If Windows prompts you as to whether or not you wish to run AdwCleaner, please allow it to run.

-
Enable “Reset Chrome policies” to remove malicious browser policies.
When AdwCleaner starts, on the left side of the window, click on “Settings” and then enable “Reset Chrome policies“.

-
Click on the “Scan” button.
On the left side of the AdwCleaner window, click on “Dashboard” and then click “Scan” to perform a computer scan.

-
Wait for the AdwCleaner scan to finish.
AdwCleaner will now scan your computer for malware. This process can take a few minutes.
-
Click on “Quarantine” to remove malware.
When the AdwCleaner scan is completed it will display all of the items it has found. Click on the “Quarantine” button to remove the malicious programs from your computer.

-
Click on “Continue” to remove the malicious programs.
AdwCleaner will now prompt you to save any open files or data as the program will need to close any open programs before it starts to clean. Click on the “Continue” button to finish the removal process.

AdwCleaner will now delete all detected malware from your computer. When the malware removal process is complete, you may be asked to restart your computer.


STEP 7: Perform a final check with ESET Online Scanner
This final step involves installing and running a scan with ESET Online Scanner to check for any additional malicious programs that may be installed on the computer..
ESET Online Scanner is a free second-opinion scanner, designed to rescue your computer from malware (viruses, trojans, rootkits, etc.) that have infected your computer despite all the security measures you have taken (such as anti-virus software, firewalls, etc.).
-
Download ESET Online Scanner.
You can download ESET Online Scanner by clicking the link below.
-
Double-click on esetonlinescanner.exe to run the installer.
When ESET Online Scanner has finished downloading, double-click on “esetonlinescanner.exe” to install it program on your computer. In most cases, downloaded files are saved to the Downloads folder.

-
Install ESET Online Scanner.
When ESET Online Scanner starts you will be presented with the start screen as shown below. Select your desired language from the drop-down menu and click Get started.

In the Terms of use screen, click Accept.
Select your preference for the Customer Experience Improvement Program and the Detection feedback system and click Continue.
-
Start a Full Scan with ESET Online Scanner
Click on Full Scan to perform an in-depth inspection of the entire computer.
Select Enable for Detection of Potentially Unwanted Applications, then click Start scan.
-
Wait for the ESET Online Scanner scan to finish.
ESET Online Scanner will now begin to scan your computer for malware. This process can take quite a while, so we suggest you do something else and periodically check on the status of the scan to see when it is finished.
-
ESET Online Scanner will automatically remove the malicious files.
At the end of the scan, the Found and resolved detections screen will be displayed. You can click View detailed results to view specific information. Detected threats are automatically cleaned and quarantined.


Your computer should now be free of the Atieclxx.exe Trojan and other malware.
If your current antivirus allowed this malicious program on your computer, you may want to consider purchasing Malwarebytes Premium to protect against these types of threats in the future.
If you are still having problems with your computer after completing these instructions, then please follow one of the steps:
- Run a computer scan with ESET Online Scanner
- Ask for help in our Windows Malware Removal Help & Support forum.
Here are 10 basic security tips to help you avoid malware and protect your device:
To avoid potential dangers on the internet, it’s important to follow these 10 basic safety rules. By doing so, you can protect yourself from many of the unpleasant surprises that can arise when using the web.
-
Что такое atieclxx.exe?
-
Как отключить службу?
-
Как удалить вирус, скрывающийся под файлом драйвера?
Всем доброго времени суток. В последнее время пользователи чаще спрашивают у поисковиков о неизвестных процессах, которые нагружают систему и делают работу за компьютером невыносимой. Сегодня мы рассмотрим службу, которая отвечает за работоспособность видеокарт от AMD. Итак, что за процесс atieclxx.exe и как его остановить?
Atieclxx.exe – это исполняющий файл подпрограммы AMD External Events Client Module, входящей в состав пакета драйверов для видеокарт компании AMD. Именно он «руководит» всеми уведомлениями, связанными с конфигурацией видеоустройства и дефицитом видеопамяти (VRAM).
Если вы счастливый обладатель компьютера со встроенной видеокартой ATI Radeon, паниковать не стоит: файл atieclxx.exe имеет рейтинг надежности 81%, что является довольно высоким показателем. Т.е. вероятность того, что в системе засел вредоносный софт составляет 19%. Это тоже весомая цифра, поэтому если после отключения службы процесс не исчезнет, нужно бежать за помощью к антивирусным утилитам.
Другое дело, если у вас видеокарта от Nvidia – никакие службы отключать не нужно, сразу переходите к пункту с удалением вируса.
Как отключить службу?
Для этого выполните следующие пункты:
- Откройте «Панель управления» – «Администрирование» – «Службы».
- В списке доступных служб найдите AMD External Events Client Module или что-то относящееся к фирме AMD.
- С помощью ПКМ перейдите в «Свойства» и отключите службу.

Теперь нужно изъять все компоненты, связанные с видеодрайвером, из автозапуска.
Для этого:
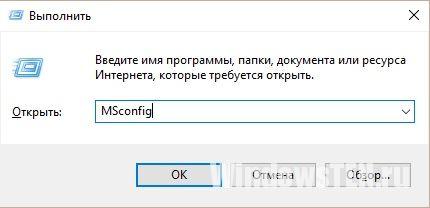
- Вызовите окно «Открыть» путем нажатия клавиш Win+R.
- Наберите
msconfigи нажмите «OK».
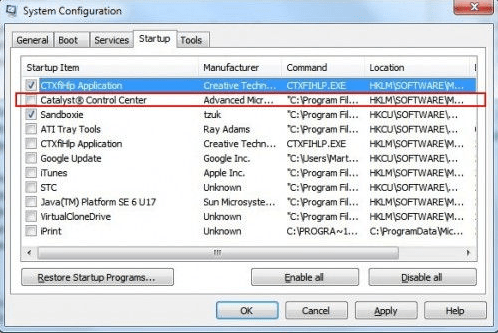
- В появившемся окне перейдите во вкладку «Автозагрузка» и снимите галочки со всех пунктов, напоминающих AMD-приложения (в Windows 10 данная вкладка находится в «Диспетчере задач»).

- Перезагрузите компьютер.
Если все прошло гладко, назойливый процесс больше не побеспокоит вас. Но в случае повторного запуска стоит говорить о наличии на компьютере вредоносного ПО.
Как удалить вирус, скрывающийся под файлом драйвера?
Данный пункт актуален для собственников видеокарт от Nvidia и людей, которым отключение службы не помогло.
Итак, для борьбы с вирусом нужно:
- Очистить содержимое из папки Temp по пути C:\Users\<ИмяПользователя>\AppData\Local\Temp.
- Удалить недавно установленные приложения.
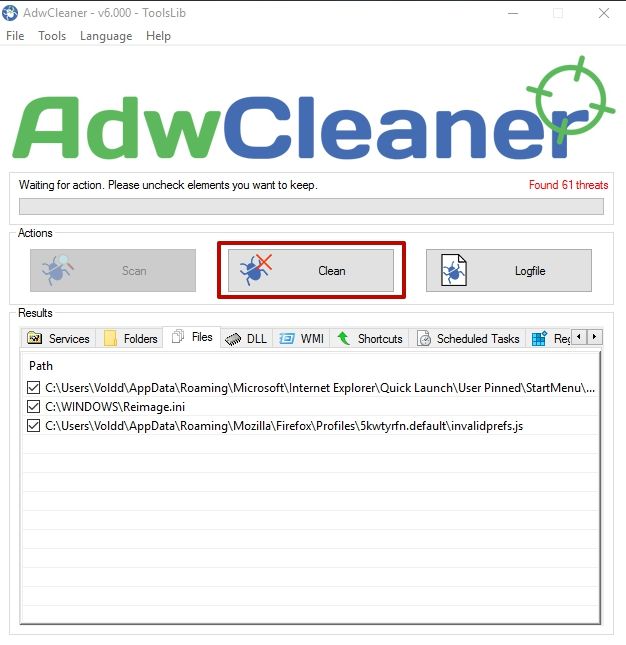
- Установить AdwCleaner и CCleaner.
- Запустить AdwCleaner. Нажать «Сканировать», дождаться окончания операции, после чего кликнуть «Очистка».

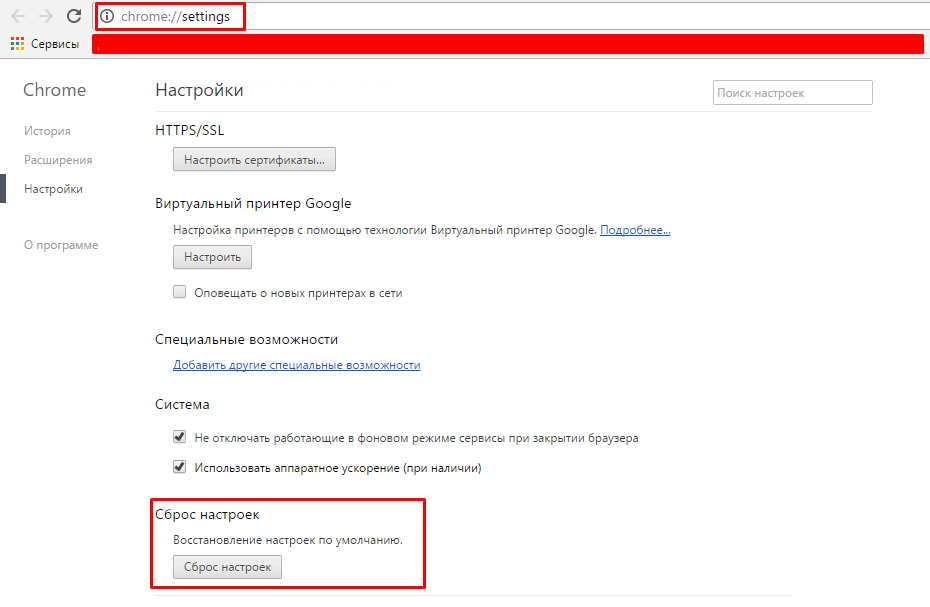
- Сбросить настройки в браузерах.

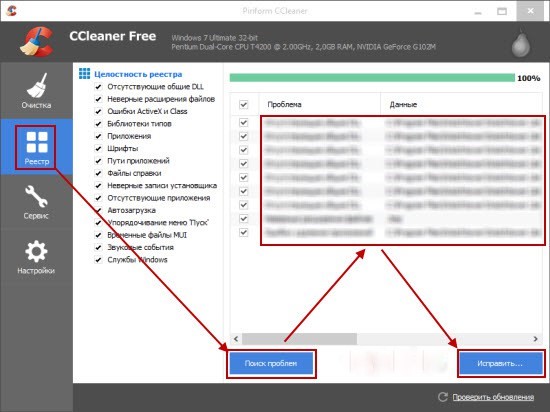
- Очистить неактуальные записи в реестре с помощью CCleaner.

- Перезагрузить компьютер.
Данных действий должно хватить для эффективного излечения системы. Но если ничего не помогло – устанавливайте Dr.Web CureIt! и проведите полное сканирование жесткого диска, используя подсказки приложения. Теперь вы знаете, что за процесс atieclxx.exe и как его удалить.