
You are here: Home / How To / [FIXED] Atibtmon.exe Runtime Error in Windows 10, 8, 7
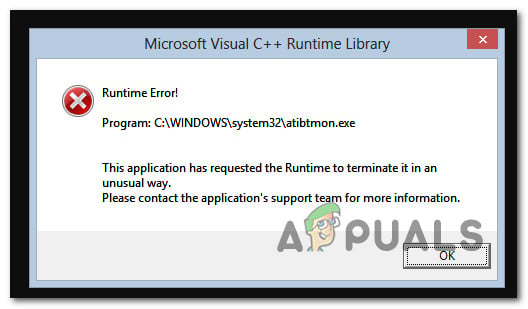
If during your PC startup/Shutdown, application startup or while using a particular function, an error pops on your screen saying “Runtime Error. The application has requested the Runtime to terminate in an unusual way. Please contact the application support team.”, then you are lucky to find this page which will guide you through all the potential solutions to this problem known as atibtmon.exe runtime error.

What is atibtmon.exe file?
ATIBtMon stands for Array Technologies Inc. Brightness Monitor. The original atibtmon.exe file is a software element of ATI Brightness Monitor by AMD. It is an executable file which encompasses a step by step instruction that a computer apprehends to carry out a particular function(s).
When atibtmon.exe is opened the PC automatically executes these instructions drafted by AMD to run ATI Brightness Monitor. This program is nothing but let the users adjust the brightness of the display.
Exe files are one of the most unique and useful files found in the PC directories. These files are targeted by viruses and malware in order to disguise in form of Exe files in order to corrupt the system using these executable files.
These Viruses thus tends to corrupt, infect or replace these files which consequently causes atibtmon.exe runtime error on Windows 10 to take place.
Causes of Atibtmon.exe runtime Error
Briefly described above, this problem generally takes place due to corrupt, infected and misplaced files. But talking more specifically:
- Corrupt Windows registry files of ATI brightness monitor
- Virus or malware corruption of atibtmon.exe
- atibtmon.exe deleted mistakenly
- Incomplete installation of ATI brightness monitor
- Conflicting programs affecting atibtmon.exe
4 Ways to fix atibtmon.exe runtime error
The above causes have corresponding troubleshooting fixes. Thus, these tips will ensure that you never get this error message again.
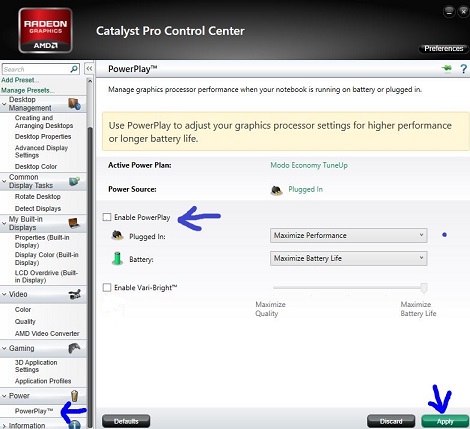
Fix 1: Disable Powerplay in Catalyst Control Center
Similar to the above fix, try disabling Powerplay in Catalyst Control Centre. Since this feature interferes with the power settings of your PC, therefore causes the error. To switch off the Powerplay option:
- Click on Windows icon and search for Catalyst Control Center and open it.
- Navigate to Power > PowerPlay.
- Uncheck Enable Powerplay.
- Tap Apply to save changes.

Furthermore, you might need to change you Power plan settings so that the change can take effect. Therefore to fix power plan settings follow these simple steps:
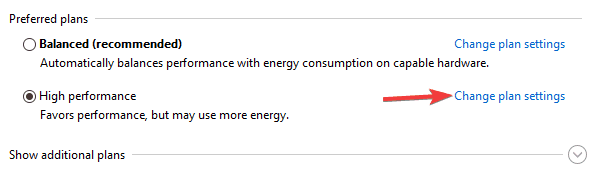
- First of all, Right-click the Battery icon in the bottom right of Windows taskbar and select Power Options.
- Choose a Power setting, and click on Change Plan Settings.

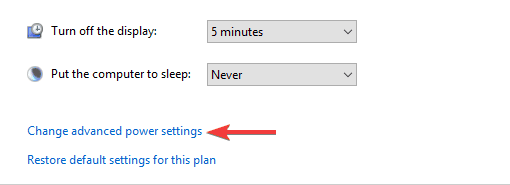
- Now click on Change Advanced Power Settings.

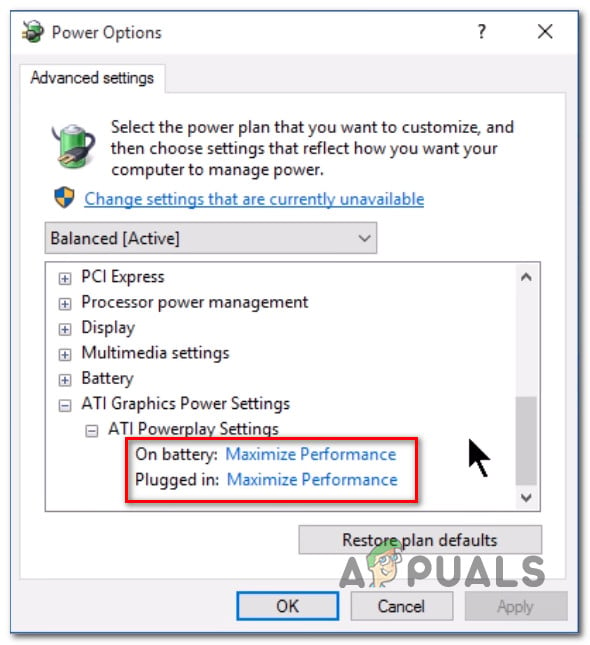
- Find the ATI Graphics Power Settings on the list and expand it.
- Consequently, for both the ATI Powerplay Settings, set them to Maximum Performance and save changes.
After disabling this feature, check if the problem still exists.
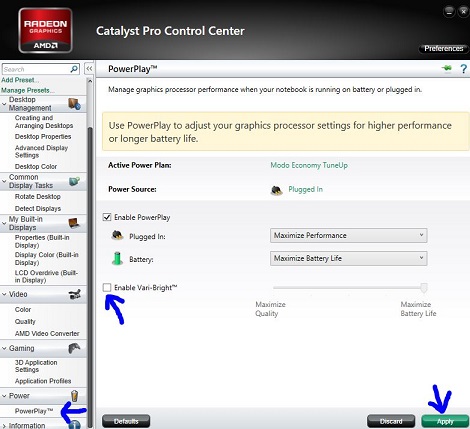
Fix 2: Turn off Vari-Bright in Catalyst Control Center
Many users repeatedly reported, disabling Vari-Bright option form Catalyst Control Centre fixed the error. In order to fix this issue, you need to do the following:
- Same as Step 1, Fix 1
- Same as Step 2, Fix 1
- Uncheck the Enable Vari-Bright.
- Same as Step 4, Fix 1
This will resolve your issue in no time.
NOTE: If Catalyst Control Centre is not there in your system, we strongly recommend you to install it before trying the next steps.
Fix 3: Repair registry files of ATI Brightness Monitor Display
Windows registry files are important for the proper functioning of the programs. Any alteration in the registration files might cause errors to pop up on your display. These alterations like files moved/deleted, corrupt/infected files, the invalidity of EXE files, etc. When windows try to look for these EXE files for an execution and find that the file or location is invalid, it throws an atibtmon.exe runtime error.
Thus, editing the registry files might fix this issue. But manually altering the files within the registry folder is a bit risky. Therefore, if you are not a PC professional you can use registry cleaners and try one of them by clicking here.
Fix 4: Check for Viruses and Malware
One of the major reason for this atibtmon.exe error is corrupt files related to atibtmon.exe. When these EXE files are attacked by viruses or malware, the files get corrupt. These executable files are targeted especially by these viruses and malware in order to morph or blend into these EXE files. Once these executable files are run, errors start to pop on the screen.
Thus, it is highly recommended to run a full system scan and repair these corrupt files using a good antivirus.
Fix 5: Try Uninstalling and reinstalling Catalyst Control Centre
As you have probably seen, the Catalyst Control Centre tends to create a lot of affairs and issues. Thus reinstalling the software might fix the runtime error issue.
If after uninstalling it, the problem gets resolved, this will firstly ensure that the main culprit for this trouble was this software. Reinstalling a freshly downloaded copy of this software will ensure there are no corrupt or infected files in the batch. Download Catalyst Control Centre from here.
Final Words
In conclusion, I hope so you were able to resolve the error message by referring to the above troubleshooting fixes. If you are still facing the atibtmon.exe runtime error on your Windows 10, 8 or 7 then try installing a fresh copy of Windows. Remember to take back up beforehand. If you are facing problem following the above steps, you can reach us out in the comments section below for all your queries.
The Runtime Error atibtmon.exe is typically encountered when users log into their Windows computers. This issue is confirmed on every Windows version. You’ll most commonly see this error occurring when unplugging your laptop from the cable or booting directly on battery life.
Note: The Atibtmon.exe is an executable belonging to ATI Brightness Monitor software. This tool lets users access their brightness options for their display directly through the Windows System Tray. It is generally safe to terminate or remove, but doing so will likely mean that you will no longer have any control over the brightness of your monitor in case you’re using a laptop.
The Runtime Error atibtmon.exe usually occurs due to a conflict between the built-in Windows Power saving settings and the ATI display car settings.
1. Set ATI Graphics Power Settings to Maximum Performance
There’s an easy fix if you are experiencing this issue due to a conflict between the built-in Windows Power saving settings and the ATI display card set.
All you have to do is make your way to the ATI Graphics Power settings and set both behaviors (plugged and unplugged) to Maximize Performance. After you do this and reboot your PC, you should no longer experience this problem.
Here’s what you need to do to apply this fix:
- First, make sure you plug your laptop or ultrabook into a power source.
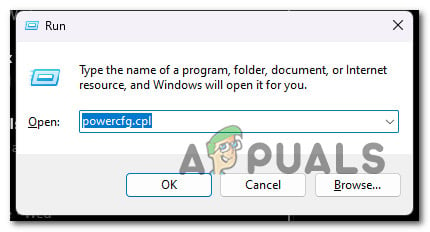
- Next, type ‘powercfg.cpl’ inside the Run program, then press Ctrl + Shift + Enter to open up the Power Settings on your Windows PC.

Access the Power Option settings - Click Yes to grant admin access at the User Account Control (UAC).
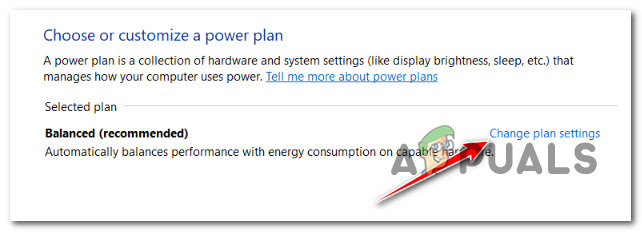
- Once inside the Power Settings, click on the Change plan settings hyperlink associated with the active power plan.

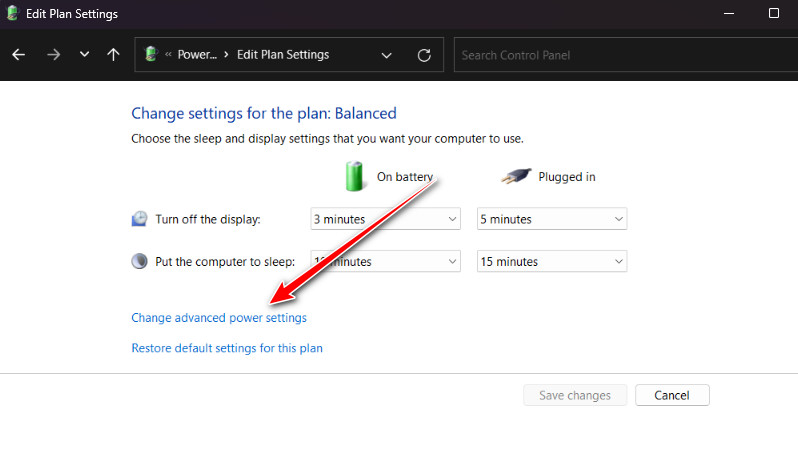
Changing the Plan Settings - From the next screen, click on Change advanced power settings.

Change the advanced power settings - Under the Advanced Settings screen, scroll to the bottom, and you should find the ATI Graphics Power Settings.
- Click on the ‘plus’ icon to expand the ATI Graphics Power Settings.
- Expand the ATI Powerplay Settings.
- Next, make sure both On battery and Plugged in settings are set to Maximum Performance.

Adjusting the settings - Click Apply to save the changes.
- Reboot your PC and see if the problem is now fixed.
If the problem is still unresolved, move to the next method below.
2. Perform a security scan
If the first method above didn’t work for you, you should consider a possible security problem. Malware will often pretend to be a real process to avoid being found.
If the atibtmon.exe file isn’t in its usual place, that should be the first sign that something is wrong. If Atibtmon.exe is not in the C:\Windows\System32 folder, you should use a powerful scanner to do a deep security scan.
Malwarebytes is the best software to use in this case because it has a history of dealing with viruses that have the ability to pose as system processes. It is free and will find most malware that acts like this.
Follow this article to learn how to use the free version of Malwarebytes to do a deep scan and get rid of the virus. This will make things easier for you.
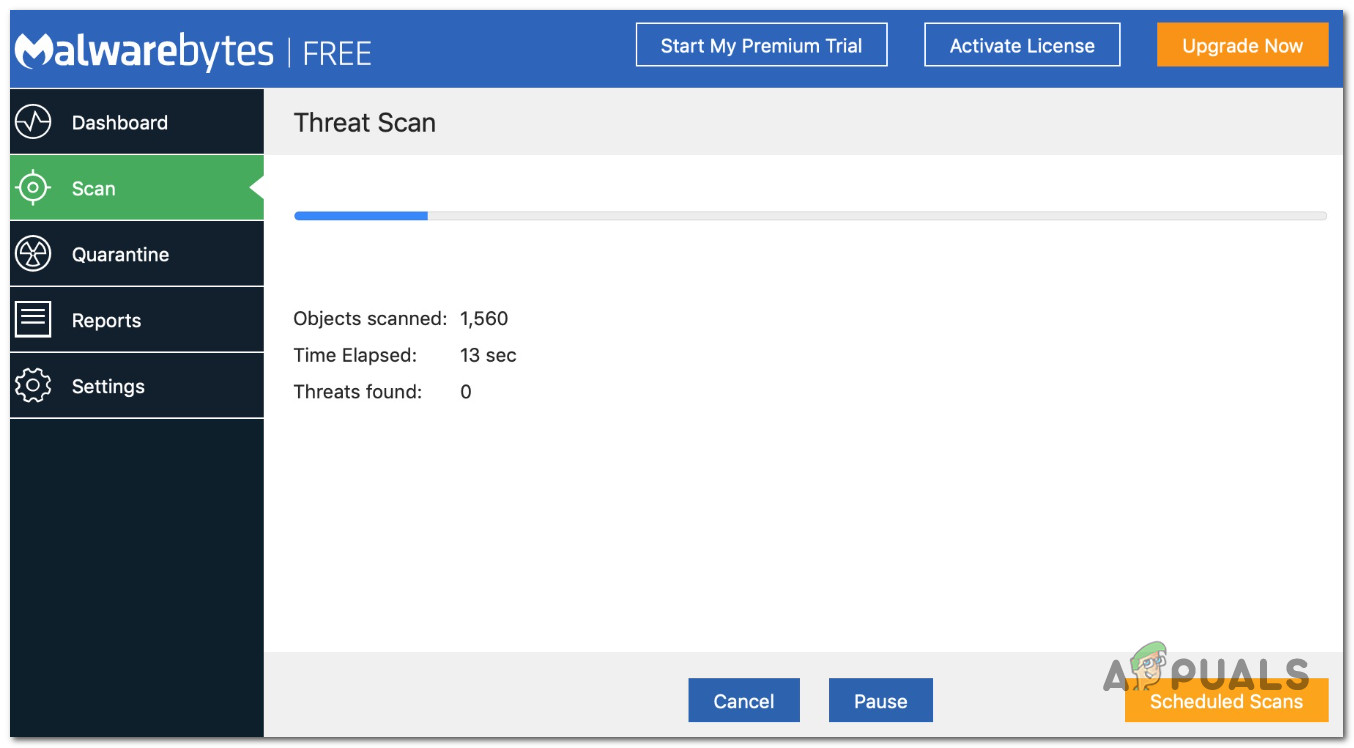
If the scan is successful and the virus is gone, restart your computer and check to see if the Atibtmon.exe Runtime Error is still happening.
If the Atibtmon.exe is still giving you problems at startup after you’ve made sure it’s real, move on to the next method below.
3. Rename atibtmon.exe
If none of the solutions featured above have helped you, one unconventionally approach is to navigate to the location of the atibtmon.exe file and rename it.
This will serve the purpose of forcing your OS to disregard the atibtmon.exe file completely. If you do this, you’ll most likely stop getting the startup runtime error at the next system startup since there is no longer a atibtmon.exe to be called.
Note: This method assumes that you’ve already followed the method above to ensure that you’re not dealing with a virus infection. If you end up enforcing this method, know that display brightness changing will be handled by the built-in Windows component (this is generally a good thing).
Follow the instructions below to rename the atibtmon.exe file:
- First, ensure that you are signed in with an administrator account. You won’t be able to rename or edit system files with a standard Windows account.
- Next, open File Explorer (Windows key + E) and navigate to the following location:
C:\Windows\System32
- Once you arrive at the correct location, locate the atibtmon executable, right-click on it and choose Rename from the context menu that just appeared.
Renaming the file - Name the file to something different or add the ‘.old’ extension at the end before saving the changes.
- Reboot your PC and see if the runtime error is now fixed.
If the Error atibtmon.exe is still occurring, move down to the next method below.
4. Disable Vari-Bright in Catalyst Control Center (if applicable)
If you’re using the AMD Catalyst Control Setting, you should know that one setting is almost certain to conflict with the atibtmon executable (Vari-Bright).
Note: Vari-Bright will adjust the screen’s brightness level automatically even if the laptop has no built-in ambient light sensor.
This feature is enabled by default and will automatically limit the maximum brightest of the screen when not on AC power. Because of this, you can expect it to conflict with every recent Windows version’s built-in brightness control process.
Fortunately, if you have this feature enabled, disabling it won’t produce any unintended consequences, as all the auto-adjustment functions can be carried on by the built-in Windows component.
Follow the instructions below to disable Vari-Bright (if you have it enabled on your system):
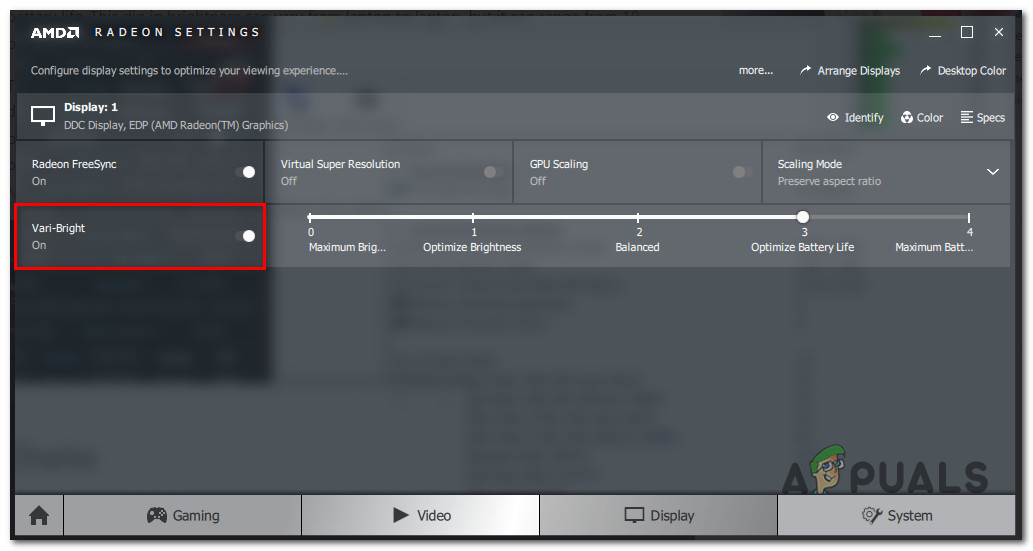
- Open the RadeonSettings menu by right-clicking on your desktop and clicking on AMD Radeon Settings from the settings menu that just appeared.
Open the AMD Radeon Settings menu - Once inside the AMD Radeon Settings, click on Display, then toggle Vari-Bright Off.

Turning vary-bright off - Save the changes, reboot your PC and see if the problem is now fixed.
If the same issue is still occurring, move to the next method below.
5. Create a new Windows account
This problem can also be caused by a problem with your Windows account’s system files. On both Windows 10 and Windows 11, this is known to cause runtime errors.
To fix this problem, create a new user account and check to see if the problem is still there. To do this, go to the Other accounts tab of your Windows installation and create a local account with administrative rights.
Important: This action will eliminate any broken dependencies linked to your user profile.
If you haven’t already tried this, follow the steps below to make a new user account and see if that fixes the atibtmon.exe runtime error:
- Press the Windows key + R to open the Run box.
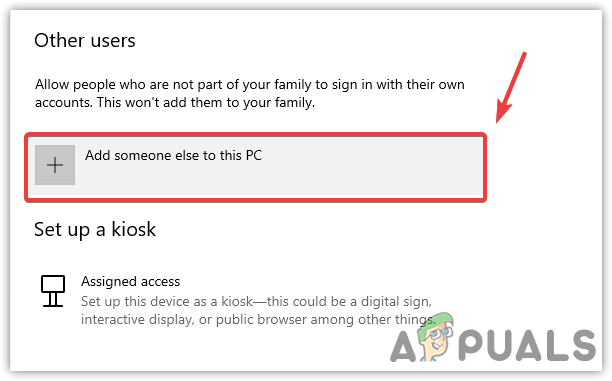
- Type “ms-settings:otherusers” in the text box and press Enter to go to the Family & Other People tab in the Settings app.
Access the Other Users tab - In the Family & other users menu, scroll down to the Other user’s tab and click “Add someone else to this PC.”

Adding someone else to this PC Note: Depending on your windows version, you will need to select a local account and assign the username, password, password hint, and recovery options before clicking Next.
- Finish the remaining steps to create a new account, then restart your PC and sign in with the newly created Windows account to see if the runtime error is now fixed.

If the problem still happens after you switch to a different account, move on to the next method.
6. Update AMD Graphics Card drivers
If you’re already using AMD’s dedicated drivers and you’re still getting the runtime error every time you start your computer, it’s likely that there’s a conflict between the drivers and the built-in adjustment function.
Note: This often happens with DELL laptops and a few other laptop models from OEMs that use dedicated AMD GPUs.
Fortunately, this will be auto-resolved if you update to the latest AMD driver version.
To fix this problem, go to Device Manager and uninstall the current AMD drivers. Then, use the official AMD channels to install the latest version of the driver that works with your computer.
Important: After uninstalling the current AMD drivers, you will experience screen flickering as your OS migrates to the generic drivers. Don’t freak out; this is completely normal.
Here’s what you need to do to update your AMD drivers to the latest:
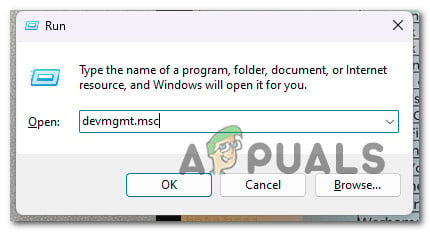
- Press the Windows key + the letter R to bring up the Run box.
- Next, press Enter after typing “devmgmt.msc” to open Device Manager.
Opening up Device Manager Note: If you are prompted by the User Account Control (UAC), click Yes to grant admin access.
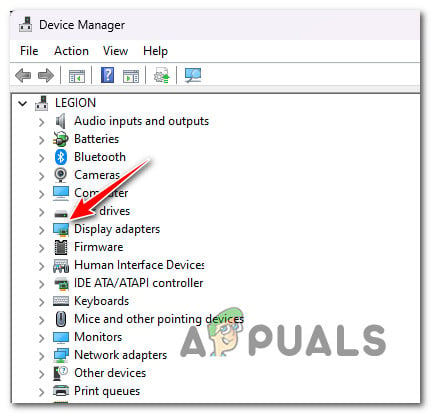
- Once you’re in Device Manager, scroll down through the list of installed devices and open the drop-down menu for Display Drivers.

Open up the Display drivers - Right-click on the entry for your AMD GPU in the Display Adapters menu and choose “Uninstall Device” from the new menu that pops up.
- Then, follow the instructions on the screen to finish installing the driver, and close the Device Manager window.
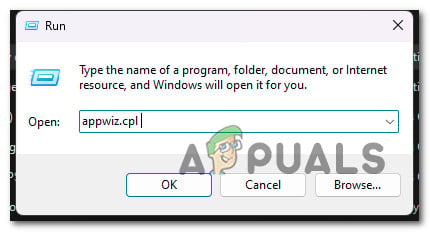
- Press the Windows key + R again to open a second run box.
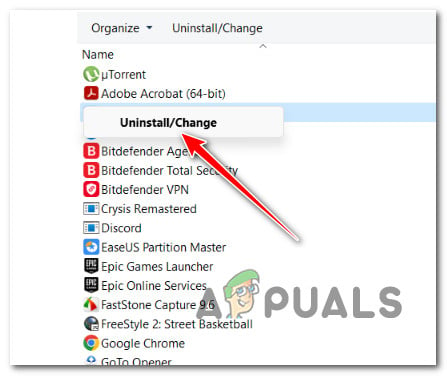
- At the next prompt, type “appwiz.cpl” and press Enter to open the Programs and Features menu.
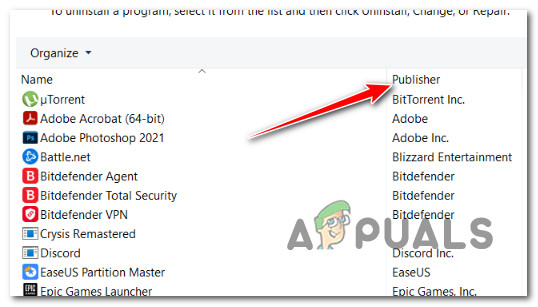
Open up the Programs and Features menu - Once you’re in the Programs and Features menu, click on the Publisher column to make it easy to find all of the software that belongs to your GPU.

Order items by publisher - Next, uninstall all of the drivers that are signed by AMD Corp. This includes the main Catalyst software as well as any other software you may have installed to help it work.

Uninstalling the AMD software Note: After you uninstall the drivers, your computer should switch to the generic versions on its own.
- Once every important part has been removed, restart your computer and wait for it to finish starting up.
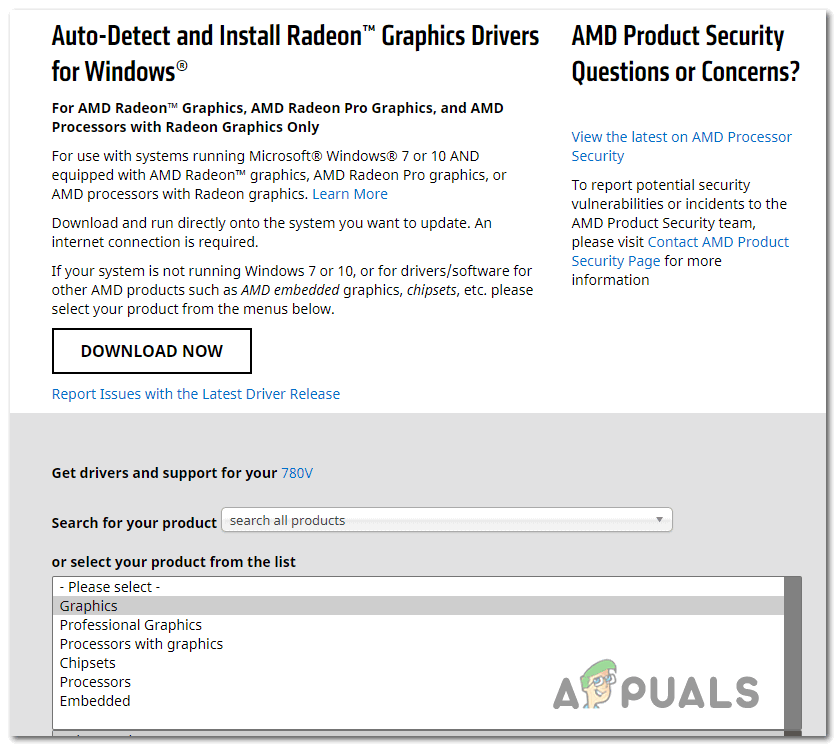
- After your computer starts up again, go to the official AMD driver download page, use the Auto-Detect feature, or choose your GPU model manually. Then, download and install the latest version of the compatible drivers.

Download the latest version of a compatible AMD driver - Follow the instructions on the screen to finish installing the latest AMD driver, reboot your PC and see if you’re still experiencing the atibtmon.exe runtime error.
If the problem is still not fixed, move to the next method below.
7. Update Visual C++ Dependencies
This runtime error can also occur due to a missing Visual C++ Redistributable 2013 pack. Remember that the AMD suite (ATI Brightness Monitor) utilizing the atibtmon.exe might require certain Visual C++ dependencies that your system is currently missing.
Note: This is much more common on Windows 11, where certain dependencies are from Visual C++ Redist. Visual Studio 2013 Packages used primarily by legacy programs have been deprecated.
If this is the case, you can fix this problem by going to the Microsoft website and downloading and installing the most recent packages.
You can do this and install any missing Visual C++ system requirements by following these steps:
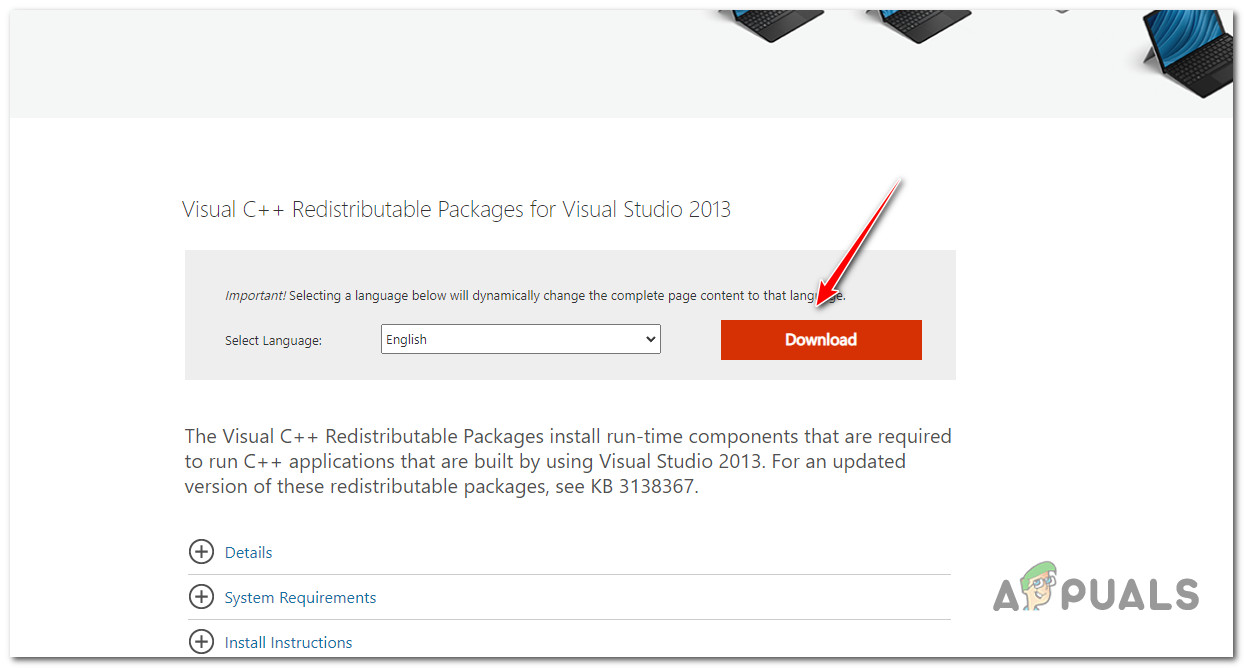
- To get started, go to the Microsoft website and download the compatible version of Visual C++ (x86 or x64).

Download Visual C+ Redist Packages Note: Please remember that you must confirm that you want Chrome to let you download more than one file simultaneously since you will likely need to download both the 32-bit and the 64-bit executable simultaneously.
- When both installers have finished downloading, double-click to install the missing Visual C++ requirements (in either order).
- After the installation is done, restart your computer.
- Wait to see if the problem is still there after the computer has been turned back on.
If you still get the same runtime error, move on to the next method.
8. Perform a clean boot
If none of the methods featured above have allowed you to fix the runtime error triggered by the atibtmon executable, ensure the issue is not caused by 3rd party process or service by achieving a clean boot state.
This will help you determine what’s wrong and see if interfering with atibtmon.exe triggers the runtime error.
Note: This is primarily reported to occur with lesser-known security suites. In some documented cases, this issue started appearing due to an overprotective security program inhibiting the ATI Brightness Monitor software.
The best way to fix this problem is to do a clean boot and see if the startup runtime error appears when no 3rd party service or process is running in the background.
If it’s not, it becomes a matter of discovering the responsible 3rd party process or service.
Important: When you do a clean boot, only the necessary starting services and processes will be allowed to run. You will lose a lot of functionality, so make sure this change is just temporary.
Follow this article to do a clean boot operation.
Note: If you clean-booted your Windows installation and no longer see the Runtime Error atibtmon.exe during startup, start re-enabling every service and process you previously disabled until you figure out the culprit.
Try the next fix if getting to a clean boot state doesn’t solve the problem.
9. Deploy SFC & DISM Scans
If you haven’t been able to find a workable solution up to this point, you might want to investigate if a potential file corruption is causing this runtime error.
If you don’t want to use third-party tools, it would be smart to use a few tools that come with the program (SFC and DISM).
Note: System File Checker and Deployment Image Servicing and Management are two built-in tools that can be used to fix corrupt system files that may stop your OS from addressing dependencies used by Windows Update.
System File Checker is the best place to start because it can be run without an internet connection.
Follow this article to deploy an SFC scan.
Note: The SFC tool will swap out broken parts of system files with healthy ones by using a cache that is stored locally. This scan shouldn’t be stopped until it’s finished to avoid making more logical mistakes. If you use an old HDD instead of a modern SSD, expect this operation to take several hours.
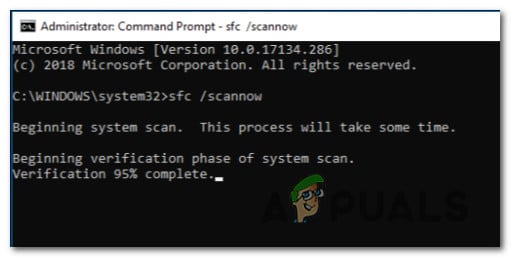
Important: If the System File Checker scan stops working while running, DO NOT CLOSE THE WINDOW until the procedure is done. It’s perfectly fine.
When the SFC scan is done, restart your computer to see if the runtime error stops occurring.
Run a DISM scan if the problem is still there.
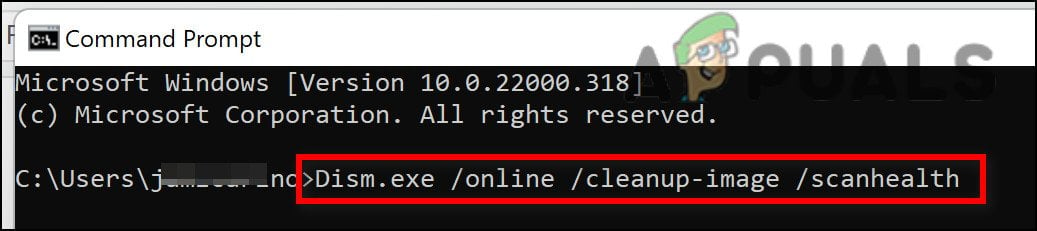
Note: Since DISM uses a part of Windows Update to replace corrupted files with ones that aren’t, ensure your Internet connection is stable.
After the SFC and DISM checks, you should restart your computer to see if the runtime error is now fixed.
If the problem keeps happening, move on to the last fix below.
10. Perform a clean install or repair install
If none of the solutions in this article helped you solve your problem, there is still one more option. You might be able to fix the atibtmon.exe startup error once and for all by refreshing every Windows component.
At this point, the best thing to do is replace every system file with a copy that you know is healthy and not corrupted since many system files fit the description of the offender.
Either of these two ways will work:
- Clean install: Try this if you need a solution right away. The biggest problem with a clean installation of Windows is that if you don’t make a backup of your data first, it will delete all of your files and apps that are currently on the same disk as your operating system. This is because a fresh installation of Windows lets you change every system file without using installation CDs.
- Repair install (in-place repair): If you have extra time, we suggest using an in-place repair instead of a repair install. This method’s main benefit is that all your files, games, and programs are kept even though it takes a little longer, and you need the right Windows 11 installation DVDs.
Readers help support Windows Report. We may get a commission if you buy through our links.
Read our disclosure page to find out how can you help Windows Report sustain the editorial team. Read more
A runtime error on Windows 10 can be frustrating, and Atibtmon.exe is one of the more common ones.
Atibtmon.exe is designed to switch to a power-saving mode when you unplug your laptop and to work with ATI graphic cards. As for its power-saving features, this application does it by dimming the brightness of your laptop display.
Many users have reported getting a runtime error that says that atibtmon.exe has requested Runtime to terminate it unusually. According to users, this issue happens when they disconnect their AC power cord.
Why does the Runtime error atibtmon.exe appear?
We have investigated this error and have concluded that the following are the primary triggers.
- Outdated drivers – If you run on outdated drivers, especially the graphics card, you may run into this runtime error.
- Malware – Malware is a common trigger for many computer issues, including the atibtmon.exe runtime error.
- Conflicting software – Some users have observed that a particular set of third-party applications may result in this error.
Atibtmon.exe Runtime Error can be an annoying problem, and many users reported it on their PC. Speaking of Atibtmon.exe, users said the following issues:
- Atibtmon.exe runtime error Toshiba – This error can appear on almost any device, and many Toshiba owners reported it. We advise you to try some of our solutions to see how to fix this problem.
- Vari Bright Windows 10 – Many users claim that this problem is related to Vari Bright feature in Catalyst Control Center. However, you can fix the problem simply by disabling this feature.
- Runtime error atibtmon.exe AMD – This error is related to your AMD graphics card, and to fix it, it’s advised to install an older graphics card driver.
- Atibtmon.exe runtime error on startup – This error can sometimes appear as soon as Windows 10 starts. However, you can fix the problem by disabling startup applications and services.
- Atibtmon.exe application error – This is just a variation of the original error, and you should be able to fix it using the same solutions.
- Atibtmon.exe stopped working – If you get a message saying that Atibtmon.exe stopped working, the problem might be your power settings. To fix the problem, change your power settings and check if that helps.
Let’s explore the best resolutions to this error on a Windows 10 device without much ado.
How can I fix the atibtmon.exe runtime error?
1. Get the older version of the display driver
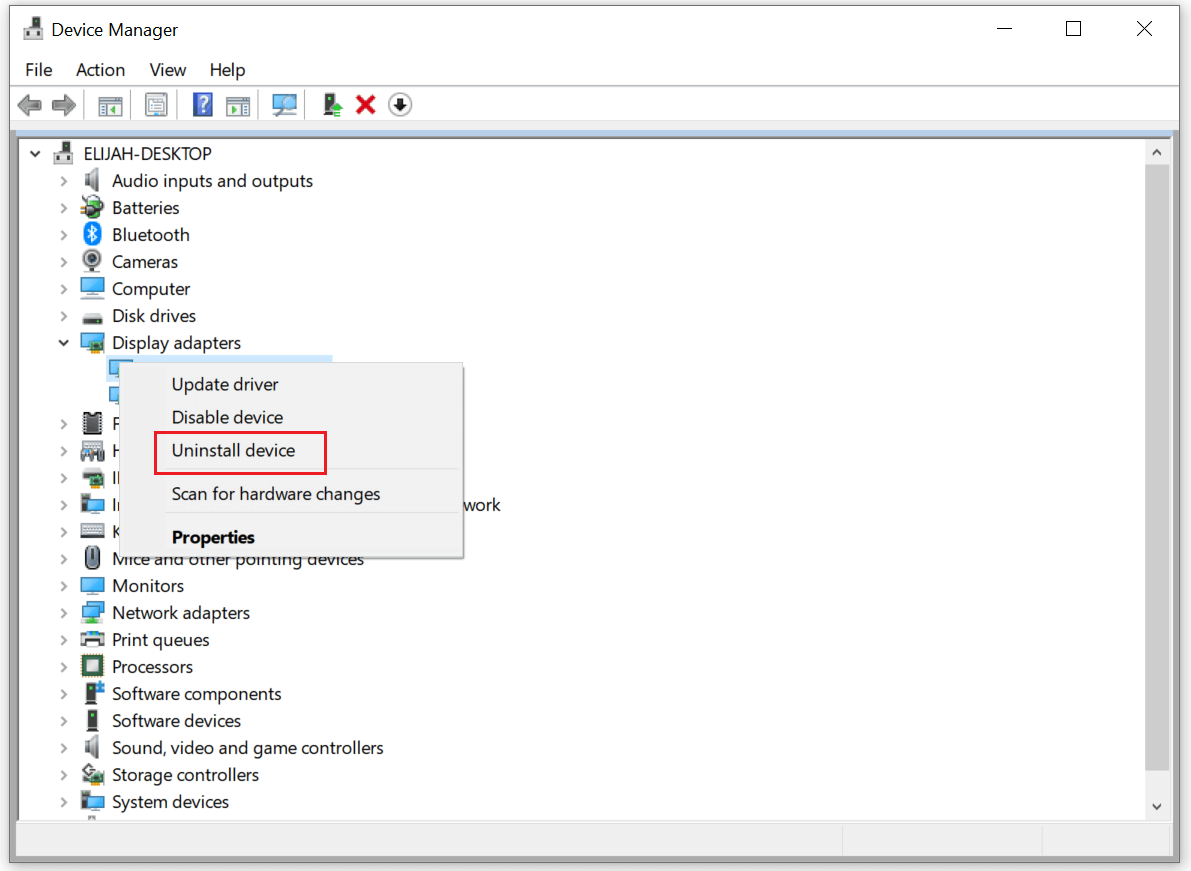
- Press Windows Key + X and choose Device Manager from the list.
- Locate your display adapter on the list, right-click it, and choose Uninstall device from the menu.

- Check Attempt to remove the driver for this device and click on Uninstall.

Atibtmon.exe Runtime Error can appear due to problems with your display driver; however, you can fix the problem simply by installing an older AMD driver.
Before installing the older driver, you need to remove the current one. Once you remove the driver, restart your PC, and the default version should be installed automatically.
It’s worth mentioning that you can altogether remove your display driver using a Display Driver Uninstaller. This is a freeware tool that will remove your display driver along with all files associated with it.
To learn more about this tool, we advise you to check our article on how to use Display Driver Uninstaller.
Once the default driver is installed, check if the problem still appears. If not, you might want to consider updating the driver to a newer version, but be sure not to install the same version that gave you this problem in the first place.
If you choose not to update your driver manually, you might want to prevent Windows from updating the driver.
Windows 10 updates outdated drivers automatically, which can sometimes cause various issues, so you need to prevent Windows 10 from updating specific drivers. Follow this handy guide to learn how to do that.
2. Automatically update drivers
While installing the drivers manually is a reliable option, specialized software can save you time and effort and get the latest updates.
This kind of tool can automatically update your drivers safely and preferentially by scanning your PC and giving you a list of outdated drivers.
Ensure your system performs smoothly and avoids all GPU driver errors by using a complete driver update assistant, namely Outbyte Driver Updater, that will do the job for you.
Here’s how to safely update your drivers:
- Download and install the Outbyte Driver Updater app.
- Launch the software and wait for the app to detect all incompatible drivers.
- Now, it will show you a list of all faulty drivers to select the ones to Update or Ignore.

- Click on Update & Apply Selected to download and install the newest versions.
- Restart your PC to ensure the applied changes.

OutByte
Keep your GPU in a flawless state without worrying about possible driver issues.
Disclaimer: You may need to upgrade the app from the free version to perform specific actions.
3. Disable Vari-Bright in Catalyst Control Center
- Launch the AMD Radeon Software.
- Click the Settings icon, and select the Display tab.

- Under Display Options, toggle off the switch for Vari-Bright.


4. Disable Powerplay in Catalyst Control Center
- Press Windows Key + S and enter power settings. Now select Power & sleep settings from the list of results.
- Select Additional power settings in the left pane.

- Locate your currently selected power plan and click Change plan settings next to it.
- Now click on Change advanced power settings.
- Locate ATI Graphics Power Settings on the list and expand it.
- Now set both ATI Powerplay Settings to Maximum Performance and save changes.


According to users, Atibtmon.exe Runtime Error can sometimes appear due to the Catalyst Control Center Powerplay feature. This feature can conflict with your power settings, causing this error.
However, you can fix the problem by disabling Powerplay in Catalyst Control Center. After disabling this feature, you also have to change your power settings.
After doing that, the conflict with the Powerplay feature should be entirely resolved, and you won’t see this error message anymore.
5. Disable AMD External Events service
- Press Windows Key + R and enter services.msc. Press Enter or click OK.
- A list of services will now appear. Double-click the AMD External Events service to open its properties.
- Set the Startup type to Disabled and click the Stop button to stop the service. Now click on Apply and OK to save changes.


To work correctly, Windows and other applications require specific services. However, sometimes services can cause Atibtmon.exe Runtime Error to appear on your PC.
Several users reported that AMD External Events service caused this problem; you must disable it to fix it.
After disabling this service, check if the problem persists.
- Fix: An Error Occurred While Loading a Higher Quality Version of This Video
- iTunesMobileDevice.dll is Missing From Your Computer [Solved]
- SYNSOACC.DLL Could Not Be Located: How to Fix in Cubase
- Fix: Omen Gaming Hub Undervolting Not Working
- How to Fix Errors Related to the LibGLESv2.dll File
6. Perform a Clean boot
- Press Windows Key + R and enter msconfig. Now press Enter or click OK.
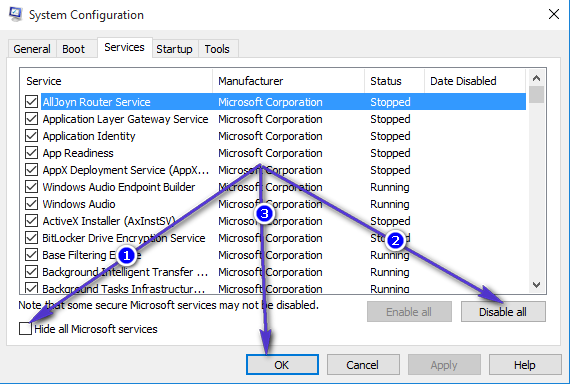
- Navigate to the Services tab and check Hide all Microsoft services; click the Disable all button to disable the services.

- Navigate to the Startup tab and click on Open Task Manager.
- A list of startup applications will now appear. Locate the first item on the list, right-click it, and choose Disable from the menu.
- Repeat this step for all startup applications on the list.

- Repeat this step for all startup applications on the list.
- Now go back to the System Configuration window and click on Apply and OK.
- Restart your PC.


As mentioned, third-party applications can interfere with Windows and cause Atibtmon.exe Runtime Error to appear. In addition, sometimes, these applications can automatically start with Windows and cause this error on startup.
Once your PC restarts, check if the problem still appears. If not, it means that one of the disabled applications or services is causing the issue.
We hope these solutions helped you with solving this runtime error. If you have any comments or questions, or you maybe know some other solutions for this problem, reach for our comment section below.
Also, if you have any other problem related to Windows 10, you can search for the solution in our Windows 10 Fix section. We also have a guide on atiumdag.dll errors, so don’t miss it.
If you’re having runtime issues with Microsoft Visual C in Windows 10, here’s how to fix that, or in case your issues are related to RuntimeBroker.exe Error in Windows 10, we have a fix for that, as well.
Ivan Jenic
Windows Hardware Expert
Passionate about all elements related to Windows and combined with his innate curiosity, Ivan has delved deep into understanding this operating system, with a specialization in drivers and driver troubleshooting.
When he’s not tackling diverse driver-related problems, Ivan enjoys watching good movies and spending time hiking with his family and friends.
Have you ever received Atibtmon.exe Windows 10 Runtime Error? If so, you can read this post offered by MiniTool Solution to get 5 useful solutions. You can try to simply remove your laptop battery, get the older version of the display driver and more.
You may get Runtime Error Atibtmon.exe in Windows 10. First, you need to understand what atibtmon.exe does. This is a program designed to switch to power-saving mode when you unplug your laptop. It is designed to work with ATI graphic cards.
Next, if you want to fix this error, keep reading to see if the following solutions work for you.
How to Fix Atibtmon.exe Runtime Error in Windows 10?
Solution 1: Remove the Laptop Battery
To fix Atibtmon.exe Windows 10 Runtime Error, here is a workaround for you. You can try to remove your laptop battery to circumvent this issue. Then, connect the laptop directly to the power supply.
After that, check if the issue is solved. If not, move down to the following methods.
Solution 2: Get the Older Version of the Display Driver
Atibtmon.exe Windows 10 Runtime Error may occur due to problems with your display driver. However, you can simply fix this problem by installing an old AMD driver. Before you install the older driver, you should remove the current one. To do that, follow the steps below.
Step 1: Right-click the Start menu and then select Device Manager to open it.
Step 2: Click Display Adapters to expand it. Right-click your display adapter on the list, right click it and select Uninstall device from the menu.
Step 3: Check Delete the driver software for this device and then click Uninstall.
Step 4: Once you remove the driver, restart your computer. The default version should be installed automatically now.
Solution 3: Disable Powerplay
Sometimes, Atibtmon.exe Windows 10 Runtime Error may occur because of Powerplay feature in Catalyst Control Center. This feature may come into conflict with your power settings. You can simply fix this problem by disabling Powerplay in Catalyst Control Center. Here are the steps on how to do that.
Tip: After disabling Powerplay feature, you also have to change your power settings.
Step 1: Input power settings in the Search bar and select Power & sleep settings.
Step 2: Then, click Additional power settings.
Step 3: Now, click Change advanced power settings.
Step 4: Find ATI Graphics Power Settings and expand it.
Step 5: Set both ATI Powerplay Settings to Maximum Performance and save changes.
After that, the conflict between Powerplay feature and your power settings should be completely resolved now. Meanwhile, Atibtmon.exe Windows 10 Runtime Error should have disappeared.
Solution 4: Disable AMD External Events Service
To work properly, Windows and other apps require certain services. However, Atibtmon.exe Windows 10 Runtime Error may appear on your PC due to AMD External Events service. In order to fix this issue, you should disable this service. The following steps will show you how to do so.
Step 1: Press the Win key + R key to open the Run dialog box. Next, type services.msc and click OK to open Services.
Step 2: Find AMD External Events service and double-click it to open its properties.
Step 3: Set Startup type to Disabled and click Stop under Service status to stop the service. Now, click Apply and OK.
After disabling AMD External Events service, check if Atibtmon.exe Windows 10 Runtime Error has been solved.
Solution 5: Perform a Clean Boot
Atibtmon.exe Windows 10 Runtime Error may appear because third-party applications can interfere with Windows. These applications may automatically start with Windows and then cause this problem right on startup.
Luckily, you can find the problematic application and remove it to fix Atibtmon.exe Windows 10 Runtime Error. The steps are as follows.
Step 1: Press the Win key + R key to open the Run dialog box. Next, type msconfig and click OK.
Step 2: Go to the Services tab and check Hide all Microsoft services. Click Disable all to disable the services.
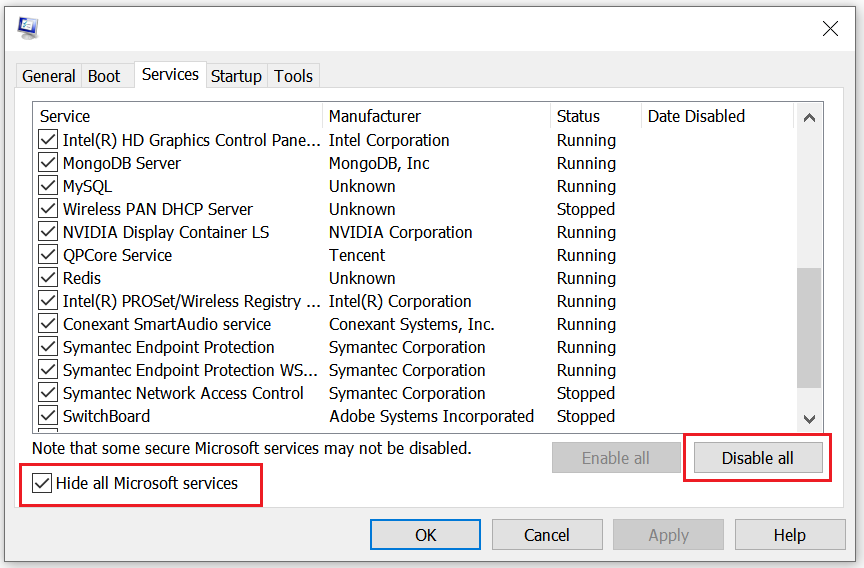
Step 3: Go to the Startup tab and click Open Task Manager.
Step 4: All startup applications will be displayed. Find one item on the list, right-click it and select Disable. Repeat this step for all startup applications.
Step 5: Go back to the System Configuration window and click Apply and OK.
Step 6: Restart your computer.
Once your computer restarts, check if Atibtmon.exe Windows 10 Runtime Error has gone. If not, that means one of the disabled applications or services is causing Atibtmon.exe Runtime Error r.
In order to find out which application is causing the problem, enable applications one by one and then check if the same issue reoccurs. Remember to restart your computer after enabling an application or service to apply the changes.
If you find the problematic application or service, keep it disabled, remove it or update it. Then, check if that solves the problem.
Bottom Line
Right now, you have gotten the methods to fix Atibtmon.exe Windows 10 Runtime Error. If you are still encountering this error, you can try the methods mentioned above.
Learn how to resolve the frustrating atibtmon.exe runtime error that occurs when unplugging your laptop, ensuring smooth power transitions and optimal performance.
Published
3 min read

The atibtmon.exe runtime error is a common issue that Windows 10 and 11 users encounter when disconnecting their laptops from AC power. This error, while not critical, can be annoying and disrupt your workflow. Let’s explore what causes this error and how to fix it effectively.
When you unplug your laptop, you might see this error message:
Microsoft Visual C++ Runtime Library
Runtime Error!
Program: C:\WINDOWS\system32\atibtmon.exe

This application has requested the Runtime to terminate it in an unusual way.
Please contact the application's support team for more information.
The atibtmon.exe file, short for ATI Brightness Monitor, is designed to manage power-saving features for ATI graphics cards. It’s responsible for adjusting screen brightness when switching from AC power to battery. While not essential for Windows operation, resolving this error can improve your system’s stability.
Let’s dive into the most effective solutions to fix this pesky error:
Method 1: Adjust Power Settings
Step 1: Right-click on the battery icon in the taskbar and select “Power Options”.
Step 2: Click on “Change plan settings” next to your current power plan.
Step 3: Click on “Change advanced power settings”.
Step 4: Scroll down to find “ATI Graphics Power Settings” and expand it.
Step 5: Set all options under “ATI Powerplay Settings” to “Maximize Performance” for both “On battery” and “Plugged in”.
Step 6: Click “Apply” and then “OK” to save your changes.
This adjustment prevents the system from aggressively changing power states, which can trigger the atibtmon.exe error.
Method 2: Update or Rollback Graphics Drivers
Step 1: Press Windows key + X and select “Device Manager”.
Step 2: Expand the “Display adapters” section.
Step 3: Right-click on your ATI/AMD graphics card and select “Update driver”.
Step 4: Choose “Search automatically for updated driver software” and follow the prompts.
If updating doesn’t resolve the issue, try rolling back to a previous driver version:
Step 5: Right-click the graphics card again and select “Properties”.
Step 6: Go to the “Driver” tab and click “Roll Back Driver” if available.
Updating or rolling back drivers can resolve compatibility issues that may cause the atibtmon.exe error.
Method 3: Disable AMD External Events Utility
Step 1: Press Windows key + R, type “services.msc”, and press Enter.
Step 2: Scroll down to find “AMD External Events Utility”.
Step 3: Double-click it and set the “Startup type” to “Disabled”.
Step 4: Click “Stop” under “Service status”.
Step 5: Click “Apply” and then “OK”.
Disabling this service can prevent conflicts that lead to the atibtmon.exe error, though it may affect some AMD-specific features.
Method 4: Rename the Atibtmon.exe File
Step 1: Open File Explorer and navigate to C:\Windows\System32.
Step 2: Find the “atibtmon.exe” file. If you can’t see it, click on “View” in the toolbar and check “Hidden items”.
Step 3: Right-click on “atibtmon.exe” and select “Rename”.
Step 4: Change the name to “atibtmon.exe.old”.
This method prevents Windows from running the file, effectively stopping the error. However, it may disable some power management features for your graphics card.
Method 5: Clean Boot Windows
Step 1: Press Windows key + R, type “msconfig”, and press Enter.
Step 2: Go to the “Services” tab and check “Hide all Microsoft services”.
Step 3: Click “Disable all”.
Step 4: Go to the “Startup” tab and click “Open Task Manager”.
Step 5: Disable all startup items in Task Manager.
Step 6: Close Task Manager, click “Apply” and “OK” in System Configuration, then restart your computer.
A clean boot helps identify if a third-party application is causing the atibtmon.exe error. If the error doesn’t occur in clean boot, gradually re-enable services and startup items to pinpoint the culprit.
By following these methods, you should be able to resolve the atibtmon.exe runtime error. Remember to test your laptop by unplugging it after each method to see if the error persists. If none of these solutions work, consider contacting your laptop manufacturer’s support team for further assistance.