
FAQ
[Windows 11] How to upgrade to Windows 11
If your existing Windows 10 PC is running the most current version of Windows 10 and meets the minimum hardware specifications it will be able to upgrade to Windows 11. The upgrade rollout plan is still being finalized, but for most devices already in use today, we expect it to be ready sometime in early 2022. Not all Windows 10 PCs that are eligible to upgrade to Windows 11 will be offered to upgrade at the same time. To see if your PC is eligible to upgrade, you can download and run the PC Health Check app to determine if your PC is eligible to upgrade to Windows 11.
Note: According to the Microsoft statement, all your files and data will transfer after upgrading. However, we recommend backing up your files before installation. Learn more about OneDrive PC folder Backup.
To provide you more detailed instruction, you can also click ASUS Youtube video link below to know more about How to upgrade to Windows 11
ttps://www.youtube.com/watch?v=dN6OlNb0UnA
Microsoft provides two methods to upgrade to Windows 11, and you can choose either one to perform it:
- Method 1: Get the Windows 11 upgrade notification via Windows Update
- Method 2: Using Windows 11 Installation Assistant
Method 1: Get the Windows 11 upgrade notification via Windows Update
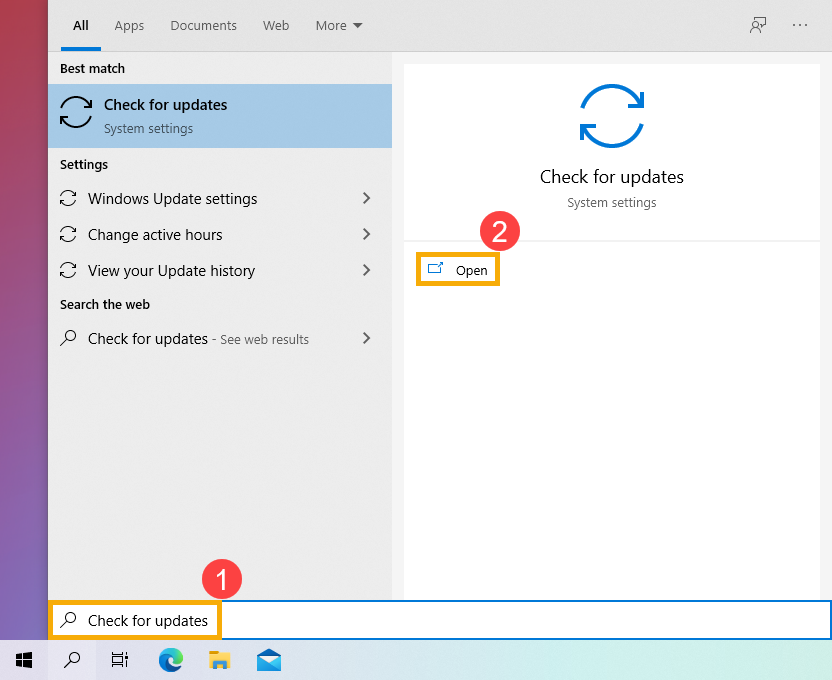
- Type and search [Check for updates] in the Windows search bar①, then click [Open]②.

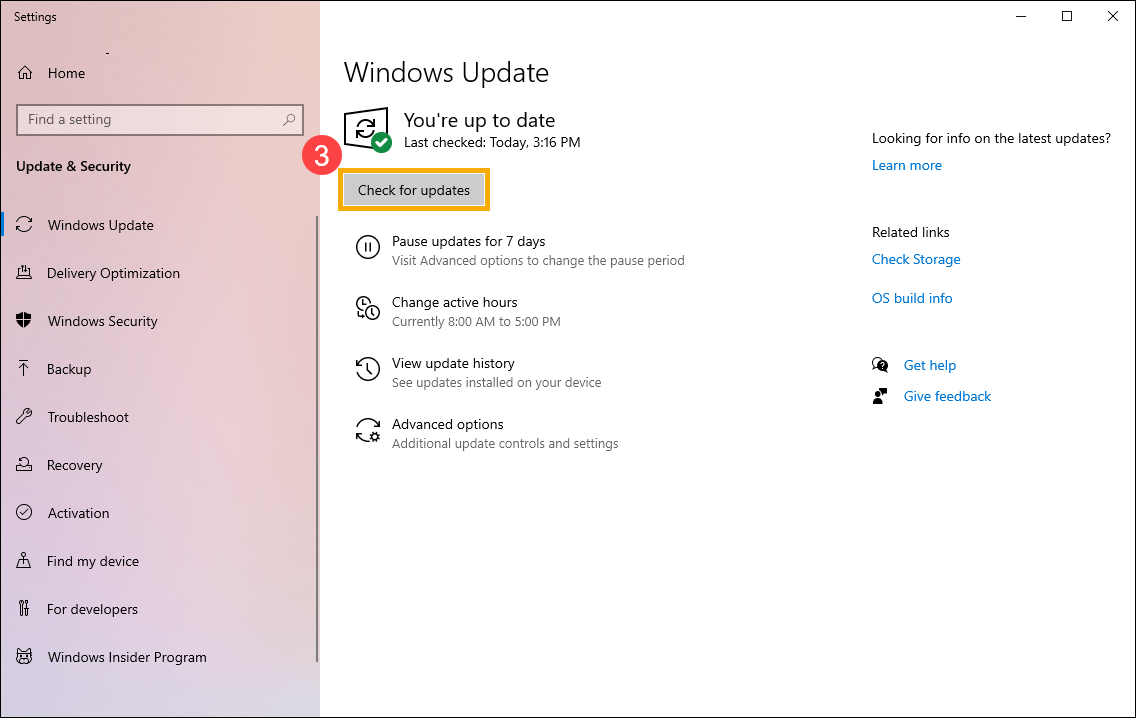
- Click [Check for updates]③.
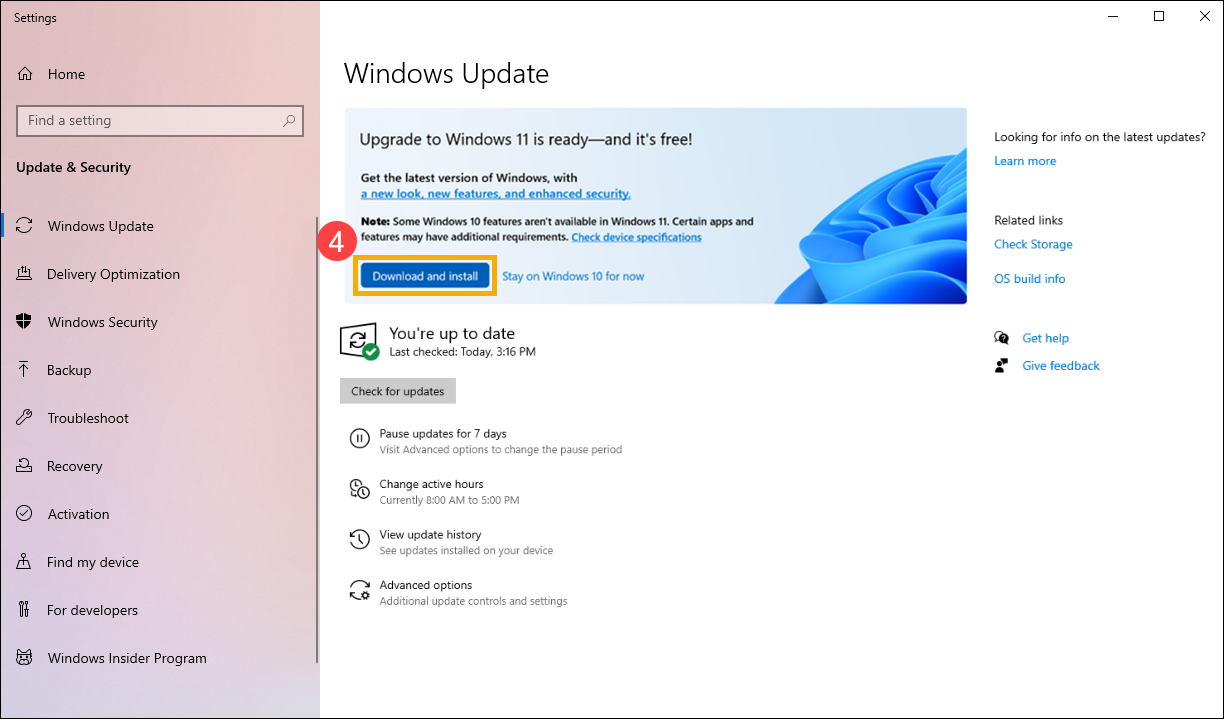
- If the notification of Windows 11 upgrade is available, click [Download and install] to start to upgrade④.
If your computer doesn’t receive the upgrade notification yet, it means that Microsoft is still on-going with deployment. Therefore, you can refer to Method 2: Using Windows 11 Installation Assistant if you want to get Windows 11 right away.
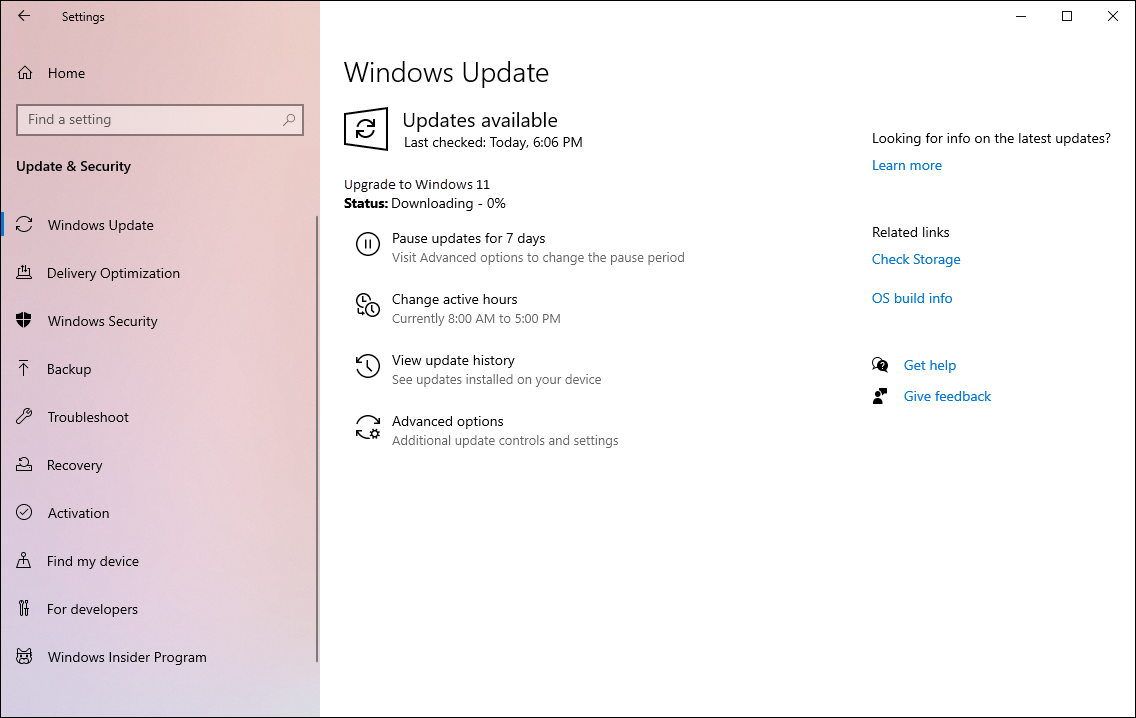
- Windows Update is downloading Windows 11. It may take some time to download, and it’s fine to keep using your PC.
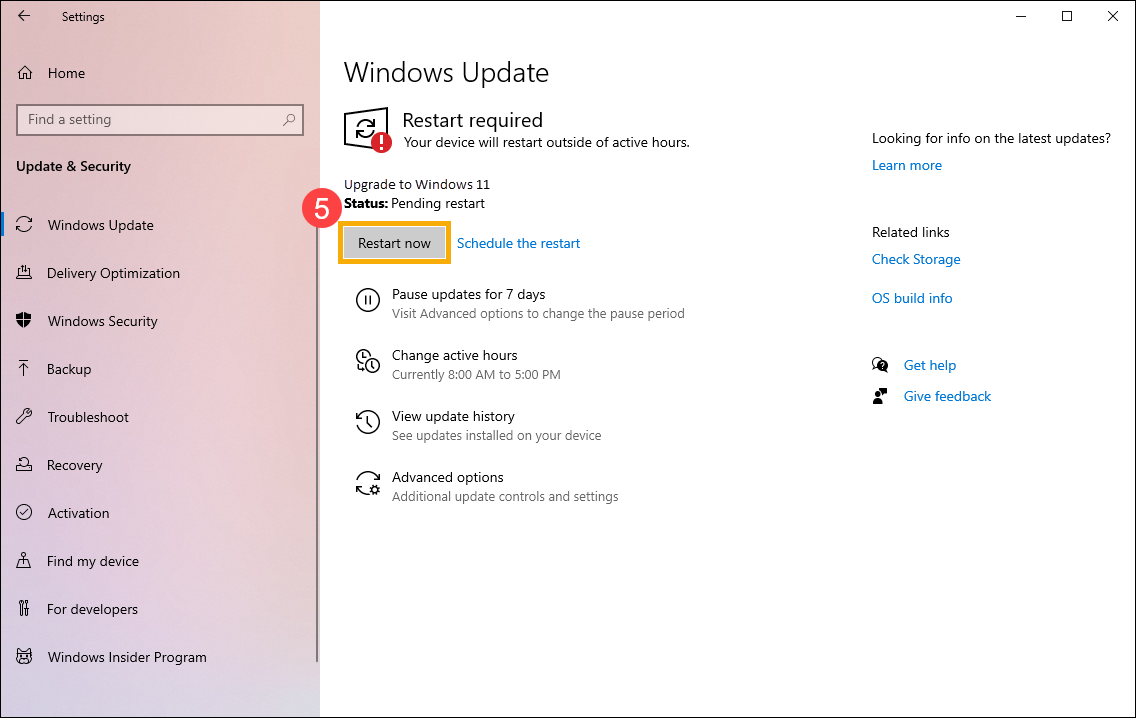
- After the downloading process is completed, please click [Restart now]⑤ to start to install Windows 11.
Note: It will take some time to update Windows, so please make sure that the AC adapter is connected during the updating process. Also, please do not force to shut down to prevent any issue.
- After the computer enters the desktop again, it means Windows 11 installation is completed.
Method 2: Using Windows 11 Installation Assistant
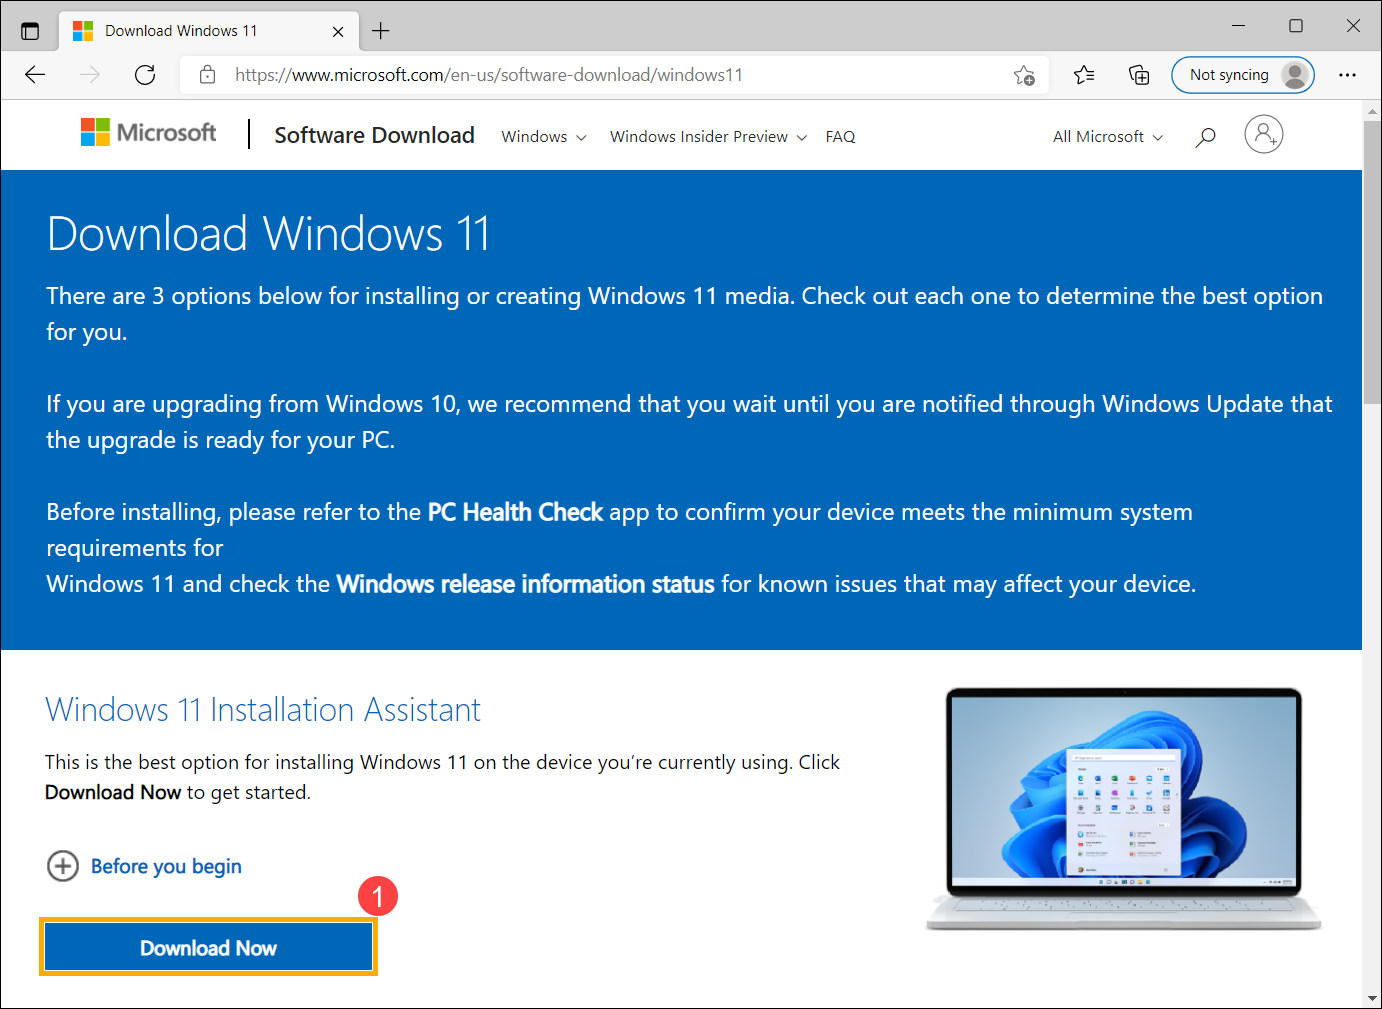
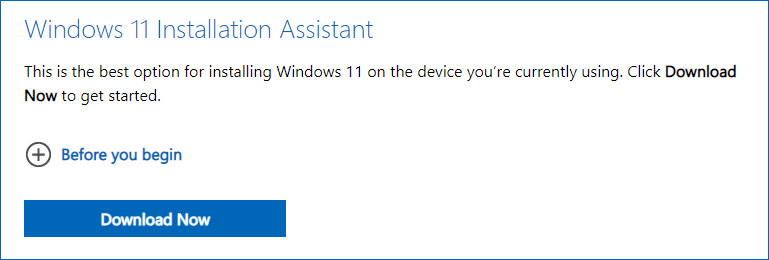
- Go to the Microsoft official website to download the Installation Assistant tool. Click [Download now]① to start to download the Windows 11 Installation Assistant tool.
Note: The following picture is the current version and just for reference, please download the latest version which Microsoft provides.
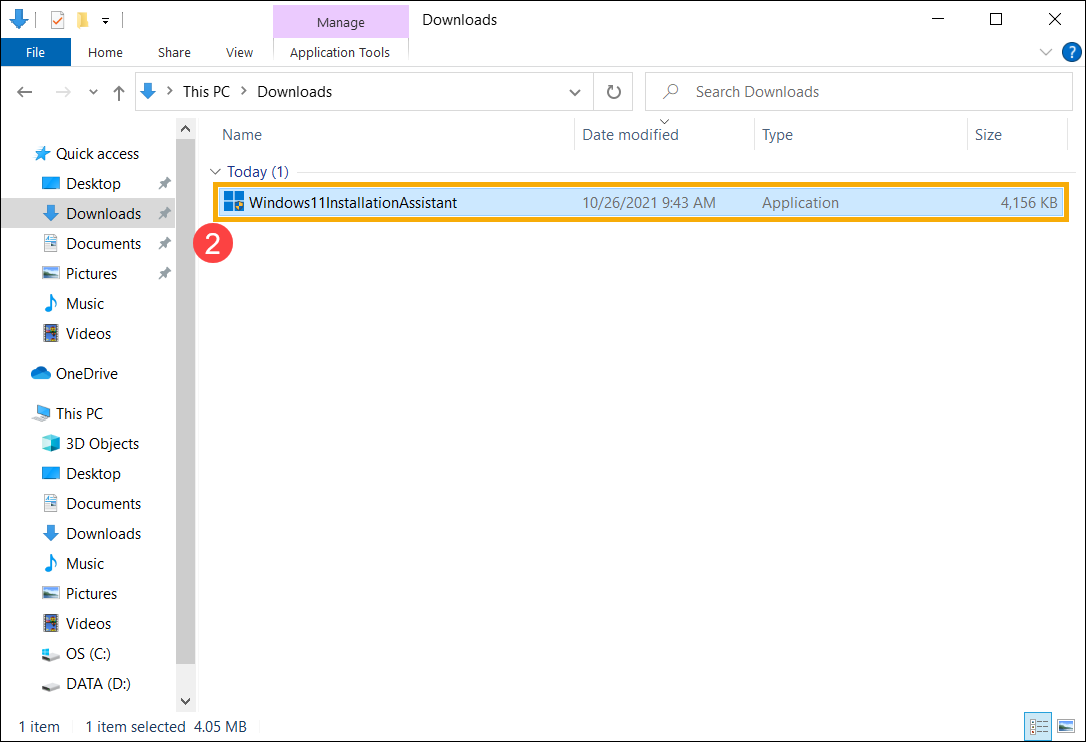
- After the download process is completed, double-click your downloaded tool②.
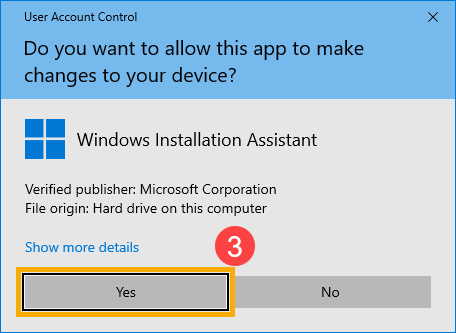
- If the User Account Control notification is appeared, please select [Yes]③.
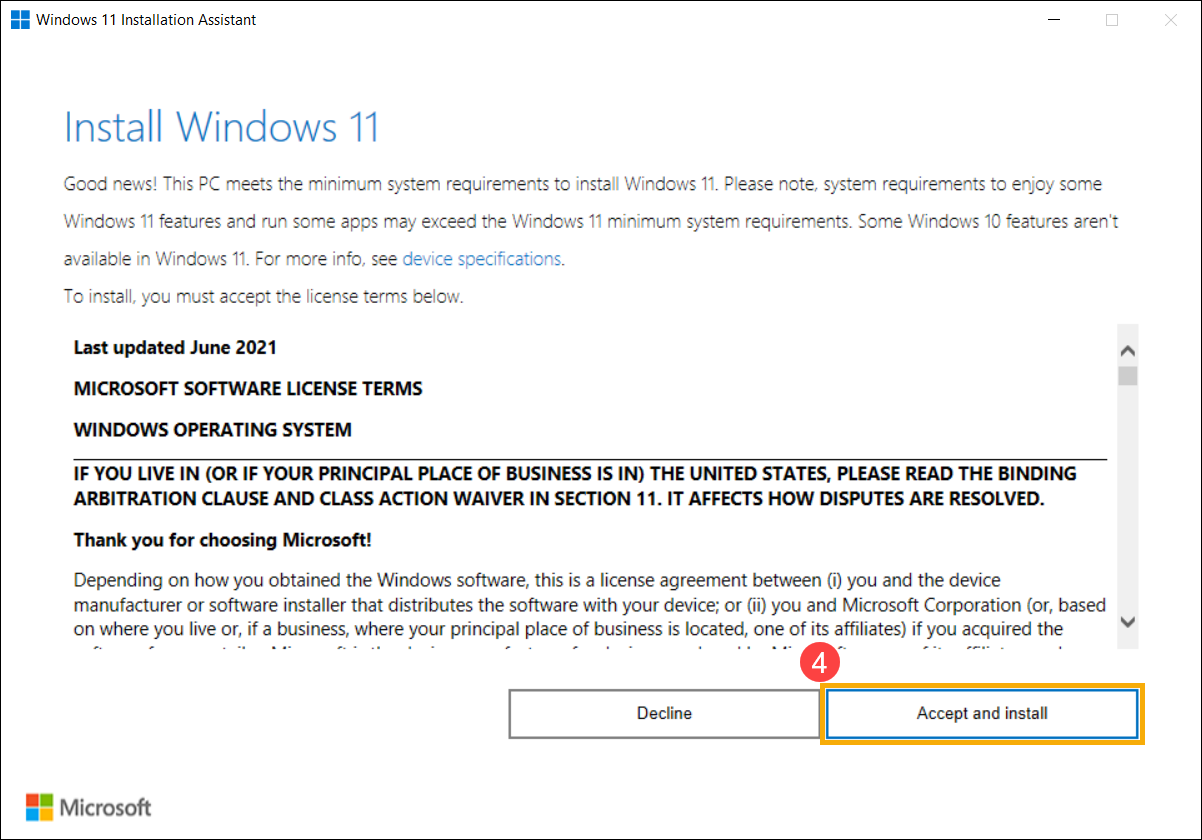
- Please read through the Microsoft software license terms, then select [Accept and install] to continue the Windows 11 upgrade process④.
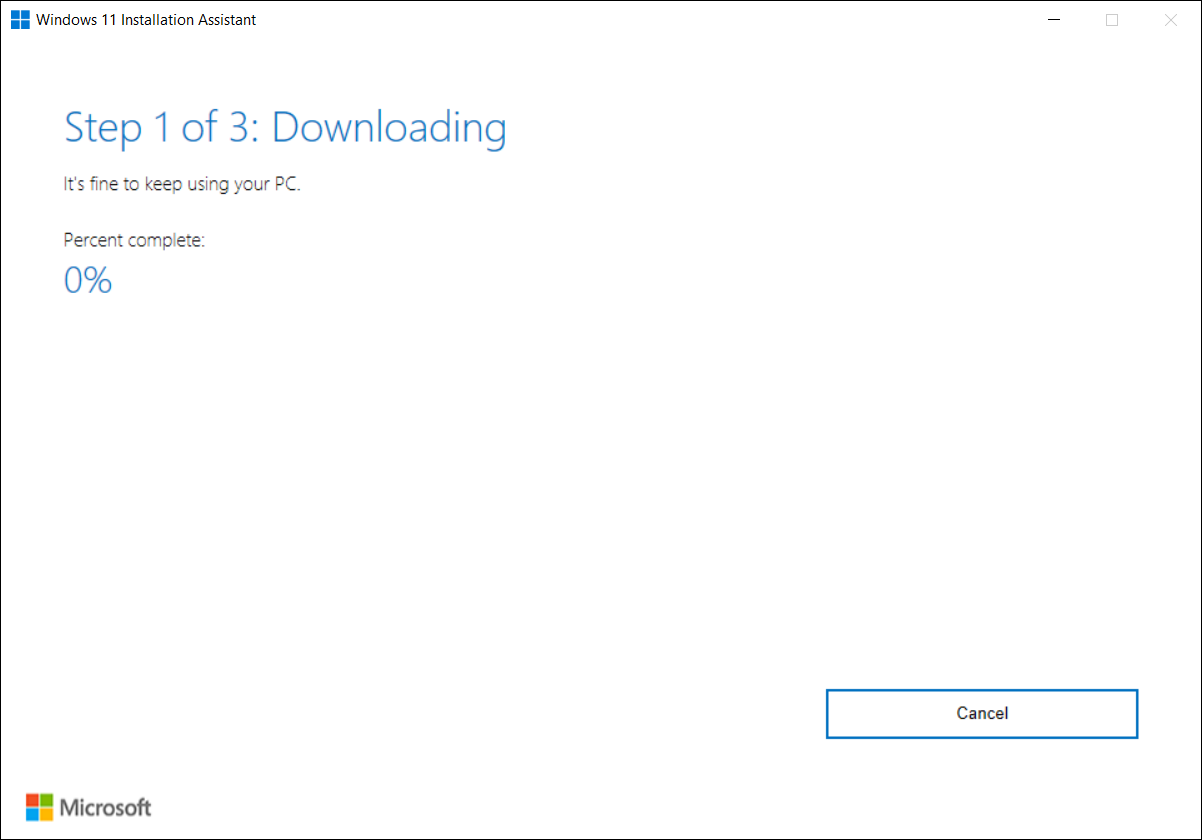
- Installation Assistant is downloading Windows 11. It may take some time to download, and it’s fine to keep using your PC.
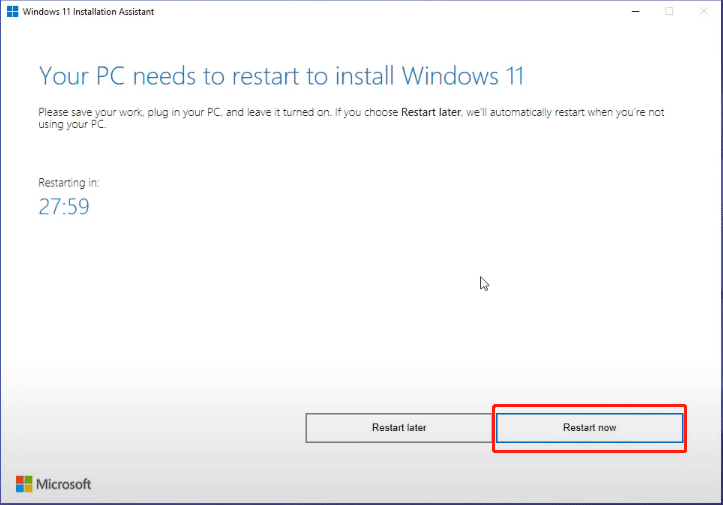
- After the downloading process is completed, please click [Restart now]⑤ to start to install Windows 11.
Note: It will take some time to update Windows, so please make sure that the AC adapter is connected during the updating process. Also, please do not force to shut down to prevent any issue.
- After the computer enters the desktop again, it means Windows 11 installation is completed.

Was this information helpful?
Yes
No
- Above information might be partly or entirely quoted from exterior websites or sources. please refer to the information based on the source that we noted. Please directly contact or inquire the sources if there is any further question and note that ASUS is neither relevant nor responsible for its content/service
- This information may not suitable for all the products from the same category/series. Some of the screen shots and operations could be different from the software versions.
- ASUS provides the above information for reference only. If you have any questions about the content, please contact the above product vendor directly. Please note that ASUS is not responsible for the content or service provided by the above product vendor.
- Brand and product names mentioned are trademarks of their respective companies.

ASUS также позаботилась о владельцах своих материнских плат, которые решили перейти на Windows 11. Для этого компания выложила развернутый пост в разделе FAQ на своем официальном сайте.
Во-первых, в нем перечисляются все текущие требования к аппаратному обеспечению для перехода на Windows 11 и полезные ссылки. Например, есть ссылки на актуальный список совместимых процессоров AMD и Intel.
Во-вторых, ASUS выложила список совместимых с Windows 11 фирменных материнских плат. Он включает в себя модели следующих серий:

В-третьих, есть подробная инструкция по проверке статуса TPM на вашем компьютере. Для начала можно проверить его с помощью меню «Выполнить» (комбинация клавиш Win+R). В нем необходимо ввести «TPM.MSC» и нажать Enter.
Если поддержка TPM уже активна, то вы увидите окно TPM Management on Local Computer с указанием версии. Если технология неактивна в вашей системе, то в ответ на запрос получите сообщение о невозможности найти TPM.

Во втором случае нужно просто перейти в BIOS и включить поддержку этой технологии. Для материнских плат Intel необходимо в BIOS найти раздел Advanced – > PCH-FW Configuration, и в нем активировать пункт «PTT».

Для материнских плат AMD следует перейти на страницу Advanced – > AMD fTPM configuration, а затем выбрать значение «Firmware TPM» для параметра «TPM Device Selection». После этого не забудьте сохранить изменения. Проверить активацию TPM можно с помощью меню «Выполнить» или в BIOS на странице Advanced –> Trusted Computing.

ASUS Windows 11 update is a common topic, and you may talk about it. If you need to upgrade your ASUS laptop from Windows 10 to 11, it is an easy way and you can find some details from this post of MiniTool. Besides, driver update for Windows 11 is also introduced.
Why Need ASUS Windows 11 Update
Windows 11 has been released for a period of time and more and more persons choose to use this operating system to experience its brand-new design and improved features to meet their daily needs. Compared with Windows 10, this Windows operating system brings a different user experience and if you want to know some differences, refer to our previous post – [6 Aspects] Windows 11 vs Windows 10: What Are the Differences.
If you are using an ASUS laptop that runs Windows 10, you may take action to upgrade Windows 10 to 11. Today in this post, we will discuss you with this topic. After an update, you can enjoy the safer and more powerful Windows operating system.
Tips:
If you are using a laptop from other brands like HP, Lenovo, or Dell and want to perform a Windows 11 update, click the corresponding link to find detailed instructions — Lenovo Windows 11 Update, HP Windows 11 Update, and Dell Windows 11 Upgrade.
ASUS Windows 11 Compatible Laptops
To upgrade to Windows 11, you should make sure your ASUS laptop is compatible with this new operating system. Well then, which ASUS device can get the update?
On the official website of HP, the manufacturer displays the list of existing models that can be upgraded to Windows 11 free of charge, including consumer laptops, gaming laptops, commercial laptops, consumer desktops, gaming desktops, commercial desktops, etc. See the page of ASUS|Introducing Windows 11 on ASUS laptops and devices.

If your ASUS laptop isn’t in this list, it means Windows 11 cannot be installed on the machine. Or else, compatibility problems will appear. If you still want to use Windows 11, you can choose a new ASUS PC with Windows 11 preinstalled. Visit this page from HP, scroll down to the section of Get Windows 11 in style, with ASUS, and click one HP laptop model, then buy it on the Product Details Page.
Run PC Health Check App for a Compatibility Check
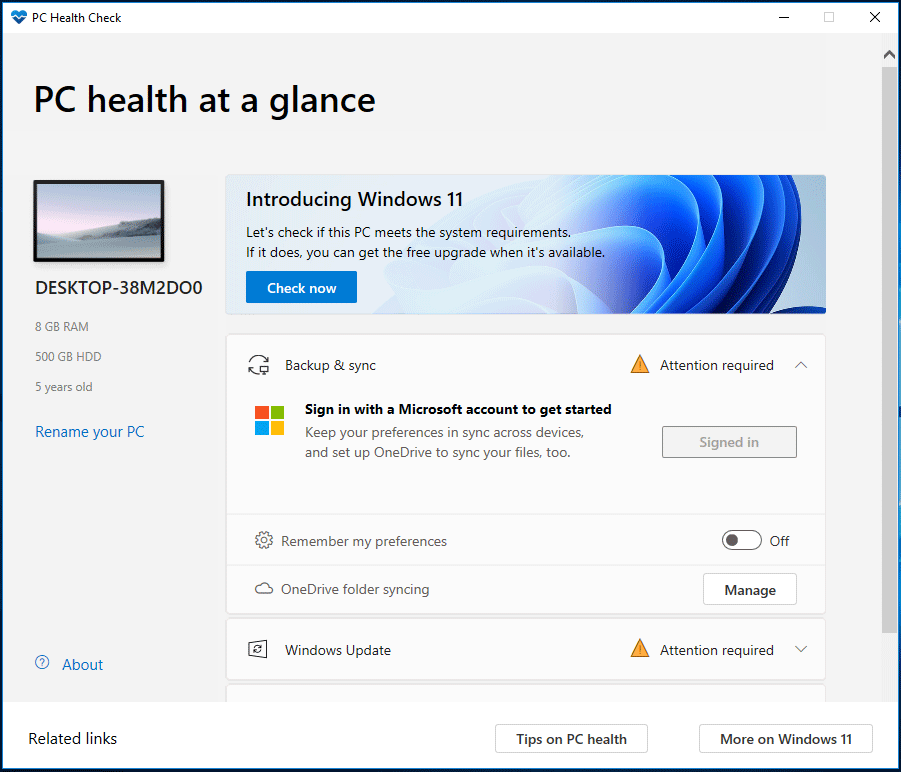
If you want to quickly see if your ASUS laptop can be compatible with Windows 11, you can run a compatibility test with a professional tool from Microsoft – PC Health Check.
This app can offer a comprehensive eligibility check for your computer to make sure it meets Windows 11 minimum system requirements. And you will know why the machine isn’t or is eligible and what you can do when the device cannot meet the requirements.
Step 1: Click the download link to get the .msi file of the PC Health Check app.
Step 2: Double-click on this file, accept license terms and install this app on your PC. Then, launch it.
Step 3: Click the button of Check now to start a check and you can know if the PC is compatible with Windows 11.
Tips:
In addition, you can use other tools to check if your PC is compatible with Windows 11 and refer to this post — Windows 11 System Requirements Tools: Run a Compatibility Check.
If your ASUS laptop meets the system requirements of Windows 11, how to perform ASUS Windows 11 update? The operation is not difficult and follow the methods below now.
How to Update Windows 11 in ASUS Laptop?
Back up Crucial Files before ASUS Windows Update
According to the statement from Microsoft, all your files and other data will transfer after upgrading to Windows 11. But you should know sometimes unforeseeable Windows update problems can happen and cause data loss, thus, we recommend backing up your important files before the update.
To do this work, MiniTool ShadowMaker is a good option. As professional and free backup software for Windows 11/10/8/7, it can easily create a backup for your files, folders, system, disks, and partitions. In terms of data that is added newly and changed, you can use MiniTool ShadowMaker to create incremental or differential backups.
Besides, you can sync files and folders to another location for backup and clone an entire hard drive for disk backup. It offers a trial edition that allows you free use all the features within 30 days. Now, click the following download button to get the .exe file and double-click on it to install the software on your Windows 10 PC for backup.
MiniTool ShadowMaker TrialClick to Download100%Clean & Safe
Step 1: Launch MiniTool ShadowMaker in Windows 10 and click Keep Trial to go on.
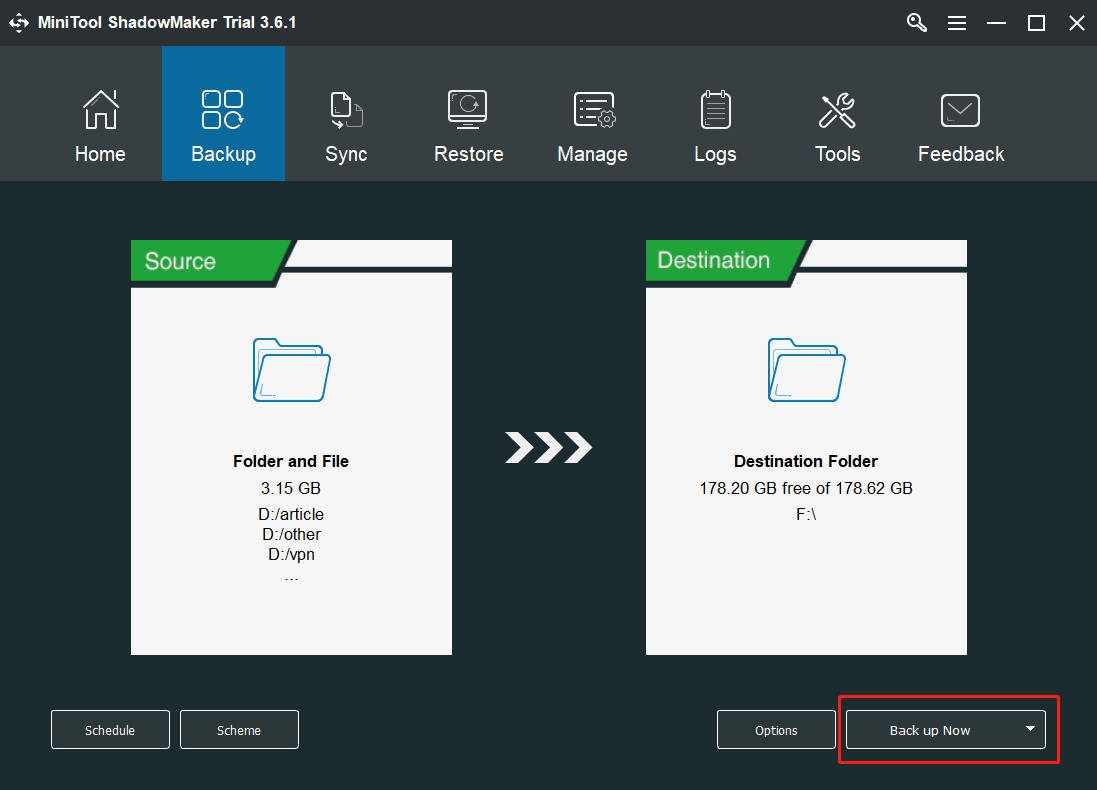
Step 2: Go to the Backup or Sync tab, and choose the backup source and destination.
Step 3: Click Back up Now or Sync Now to execute the task.
Tips:
The Backup feature helps to compress the backed-up files to an image file while the Sync feature won’t compress files and it is similar to Copy. Choose a proper one for data backup. If you want to know more information about these two features, read our previous post — Backup vs Sync: What Are the Differences Between Them.
Next, it is time to start ASUS laptop Windows 11 update.
ASUS Windows 11 Update via Windows Update
Currently, Microsoft allows you to update Windows 10 to 11 in ASUS laptops via Windows Update. If your PC is available to install Windows 11, it will give you an upgrade notification in Windows Update. See what you should do:
Step 1: Press Win + I to get the Settings menu.
Step 2: Click Update & Security to enter the Windows Update page. Click Check for updates and then you will get a Windows 11 notification, as shown below.
Step 3: Click the Download and install button to start to upgrade.

Step 4: Windows Update is downloading Windows 11. This process will take some time and you can keep using your PC.
Tips:
Sometimes Windows 11 update download will get stuck. If you are plagued by this annoying issue, go to find solutions from our previous post — [SOLUTION] Windows 11 Update Downloading Stuck at 100%.
Step 5: After finishing the download, click Restart now to install Windows 11.
Note:
During the process of the ASUS Windows 11 update, make sure the AC adapter is connected. The PC may restart several times to finish the installation of Windows 11.
ASUS Laptop Windows 11 Update via Windows 11 Installation Assistant
This is another option offered by Microsoft for Windows 11 update. Windows 11 Installation Assistant is a professional and free tool that can be used to install Windows 11 on the device you’re currently. Note that it is only available on Windows 10, version 2004 or higher.
Well then, how to update Windows 11 in ASUS laptops via this tool? See the following instructions.
Step 1: Download Windows 11 Installation Assistant from Microsoft’s official website. Just click the Download Now button to get the Windows11InstallationAssistant.exe file.
Step 2: Double-click this file to open this tool. In the UAC interface, click Yes.
Step 3: Click Accept and install to continue.
Step 4: This tool is downloading Windows 11, which can take some time.
Step 5: After that, click Restart now to start the installation process.
ASUS Windows 11 Update via Windows 11 ISO Mount
The above two ways are very direct and simple ways for ASUS Windows update. If you want to perform ASUS VivoBook Windows 11 update or upgrade to Windows 11 on other ASUS laptops, you can try another way and that is to use an ISO file and mount it for the update.
See how to do this work in this way:
Step 1: Visit the page of Windows 11 Download.
Step 2: In the Download Windows 11 Disk Image (ISO) section to get an ISO file of Windows 11. This will take several minutes to download.
Step 3: Right-click on this ISO file and choose Mount in Windows 10. Then, you will get a virtual drive.
Step 4: Open the drive and click the setup.exe file for an in-place upgrade.
Step 5: Follow the on-screen wizards to finish the upgrade on your ASUS laptop.
ASUS Laptop Windows 11 Update via Clean Install
In addition, you can try another indirect way to upgrade Windows 10 to Windows 11 and it is to perform a clean install of Windows 11. This can remove all the system files, settings, registry, apps, etc. So, make sure you backed up your vital files before you do and we have shown you how to do this task in the above part.
How to update Windows 10 to Windows 11 in ASUS laptops via this way? Download an ISO file of Windows 11, create a bootable USB drive using this ISO image (Related post: How to Create Windows 11 Installation Media on PC, Mac, or Linux), and boot the Windows 10 PC from the drive. Then, follow the on-screen instructions to start a clean install of Windows 11.
Tips:
In this post, we show you two categories to install Windows 11 – Windows 11 upgrade and clean install. If you want to know much information about them, go to read this post — Full Guide – Windows 11 Upgrade VS Clean Install, Which to Choose.
That’s the basic information about ASUS Windows 11 update. If you wonder how to update Windows 10 to 11 in ASUS laptops, follow these ways to install this new operating system. After finishing the installation, some related operations should be done, and go to the next parts to know much.
ASUS Driver Update for Windows 11
After installing Windows 11, there is a thing you should do – update device drivers so that the computer can work perfectly with the latest driver software. Or else, outdated drivers may lead to some issues.
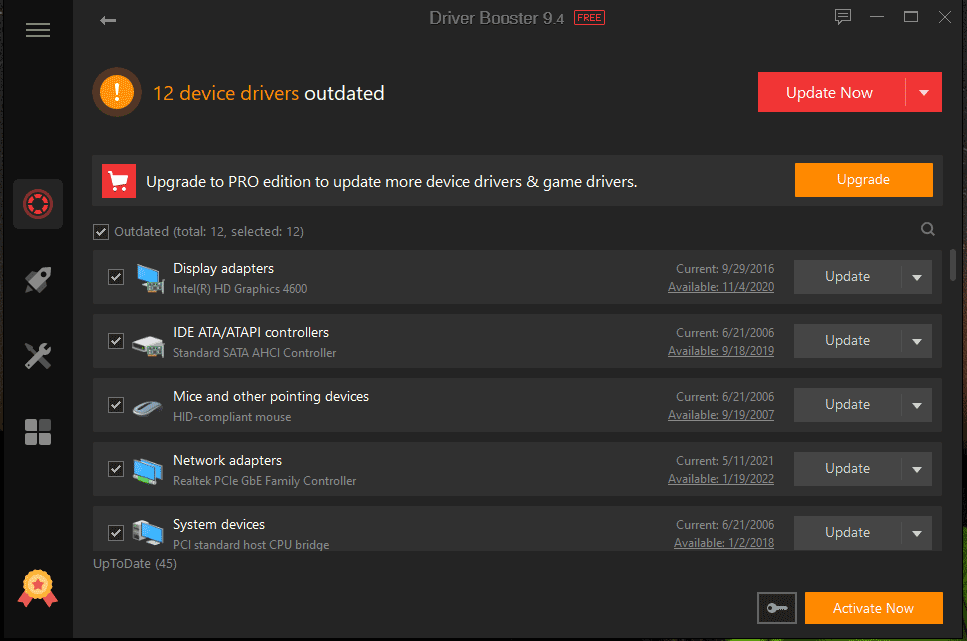
To do this work easily, you can use a professional driver update tool and we recommend using Driver Booster. It can help to scan for the entire system to detect all the devices that need driver updates. Then, update all the drivers to the latest versions at a time. Just download Driver Booster and install it for driver update.
Tips:
After upgrading to Windows 11, there are some things you are recommended to do. Just refer to this post — 10 First Things to Do after Installing Windows 11 on Your PC to find details.
Bottom Line
How to update Windows 10 to 11 in ASUS laptops like VivoBook, Zenbook, Strix G, etc.? ASUS laptop Windows 11 update is an easy job and you can follow the above-given methods (via Windows Update, Windows 11 Installation Assistant, ISO mount, and clean install) to finish the update.
If you have any ideas on ASUS Windows 11 update, write down your thoughts in the comment below to tell us. Thanks a lot. We will reply to you as soon as possible.
Installing Windows 11 on an ASUS motherboard might seem a bit daunting, but it’s actually quite straightforward. By following a few key steps and ensuring you have the right tools, you’ll have Windows 11 up and running on your ASUS system in no time. Here’s how you can do it.
This guide will walk you through the steps to install Windows 11 on an ASUS motherboard. We’ll cover everything from preparing your USB installation media to configuring your BIOS settings and completing the installation process.
Step 1: Create Windows 11 Installation Media
First, download the Windows 11 ISO file and use a tool like Rufus to create a bootable USB drive.
Make sure your USB drive has at least 8GB of storage space. Download the ISO file from the Microsoft website and launch Rufus. Select the USB drive and the ISO file, then click «Start» to create the installation media.
Step 2: Insert the USB Drive into Your Computer
Insert the bootable USB drive into an available USB port on your ASUS motherboard-equipped computer.
Ensure that your computer is powered off before inserting the USB drive. Once inserted, turn on your computer and enter the BIOS setup.
Step 3: Enter BIOS Setup
Power on your computer and press the designated key (usually F2 or DEL) to enter the BIOS menu.
In the BIOS menu, you’ll need to change the boot order to prioritize the USB drive. Navigate to the Boot tab and move your USB drive to the top of the boot priority list, then save and exit.
Step 4: Boot from USB Drive
Restart your computer and it will boot from the USB drive, starting the Windows 11 installation process.
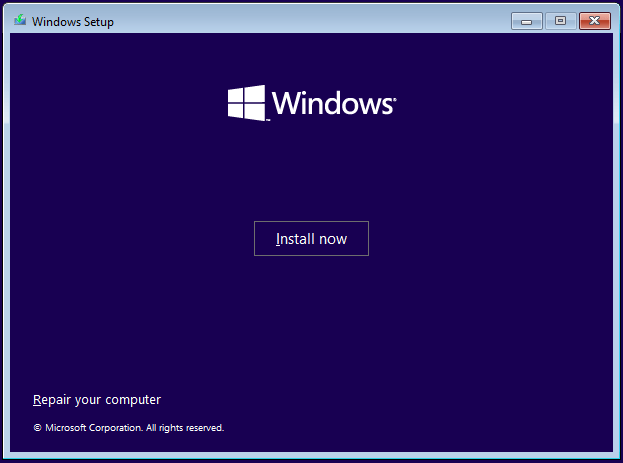
If everything goes smoothly, you should see the Windows 11 installation screen. Follow the on-screen instructions to proceed with the installation.
Step 5: Follow the Windows 11 Installation Wizard
Complete the installation by following the wizard’s prompts, such as selecting your language, time, and keyboard preferences.
You’ll also need to choose the drive where you want to install Windows 11. Typically, this would be your primary SSD or HDD. The wizard will guide you through the rest of the setup.
Step 6: Configure Your Settings
After Windows 11 is installed, you’ll need to go through the initial setup, which includes configuring your settings and preferences.
This includes setting up a user account, connecting to Wi-Fi, and installing updates. Make sure to connect your ASUS motherboard drivers if they aren’t installed automatically.
Step 7: Install ASUS Motherboard Drivers
Download and install the latest drivers for your ASUS motherboard from the ASUS support website.
Having the latest drivers ensures optimal performance and compatibility with Windows 11. Look for drivers specifically for Windows 11 if available.
Once you complete these steps, your ASUS motherboard will run Windows 11 smoothly. The installation process might take some time, but it’s mostly automated once you kick things off.
Tips for Installing Windows 11 on ASUS Motherboard
- Backup Your Data: Always back up your important files before beginning the installation process to prevent any data loss.
- Check Compatibility: Ensure your motherboard and other hardware components are compatible with Windows 11.
- Update BIOS: Consider updating your BIOS to the latest version for improved stability and compatibility.
- Keep Drivers Handy: Have all necessary drivers downloaded and ready on a secondary USB drive.
- Follow Instructions: Carefully follow on-screen instructions during installation to avoid any errors.
Frequently Asked Questions
Do I need a product key for Windows 11 installation?
Yes, you’ll need a valid Windows 11 product key to activate the operating system after installation.
Can I install Windows 11 on an older ASUS motherboard?
It depends on the hardware specifications. Check the requirements for Windows 11 to ensure compatibility.
How do I update my ASUS motherboard BIOS?
Visit the ASUS support website, download the latest BIOS update, and follow the instructions provided.
What if my PC doesn’t boot from the USB drive?
Make sure the USB drive is properly created and that it’s set as the primary boot device in the BIOS.
Is it necessary to install ASUS motherboard drivers?
Yes, installing the latest drivers ensures that all components of your motherboard function correctly with Windows 11.
Summary of Steps
- Create Windows 11 installation media.
- Insert the USB drive into your computer.
- Enter BIOS setup.
- Boot from USB drive.
- Follow the Windows 11 installation wizard.
- Configure your settings.
- Install ASUS motherboard drivers.
Conclusion
Installing Windows 11 on an ASUS motherboard might seem like a complex task, but with the right steps, it becomes a manageable process. From creating a bootable USB drive to configuring your BIOS settings, each step is crucial to ensure a smooth installation. Once complete, you’ll enjoy the new features and improved performance Windows 11 offers. Remember to always backup your important data before starting the installation, and keep your drivers updated for the best experience. If you follow this guide, you’ll have Windows 11 up and running in no time. For further reading, you might want to check out additional resources on the ASUS support website or Microsoft’s official Windows 11 page. Happy installing!
Kermit Matthews is a freelance writer based in Philadelphia, Pennsylvania with more than a decade of experience writing technology guides. He has a Bachelor’s and Master’s degree in Computer Science and has spent much of his professional career in IT management.
He specializes in writing content about iPhones, Android devices, Microsoft Office, and many other popular applications and devices.
Read his full bio here.
Ultimate Guide: Flashing BIOS & Installing Windows 11 on ASUS TUF Gaming Z690-Plus WIFI D4
Table of Contents:
- Introduction
- Flashing the BIOS
- Configuring the BIOS
- Installing Windows 11
- Downloading the latest drivers
5.1. Ethernet driver
5.2. Rest of the drivers - Preparing the installation media
- Inserting the media and booting up the PC
- BIOS update process
8.1. Using Asus Easy Flash utility
8.2. Flashing the BIOS - BIOS configuration
- Setting up XMP profile for memory
- Configuring System Agent (SA) settings
- Enabling TPM for Windows 11
- Configuring PCIe and NVMe drives
- Installing Windows 11
- Manually installing drivers
15.1. Chipset driver
15.2. MEI driver
15.3. Serial I/O driver
15.4. RST driver
15.5. Wi-Fi and Bluetooth drivers
15.6. Audio driver
15.7. AI Suite
15.8. Video driver - Windows updates and additional installations
16.1. Installing Windows updates
16.2. EVGA Precision and RGB configuration
16.3. Checking for Armoury Crate updates
16.4. Additional driver utilities - Conclusion
Installing and Configuring a PC: Step-by-Step Guide
Are You ready to bring your newly built PC to life? In this comprehensive guide, we will walk you through the process of flashing the BIOS, configuring the BIOS settings, installing Windows 11, and downloading all the necessary drivers to ensure your system is up and running smoothly. Whether you’re a seasoned PC builder or a newbie, this step-by-step guide will help you get your PC up and running in no time.
1. Introduction
Congratulations on successfully assembling your PC! Now, let’s dive into the exciting Journey of setting it up and optimizing it for peak performance. In this guide, we will cover everything from flashing the BIOS to installing the latest drivers and configuring essential settings. So, let’s get started!
2. Flashing the BIOS
The first step in setting up your PC is to flash the BIOS. Flashing the BIOS ensures compatibility with potential unsupported processors and fixes any initial issues that might exist. Download the latest BIOS from the motherboard manufacturer’s Website and follow the provided instructions to flash the BIOS using the Asus Easy Flash utility. Remember to back up your data and follow the necessary precautions during the flashing process.
3. Configuring the BIOS
Once the BIOS has been successfully flashed, it’s time to configure the BIOS settings. Enter the BIOS by pressing the designated key during startup (usually F1 or DEL). Set the correct date and time stamp, and then proceed to adjust settings such as XMP profiles for memory overclocking, PCIe and NVMe configurations, and enabling necessary features like TPM 2.0 for Windows 11 compatibility.
4. Installing Windows 11
With the BIOS configured, it’s time to install the operating system. Prepare an installation media (USB thumb drive) with Windows 11 and connect it to your PC. Enter the boot menu and select the installation media as the primary boot device. Follow the on-screen instructions to install Windows 11, choosing your desired settings and customization options.
5. Downloading the latest drivers
After installing Windows 11, it’s crucial to download and install the latest drivers for optimum performance and system stability. Visit the motherboard manufacturer’s website and navigate to the support page for your specific model. Download the necessary drivers, including the Ethernet driver, chipset driver, audio driver, and more.
5.1. Ethernet driver: Start by downloading the Ethernet driver to enable internet connectivity for further driver downloads and Windows updates.
5.2. Rest of the drivers: Proceed to download all other drivers, including the wireless driver, VGA driver, Bluetooth utilities, and more. While some drivers may not be immediately necessary, it’s advisable to have them ready for future use.
6. Preparing the installation media
In addition to the Wi-Fi or Ethernet drivers, you will need to prepare a separate installation media for Windows 11. Format a USB thumb drive to FAT32 and follow the instructions provided in a separate video, which will be linked below, to download and prepare the Windows 11 installation.
7. Inserting the media and booting up the PC
With both the driver and Windows 11 installation media ready, insert the respective thumb drives into your PC. Enter the BIOS and make sure the boot order is set to prioritize the Windows 11 installation media. Restart your PC and follow the Prompts to initiate the installation process.
8. BIOS update process
In this step, we will explain the process of updating the BIOS to ensure it supports the latest features and compatibility revisions. It’s important to keep the BIOS up to date for optimal system performance.
8.1. Using Asus Easy Flash utility: Access the Asus Easy Flash utility in the BIOS, locate the downloaded BIOS file on the thumb drive, and begin the flashing process. Follow the on-screen instructions and wait for the BIOS to be updated successfully.
8.2. Flashing the BIOS: Once the BIOS update process is initiated, the system will reboot automatically. Don’t panic if the computer restarts multiple times during this process. Once the update is complete, re-enter the BIOS to confirm the updated version.
9. BIOS configuration
After updating the BIOS, it’s essential to configure the settings properly. Within the BIOS menu, navigate through various sections to set up critical configurations, such as XMP profiles for memory overclocking, PCIe settings for M.2 drives, and enabling TPM 2.0 for Windows 11 compatibility.
10. Setting up XMP profile for memory
To unleash the full potential of your RAM, enable the XMP (Extreme Memory Profile) profile within the BIOS. This profile automatically adjusts memory timings and voltage to ensure stability and optimal performance. Select the appropriate XMP profile for your RAM and save the changes.
11. Configuring System Agent (SA) settings
In the BIOS menu, find the System Agent (SA) configuration settings. Set the PCIe configuration to match your M.2 drive specifications (Gen 3 or Gen 4). Additionally, ensure that the TPM 2.0 device is found and enabled under the Trusted Computing section to guarantee Windows 11 compatibility.
12. Enabling TPM for Windows 11
Windows 11 requires a TPM 2.0 device for secure boot and enhanced security features. Confirm that your motherboard has a TPM device enabled. If not, refer to the user manual or the manufacturer’s website for TPM installation instructions specific to your motherboard.
13. Configuring PCIe and NVMe drives
Configure the PCIe settings to support resizable bar and enable the full capabilities of your graphics card. Ensure that the NVMe drives are set to the appropriate specifications (Gen 3 or Gen 4) to maximize their performance potential.
14. Installing Windows 11
With the BIOS settings correctly configured, proceed to install Windows 11 using the previously prepared installation media. Follow the on-screen prompts, choose your desired settings, and Create your user account. Ensure that all previous partitions are removed before installing Windows 11 on the designated drive.
15. Manually installing drivers
After Windows 11 installation, it’s time to install the necessary drivers to ensure compatibility and optimal performance. Manually install each driver downloaded earlier, starting with the chipset driver, MEI driver, Serial I/O driver, RST driver, Wi-Fi and Bluetooth drivers, audio driver, AI Suite, and video driver. Extract the files from their respective ZIP folders and run the setup files. Follow the on-screen instructions for each driver installation.
16.Windows updates and additional installations
Once all the drivers are installed, navigate to the Windows update settings and download any available updates. Restart your PC if prompted. Additionally, you can use the EVGA Precision software to configure the fan curves and lighting settings for your EVGA graphics card. Check for Armoury Crate updates and install any recommended driver utilities from the motherboard manufacturer’s website for added functionality.
17. Conclusion
Congratulations! You have successfully installed and configured your PC. Ensure that you regularly update your drivers and Windows 11 to maintain system stability and security. If you have any questions or need further assistance, don’t hesitate to leave a comment below. Enjoy your new PC and happy computing!
Highlights:
- Flash the BIOS to support unsupported processors and fix any initial issues.
- Configure the BIOS settings, including XMP profiles, PCIe configurations, and TPM enablement.
- Install Windows 11 using a prepared installation media.
- Download and install the latest drivers for optimal performance.
- Manually install each driver, including chipset, audio, video, and more.
- Consider using EVGA Precision for graphics card customization.
- Regularly update drivers and Windows for optimal system stability and security.
FAQ:
Q: Do I need to update the BIOS?
A: Updating the BIOS is recommended to ensure compatibility and fix any initial issues, but it is not always necessary. Evaluate your specific situation and motherboard manufacturer’s recommendations to determine if a BIOS update is required.
Q: How often should I update my drivers?
A: It is advisable to periodically check for driver updates, especially for critical components like graphics cards and chipsets. Keep track of the latest driver versions provided by the manufacturers and update as needed for improved performance and compatibility.
Q: Can I install Windows 10 instead of Windows 11?
A: Yes, the installation process described in this guide can be applied to Windows 10 as well. Simply use a Windows 10 installation media and follow the same steps, adjusting any Windows 11-specific settings accordingly.
Q: Is it necessary to manually install all the drivers?
A: Manually installing drivers ensures that you have the latest versions and allows for customization during the installation process. However, some drivers can also be installed using software like Armoury Crate or automatic driver update utilities. Evaluate your preferences and needs when deciding whether to install drivers manually or use automated tools.
Q: Should I overclock my memory using XMP profiles?
A: Overclocking memory with XMP profiles can provide performance benefits, but it also increases the risk of instability. If you are unfamiliar with overclocking or are not confident in monitoring system stability, it is recommended to either use the default memory settings or consult an expert for assistance.
Q: What should I do if I encounter any installation or driver-related issues?
A: If you encounter problems during installation or with specific drivers, refer to the manufacturer’s support resources, consult online forums, or seek assistance from experienced individuals who have expertise with the specific components and software involved.
Note: The answers provided above are general guidelines, and specific circumstances may require tailored solutions. It is always recommended to refer to the manufacturer’s documentation and Seek expert advice if needed.