
FAQ
[Windows 11/10] Troubleshooting — Cannot Find Drives When Installing Windows OS
Applicable Products: Notebook, Desktop, All-in-One PC, Gaming Handheld, MiniPC
Note: The following method for reinstalling Windows is exclusively applicable to devices with x86/x64 architecture. For devices with ARM architecture (such as the Qualcomm® CPU platform), you can refer to this article for operating system reinstallation: Cloud Recovery within MyASUS in WinRE — Introduction.
Note: How to determine the architecture of your device.
Navigate to Windows Settings > System > About. Here, you can view the architecture of your device under System type. (The image on the left shows an x64 architecture; the image on the right shows an ARM architecture.)
This article provides a troubleshooting guide on how to solve the issue of not being able to find a disk drive during the installation of Windows 11/10. The solution is to load the corresponding driver during the installation process.
To provide you more detailed instruction, you can also click ASUS YouTube video link below to know more about How to fix cannot find drives when installing Windows 11/10:
For the Intel CPU platform, you need to manually install Intel Rapid Storage Technology (IRST) driver during the Windows installation process. You can also refer to the Intel document of How to Configure RAID or Intel Optane Memory with Intel RST on an Intel VMD Capable Platform.
Note: For models equipped with the Intel Lunar Lake CPU platform, the manual installation of IRST drivers is not supported. Please use Windows 11 24H2 or a higher version, and you can then install the operating system normally.
Note: The following pictures are a reference, it may be various depending on the different versions.
Method 1: Manually install Intel Rapid Storage Technology (IRST) driverDownload and Extract Intel Rapid Storage Technology (IRST) driver
- Please refer to this article: How to search and download drivers. Afterwards, visit the support page of your device model and download the Intel Rapid Storage Technology (IRST) driver from the Chipset category.
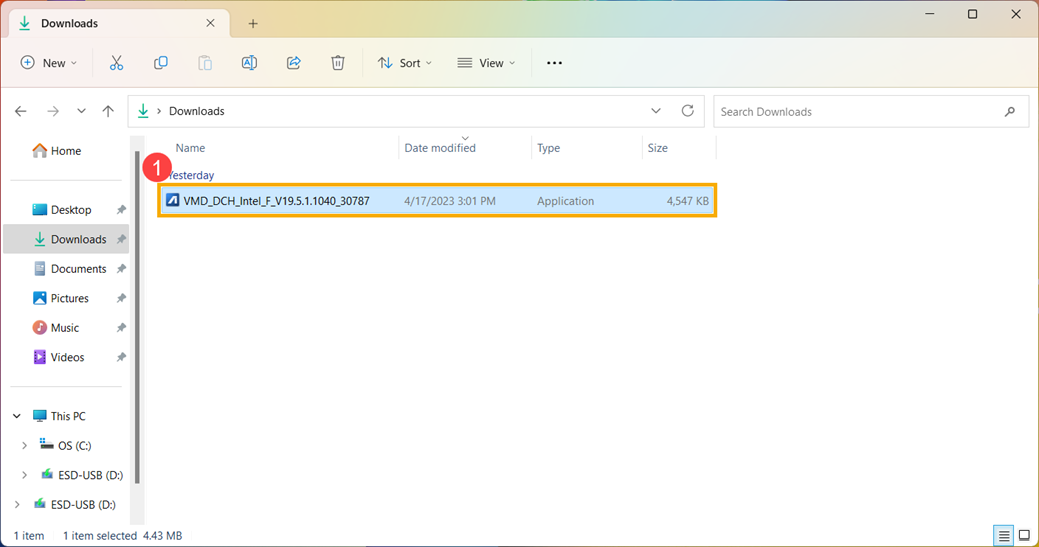
Note: The following steps use version V19.5.1.1040 as an example, and the images are for reference only. You should download the latest version for your device model. - After the download is complete, double-click on the downloaded file [VMD_DCH_Intel_F_V19.5.1.1040_30787]①.

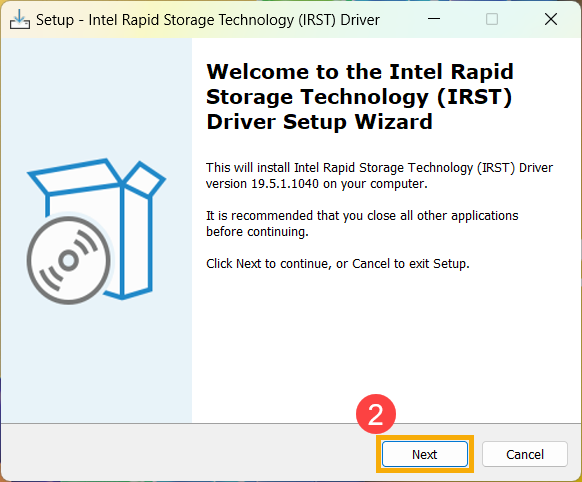
- When the IRST Setup Wizard opens, click [Next]②.
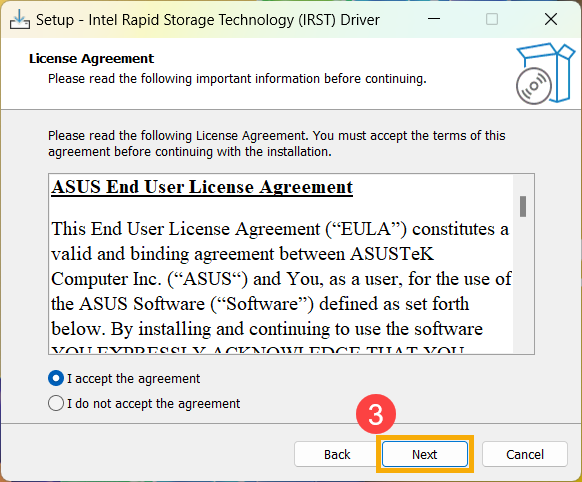
- Read and accept the Asus software license agreement, and then click [Next]③.
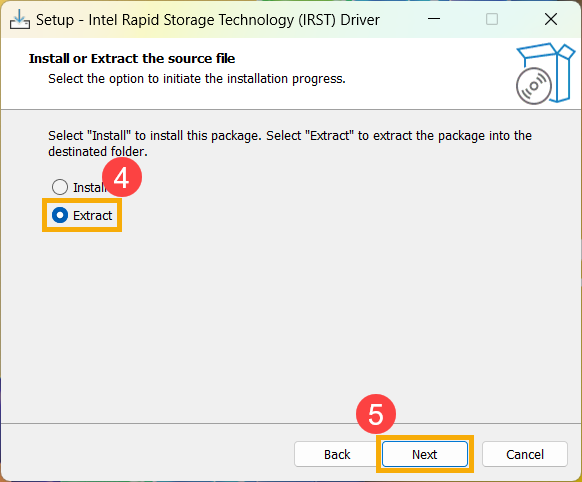
- Choose [Extract]④ and then click [Next]⑤.
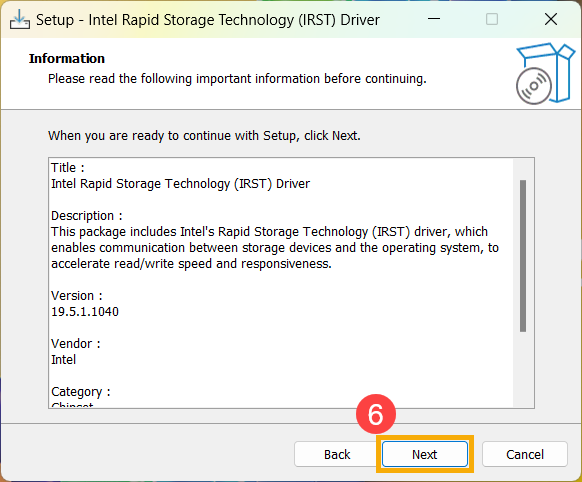
- Read the important information and then click [Next]⑥.
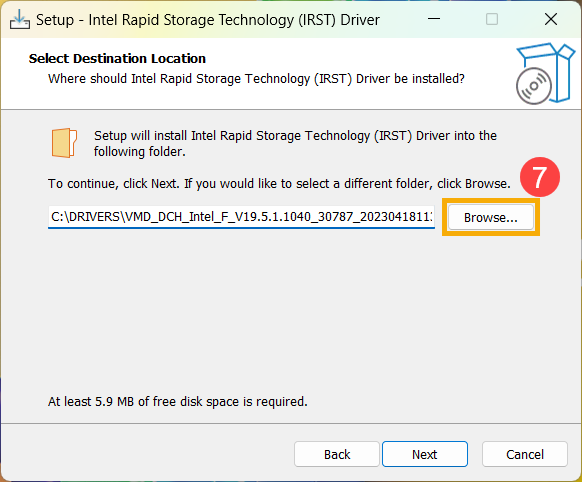
- When selecting the destination folder, connect the USB flash drive to the device and click [Browse]⑦.
Note: If your Windows 11/10 installation media is also using a USB flash drive, you can choose to extract the package to the same flash drive.
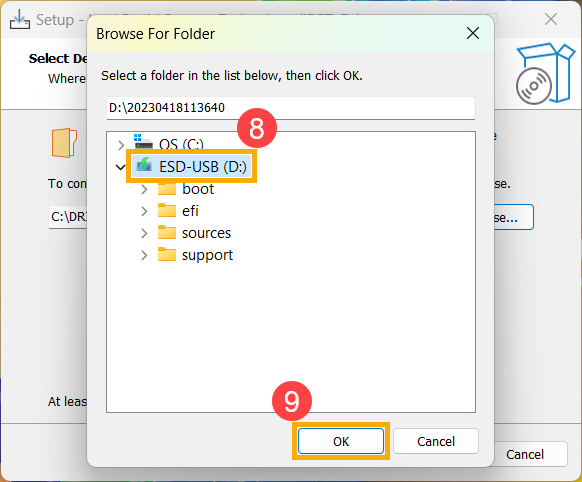
- Choose the root directory of the USB flash drive⑧ and then click [OK]⑨.
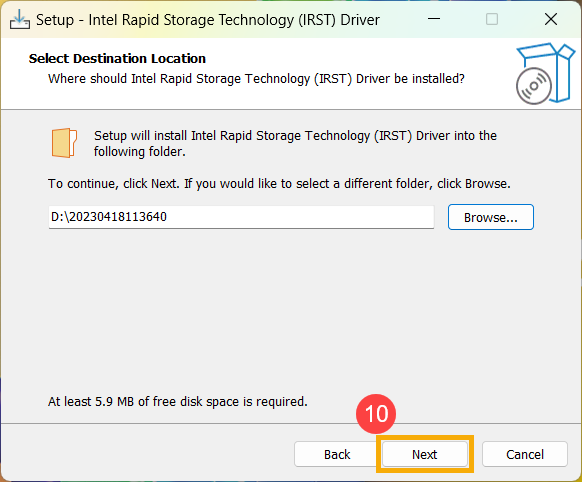
- After selecting the destination folder, click [Next]⑩.
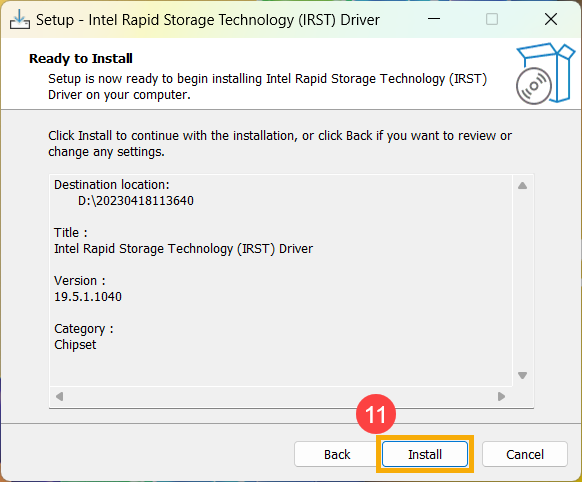
- Click [Install]⑪, and the IRST driver will be extracted to the USB flash drive.
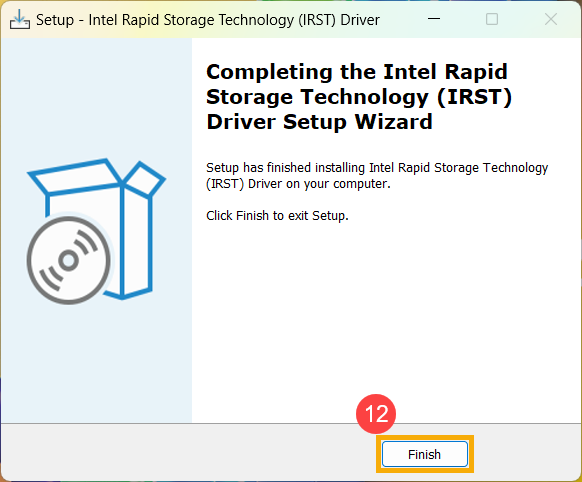
- When the extraction is complete, click [Finish]⑫ to close the installation program.
- Continue with the next section, Installing the Intel Rapid Storage Technology (IRST) driver.
Install Intel Rapid Storage Technology (IRST) driver
- Connect the USB flash drive containing the Windows 11/10 installation media and the extracted Intel Rapid Storage Technology (IRST) driver (VMD_DCH_Intel_F_V19.5.1.1040_30787) to the device . (If you are installing using a Windows 11/10 CD, please insert the CD along with the USB flash drive mentioned above.)
Note: The version numbers and images below are for reference only. Please download the latest version from the support page for your device model when performing the actual operation. - Proceed with the Windows 11/10 installation process again. If you need to know how to install Windows 11/10 using installation media, please refer to this article: How to use installation media to install Windows 11/10.
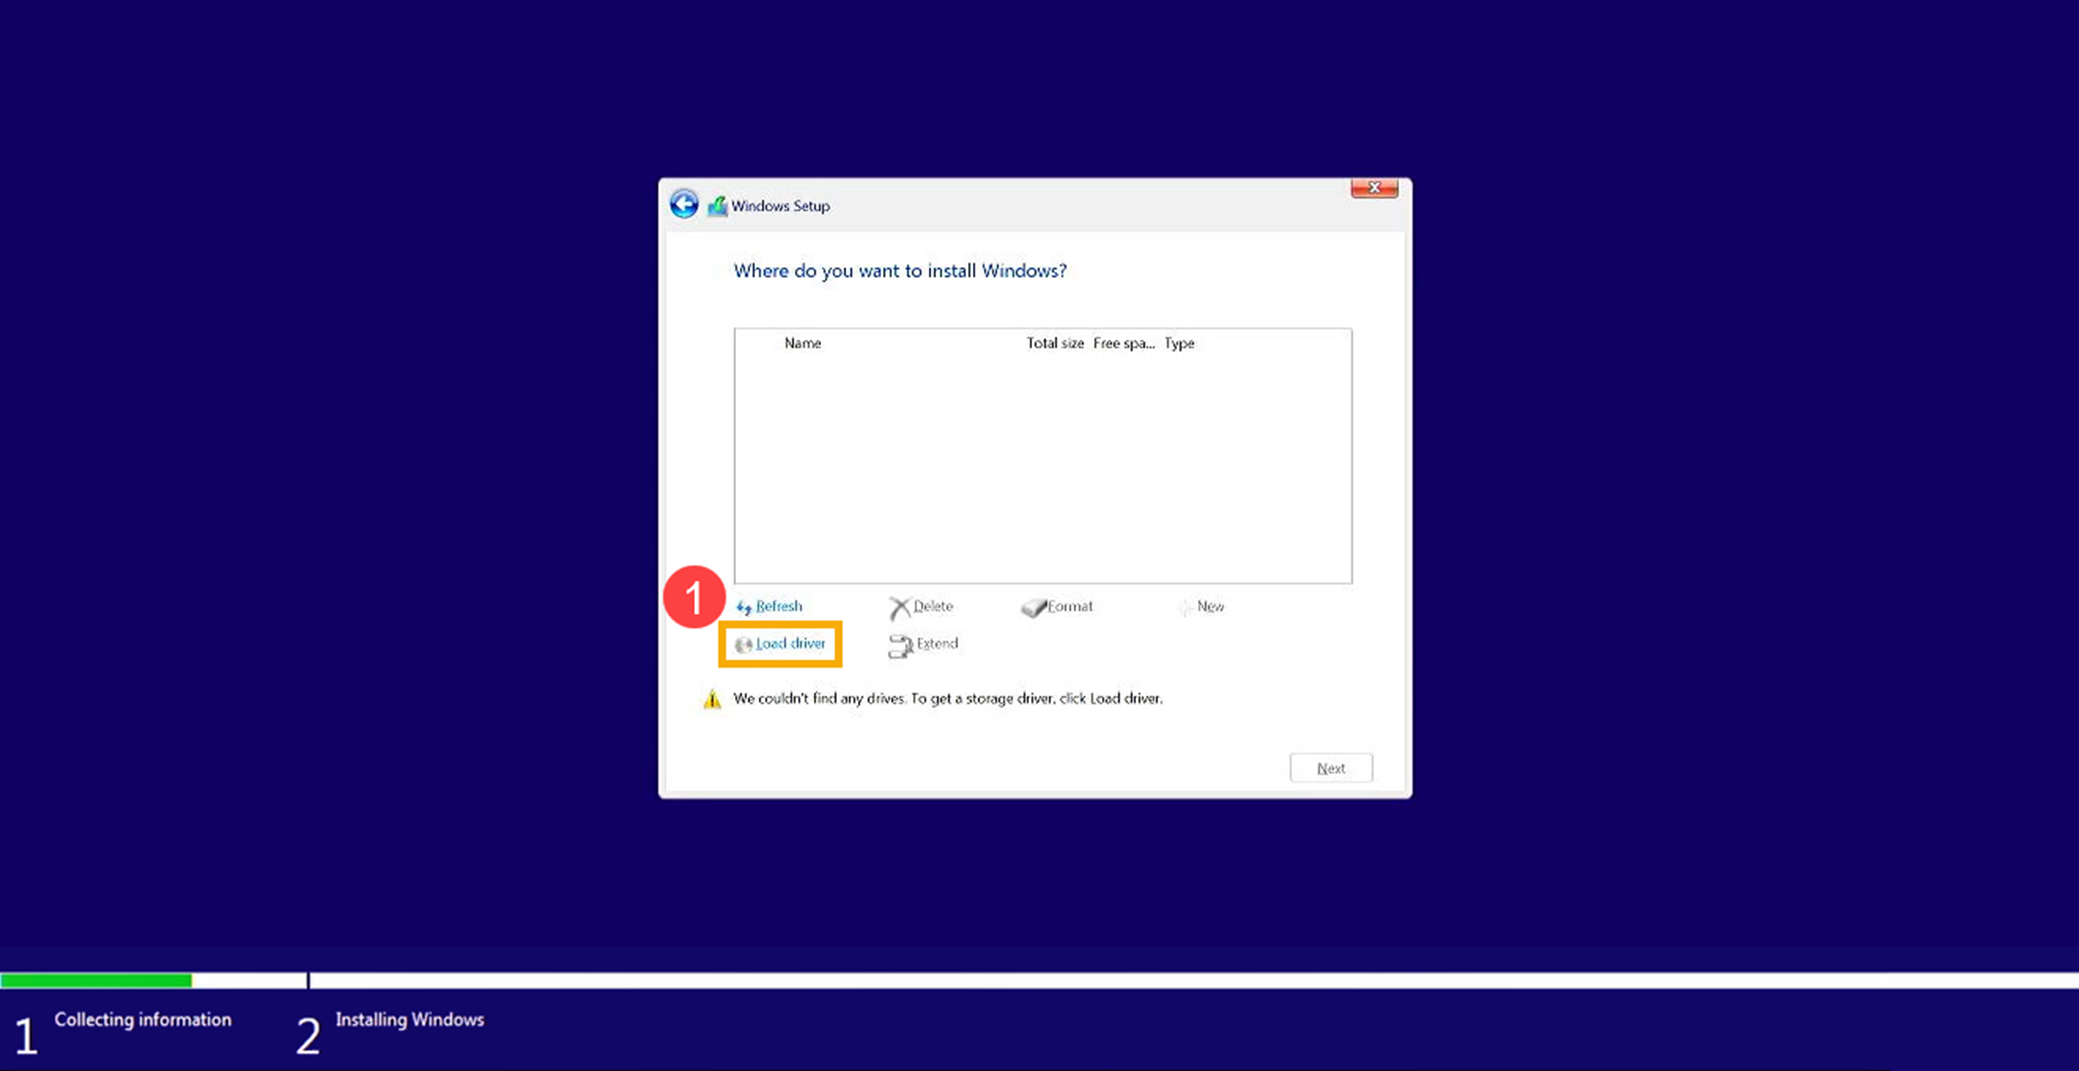
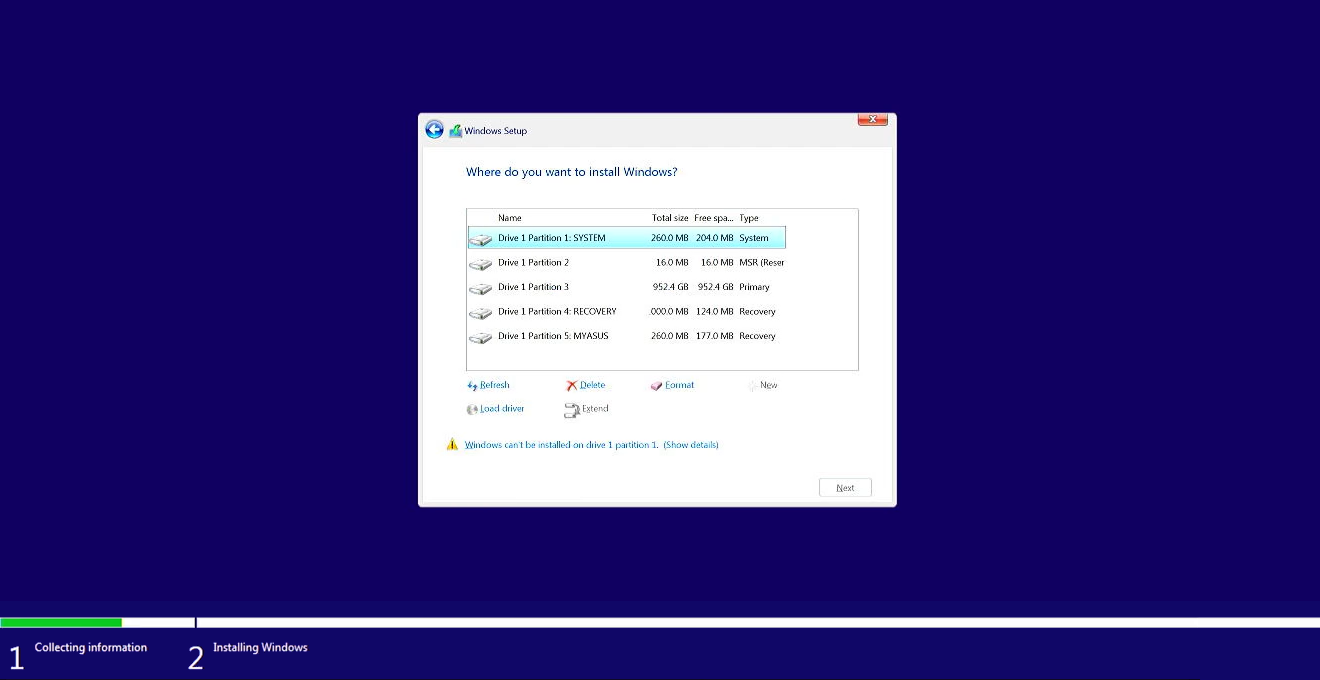
- When you see the screen ‘Where do you want to install Windows’ and Windows cannot find any drives, please click [Load driver]①.
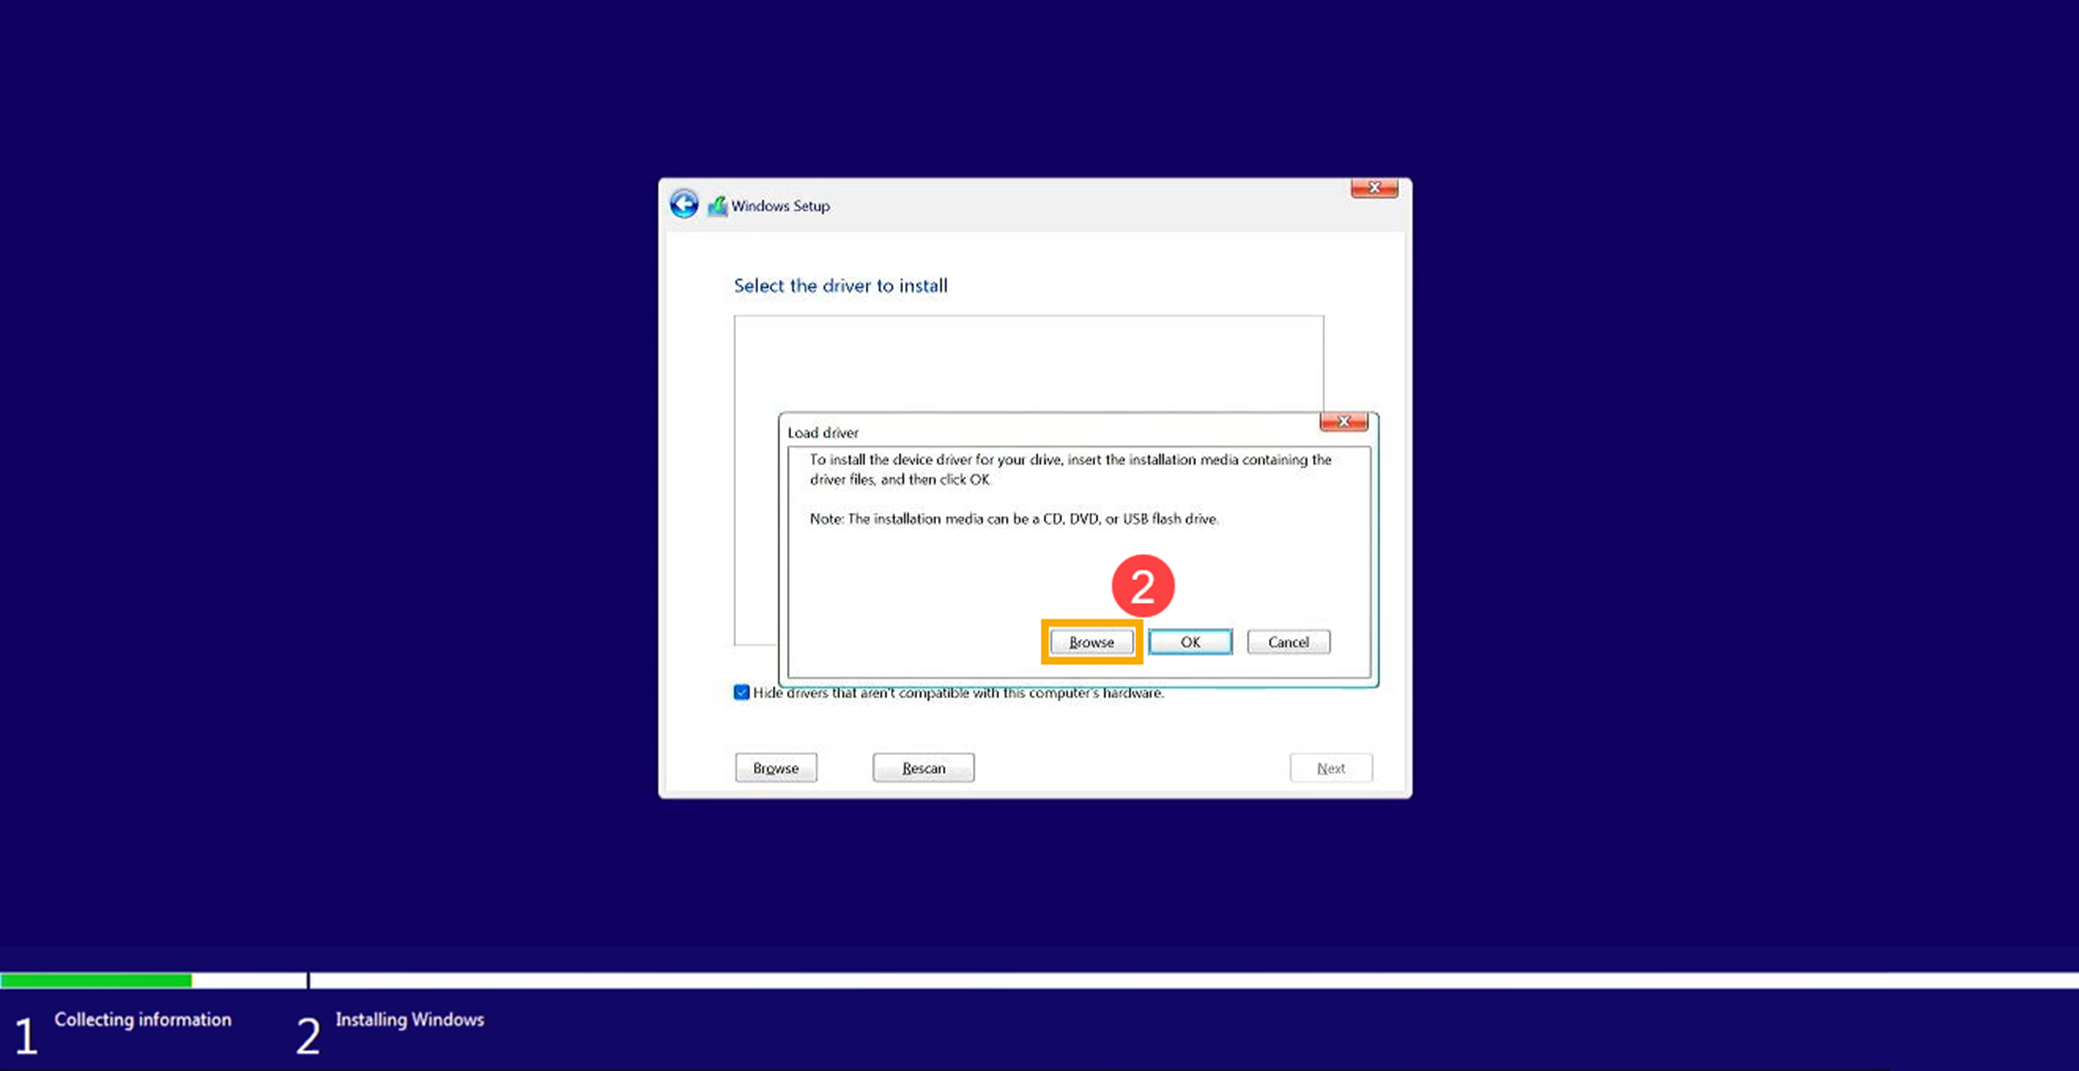
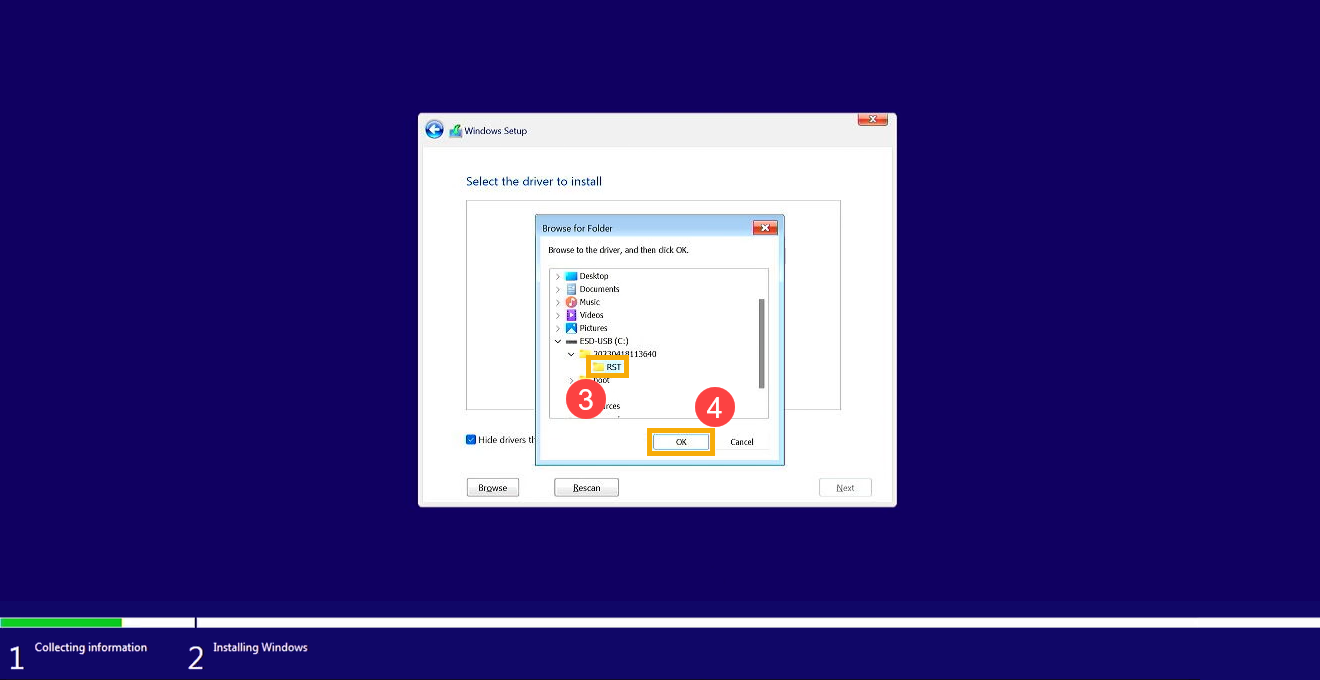
- Select [Browse]②.
- Find the folder where you extracted the IRST driver earlier, select the [RST] folder③, and then click [OK]④.
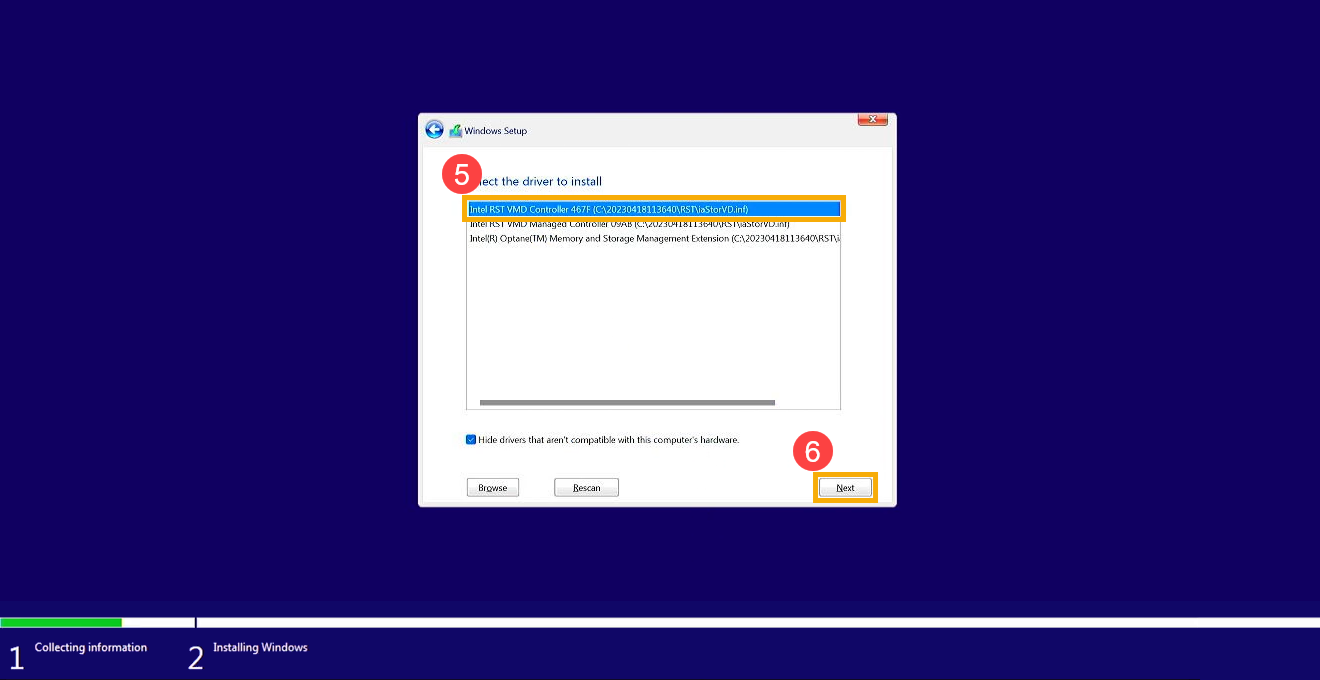
- Select [Intel RST VMD Controller]⑤, and then click [Next]⑥ to start installing the driver.
- Once the driver installation is complete, the disk drive will be displayed normally.
If you still cannot find the disk drive during Windows installation, consider referring to this section: Disable Intel Volume Management Device (VMD) technology to continue with the installation of Windows.
Method 2: Disable Intel Volume Management Device (VMD) technology
Note: Disable VMD technology will make your device can’t utilize RAID Array.
- Firstly, the device needs to enter BIOS configuration.
While the device isn’t powered on yet, press and hold the F2 button of the keyboard, and then press the Power button to enter the BIOS configuration. Here you can learn more about How to enter the BIOS configuration.
Note: Gaming handhelds need to press and hold the volume (-) key, then press the power button to turn on the device. - After entering the BIOS setup screen, please follow the steps based on your device’s BIOS interface:
Note: The BIOS screens may vary slightly depending on the model.
How to Disable VMD Technology in the UEFI Interface
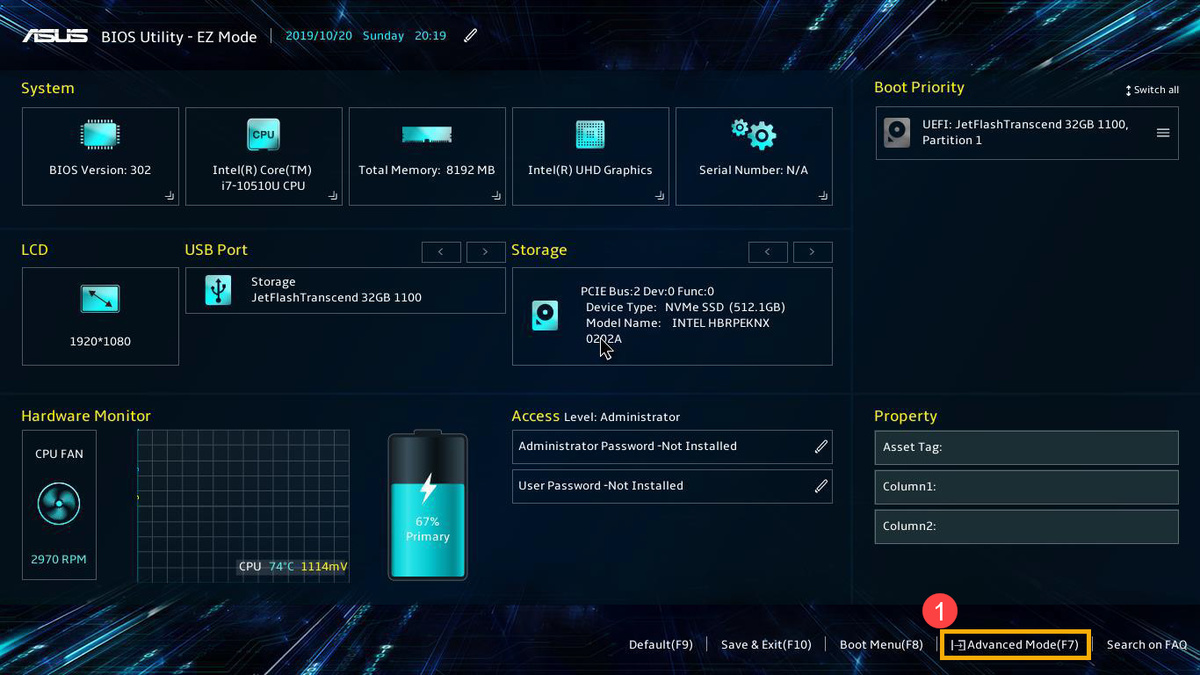
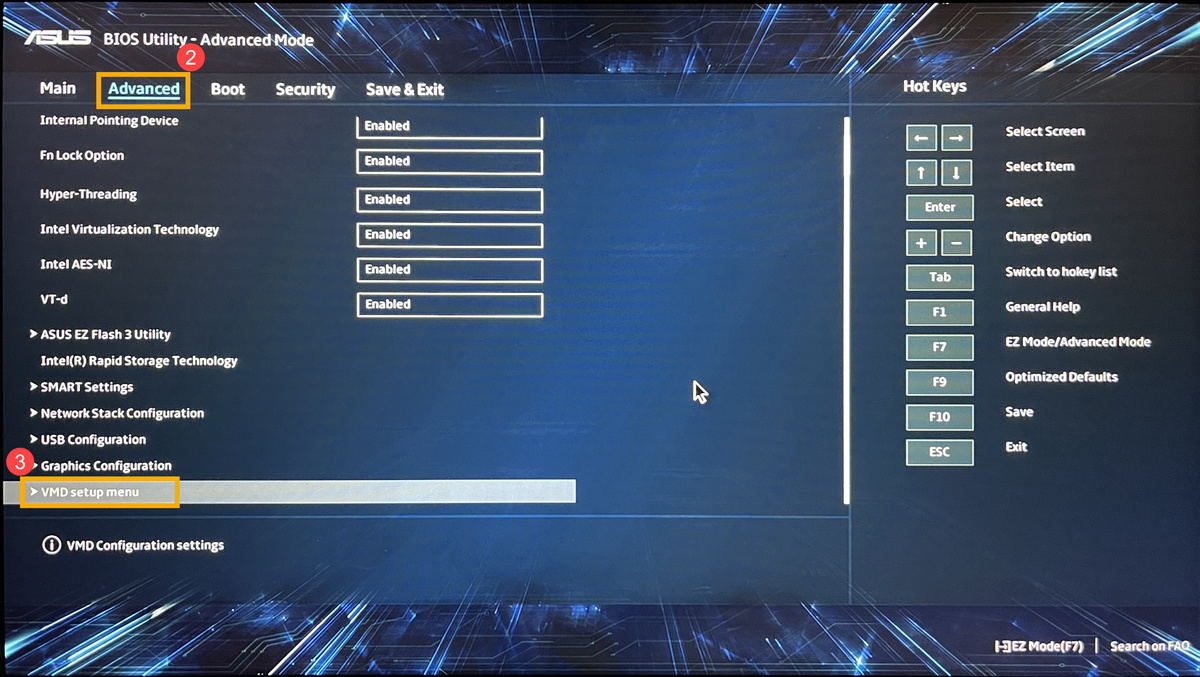
- After entering the BIOS configuration, press Hotkey[F7], or use the cursor to click [Advanced Mode]① that the screen displayed.
- Go to [Advanced]② screen, and then select [VMD setup menu]③.
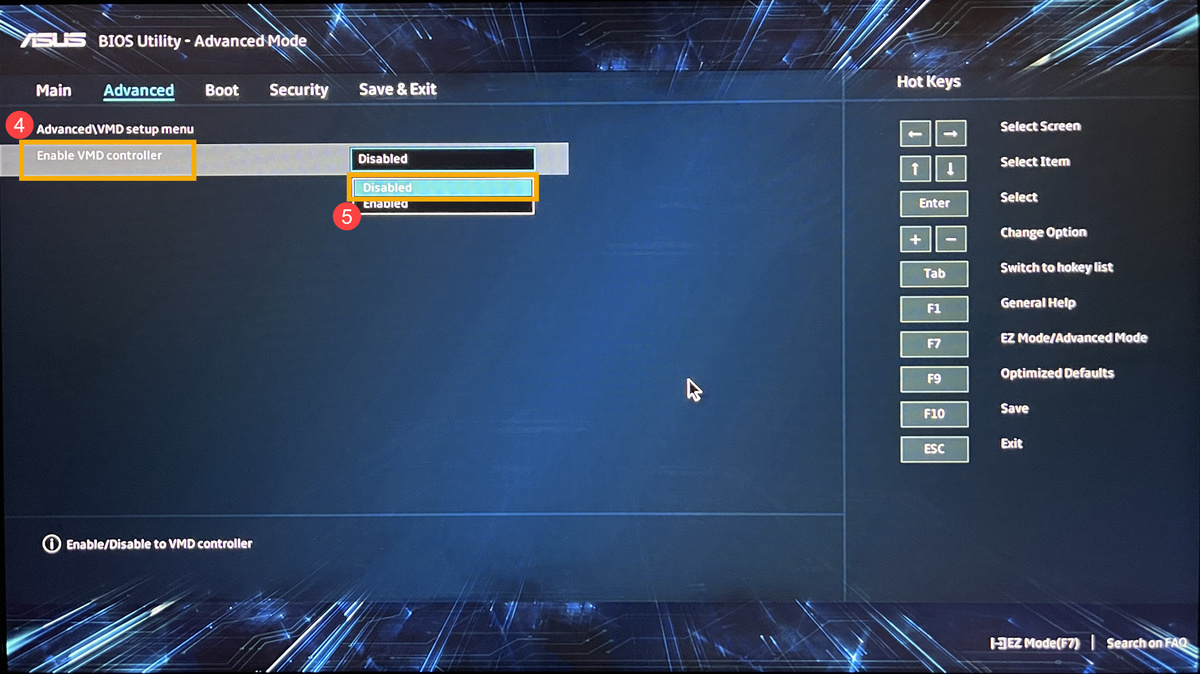
- Select [Enable VMD controller]④, and then select [Disabled]⑤.
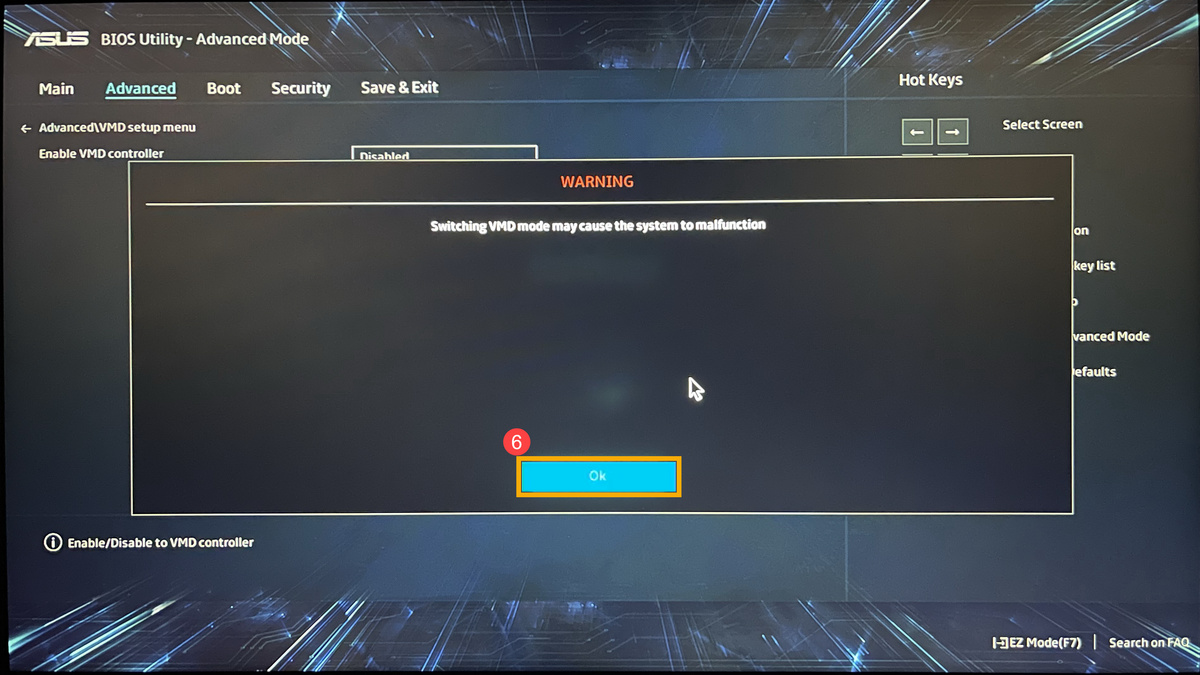
- Click [Ok]⑥ to disable Intel Volume Management Device (VMD) technology.
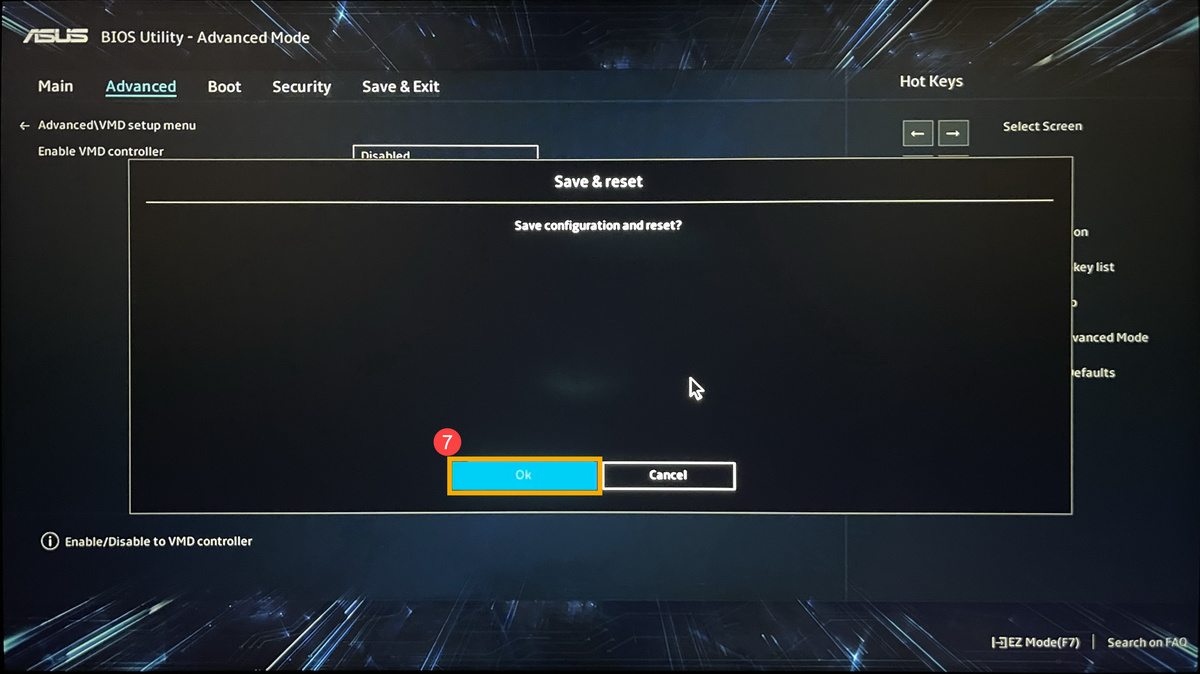
- Save & Exit Setup. Press Hotkey[F10] and select [Ok]⑦, the device will restart. After that, you will be able to find drives on this device when installing Windows 11/10. Here you can learn more about How to use installation media to insatll Windows 11/10.
Note: You can also navigate to the ‘Save & Exit’ page and select the ‘Save Changes and Exit’ option.
How to Disable VMD Technology in the MyASUS in UEFI Interface
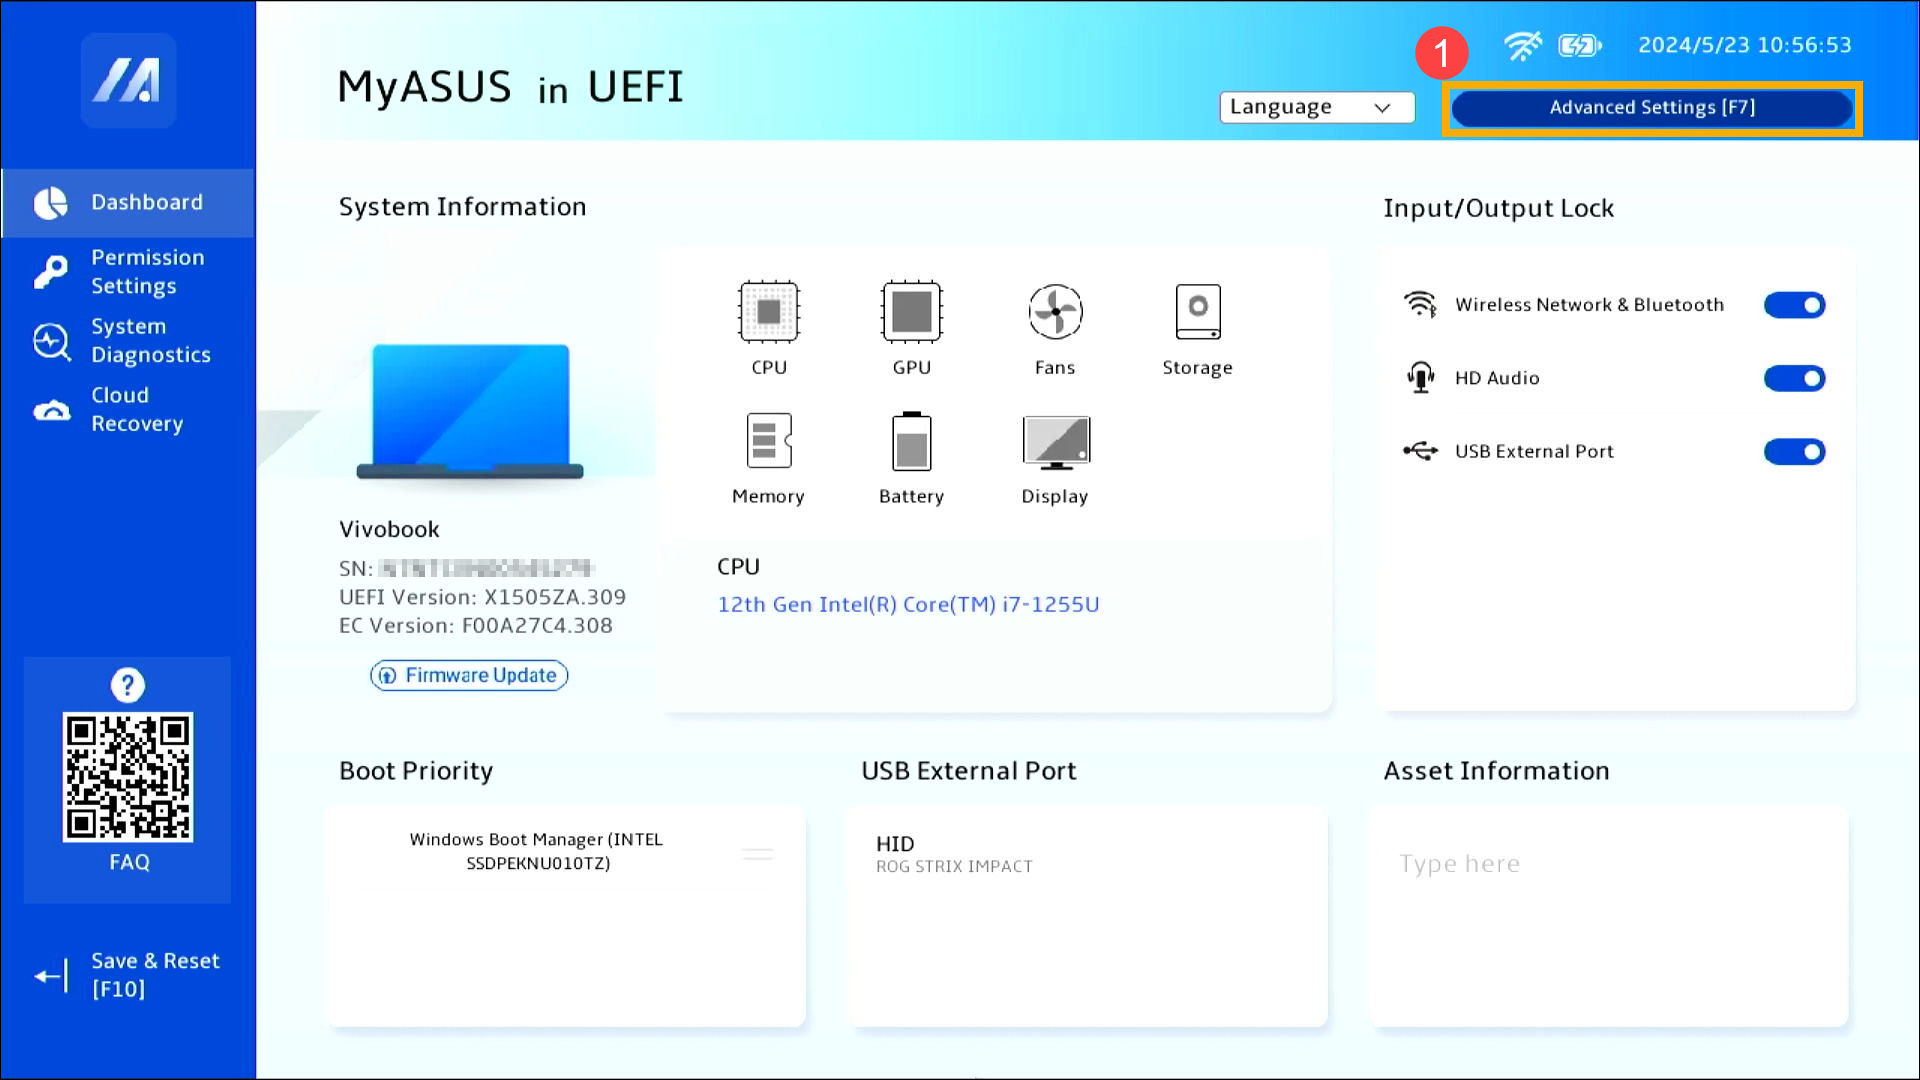
- After entering the BIOS configuration, press Hotkey[F7], or use the cursor to click [Advanced Settings]① that the screen displayed.
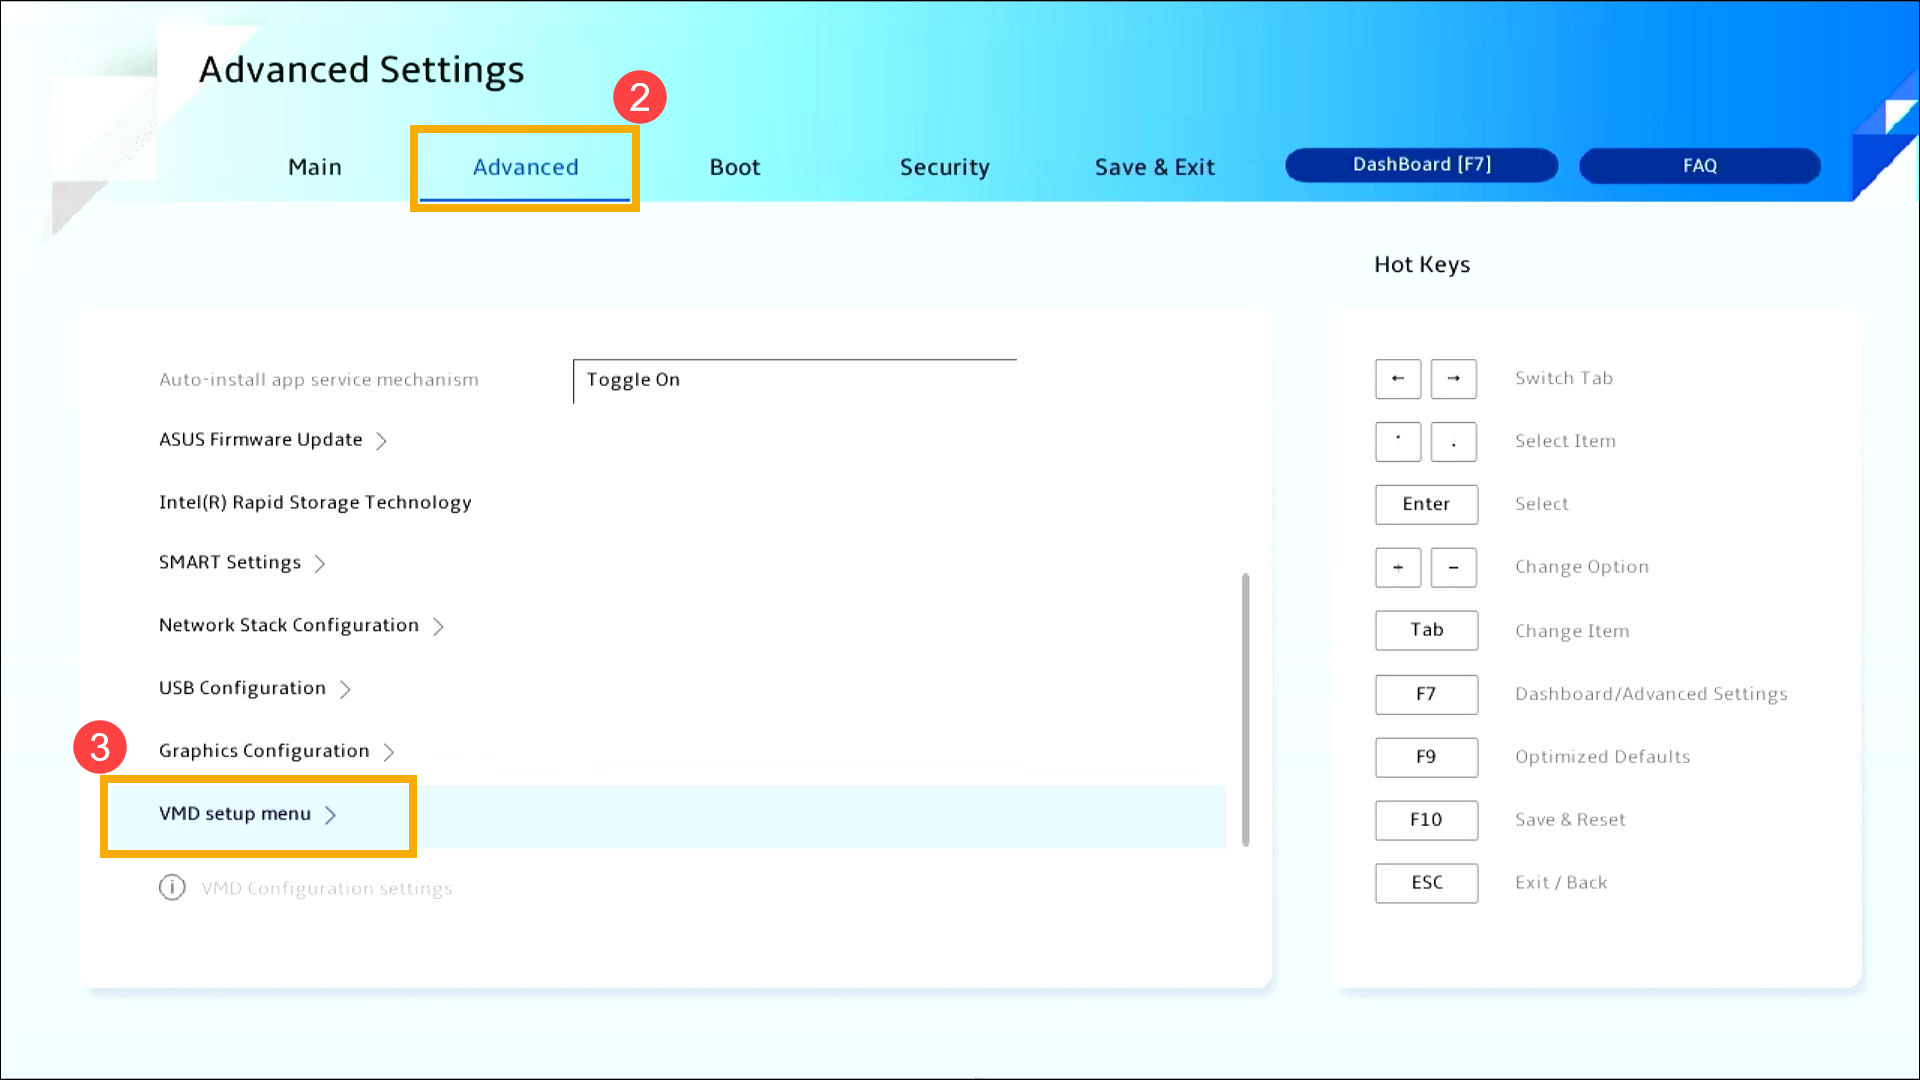
- Go to [Advanced]② screen, and then select [VMD setup menu]③.
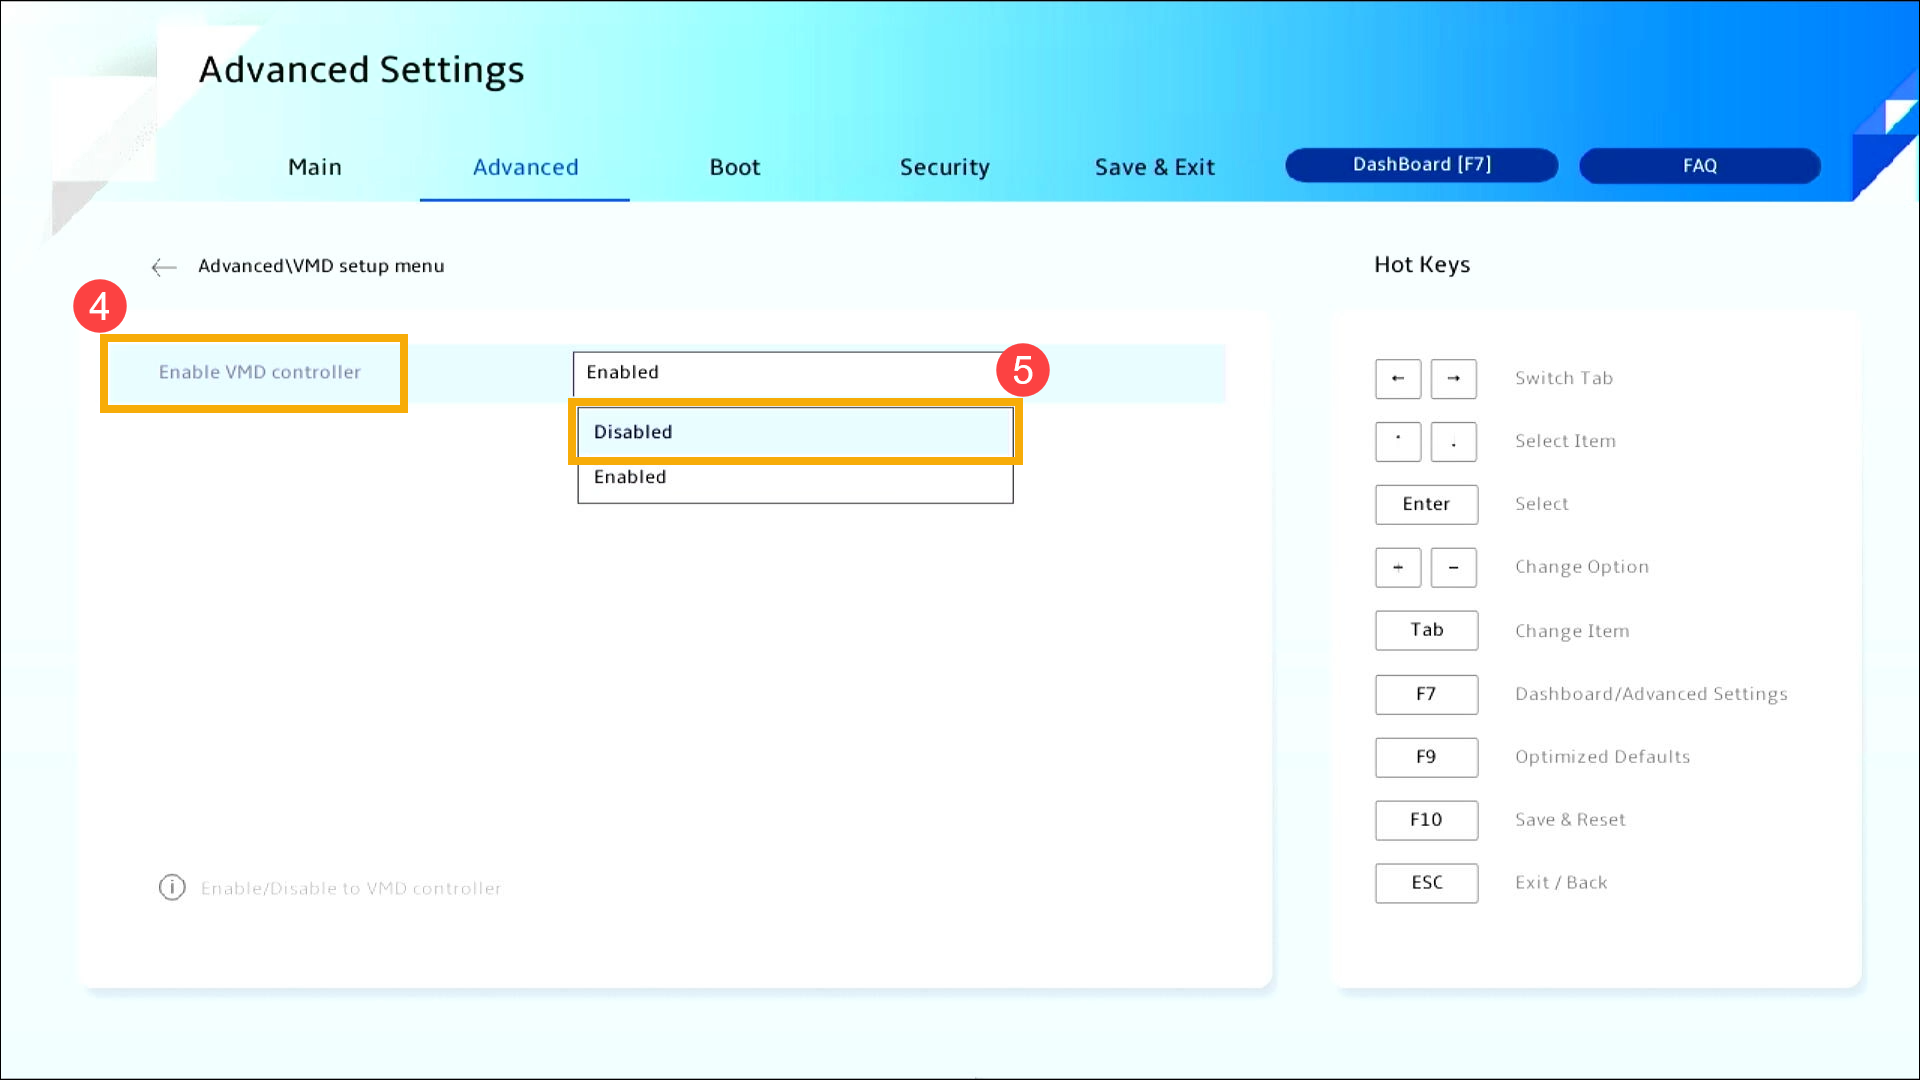
- Select [Enable VMD controller]④, and then select [Disabled]⑤.
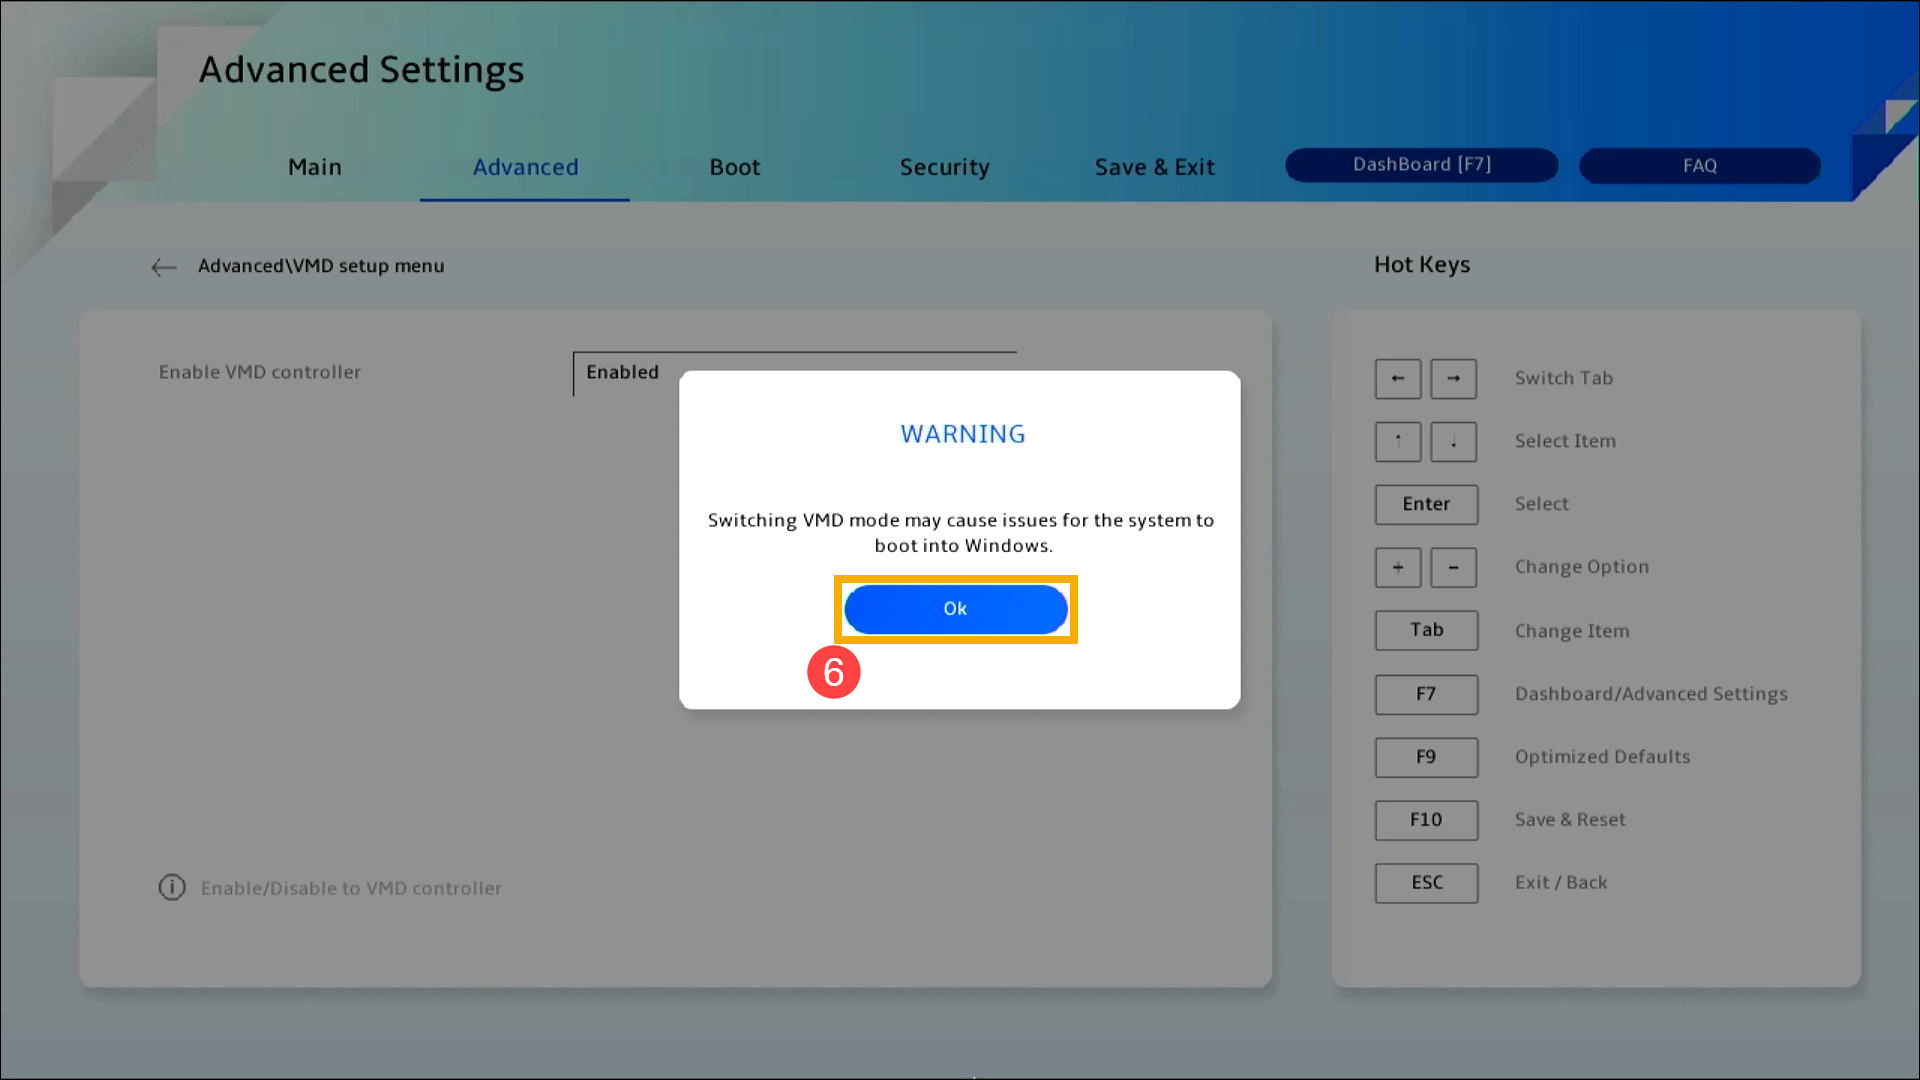
- Click [Ok]⑥ to disable Intel Volume Management Device (VMD) technology.
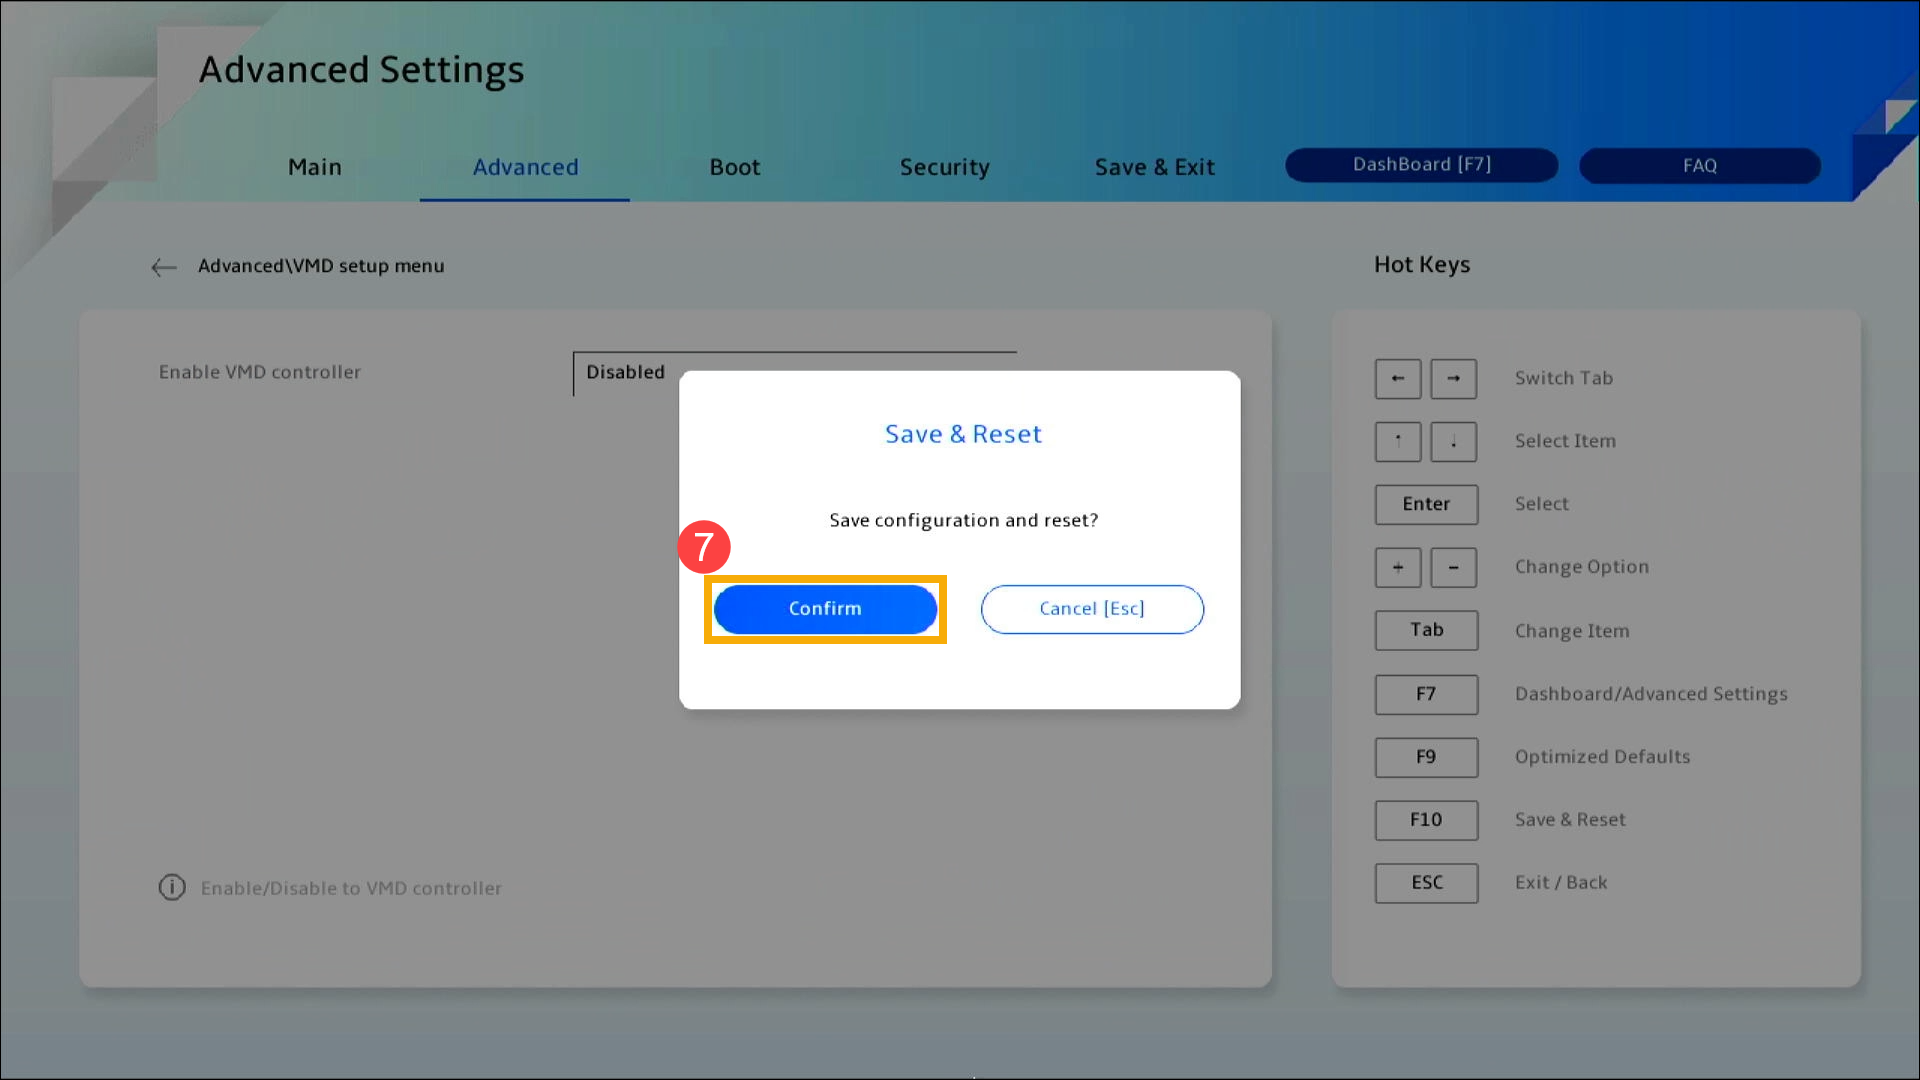
- Save & Exit Setup. Press Hotkey[F10] and select [Confirm]⑦, the device will restart. After that, you will be able to find drives on this device when installing Windows 11/10. Here you can learn more about How to use installation media to insatll Windows 11/10.
Note: You can also navigate to the ‘Save & Exit’ page and select the ‘Save Changes and Exit’ option.
If your problem is not worked out with above solution and information, please contact ASUS customer service center for further information.
Was this information helpful?
Yes
No
- Above information might be partly or entirely quoted from exterior websites or sources. please refer to the information based on the source that we noted. Please directly contact or inquire the sources if there is any further question and note that ASUS is neither relevant nor responsible for its content/service
- This information may not suitable for all the products from the same category/series. Some of the screen shots and operations could be different from the software versions.
- ASUS provides the above information for reference only. If you have any questions about the content, please contact the above product vendor directly. Please note that ASUS is not responsible for the content or service provided by the above product vendor.
- Brand and product names mentioned are trademarks of their respective companies.
| Автор | Сообщение | ||
|---|---|---|---|
|
|||
|
Junior Статус: Не в сети |
Всем здра!!! Скрины прилагаю. #77 |
| Реклама | |
|
Партнер |
|
KENDOR |
|
|
Member Статус: Не в сети |
Включить режим CSM, отключить Fastboot (Secure boot) |
|
Unicum1984 |
|
|
Junior Статус: Не в сети |
KENDOR писал(а): Включить режим CSM, отключить Fastboot Прошу прощение… Где??? Там и близко нет таких параметром в биосе(((( |
|
KENDOR |
|
|
Member Статус: Не в сети |
Для ленивых — |
|
Unicum1984 |
|
|
Junior Статус: Не в сети |
KENDOR писал(а): Для ленивых — Это все сделано, кроме Security — Secure boot menu — Secure boot control — Disabled Блин картинки не грузятся, там я все выложил, какие пункты есть каких нет |
|
KENDOR |
|
|
Member Статус: Не в сети |
Вот и отключи для начала Security, потом и CSM появится. |
|
Unicum1984 |
|
|
Junior Статус: Не в сети |
KENDOR писал(а): Вот и отключи для начала Security, потом и CSM появится. отключил, сразу же #77#77 #77#77 Последний раз редактировалось Unicum1984 24.11.2018 22:32, всего редактировалось 1 раз. |
|
KENDOR |
|
|
Member Статус: Не в сети |
И? В буде что кажет? |
|
Unicum1984 |
|
|
Junior Статус: Не в сети |
KENDOR писал(а): И? В буде что кажет? картинку выше прилепил. НИЧЕ((((( |
|
KENDOR |
|
|
Member Статус: Не в сети |
Boot option какой есть выбор ? |
|
Unicum1984 |
|
|
Junior Статус: Не в сети |
KENDOR писал(а): Boot option какой есть выбор ? только винт тошиба, и все! |
|
KENDOR |
|
|
Member Статус: Не в сети |
Unicum1984 писал(а): Ну как не видит… она в биосе есть а вот выбрать её нет возможности Где он её видит ? |
|
Unicum1984 |
|
|
Junior Статус: Не в сети |
#77#77 в пункте add boot там только можно добавить бус с тошибой, я же говорю, что даже прошить биос не могу(((( |
|
KENDOR |
|
|
Member Статус: Не в сети |
А при нажатии F8 на моменте старта бука, что в бут меню есть ? |
|
Unicum1984 |
|
|
Junior Статус: Не в сети |
KENDOR писал(а): А при нажатии F8 на моменте старта бука, что в бут меню есть ? #77#77 |
|
KENDOR |
|
|
Member Статус: Не в сети |
В главном меню, предыдущая картинка, гле юсб порты и флэшка, что происходит, если на стрелочки лево/право понажимать? |
|
Unicum1984 |
|
|
Junior Статус: Не в сети |
KENDOR писал(а): В главном меню, предыдущая картинка, гле юсб порты и флэшка, что происходит, если на стрелочки лево/право понажимать? ничего, просто он показывает что в системе 3 юсб присутствуют. я же говорю, что самое интересно, нет выбора загрузки( |
|
KENDOR |
|
|
Member Статус: Не в сети |
Ха! Нет в этом буке режима легаси, толко уефи. Так что делай руфусом флэху с разделом GPT. Запуск и установка через ESC. |
|
Unicum1984 |
|
|
Junior Статус: Не в сети |
KENDOR писал(а): Ха! Нет в этом буке режима легаси, толко уефи. Так что делай руфусом флэху с разделом GPT. Запуск и установка через ESC. А вот и болт на 32 с левой резьбой, делал, и ничего не получается, заходил а загрузчик через Esc |
—
Кто сейчас на конференции |
|
Сейчас этот форум просматривают: нет зарегистрированных пользователей и гости: 2 |
| Вы не можете начинать темы Вы не можете отвечать на сообщения Вы не можете редактировать свои сообщения Вы не можете удалять свои сообщения Вы не можете добавлять вложения |
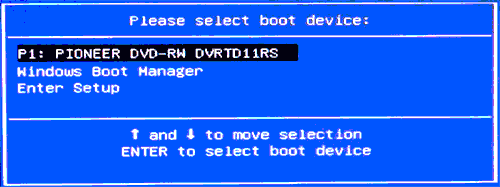
Руководства по установке Windows с флешки или просто загрузки компьютера с неё включают в себя простые шаги: поставить загрузку с флешки в БИОС (UEFI) или же выбрать загрузочную флешку в Boot Menu, однако в некоторых случаях USB накопитель там не отображается.
В этой инструкции подробно о причинах, по которым БИОС не видит загрузочную флешку или она не показывает в меню загрузки и о том, как это исправить. См. также: Как использовать Boot Menu на компьютере или ноутбуке.
Загрузка Legacy и EFI, Secure Boot
Самая распространенная причина того, что загрузочная флешка не видна в Boot Menu — несоответствие режима загрузки, который поддерживается этой флешкой режиму загрузки, выставленному в БИОС (UEFI).
Большинство современных компьютеров и ноутбуков поддерживают два режима загрузки: EFI и Legacy, при этом часто по умолчанию включен только первый (хотя, бывает и наоборот).
Если записать USB накопитель для Legacy-режима (Windows 7, многие Live CD), а в БИОС включена только загрузка EFI, то такая флешка будет не видна в качестве загрузочной и выбрать её в Boot Menu не получится.
Решения в данной ситуации могут быть следующими:
- Включить поддержку нужного режима загрузки в БИОС.
- Записать флешку иначе для поддержки нужного режима загрузки, если это возможно (для некоторых образов, особенно не самых новых, возможна только загрузка Legacy).
Что касается первого пункта, чаще всего требуется включить именно поддержку Legacy режима загрузки. Обычно это делается на вкладке Boot (загрузка) в БИОС (см. Как зайти в БИОС), а пункт, который нужно включить (установить в режим Enabled) может называться:
- Legacy Support, Legacy Boot
- Compatibility Support Mode (CSM)
- Иногда этот пункт выглядит как выбор ОС в БИОС. Т.е. название пункта — OS, а варианты значений пункта включают в себя Windows 10 или 8 (для EFI загрузки) и Windows 7 или Other OS (для Legacy загрузки).
Дополнительно, при использовании загрузочной флешки, которая поддерживает только Legacy загрузку, следует отключить Secure Boot, см. Как отключить Secure Boot.
По второму пункту: если записываемый на флешку образ поддерживает загрузку и для EFI и для Legacy режима, вы просто можете записать его иначе, не меняя параметров БИОС (однако, для образов, отличных от оригинальных Windows 10, 8.1 и 8 всё равно может требоваться отключение Secure Boot).
Проще всего это сделать с помощью программы бесплатной программы Rufus — она позволяет легко выбрать, для какого типа загрузки следует записать накопитель, основные два варианта — MBR для компьютеров с BIOS или UEFI-CSM (Legacy), GPT для компьютеров с UEFI (EFI загрузка).
Подробнее по программе и где скачать — Создание загрузочной флешки в Rufus.
Примечание: если речь идет об оригинальном образе Windows 10 или 8.1, можно записать его официальным способом, такая флешка будет поддерживать сразу два типа загрузки, см. Загрузочная флешка Windows 10.
Дополнительные причины того, что флешка не отображается в Boot Menu и BIOS
В завершение — ещё некоторые нюансы, которые, по моему опыту, бывают не до конца понятны начинающим пользователям, из-за чего возникают проблемы и невозможность поставить загрузку с флешки в БИОС или выбрать её в Boot Menu.
- В большинстве современных версий BIOS для того, чтобы поставить загрузку с флешки в настройках, её следует предварительно подключить (так, чтобы она определилась компьютером). Если она отключена, то не отображается (подключаем, перезагружаем компьютер, входим в БИОС). Также учитывайте, что «USB-HDD» на некоторых старых материнских платах — это не флешка. Подробнее: Как поставить загрузку с флешки в БИОС.
- Для того, чтобы USB накопитель был виден в Boot Menu, он должен быть загрузочным. Иногда пользователи просто копируют ISO (сам файл образа) на флешку (это не делает ее загрузочной), иногда — так же вручную копируют содержимое образа на накопитель (это работает только для EFI загрузки и только для накопителей FAT32). Возможно, будет полезным: Лучшие программы для создания загрузочной флешки.
Кажется, всё. Если вспомню ещё какие-либо особенности, имеющие отношение к теме, обязательно дополню материал.
-
-
#1
Установил винду на другом пк … не видит. Пытался через флешку обновить винду не видит флешку , точнее тире слева верху.
Что только не делал, флешку в mbr и gpt и, батарейку биоса менял вытаскивал всю периферию и кулера с мат платы. На втором пк все грузит на asus m5a78l-le не грузит. Подскажите что делать. Если поможет то на 1 секунду с флешки логотип винды появляется и опять тире… =(
Последнее редактирование модератором:
-
-
#5
непонятно кто кого не видит.