
Perhaps you’ve heard about the handy features of the Apple Calendar app from your friends or colleagues. Or maybe you’ve tried your hand at it yourself at some point.
As the default calendar app from Apple, the Calendar app can run on both the macOS and the iOS mobile operating system. However, if you want to access the Calendar app on your PC, you’ve to follow a different approach. In this article, we’ll look at how to get the Apple Calendar app on your PC and then discuss the different ways to use it.
How to Download and Use Apple Calendar on Windows PC
Apple Calendar helps you make the most of your schedules and reminders. On your Windows computer, you have two major ways to access and use Apple Calendar. Here’s how you can get started:
1. Apple iCloud
iCloud is an Apple service that keeps all your critical data on the cloud. It stores almost everything that’s kept locally on your PC: Contacts, Pages, Reminders, etc.—it’s all there. You’ll also find the Calendar app there, of course. So, if you want to access the Calendar app on Windows through iCloud, follow the steps below:
- Head to iCloud.com and sign in to your Apple account.
- You’ll get a sign-in confirmation on your Apple device. Click on Allow to go ahead with the sign-in.
- As soon as you click on Allow from above, you’ll get a verification code. Note it down.
- Now head back to your Windows. You’ll see a host of Apple apps here; click on Calendar.
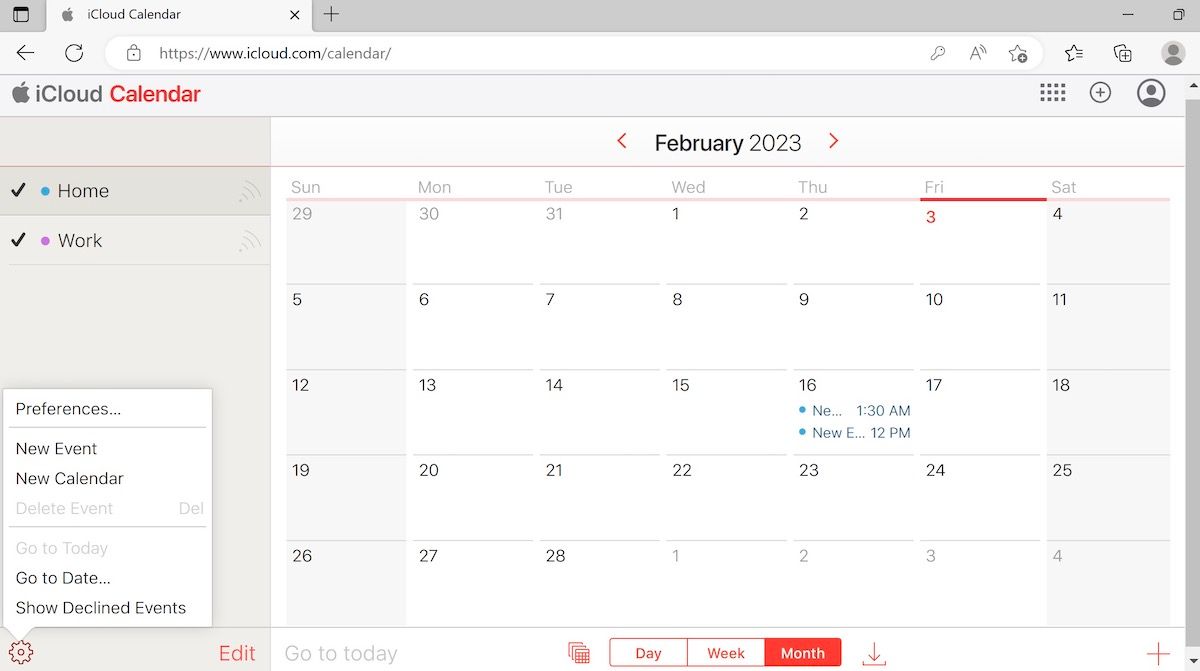
That’s it. Follow the above steps, and you’ll be inside the Calendar web app. You’ll get a view like this:
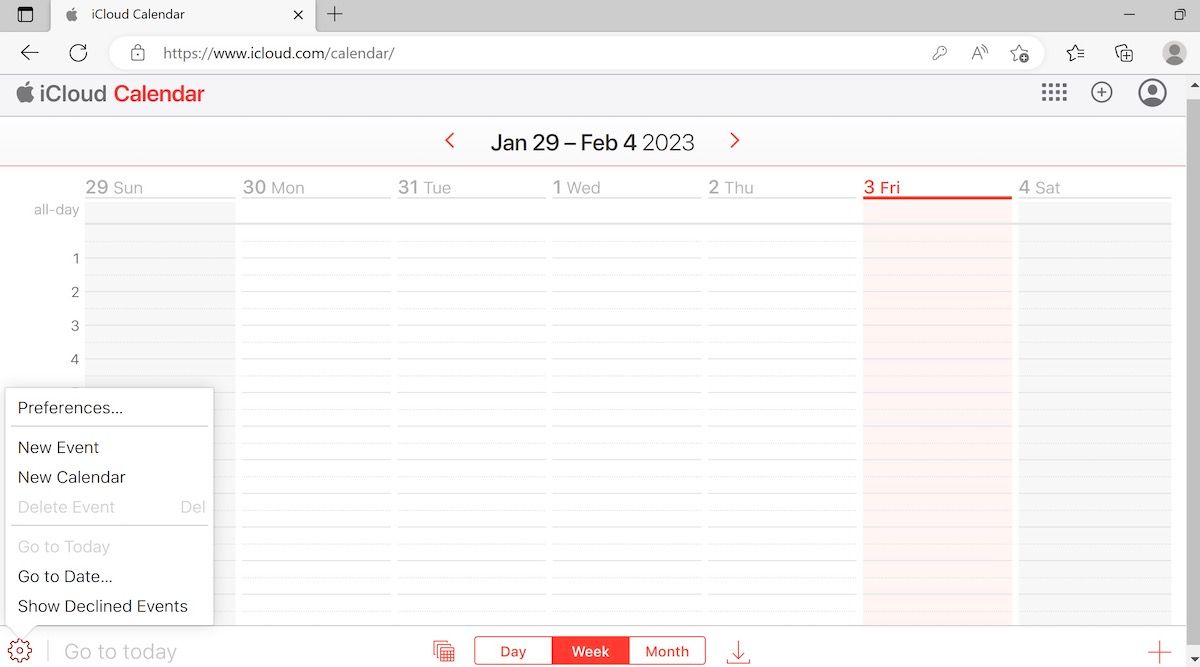
As you can see, from the bottom of the page you’ll be able to choose how you want to arrange your Calendar; you have three basic categories: Day, Week, or Month.
Similarly, if you would like to set a new event, simply click on the + sign from the right corner. Enter all the relevant details like the Event name, location, time, date, etc., and you can create your event from here successfully.
From the bottom-left corner, click on the Settings icon, and you’ll find a host of new settings that you can tweak. It includes everything from Preferences, New Event, New Calendar, Delete Event, Go to Date, Show Declined Events, and so on. You can choose either of these, and you’ll be okay with the iCloud Calendar app.
If you’d like to give a more in-depth look, you can check out our detailed guide on using Apple Calendar on Mac that we’ve covered before; the same tricks apply to using it on Windows as well.
2. iCloud Windows App
If you’re going to use the Apple Calendar for a while, then sticking with the Apple iCloud Windows app might be more helpful in the long run. After you’ve downloaded the app, you can run iCloud on Windows with ease. Here’s how you can get started:
- Head to the Microsoft Store and download the iCloud app from there.
- Click on Open after the installation is finished.
- Enter your Apple ID and password, and click on Sign in to proceed.
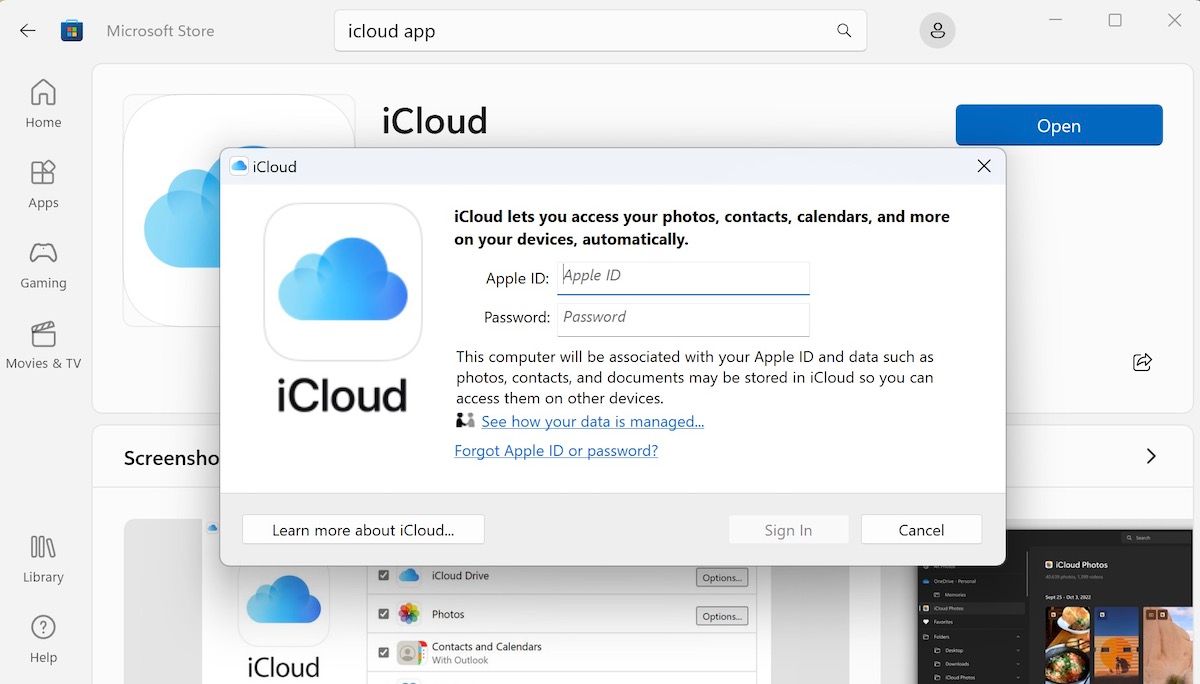
You’ll get a new dialog box on your Apple device asking you to confirm your action. Click on Allow to move ahead from there. Next, you’ll receive a verification code on your Apple ID as soon as you do this. Note down the code and follow the steps below:
- Enter the code you noted above into your iCloud app, and the app will log you in automatically.
- You’ll get asked to sync iCloud, Bookmarks, Photos, Mail, Calendar, etc.
- Turn on the iCloud Mail and Calendar sync with Outlook and click on Apply.
- Now open the Outlook app on your Windows and use the Calendar option from the bottom.
And that’s how, with the help of the iCloud Windows app and Outlook, you can use the Apple Calendar on your PC.
Getting and Using the Apple Calendar on Windows PC
The Calendar app from Apple has all the right features that make it a joy to use; the options to sync, the ability to set up reminders, the sleek design, etc.—all a helpful addition to the workings of your PC. Luckily, now you can enjoy the same features of Apple Calendar on your PC; follow the different methods we’ve laid out above and your settings will be laid out.
Apple Calendar is a popular time-management and scheduling application that is primarily designed for macOS and iOS devices. However, many Windows users also find the Apple Calendar to be a useful tool for organizing their daily schedules and keeping track of important events. In this article, we will guide you through the process of using Apple Calendar on Windows 10 or 11.
Overview of Apple Calendar
Apple Calendar, formerly known as iCal, is a digital calendar application developed by Apple Inc. It provides users with a convenient way to manage their schedules, appointments, and events. The app features a sleek and intuitive interface that allows users to create, edit, and view calendars, as well as set reminders and alerts for upcoming events.
One of the key features of Apple Calendar is its integration with other Apple services such as iCloud, which allows users to sync their calendars across all their Apple devices. This means that any changes made to your calendar on one device will automatically be reflected on all your other devices.
Using Apple Calendar on Windows 10 or 11
While Apple Calendar is not natively supported on Windows devices, there are still several ways to access and use it on Windows 10 or 11. Below, we will discuss some methods that you can use to access and use Apple Calendar on your Windows PC.
Method 1: Accessing Apple Calendar via iCloud
One of the easiest ways to access Apple Calendar on your Windows PC is by using the iCloud website. To do this, follow the steps below:
Step 1: Open a web browser on your Windows PC and navigate to the iCloud website (www.icloud.com).
Step 2: Sign in to your iCloud account using your Apple ID and password.
Step 3: Once you are logged in, click on the «Calendar» icon to access your Apple Calendar.
Step 4: You can now view, create, edit, and delete events on your Apple Calendar directly from the iCloud website.
Using Apple Calendar via iCloud is a convenient method for accessing your calendar on Windows devices. However, please note that this method requires an active internet connection and may not offer all the features available in the native Apple Calendar app.
Method 2: Syncing Apple Calendar with Windows Calendar App
Another way to access Apple Calendar on Windows 10 or 11 is by syncing it with the built-in Windows Calendar app. To do this, follow the steps below:
Step 1: On your Windows PC, open the Windows Calendar app by clicking on the Start menu and searching for «Calendar.»
Step 2: In the Windows Calendar app, click on the settings icon (gear icon) in the bottom left corner of the window.
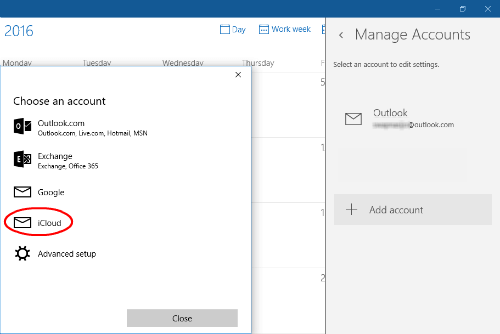
Step 3: Select «Accounts» from the settings menu and click on «Add account.»
Step 4: Choose «iCloud» from the list of account options and enter your iCloud email address and password.
Step 5: Follow the on-screen instructions to complete the setup process. Once your iCloud account is added, your Apple Calendar events will sync with the Windows Calendar app.
By syncing your Apple Calendar with the Windows Calendar app, you can access and manage your calendar events directly from the Windows desktop. This method provides a more seamless integration between your Apple and Windows devices, allowing you to stay organized across different platforms.
Method 3: Using Third-Party Apps
If you prefer a more feature-rich experience when using Apple Calendar on Windows, you can also consider using third-party calendar applications that offer support for iCloud calendars. Some popular third-party calendar apps that support Apple Calendar integration on Windows include Fantastical, BusyCal, and CalendarPro.
To use third-party apps to access Apple Calendar on Windows, follow the steps below:
Step 1: Download and install the desired third-party calendar app on your Windows PC.
Step 2: Open the app and navigate to the settings or account management section.
Step 3: Add your iCloud account to the app by entering your iCloud email address and password.
Step 4: Once your account is added, you will be able to view and manage your Apple Calendar events within the third-party app.
Using third-party calendar apps can provide additional features and customization options that may not be available in the built-in Windows Calendar app. These apps often offer a more seamless integration with iCloud, allowing you to access and manage your Apple Calendar events in a more efficient manner.
Conclusion
While Apple Calendar is primarily designed for macOS and iOS devices, Windows users can still access and use the app on their PCs through various methods. By following the steps outlined in this article, you can seamlessly integrate your Apple Calendar with your Windows 10 or 11 device, allowing you to stay organized and on top of your schedule.
Whether you choose to access Apple Calendar via iCloud, sync it with the Windows Calendar app, or use third-party apps, there are several options available for Windows users to make the most of this popular time-management tool. With the ability to view, create, and edit events across multiple devices, Apple Calendar offers a convenient way to keep track of your schedules and appointments, regardless of the platform you are using.
If you’re moving from a Mac to a PC, you may want to retain your iCloud email and calendar accounts, rather than get a new address or set up automatic forwarding. Fortunately, Apple’s internet services are compatible with the Windows 10’s Mail and Calendar applications, and it’s not that difficult or time consuming to set it all up.
While you’ll need to download the iCloud on Windows application to access the photos and bookmarks from your iCloud account, all you need to get your mail and calendars running on Windows is your sign-in information. Once you set up your iCloud account up in Windows 10, the Live Tiles in the Start Menu will now contain up-to-the-minute information, with your upcoming appointments and the subject lines from your unread email messages.
MORE: Windows 10: Full Review
A lot of the changes from OS X to Windows 10 are confusing, but since both operating systems have apps named Mail and Calendar, there are at least two fewer thing you’ll have to get used to. Here are our step-by-step instructions for setting up these iCloud services in Windows 10.
How to Install iCloud Email and Calendars on Windows 10
1. Click the Start button.
2. Type «settings».
3. Select the Settings app.
Sign up to receive The Snapshot, a free special dispatch from Laptop Mag, in your inbox.
4. Click Accounts.
5. Click Add an account.
6. Select iCloud.
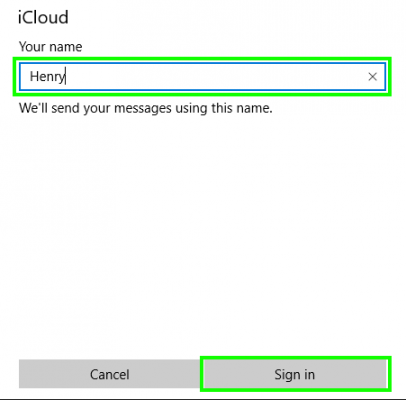
7. Enter your iCloud email address and password, and click Sign in. If you have two-factor authentication enabled for iCloud, you’ll need to generate a new password from the Apple ID website.
9. Click Done.
10. Click the Start button.
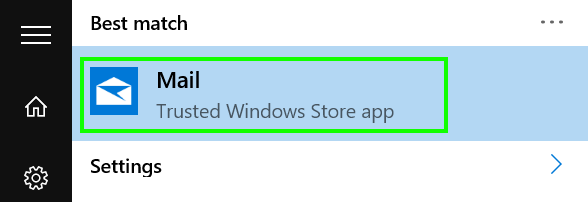
11. Type «mail».

12. Select Mail.
13. Click Get Started.
14. Click Ready to go.
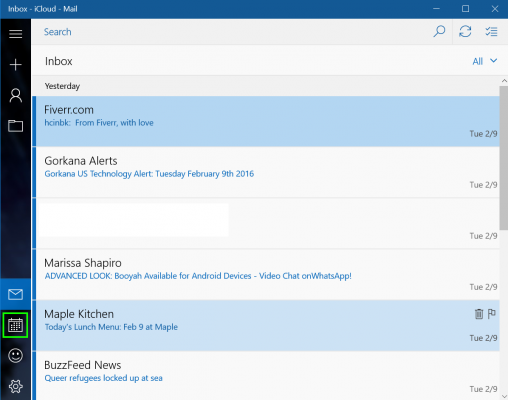
15. Click the Calendar icon. Your iCloud email will begin downloading.
16. Click Get Started.
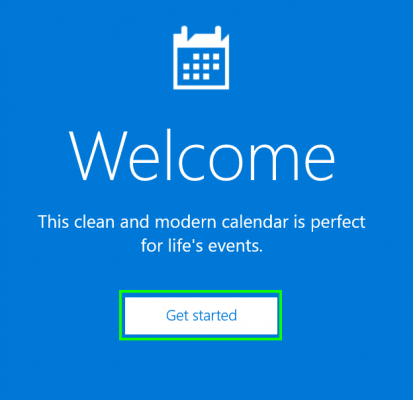
17. Click Ready to go.
Now your iCloud email and calendars are set up on your PC!
Mac to PC Guide: How to Make the Switch
- Previous Tip
- Next Tip
- Create a Microsoft Account
- Set Up and Use iCloud on Windows
- Format a Hard Drive For Both Windows and Mac
- Move Your Mac files to a Windows PC
- Convert Mac-Specific Files To Work on Windows 10
- Authorize Your New PC with Your iTunes Account
- How to Import iPhone Photos to Windows 10
- A Guide to Windows 10 Touchpad Gestures for Mac Users
- A Mac User’s Guide to Windows 10 Keyboard Shortcuts
- Sign Into Facebook and Twitter in Windows 10
- How to Force Quit in Windows 10
- How to Install Apps in Windows 10
- Make Desktop Shortcuts in Windows 10
- Snap 4 Windows at Once in Windows 10
- How to Use Cortana in Windows 10: Tips and How-Tos
- Install QuickTime on Windows 10
Henry was a contributing writer at Laptop Mag. He penned hundreds of articles, including helpful how-tos for Windows, Mac, and Gmail. Henry has also written about some of the best Chromebooks, and he has reviewed many Apple devices, including various MacBook Air laptops. He is now a managing editor at our sister site Tom’s Guide, covering streaming media, laptops, and all things Apple.
More about hard drives online storage
Apple and Microsoft OS were not friendly enough to synchronize iCloud calendars on Windows Operating system. Apple hesitates to break its echo system and limited real-time synchronization and other features in between MAC and iOS devices.
We mentioned a couple of workarounds to sync iCloud calendar with Windows Desktop Calendar client with CalDAV and other offline methods early in our articles. Apple released its application for Windows users to integrate iCloud features with Windows OS. Unfortunately, “iCloud for Windows” failed to give the same user experience that enjoyed by Mac users.
Editor’s Note: The solution required MS Office 365 or Outlook 2010 and above to work Please see more details at Apple’s Support Page.
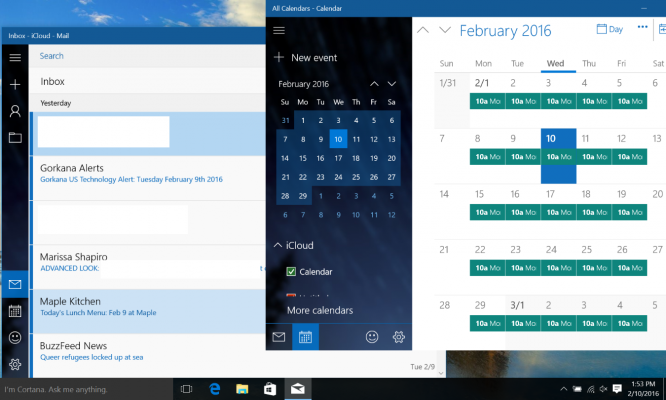
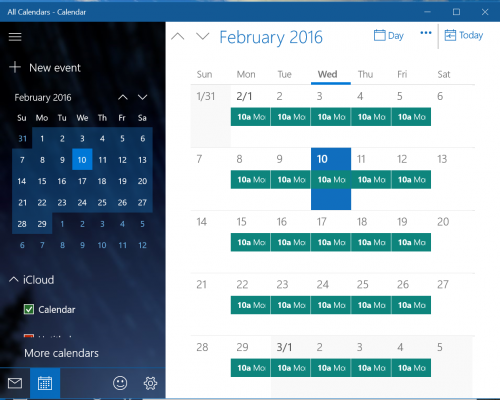
Windows 10 made a dramatic change in desktop Calendar Application. The best of them that I can say, Windows 10 calendar app can sync and display multiple iCloud calendars in a single window. This new baked Windows Calendar app is giving an excellent UI experience like a MAC Calendar with iCloud Calendars. If you want to sync a Google calendar instead of iCloud calendar, please see our solution to Setup Google Calendar in New Windows 10 Calendar and Mail App
The setup procedure to sync iCloud calendars in Windows 10 is straightforward, basically a two steps procedure. Once you setup iCloud on Windows, you can create events in Windows or iOS devices and both will sync each other within seconds, work like a charm.
Set up iCloud on Windows Calendar
Let’s see how to easy to bring the iCloud calendar to your PC. First, open the calendar app on the Windows 10 operating system. Now click on the Settings icon (gear) on Windows calendar at the left sidebar.
Add iCloud on Windows
To add iCloud calendar follow Windows Calendar > Settings > Manage Accounts > Add account > Choose an account > iCloud.
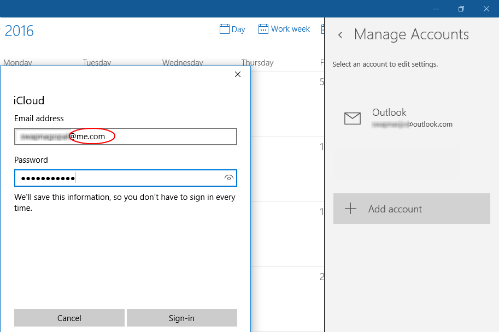
Now enter your iCloud email address ending with me.com. We found the calendar syncing with me.com rather than iCloud.com.
Enter iCloud Credentials
If you have an iCloud account with [email protected], you can give [email protected] and type the same password that you use to login to your iCloud account. Click on Sign-in button and click on Done button on next window.
This will lead back you to the main Windows calendar screen. On the left sidebar you can see a new iCloud account that you added with all the primary and secondary iCloud calendars underneath it.
Add Secondary Calendars
These secondary iCloud calendars are not owned by the current user. Those are typically shared calendars from other users. Windows had the issue before for synching secondary iCloud calendars in early versions, but here everything was smooth like a breeze!
If you have multiple iCloud calendars, you can see all of them in one calendar tab, and you can turn off/on the calendars from Calendar sidebar.
Related: How to Setup iCloud email on Windows 10
Create iCloud Event on Windows Calendar
You can create new events on Windows Calendar by clicking left button on any date. You can fill out details here or click on more details to pop out as a new window.
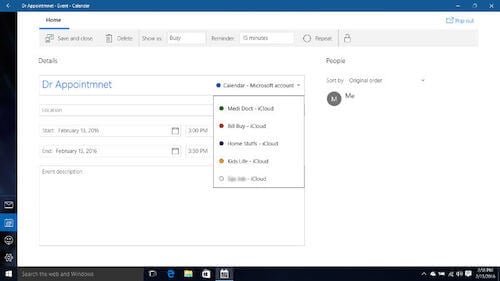
On the new event window, under details, you can provide the title of the calendar. On the same place right side of the Title bar, you can select one of the iCloud calendars that you want to create a new event. Please fill out the other details and date before Save and close the new calendar window.
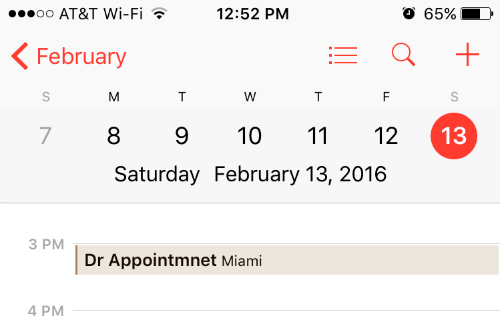
Once you click on the Save and close button, you can see the event created on the Calendar app. Now you can check the calendar app on your iPhone or iPad and see it synchronized the same event on your iDevice.
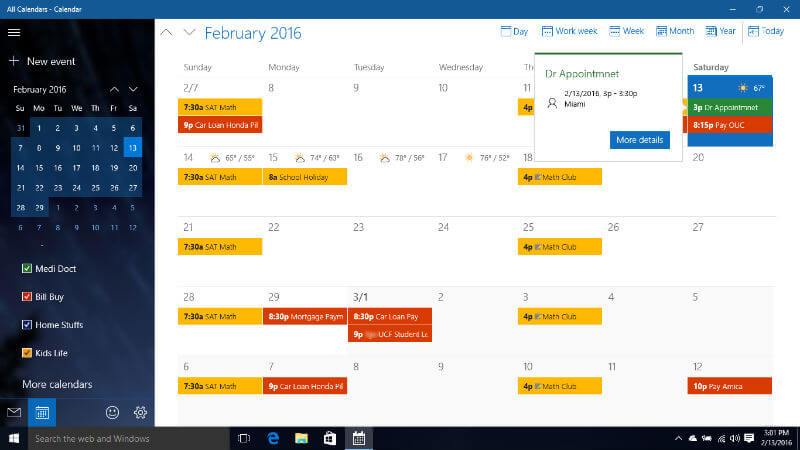
The final iCloud calendar will come with color-coded for each schedule, and the Windows Calendar app will look like above. This solution to synchronize iCloud calendar on Windows 10 is a pretty easy and smart decision from Microsoft. Those who like iPhone and Windows computer can sync their calendar in their system and iPhone in real-time.
Disclosure: Mashtips is supported by its audience. As an Amazon Associate I earn from qualifying purchases.
Applies ToOutlook for Microsoft 365 Outlook 2024 Outlook 2021 Outlook 2019 Outlook 2016
You can use iCloud for Windows to synchronize your calendar and contacts between your iOS device and Outlook. To install iCloud for Windows, use the following steps.
-
Download and install iCloud for Windows.
-
After installation, launch the iCloud app and sign in with your Apple ID and password.
-
In the iCloud app, select the option to sync Contacts and Calendars, then click Apply.
-
Once the setup has finished, launch Outlook. Your iCloud contacts and calendars should now be synchronizing with Outlook.
Need more help?
Want more options?
Explore subscription benefits, browse training courses, learn how to secure your device, and more.