
When it comes to customizing your Windows 10 experience, themes play a crucial role in personalizing the look and feel of your desktop. But have you ever wondered where these themes are actually stored in your computer? It may surprise you to know that themes in Windows 10 are stored in a specific location, allowing you to easily access and manage them according to your preferences.
Themes in Windows 10 are stored in the «Themes» folder, which is located within the «AppData» directory of your user profile. This folder contains all the necessary files and settings that contribute to the appearance and functionality of a theme. From wallpapers and icons to window colors and sounds, these elements are neatly organized within the Themes folder for easy management and customization.
In Windows 10, themes are stored in a specific folder location. To find themes, go to «C:\Users\[Your Username]\AppData\Local\Microsoft\Windows\Themes» in File Explorer. AppData is a hidden folder, so make sure to enable hidden items in the View tab. In this location, you will find all the themes installed on your Windows 10 system. From here, you can manage, delete, or add new themes to personalize your desktop.

Understanding the Location of Themes in Windows 10
Windows 10 offers a wide variety of themes that allow users to customize their desktop appearance. These themes include a collection of wallpapers, colors, sounds, and mouse pointers that can transform the overall look and feel of the operating system. However, many users wonder where these themes are stored on their system. In this article, we will delve into the different locations where themes are stored in Windows 10, providing you with a comprehensive understanding of their whereabouts.
Themes Stored in the AppData Folder
One of the primary locations where themes are stored in Windows 10 is the AppData folder. The AppData folder is a hidden folder in the user’s profile directory, which contains data specific to individual users. Within the AppData folder, you will find the Themes folder, which houses the themes installed on your system.
To access the AppData folder and locate the Themes folder, follow these steps:
- Open File Explorer by pressing Windows key + E.
- In the File Explorer window, navigate to the following path:
C:\Users\[Your Username]\AppData\Local\Microsoft\Windows\Themes. - Here, you will find the Themes folder, which contains the installed themes.
It’s important to note that the AppData folder is hidden by default. To make it visible, you may need to enable the option to show hidden files and folders in the Folder Options settings.
Themes Stored in the Windows Directory
In addition to the AppData folder, Windows also stores some themes in the Windows directory. The Windows directory is where the operating system files are located.
To access the themes stored in the Windows directory, follow these steps:
- Open File Explorer by pressing Windows key + E.
- Navigate to the following path:
C:\Windows\Resources\Themes. - Here, you will find various theme files with the extension
.themeor.themepack.
It’s worth mentioning that modifying or deleting themes in the Windows directory may require administrative privileges.
Themes Stored in Installed Applications
Some applications come with their own themes that are stored within their installation directory. These applications may provide an option to select or activate their respective themes, allowing you to customize the appearance of the application to your liking.
To access themes stored in installed applications, follow these general steps:
- Identify the application that you want to access the themes for.
- Navigate to the installation directory of the application.
- Look for a folder or subfolder that contains the themes or related files.
The exact location of themes within installed applications may vary, so it’s recommended to consult the application’s documentation or support resources for specific instructions.
Using the Personalization Settings in Windows 10
Windows 10 also provides an intuitive user interface for managing and customizing themes through the Personalization settings. These settings allow users to change the desktop background, colors, sounds, and other visual elements easily.
To access the Personalization settings and customize your themes, follow these steps:
- Right-click on the desktop and select Personalize from the context menu.
- In the Personalization window, you can choose different themes, customize the background, colors, sounds, and more.
- You can also download additional themes from the Microsoft Store by clicking on Get more themes in Microsoft Store.
Using the Personalization settings is a convenient way to manage your themes without needing to directly access the theme files.
Exporting and Importing Themes
Windows 10 allows you to export and import themes, making it easy to transfer your customizations between different systems or share them with others.
To export a theme, follow these steps:
- Open the Personalization settings as mentioned earlier.
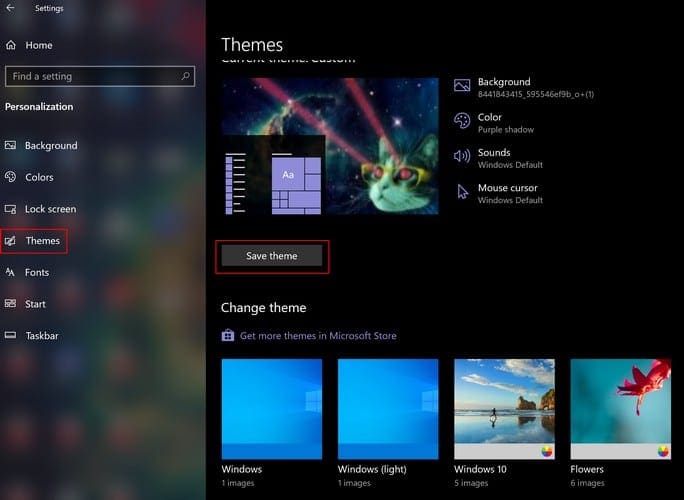
- Click on the Themes option on the left-hand side.
- From the dropdown menu next to Save Theme, select Save theme for sharing.
- Choose the location where you want to save the theme file and click on Save.
To import a theme, follow these steps:
- Open the Personalization settings.
- Click on the Themes option.
- Click on Browse and navigate to the location where the theme file is saved.
- Select the theme file and click on Open.
By exporting and importing themes, you can easily replicate your customizations or share them with others, providing a consistent visual experience.
Conclusion
In conclusion, themes in Windows 10 are stored in the AppData folder, the Windows directory, and within the installation directories of specific applications. Additionally, the Personalization settings offer a user-friendly interface for customizing and managing themes. By exploring these various locations and utilizing the Personalization settings, users can effortlessly personalize their desktop appearance and share their custom themes with others.
Where to Find Windows 10 Themes
If you’re a Windows 10 user looking to personalize your desktop, themes are a great way to give your computer a fresh look. But where are these themes stored? Let’s find out.
Windows 10 themes are stored in a specific folder on your computer. To access this folder, follow these steps:
- Open the File Explorer by clicking on the folder icon in the taskbar or by pressing the Windows key + E.
- In the File Explorer, navigate to the following directory: C:\Windows\Resources\Themes
- Once you’ve reached the Themes folder, you’ll find a collection of different themes, including the default themes provided by Windows 10.
- You can now select and apply any theme of your choice by right-clicking on it and selecting «Open» or «Save theme» to use it on your desktop.
Remember, modifying or creating new themes may require additional tools or knowledge. It’s always a good idea to backup any important files or settings before making changes to your themes.
Key Takeaways — Where Are Themes Stored in Windows 10
- Themes in Windows 10 are stored in a specific folder.
- The default location for themes is in the «AppData» folder.
- You can access the themes folder by typing «%localappdata%\Microsoft\Windows\Themes» in the File Explorer address bar.
- The themes folder contains all the themes installed on your computer.
- Each theme is represented by a .theme file, which contains information about the desktop background, color scheme, sounds, and more.
Frequently Asked Questions
When it comes to personalizing your Windows 10 experience, themes play a crucial role. Themes allow you to customize the look and feel of your desktop, including wallpapers, colors, sounds, and more. But have you ever wondered where these themes are stored? In this article, we will answer some frequently asked questions about the storage location of themes in Windows 10.
1. Where are themes stored in Windows 10?
In Windows 10, themes are stored in a specific folder location. The exact path to this location is:
%AppData%\Microsoft\Windows\ThemesAlternatively, you can navigate to this location manually by following these steps:
1. Press the "Windows" key + "R" to open the Run dialog box.
2. Type "%AppData%\Microsoft\Windows\Themes" and press Enter.
3. The themes folder will open, displaying all the themes you have installed.
This folder contains all the theme files, including the background images, color schemes, sounds, and mouse cursors associated with each theme.
2. Can I add custom themes to the storage location?
Yes, you can add custom themes to the themes storage location in Windows 10. To do this, follow these steps:
1. Download or create your custom theme files. These files should have the extension ".theme".
2. Copy the custom theme files to the themes storage location: %AppData%\Microsoft\Windows\Themes.
3. The custom theme will now appear in the Personalization settings and can be applied to your desktop.
By adding custom themes to the storage location, you can personalize your Windows 10 experience even further.
3. Can I delete themes from the storage location?
Yes, you can delete themes from the themes storage location. To remove a theme from your Windows 10 system, follow these steps:
1. Open the themes folder: %AppData%\Microsoft\Windows\Themes
2. Find the theme you want to delete and right-click on it.
3. Select "Delete" from the context menu.
4. Confirm the deletion when prompted.
5. The theme will be permanently removed from your system.
Deleting themes from the storage location allows you to declutter your system and manage your personalized themes more efficiently.
4. Can I backup themes from the storage location?
Yes, you can easily backup themes from the themes storage location in Windows 10. Follow these steps to create a backup:
1. Open the themes folder: %AppData%\Microsoft\Windows\Themes
2. Select the themes you want to backup. You can use Ctrl + click to select multiple themes.
3. Right-click on the selected themes and choose "Copy" from the context menu.
4. Paste the copied themes to a backup folder of your choice.
5. You now have a backup of your themes.
Creating backups of your themes ensures that you can easily restore them if needed or transfer them to another Windows 10 system.
5. Can I share themes with others using the storage location?
Yes, the themes storage location allows you to share themes with others. To share a theme in Windows 10, follow these steps:
1. Open the themes folder: %AppData%\Microsoft\Windows\Themes
2. Locate the theme you want to share.
3. Right-click on the theme and select "Send to" from the context menu.
4. Choose a method to share the theme, such as email or cloud storage.
5. The recipient can then save the theme to their own themes storage location and apply it to their desktop.
Sharing themes with others allows you to showcase your personalized Windows 10 themes and exchange customization ideas.
In summary, themes in Windows 10 are stored in a specific location on your computer. The themes files are typically located in the «C:\Windows\Resources\Themes» folder. Within this folder, you can find various subfolders that contain individual theme files, including images, sounds, and other customization elements.
When you install a new theme or customize an existing one, the theme files are placed in this designated folder. You can access and manage your themes by going to the «Personalization» settings in Windows 10. From there, you can choose, apply, and customize themes to personalize your computer’s appearance according to your preferences.
После того, как несколько человек в комментариях к разным статьям на сайте написали о том, что делают скриншоты понравившихся обоев рабочего стола из тех, что доступны в Windows 10 по умолчанию, а также посетовали на то, что нельзя сделать скриншот экрана блокировки, решено было рассказать, где хранятся обои рабочего стола по умолчанию, обои экрана блокировки и текущие обои в Windows 10.
Все файлы фотографий и изображений, использующиеся в качестве обоев Windows 10, всегда можно достать из соответствующих папок на системном диске вашего компьютера или ноутбука. Таких папок несколько и именно о том, где их найти и пойдет речь в этой короткой инструкции.
Папка с обоями рабочего стола по умолчанию и с текущими обоями рабочего стола
В Windows 10 присутствует сразу несколько различных папок, в которых находятся фотографии и изображения, которые устанавливаются на рабочий стол как обои.
Далее — расположение этих папок (пути, начинающиеся с указания папок наподобие %LocalAppData% достаточно просто скопировать и вставить в адресную строку проводника, чтобы попасть в нужное расположение):
Где хранятся фоновые фотографии экрана блокировки
Если вас интересуют обои (фоновые изображения) экрана блокировки Windows 10, вы также легко их можете найти. Стандартные обои, присутствующие сразу после установки, расположены в папке C:\Windows\Web\Screen\.
Однако, мало кого интересуют обои по умолчанию, чаще бывают интересны те, что ОС загружает из Интернета. Их вы можете обнаружить в папке
%LocalAppData%\Packages\Microsoft.Windows.ContentDeliveryManager_cw5n1h2txyewy\LocalState\Assets

Просто скопируйте и введите указанный путь в адресную строку проводника, откроется папка, содержащая множество файлов без расширения. Вы можете скопировать их куда-либо и установить для этих файлов расширение .jpg, либо просто открыть с помощью какого-либо графического редактора или программы для просмотра фото.
В указанной папке обычно хранится множество файлов обоев, но, одновременно, там есть и другие, ненужные изображения, не являющиеся фонами экрана блокировки. Если вы хотите добавить расширение .jpg сразу для всех из них и скопировать в папку «Изображения\LockScreen», можно создать и использовать следующий bat файл (см. Как создать bat-файл):
cd /D %userprofile%\AppData\Local\Packages\Microsoft.Windows.ContentDeliveryManager_cw5n1h2txyewy\LocalState\Assets
mkdir "%userprofile%\Pictures\LockScreen\" 1>nul 2>&1
copy * "%userprofile%\Pictures\LockScreen\*.jpg"
Want to make your desktop unique but unsure where Windows 10 themes are stored? This guide will show you how to find, customize, and manage your themes easily.
Windows 10 offers a mix of themes, including three colorful ones like Windows, Windows 10, and Flowers. It also has four high contrast themes for better visibility. You can find thousands of custom themes online to download. These themes are kept in a hidden folder called AppDataLocalMicrosoftWindowsThemes. Knowing where themes are stored helps you change your desktop look anytime.
Where Are Themes Stored in Windows 10
Managing your Windows 10 themes is key to making your computer feel like yours. It’s important to know where these themes are kept. This knowledge is essential, whether you want to find, handle, or change your themes.
Accessing the AppData Folder
To find your themes, you have to get to the AppData directory. This folder is hidden by default because it has files important for many apps. To see it:
- Open File Explorer.
- Go to your user profile directory, usually at
C:Users[YourUsername]. - Show hidden items by clicking ‘View’ and ticking the ‘Hidden items’ box.
After making hidden items show, you can enter the AppData directory. Here, you’ll find subfolders like Local, Roaming, and LocalLow.
Locating the Themes Folder
You’ll find the Themes folder within the AppData directory by following these steps:
- Enter the AppData folder.
- Go to
LocalMicrosoftWindowsThemesto see all themes made by users in Windows 10.
For themes that came with Windows 10 or were downloaded from the Microsoft Store, look in different spots. Pre-installed themes are at C:WindowsResourcesThemes. Themes from other sources are in C:Program FilesThemes.
Handling Hidden Items in File Explorer
Themes in Windows 10 are in various spots that might be hidden. To find them, follow these directions:
- Open File Explorer.
- Go to the ‘View’ tab at the window’s top.
- Tick the ‘Hidden items’ box to see hidden files and folders.
This process is crucial for getting to places like the AppData folder and managing your themes. It lets you navigate to places like %LocalAppData%MicrosoftWindowsThemes and more.
Knowing how to find and manage your themes in Windows 10 helps in personalizing your computer. Whether downloading new themes, making your own, or sharing them, it’s essential to know where these files are and how to access them.
Understanding .theme and .themepack Files
When customizing Windows desktop, knowing the difference between .theme and .themepack files is key. These formats let you personalize and share your desktop, making it unique.
.theme File Structure
A .theme file is a versatile .ini text file. It changes how desktop elements look on Windows. It has sections for each customization part:
- [Theme]: States the theme name, logo, and desktop icons. Remember, the BrandImage must be an 80×240 pixels PNG file.
- [Control PanelColors]: You can change RGB values for things like buttons and text.
- [Control PanelCursors]: Lets you pick your cursor by choosing .cur files.
- [Control PanelDesktop]: Pick your desktop wallpaper, its path, and display mode.
- [Slideshow] (optional): Set up a slideshow background. Options include Interval, Shuffle, RSSFeed, and ImagesRootPath.
Editing .theme files carefully lets users fully customize their Windows desktops. You can pick everything from colors, icons, to cursor styles.
.themepack File Usage
.themepack files make it easy to share themes, introduced in Windows 7. They bundle everything needed. Here’s how to use .themepack files:
- Create a Custom Theme: Change things like your desktop background, window colors, and sounds in the Personalization Control Panel.
- Save as .themepack: Save your theme as a .themepack once you’re happy with it.
- Share: Easily share your theme through email, a network, or an external drive.
This method includes everything, from wallpapers to sounds. It makes sharing and applying themes simple.
By learning .theme editing and .themepack sharing, you can make a unique Windows desktop. With a little effort, customizing your desktop is easy and fun, giving you a workspace that is both good-looking and practical.
Managing Themes via the Personalization Settings
Windows 10 makes it easy to customize your desktop. You can find Personalization settings under the “Settings” menu. Here, you can tweak theme settings, change your desktop background, and adjust many other desktop appearance options.
To change your desktop background, Windows 10 offers lots of choices. You can pick from various pictures, solid colors, or even a slideshow. With 24 solid color backgrounds and 48 color options for the interface, your desktop can truly match your style.
Beyond the background, Windows 10 lets you customize themes settings more deeply. Adjust window and app colors, set up sounds, and choose mouse cursor styles. This all-around customization makes your computer look unified and attractive.
Looking for new themes? Click on the “Get more themes in Microsoft Store” link for more options. You can find themes from other websites, device manufacturers, or friends, too. The Microsoft Store has both free and premium themes, giving you a wide range of choices.
Dealing with high contrast themes is easy in Windows 10. Four preset high contrast themes help those with vision challenges. They’re in the C:WindowsResourcesEase of Access Themes folder, designed to aid in easier PC navigation and use.
Your theme settings in Windows 10 are saved in the registry at HKEY_CURRENT_USERSOFTWAREMicrosoftWindowsCurrentTemplateThemes. This means your personalized look stays the same, even through updates or restarts.
To share themes across devices, use the export and import feature. Go to the “Themes” section in Personalization settings and pick your theme. After saving the theme file, you can import it onto another PC. This feature keeps your favorite setup with you, no matter the device.
In summary, Windows 10’s Personalization settings offer detailed ways to manage your desktop themes. Exploring these options can make your computing experience both fun and productive.
Accessing Themes from the Windows Directory
You can find Windows 10 themes in the Microsoft Store or on websites. But, you can also get them straight from your computer’s Windows directory. Here are the steps to find these files.
Default Themes Location
Windows 10 has default themes in a special folder. Look for this folder at C:WindowsResourcesThemes. It’s called the System themes directory Windows 10. Here, you get direct access to pre-installed themes.
Within this folder, you’ll see themes Microsoft made. Look for files ending in .theme or .themepack. These files are key to using a theme.
Administrative Privileges Required
Going to the System themes directory Windows 10 is easy. But, changing themes needs extra permission. You need theme modification privileges to edit, delete, or add themes.
To get these permissions, right-click the Themes folder and select Properties. Then go to the Security tab. Click on Edit, and give yourself Full Control. This lets you manage your themes easily.
By doing this, you gain full control over the System themes directory Windows 10. You can then make your Windows look just how you like.
Conclusion
We have explored the ins and outs of Windows 10 themes thoroughly. Now, you know where themes are stored and understand the types of theme files. You’ve learned that the default themes are in “C:WindowsResourcesThemes”. Your own themes? They’re in “C:Users{username}AppDataLocalMicrosoftWindowsThemes”.
With this new understanding, you can now personalize your desktop. You can change your background, colors, and sounds as you like. Whether you’re using the default themes or adding your own to the %localappdata% directory, you can make your computer look just the way you want.
In short, there’s so much you can do to make your Windows interface better. Use what you’ve learned to meet your needs and match your style. This will make your computer not just more appealing to look at but also more enjoyable to use. Customize your desktop with these tips and make your Windows 11 experience uniquely yours.
Desktop themes have been around since Windows 7 – they usually include things like wallpapers, sound schemes, icons, screensavers and even entire colour schemes for your machine.
You can grab themes you like from the Windows store, or you can customise one and make your own. Whichever you prefer, you can easily find the ones you have at the moment by going to the folder where they are stored.
To find that folder, follow one of the following two methods.
-
Use ‘Run’
Press the Windows key and R at the same time in order to open the Run command box. Paste the following text into it: %localappdata%\Microsoft\Windows\Themes Press Enter. The folder you are looking for will open automatically.
-
Use the Search
In order to do this, press the Windows key, then use Ctrl + V in order to paste the same text (%localappdata%\Microsoft\Windows\Themes) into the search function there. Press Enter or click on the Folder that appears at the top of the search results in order to open the Themes folder.
Readers help support Windows Report. We may get a commission if you buy through our links.
Read our disclosure page to find out how can you help Windows Report sustain the editorial team. Read more
Windows 11 is endowed with many customization options, including a series of themes and wallpapers. While these themes are aesthetic in their own way, some users still want to know their background location on Windows 11.
This guide will show different methods to get to the Windows 11 theme background location.
What is the Windows 11 default theme background?
The Windows 11 default theme background is a blooming, abstract royal blue flower with a sky blue background. This background is one of the most popular, thanks to the anticipation that preceded the release of the OS.
However, a series of other backgrounds came with the OS. So, you can always change your Windows 11 desktop theme background. And if there are too many, deleting themes in Windows is even easier.
Where are theme backgrounds stored on Windows 11?
1. Using the Run utility to reach your current theme backgrounds
- If you want to open your current theme background wallpaper directly, press the Windows key + R to launch the Run utility, type the command below, and hit Enter:
%AppData%\Microsoft\Windows\Themes\TranscodedWallpaper
- Now, select the app you want to use to open the background.

- To open the folder containing your current theme background wallpaper instead, launch the Run utility, copy and paste the command below, and click OK:
%AppData%\Microsoft\Windows\Themes\CachedFiles
- Finally, you will see a CachedFiles folder open in File Explorer, which contains all your theme backgrounds. You can open them with any image editor to make changes to them.


If you want to reach the location of your current theme backgrounds on Windows 11, this method is the easiest and fastest.
2. Locating your downloaded theme backgrounds
- Press the Windows key + E to launch File Explorer and click the View tab at the top.
- Select Show and click Hidden items.

- Now, navigate to the path (replace <username> with your user account name) below:
C:\Users\<username>\AppData\Local\Microsoft\Windows\Themes
- Next, double-click the theme folder you want to open.
- Finally, open the DesktopBackground folder to view all the images available for that theme.


Unlike the Run command option, which allows you to open the location of your current theme background on Windows 11, this method helps you to open just about any downloaded theme.
It is especially useful if you use a slideshow theme with multiple wallpapers.
3. Use PowerShell to locate your current theme background
- Press the Windows key, type powershell, and select Run as administrator under Windows PowerShell.

- Now, copy and paste the following commands and hit Enter after each:
$TIC=(Get-ItemProperty 'HKCU:\Control Panel\Desktop' TranscodedImageCache -ErrorAction Stop).TranscodedImageCache[System.Text.Encoding]::Unicode.GetString($TIC) -replace '(.+)([A-Z]:[0-9a-zA-Z\\])+','$2'
- This will display the path of your present background theme.
- Finally, you can copy and paste the path in the File Explorer search bar to go to the location. Alternatively, you can remove the img extension at the end of the command to open the folder and get access to other backgrounds.


If you want to find out the location of your current Windows 11 theme background wallpaper, whether the default or downloaded, you can run the command above using PowerShell. It will give you the path you need to follow to locate the wallpaper.
4. Locate your default theme backgrounds
- Launch File Explorer and navigate to the path below:
C:\Windows\Web
- Here you will find different folders, including Wallpaper and Screen.
- Finally, open any of the folders to view the different images used for Windows default background themes.


If you are only interested in the location of your default theme backgrounds wallpapers on Windows 11, the Web folder contains a multitude of them.
5. Locating the current desktop background registry path
- Press the Windows key + R, type regedit, and click OK.
- Navigate to the path below in the left pane:
HKEY_CURRENT_USER\Control Panel\Desktop - Double-click the WallPaper option in the right pane.

- Next, copy the path in the Value data box and click the OK button.
- You can now past the path in the File Explorer search box to open the Wallpaper path.
- To get the path of previously set theme backgrounds, follow the path below:
HKEY_CURRENT_USER\Software\Microsoft\Windows\CurrentVersion\Explorer\Wallpapers - Finally, double-click any of the BackgroundHistoryPath options in the right pane to open it Value data box and copy its value.


In some cases, you might need the location of a hidden Windows 11 background wallpaper via the Registry Editor. You will find everything in the registry locations above.
We can now conclude this detailed guide on how to reach the Windows 11 background location. With the options provided in this guide, you should be able to find just about any wallpaper on your PC.
Lastly, if you need a list of the top Windows 11 themes and skins to give your PC a fresh look, our guide contains some mesmerizing options.
Did you manage to locate the theme background on your PC? Comment in the dedicated section below.
Ola-Hassan Bolaji
Windows Hardware Expert
A Computer Engineering graduate, he has spent most of his life reading and writing about computers.
He finds joy in simplifying complex topics into simple solutions for PC users. The quality of his work and providing step-wise tested and proven solutions to PC issues are all that matter to him.
Away from computers, he is either reading or watching football!