
Разборки со шрифтами в Windows 10.

Сломались у меня как-то шрифты. Каким-то ветром занесло старую версию шрифта Roboto в систему, из-за чего сайты Google местами стали выглядеть очень некрасиво: буквы слипались, текст стал читаться хуже. В полной мере ощутил на себе понятие «кровь из глаз».
Решение проблемы я начал с загрузки самой последней версии. Веселье началось дальше.
Оказалось, что в Windows 10 шрифты ставятся не только по привычному пути «C:\Windows\Fonts«, но и у каждого пользователя теперь есть свой каталог со шрифтами по пути «%userprofile%\AppData\Local\Microsoft\Windows\Fonts«.
Проблемный шрифт нашёлся по второму пути, но заменить его просто так не получалось, потому что файлы использовались другими программами. Обычная установка шрифта добавляла новые файлы с суффиксом «_1» после имени перед расширением. По идее можно подменить файлы, загрузившись с какого-нибудь LiveCD/LiveDVD/LiveUSB, но после перезагрузки файлы всё же освобождаются, и их можно удалить.
Но я всё же решил выяснить, откуда система берет информацию о шрифтах. Сделать я это решил поиском по имени файла шрифта в реестре. Упоминание файла попалось в разделе «HKEY_CURRENT_USER\Software\Microsoft\Windows NT\CurrentVersion\Fonts«.
Я попробовал удалить из раздела несколько параметров с именами шрифтов, которые я ставил самостоятельно. После перезагрузки шрифты из системы пропадали, но сами файлы оставались на месте.
Далее я захотел удалить несколько проблемных шрифтов уже из системного каталога. У меня стояла старая версия шрифта «Times New Roman» и ещё нескольких. В панели управления существовали вместе шрифты «Times New Roman» и «Times New Roman Обычный». Второй брался из файла под именем «times_0.ttf«.
Удалял я их тем же способом, только список шрифтов брал уже из раздела «HKEY_LOCAL_MACHINE\SOFTWARE\Microsoft\Windows NT\CurrentVersion\Fonts«. После перезагрузки ненужные шрифты опять же чудесным образом исчезли из системы, а файлы я уже вручную удалил.
Ещё я нашёл инструкцию по принудительной перестройке кэша шрифтов, но она у меня не заработала. Скорее всего все операции надо производить из другой системы.
- Остановить службу «Служба кэша шрифтов Windows»;
- Удалить содержимое каталога «\Windows\ServiceProfiles\LocalService\AppData\Local\FontCache«;
- Удалить файл «%WinDir%\System32\FNTCACHE.DAT«;
- Перезагрузить компьютер.
Проблема в том, что после остановки служба тут же запускается системой.
—>
Windows 10 имеет множество встроенных шрифтов. Как и его предшественники, система также позволяет легко просматривать, устанавливать и удалять шрифты.
При использовании Windows 10 вам может потребоваться доступ к настройкам шрифтов для просмотра, установки и удаления. В этом руководстве мы узнаем, где система хранит шрифты и способы их установки и удаления в Windows 10.
Доступ к шрифтам и их настройка в Windows 10
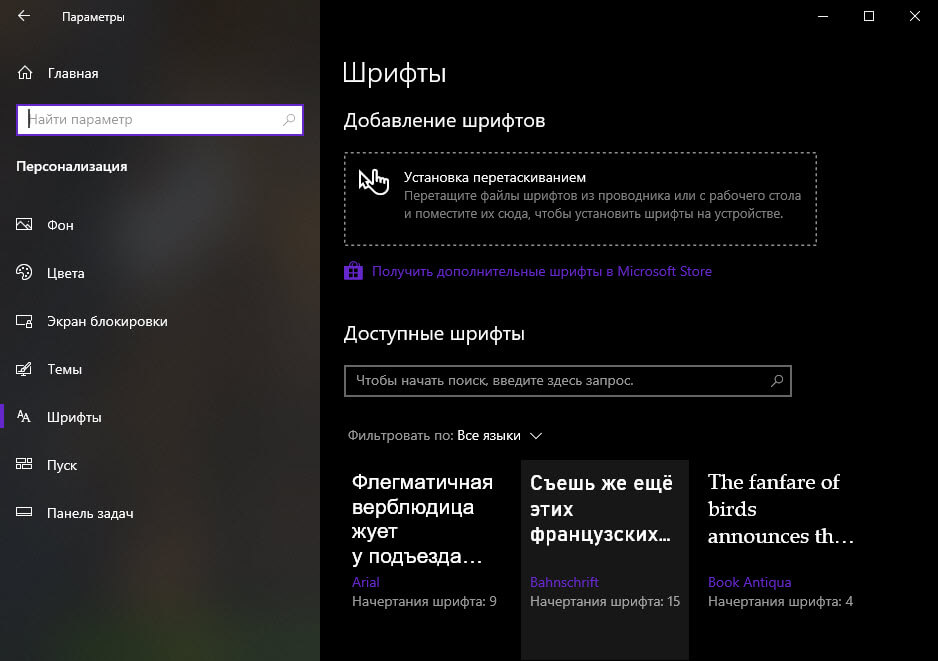
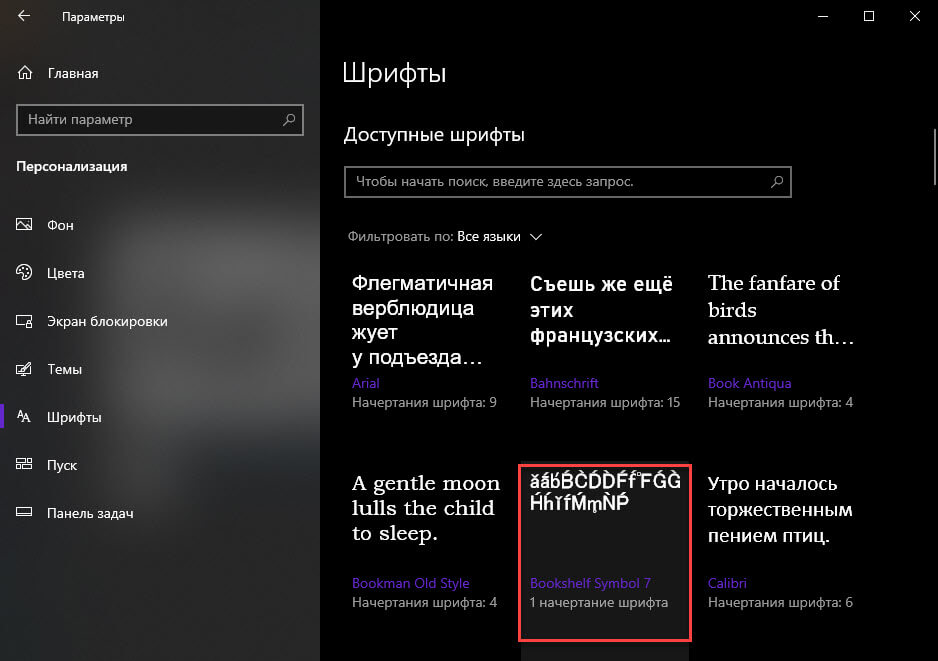
Вы можете просмотреть все доступные шрифты, а также установить и удалить их, в приложении «Параметры» → «Персонализация» → «Шрифты». Вы можете получить доступ к настройкам определенного шрифта с этой же страницы. Используйте окно поиска в разделе «Доступные шрифты» чтобы найти нужный шрифт, к которому вы хотите получить доступ.
Все установленные шрифты сохраняются в папке C:\Windows\Fonts.
Предварительный просмотр шрифта в Windows 10
Шаг 1: Откройте страницу «Шрифты», перейдя в «Параметры» и выбрав группу настроек «Персонализация» → «Шрифты».
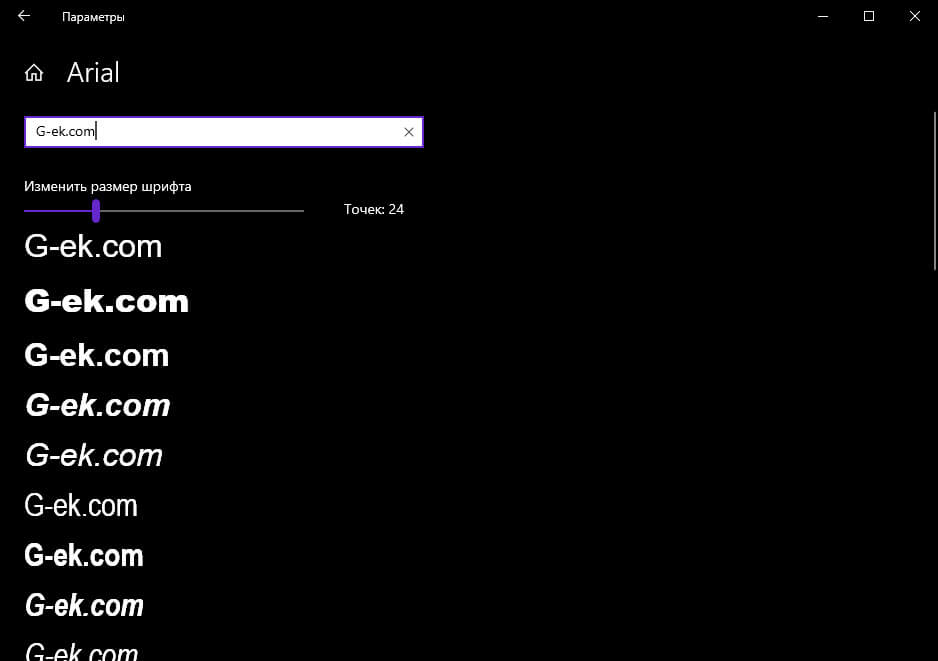
Шаг 2: Нажмите на шрифт, чтобы открыть детали. В поле «Введите данные для предварительного просмотра шрифтов» введите любое слово, чтобы увидеть, как оно будет выглядеть.
Установить новый шрифт из Магазина в Windows 10
В Windows 10 теперь есть возможность устанавливать шрифты из официального Магазина. Хотя в Магазине имеется ограниченное количество шрифтов, ожидается, что в будущем коллекция шрифтов увеличится.
Чтобы установить шрифт из Магазина:
В самом магазине Microsoft вы можете увидеть первые доступные шрифты, но уже с текущими версиями Windows 10. Вам просто нужно ввести в поиск магазина «шрифт». Затем вы увидите все шрифты, доступные на данный момент.
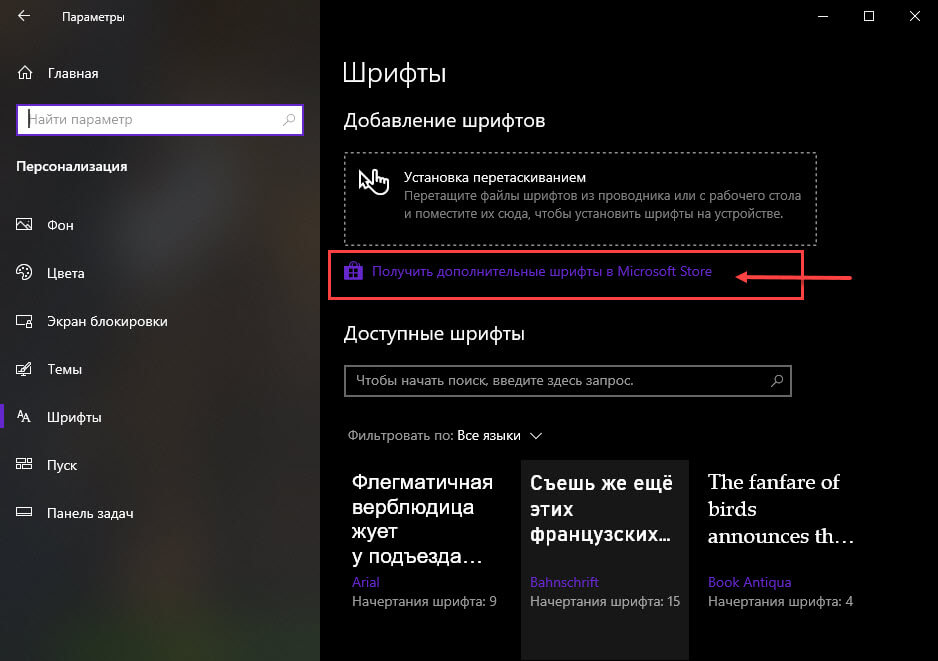
Шаг 1: Перейдите на страницу «Параметры» → «Персонализация» → «Шрифты».
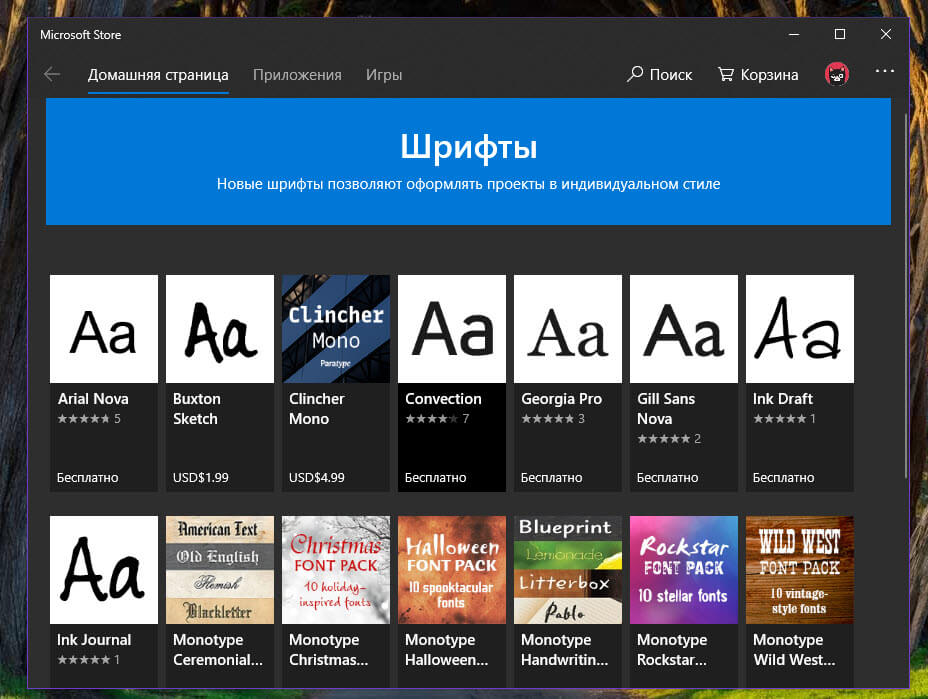
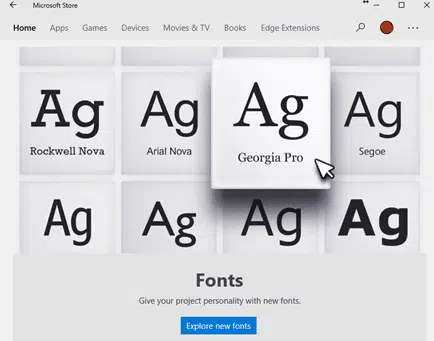
Шаг 2: Нажмите ссылку «Получить дополнительные шрифты в Microsoft Store», чтобы открыть страницу шрифтов в приложении «Магазин». Кроме того, вы можете напрямую открыть приложение Store и выполнить поиск шрифтов.
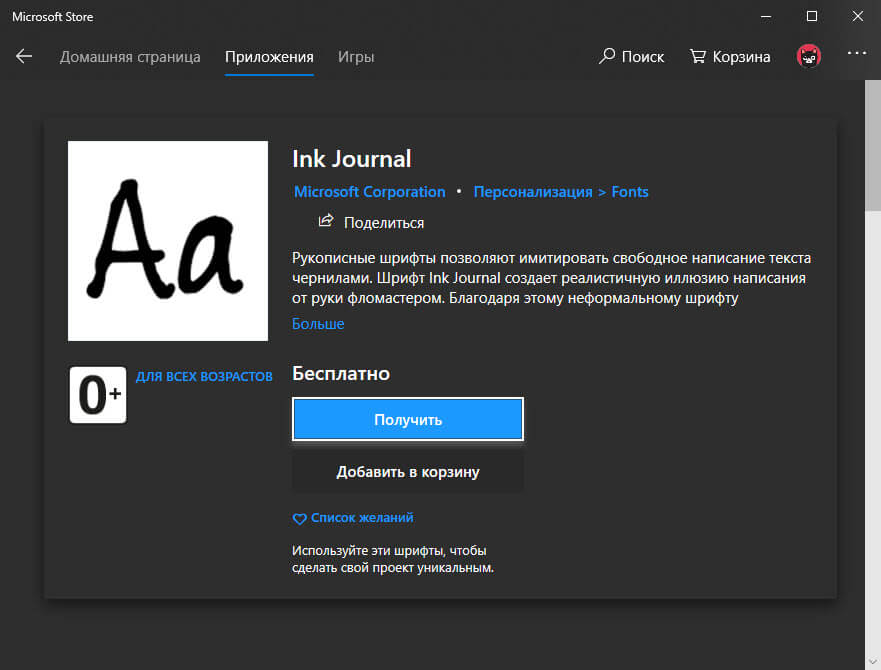
Шаг 3: В галерее шрифтов дважды кликните на значок шрифта, чтобы открыть его страницу.
Шаг 4: Наконец, нажмите кнопку «Получить», чтобы загрузить и установить шрифт.
Установленный шрифт появится на странице «Шрифты» в приложении «Параметры». Если есть обновление для шрифта, его можно немедленно установить с помощью магазина Windows 10.
Шрифты доступные в настоящее время в магазине Microsoft:
- Arial Nova
- Convection
- Nina
- Rockwell Nova
- Gill Sans Nova
- Verdana Pro
- Georgia Pro
- Ink Draft
- Ink Journal
- Convection
- PT Root UI
Установка сторонних шрифтов вручную
Помимо шрифтов, доступных в Магазине, вы также можете установить сотни красивых шрифтов, доступных в Интернете. Например, вы можете загрузить и установить Google Fonts в Windows 10.
Чтобы установить сторонний шрифт:
Шаг 1: Загрузите шрифт на свой компьютер. Извлеките его, если он находится в ZIP-архиве.
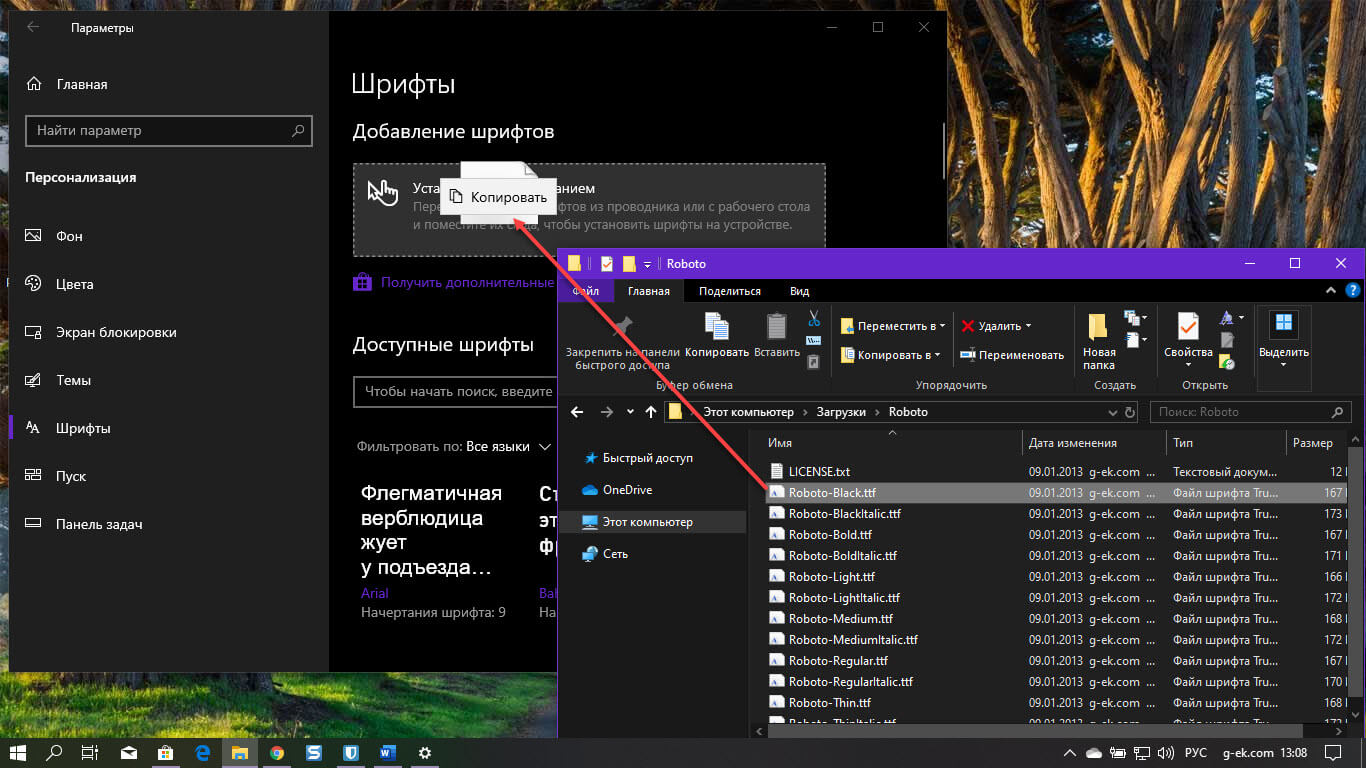
Шаг 2: Перейдите на страницу «Параметры» → «Персонализация» → «Шрифты». Перетащите новый файл шрифта в область «Добавление шрифтов» → «Установка перетаскиванием», чтобы установить сторонний шрифт.
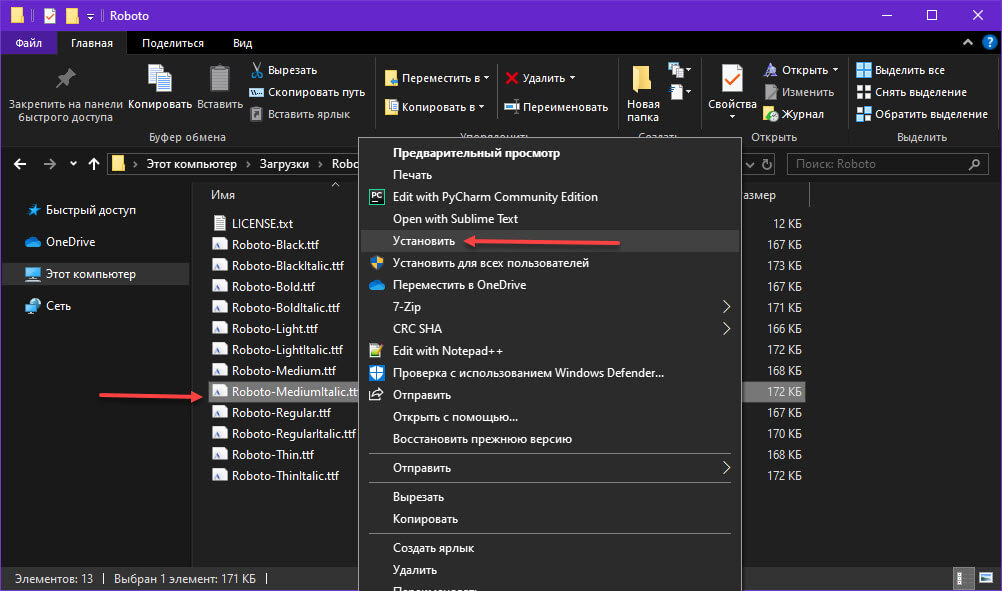
Кроме того, вы можете кликнуть правой кнопкой мыши в проводнике на файле шрифта и выбрать опцию «Установить».
Удалить шрифт в Windows 10
Шаг 1: Прежде всего, перейдите на страницу «Параметры» → «Персонализация» → «Шрифты».
Шаг 2: Нажмите на шрифт, который вы хотите удалить, чтобы открыть страницу с информацией.
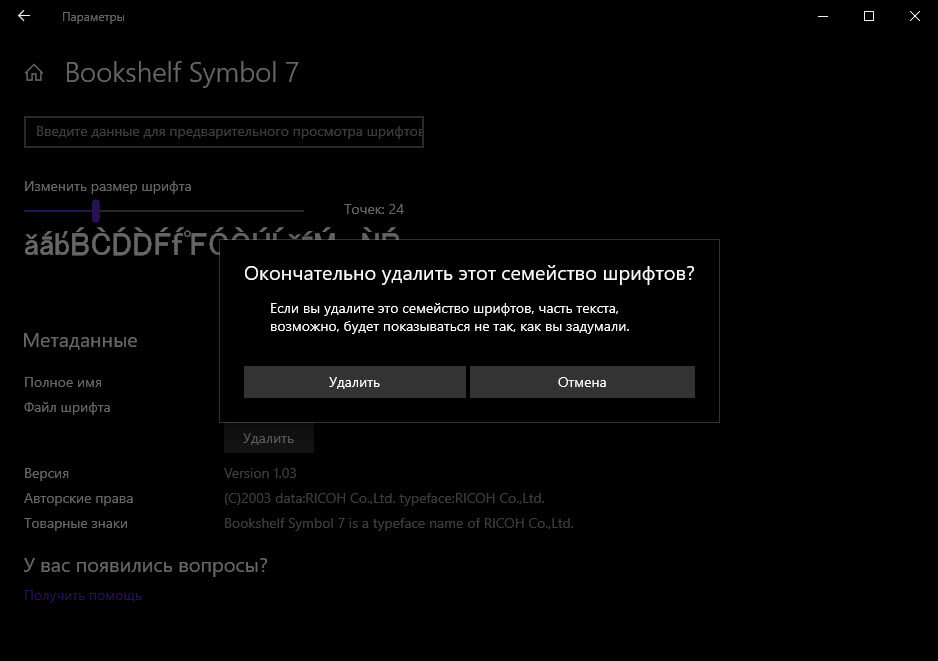
Шаг 3: Прокрутите страницу вниз, чтобы увидеть кнопку «Удалить». Нажмите на кнопку «Удалить». В диалоговом окне подтверждения, нажмите кнопку Удалить еще раз, чтобы удалить шрифт с вашего компьютера.
Все!
With the sale of fonts via the Microsoft Store and cloud fonts there’s now a complication in the familiar way fonts are managed in Windows 11/Windows 10 and how Office for Windows handles new fonts. There are now three different locations that fonts can be saved.
For as long as anyone can remember, all Windows fonts where in a single folder: /Windows/Fonts
But not anymore …
Fonts from Microsoft Store
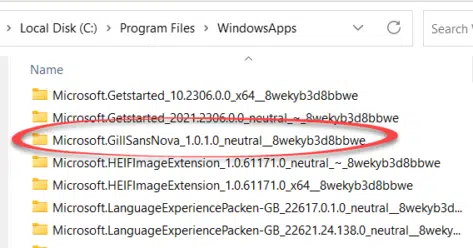
Fonts installed from the Microsoft Store are put into Windows in an entirely new method.
These fonts are placed in Program Files/WindowsApps/ a hidden folder. If you have access rights, each font is in its own folder eg C:\Program Files\WindowsApps\ Microsoft.GillSansNova_1.0.1.0_neutral__8wekyb3d8bbwe
It’s a new method that Microsoft Office hasn’t been updated to fully deal with. Disconnects between Windows and Office aren’t new, sometimes it’s hard to believe that they are made by the same company.
This isn’t a nerdy technical point. It makes a difference to how users manage their fonts and how programs work with fonts.
New fonts don’t appear in Office desktop or Mobile apps
For some years now, Office users have been accustomed to newly installed fonts appearing in Word, Excel, PowerPoint etc right away. No need to restart the program as much older Office programs needed.
Fonts installed via the Microsoft Store don’t immediately appear in modern Office 365 for Windows programs but if you wait a little while (minutes) the font list is quietly updated in the background.
If the font list doesn’t update (e.g some older versions of Office) or you’re in a hurry restart the program.
Cloud Fonts
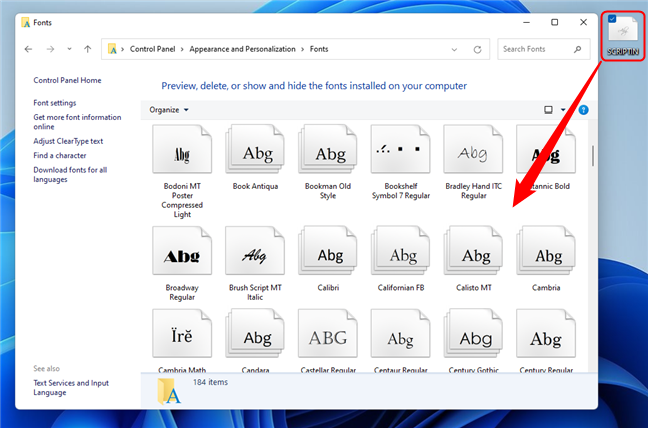
Cloud Fonts are available to Microsoft 365 customers and are automatically downloaded from Microsoft (‘the cloud’). They appear with a little cloud and arrow icon like this …
See Cloud fonts, the free extra in Office 2021 and Microsoft 365
Once downloaded they are saved in yet another location
C:\Users\<user>\AppData\Local\Microsoft\FontCache\4\CloudFonts\
See Make Cloud Fonts available to all programs, not just Office for more details.
Control Panel – Fonts
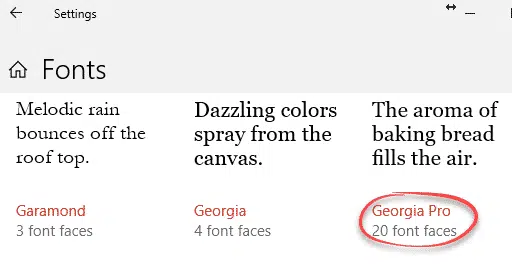
The familiar Control Panel has been the place to manage fonts. It’s still in Windows 11/10 but does NOT show any fonts from the Microsoft Store or Cloud Fonts. Georgia Pro is missing from this list, even though it’s installed on the computer.
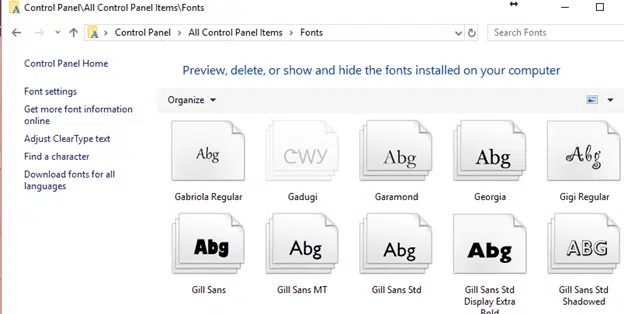
That’s because the ‘old’ Control Panel system only looks in the Windows/Fonts folder.
The new Settings | Personalization | Fonts area in Windows 11/10 shows all fonts. For example, Georgia (standard) and Georgia Pro (from Microsoft Store)
Find out more about fonts
Cloud fonts, the free extra in Office 2021 and Microsoft 365
Handwriting fonts for literacy skills
Use Google Fonts for free in Microsoft Office
Goldman Sachs font for a new look in Excel, Word and Office
Windows has more than just a few preinstalled fonts. However, at some point, you might want more. What if you find a beautiful font online and want it on your computer? How do you install free fonts in Windows 11 and Windows 10? Moreover, how do you see what fonts are on your computer? These are a few of the questions we’re going to answer in this tutorial. So, if you want to know how to view your fonts and how to install new fonts in Windows using several methods, read on:
NOTE: This article applies to Windows 11 and Windows 10. The screenshots are from Windows 11, but the methods described below work the same for both operating systems. If you want to know what version of Windows you have on your computer, here is an article on the subject: How to tell what Windows I have (11 ways).
How to see what fonts are on your computer
First things first: let’s learn how to see the fonts available on your Windows computer. To find your installed fonts, you need to open the Settings app, and a quick way to do that is to press Win + I on your keyboard. Then, in the Settings window, select Personalization. In Windows 11, this setting is in the left pane, while in Windows 10 it’s in the main part of the Settings window.
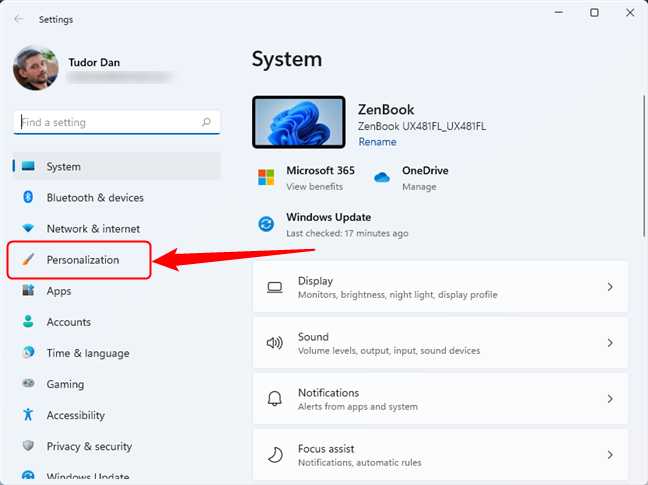
Navigate to Personalization in Settings
Next, select Fonts. In Windows 11, the Fonts button is in the main section of the window, while in Windows 10, it’s in the left pane.
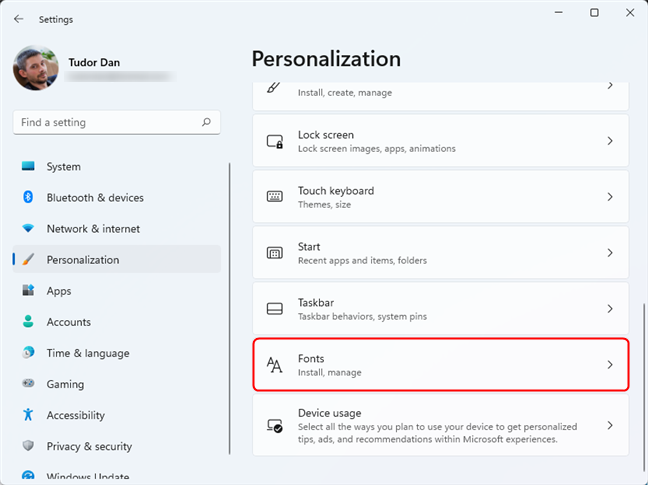
Select Fonts in Settings to see the list of Available fonts
In both operating systems, this action displays a list of available fonts. Now, let’s explain what you can do in the Fonts window.
How to see the details of a font (family) in Windows 10 and Windows 11
If you want to see the details of a particular font or font family, click or tap on its name.
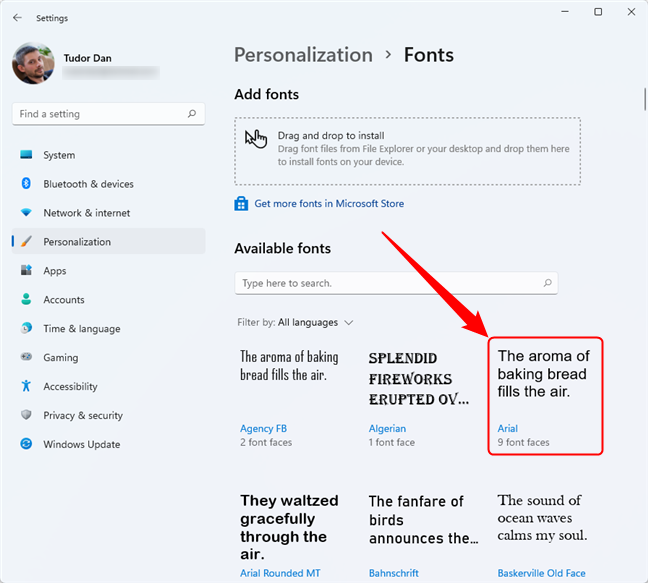
Click or tap on a font family to see details about it
TIP: You can also use the search box at the top to type the name of the font that you want to view, and then click/tap on the appropriate search result.
When you click or tap on a font family, Windows shows you examples of text using the fonts of that font family. Furthermore, you can also enter your own text in the box at the top to see what it looks like when using the selected font(s). Moving the slider below the input field will change the size of the font.
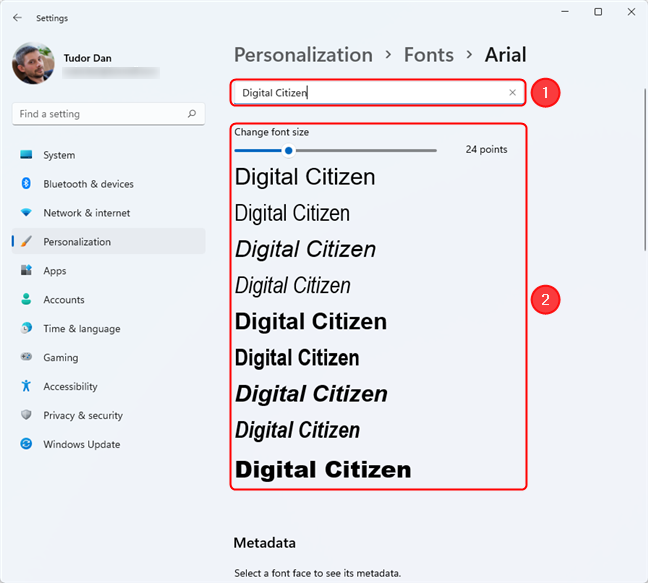
Enter a text to preview the fonts
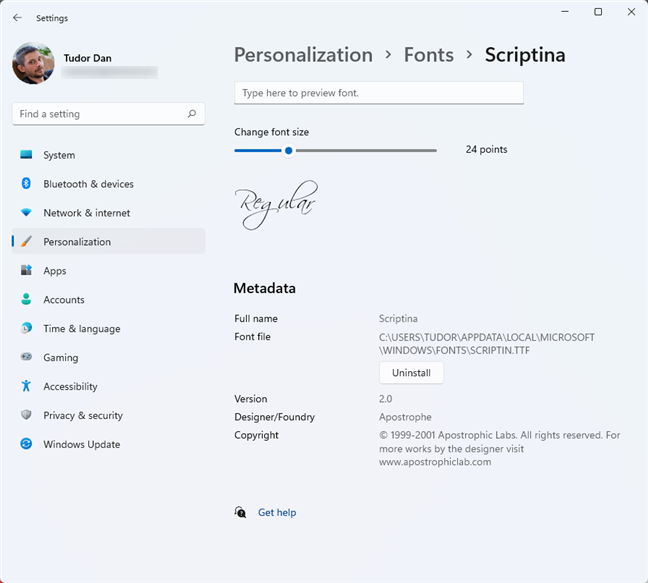
For every installed font and font family, you can check the Metadata under the preview section. However, for font families, you need first to select the font face that interests you to see its Metadata. In this case, the information updates on the font face you choose, as the metadata can differ between font faces within a family.
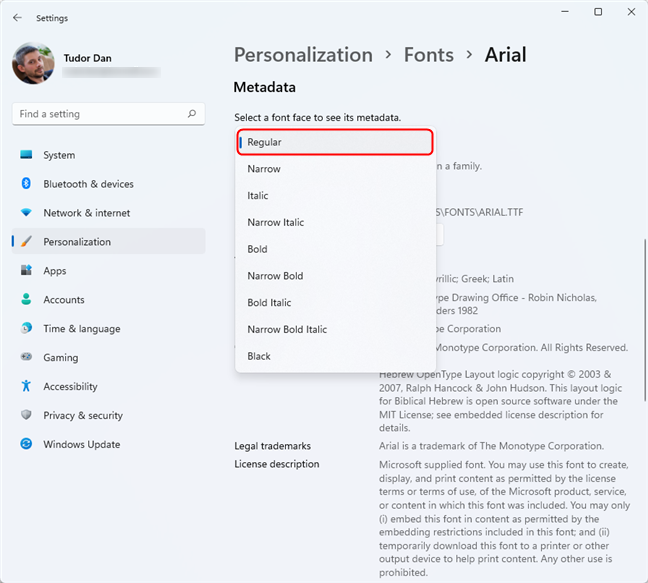
Font details in the Windows 11 Settings
Then there are also the special “variable fonts,” which can have additional properties that you can adjust, like modifiable weight or width. If you select such a font, the Settings app will also give you a link called “Variable font properties.” Clicking or tapping on it opens a new page, where you can see additional details about that font.
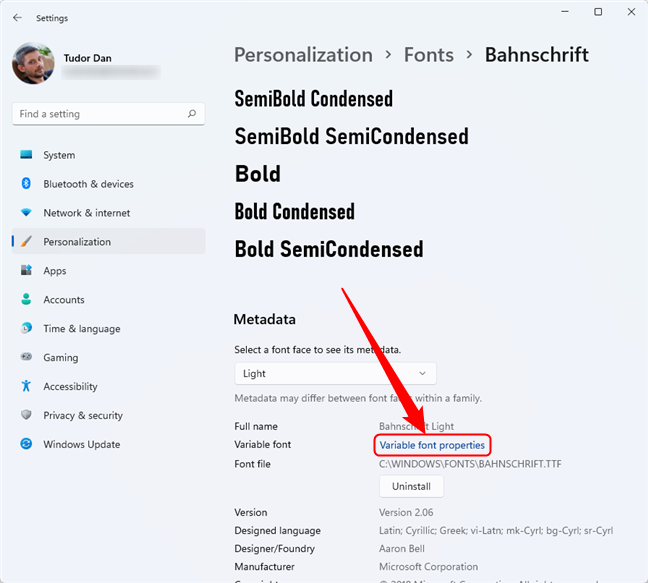
Opening the properties of a variable font
In the first menu — Font instances — you can select a design variation of that font (family). Then, you can choose the axis of variation, which is a fancy way of naming the different properties that a font can have. On this list, you can find and select properties such as weight and width.

Variable font properties in Windows 11
At the bottom of the Variable font properties page, you can preview the selected font face using your own text, just like on a font or font family’s standard page.
How to install fonts in Windows
There are several ways to install fonts in Windows 10 and Windows 11. The fonts you install will be available throughout the operating system in every app where you write and edit text. Without further ado, here’s how to install fonts on your computer:
1. How to install fonts from the Microsoft Store
One of the easiest ways to install a font in Windows is via the Microsoft Store. Open the font section from the Settings app like we’ve shown you earlier in this article: navigate to Settings > Personalization > Fonts. At the top of the page, you will find a link that says “Get more fonts in Microsoft Store.” Click or tap on it.
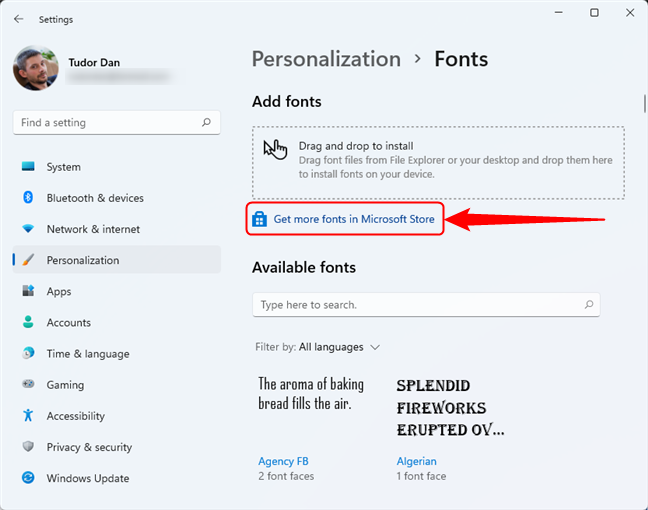
Download and install fonts from the Microsoft Store
Following the aforementioned link opens the Microsoft Store and takes you to its Fonts section. There, you can browse and see the available fonts. Once you find a font that you want to download and install, click or tap on it.
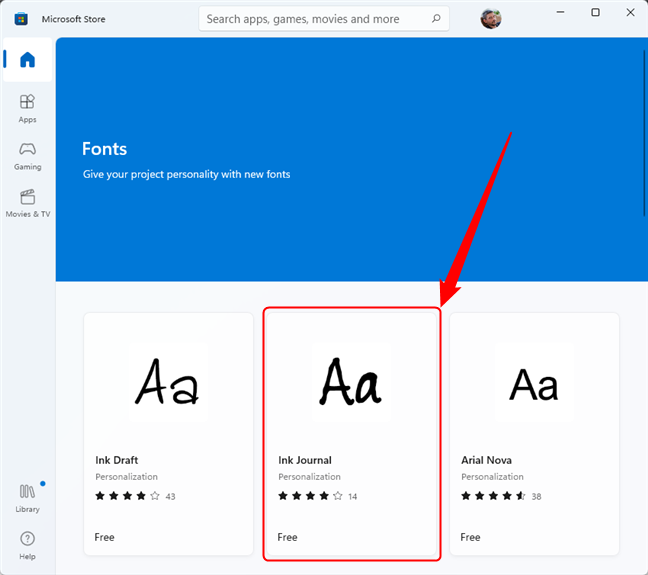
The Fonts section in the Microsoft Store
Check the details of the font and, if you decide you want it, click or tap the Get button from the top-right corner of the window.
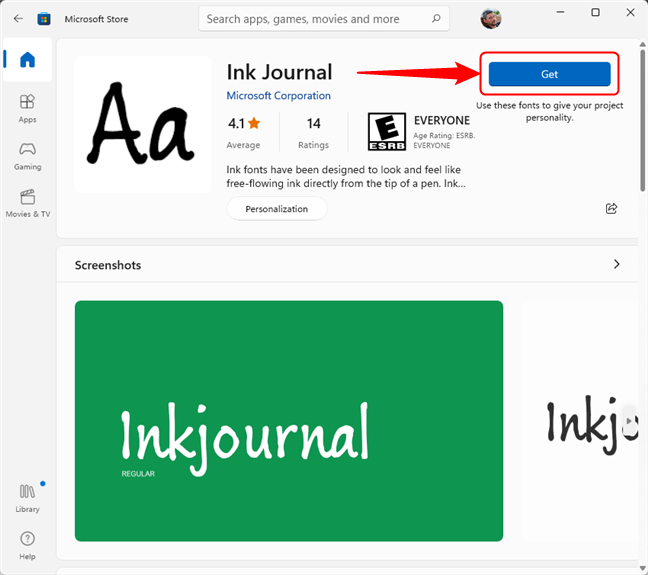
Install a font in Windows from the Microsoft Store
NOTE: If the font you want to install is a paid one, you’ll need to first buy it before being allowed to download it.
Once the installation is done, the Get button changes to an Open one. Pressing it takes you back to the Fonts page from the Settings app, where you can find the new font listed among the ones available on your PC.
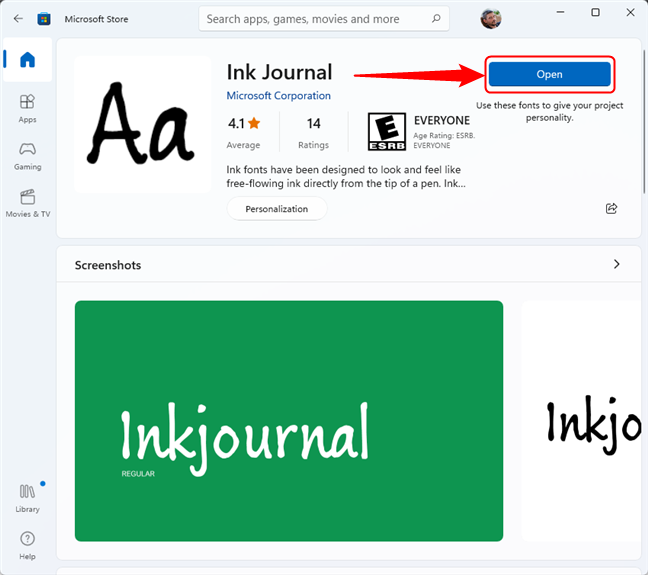
Font page for an installed font in Microsoft Store
2. How to install downloaded fonts using the Settings app
If you already downloaded a font and you want to install it on your PC, you can do so in several different ways. The simplest one is to open the Settings app, navigate to the Fonts page (Settings > Personalization > Fonts), and drag and drop the font file onto the “Drag and drop to install” section at the top.
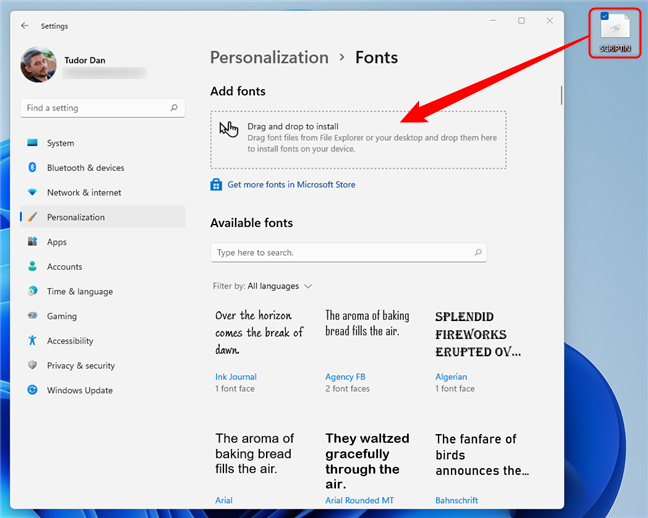
Drag and drop a font file onto the Fonts page to install it
3. How to install fonts using File Explorer
You can also install a downloaded font using File Explorer. First, navigate to where you have the font file, then right-click on it. Select “Show more options” to access the old right-click menu.
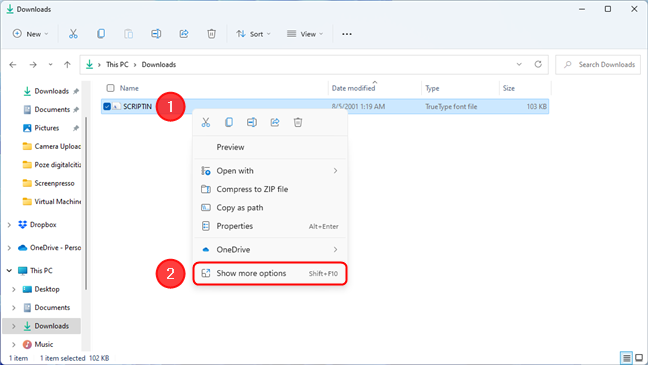
Access the classic right-click menu in Windows 11
In the classic right-click menu, click or tap on Install.
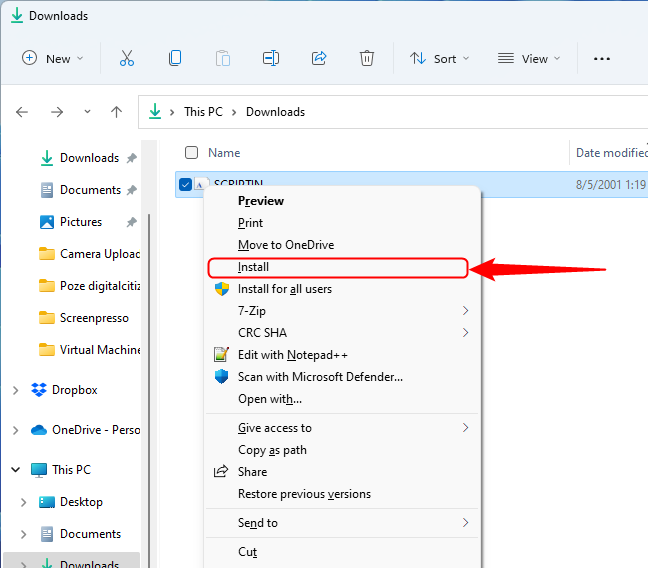
How to install a font from the right-click menu
In Windows 10, the classic right-click menu is displayed by default, so all you need to do is right-click on the font and then click or tap on Install.
4. How to install fonts for all users
The previous method is also the one you should use if you want to install fonts for all users. Just follow the same steps to navigate to the font file with File Explorer and right-click on it. But, in the context menu, select “Install for all users” instead of the simple Install. The only requirement here is that you need to have administrative rights to be able to install a font for all the users on your Windows computer.
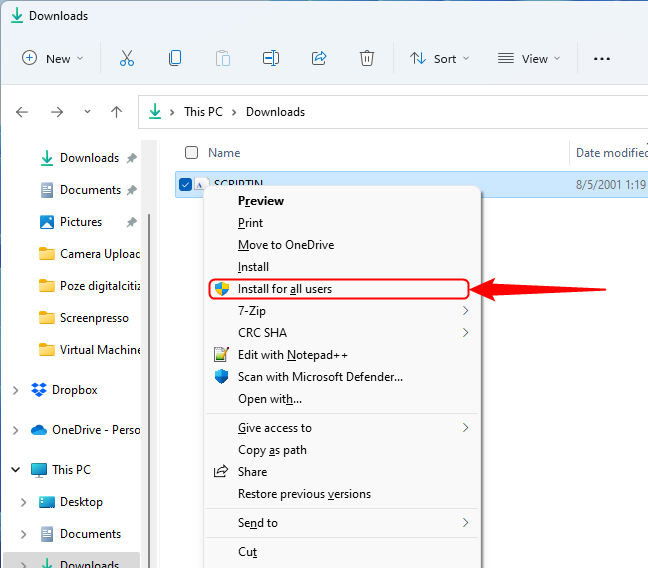
How to install a font for all users from the right-click menu
5. How to install fonts from the font preview window
Another easy way to install a downloaded font is from its preview window. Double-click or double-tap on its file, and Windows will launch a preview window where it shows you what that font looks like. Additionally, it also provides you with two buttons at the top: Print and Install. Obviously, to install a font in Windows from here, you’ll have to press the Install button.
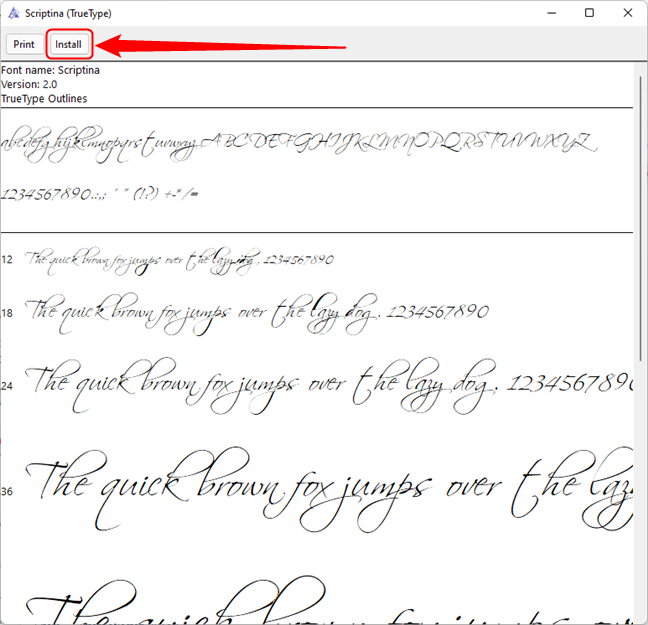
Install a font in Windows from the font preview window
6. How to install fonts from the Control Panel
If you’re a more conservative user, the old Control Panel offers another method to install and manage fonts in Windows. Open the Control Panel and navigate to “Appearance and Personalization > Fonts.” Then, simply drag and drop the font you want to install onto the list of fonts displayed in the Control Panel.
How to install a font in Windows 10 and Windows 11 with Control Panel
Where is the font folder in Windows?
OK, so you’ve installed one or more fonts on your computer. Now, you might wonder where all the fonts go on your PC. So, where’s the font folder in Windows? Well, it depends:
The default font folder in Windows that stores the system fonts and all the fonts installed for all the users of your computer is
C:\Windows\Fonts
You can either navigate to this folder or simply insert the path in the Address bar.
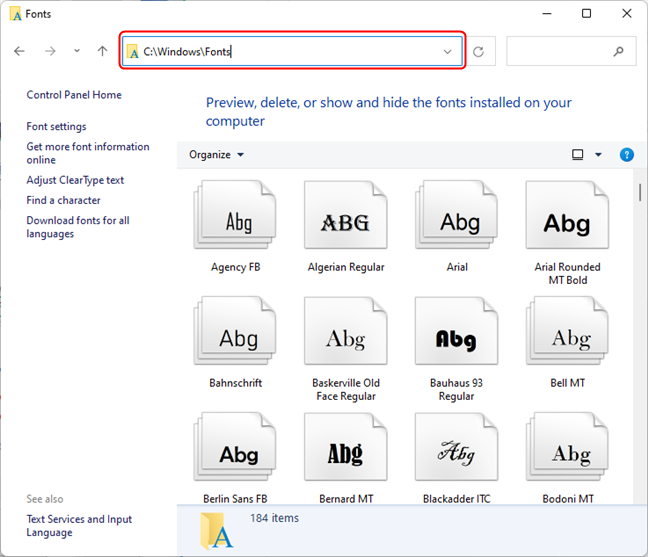
The location of the font folder in Windows 10 and Windows 11 (all users)
But you might have also installed fonts only for yourself — for your user account only. Unless you’ve followed the “install fonts for all users” method we’ve shown you, the fonts you install using the other methods go into your current user’s profile in a special folder that’s not available for the other users of your computer. You can find this folder in the following location:
%LOCALAPPDATA%\Microsoft\Windows\Fonts
How to uninstall fonts in Windows
The best and easiest method to uninstall fonts from Windows is through the Settings app. Open it and get to the font management section, just like we’ve shown you at the beginning of this guide: navigate to “Settings > Personalization > Fonts.” Identify the font (family) you want to uninstall and click or tap on it. If you’ve selected a font family (which has multiple fonts bundled together), choose the one you want to uninstall from the drop-down menu. Then, click or tap the Uninstall button.
Uninstall a font in Windows 11
Confirm the uninstall action, and the font is removed.
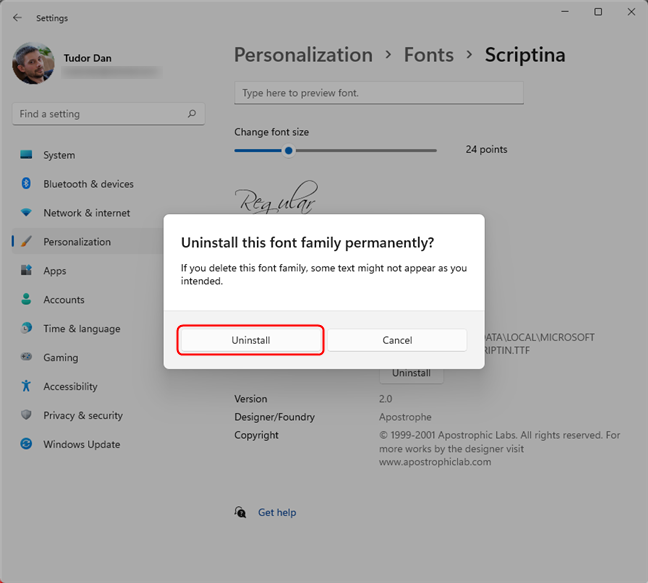
Confirm to uninstall a font in Windows 11
That’s it!
How do you prefer to install fonts in Windows?
Now you know how to see the fonts on your Windows computer. You also know how to install fonts in Windows 10 and Windows 11 for you and all the users on your PC. And, as you’ve seen, there are plenty of different ways to do it. So, before leaving, tell us: What’s your favorite method of installing fonts in Windows? Do you like the font management options found on the operating systems or did you hope Microsoft would make everything more user-friendly in Windows 11? Let us know in a comment below.
Все, что вам нужно знать о папке Appdata local microsoft windows fonts
Appdata local microsoft windows fonts — это папка в операционной системе Windows, которая содержит системные шрифты. Шрифты используются для отображения текста на экране и в печати, и они играют важную роль в оформлении внешнего вида приложений и веб-страниц.
Когда вы устанавливаете новый шрифт на своем компьютере, Windows сохраняет его файлы в папке Appdata local microsoft windows fonts. Это позволяет вам использовать этот шрифт в различных программах и приложениях, которые поддерживают его.
Чтобы найти папку Appdata local microsoft windows fonts, вы можете пройти следующий путь: C:\Users\Имя пользователя\AppData\Local\Microsoft\Windows\Fonts. Здесь «Имя пользователя» — это ваше имя пользователя в системе Windows.
Важно отметить, что доступ к папке Appdata local microsoft windows fonts имеют только администраторы системы. Если вы не являетесь администратором, вы не сможете изменять или добавлять новые шрифты в эту папку. Однако вы можете использовать уже установленные системные шрифты для своих проектов.