
windows:server:2022:apcupsd
Содержание
Случилось страшное! – старенький IPPON Smart Winner 3000 потерял связь с реальностью сервером по USB…
Не знаю пока, насколько страшная это беда, в ремонт его пока не отвозили, а просто, учитывая его солидный возраст и грядущую массовую замену АКБ1), заказали новый ИБП Ippon Innova RT II 3000, но последний соизволил задержаться в доставке на несколько месяцев… Т.е. все это время стойка находится под постоянной угрозой – сам ИБП вроде, и работает, и нагрузку какое-то более-менее приличное время держит, но серверам ничего не рассказывает и, в случае чего, они рискуют просто вырубиться в момент!
В связи с недопустимостью такого развития событий, придумалась простая, но рабочая схема – к одному из серверов был подключен по USB простенький APC Back-UPS CS практически без нагрузки2)…
Далее планировалось на этот сервер воткнуть PowerChute Personal Edition3) или, если что-то пойдет не так, какой-то альтернативный софт… и естественно, что-то пошло нет так – Personal Edition не устанавливается на сервера, и этим «альтернативным софтом», после долгих мытарств и тестов, был выбран Apcupsd.
Конфигурация
И правильно, что он – настройка там простая и незатейливая при всем необходимом функционале.
Ведущий
После загрузки4) и установки приложения на «главном» сервере, куда подключен ИБП, нужно заменить драйвер «American Power Conversion USB ИБП» в разделе «Устройства HID (Human Interface Devices)» на «American Power Conversion USB UPS (Apcupsd)»5), после чего он переместится в раздел «Батареи» вместо присутствующего там по умолчанию устройства «Батарея ИБП HID».
Конфигурация примерно такая:
- apcupsd.conf
-
# General
#UPSNAME
UPSCABLE usb
UPSTYPE usb
DEVICE
#POLLTIME 60
SCRIPTDIR c:\apcupsd\etc\apcupsd
PWRFAILDIR c:\apcupsd\etc\apcupsd
NOLOGINDIR c:\apcupsd\etc\apcupsd

# Failures
ONBATTERYDELAY 6
BATTERYLEVEL 70
MINUTES 5
TIMEOUT 0
ANNOY 300
ANNOYDELAY 60
NOLOGON disable
KILLDELAY 0

# NIS
NETSERVER on
NISIP 0.0.0.0
NISPORT 3551
EVENTSFILE c:\apcupsd\etc\apcupsd\apcupsd.events
EVENTSFILEMAX 10

# Sharing
UPSCLASS standalone
UPSMODE disable

# Logging
STATTIME 0
STATFILE c:\apcupsd\etc\apcupsd\apcupsd.status
LOGSTATS off
DATATIME 0
#FACILITY DAEMON

# UPS EPROM
#UPSNAME UPS_IDEN
#BATTDATE mm/dd/yy
#SENSITIVITY H
#WAKEUP 60
#SLEEP 180
#LOTRANSFER  208
#HITRANSFER 253
#RETURNCHARGE 15
#BEEPSTATE T
#LOWBATT 2
#OUTPUTVOLTS 230
#SELFTEST 336
Значимые переменные, которые необходимо проверить и при необходимости изменить:
-
UPSCABLE
-
UPSTYPE
-
DEVICE
-
POLLTIME
-
BATTERYLEVEL
-
MINUTES
-
NETSERVER
-
NISIP
-
NISPORT
В общем, файл конфигурации хорошо прокомментирован, добавить нечего, но вот, если нужно, онлайн описание директив.
Ведомые
На ведомых серверах конфигурация должна быть изменена так6):
UPSCABLE ether
UPSTYPE net
DEVICE master-dvs.local:3551
POLLTIME 10
BATTERYLEVEL 80
MINUTES 6
Директива «NETSERVER» должна тоже быть в положении «on»!
Расписания
Для минимизации казусов, я выбрал такие значения директив «BATTERYLEVEL» и «MINUTES»:
| Role | BATTERYLEVEL | MINUTES |
|---|---|---|
| Primary7) | 90 | 7 |
Slaves  |
80 | 6 |
| Master9) | 70 | 5 |
Т.к. в этой модели ведомые опрашивают ведущего, а не ведущий уведомляет ведомых, для корректной последовательности выключения важно, чтобы ведущий выключался последним, иначе, при потере связи с ведущим, ведомые сразу выключатся не взирая на «расписание»!
Уведомления
Для отправки уведомлений на почту, в комплекте присутствуют несколько простых скриптов, внутри, по сути, практически идентичных:
-
commfailure.vbs.example
-
offbattery.vbs.example
-
onbattery.vbs.example
Для активации, их нужно отредактировать, добавив правильные настройки почты, и переименовать, убрав «.example» из имени файла.
При необходимости можно повесить уведомления на другие события, скопировав скрипт «commfailure.vbs», отредактировав и переименовав его в одно из этих значений:
-
commfailure
-
commok
-
powerout
-
onbattery
-
offbattery
-
mainsback
-
failing
-
timeout
-
loadlimit
-
runlimit
-
doshutdown
-
annoyme
-
emergency
-
changeme
-
remotedown
-
startselftest
-
endselftest
-
battdetach
-
battattach
Дисклеймер
-
Использование материалов данной базы знаний разрешено на условиях лицензии, указанной внизу каждой страницы! При использовании материалов активная гиперссылка на соответствующую страницу данной базы знаний обязательна!
-
Автор не несет и не может нести какую либо ответственность за последствия использования материалов, размещенных в данной базе знаний. Все материалы предоставляются по принципу «как есть». Используйте их исключительно на свой страх и риск.
-
Все высказывания, мысли или идеи автора, размещенные в материалах данной базе знаний, являются исключительно его личным субъективным мнением и могут не совпадать с мнением читателей!
-
При размещении ссылок в данной базе знаний на интернет-страницы третьих лиц автор не несет ответственности за их техническую функциональность (особенно отсутствие вирусов) и содержание! При обнаружении таких ссылок, можно и желательно сообщить о них в комментариях к соответствующей статье.
Последнее изменение: 2023/09/21 01:28 —
Николай Солошин
В этой заметке мы рассмотрим пример настройки свободного программного обеспечения Network UPS Tools (NUT) для контролируемого выключения сервера виртуализации Hyper-V на базе ОС Windows Server 2022. В рассматриваемом примере NUT будет использоваться в связке с двумя ИБП APC Smart-UPS SURT6000XLI, в которые установлены ранее рассмотренные платы Инматикс ПСУ Спутник А21. То есть в нашем случае к двум блокам питания хоста виртуализации подключены два разных ИБП, а ПО NUT, установленное на хост, будет контролировать состояние обоих ИБП и в случае проблем с электропитанием на ИБП инициировать команду завершения работы виртуальных машин хоста и штатного выключения хостовой ОС.
Основную информацию о NUT можно найти на сайте проекта, где в разделе документации можно найти ссылку на полезный для нас документ «NUT Configuration Examples». Кроме того, не лишним будет ознакомление с документом на русском языке, опубликованном на сайте Инматикс «Завершение работы серверов и ПК» с примерами установки и настройки NUT в простых конфигурациях на ОС Linux Debian и Windows.
Инсталляционные сборки NUT существуют под множество разных операционных сред. Найти интересующий нас пакет под ОС Windows можно на сайте в разделе «Binary packages». Имеющийся на данный момент времени пакет NUT-Installer-2.6.5-6.msi является инсталлятором «не первой свежести», но он без нареканий устанавливается на ОС Windows Server 2022.
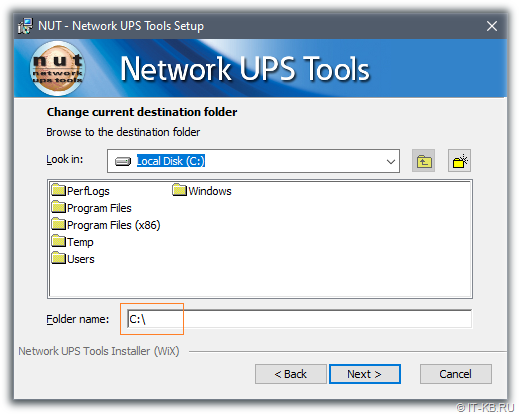
В ходе установки инсталлятор просит принять лицензионное соглашение GPLv2 и предлагает указать каталог установки (по умолчанию на 64-битной версии Windows Server устанавливается в каталог «C:\Program Files (x86)»). Чтобы в перспективе избежать потенциальных проблем NUT с путями, содержащими пробелы и спецсимволы, изменим каталог установки на «C:\», в результате чего установка будет выполнена в каталог «C:\NUT».
На этапе запроса об установке драйвера libUSB можем отключить опцию, так как в нашем случае подключение к ИБП будет выполняться не через USB, а по сети через драйвер snmp-ups, который входит в базовую поставку инсталлятора NUT под Windows.

По окончании процесса установки в системе появится служба «Network UPS Tools» с автоматическим типом запуска, но она будет остановлена.

Чтобы избежать некоторых ошибок запуска исполняемых файлов, входящих в состав NUT, нам потребуется докинуть несколько библиотек, необходимых для поддержки шифрования, которое, в частности, будет использоваться при работе с протоколом SNMPv3.
Найти эти библиотеки можно в подкаталоге «\Network UPS Tools\windows\libs» архива, который можно загрузить с сайта Инматикс по ссылке Network-UPS-Tools.zip.
Скопируем файлы библиотек по следующим путям:
1) libeay32.dll, msvcr120.dll, ssleay32.dll в каталог «C:\NUT\bin«;
2) libeay32.dll, msvcr120.dll, ssleay32.dll, libgcc_s_dw2-1.dll, libssl32.dll в каталог «C:\NUT\sbin«
Следующим шагом перед запуском службы «Network UPS Tools» будет настройка конфигурационных файлов NUT.
Настройка конфигурационных файлов NUT
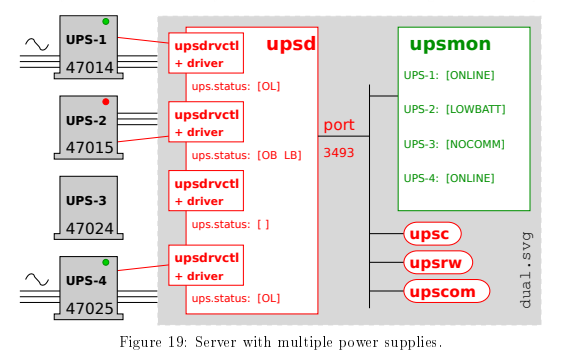
Архитектурно в составе NUT можно выделить 3 базовые компоненты:
1) Компонента драйвера (driver), которая отвечает за связь с ИБП и управляется через файл ups.conf;
2) Серверная компонента (upsd), использующая драйвер для сообщений о состоянии ИБП, которая управляется через файл upsd.conf;
3) Компонента мониторинга (upsmon), которая контролирует сервер upsd и выполняет командные действия, такие как, например, выключение ОС. Управляется через файл upsmon.conf.
Приведу наглядный пример взаимодействия компонент NUT для хоста с несколькими блоками питания из документа «NUT Configuration Examples»:
Правим конфигурационные файлы в подкаталоге «etc» каталога установки NUT. В нашем случае это «C:\NUT\etc«.
В первую очередь отредактируем файл nut.conf.sample, указав режим работы NUT, сохраним и переименуем файл в nut.conf.
MODE=standalone
NUT может работать в режимах сервера (управляет выключением других устройств в сети), клиента (принимает команды от сервера NUT в сети), изолированном (все компоненты в рамках одного хоста). Справку по этому конфигурационному файлу можно получить в закомментированных строках nut.conf.sample, либо найти в файле \docs\man\nut.conf.html каталога установки NUT.
Настроим конфигурацию драйверов NUT. Для этого отредактируем файл ups.conf.sample и переименуем его в ups.conf. Справку по этому конфигурационному файлу можно получить в закомментированных строках ups.conf.sample, либо найти в файле \docs\man\ups.conf.html каталога установки NUT.
Есть разные варианты настройки драйвера и они зависят от типа подключения компьютера с NUT к ИБП и от модели ИБП. Перечень совместимых моделей ИБП и рекомендуемые параметры конфигурации для них можно найти в «Hardware compatibility list».
В нашем случае NUT будет подключаться к ИБП не напрямую через USB, а по сети по протоколу SNMP. Поэтому нам потребуется настроить драйвер snmp-ups. Простой пример настройки подключения к ИБП по протоколу SNMPv1:
[MYUPS-001]
driver = snmp-ups
port = my-ups-001.example.com
snmp_version = v1
community = public
pollfreq = 10
desc = "APC Smart-UPS 6000"
В нашем случае к компьютеру с NUT подключены 2 ИБП, доступ к которым мы сконфигурируем по протоколу SNMPv3. Результирующий файл ups.conf (без учёта комментариев):
[KOM-UP001]
driver = snmp-ups
mibs = ietf
port = kom-up001.holding.com
snmp_version = v3
secLevel = authPriv
secName = nut-user
authProtocol = SHA
authPassword = zN3s8fU!sO1sbPMsF
privProtocol = DES
privPassword = H5iXoLe5x4ZY52w-d
pollfreq = 10
desc = "APC Smart-UPS SURT6000XLI with NMC Sputnik"

[KOM-UP002]
driver = snmp-ups
mibs = ietf
port = kom-up002.holding.com
snmp_version = v3
secLevel = authPriv
secName = nut-user
authProtocol = SHA
authPassword = fR!sO1sbPMsFzN3s8
privProtocol = DES
privPassword = Le5x4ZYv2w-dH5iXo
pollfreq = 10
desc = "APC Smart-UPS SURT6000XLI with NMC Sputnik"
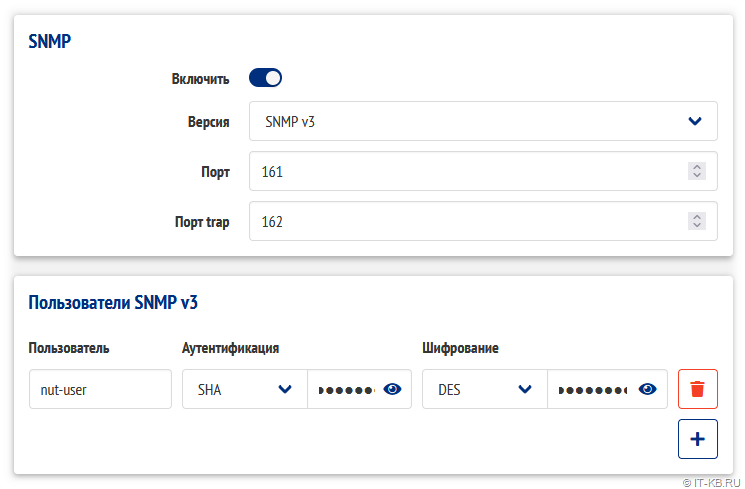
Использовать AES в качестве протокола аутентификации не получится, так как NUT не сможет подключиться к ПСУ Спутник в этом случае. По заверениям тех.поддержки Инматикс проблема здесь в NUT, так как с другими программами ПСУ Спутник успешно аутентифицирует AES. Поэтому в данном случае используем DES. Пример настройки SNMPv3 на стороне платы управления ИБП ПСУ Спутник:
При задании паролей для пользователя SNMPv3 лучше не злоупотреблять спец.символами, так как это может создать проблемы в работе NUT. Например, использование знака «#» точно вызывает ошибку загрузки драйвера snmp-ups в NUT, при том, что, например, символы «!» и «-» проблем не создадут.
Следующим шагом настроим серверную компоненту upsd таким образом, чтобы upsd не был доступен по сети и прослушивал только локальный порт 3493, переименовав файл upsd.conf.sample в upsd.conf и раскомментировав в нём строку:
LISTEN 127.0.0.1 3493
Далее настроим конфигурационный файл с пользователями, которые будут иметь доступ к серверу upsd, переименовав файл upsd.users.sample в upsd.users. Внесём в файл секцию с описанием пользователя, например, с именем «upsmon-user«:
[upsmon-user]
password = sImplePZsw0rd
upsmon master
Затем настроим конфигурационный файл компоненты мониторинга upsmon. Для этого переименуем файл upsmon.conf.sample в файл upsmon.conf и добавим/отредактируем/раскомментируем в нём следующие строки (прочие открытые строки следует закомментировать):
MONITOR KOM-UP001@localhost 1 upsmon-user sImplePZsw0rd master
MONITOR KOM-UP002@localhost 1 upsmon-user sImplePZsw0rd master
MINSUPPLIES 1
SHUTDOWNCMD "C:\\WINDOWS\\system32\\shutdown.exe -s -t 0"
NOTIFYCMD "C:\\NUT\\sbin\\upssched.exe"
POLLFREQ 5
POLLFREQALERT 5
HOSTSYNC 15
DEADTIME 15
POWERDOWNFLAG "C:\\NUT\\killpower"
NOTIFYMSG ONLINE    "UPS %s on line power"
NOTIFYMSG ONBATT    "UPS %s on battery"
NOTIFYMSG LOWBATT   "UPS %s battery is low"
NOTIFYMSG FSD       "UPS %s: forced shutdown in progress"
NOTIFYMSG COMMOK    "Communications with UPS %s established"
NOTIFYMSG COMMBAD   "Communications with UPS %s lost"
NOTIFYMSG SHUTDOWN  "Auto logout and shutdown proceeding"
NOTIFYMSG REPLBATT  "UPS %s battery needs to be replaced"
NOTIFYMSG NOCOMM    "UPS %s is unavailable"
NOTIFYMSG NOPARENT  "upsmon parent process died - shutdown impossible"
NOTIFYFLAG ONLINE   SYSLOG+EXEC
NOTIFYFLAG ONBATT   SYSLOG+EXEC
NOTIFYFLAG LOWBATT  SYSLOG+EXEC
NOTIFYFLAG FSD  SYSLOG
NOTIFYFLAG COMMOK   SYSLOG
NOTIFYFLAG COMMBAD  SYSLOG
NOTIFYFLAG SHUTDOWN SYSLOG
NOTIFYFLAG REPLBATT SYSLOG
NOTIFYFLAG NOCOMM   SYSLOG
NOTIFYFLAG NOPARENT SYSLOG
RBWARNTIME 43200
NOCOMMWARNTIME 300
FINALDELAY 5
Первые две строки определяют подключение компоненты мониторинга к драйверам, описанным нами в ups.conf с учётной записью, описанной нами в upsd.users. Третья строка с параметром MINSUPPLIES определяет минимально допустимое количество источников питания в состоянии ONLINE. На сервере с двумя блоками питания, подключенным к двум разным ИБП, логично определить значение этого параметра в 1. На сервере с 4 блоками питания, подключенными к разным источникам питания, это значение может быть, например, 2 или 3. Важным здесь также являются параметры NOTIFYFLAG. Обратите внимание на то, что для большинства разных состояний источников питания у нас определено лишь логирование (SYSLOG). И только для трёх состояний (ONLINE, ONBATT, LOWBATT) мы включаем логирование и запуск команды (SYSLOG+EXEC). Под командой здесь подразумевается исполняемый файл планировщика upssched.exe, ссылка на который описана в параметре NOTIFYCMD.
Чтобы лучше понять все описанные параметры, рекомендуется ознакомиться со справкой по этому конфигурационному файлу, которую можно получить в закомментированных строках исходного файла upsmon.conf.sample, либо найти в файле \docs\man\upsmon.conf.html каталога установки NUT.
Настроим конфигурационный файл вспомогательного планировщика upssched, который вызывается в NOTIFYCMD конфигурации компоненты upsmon. Для этого переименуем файл upssched.conf.sample в файл upssched.conf и внесём в него следующие строки (прочие открытые строки следует закомментировать):
CMDSCRIPT "PowerShell.exe -NoProfile -Command C:\\NUT\\sbin\\upssched-script.ps1"
PIPEFN "\"C:\\NUT\\upssched.pipe\""
LOCKFN "\"C:\\NUT\\upssched.lock\""
AT LOWBATT * EXECUTE ups-on-battery
AT ONBATT * START-TIMER ups-on-battery 3600
AT ONLINE * CANCEL-TIMER ups-on-battery
Данная конфигурация предполагает то, что после того, как любой из ИБП переходит в состояние работы от батарей (ONBATT) запускается таймер, ожидающий 1 час (3600 секунд). Это время может корректироваться в зависимости от возможностей ваших ИБП по времени автономной работы от батарей при пропадании входного напряжения. Если в течение указанного периода времени входное напряжение на ИБП вернётся и он перейдёт с батарей на питание от сети (возврат в статус ONLINE), то обратный отсчёт времени таймера будет прерван. Если обратный отсчёт времени таймера доработает до конца, то произойдёт вызов скрипта завершения работы (CMDSCRIPT) с передачей ему параметра «ups-on-battery». При этом, в любой из ситуаций, если с ИБП будет получен статус об исчерпании заряда батарей (LOWBATT), то будет выполнен вызов скрипта завершения работы (CMDSCRIPT) с передачей ему параметра «ups-on-battery».
Теперь в каталоге установки NUT в подкаталоге «sbin» создадим файл PowerShell скрипта, который будет дёргаться планировщиком upssched и выполнять завершение работы виртуальных машин Hyper-V и ОС самого хоста виртуализации, записывая при этом свои действия в event-лог хоста. Пример содержимого файла скрипта upssched-script.ps1:
<#
  .SYNOPSIS
  Helper script for the upssched.exe process from Network UPS Tools (NUT) for Windows.
  The script can be placed in the sbin subdirectory of the NUT installation directory.
  Don't forget to change the $NUTdir variable.

  .DESCRIPTION
  The upssched-script.ps1 script is called by the upssched.exe process.
  The script uses the value of the MINPOWERSUPPLY variable from upsmon.conf file.
  To obtain the status of the UPS connected to the system, the script calls the upsc.exe utility.
  If the value of the MINPOWERSUPPLY variable is less than the number of UPSs in the 'OL' status, the script begins the system shutdown procedure.
  When the $vmsshutdown variable is enabled before shutting down the system, a forced shutdown of all Hyper-V virtual machines is performed

  The script was tested on Windows Server 2022 with PowerShell 5.1 and Network UPS Tools for Windows 2.6.5

  .PARAMETER State
  Specifies a marker for the current state of the UPS based on data from the upsmon process.
  Valid values: ups-on-battery

  .INPUTS
  None. You cannot pipe objects to script.

  .OUTPUTS
  The script generates only information output about the operations performed

  .EXAMPLE
  PS> .\upssched-script.ps1 ups-on-battery

  .EXAMPLE
  PS> .\upssched-script.ps1 -State ups-on-battery

  .EXAMPLE
  PowerShell.exe -NoProfile -Command "C:\NUT\sbin\upssched-script.ps1 ups-on-battery"

  .NOTES
  Author: Aleksey.Maksimov@it-kb.ru
  Version: 1.1 (2023-09-22)
  Purpose: Helper script for the upssched.exe process from Network UPS Tools for Windows
#>

Param (
[Parameter (Mandatory=$true, Position=1)]
[string]$State
)

$NUTdir = "C:\NUT"
$upsmoncfg = $NUTdir + "\etc\upsmon.conf"
$upscexe = $NUTdir + "\bin\upsc.exe"
$vmsshutdown = $true
$writeevents = $true
$eventlogsrc = "Network UPS Tools Script"

If ($writeevents -eq $true) {
    If ([System.Diagnostics.EventLog]::SourceExists($eventlogsrc) -eq $false) {
      [System.Diagnostics.EventLog]::CreateEventSource($eventlogsrc, "Application")
    }
}

Function Logger {
    [CmdletBinding()]
    param(
        [Parameter(Mandatory=$true, Position=1)]
        [string]$Message,
        [Parameter(Mandatory=$false, Position=2)]
        [string]$Color =  "Gray"
    )
    Write-Host $Message -ForegroundColor $Color
    If ($writeevents -eq $true) {
        $EvtType = "Information"
        If ($Color -eq "Yellow") { $EvtType = "Warning" }
        Write-EventLog -LogName "Application" -Source "Network UPS Tools Script" -Category 0 -EventID 1 -EntryType $EvtType -Message $Message
    }
}

If ($State -eq 'ups-on-battery') {

    If (![System.IO.File]::Exists($upsmoncfg)) {
        Logger -Message "The path to the upsmon.conf file is incorrect. `nScript stopped." -Color "Yellow"
        Break
    }
    [int]$ACSourcesMin = ((Get-Content $upsmoncfg | Where-Object {$_.StartsWith("MINSUPPLIES")}).Trim()[-1]).ToString() -as [int]
    Logger -Message "Retrieved the value of the MINPOWERSUPPLY variable from upsmon.conf : '$ACSourcesMin'"

    If ($ACSourcesMin -lt 1) {
        Logger -Message "The value of the MINPOWERSUPPLY variable in the upsmon.conf file is incorrect. `nScript stopped." -Color "Yellow"
        Break
    }

    If (![System.IO.File]::Exists($upscexe)) {
        Logger -Message "The path to the upsc.exe file is incorrect. `nScript stopped." -Color "Yellow"
        Break
    }
    [int]$ACSourcesCurr = 0
    $Sources = @(& $upscexe -l)
    If ($Sources.Count -lt 1) {
        Logger -Message "The 'upsc' program returned less than one UPS. `nScript stopped." -Color "Yellow"
        Break
    }
    #Logger -Message "Retrieved the count of the UPS from 'upsc -l' : '$($Sources.Count)'"

    ForEach ($Source in $Sources) {
        $Status = @(& $upscexe $Source ups.status)
        Logger -Message "Retrieved UPS status from 'upsc $Source ups.status' : '$Status'"
        If ($Status -eq 'OL') { $ACSourcesCurr = $ACSourcesCurr + 1 }
    }
    #Logger -Message "Counted number of UPSs in ONLINE state : $ACSourcesCurr"

    If ($ACSourcesCurr -lt $ACSourcesMin) {
        Logger -Message "Counted number of UPSs in ONLINE state ($ACSourcesCurr) less than value of the MINPOWERSUPPLY variable in upsmon.conf ($ACSourcesMin)"
        If ($vmsshutdown -eq $true) {
            Logger -Message "Shutting down Hyper-V virtual machines..."
            Get-VM | Where State -eq 'Running' | Stop-VM -Force;
        }
        Logger -Message "Shutting down the system..."
        Stop-Computer -ComputerName localhost -Force;
    }
    Else {
        Logger -Message "Counted number of UPSs in ONLINE state ($ACSourcesCurr) greater than or equal to value of the MINPOWERSUPPLY variable in upsmon.conf ($ACSourcesMin).`nThe script completed without shutting down the system"
    }
}
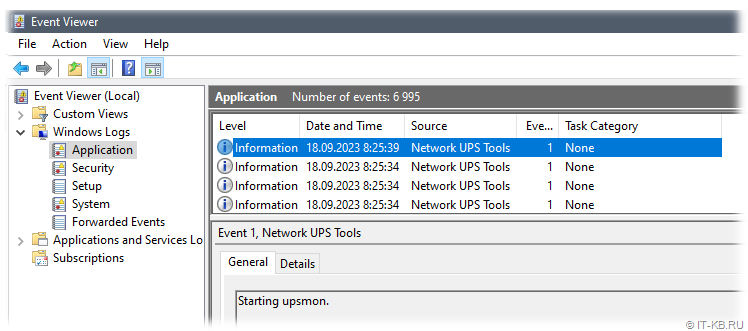
В начале своей работы скрипт регистрирует в системном event-логе «Application» новый источник «Network UPS Tools Script«, который будет использоваться для записи событий, связанных с работой скрипта.
Затем из каталога установки NUT (указывается через переменную $NUTdir), предпринимается попытка чтения конфигурационного файла upsmon.conf и считывания значение параметра MINSUPPLIES.
Затем с помощью утилиты upsc.exe извлекается информация о всех подключенных к NUT ИБП в состоянии ONLINE.
Если оказывается, что штатно работающих от входящей электросети ИБП меньше, чем значение полученного ранее параметра MINSUPPLIES, то инициируется процедура завершения работы всех виртуальных машин Hyper-V, а затем самого хоста виртуализации.
Конфигурационные файлы подготовлены и теперь можем попробовать выполнить запуск службы «Network UPS Tools«, например с помощью PowerShell:
Start-Service "Network UPS Tools"
NUT регистрирует события в event-логе «Application«. В случае возникновения проблем при запуске службы в первую очередь стоит заглянуть в этот лог.
Замечено, что подключение драйвера snmp-ups к ИБП в некоторых случаях происходит с небольшой задержкой и несколько первичных попыток подключения в течение примерно первой минуты безуспешны. Это приводит к появлению ошибки «upsmon — Poll UPS failed — Data stale» в event-логе Application. Причём данное поведение не зависит от выбора версии протокола SNMP. То есть NUT не сразу подключается к плате управления и получает с неё актуальные данные. По имеющейся информации на более актуальных версиях NUT под Linux такое поведение не воспроизводится, поэтому можно предполагать, что связано с это с «шероховатостями» в реализации NUT под Windows. Есть ощущение, что ошибки появляются по той причине, что модуль upsmon запускается немного раньше, чем успевает пройти инициализацию каждый экземпляр драйвера snmp-ups. По логам можно заметить, что драйвер snmp-ups для второго ИБП загружается позже, чем начинает работу upsmon. После ряда экспериментов стало очевидно то, что это проявляется для разных ИБП и разных плат Спутник, но по сути на работу NUT негативно не влияет.
Кроме того, замечено, что иногда NUT 2.6.5 перестаёт писать в event-лог Application. Закономерности такого поведения мне выяснить не удалось. Похоже, что эта проблема проявляется плавающим образом. Наличие этой проблемы стало одним из аргументов, который побудил реализовать дополнительный функционал записи в event-лог в скрипте выключения upssched-script.ps1, который мы представили выше. По большому счёту на ключевую функциональность NUT эта проблема влияния не имеет.
Проверка состояния подключений NUT к ИБП
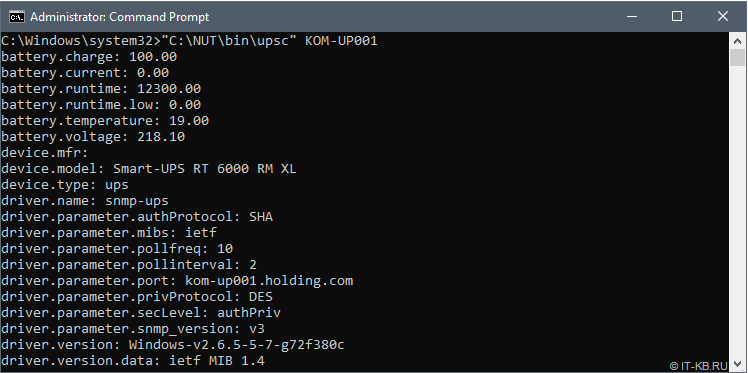
Убедиться в правильности настройки связи NUT с платами управления ИБП можно вызвав утилиту upsc (upsc (8)), передав ей в качестве параметра имя ИБП, которое мы указали ранее в конфигурации NUT:
"C:\NUT\bin\upsc" KOM-UP001
При успешно установленной связи драйвера NUT с платой управления ИБП мы должны получить вывод, отображающий текущие показатели работы ИБП
Запрос к ИБП можно конкретизировать. Например, чтобы запросить только текущий статус ИБП, можно выполнить:
"C:\NUT\bin\upsc" KOM-UP001 ups.status

В данном случае статус «OL» означает, что ИБП работает в штатном режиме от входящей электросети. «OB» означает работу от батарей. «LB» говорит о почти полном разряде батарей («LB OL» при низком заряде и питании от сети, «LB OB» при низком заряде и питании от батарей).
Тестирование сценариев отключения питания на ИБП
После того, как вся конфигурация NUT настроена и мы убедились в успешности подключения NUT к обоим ИБП, правильным будет отработать возможные сценарии с наступлением случаев, когда на любом одном или сразу двух ИБП пропадает входное напряжение.
Перечень проверок, которые покажут нам корректность работы настроенной конфигурации NUT:
1) Отключаем ввод на первом ИБП и ожидаем N минут (по значению указанному нами в upssched.conf). Все виртуальные машины и сам хост виртуализации должны продолжить работу.
2) Отключаем ввод на втором ИБП и ожидаем N минут. Все виртуальные машины и сам хост виртуализации должны продолжить работу.
3) Отключаем ввод на обоих ИБП и ожидаем N минут, после чего должно начаться выключение виртуальных машин, а затем самого хоста виртуализации.
4) Отключаем ввод на ИБП (на любом одном или на обоих сразу), ожидаем период времени, меньший чем N минут. Снова включаем ввод на ИБП. В event-логе должны появиться соответствующие уведомления, а процесс выключения ВМ и хоста не должен запуститься.
5) Отключение по событию слабого заряда батарей, наступающему до истечения N минут. То есть обрабатывается ситуация, когда оба ИБП работают от батарей и у одного любого наступает событие низкий заряд – инициируем выключение виртуальных машин и хоста виртуализации.
При проверке сценариев 3 и 5 следует убедиться в том, что гостевые ОС в виртуальных машинах штатным образом завершают свою работу.
Вариант поднятия версии NUT на Windows
Если есть какие-либо причины или выявленный проблемы, препятствующие использованию указанной готовой сборки NUT «не первой свежести» 2.6.5 на Windows, то можно попробовать обновить исполняемые файлы NUT до актуальной версии из сборок, которые доступны по ссылке «AppVeyor — nut-travis» с вкладки Artifacts:
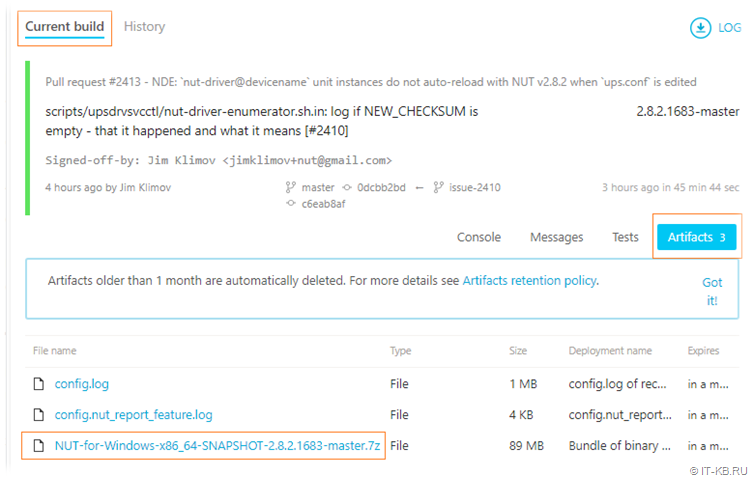
Скачиваем и распаковываем архив NUT-for-Windows-x86_64-SNAPSHOT-2.8.*-master.7z.
Останавливаем службу NUT и убеждаемся, что все процессы NUT (nut.exe, upsd.exe, upsmon.exe, snmp-ups.exe) выгружены из памяти.
Всё содержимое архивного подкаталога «\NUT-for-Windows-x86_64-SNAPSHOT\mingw64» копируем с заменой файлов в каталог установки NUT.
При подобном тестировании одной из предыдущих сборок NUT (2.8.0.806) обнаружилось, что для работы обновлённого драйвера snmp-ups.exe потребуется библиотека libcrypto-1_1-x64.dll. Где взять эту библиотеку их состава OpenSSL? Ссылки на источники загрузки готовых библиотек можно найти здесь: «OpenSSL Wiki — Binaries» . Выбираем на этой странице како-либо из источников, например «ICS Download» и качаем с него архив библиотек OpenSSL 1.1 для x64 Windows. Из архива текущей версии, например openssl-1.1.1w-win64.zip, извлекаем интересующий нас файл библиотеки libcrypto-1_1-x64.dll в каталог с исполняемым файлом snmp-ups.exe (C:\NUT\bin).
Запускаем службу и наблюдаем за event-логом. Не исключено, что в более свежих версиях NUT потребуется корректировка выше описанных параметров конфигурационных файлов NUT.
Диагностика работы NUT
В некоторых случаях может возникнуть какая-либо проблема, причину которой не получается понять по регистрируемым событиям event-лога. В такой ситуации можно воспользоваться отладочным запуском исполняемых файлов NUT в интерактивном режиме.
1) Останавливаем службу «Network UPS Tools» и убеждаемся, что все процессы NUT (nut.exe, upsd.exe, upsmon.exe, snmp-ups.exe) выгружены из памяти.
2) Открываем первую консоль cmd.exe и запускаем в интерактивном режиме экземпляры драйвера с помощью утилиты upsdrvctl.exe:
"C:\NUT\bin\upsdrvctl.exe" -D start
Процедура отработает и в системе должно появится 2 процесса snmp-ups (по процессу на каждый ИБП) из ups.conf. Если требуется более подробный вывод информации, то можно менять ключ «-D» на «-DD» , «-DDD» и так далее. Оставляем эту консоль в запущенном состоянии.
3) Открываем вторую консоль cmd.exe и запускаем в интерактивном режиме процесс сервера NUT upsd.exe:
"C:\NUT\sbin\upsd.exe" -D
В этот момент процесс сервера должен подключиться к ранее запущенным в первой консоли экземплярам драйвера. Оставляем эту консоль в запущенном состоянии.
4) Открываем третью консоль cmd.exe и запускаем в интерактивном режиме процесс клиента NUT upsmon.exe:
"C:\NUT\sbin\upsmon.exe" -D
Процесс должен подключиться к ранее запущенному во второй консоли экземпляру сервера upsd и получить от него данные о состоянии ИБП. Оставляем эту консоль в запущенном состоянии.
После этого можно выполнять всевозможные тестирования и отладочные мероприятия, например выключить автомат ИБП и наблюдать за реакцией в открытых консолях с процессами upsd и upsmon будет.
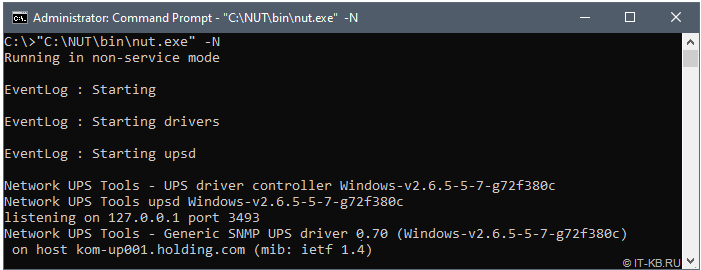
Для отладки работы самой службы «Network UPS Tools» можно попробовать выполнить интерактивный запуск исполняемый файл службы. Для этого останавливаем службу NUT и запускаем приложение в командной строке в интерактивном режиме:
"C:\NUT\bin\nut.exe" -N
На консоль при этом будет выводиться больше информации, чем мы можем увидеть в событиях event-лога.
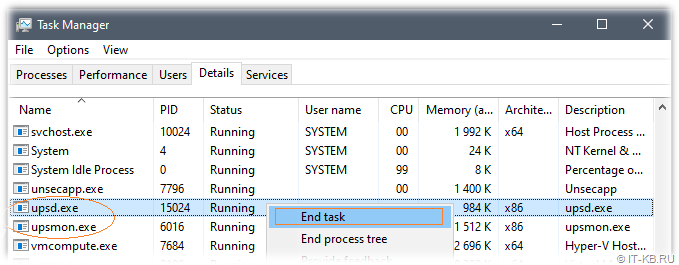
После прерывания процесса отладки через Ctrl+C потребуется дополнительно через Task Manager удалить процессы upsd.exe, upsmon.exe и snmp-ups.exe (процессы snmp-ups создаются на каждый ИБП отдельно).
Заключение
Проведённые испытания свободного ПО Network UPS Tools на хосте виртуализации c ОС Windows Server 2022, подключенном разными блоками питания к разным ИБП APC Smart-UPS, показали, что данное ПО вполне справляется с задачей контролируемого выключения виртуальных машин Hyper-V и хостовой ОС. То есть NUT может рассматриваться в качестве альтернативы теперь уже платному ПО APC PCNS (PowerChute Network Shutdown).
В рассматриваемом примере компоненты NUT взаимодействовали с платами управления ИБП ПСУ Спутник, но следует понимать, что NUT это универсальное средство и может использоваться с множеством других плат управления ИБП, позволяющих выполнять опрос состояния ИБП по протоколу SNMP (и не только).
If you are using your APC UPS to protect a Windows computer or Windows Server server, you will be able to use PowerChute Personal Edition software.
Thanks to this software, you will be able to manage your UPS (via the data cable), as well as configure the automatic shutdown of your computer or server so that it turns off properly in the event that a power outage lasts too long.
- Installing your APC UPS driver on Windows
- Download and Install PowerChute Personal Edition
- PowerChute Personal Edition overview
- Monitor System
- Configuration
- Help and support
- Manually test your APC UPS (run a self-test)
- Disable UPS audible alarm
- Actual UPS test (temporary switch to battery)
1. Installing your APC UPS driver on Windows
To begin, plug your APC UPS into your computer if you haven’t already.
If your computer is on Windows, the appropriate driver will be installed automatically from the Internet.
In our case, on Windows 10, this notification appears :
Plain Text
Device is ready.
"Back-UPS RS 1500G FW:878.L5 .I USB FW:L5" is set up and ready to go.
To see the hardware recognized by Windows once the driver is automatically installed from Microsoft’s server, open the file explorer and right-click «Manage» on «This PC» (or «Computer»).

Go to «Device Manager» and you will see 2 new devices appear :
- «HID UPS Battery» in the «Batteries» section
- «American Power Conversion USB UPS» in the «Human Interfaces Devices» section
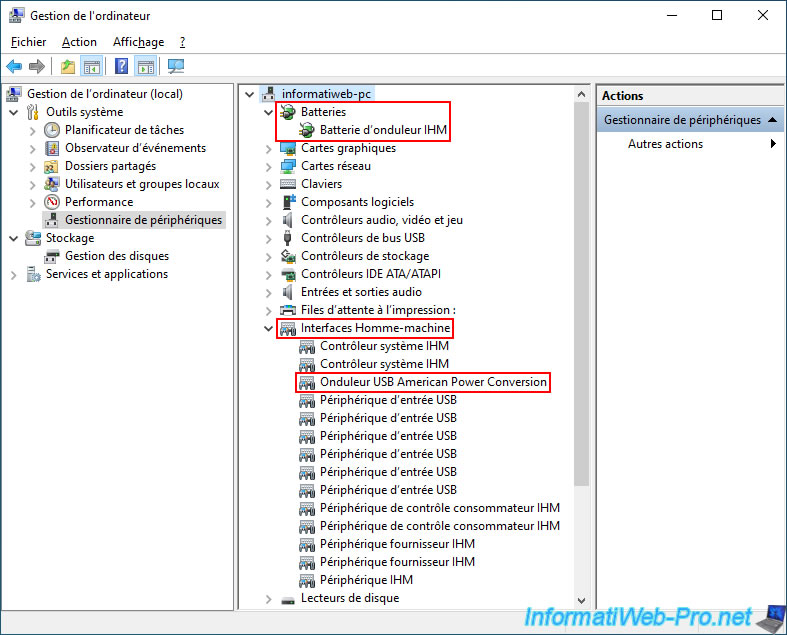
If you view the properties of the HID UPS Battery, you will see that the battery is on the American Power Conversion USB UPS.

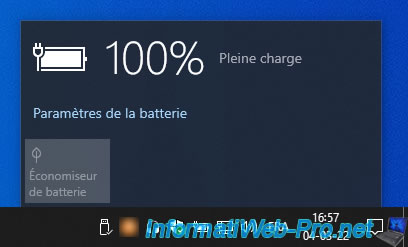
At the moment, it’s possible that Windows considers that your computer is on battery (as is the case with portable PCs).
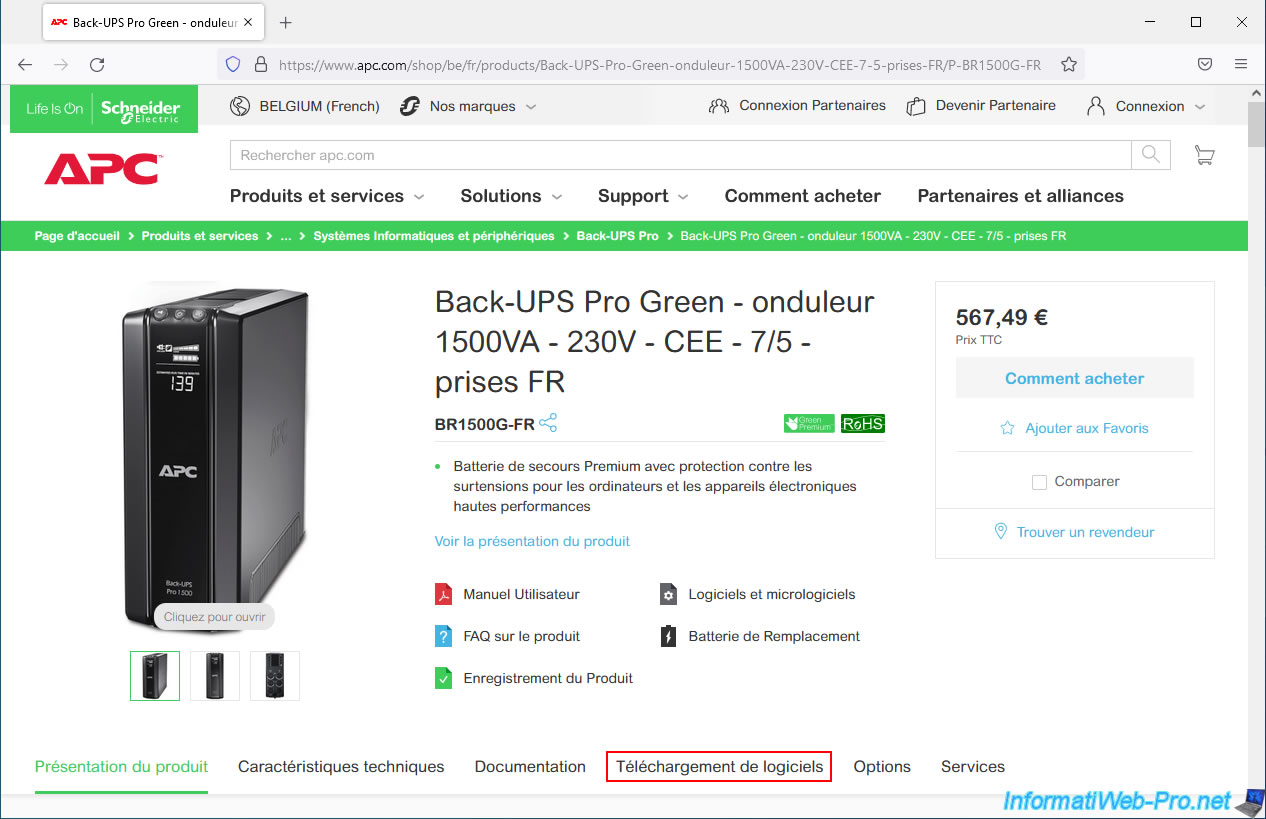
2. Download and Install PowerChute Personal Edition
To download software compatible with your APC UPS (including PowerChute Personal Edition), find your UPS page on the APC website and click on the «Software Downloads» tab.
In the «Software Downloads» section that appears, click the «Download» button for the proposed «PowerChute Personal Edition» program.
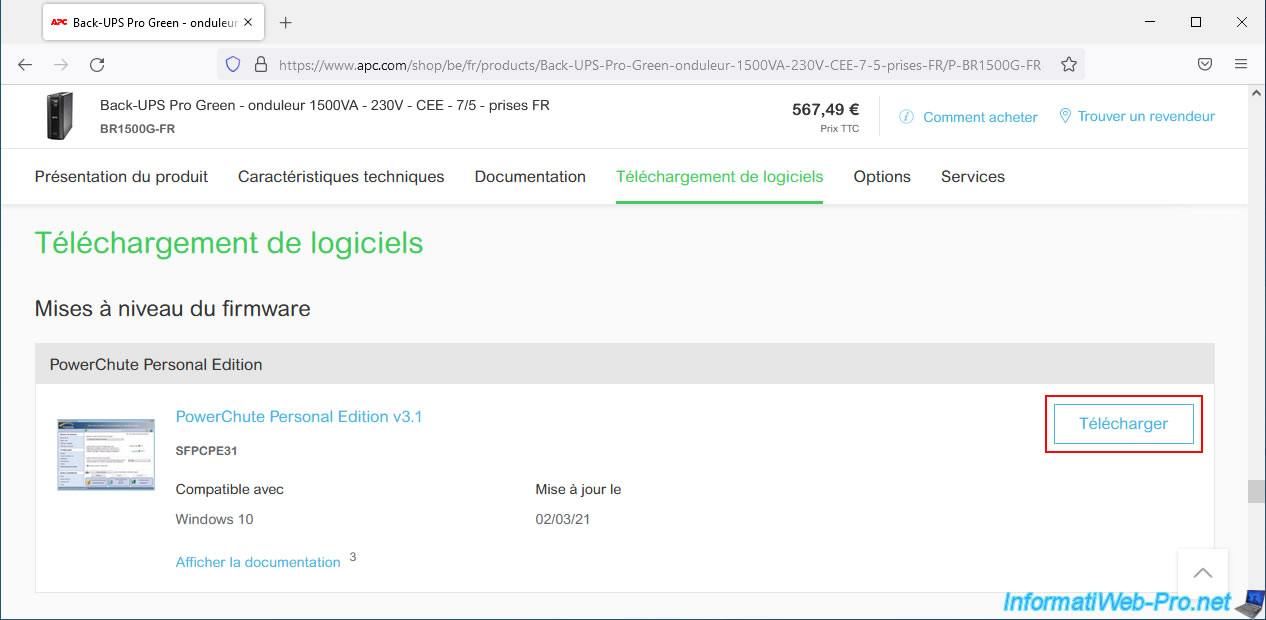
A «PCPE_3.1.0.exe» file will be proposed.
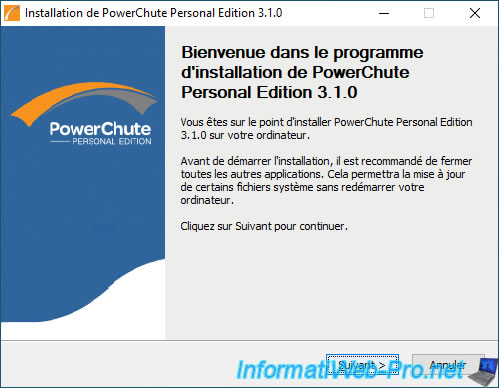
Launch the downloaded file and the PowerChute Personal Edition 3.1.0 Setup Wizard will appear.
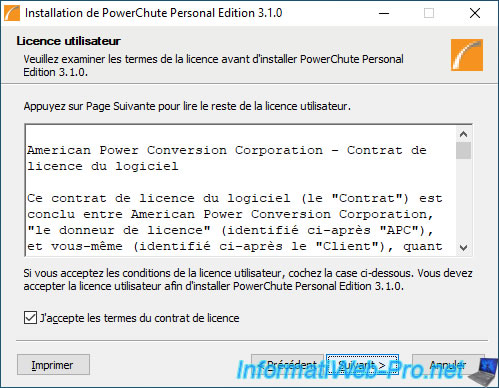
Accept the terms of the license agreement.
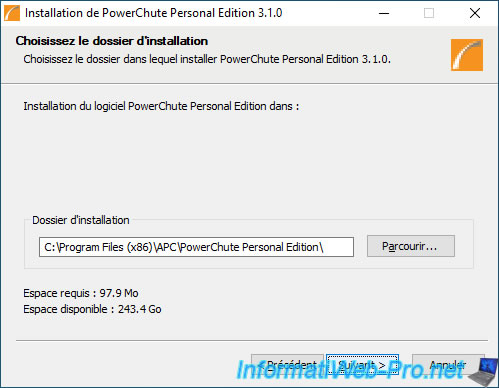
Leave the installation folder specified by default.
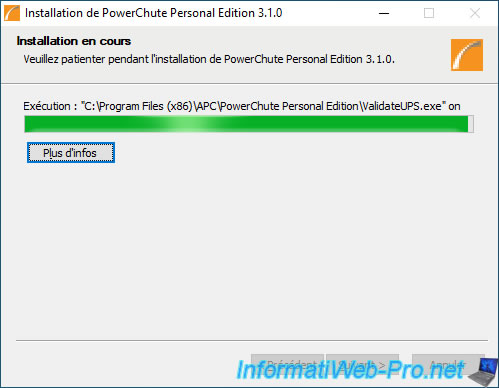
Wait while PowerChute Personal Edition installs.
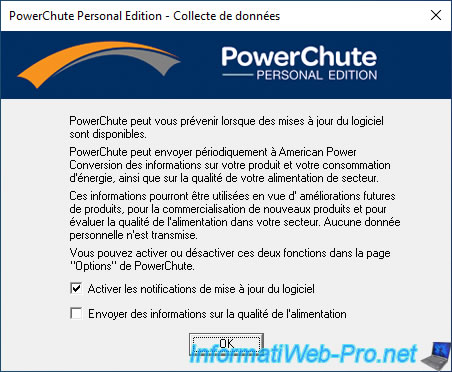
At the end of the installation, a small window «PowerChute Personal Edition — Data Collection» will appear.
Check the box «Enable software update notifications» to keep this software updated on your computer.
For the «Send power quality information» box, uncheck it to avoid sending information about your product and consumption to American Power Conversion (APC).
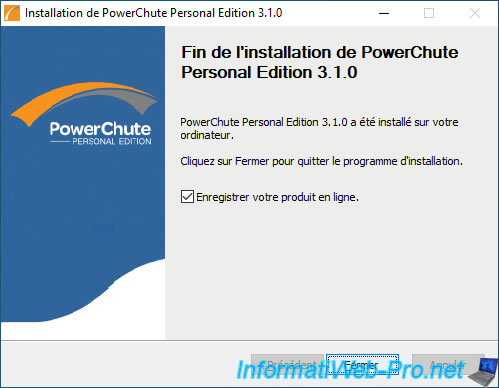
Leave the box «Register your product online» checked (if necessary).
Once PowerChute Personal Edition is installed, an «Energy Cost Setup» notification will appear letting you know you can set your energy costs.
This simply allows you to know how much the electricity consumption of what you have connected to your UPS costs you.
It’s therefore optional.
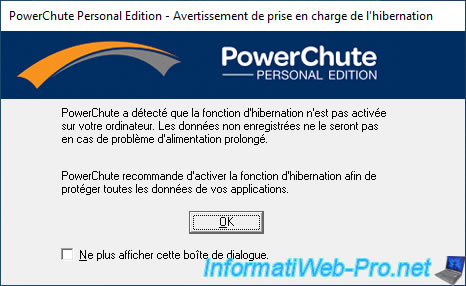
If hibernation is not enabled on your computer, a «Hybernation Support Warning» window will appear.
To solve the problem, make sure you have installed all the drivers for your computer (mainly those for the motherboard) and that they are up to date.
Next, make sure Windows is configured to allow hibernation.
To open PowerChute Personal Edition, double-click the orange icon located in the taskbar (next to the clock).
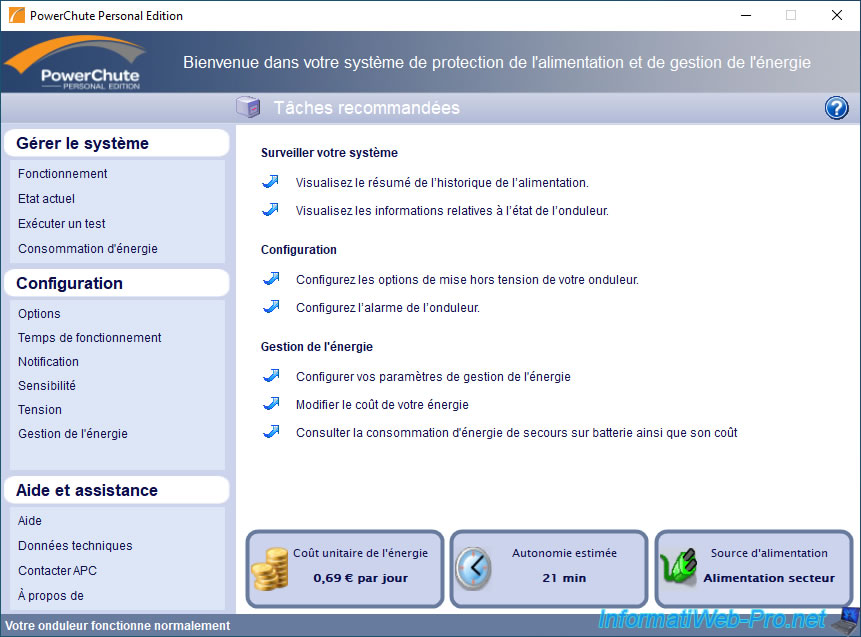
By default, a «Recommended tasks» section will appear with different options :
- Monitor your System
- View summary of historical power events : quickly see what power issues you’ve had, how many, …
- View battery backup status information : see the current status of your UPS (its type of power supply, consumption, battery charge, …)
- Configuration
- Configure the shutdown options of your battery backup : configure automatic shutdown of your computer or server based on the autonomy of your UPS’s batteries
- Configure your battery backup alarm : enable or disable the UPS sound alarm
- Energy management
- Configure your energy management settings : enable, disable and configure energy saving thanks to outlets controlled by the master outlet
- Change the cost of your energy : change the energy cost to see how much your electricity bill will be for equipment plugged into your UPS
- View battery backup energy usage and cost : see your consumption in euros (€) and in kWh
Note : you can return to this list of recommended tasks by clicking on the icon representing a small house which will appear at the top right.
3.1. Monitor System
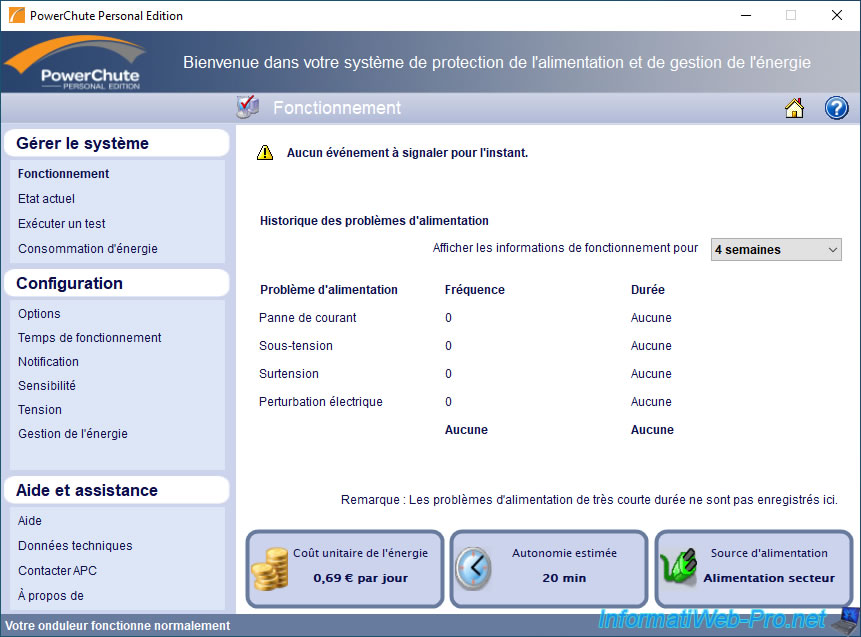
In the «Monitor System -> Performance» section, you will be able to see the last event that occurred on your UPS, as well as the list of power problems that occurred, their number and their durations :
- Blackout
- Undervoltage
- Overvoltage
- Electrical noise
You will be able to view the history of your power issues for :
- 1 week
- 4 weeks (approximately 1 month)
- 12 weeks (approximately 3 month)
- 24 weeks (approximately 6 month)
Note that very short power problems are not counted here.
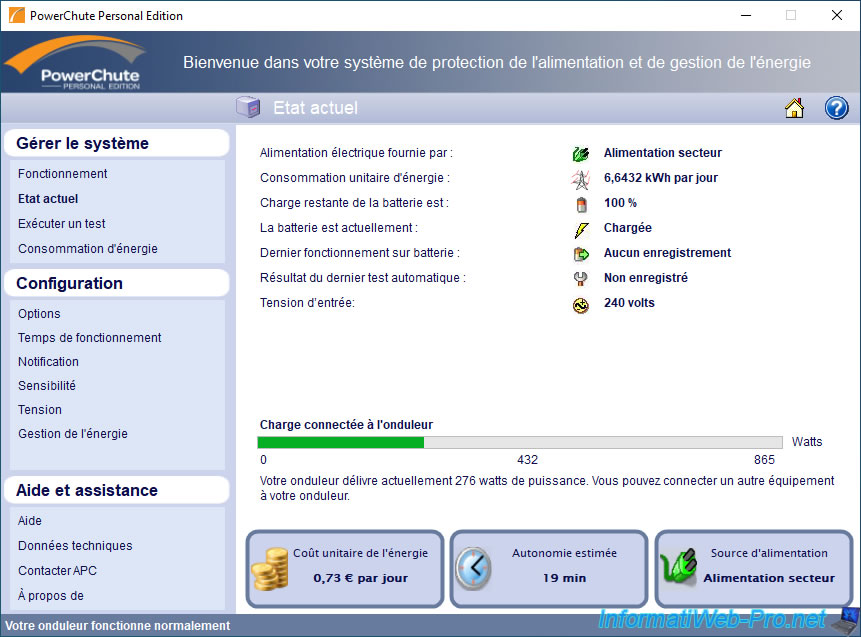
In the «Monitor System -> Current Status» section, you will be able to see the current status of your UPS :
- Electrical poweris being supplied by : indicates whether your UPS is powered normally (AC Utility Power) or by its battery (Battery)
- Energy Usage Rate : the consumption of the equipment connected to your UPS in kWh per day
- Remaining battery charge is : the charge level of your UPS battery. Eg : 100%.
- Battery is currently : indicates whether the battery is charged, charging or discharging (during a power outage, for example)
- last transfer to battery was caused by : shows why and when your UPS switched to Battery power instead of AC Utility Power
- Result of last manual self-test is : shows the status of the last self-test and the date it was performed.
However, the self-test performed at UPS startup (when you turn on the UPS) is not saved in PowerChute Personal Edition since typically you will turn on your UPS before the computer.
Although it’s possible to start the computer from cold (when the UPS is powered only by its battery and not the mains power) if you wish. - Input Voltage : the voltage of your electrical network that enters the UPS
You will also be able to see how much use (load) the UPS has in relation to the maximum load it’s supporting.
In the example below, you can see that our hardware plugged into our UPS is consuming 276 watts (of power) out of the maximum 865 watts our UPS can supply.
At the bottom of the window, you can clearly see :
- Energy Cost Rate : the price of your electricity consumption per day
- Estimated Battery Time : how much battery life you will have left if a power outage occurs now.
Note that the estimated autonomy depends on the current load of your UPS, as well as the maximum load that it can support - Power Source : indicates whether your UPS is currently using utility power or its battery.
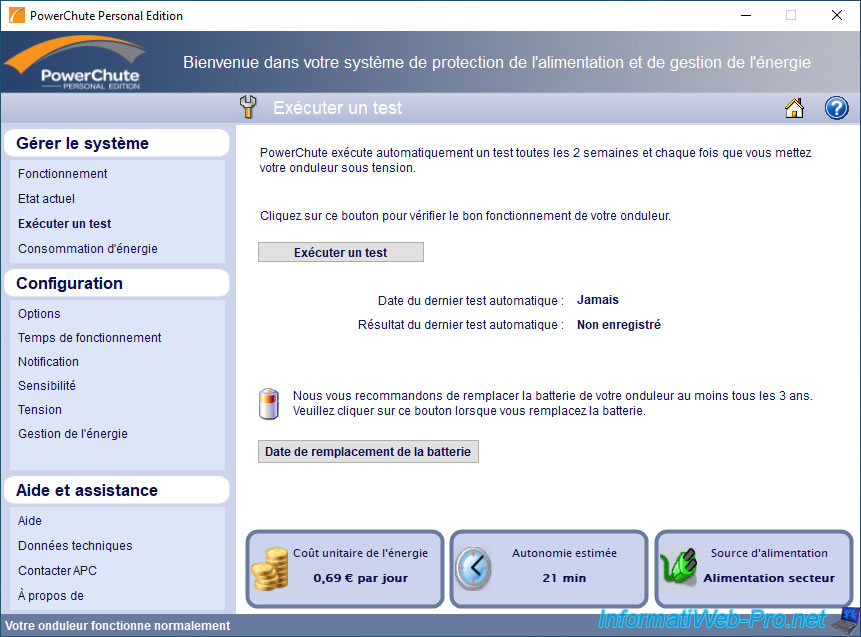
In the «Monitor System -> Run Self-Test» section, you can easily and quickly test your UPS by clicking the «Run Self-Test» button.
However, as indicated here, this automatic test is carried out each time your UPS is powered up (turned on), as well as every 2 weeks.
Thus, if the UPS remains permanently on, which is generally the case since they are mainly used to protect servers, your UPS will continue to test itself periodically (every 2 weeks) to warn you when a fault occurs will have been detected.
Note that APC recommends that you replace your UPS battery at least once every 3 years.
If you change your UPS battery one day, don’t forget to click the «Replace Battery Date» button so that the UPS remembers the date you changed its battery.
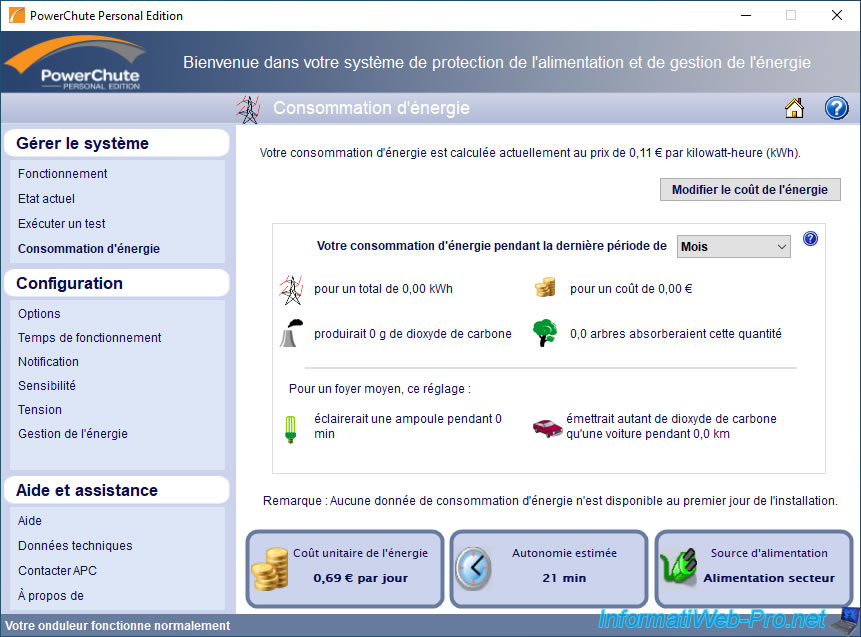
In the «Monitor System -> Energy Usage» section, you will be able to see information about your energy usage :
- energy consumption in kWh
- its cost in € (depending on your energy cost that you can modify via the «Change Energy Cost» button)
- the estimate of the amount of carbon dioxide (CO2) you have potentially produced
- the number of trees that would absorb this amount of CO2
- other information displayed for information purposes in relation to your energy consumption
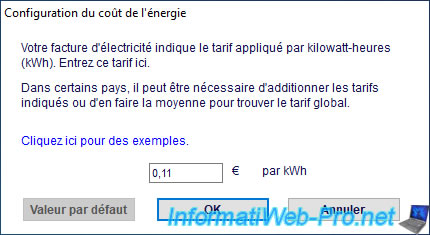
If you click on the «Change Energy Cost» button, you will be able to change your energy cost in € per kWh.
3.2. Configuration
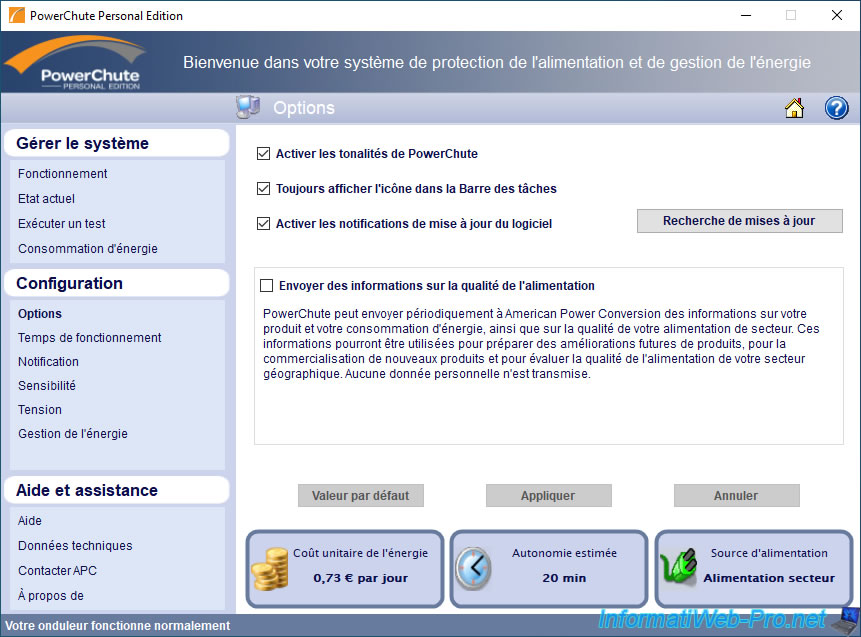
In the «Configuration -> Options» section, you can choose to :
- Enable PowerChute notification sounds : allows PowerChute to sound an audible alarm directly from the UPS when an important event occurs or after a self-test.
Warning : the sound alarm will only be triggered if the sound of the UPS is enabled (in : Configuration -> Notification) - Always show icon on the taskbar : allows you to display or not the PowerChute icon in the taskbar (next to the clock).
This way, you can hide the icon if you want while leaving PowerChute running in the background. - Enable software update notifications : allows you to be notified when there is an update for this PowerChute Personal Edition software.
If you wish, you can manually check for PowerChute updates by clicking the «Check for updates» button. - Send power quality information : sets whether or not to send information about your product, power usage, and power quality to American Power Conversion (APC).
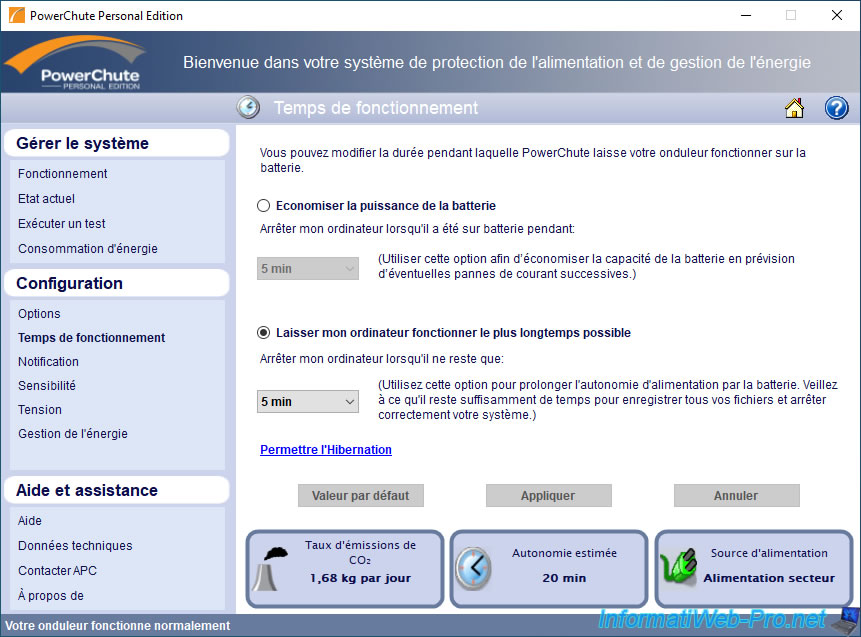
In the «Configuration -> Runtime» section, you can choose whether you prefer :
- preserve battery power : allows you to automatically shut down your computer or server when it has been on battery power for several minutes.
This saves the battery and thus makes it possible to use the battery again in the event of a future power outage.
For example, the theoretical battery charging time of our APC BR1500G-FR UPS is 8 hours. - Keep my computer on as long as possible : allows you to use your UPS battery in the event of a power outage, then to benefit from sufficient time (which you will have calculated beforehand) to be able to shut down your computer or server correctly
If the «Enable Hibernation» link is displayed, this feature is not enabled on your computer.
To enable it, click on this link. Otherwise, make sure you have installed all the drivers for your computer and find the method to enable hibernation on your version of Windows.
In the event of a power outage (and depending on the type of UPS, also in the event of overvoltages or undervoltages), your UPS will use its battery to power your IT equipment.
When the desired condition is met, your UPS will signal your computer or server (via PowerChute Personal Edition) to hibernate (if hibernation is enabled on your computer) or shut down (if hibernation is not enabled).
If you click on the «Allow Hibernation» link, a small «Hibernation Disabled» window will appear.
Click on the «Allow» button.
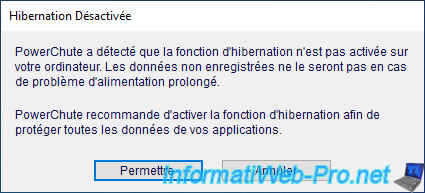
However, this may not work.
In this case, you will have to fix this problem manually in Windows settings.
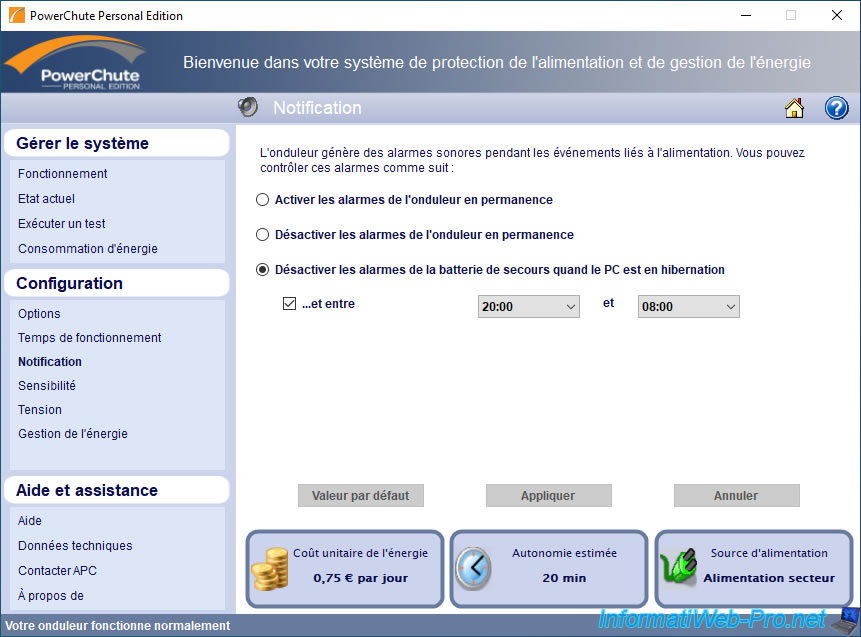
In the «Configuration -> Notification» section, you can choose to :
- Enable the battery backup alarms at all times
- Disable the battery backup alarms at all times
- Disable the battery backup alarms when the PC is in hibernation, as well as during a specific time slot (if desired).
This prevents the UPS from beeping at night, for example.
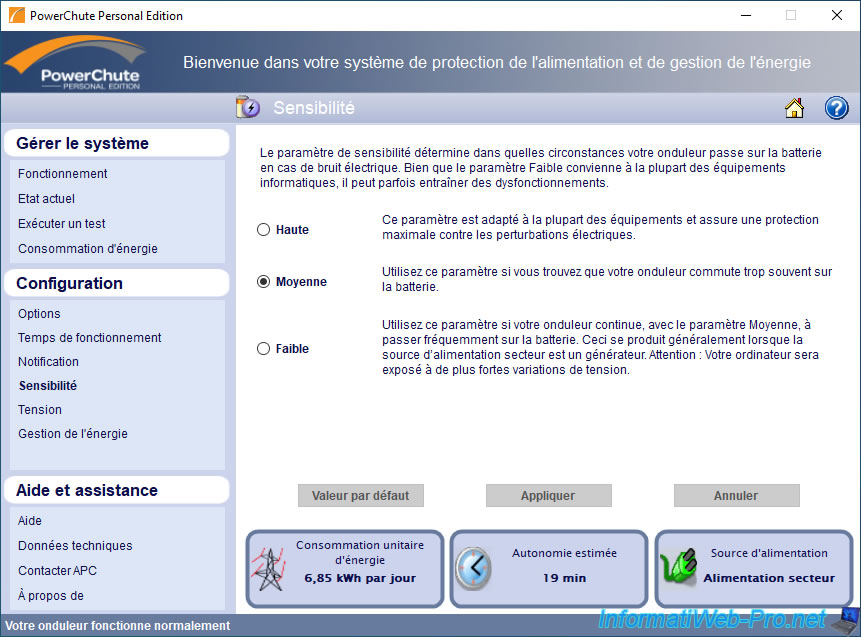
In the «Configuration -> Sensitivity» section, you can adjust the sensitivity of your UPS.
That is, under what conditions will your UPS need to use its battery instead of utility power.
By default, the sensitivity is set to Medium to protect your computer hardware by avoiding excessive battery usage.
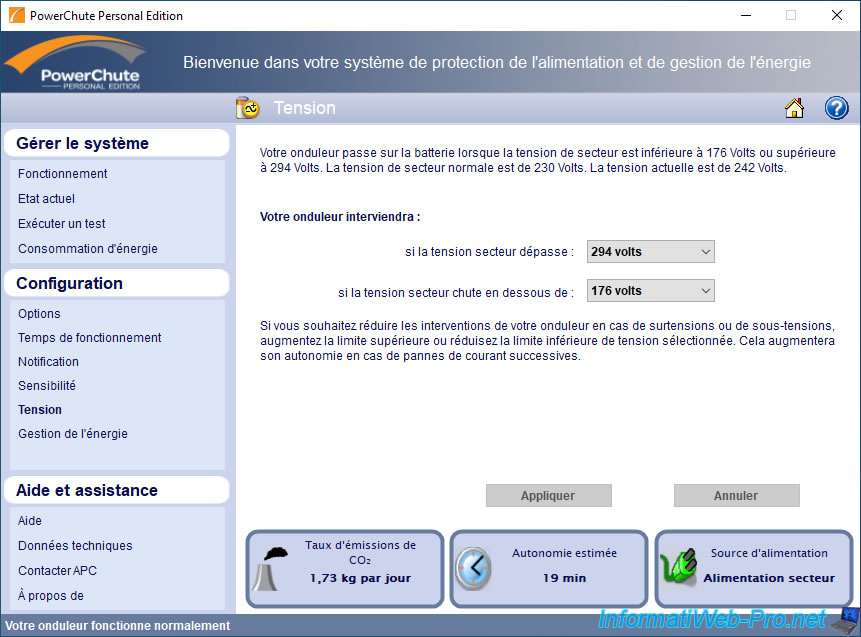
In the «Configuration -> Voltage» section, you will be able to choose the voltage range (in volts) that you accept for your computer hardware.
Outside of this range, your UPS will switch to battery to protect your IT equipment.
However, the longer your UPS is on battery, the faster the batteries will wear out.
In the «Configuration -> Energy Management» section, you can enable or not the energy management.
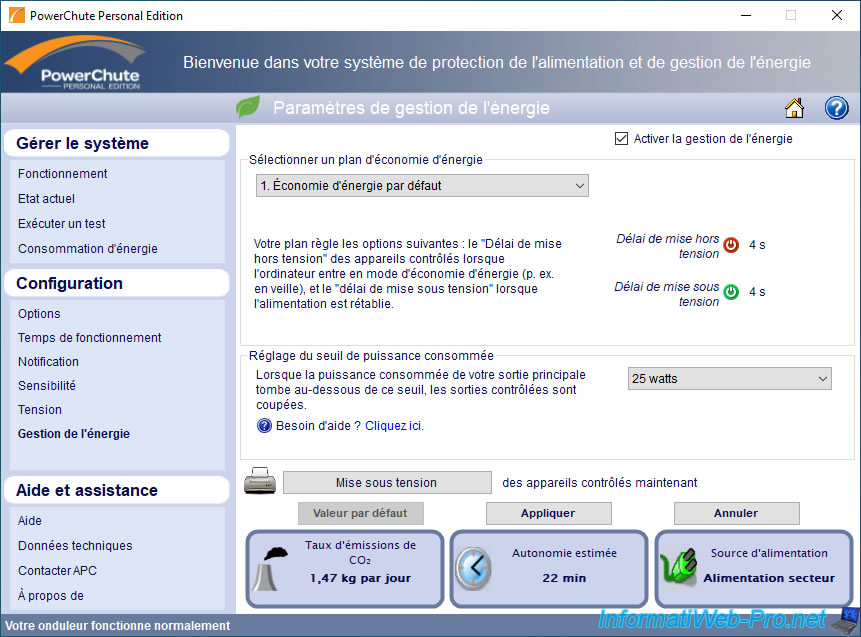
To enable this feature, check the «Enable Energy Management» box.
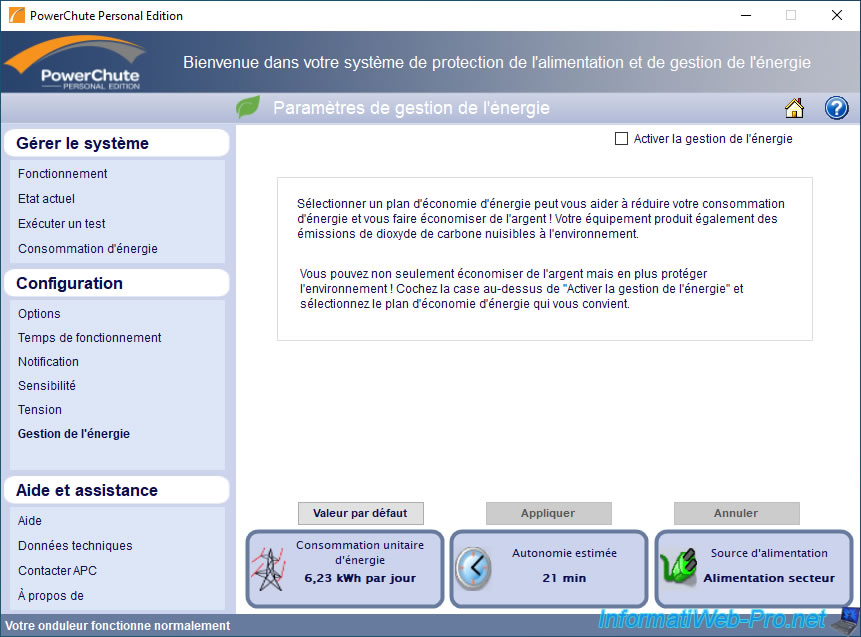
Once energy saving is enabled, you will be able to choose the predefined energy saving plan you want :
- Default Energy Savings : 4 sec delay. for power off and power on
- Maximum Energy Savings : 4 sec delay. for power off and 20 min. for power on
- Minimum Energy Savings : the reverse of the previous one (20 min. for power off and 4 sec. for power on)
- Customized Energy Saving : allows you to separately specify a timeout in sec. or in min. for power off and power on
Power off and power on delay explanations :
- Turn off after : delay after which power to devices plugged into outlets controlled by the master outlet will be cut off when your UPS enters power save mode.
- Turn on after : delay after which power to these controlled devices will be restored when the UPS exits power saving mode.
The «Set Power Consumption Threshold» section allows you to specify to your UPS below what power consumption, it must cut off the power supply to the outlets controlled by the master socket.
Which allows the UPS to cut power to your screen, speakers, … when your computer tower is off to save energy and save you money.
If necessary, you can manually power up the devices plugged into the outlets controlled by your UPS by clicking on the «Turn Power On» button.
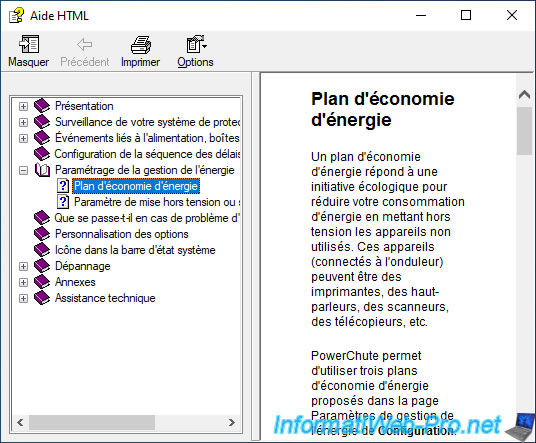
3.3. Help and support
If you click on the «Help and Support -> Help» section or on the question mark on a blue background located at the top right, an «HTML Help» window will appear with information about the section you are in.
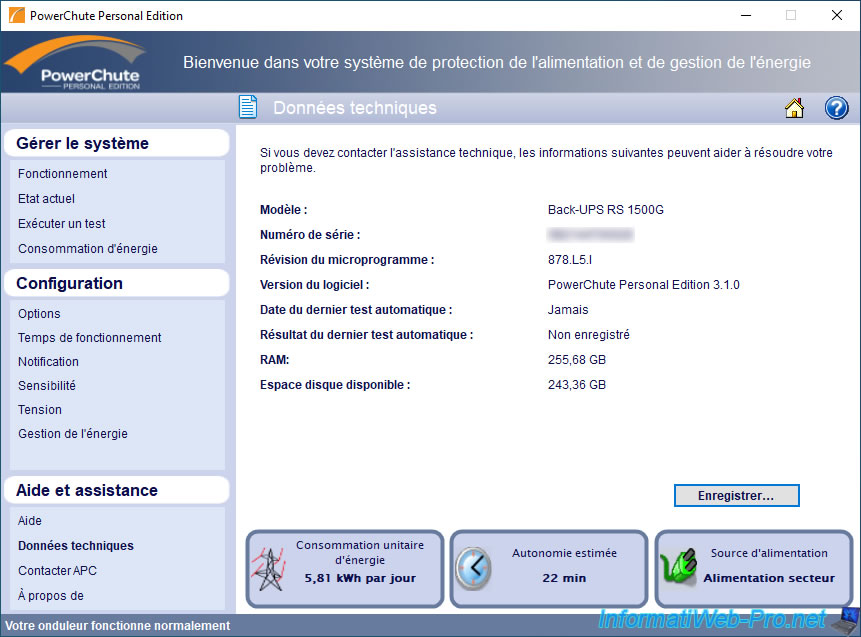
In the «Help and Support -> Technical Data» section, you will find :
- Model : the model of your APC UPS. Note that this may differ from the commercial model displayed on the APC site or the site where you purchased it.
For example, in our case, we have an APC Back-UPS Pro 1500, 230 V, CEE 7/5 (BR1500G-FR). However, PowerChute Personal Edition tells us about another model : Back-UPS RS 1500G. - Serial number : the serial number of your APC UPS.
- Firmware revision : the firmware version of your APC UPS
- Software version : the PowerChute Personal Edition software version you are currently using
- Date of last automatic test : the date of the last automatic test performed.
However, the date of the automatic test carried out when your UPS was switched on will not appear here. - RAM : the amount of RAM present (installed) on your computer or server
- Free Disk Space : the amount of free space available on your computer.
If there is a problem with your UPS, this information may be helpful to APC technical support in trying to resolve your problem.
If you navigate to the «Help and Support -> Contact APC» section, your default web browser will open and the APC Support page will appear.
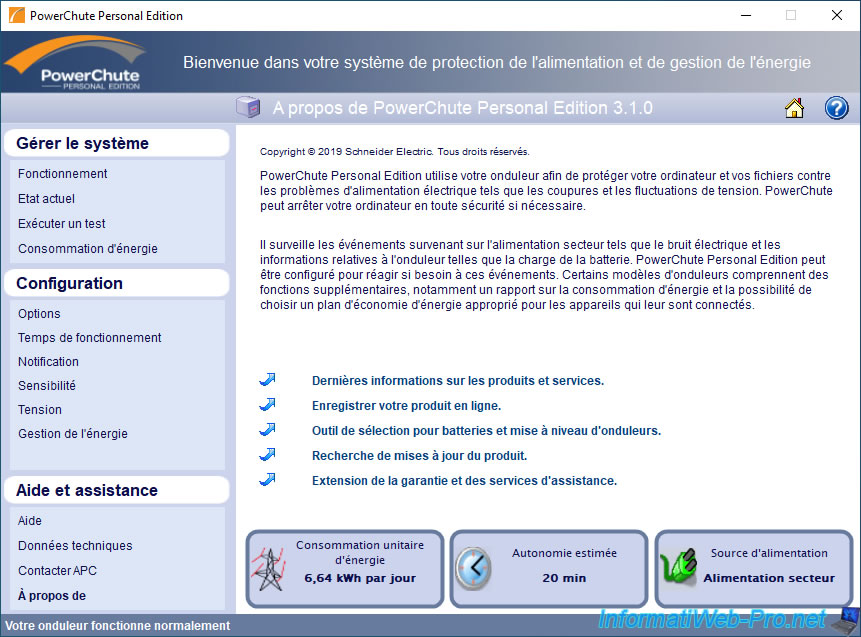
Finally, in the «Help and Support -> About» section, you will find information about this PowerChute Personal Edition program.
You will also find several links to different sections of the APC site :
- Latest information on products and services : allows you to see the various products and services offered by APC
- Register your product online : allows you to register your UPS online at the APC website
- UPS Battery Replacement and Upgrade Selector : find the right spare battery model for your UPS to replace when needed.
Generally, at least every 3 years, according to the manufacturer (APC). - Check for product updates : check for product updates.
- Extended warranty and support services : allows you to choose an APC service for your UPS.
Posted:
2021-07-08
02:05 AM
. Last Modified:
2024-02-29
10:19 PM
I have a Windows server 2008 R2 running Powerchute Business Edition v9.2. I have one SmartUPS 1500 plugged into the server via a USB cable and the Powerchute sees it fine and manages it fine. I also have a 2nd SmartUPS 1500 that I want to add to it so I can see and manage the 2nd UPS. I don’t care about it being able to shutdown the server or not. This server has redundant power supplies and each UPS is plugged into separate power sources with each power supply plugged into each separate UPS.
When I try to run the Device list configuration program, it never seems to even try to discover the new 2nd UPS. The current UPS is listed in the device list using the server name. I know the new 2nd UPS is being seen by the server, because it is listed in the computers device manager list.
When I run the PCBE it shows the existing hostname (servername) and shows just one device. Its the original UPS. The 2nd UPS is not showing up.
How can I add this 2nd UPS so can manage the settings for this UPS?
APC UPS — Authentication on the Active Directory
APC UPS — Authentication on the Active Directory
Would you like to learn how to configure an APC UPS to authenticate on the Active directory? In this tutorial, we are going to show you how to authenticate the APC UPS users on the Active Directory database using the Microsoft NPS server.
Copyright © 2018-2021 by Techexpert.tips.
All rights reserved. No part of this publication may be reproduced, distributed, or transmitted in any form or by any means without the prior written permission of the publisher.
Equipment list
Here you can find the list of equipment used to create this tutorial.
This link will also show the software list used to create this tutorial.
APC UPS — Playlist:
On this page, we offer quick access to a list of videos related to the APC UPS.
Don’t forget to subscribe to our youtube channel named FKIT.
APC UPS — Related Tutorial:
On this page, we offer quick access to a list of tutorials related to APC UPS.
Tutorial — Radius Server Installation on Windows
• IP — 192.168.15.10.
• Operacional System — Windows 2012 R2
• Hostname — TECH-DC01
• Active Directory Domain: TECH.LOCAL
Open the Server Manager application.
Access the Manage menu and click on Add roles and features.

Access the Server roles screen, select the Network Policy and Access Service option.
Click on the Next button.

On the following screen, click on the Add features button.

On the Role service screen, click on the Next Button.

On the next screen, click on the Install button.

You have finished the Radius server installation on Windows 2012.
Tutorial Radius Server — Active Directory Integration
Next, we need to create at least 1 account on the Active directory.
The ADMIN account will be used to login on the APC UPS web interface.
On the domain controller, open the application named: Active Directory Users and Computers
Create a new account inside the Users container.

Create a new account named: admin
Password configured to the ADMIN user: 123qwe..
This account will be used to authenticate as admin on the APC UPS web interface.


Congratulations, you have created the required Active Directory accounts.
Next, we need to create at least 1 group on the Active directory database.
On the domain controller, open the application named: Active Directory Users and Computers
Create a new group inside the Users container.

Create a new group named: APC-ADMIN
Members of this group will have administrative permission on the APC UPS web interface.

Important! Add the admin user as a member of the APC-ADMIN group.

Congratulations, you have created the required Active Directory group.
Tutorial Radius Server — Add Client Devices
On the Radius server, open the application named: Network Policy Server
You need to authorize the Radius server on the Active directory database.
Right-click on NPS(LOCAL) and select the Register server in Active Directory option.

On the confirmation screen, click on the OK button.
Next, you need to configure Radius clients.
Radius clients are devices that will be allowed to request authentication from the Radius server.
Important! Do not confuse Radius clients with Radius users.
Right click on Radius Clients folder and select the New option.

Here is an example of a Client configured to allow an APC UPS to connect to the Radius server.
You need to set the following configuration:
• Friendly name to the device — Add a description to your UPS.
• Device IP Address — IP address of your UPS.
• Device Shared secret — kamisama123
The Shared secret will be used to authorize the device to use the Radius server.
You have finished the Radius client configuration.
Tutorial Radius Server — Configure a Network Policy
Now, you need to create a Network Polity to allow authentication.
Right click on the Network Policies folder and select the New option.
Enter a name to the network policy and click on the Next button.

Click on the Add condition button.
We are going to allow members of the APC-ADMIN group to authenticate.

Select the User group option and click on the Add button.

Click on the Add Groups button and locate the APC-ADMIN group.

Select the Access granted option and click on the Next button.
This will allow members of the APC-ADMIN group to authenticate on the Radius server.

On the Authentication Methods screen, select the Unencrypted authentication (PAP, SPAP) option.

If the following warning is presented, click on the No button.

Select the Vendor Specific radius attribute option and click on the Add button

Select the Custom vendor option.
Select the Vendor-Specific Attribute and click on the Add button.


Set the Vendor Code: 318
Select: Yes, it conforms.
Click on the Configure Attribute button.
Set the Vendor-assigned attribute number: 1
Select the Atribute format: Decimal
Enter the Attribute Value: 1
The NPS Radius server will pass the vendor specific information back to the UPS device.
The APC UPS will give the authenticated users administrative permission over the device.

Verify the Radius server configuration summary and click on the Finish button.

Congratulations! You have finished the Radius server configuration.
APC UPS — Radius Authentication on Active Directory
First, we need to access the APC UPS web interface.
Open your browser and enter the IP address of the APC UPS.
On the login screen, use the default username and default password.
• Default Username: apc
• Default Password: apc

After a successful login, you will be sent to the APC UPS Dashboard.

Access the Configuration menu, access the Security menu.
Access the Remote users menu and select the Radius option.

Select the primary Radius server.

On the RADIUS Server settings area, perform the following configuration:
• Radius Server — 192.168.15.10
• Port — 1812
• Secret — The Radius Client shared secret (kamisama123)
• Reply Timeout — 1 Second
You need to change IP address of the Radius server.
You need to change the secret.
To test the Radius authentication, select the test option and enter a user account from the Active directory.

After testing the Radius authentication successfully, select the Skip test and apply option.

Access the Configuration menu, access the Security menu.
Access the Remote users menu and select the Authentication option.

Select the option: Radius, then local authentication option.
Click on the Apply button to finish the Radius authentication configuration.
First, the UPS will try to authenticate the users using the Radius server.
If the Radius server is offline, the system will authenticate using the local user accounts.
Congratulations! You have configured the UPS authentication to use the Active directory.
APC UPS — Radius Authentication Test
After finishing the Radius configuration, you should log off the APC web interface.
Try to login using the admin user and the password from the Active directory.
On the login screen, use the admin user and the password from the Active directory.
• Username: admin
• Password: Enter the Active directory password.
If your test succeeds, you will be sent to the APC UPS Dashboard.
Congratulations! You have configured the APC UPS authentication on the Active directory.
VirtualCoin CISSP, PMP, CCNP, MCSE, LPIC22022-02-19T05:03:54-03:00
Related Posts
Page load link
Ok