
- How to check Apache configuration
- Using Apache HTTP Server on Microsoft Windows
- How to check Apache configuration
- How Do I Do The Equivalent of «apachectl configtest» With Apache For
- How to Install Apache on a Windows Server
- How do I test httpd.conf on my Windows?
How to check Apache configuration
People also askHow to test the Apache configuration file for errors?How to
test the Apache configuration file for errors?After making changes to the
Apache configuration file, testing the configuration before implementing it is
a good practice. To test the Apache configuration file for errors, use the
following command: If the configuration file is fine, this command will return
Syntax Ok. Otherwise, it will return detailed information about the error
discovered.Test the Apache Configuration File httpd.conf
$ sudo vi /etc/apache2/apache2.conf


$ sudo apachectl configtest
AH00543: apache2: bad user name username
Action 'configtest' failed.
The Apache error log may have more information.


$ sudo apachectl configtest
Syntax OK


$ sudo systemctl restart apache2 # Ubuntu, Debian, openSUSE and SLES
$ sudo systemctl restart httpd # CentOS and Red Hat
Using Apache HTTP Server on Microsoft Windows
To restart Apache, either press Control-Break in the console window you used
for starting Apache, or enter. httpd.exe -k restart. if the server is running
as a service. Note for people familiar with the Unix version of Apache: these
commands provide a Windows equivalent to kill -TERM pid and kill -USR1 pid.
RewriteEngine On
RewriteMap lowercase int:tolower
RewriteCond "%{REQUEST_URI}" "[A-Z]"
RewriteRule "(.*)" "${lowercase:$1}" [R,L]


LoadModule status_module "modules/mod_status.so"


DocumentRoot "//dochost/www/html/"


DocumentRoot "//192.168.1.50/docs/"


Alias "/images/" "//imagehost/www/images/"

<Directory "//imagehost/www/images/">
#...
</Directory>
How to check Apache configuration
Steps to test Apache configuration without restarting service: Launch your
preferred terminal application. Edit Apache configuration file using your
preferred text editor. Test Apache configuration file syntax using apachectl
or similar binaries. $ sudo apachectl configtest AH00543: apache2: bad user
name username Action ‘configtest’ failed.
$ sudo vi /etc/apache2/apache2.conf


$ sudo apachectl configtest
AH00543: apache2: bad user name username
Action 'configtest' failed.
The Apache error log may have more information.


$ sudo apachectl configtest
Syntax OK


$ sudo systemctl restart apache2 # Ubuntu, Debian, openSUSE and SLES
$ sudo systemctl restart httpd # CentOS and Red Hat
How Do I Do The Equivalent of «apachectl configtest» With Apache For
Windows?
According to the current Apache 2.4 documentation for apachectl, configtest is
equivalent to httpd -t. For reference, httpd -t allows you to: Run syntax
tests for configuration files only. The program immediately exits after these
syntax parsing tests with either a return code of 0 (Syntax OK) or return code
not equal to 0 (Syntax Error).
http://example.brak


127.0.0.1  example.brak


$ /cygdrive/c/Apache22/bin/httpd -k start -n Apache2.2


c:\> \Apache22\bin\httpd -k start -n Apache2.2


c:\> dir
c:\> echo %errorlevel%
0


c:\Apache2.2\logs\error.log


 (OS 3)The system cannot find the path specified.  : httpd.exe: could not open error log file C:/cygwin64/home/Thunderball/_Websites/Soggy/logs/error.log.
 Unable to open logs
How to Install Apache on a Windows Server
httpd.exe -k install -n "Apache HTTP Server"


Installing the 'Apache HTTP Server' service
 The 'Apache HTTP Server' service is successfully installed.
 Testing httpd.conf....
 Errors reported here must be corrected before the service can be started.
How do I test httpd.conf on my Windows?
On windows, test the configuration with: httpd.exe -t Share. Follow answered
Aug 2, 2015 at 21:25. covener covener. 2019 at 12:26. I don’t know what «V7»
means here, but the question is about Apache 2.4 on Windows. – covener. May 2,
2019 at 12:56. Add a comment Your Answer Thanks for contributing an answer to
Stack Overflow!
httpd.exe -tChecking the Apache configuration for errors is essential to prevent service disruptions and downtime. Minor typos or misconfigurations can prevent Apache from starting, which could affect hosted websites or applications. Using built-in validation commands helps maintain a stable environment.
The apachectl and httpd utilities provide a straightforward way to verify syntax without interrupting the current service. These commands detect issues in the configuration file, highlight potential conflicts, and provide helpful error messages. Identifying these issues early ensures a smoother experience when applying configuration changes.
Frequent checks of the Apache configuration help avoid unexpected failures and streamline the debugging process. This practice is especially important after any modifications, as it mitigates the risk of critical errors and keeps the web server running reliably.
Steps to check Apache configuration:
-
Open a terminal application.
-
Modify the Apache configuration file as needed.
$ sudo vi /etc/apache2/apache2.conf
-
Use apachectl or similar binaries to test the Apache configuration file syntax.
$ sudo apachectl configtest
AH00543: apache2: bad user name username
Action 'configtest' failed.
The Apache error log may have more information.
Use -t option instead of configtest if you’re using httpd or apache and not apachectl
-
Review the output for any errors or warnings.
-
Correct any issues in the configuration file.
-
Re-run the command until no errors are reported.
$ sudo apachectl configtest
Syntax OK
-
Restart the Apache service once the configuration is error-free.
$ sudo systemctl restart apache2 # Ubuntu, Debian, openSUSE and SLES
$ sudo systemctl restart httpd # CentOS and Red Hat
Discuss the article:
Comment
anonymously. Login not required.
After making changes to the Apache configuration file, testing the configuration before implementing it is a good practice.
To test the Apache configuration file for errors, use the following command:
apachectl configtest
If the configuration file is fine, this command will return Syntax Ok. Otherwise, it will return detailed information about the error discovered.
If apachectl is not in your PATH and you do not know where it is, refer to the tech recipe Find a file by name to find the location of apachectl, then run it with the fully qualified path. Note the following example:
/usr/local/apache/bin/apachectl configtest
Quinn McHenry
Quinn was one of the original co-founders of Tech-Recipes. He is currently crafting iOS applications as a senior developer at Small Planet Digital in Brooklyn, New York.
Setup Apache web server in windows using Apache Lounge
apache_setup
Table of Contents
What is Apache HTTP server
- It is an opensource HTTP web server that can deliver web content
- It is one of the most used web servers
- It is known for its security, modularity and reliability
Why use Apache HTTP server
Some of the use cases for using Apache web server is
- Static file hosting
- Reverse proxy
- Hosting servers than render PHP, Perl, Lua scripts
- FTP
- URL rewriting
- Gzip compression and decompression
and many more
Setup Apache server for windows
- Apache for windows is not available from Apache foundation but available from third party vendors like Apache lounge
- Download the zip from Apache lounge and extract the “Apache24” folder into C folder
- Register Apache server as a windows service using the command inside the bin folder
httpd.exe -k install
- Check Apache configuration using the command inside bin folder
httpd.exe -t
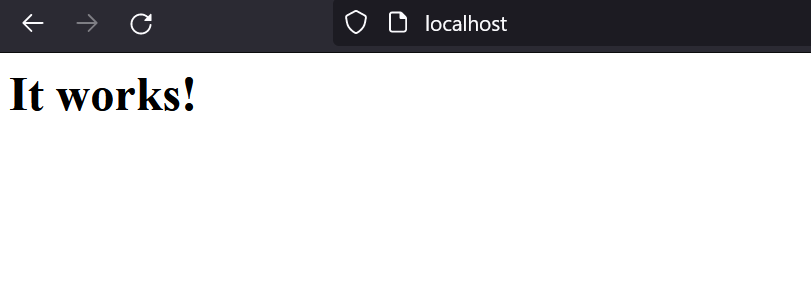
- Now a web page should be displayed in the browser at http://locahost
- The static content is served from htdocs folder
Configure server with httpd.conf file
- httpd.conf file can be used to configure the web server. It is present in the conf folder
- Various modules can be enabled and disabled from this file
- Other configuration files can be included in this file
- Many configuration files covering different scenarios like reverse proxy, ssl etc are present in the conf/extra folder for reference. We can create our own configuration file by using these reference configuration files
- Apache Conf VS code extension can be used for easy syntax highlighting of the config files
- Out of the box, the httpd.conf of the server is configured to listen on port 80 and server static content from the htdocs folder. Also a lot of best practices are implemented in the httpd.conf file
Serve static files using directory browsing
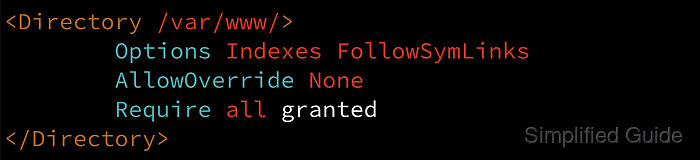
- The following configuration in the httpd.conf file configures the web server to serve static content from htdocs folder
# DocumentRoot: The directory out of which you will serve your
# documents. By default, all requests are taken from this directory, but
# symbolic links and aliases may be used to point to other locations.
#
DocumentRoot "${SRVROOT}/htdocs"
<Directory "${SRVROOT}/htdocs">
    #
    # Possible values for the Options directive are "None", "All",
    # or any combination of:
    #   Indexes Includes FollowSymLinks SymLinksifOwnerMatch ExecCGI MultiViews
    #
    # Note that "MultiViews" must be named *explicitly* --- "Options All"
    # doesn't give it to you.
    #
    # The Options directive is both complicated and important.  Please see
    # <http://httpd.apache.org/docs/2.4/mod/core.html#options>
    # for more information.
    #
    Options Indexes FollowSymLinks

    #
    # AllowOverride controls what directives may be placed in .htaccess files.
    # It can be "All", "None", or any combination of the keywords:
    #   AllowOverride FileInfo AuthConfig Limit
    #
    AllowOverride None

    #
    # Controls who can get stuff from this server.
    #
    Require all granted
</Directory>

#
# DirectoryIndex: sets the file that Apache will serve if a directory
# is requested.
#
<IfModule dir_module>
    DirectoryIndex index.html
</IfModule>
- Options Indexes FollowSymLinks means the options Indexes and FollowSymLinks are enabled. Indexes means, if no index page is present in a folder, the folder contents will be shown to the user. FollowSymlinks means that the server will follow a symbolic link (or a file shortcut) if present. Do not use FollowSymLinks if not required
- AllowOverride None means, the configuration of the directive is not allowed to be changed by the .htaccess files
- Require all granted means, all can access the folder contents with out any authorization
- DirectoryIndex index.html means, if a directory is requested, this index.html will be served if present
Multiple web servers using virtual hosts
- Virtual hosts are a way to run multiple servers each with different server name or listening port in a single Apache server
- For example, the below configuration can host two directories each listening for different hostnames on port 80
<Directory "${SRVROOT}/docs/dummy1">
    Require all granted
</Directory>
<VirtualHost *:80>
    ServerAdmin webmaster@dummy-host.example.com
    DocumentRoot "${SRVROOT}/docs/dummy1"
    ServerName dummy-host.example.com
    ServerAlias www.dummy-host.example.com
    Options Indexes
    ErrorLog "logs/dummy-host.example.com-error.log"
</VirtualHost>

<VirtualHost *:80>
    ServerAdmin webmaster@dummy-host2.example.com
    DocumentRoot "${SRVROOT}/docs/dummy2"
    ServerName dummy-host2.example.com
    ErrorLog "logs/dummy-host2.example.com-error.log"
    Options Indexes
    <Directory "${SRVROOT}/docs/dummy2">
        Require all granted
    </Directory>
</VirtualHost>
-
In the above example configuration, the two virtual hosts are listening on the same port 80, but if the hostname in the request is “dummy-host.example.com” the request will be handled by the first virtual host and if the hostname in the request is “dummy-host2.example.com”, the request will be handled by the second virtual host
-
The first virtual host serves the folder “/docs/dummy1”
-
The second virtual host serves the folder “/docs/dummy2”
-
Different ports can also be linked to multiple virtual hosts based on the requirement
-
Below is an example configuration of two virtual hosts listening on two different ports at localhost
<Directory "${SRVROOT}/docs/dummy1">
    Require all granted
</Directory>
Listen 81
<VirtualHost *:81>
    ServerAdmin webmaster@dummy-host.example.com
    DocumentRoot "${SRVROOT}/docs/dummy1"
    ServerName localhost
    Options Indexes
    ErrorLog "logs/dummy-host1-error.log"
</VirtualHost>

Listen 82
<VirtualHost *:82>
    ServerAdmin webmaster@dummy-host2.example.com
    DocumentRoot "${SRVROOT}/docs/dummy2"
    ServerName localhost
    ErrorLog "logs/dummy-host2-error.log"
    Options Indexes
    <Directory "${SRVROOT}/docs/dummy2">
        Require all granted
    </Directory>
</VirtualHost>
- Notice that
Listen 81andListen 82are written explicitly so that Apache server listens on ports 81 and 82.
Enable modules in Apache server using httpd.conf file
- Just un-comment the relevant line in httpd.conf file to enable modules in Apache server. Remove “#” at the start of the line to un-comment it.
- For example, to enable the module “mod_proxy” in Apache server, un-comment the line “LoadModule proxy_module modules/mod_proxy.so” in the httpd.conf file
Using SSL for running over HTTPS
Create localhost SSL certificate for testing purposes
- Run the following command in the Apache folder and provide the required inputs. This command uses OpenSSL to create SSL certificate and SSL private key
.\\bin\\openssl.exe req -x509 -nodes -days 365 -newkey rsa:2048 -keyout "conf/server.key" -out "conf/server.crt"
- The generated SSL certificate and SSL private key files can be used for HTTPS hosting on localhost
Modules to be enabled
- Enable the mod_ssl, mod_headers, mod_socache_shmcb modules in the httpd.conf file
Configuration for HTTPS in a virtual host
# test_ssl.conf
Listen 443

#   SSL Cipher Suite:
#   List the ciphers that the client is permitted to negotiate,
#   and that httpd will negotiate as the client of a proxied server.
#   See the OpenSSL documentation for a complete list of ciphers, and
#   ensure these follow appropriate best practices for this deployment.
#   httpd 2.2.30, 2.4.13 and later force-disable aNULL, eNULL and EXP ciphers,
#   while OpenSSL disabled these by default in 0.9.8zf/1.0.0r/1.0.1m/1.0.2a.
SSLCipherSuite HIGH:MEDIUM:!MD5:!RC4:!3DES
SSLProxyCipherSuite HIGH:MEDIUM:!MD5:!RC4:!3DES

#   SSL Protocol support:
#   List the protocol versions which clients are allowed to connect with.
#   Disable SSLv3 by default (cf. RFC 7525 3.1.1).  TLSv1 (1.0) should be
#   disabled as quickly as practical.  By the end of 2016, only the TLSv1.2
#   protocol or later should remain in use.
SSLProtocol all -SSLv3 -TLSv1
SSLProxyProtocol all -SSLv3 -TLSv1

#   Pass Phrase Dialog:
#   Configure the pass phrase gathering process.
#   The filtering dialog program (`builtin' is an internal
#   terminal dialog) has to provide the pass phrase on stdout.
SSLPassPhraseDialog  builtin

#   Inter-Process Session Cache:
#   Configure the SSL Session Cache: First the mechanism
#   to use and second the expiring timeout (in seconds).
#SSLSessionCache         "dbm:${SRVROOT}/logs/ssl_scache"
SSLSessionCache        "shmcb:${SRVROOT}/logs/ssl_scache(512000)"
SSLSessionCacheTimeout  300

<Directory "C:\\Users\\James\\Pictures">
    AllowOverride None
    Require all granted
</Directory>

<VirtualHost _default_:443>
    ServerName localhost:443
    ServerAdmin admin@example.com

    ErrorLog "${SRVROOT}/logs/error.log"
    TransferLog "${SRVROOT}/logs/access.log"

    SSLEngine on
    SSLCertificateFile "${SRVROOT}/conf/server.crt"
    SSLCertificateKeyFile "${SRVROOT}/conf/server.key"

    ProxyRequests Off

    DocumentRoot "C:\\Users\\James\\Pictures"
    Options Indexes
</VirtualHost>
- The above example configuration is used to setup a virtual host to listen on port 443 over HTTPS and server a local directory.
- A file “conf/extra/test_ssl.conf” is created with the above configuration in it. Make sure to include this configuration in the httpd.conf file by adding the line “Include conf/extra/test_ssl.conf” in the file
- The configuration is as follows
- Since we require to listen in 443, we need to explicitly mention “Listen 443″, since only port 80 is used by default by Apache server
- The next configuration is to set the Cipher suites for HTTPS negotiation between client and server
- The next configuration is to configure the supported SSL protocols
- The next configurations are for configuring SSL passphrase and session cache timeout
- In this example, we are serving a folder “C:\Users\James\Pictures”. But the folder access needs to be explicitly given to the Apache server. We have granted permission to access the folder using the “<Directory “C:\Users\James\Pictures”>” section.
- In the virtual host section we have configured the log files location, SSL certificates and directory hosting location, enabled directory listing of the folder.
Configure HTTPS redirection
- HTTPS redirection is redirecting the traffic on HTTP to HTTPS
- To acheive HTTPS redirection, a virtual host over HTTP and HTTPS
- All the configuration of the website will be present in the HTTPS (port 443) virtual host
- The virtual host for HTTP (port 80) will just redirect all the requests to HTTPS virtual host using the
Redirect permanentdirective as shown below
<VirtualHost *:80>
  ServerName example.com
  Redirect permanent / https://example.com/
</VirtualHost>

<VirtualHost *:443>
  ServerName example.com
  # SSL and other apache configurations
</VirtualHost>
- HTTPS redirection can be achieved using other approaches using
mod_rewritemodule, but the above approach is simple and fits almost all use cases
Configure reverse proxy
Modules to be enabled
- Enable the modules mod_proxy, mod_proxy_http, mod_ssl, mod_headers, mod_socache_shmcb in the httpd.conf file
# test_reverse_proxy.conf
Listen 443

#   SSL Cipher Suite:
SSLCipherSuite HIGH:MEDIUM:!MD5:!RC4:!3DES
SSLProxyCipherSuite HIGH:MEDIUM:!MD5:!RC4:!3DES

#   SSL Protocol support:
SSLProtocol all -SSLv3 -TLSv1
SSLProxyProtocol all -SSLv3 -TLSv1

#   Pass Phrase Dialog:
SSLPassPhraseDialog  builtin

#   Inter-Process Session Cache:
#SSLSessionCache         "dbm:${SRVROOT}/logs/ssl_scache"
SSLSessionCache        "shmcb:${SRVROOT}/logs/ssl_scache(512000)"
SSLSessionCacheTimeout  300

<VirtualHost _default_:443>
    ServerName localhost:443
    ServerAdmin admin@example.com

    ErrorLog "${SRVROOT}/logs/error.log"
    TransferLog "${SRVROOT}/logs/access.log"

    SSLEngine on
    SSLCertificateFile "${SRVROOT}/conf/server.crt"
    SSLCertificateKeyFile "${SRVROOT}/conf/server.key"

    ProxyRequests Off
    ProxyPreserveHost On

    SSLProxyEngine On
    SSLProxyCheckPeerCN on
    SSLProxyCheckPeerExpire on

    RequestHeader set X-Forwarded-Proto "https"
    RequestHeader set X-Forwarded-Port "443"
    ProxyPass /test http://127.0.0.1:8080
    ProxyPassReverse /test http://127.0.0.1:8080
</VirtualHost>
- A file named “test_reverse_proxy.conf” can be created and included in the httpd.conf by adding the line “Include conf/extra/test_reverse_proxy.conf” in the file
- The above configuration makes the Apache web server to listen on HTTPS and act as a reverse proxy for an application running at “http://127.0.0.1:8080/” when the request path starts with “/path”
- Enable mod_proxy, mod_proxy_http, mod_ssl, mod_headers, mod_socache_shmcb modules in the httpd.conf file
- ProxyAddHeaders on passes X-Forwarded-Host, XForwarded-For, and X-Forwarded-Server headers to the back-end server by default
- ProxyPreserveHost on retains the original host from the client browser
- SSLProxyEngine on is used to enable SSL in reverse proxy
- SSLProxyCheckPeerCN on means Apache will check if request URL hostname and server certificate CN (common name) are the same. If both are not same, 502 (bad gateway) response will be given
- SSLProxyCheckPeerExpire on means Apache will check if the server certificate is expired. If expired, 502 (Bad gateway) response will be given
Video
The video for this post can be seen here and here and here
References
- Tutorial to setup reverse proxy in Apache config — http://www.apachetutor.org/admin/reverseproxies
- virtual host explained — https://dasunhegoda.com/what-how-to-apache-virtual-host/444/
- ProxyPreserveHost — https://docs.oracle.com/cd/E93962_01/bigData.Doc/install_onPrem/src/cins_studio_reverse_proxy_apache_proxypreservehost.html
- SSLProxyEngine on — https://httpd.apache.org/docs/2.4/mod/mod_ssl.html#sslproxyengine
- SSLProxyCheckPeerCN on — https://httpd.apache.org/docs/2.4/mod/mod_ssl.html#sslproxycheckpeercn
- SSLProxyCheckPeerExpire on — https://httpd.apache.org/docs/2.4/mod/mod_ssl.html#sslproxycheckpeerexpire