
Office Online Server is a Microsoft server product that allows users to access and use the familiar Microsoft Office applications, such as Word, Excel, PowerPoint, and OneNote, via a web browser. This article explains how to install and configure Office Online Server.
What is Office Online Server?
Office Online Server is designed to provide users with the ability to create, edit, and view Office documents online, without having to install the Office applications on their local computers. This makes it ideal for organizations that want to provide their employees with easy access to Office applications from anywhere, using any device with an internet connection.
OOS can be used to:
-
Provide employees with the ability to create, edit, and view Office documents online, using any device with an internet connection.
-
Collaborate on Office documents in real-time, with multiple users working on the same document simultaneously.
-
Access Office documents stored in SharePoint or OneDrive for Business, without the need to download them to the local computer.
-
Integrate with other Microsoft server products, such as SharePoint, Exchange, and Skype for Business, to provide a complete productivity solution for organizations.
Overall, Office Online Server offers a flexible and powerful way for organizations to provide their employees with access to the full range of Microsoft Office applications, regardless of their location or device.
Installation
Step 1: Installing the server.
Server must be Windows Server 2012 R2, Windows Server 2016 or Windows Server 2019 or Windows Server 2022.
-
- Step by Step — Installing Server 2019 — superuser (kbsuperuser.com)
- Important:
- Windows Server 2016 requires Office Online Server April 2017 or later.
- Windows Server 2019 requires Office Online Server July 2021 patch or later.
- Windows Server 2022 requires Office Online Server Nov 2021 patch or later.
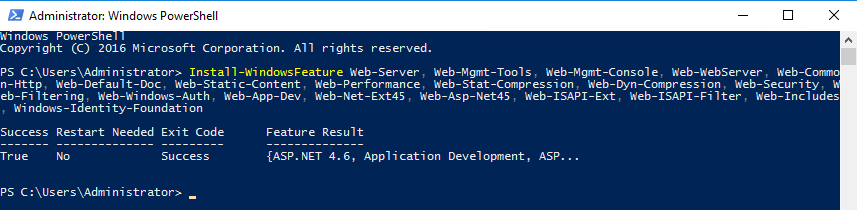
Step 2: Adding Features to Server
Open the Microsoft PowerShell prompt as an administrator and run following commands to install the required roles and services.
-
- Server 2012 R2
- Add-WindowsFeature Web-Server,Web-Mgmt-Tools,Web-Mgmt-Console,Web-WebServer,Web-Common-Http,Web-Default-Doc,Web-Static-Content,Web-Performance,Web-Stat-Compression,Web-Dyn-Compression,Web-Security,Web-Filtering,Web-Windows-Auth,Web-App-Dev,Web-Net-Ext45,Web-Asp-Net45,Web-ISAPI-Ext,Web-ISAPI-Filter,Web-Includes,InkandHandwritingServices,NET-Framework-Features,NET-Framework-Core,NET-HTTP-Activation,NET-Non-HTTP-Activ,NET-WCF-HTTP-Activation45,Windows-Identity-Foundation,Server-Media-Foundation
- Server 2016 and later
- Add-WindowsFeature Web-Server,Web-Mgmt-Tools,Web-Mgmt-Console,Web-WebServer,Web-Common-Http,Web-Default-Doc,Web-Static-Content,Web-Performance,Web-Stat-Compression,Web-Dyn-Compression,Web-Security,Web-Filtering,Web-Windows-Auth,Web-App-Dev,Web-Net-Ext45,Web-Asp-Net45,Web-ISAPI-Ext,Web-ISAPI-Filter,Web-Includes,NET-Framework-Features,NET-Framework-45-Features,NET-Framework-Core,NET-Framework-45-Core,NET-HTTP-Activation,NET-Non-HTTP-Activ,NET-WCF-HTTP-Activation45,Windows-Identity-Foundation,Server-Media-Foundation
- Server 2012 R2
- Restart the server.
Step 3: Installing prerequisites
-
- Microsoft .NET Framework 4.5.2
- Download Microsoft .NET Framework 4.5.2 (Web Installer) for Windows Vista SP2, Windows 7 SP1, Windows 8, Windows 8.1, Windows Server 2008 SP2 Windows Server 2008 R2 SP1, Windows Server 2012 and Windows Server 2012 R2 from Official Microsoft Download Center
- Visual C++ Redistributable Packacges for Visual Studio 2013
- Download Visual C++ Redistributable Packages for Visual Studio 2013 from Official Microsoft Download Center
- Visual C++ Redistributable for Visual Studio 2015
- Download Visual C++ Redistributable for Visual Studio 2015 from Official Microsoft Download Center
- Microsoft Identity Model Extension
- Download Visual C++ Redistributable for Visual Studio 2015 from Official Microsoft Download Center
- Microsoft .NET Framework 4.5.2
- Restart the server.
Step 4: Installing prerequisites
-
- Choose file location. It is recommended to use system drive for installation.
Step 5: Creating IIS Cert for OOS Server
-
- Open IIS Manager and Select «Server Certificates». Then select «Select Certificate Request» from right panel.
-
- Since «Common Name» will be used as access URL for the OOS, this field needs to be filled carefully.
-
- If the services will be used by external users use a CA created certificate. Self-signed or Doman CA Certs can be used.
Step 6: Creating Office Online Farm
-
- Open PowerShell with Admin Privileges:
- New-OfficeWebAppsFarm -InternalURL “https://oos.kbsuperuser.com” -ExternalURL “https://oos.kbsuperuser.com” -CertificateName “OOS Cert”
- You should see the results after running the command:
- Open PowerShell with Admin Privileges:
-
- This is the default settings for OOS. But you may change the settings according to your requirements:
- Add «-AllowHTTP» to allow HTTP traffic,
- Add «-EditingEnabled» to enable both editing and viewing.
- Etc.
- This is the default settings for OOS. But you may change the settings according to your requirements:
Step 7: Verify if the farm created succesfully:
-
- You need to visit this website with no problem. The link should not give prompt any warning such as untrusted website.
- https://oos.kbsuperuser.com/hosting/discovery
- The first few lines of that file should resemble the following example:
- <?xml version=»1.0″ encoding=»UTF-8″?>
<wopi-discovery><net-zone
name=»internal-https»><app name=»Excel» checkLicense=»true»
favIconUrl=»https://oos.kbsuperuser.com/x/_layouts/images/FavIcon_Excel.ico»><action
name=»view»
urlsrc=»https://oos.kbsuperuser.com/x/_layouts/xlviewerinternal.aspx?<ui=UI_LLCC&><rs=DC_LLCC&>»
default=»true» ext=»ods»/><action name=»view»
urlsrc=»https://oos.kbsuperuser.com/x/_layouts/xlviewerinternal.aspx?<ui=UI_LLCC&><rs=DC_LLCC&>»
default=»true» ext=»xls»/><action name=»view»
- <?xml version=»1.0″ encoding=»UTF-8″?>
- You need to visit this website with no problem. The link should not give prompt any warning such as untrusted website.
Step 8: Configure Exchange Server to use OOS services:
-
- Open the Exchange Management Shell and run the following command to configure Exchange at Mailbox Level:
- Set-MailboxServer MBX -WacDiscoveryEndpoint «https://oos.kbsuperuser.com/hosting/discovery»
- Restart-WebAppPool MsExchangeOwaAppPool
- Open the Exchange Management Shell and run the following command to configure Exchange at Organization Level:
- Set-OrganizationConfig -WacDiscoveryEndpoint «https://oos.kbsuperuser.com/hosting/discovery»
- Restart-WebAppPool MsExchangeOwaAppPool
- Open the Exchange Management Shell and run the following command to configure Exchange at Mailbox Level:
Step 9: Check if the configuration completed successfully:
-
- Check the Event Logs from Exchange Server. You need to see Event 140 & 142 without error. That means the connection is ok between Exchange Server and OOS.
- The «preview» option needs to be available in OWA if all the configuration is correct.
Step 10: Configure Sharepoint Server to use OOS services:
-
- Open an elevated SharePoint 2016 Management Shell:
- New-SPWOPIBinding -ServerName oos.kbsuperuser.com
- Get-SPWOPIZone
- Open an elevated SharePoint 2016 Management Shell:
Step 11: Check if the configuration completed successfully:
-
- In SharePoint Server 2016, make sure you aren’t logged on as System Account because you won’t be able to edit or view the documents with Office Online. Go to a SharePoint Server 2016 document library that contains Office documents and view a Word, PowerPoint, Excel, or OneNote file. The document should open in a browser that displays the file by using Office Online.
Tags:
- microsoft office
- server 2019
- server 2016
- microsoft
- installation
- windows server
What’s Your Reaction?
2
Like
0
Dislike
0
Love
0
Funny
0
Angry
0
Sad
2
Wow
G-TMR3K8FQQP
Все способы:
- Шаг 1: Скачивание и распаковка файлов
- Шаг 2: Изменение конфигурационного файла
- Шаг 3: Первый запуск локального веб-сервера
- Вопросы и ответы: 17
В этой статье мы разберем только основные принципы установки и первого запуска веб-сервера Apache на компьютере под управлением Windows. Учитывайте, что все остальные действия, такие как: установка PHP, подключение MySQL, добавление других необходимых компонентов для локального сервера, придется выполнять вручную, из-за чего могут изменяться настройки Apache. Если во время редактирования глобальных параметров возникнут проблемы, не стесняйтесь обращаться к официальной документации и искать в поисковике решение ошибок по их кодам.
Шаг 1: Скачивание и распаковка файлов
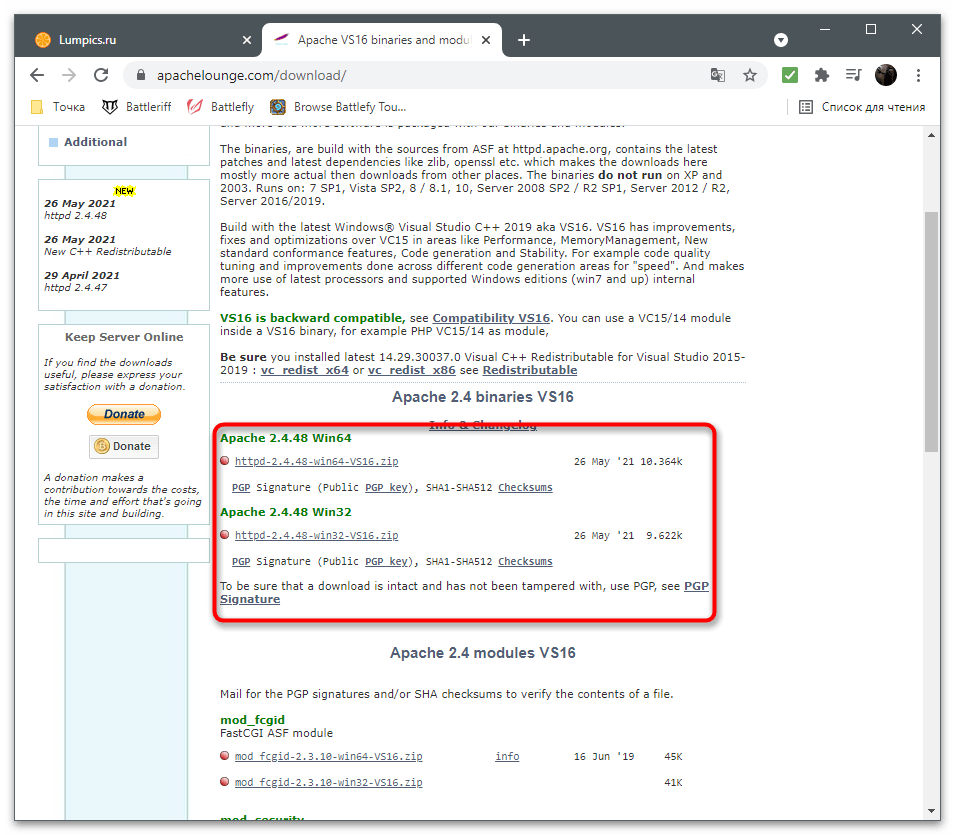
Apache для Windows распространяется в виде ZIP-архива, в котором находятся все нужные файлы. Установка через Терминал, как это осуществляется в дистрибутивах Linux, в этом случае недоступна, поэтому для получения файлов выполните следующие действия:
Скачать Apache с официального сайта
- Кликните по кнопке выше, чтобы перейти на официальный сайт веб-сервера, где нажмите по ссылке с названием последней доступной версии Apache.
- Вы окажетесь на странице описания версии, после чего выберите «Files for Microsoft Windows».
- В разделе «Downloading Apache for Windows» нажмите на ссылку «Apache Lounge».
- Выберите версию для разрядности своей операционной системы и начните загрузку.
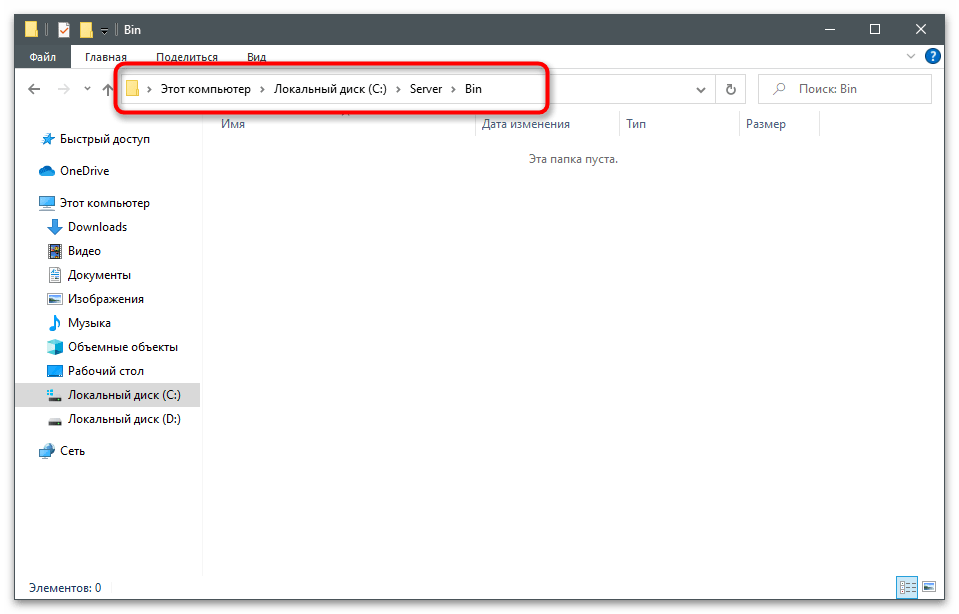
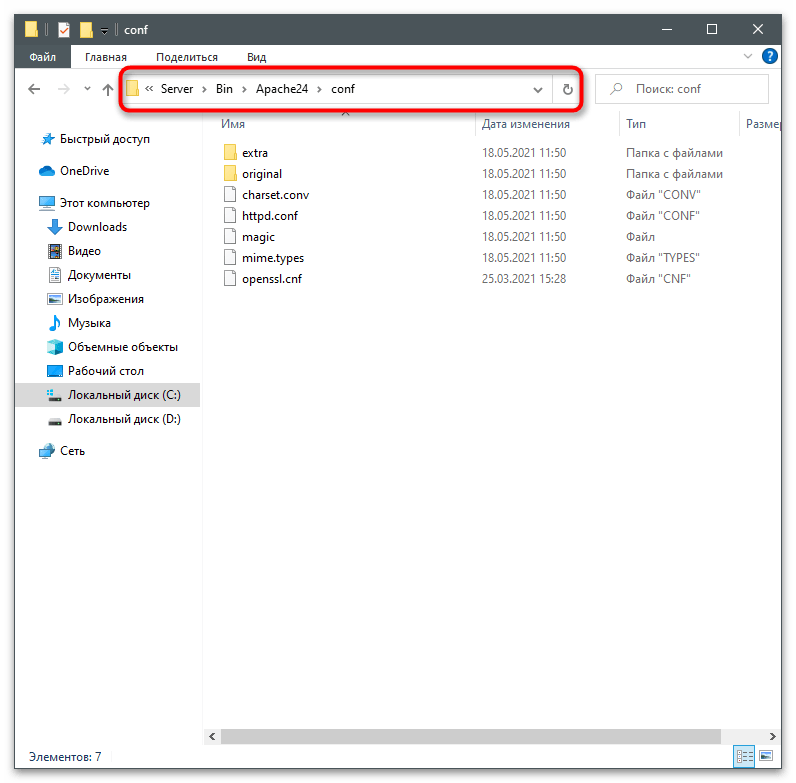
- Пока файлы скачиваются, создайте папку, куда будут помещены все элементы, связанные с веб-сервером. Мы выбрали для этого системный раздел жесткого диска, создали папку «Server», а в ней — «Bin». Это стандартные названия каталогов, поэтому при редактировании конфигурационного файла будем учитывать именно данное расположение.
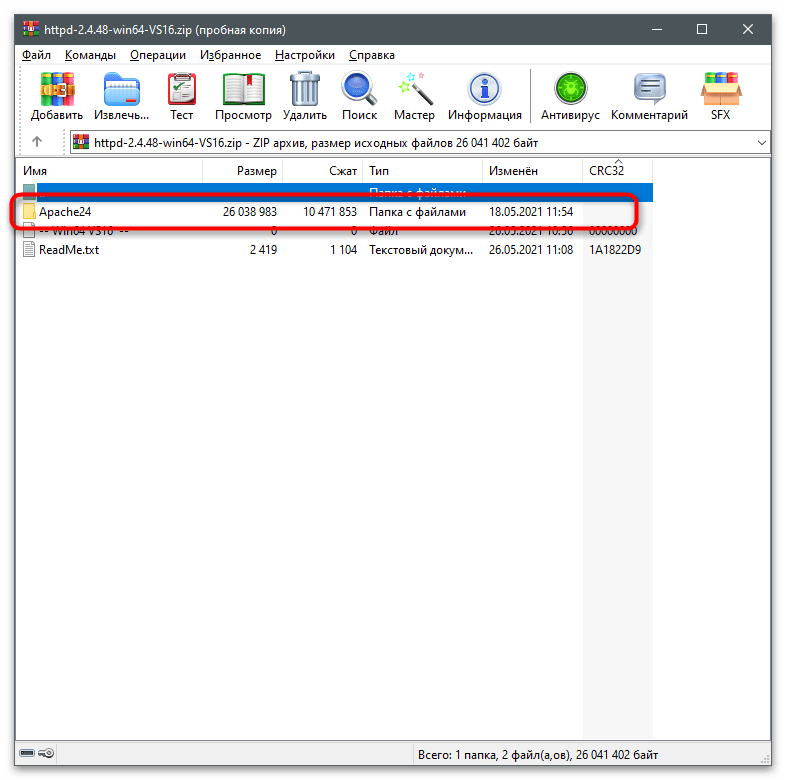
- Перетащите папку «Apache24» из скачанного архива в созданный ранее каталог «Bin».


Шаг 2: Изменение конфигурационного файла
Конфигурация локального веб-сервера, установленная по умолчанию, не подходит для его нормального запуска, чтобы проверить работу и подключить остальные компоненты. Связано это с изменением пути расположения файлов и другими параметрами, влияющими на старт программы. Измените их, выполнив представленные далее шаги.
- Перейдите по пути
C:\Server\bin\Apache24\conf\. - Дважды кликните по файлу «httpd.conf» для его открытия.
- Если у вас есть продвинутый текстовый редактор, выберите его для просмотра файла конфигурации. В противном случае используйте стандартный «Блокнот».
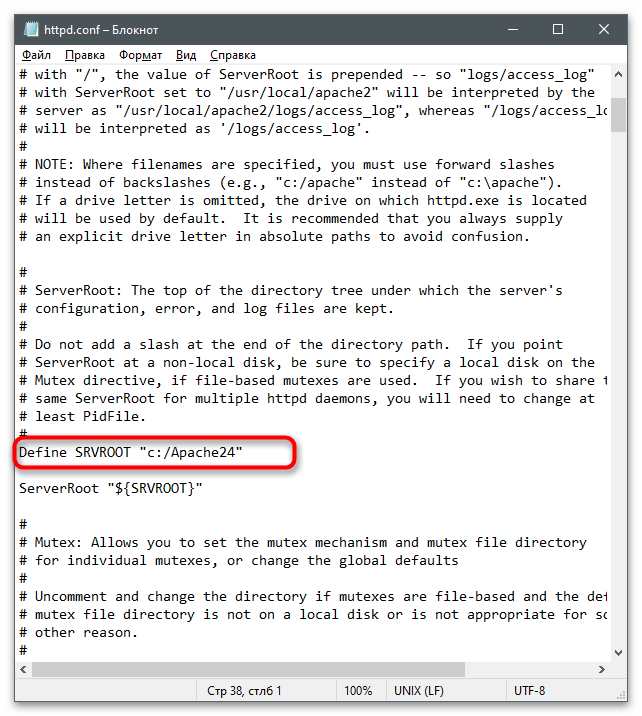
- В документе найдите строку
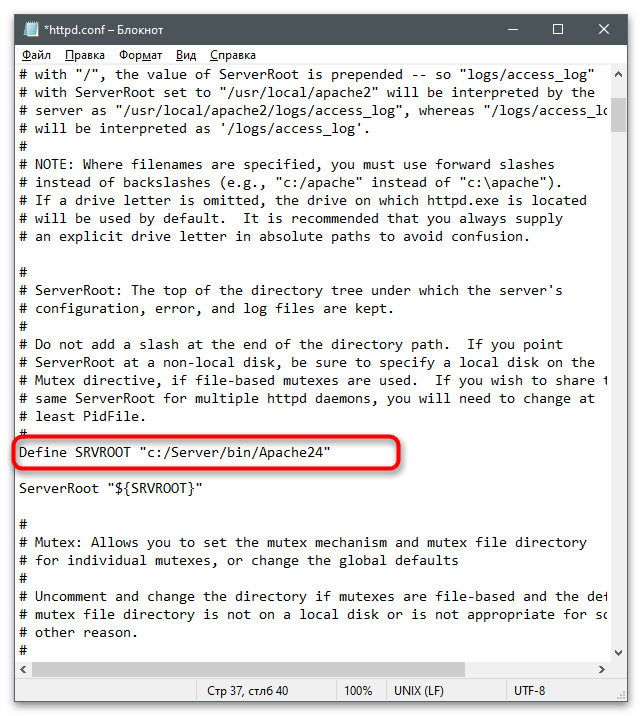
Define SRVROOT "c:/Apache24". - Замените ее на
Define SRVROOT "c:/Server/bin/Apache24", чтобы указать новый путь к файлам. Учитывайте, что в строке мы указали созданный ранее путь. Если у вас он отличается, поменяйте выражение в кавычках. - Далее найдите строку
#ServerName www.example.com:80, которая по умолчанию заключена в комментарий и неактивна. - Измените ее на
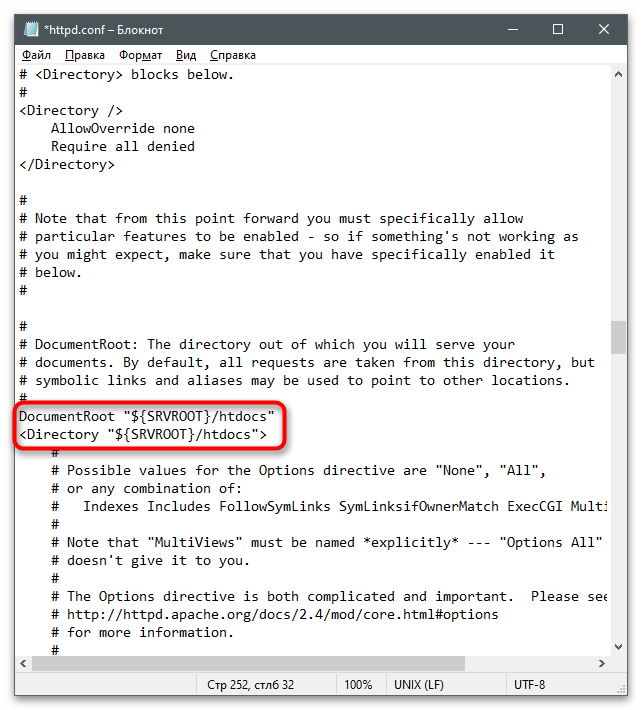
ServerName localhost, указав тем самым локальный адрес, который в дальнейшем и будет использоваться для проверки веб-сервера. - Отыщите строки
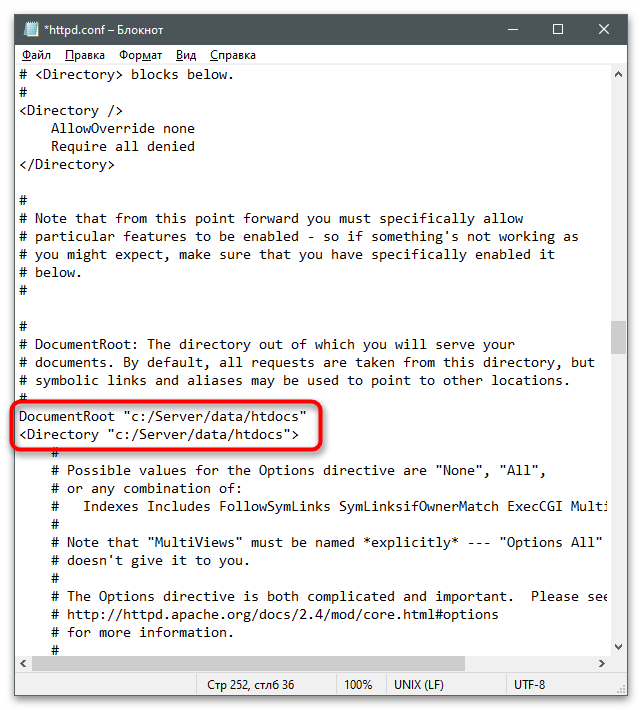
DocumentRoot "${SRVROOT}/htdocs"и<Directory "${SRVROOT}/htdocs">, которые отвечают за расположение связанных с сервером файлов. - Замените их на
DocumentRoot "c:/Server/data/htdocs"и<Directory "c:/Server/data/htdocs">. - Сейчас параметр
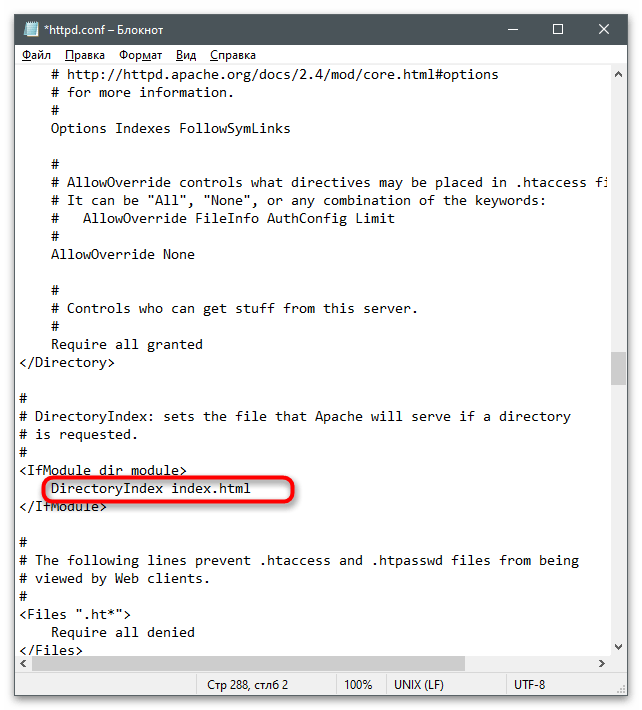
DirectoryIndexимеет только значениеindex.html, поэтому его тоже нужно найти и отредактировать. - Добавьте еще несколько доступных форматов файлов, чтобы в итоге строка обрела вид
DirectoryIndex index.php index.html index.htm. - Для строки
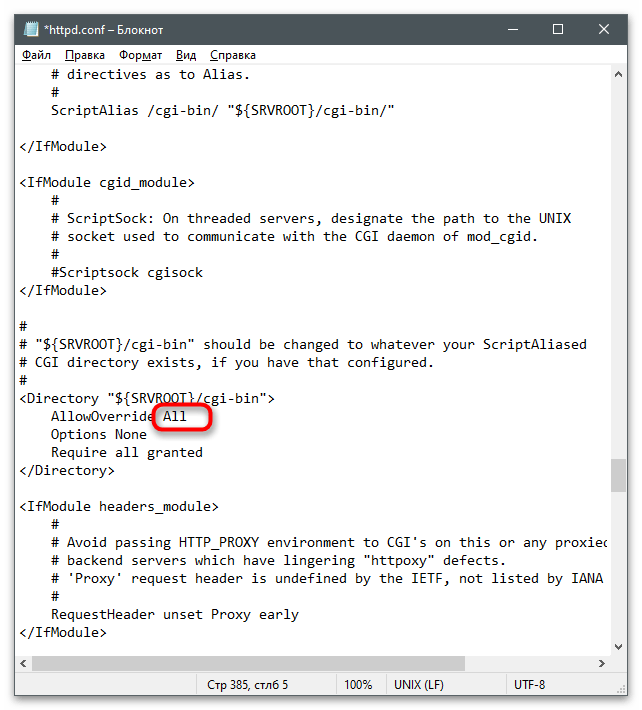
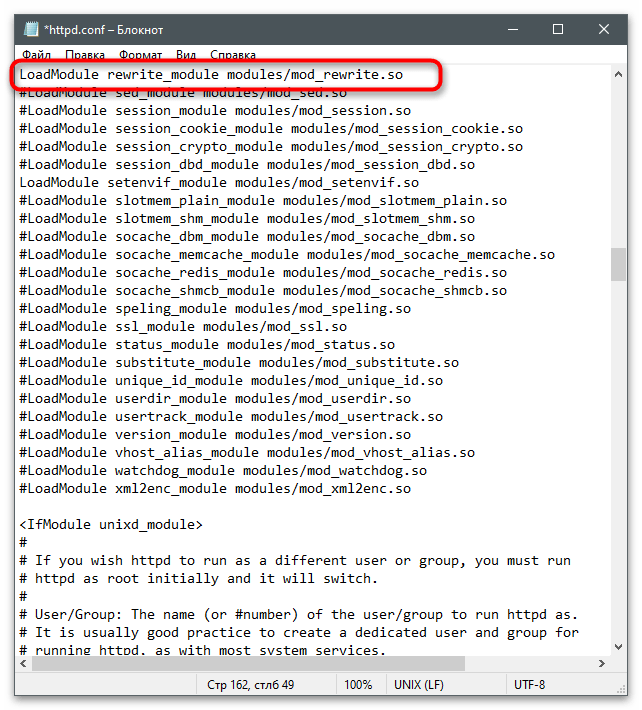
AllowOverride Noneпоменяйте состояние наAll, удалив предыдущее выражение. - Осталось только найти
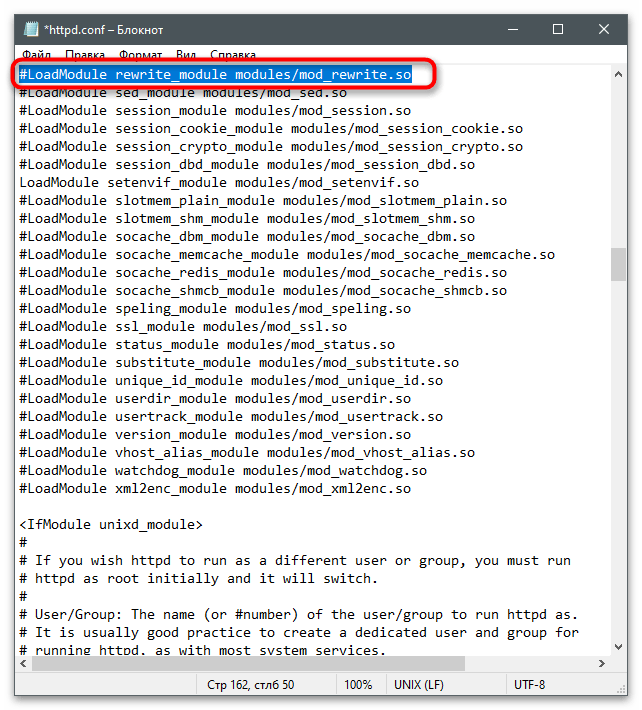
#LoadModule rewrite_module modules/mod_rewrite.soи убрать значок #, активировав тем самым строку. - В итоге она должна отображаться так, как это показано на следующем скриншоте.
- Если с поиском конкретных строк у вас возникают проблемы, используйте сочетание клавиш Ctrl + F, чтобы вызвать инструмент «Найти» и вписать там необходимое выражение.
- Перед выходом не забудьте сохранить изменения в конфигурационном файле.


Шаг 3: Первый запуск локального веб-сервера
Приступим к первому запуску локального веб-сервера Apache для проверки его работоспособности. Надо это для того, чтобы при дальнейшей настройке у вас не возникло серьезных неполадок, на решение которых потратится много времени.
- Щелкните правой кнопкой мыши по меню «Пуск» и из появившегося меню выберите пункт «Windows PowerShell (администратор)».
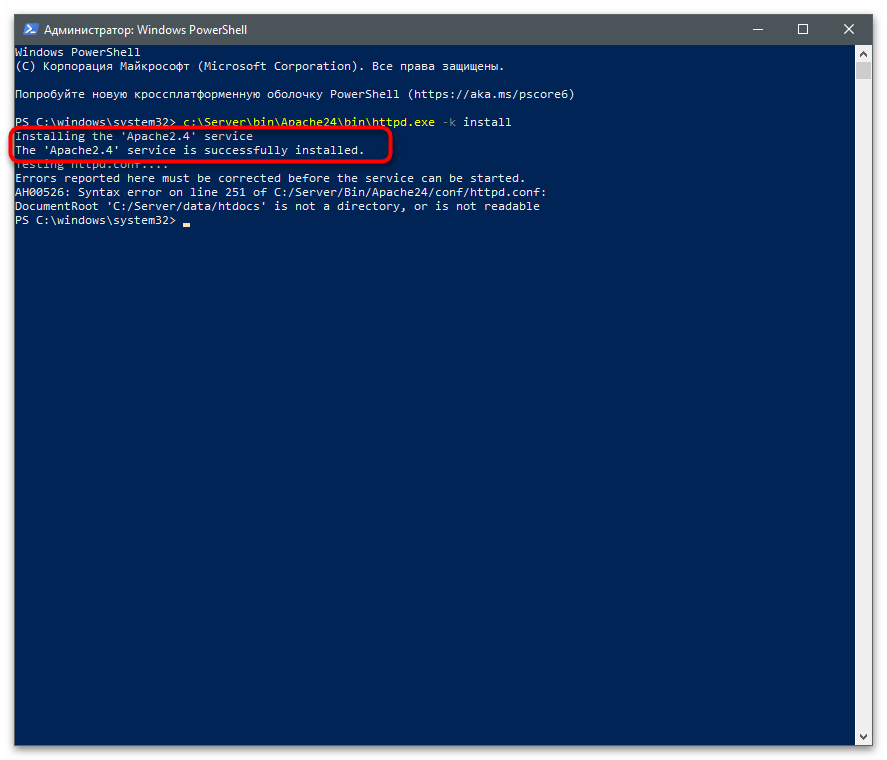
- Введите команду
c:\Server\bin\Apache24\bin\httpd.exe -k installи нажмите Enter для ее активации. Она установит компоненты Apache и подготовит их к работе. - После получения информации об успешной установке сервисов переходите к следующему шагу.
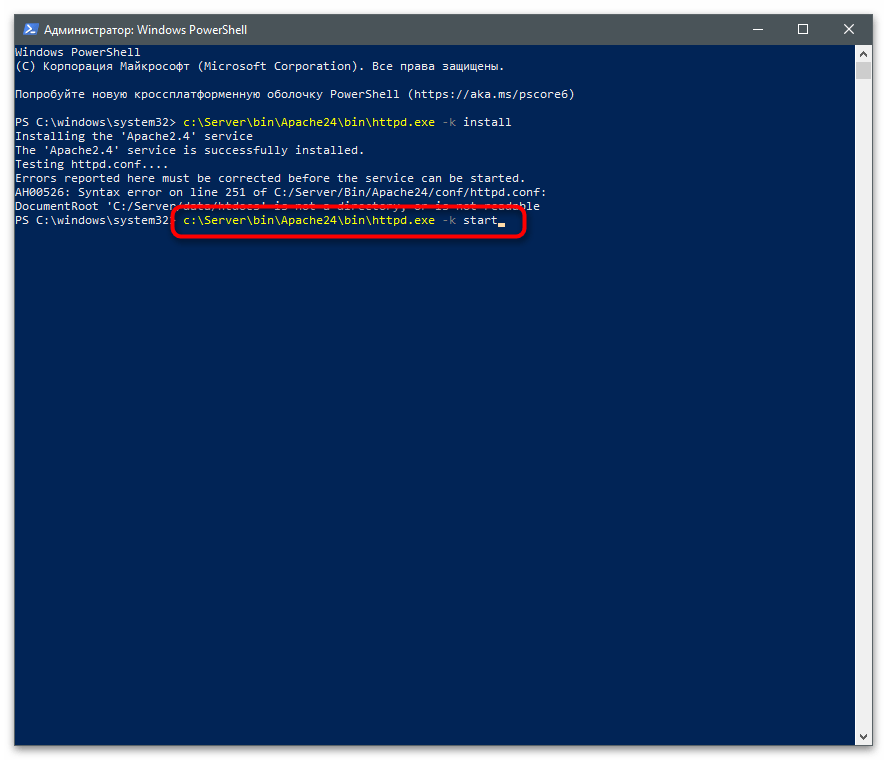
- Запуск веб-сервера осуществляется через команду c
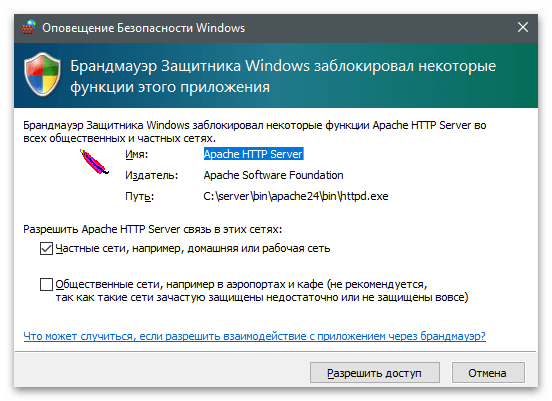
:\Server\bin\Apache24\bin\httpd.exe -k start. - Появится оповещение Безопасности Windows, которое следует подтвердить, нажав «Разрешить доступ».
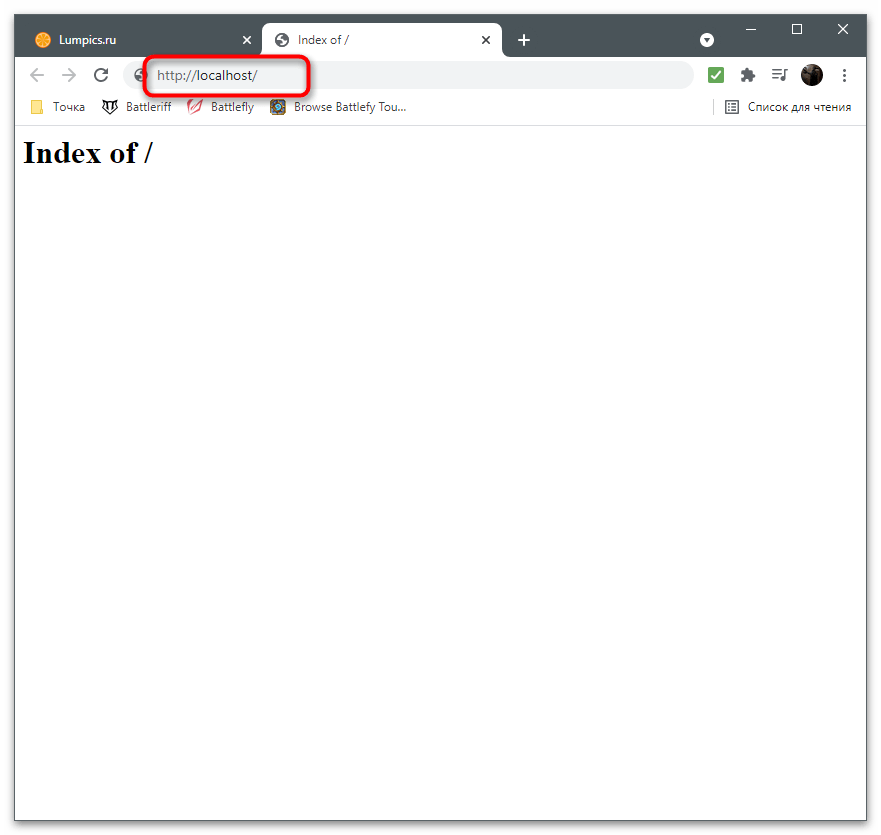
- Откройте любой браузер и перейдите по адресу
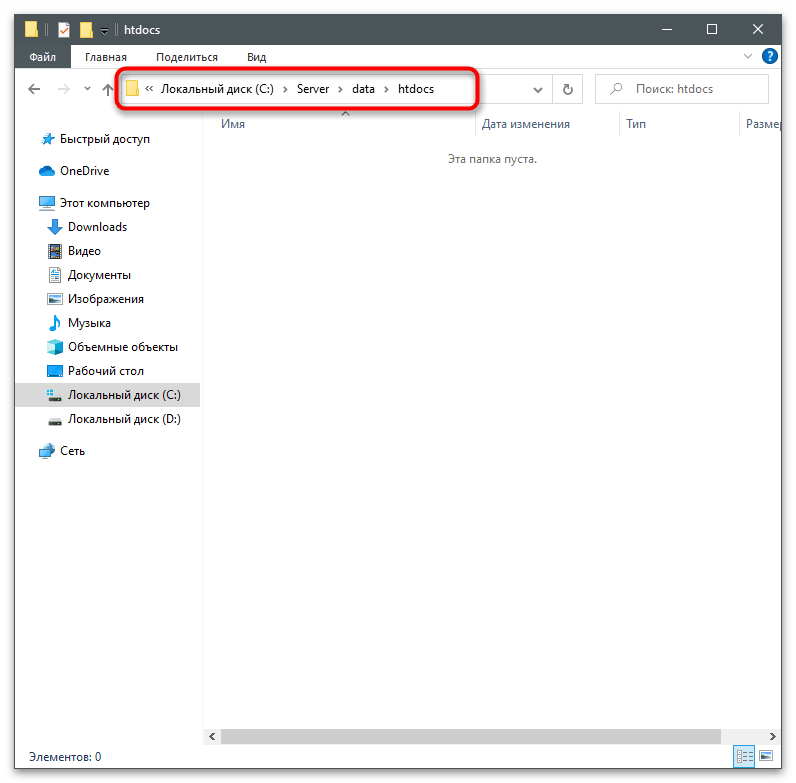
http://localhost/. Если на странице появилась надпись «Index of /», значит, все действия выполнены правильно. - При получении ошибки в консоли, свидетельствующей об отсутствии необходимых папок, перейдите в каталог «Server», создайте там директорию «data» с подпапкой «htdocs».

Наша группа в TelegramПолезные советы и помощь
Provide feedback
Saved searches
Use saved searches to filter your results more quickly
Sign up
HomeBlog[Step by Step] Installing and Configuring Office Online Server on Windows Server 2016 for Exchange 2016
Office Online Server (OOS) is successor of Office Web Apps Server (OWA), which allows organizations to deliver browser-based versions of Word, PowerPoint, Excel and OneNote, among other capabilities. Microsoft recognizes that many organizations still value running server products on-premises for a variety of reasons. Just want to update over here, Office Web Apps Server is not supportable for Windows Server 2016.
OOS scales well for your enterprise whether you have 100 employees or 100,000. The architecture enables one OOS farm to serve multiple SharePoint, Exchange and Skype for Business instances. OOS is designed to work with SharePoint Server 2016, Exchange Server 2016 and Skype for Business Server 2015. It is also backwards compatible with SharePoint Server 2013, Lync Server 2013 and, in some scenarios, with Exchange Server 2013. You can also integrate other products with OOS through our public API.
Today, we are releasing our first significant update to Office Online Server that includes:
-
Performance improvements to co-authoring in Word Online.
-
Support for embedded Power View sheets in Excel Online.
-
Improvements when working with tables in Word Online and PowerPoint Online, including better drag-and-drop support.
-
Support for showing spelling errors inline in the PowerPoint editor.
-
Improved picture resizing in Word Online.
-
Copy and paste improvements in PowerPoint Online.
-
Support for shapes in Excel Online viewer.
-
Significant improvements for users that rely on assistive technologies—HTML markup updated to more fully support W3C accessibility standards.
So, the question will be how can I get Office Online Server. The answer would be you need to get download it from your Volume License Service Center. Customers with a Volume Licensing account can download Office Online Server from the Volume License Servicing Center at no cost and will have view-only functionality, which includes PowerPoint sharing in Skype for Business.
Lab Environment:
Here is the architecture I am using for my Lab environment of OOS installation and configuration for Exchange 2016
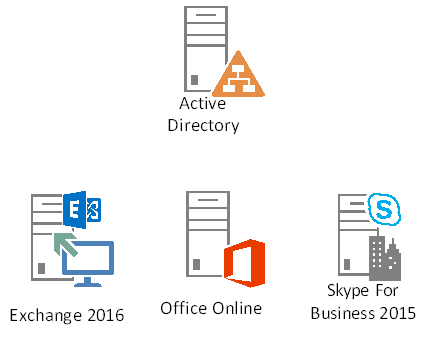
| Role | HostName | Server OS |
| Active Directory with Certificate Authority | WS2K16DC | Windows Server 2016 |
| Exchange Server 2016 | WS2K16EXG | Windows Server 2016 |
| Office Online Server | WS2K16OWA | Windows Server 2016 |
| Skype For Business 2015 (Standalone) | WS2K16SFB | Windows Server 2016 |
Installing Prerequisites:
Before installing the OOS, we need to install the pre-requisites. Below is the Windows feature that are mandatory to install for the OOS in Windows Server 2016.
Install-WindowsFeature Web-Server, Web-Mgmt-Tools, Web-Mgmt-Console, Web-WebServer, Web-Common-Http, Web-Default-Doc, Web-Static-Content, Web-Performance, Web-Stat-Compression, Web-Dyn-Compression, Web-Security, Web-Filtering, Web-Windows-Auth, Web-App-Dev, Web-Net-Ext45, Web-Asp-Net45, Web-ISAPI-Ext, Web-ISAPI-Filter, Web-Includes, Windows-Identity-Foundation
Installing OOS:
After the installation of Windows Features, now it’s time to install the OOS. To install OOS mount the download DVD from Volume License Service Center, and execute it.
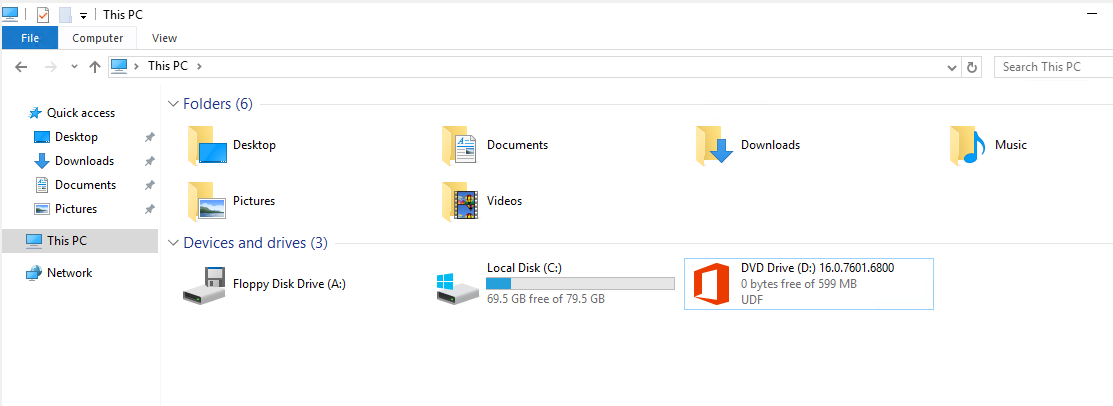
Once the DVD is executed, it will prepare the necessary files that are required for the installation.
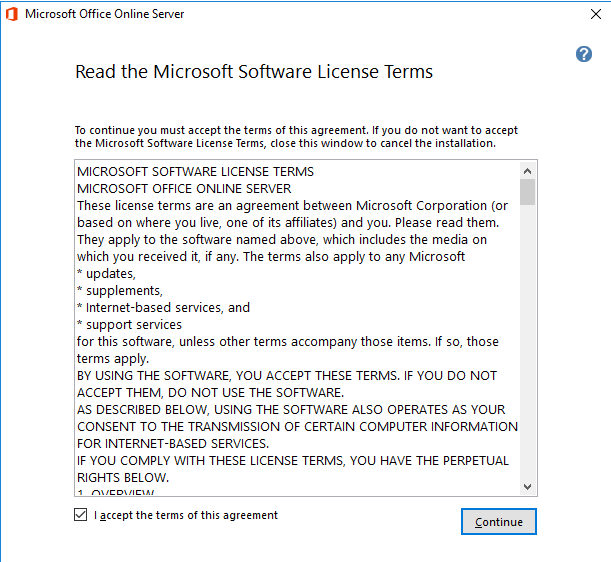
Once the preparation of files is complete, Check on EULA and click on ‘Continue’.
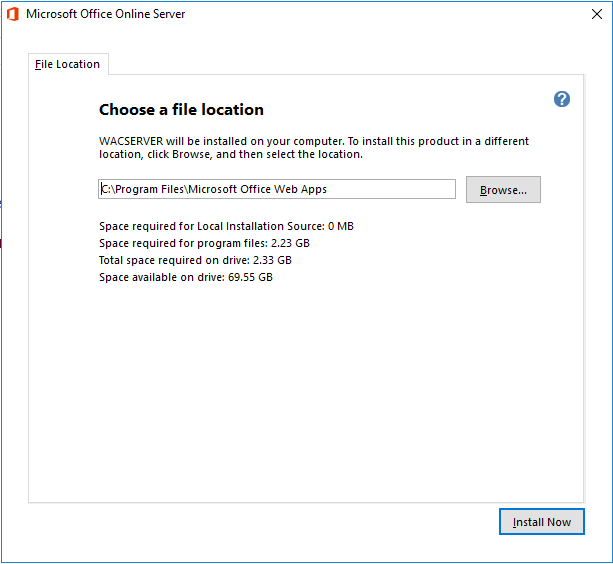
On the ‘File Location’ provide the path where OOS is needed to be installed and click on ‘Install Now’.
It will take around 10-15 minutes depending upon the specs of hardware to get complete the installation.
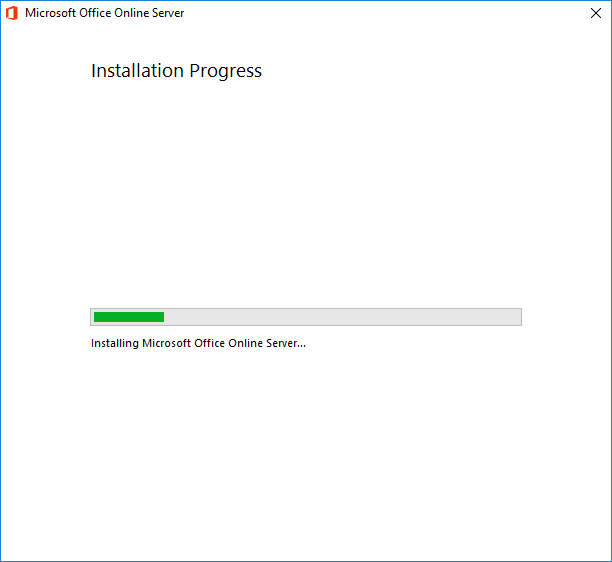
Once the installation is complete, click on ‘Close’.

Configuring OOS:
Unlike other application, it was quite easy for us to install OOS. Now the time is to configure it. Configuring OOS only contains the management of the certificate. Hence if your machine is in the domain and you just want the feature of OOS within your private intranet, it’s okay to use Local Certificate Authority (CA). But if you want to use it on the External organization too, you need to have public SSL. For my demo lab, I just needed private certificate, hence created the one using Local CA.
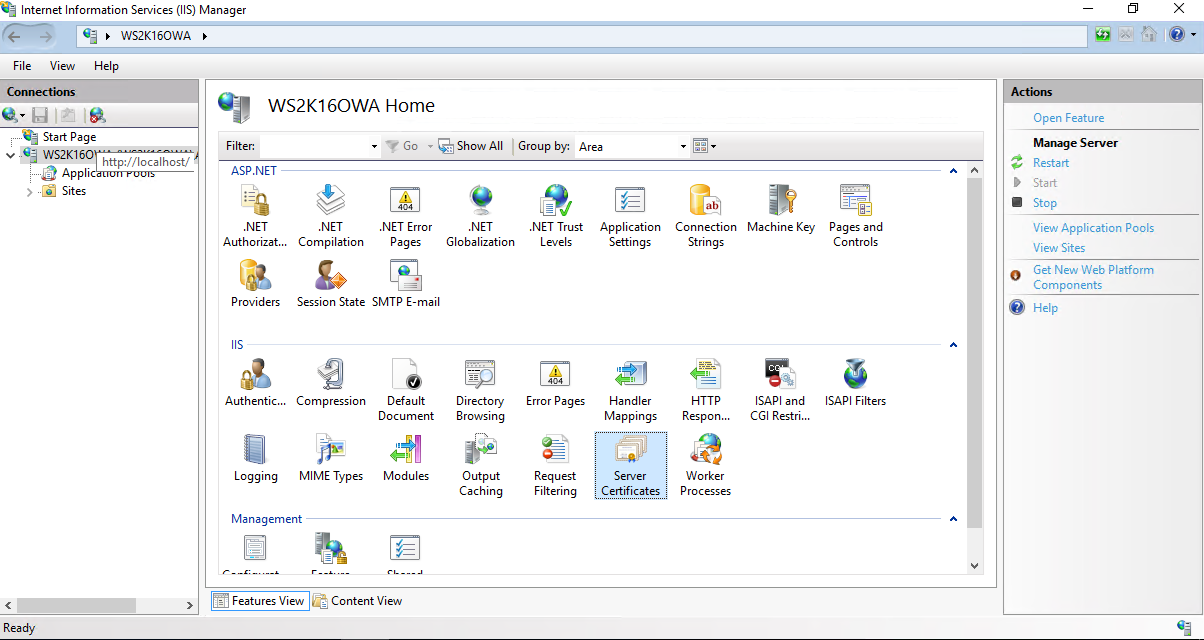
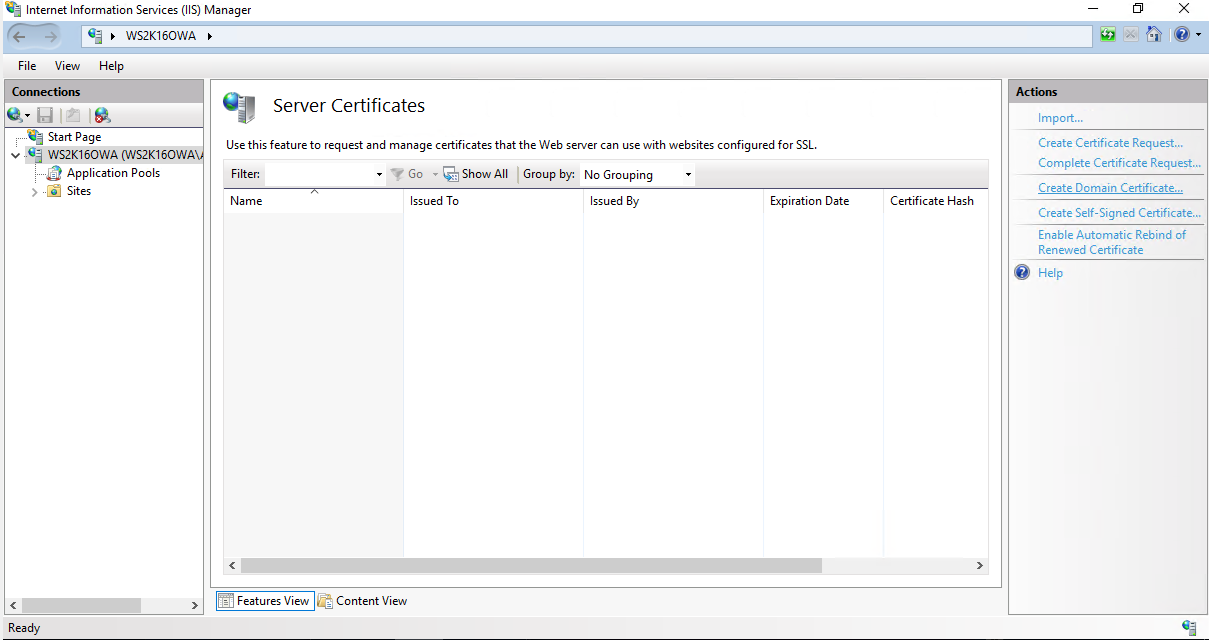
To create the local certificate, Open IIS Manger-> Expand your hostname and open ‘Server Certificates’.
On the ‘Server Certificates’ right side at Action Panel, click on ‘Create Domain Certificate’.
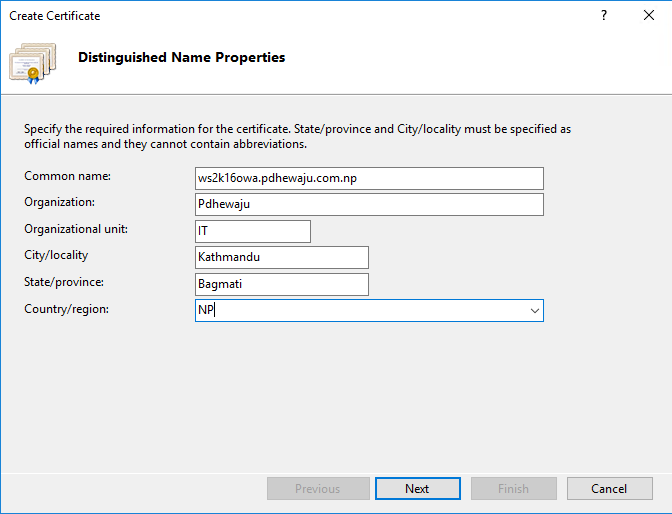
A new window will get open, Provide the detail of Certificate on this window. The most important thing over here is, on the ‘Common Name’ you need to provide FQDN of your server. Else the certificate will not be valid and trusted. ( I have faced few problems year back with this issues, so sharing my experience on it).
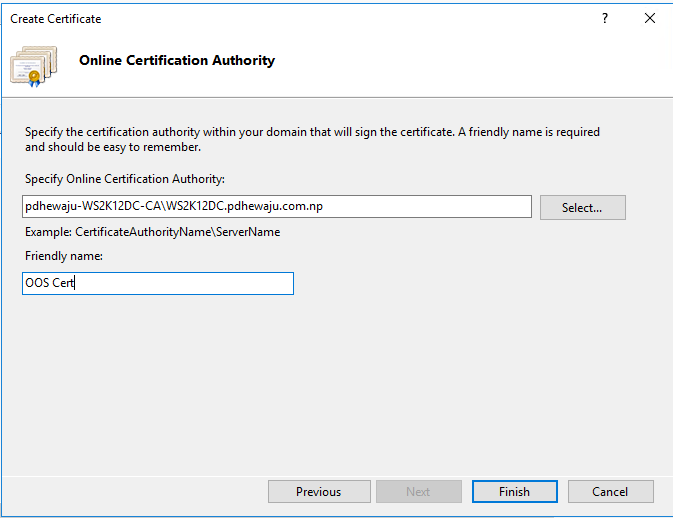
On ‘Online Certificate Authority’, Select the Certificate Authority server and provide the ‘Friendly Name’ this could be anything and click on ‘Finish’.
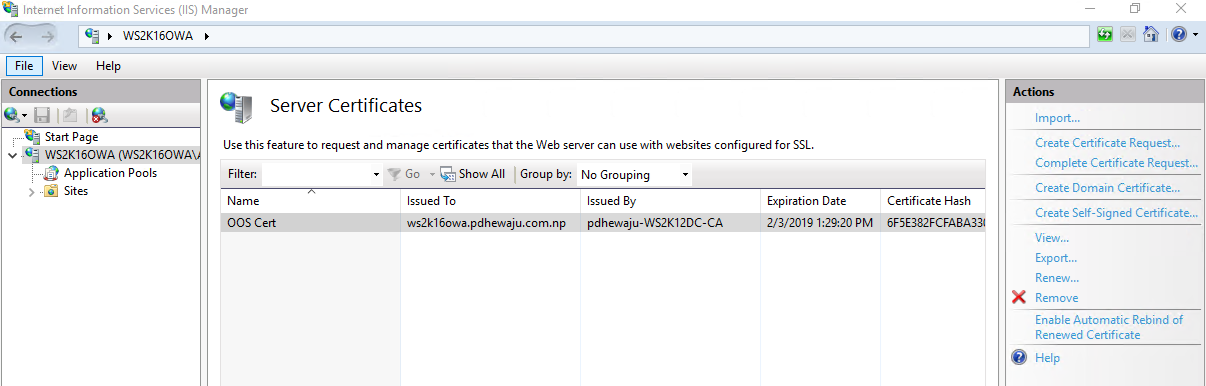
Now you can see your newly certificate on you ‘Server Certificates’.
To Configure the OOS, we just need to assign the newly created certificate for the OOS Farm with below cmdlet.
PS C:\Users\Administrator>New-OfficeWebAppsFarm -InternalURL "https://WS2K16OWA.pdhewaju.com.np" -ExternalURL "https://WS2K16OWA.pdhewaju.com.np" -CertificateName "OOS Cert"
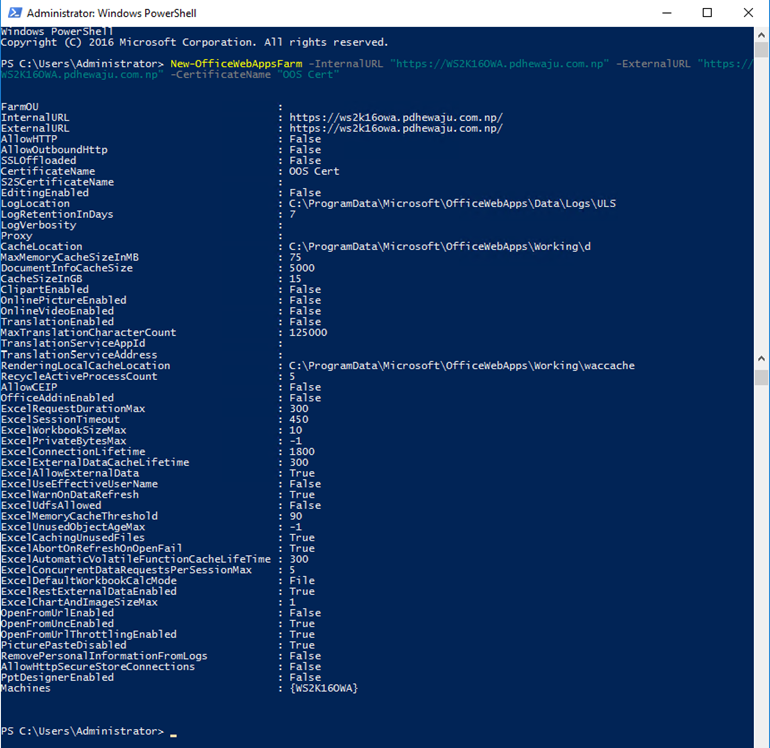
And now our OOS Server is installed and configured completely to integrate with other application like SharePoint, Exchange and Skype for Business.
Configuring OOS for Exchange 2016:
Configuring OOS itself is not worth unless we integrate it with any other application like SharePoint, Exchange and Skype for Business. Over here I will sharing my knowledge on how we can integrate OOS with Exchange 2016, also had share how we can troubleshoot few errors.
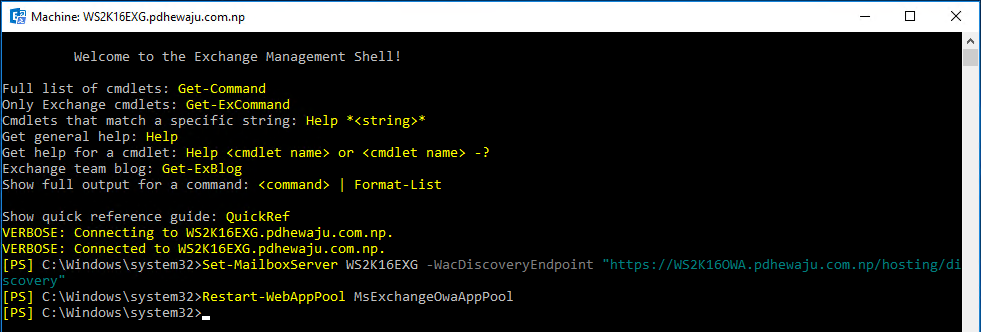
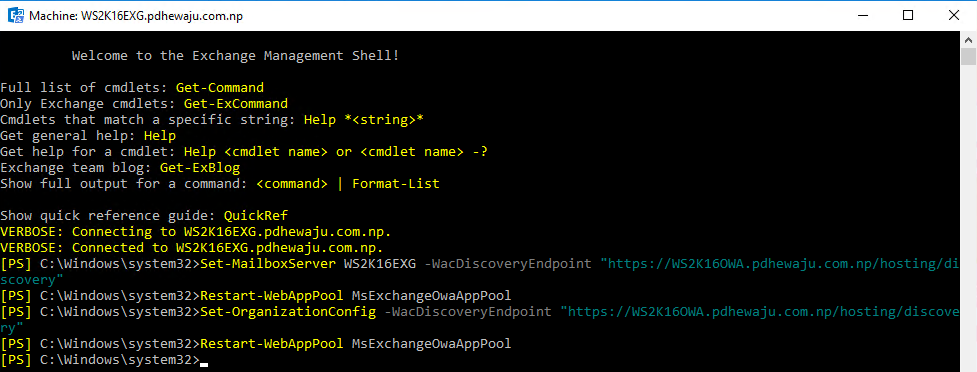
To configure OOS for Exchange 2016, open Exchange PowerShell and run below cmdlet to active WAC Discovery Endpoint. Basically, the link for the WAC Discovery Endpoint will be ‘https://<FQDN of OOS>/hosting/discovery’
[PS] C:\Windows\System32>Set-MailboxServer WS2K16EXG -WacDiscoveryEndpoint "https://WS2K16OWA.pdhewaju.com.np/hosting/discovery"
[PS] C:\Windows\System32>Restart-WebAppPool MsExchangeOwaAppPool
After configuration of WAC Discovery Endpoint for the Mailboxes, we need to configure it for the organization too. To configure WAC Discovery Endpoint for the Organization use below cmdlet.
[PS] C:\Windows\System32>Set-OrganizationConfig -WacDiscoveryEndpoint "https://WS2K16OWA.pdhewaju.com.np/hosting/discovery"
[PS] C:\Windows\System32>Restart-WebAppPool MsExchangeOwaAppPool
And it is all to bind the Office Online Server with Exchange Server 2016. Now let us move for the testing of the configuration.
Testing:
For the testing purpose, I have created two email address
demo@pdhewaju.com.np &
dm01@pdhewaju.com.np
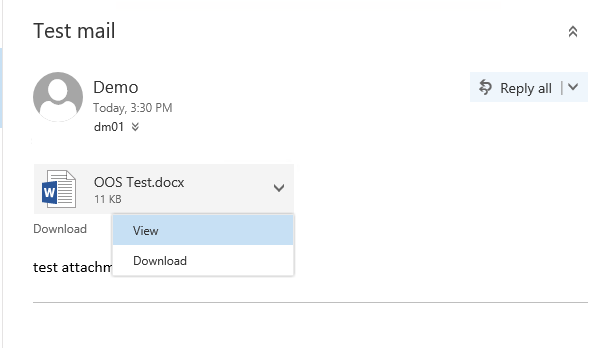
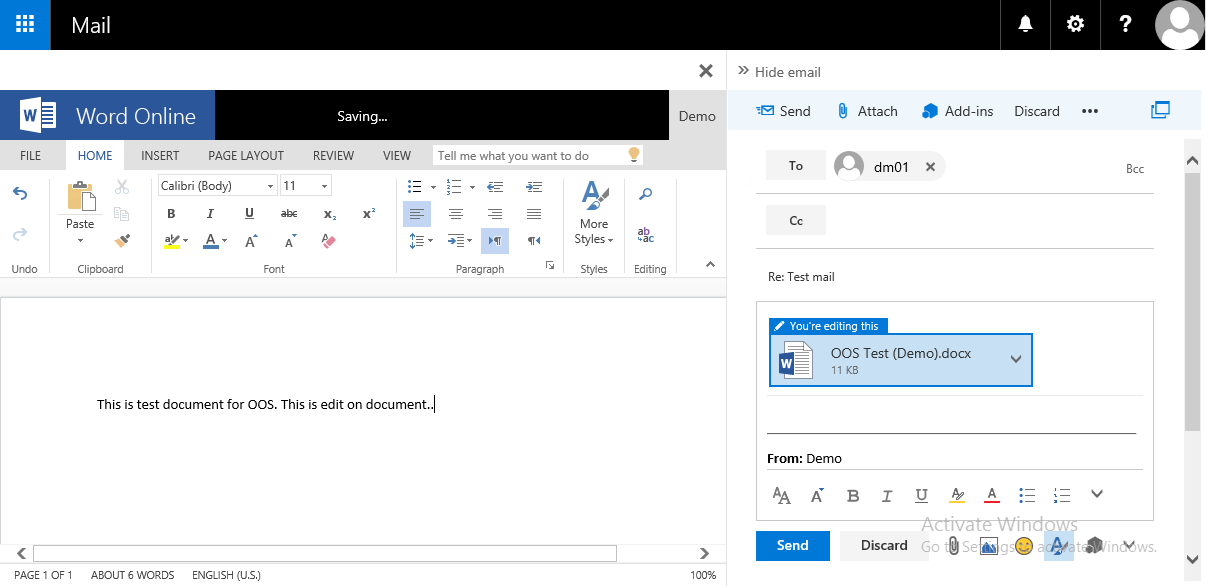
Over here I have attached a Word Document on an email and send it to the DM01 to check it. When I clicked on the dropdown of the attachment document, I can see two options ‘View’ and ‘Download’. This means my configuration is working.
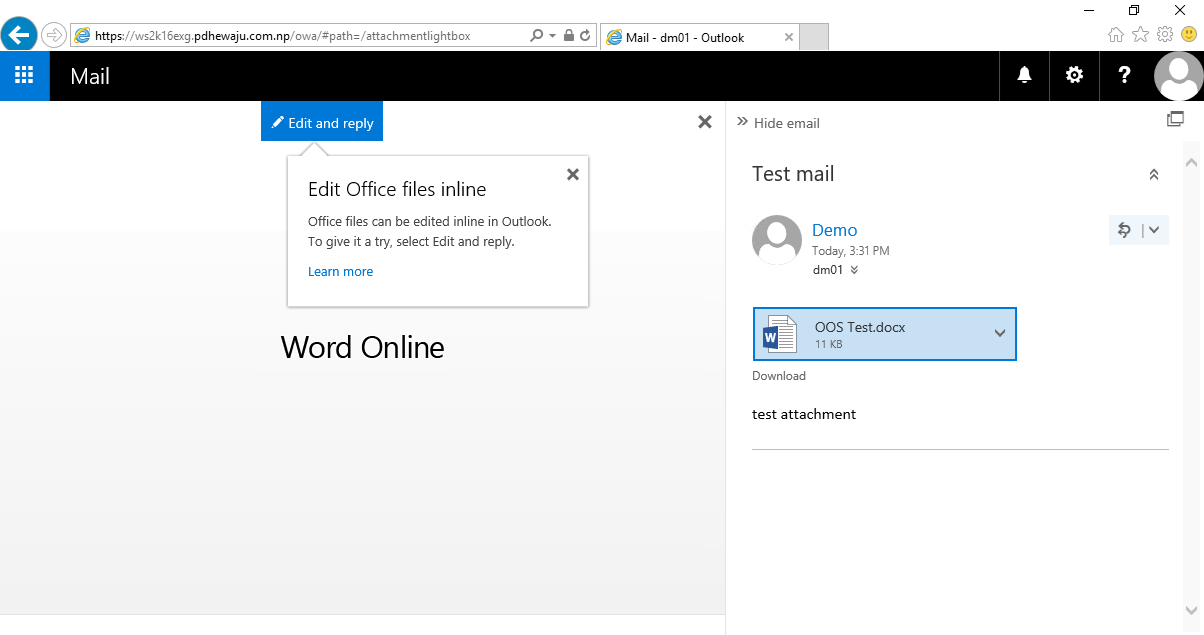
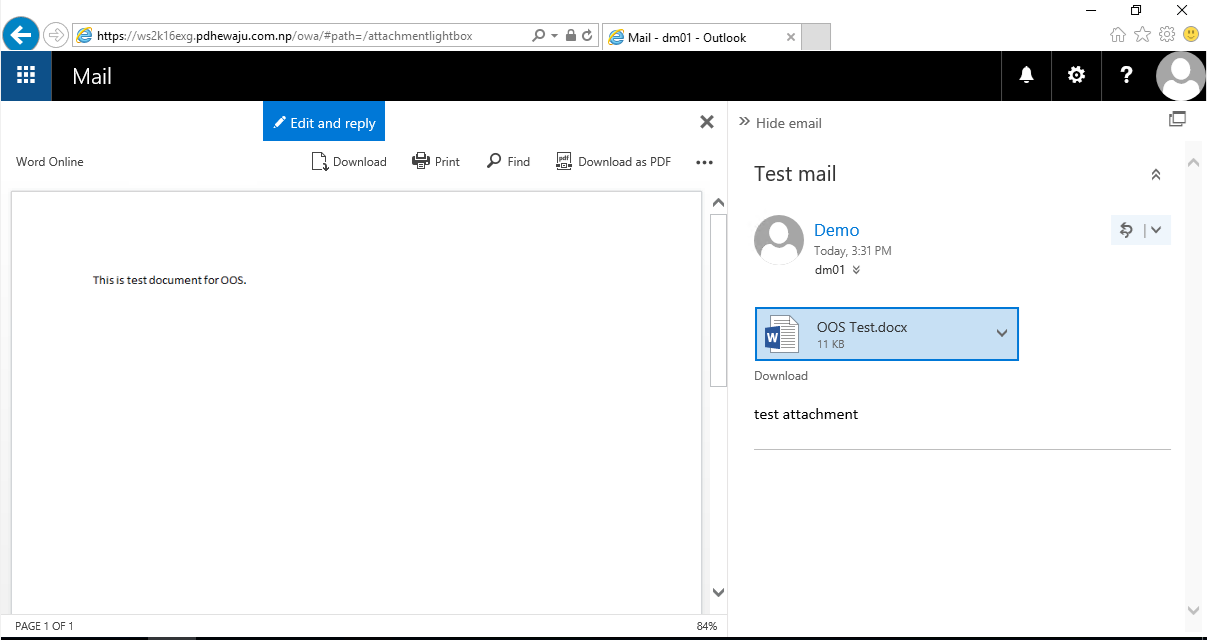
Once you click on ‘View’, you document will start to get open on Word Online which has been hosted by OOS Server.
But sometime you might get this kind of error ‘Sorry, there was a problem and we can’t open this document. If this happens again, try opening the document in Microsoft Word.’ To fix this error, get to this blog where I have posted the resolution for problem like this.

If everything goes right, you will be able to read and edit the document.
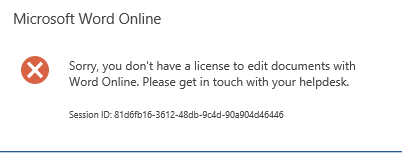
During the Edit of the document you might face this issue ‘Sorry, you don’t have a license to edit document with Word Online. Please get in touch with your helpdesk’. If this kind of error appears, please follow the instruction on this blog to resolve it.
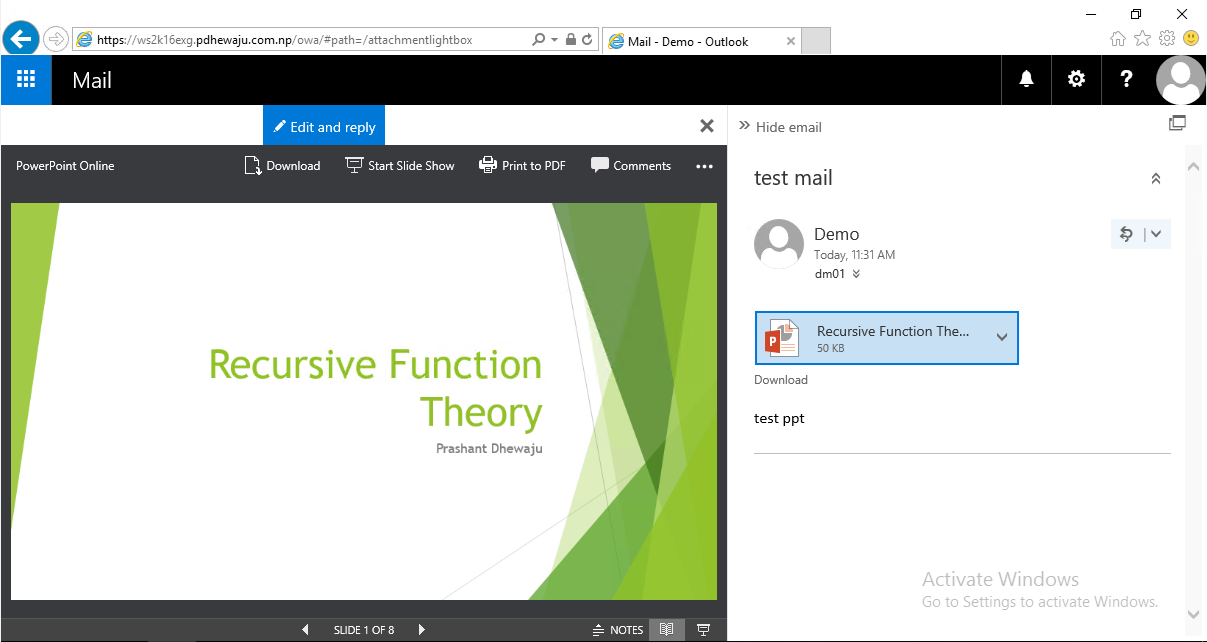
Similarly, you can edit and view other office documents too like PowerPoint and Excel.
I hope this was the easy configuration for the integration of Office Online Server with Exchange Server 2016. Please keep commenting for any issue you do have on this scenario. 🙂
This is Step 7 in my SharePoint 2013 Setup Guide
Installing Office Web Apps
Office Web Apps 2013 is a stand-alone server web application that provides capabilities to open and render a Microsoft Office Word, Excel, PowerPoint, or OneNote document as a web page. Microsoft SharePoint 2013, Exchange 2013, and Lync 2013 can share the rendering service to display Office documents in those applications as a web page. Additionally, when accessed from within a SharePoint 2013 farm, Office Web Apps also enables rich editing features for those documents.
Note: You cannot install Office Web Apps on the same server as SharePoint 2013
Please follow the server preparation process in the following sections for the appropriate server, either Windows Server 2008 R2 or Windows Server 2012.
Windows Server 2008 R2 Preparation
Start by installing the following prerequisite software for Windows Server 2008 R2:
- Windows Server 2008 R2 Service Pack 1
- .NET Framework 4.5
- Windows PowerShell 3.0
- KB2592525
Open a PowerShell command running as an Administrator and execute the following commands to install the required roles and services for Office Web Apps.
Import-Module ServerManager

## Run the following command as a single line

Add-WindowsFeature Web-Server,Web-WebServer,Web-Common-Http,Web-Static-Content,Web-App-Dev,Web-Asp-Net,Web-Net-Ext,Web-ISAPI-Ext,Web-ISAPI-Filter,Web-Includes,Web-Security,Web-Windows-Auth,Web-Filtering,Web-Stat-Compression,Web-Dyn-Compression,Web-Mgmt-Console,Ink-Handwriting,IH-Ink-Support
Please continue with the “Office Web Apps Installation” section below.
Windows Server 2012 Preparation
To begin, open a PowerShell command running as an Administrator and execute the following commands to install the required roles and services for Office Web Apps.
Add-WindowsFeature Web-Server,Web-Mgmt-Tools,Web-Mgmt-Console,Web-WebServer,Web-Common-Http,Web-Default-Doc,Web-Static-Content,Web-Performance,Web-Stat-Compression,Web-Dyn-Compression,Web-Security,Web-Filtering,Web-Windows-Auth,Web-App-Dev,Web-Net-Ext45,Web-Asp-Net45,Web-ISAPI-Ext,Web-ISAPI-Filter,Web-Includes,InkandHandwritingServices
Please continue with the “Office Web Apps Installation” section below.
Office Web Apps Installation
Open and run the Office Web Apps setup.exe media to launch the setup wizard.
- In the Office Web Apps Server 2013 Wizard, on the Read the Microsoft Software License Terms page, select I accept the terms of this agreement and then select Continue.
- On the Choose a file location page, select the folder where you want the Office Web Apps Server files to be installed (for example, C:\Program Files\Microsoft Office Web Apps), and then select Install Now. Note that, if this folder does not exist, Setup will create it for you.
The Choose a file location screen on the Office Web Apps install wizard. - When Setup finishes installing Office Web Apps Server, choose Close.
After installing the Office Web Apps 2013 server software, you are ready to install any additional add-ins and updates. You can also install any language packs your farm requires. To install the language packs, run the setup media for each of the language packs you desire.
If applicable, install the latest service pack Microsoft has released for Office Web Apps 2013 and then apply the latest service packs Microsoft has released for Office Web Apps 2013 language packs.
Finally, check for updates on Microsoft Update in the server’s control panel.
Configuring Office Web Apps
This section describes how to configure an Office Web Apps farm and join servers to it.
Important: Low memory conditions can cause Office document previews to fail in Office Web Apps. Verify that any servers that run Office Web Apps have sufficient memory.
On the first server for the Office Web Apps farm, execute the following PowerShell command to provision the farm:
New-OfficeWebAppsFarm -InternalUrl "https://office1.contoso.com" -ExternalUrl "https://office.contoso.com" -SSLOffloaded –EditingEnabled
The SSLOffloaded command switch configures Office Web Apps for hardware load-balancing, where the load-balancing device manages the SSL certificate and then relays the request to an Office Web Apps server over HTTP unencrypted traffic. This improves the overall performance but does require a secure network between the load-balancer and the Office Web Apps servers.
The following image provides an example of the expected output from the PowerShell command.
Critical: Before you can use the Office Web Apps farm, you must add your domain to the list of allowed hosts.
Run the following PowerShell command to add your domain to the list of allowed hosts, substituting your domain for “contoso.com.”
New-OfficeWebAppsHost -Domain contoso.com
Once you have provisioned an Office Web Apps farm and allowed your domain, you can join additional Office Web Apps servers to the farm. To join additional servers, install the Office Web Apps software by following the steps in the previous section and then execute the following PowerShell command.
New-OfficeWebAppsMachine –MachineToJoin “office1.contoso.com”
You can test the Office Web Apps configuration by navigating to this URL and verifying it displays a Web app Open Platform Interface (WOPI)-discovery XML file:
https://office.contoso.com/hosting/discovery
(replacing office.contoso.com with your OWA external domain)
Note: For more information on deploying and configuring Office Web Apps, please see this TechNet article: http://technet.microsoft.com/jj219455
Configuring the Windows Firewall for Office Web Apps Traffic
On each Office Web Apps 2013 Server, you will need to set a firewall rule to allow Office Web Apps inter-farm traffic and HTTP/HTTPS traffic. Alternatively, you can disable the Windows Firewall if you choose and if you have another firewall solution.
You can set the Windows Firewall rules by navigating to the Control Panel, then click System and Security, then click Windows Firewall, and finally click Advanced settings. In the Inbound Rules area, ensure that the server allows connections on port 80 (HTTP) and port 443 (HTTPS). Add the port for the Office Web Apps inter-farm communication by following these steps:
- In the Windows Firewall with Advanced Security window, click Inbound Rules.
- In the Actions panel, click New rule…
- In the New Inbound Rule Wizard window, select Ports as the Rule Type and click Next.
- Select TCP and enter “809” for the Specific local ports. Click Next.
Windows Firewall Port Rule for Office Web Apps communication - Click Next. On the Profile screen, uncheck Public and click Next.
- On the Name screen, enter “Office Web Apps Inter-Farm Communication” and click Finish.
Configuring a SharePoint 2013 Farm for Office Web Apps
Logon to the SharePoint application server that hosts Central Administration and open the SharePoint 2013 Management Shell (PowerShell), running it as an administrator. Next, enter the following PowerShell command:
New-SPWOPIBinding -ServerName “office1.contoso.com”
Run the following PowerShell command to enabled OAuth over HTTP.
$config = (get-spsecuritytokenserviceconfig)

$config.allowoauthoverhttp = $true

$config.update()
Run the following PowerShell command to change the WOPI zone to external-https.
Set-SPWOPIZone –zone “external-https”
Finally, verify that Office Web Apps is working by navigating to a SharePoint 2013 document library and verify that you can open a document as a web page.
Note: For more information on how to configure a SharePoint 2013 farm to use Office Web Apps and for troubleshooting information, please see this TechNet article: http://technet.microsoft.com/ff431687
Next, return to the main page of my SharePoint 2013 Setup Guide and complete the Next Steps Checklist.