
Step 1 — Download
Download Apache2.4
We are going to use the unofficial Windows binary from Apache Lounge. This version has performance and stability improvements over the official Apache distribution, although I am yet to notice a significant difference. However, it is provided as a manually installable ZIP file from
Download Apache2.4
Download PHP7.1
Download PHP7.1
Extract the PHP binary archive using your unzip utility; C:\php7 is a common location.
Copy php.ini-development or php.ini-production to php.ini
Download MariaDB
Download MariaDB 10.1
Download Visual C++ Redistributable (if required)
If Some Error with
- api-ms-win-crt-runtime-l1-1-0.dll missing
- vcruntime140.dll missing
To fix this error you need Visual C++ Redistributable for Visual Studio 2015.
Download Visual C++ Redistributable
Step 2 — Extract
We will install Apache in C:Apache2, so extract the ZIP file to the root of the C: drive.
Extract PHP7.1 to root C: drive
Step 3 — Installing Apache as a Service
rem # Or whatever path you unzipped the Apache files
cd "C:\Apache24\bin"
You can install Apache as a Windows NT service as follows from the command prompt at the Apache bin subdirectory:
rem #Command to install Apache 2.4 as a Windows Service
httpd.exe -k install
If you use the first command without any special parameters except -k install, the service will be called Apache2.4 and the configuration will be assumed to be conf\httpd.conf.
If you need to specify the name of the service you want to install, use the following command. You have to do this if you have several different service installations of Apache on your computer. If you specify a name during the install, you have to also specify it during any other -k operation.
httpd.exe -k install -n "Apache 2.4"
If you need to have specifically named configuration files for different services, you must use this:
httpd.exe -k install -n "Apache 2.4" -f "c:\files\my.conf"
Removing an Apache service is easy. Just use:
httpd.exe -k uninstall
The specific Apache service to be uninstalled can be specified by using:
httpd.exe -k uninstall -n "Apache 2.4"
Step 4 — Start Apache
Add this line in Apache24\config\httpd.conf at TOP
LoadModule php7_module C:/php7/php7apache2_4.dll

<IfModule php7_module>
    DirectoryIndex index.html index.php
    AddHandler application/x-httpd-php .php
    PHPIniDir "c:/php7"
</IfModule>
rem #Command to start the Apache Windows service
net start "Apache 2.4"
Step 4 — Hit localhost in Browser
Modify Apache24\htdocs\index.php
<?php
    echo phpinfo();
?>
Go to your browser and hit http://localhost or http://127.0.0.1
Step 4 and 1/2 — For Custom Location
Modify All c:\Apache24 to Drive:\Any\ in httpd.conf
which includes change your ServerRoot, DocumentRoot, cgi-bin, htdocs
Also PHP7 Location
Reference Apache2.4 Configuration
Step 5 — Installing Maria DB
Install Maria DB
References
With Pictures
Download
You can download the required installer via links given below:
- Apache for Windows: https://www.apachelounge.com/download/
- PHP 7 for Windows (select Thread Safe): https://windows.php.net/download/
- MariaDB for Windows: https://downloads.mariadb.org/
- FakeSMTP (needed for Windows) http://nilhcem.com/FakeSMTP/download.html
MariaDB
- Firstly install MariaDB server
- If you needed you can change port during installation process. If you changed it then you improve you must connection string in PHP.
Apache 2.4 server
Install the latest C++ Redistributable Visual Studio 2017: https://www.microsoft.com/en-in/download/details.aspx?id=48145
- Unzip downloaded Apache archive to the
C:\Apache24\(or somewhere else) directory. -
After unzipping, go to the folder
C:\Apache24\conf\and open thehttpd.conffile by any text editor. -
In this file change this line
# ServerName www.example.com:80with
httpd.confServerName localhost -
Find all occurrences of
AllowOverride None
and change them toAllowOverride All -
Enable mod_rewrite by uncomment following line
#LoadModule rewrite_module modules/mod_rewrite.so
Register Apache service
- open console and go to Apache directory
cd Apache24/bin - then type following command
httpd -k install - now you can see Apache service in Services
Some PRO tips
Change your DocumentRoot
- You can change default directory where Apache will be looking for websites
DocumentRoot "L:/"
<Directory "L:/">
    Options Indexes FollowSymLinks
    AllowOverride All
    Require all granted
</Directory>
Enter fullscreen mode
Exit fullscreen mode
Add custom virtual hosts w/ local domains
- You can also create virtual host with custom local domain for each your projects. Append following to
httpd.conffile (for each project):
<VirtualHost 127.0.0.1:80>
    ServerAdmin your.name@gmail.com
    DocumentRoot "L:/MyProject"
    ServerName www.myproject.loc
    ServerAlias myproject.loc
    ServerAlias www.myproject.lc
    ServerAlias myproject.lc
    ErrorLog "logs/myproject.log"
</VirtualHost>
Enter fullscreen mode
Exit fullscreen mode
- Then you must edit the
hostsfile, in Windows is located inC:\Windows\System32\drivers\etc. In this file append following line127.0.0.1 www.myproject.loc myproject.loc www.myproject.lc myproject.lc
Change Apache default port
- You can change default port where Apache server will be listen
- just change
Listen 80to e.g.Listen 8008 - and restart service
- just change
- From now you see your website on http://localhost:8008/
PHP
- Unzip downloaded PHP archive to the
C:\php7\(or somewhere else) directory. - Rename or copy
php-ini-development.initophp.ini - Open
php.iniand edit:- Find section Dynamic Extensions and uncomment extension which you want to load, here is listing good base of enabled extensions: bz2, curl, fileinfo, intl, imap, mbstring, mysqli, openssl, pdo_mysql, pdo_sqlite, sqlite3, xsl
- Then change SMTP port to
smtp_port = 2525
-
Add PHP in system environment variable.
- in cmd type
setx path "%PATH%, C:\php7" /M
- in cmd type
-
Open Apache configuration file (
c:\Apache24\conf\httpd.conf) again- and append following lines:
PHPIniDir "C:/PHP7"
AddHandler application/x-httpd-php .php
LoadModule php7_module "C:/PHP7/php7apache2_4.dll"
Enter fullscreen mode
Exit fullscreen mode
- Then change DirectoryIndex from
index.htmlto:
<IfModule dir_module>
    DirectoryIndex index.php
</IfModule>
Enter fullscreen mode
Exit fullscreen mode
FakeSMTP
- FakeSMTP is Java application which simulate SMTP server for local developing on Windows.
- You can start it with following command:
start java -jar C:\sw\faceSMTP\fakeSMTP-2.0.jar --start-server --background --port 2525 --bind-address 127.0.0.1 --output-dir L:\_emails - Or you can create command file (e.g.:
fakesmpt.cmd) with following content:
@echo off
start java -jar C:\sw\faceSMTP\fakeSMTP-2.0.jar --start-server --background --port 2525 --bind-address 127.0.0.1 --output-dir L:\_emails
exit
Enter fullscreen mode
Exit fullscreen mode
Основная моя ОС для работы это Windows 10, в нем есть замечательный инструмент Windows Subsystem for Linux на котором можно легко настроить окружение для веб-разработки на PHP.
Зачем это надо когда есть Докер?
- Докер под Windows все-таки работает медленно.
- Раньше мне приходилось постоянно работать с разными версиями PHP, MySQL и постоянно переключаться между ними, но за последний год я работаю с одной и той же версией PHP и MariaDB, поэтому можно настроить LAMP один раз и забыть про него.
Что у нас получится в итоге:
- Ubuntu 22.04
- Apache
- PHP 7.4 (или 8.1)
- MariaDB
- PhpMyAdmin
- Composer
Установка Apache
Начнем с установки веб сервера Apache, но для начала обновим список пакетов. Выполним поочередно 3 команды:
sudo apt update
sudo apt upgrade
sudo apt install apache2
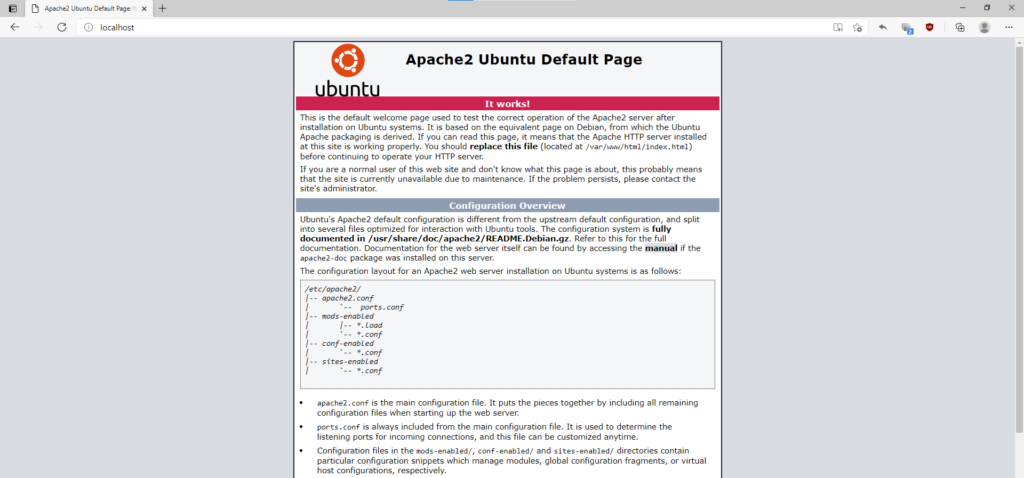
После установки, сразу попробуем запустить Апач и убедиться что все работает. Запускаем командой:
sudo service apache2 start
Далее переходим по адресу http://localhost/ и если видим приветственную страницу Apache, значит пока все делаем верно:
Далее создадим папку для наших веб-проектов. Эта папка должна быть за пределами файловой системы WSL. Например я создам ее по адресу d:\lamp-wsl, для этого выполним команду:
sudo mkdir /mnt/d/lamp-wsl
Создайте символьную ссылку на эту папку.
sudo ln -s /mnt/d/lamp-wsl /var/www/devroot
С помощью редактора Nano откроем файл конфигурации виртуального хоста Apache по умолчанию:
sudo nano /etc/apache2/sites-enabled/000-default.conf
И заменим его содержимое на:
<VirtualHost *:80>
    ServerName localhost
    ServerAdmin webmaster@localhost
    DocumentRoot  /var/www/devroot
    <Directory /var/www/>
        Options Indexes FollowSymLinks
        AllowOverride All
        Require all granted
    </Directory>
    ErrorLog ${APACHE_LOG_DIR}/error.log
    CustomLog ${APACHE_LOG_DIR}/access.log combined
</VirtualHost>
Чтобы в редакторе Nano вырезать весь текст до конца файла, нужно нажать сочетание клавиш Alt + Shift + T
Чтобы вставить текст из буфера, нажмите правую кнопку мыши.
Чтобы сохранить изменения и выйти из редактора Nano используйте сочетанием клавиш:
Ctrl+X
Если вы изменяли файл, то появится вопрос: «Save modified buffer (ANSWERING No Will DESTROY CHANGES)?». Нажмите клавишу y. Появится вопрос на ввод имени файла. Введите новое имя файла или просто нажмите Enter, если не хотите менять имя.
Теперь переходим в нашу папку для веб проектов, в моем случае d:\lamp-wsl и создадим файл для теста index.html:
<!DOCTYPE html>
<html lang="ru">
<head>
<meta charset="UTF-8">
<meta http-equiv="X-UA-Compatible" content="IE=edge">
<meta name="viewport" content="width=device-width, initial-scale=1.0">
<title>Document</title>
</head>
<body>
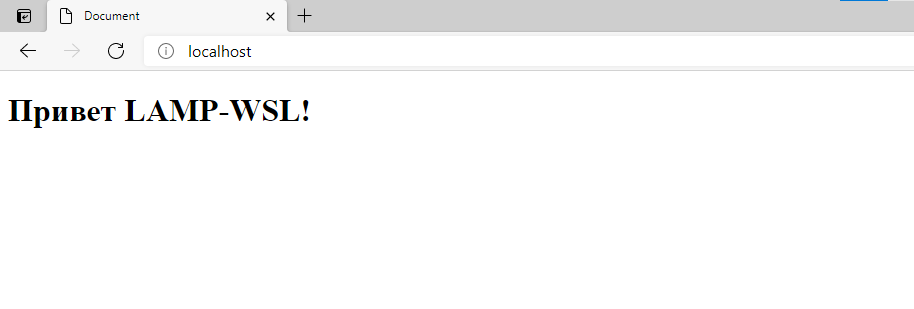
<h1>Привет LAMP-WSL!</h1>
</body>
</html>Теперь перезагружаем Apache командой:
sudo service apache2 restart
Обновляем http://localhost/ и теперь мы должны увидеть нашу тестовую страницу:
Пока не забыли, большинству проектов требуется модуль mod_rewrite поэтому включим его командой:
sudo a2enmod rewrite
И перезагрузим Апач
sudo service apache2 restart
Установка MariaDB
Можно вместо MariaDB установить MySQL, тем более она продолжает развиваться не смотря на те опасения, которые были, в результате чего и появилась MariaDB. Ниже я устанавливаю MariaDB из-за того, что про ее установку последнее время чаще спрашивают.
Итак, для установки выполним команду:
sudo apt install mariadb-server
После установки запустим MariaDB
sudo service mariadb start
И на последок выполнил скрипт для начальной настройки безопасности:
sudo mysql_secure_installation
На первый вопрос просто нажмите Enter
Следуйте инструкциям на экране, здесь важно установить root пароль. Когда будет вопрос «Set root password?» или «Change the root password?» ответьте Y и нажмите Enter.
На все остальные вопросы просто нажимайте Enter.
Установка PHP
Я установлю PHP версии 7.4 и несколько модулей к нему. Выполним команду:
sudo apt install php7.4 libapache2-mod-php7.4 php7.4-mysql php-common php7.4-cli php7.4-common php7.4-json php7.4-opcache php7.4-readline
Дополнение 30.06.2023
Чтобы установить PHP версии 8.1 на Ubuntu необходимо выполнить следующие команды:
sudo apt install -y lsb-release ca-certificates apt-transport-https software-properties-common gnupg2
echo "deb https://packages.sury.org/php/ $(lsb_release -sc) main" | sudo tee /etc/apt/sources.list.d/sury-php.listДалее:
wget -qO - https://packages.sury.org/php/apt.gpg | sudo gpg --dearmor -o /etc/apt/trusted.gpg.d/sury-keyring.gpg
sudo apt updateУстанавливаем PHP 8.1 с дополнениями:
sudo apt install php8.1 libapache2-mod-php8.1 php8.1-cli php8.1-fpm php8.1-pdo php8.1-mysql php8.1-zip php8.1-gd php8.1-mbstring php8.1-curl php8.1-xml php8.1-opcache
Перезагружаем Apache:
sudo service apache2 restart
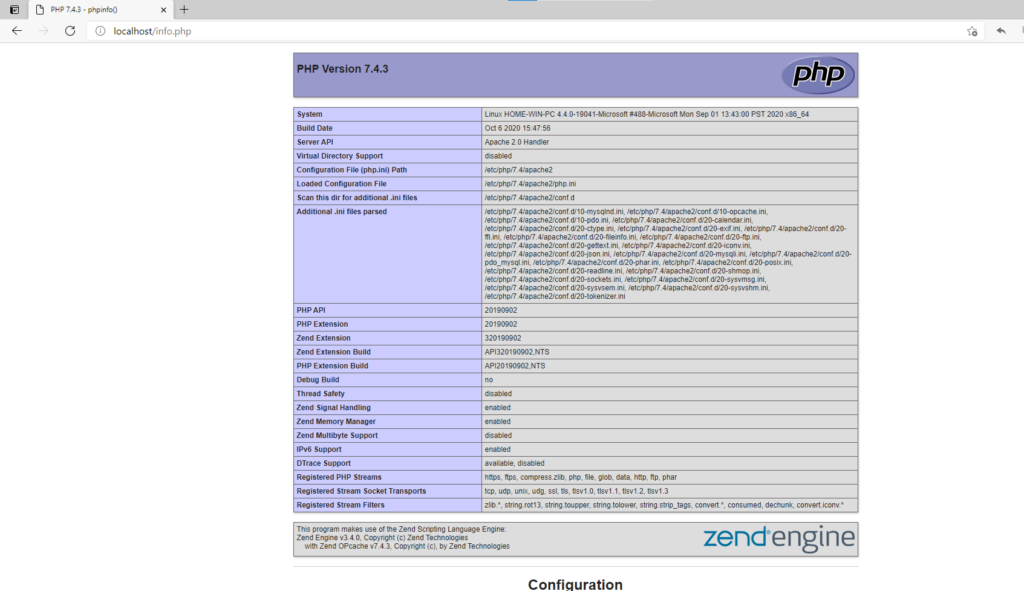
Далее в нашей папке d:\lamp-wsl и создадим файл info.php чтобы проверить работоспособность PHP, файл следующего содержания:
<?php
phpinfo();
Далее переходим по адресу http://localhost/info.php и, если не возникло никаких проблем, видим страницу с информацией о PHP:
На этом установка самого LAMP закончена, но добавим еще кое какие вещи для нашего удобства.
Устанавливаем phpMyAdmin
Выполняем команду:
sudo apt install phpmyadmin
Следуем указаниям:
На первом окне выбираем Apache (чтобы выбрать, нужно нажать пробел) и нажимаем Enter
На втором окне выбираем Yes и нажимаем Enter
Далее придумываем и вводим пароль для самого phpMyAdmin, кнопкой Tab выбираем Yes и нажимаем Enter
Установка завершена. Перезапускаем Apache
sudo service apache2 restart
Далее идем http://localhost/phpmyadmin/ и видим окно входа в phpMyAdmin
Возможная ошибка №1
Если вместо окна входа вы получили 404 ошибку, то скорее всего в первом шаге установки phpMyAdmin вы не выбрали Apache, исправить это можно следующими командами:
sudo ln -s /etc/phpmyadmin/apache.conf /etc/apache2/conf-available/phpmyadmin.conf
sudo a2enconf phpmyadmin
sudo systemctl reload apache2
Еще раз перезапустим Апач
sudo service apache2 restart
И пробуем еще раз зайти http://localhost/phpmyadmin/ , теперь должно сработать.
Возможная ошибка №2
Когда вы попытаетесь войти с логином root и паролем, которые вы установили на шаге инсталляции phpMyAdmin, то возможно вы получите следующую ошибку mysqli_real_connect(): (HY000/1698): Access denied for user ‘root’@’localhost’
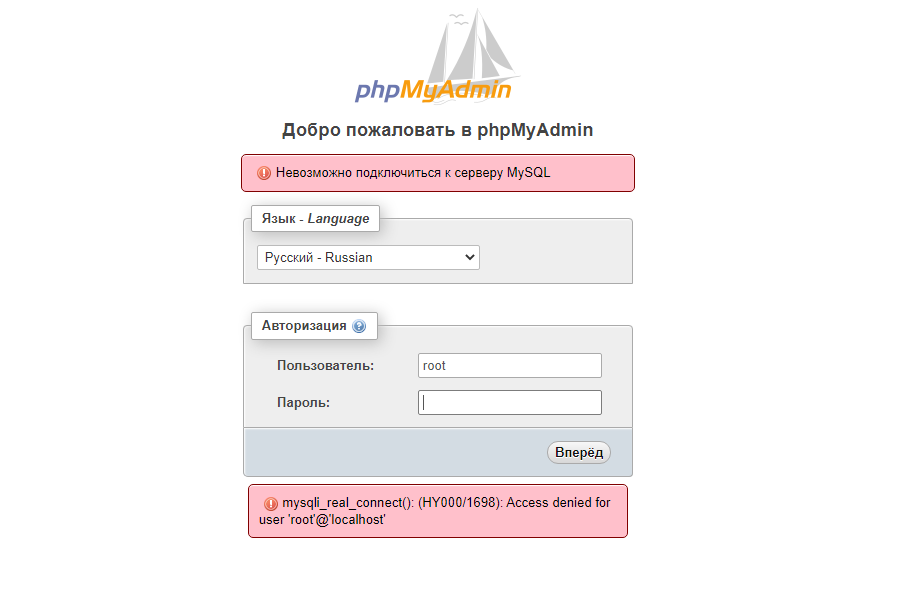
Чтобы решить эту ошибку, необходимо в терминале запустить поочередно следующие команды:
sudo mysql -p -u root
CREATE USER 'pmauser'@'localhost' IDENTIFIED BY 'ваш пароль';
GRANT ALL PRIVILEGES ON * . * TO 'pmauser'@'localhost';
FLUSH PRIVILEGES;
exit
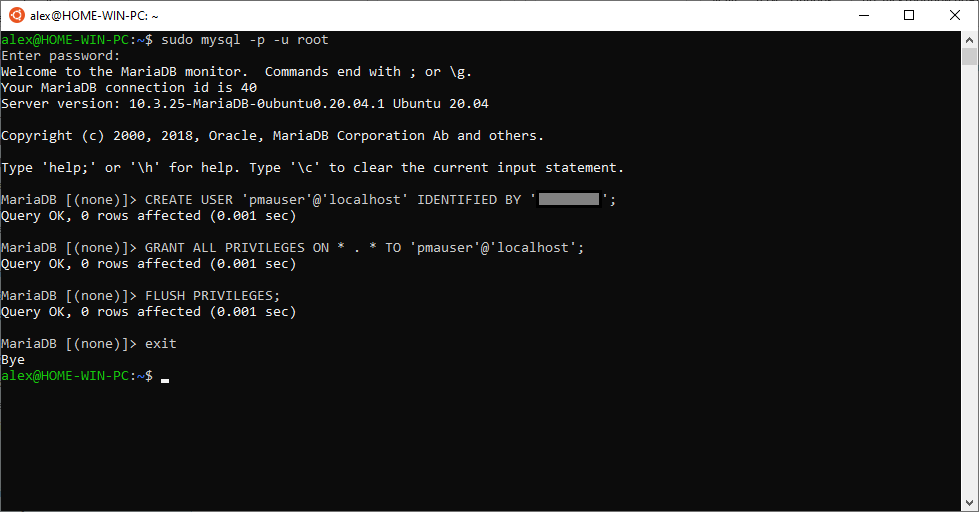
Теперь попробуйте зайти еще раз http://localhost/phpmyadmin, в качестве логина используем уже pmauser и пароль, которые вы ввели в командах выше.
Устанавливаем Composer
Установка Композера в WSL очень простая, в системе уже установлена утилита curl, поэтому воспользуемся ею:
curl -sS https://getcomposer.org/installer | php
Вот и все Попробуйте узнать версию композера, выполнив команду:
php composer.phar --version
Если хотите, чтобы Composer был установлен глобально нужно выполнить следующую команду:
sudo mv composer.phar /usr/local/bin/composer
Теперь версию можно посмотреть так:
composer --version
Создание тестовых доменов в WSL
Когда работаешь с несколькими проектами, удобней работать с ними использую отдельные домены типа http://myapp.loc/
Сейчас я покажу как такое организовать.
Для начала в нашей папке d:\lamp-wsl создадим каталог для проекта myapp. Это можно сделать или в обычном проводники или прямо из консоли WSL командой:
sudo mkdir /mnt/d/lamp-wsl/myapp
Далее с помощью редактора Nano добавим файл с настройкой виртуального хоста:
sudo nano /etc/apache2/sites-available/myapp.loc.conf
Добавим в него и сохраним следующее содержание:
<VirtualHost *:80>
	ServerName myapp.loc
	DocumentRoot /var/www/devroot/myapp
	<Directory /var/www/devroot/myapp/>
		Options Indexes FollowSymLinks
		AllowOverride All
		Require all granted
	</Directory>
	ErrorLog ${APACHE_LOG_DIR}/error.log
    CustomLog ${APACHE_LOG_DIR}/access.log combined
</VirtualHost>
Далее для подключения виртуального хоста используем команду:
sudo a2ensite myapp.loc
И перезапустим Апач
sudo service apache2 restart
И последним действием надо добавить запись в файл hosts расположенный в папке c:\windows\system32\drivers\etc
127.0.0.1 myapp.loc
Пробуйем http://myapp.loc/ все должно работать.
UPD. Как выяснилось при добавлении в файл hosts просто строки
127.0.0.1 myapp.locне всегда делает работоспособным домен myapp.loc. После небольшого гугления нашел решение тут WSL 2 Linux host cannot be accessed by a custom domain name or 127.0.0.1
Чтобы все заработало вместо этой строчки добавить следующие 2 строки:
127.0.0.1 myapp.loc
::1 myapp.loc localhost
Что еще…
В принципе все готово, можно спокойно работать. Пока единственное неудобство то, что при запуске WSL приходится вручную запускать Apache и MariaDB. Как только придумаю как сделать запуск автоматически, сразу дополню. Если кто-то знает как это решить, поделитесь.
wsl
Setting up a local PHP development environment is an important step for any PHP developer. It enables you to test and debug your code on your own computer rather than a live web server. This post will help you through the steps of creating a PHP local development environment on a Windows, Mac, or Linux workstation.
Install a web server
The first step in creating a local development environment for PHP is to install a web server. The most often used web servers for PHP programming are Apache and Nginx. Apache is the most popular web server and is included in the XAMPP and WAMP packages. Nginx is a more current web server that is gaining popularity, particularly for high-traffic websites.
Install PHP
Once you have a web server installed, the next step is to install PHP. You can download the latest version of PHP from the official website (https://windows.php.net/download/). Once downloaded, you can install the package by following the prompts.
Install a Database
PHP is frequently used with a database management system, such as MySQL or MariaDB. To store data for your PHP apps, you will need to install one of these systems. MySQL and MariaDB may both be downloaded from their respective websites (https://www.mysql.com/downloads/ and https://mariadb.org/download/).
You should also install a PHP development environment to make development easier. A development environment is a piece of software that has a collection of tools for authoring, debugging, and testing PHP code. Eclipse, NetBeans, and PhpStorm are some common options.
XAMPP and WAMP
Using a pre-configured package like XAMPP or WAMP instead of manually installing a web server, PHP, and a database is one option. XAMPP is an open-source and free package that contains Apache, PHP, and MariaDB. WAMP is a Windows-only package that includes Apache, PHP, and MySQL. Both XAMPP and WAMP are simple to install and configure, making them excellent choices for newcomers.
We will walk you through the process of setting up XAMPP on your local machine.
Download and Install XAMPP
The first step is to download the latest version of XAMPP from the official website (https://www.apachefriends.org/index.html). Once downloaded, run the installer and follow the on-screen instructions to install XAMPP on your PC.
Start XAMPP
After the installation is finished, launch XAMPP by using the control panel program. This may be located in your Start menu (Windows) or Applications folder in the XAMPP folder (Mac). You may start the Apache and MariaDB services after the control panel is open by clicking the “Start” button next to each service.
Configure PHP and Apache
XAMPP always utilizes the most recent version of PHP. If you wish to use a different version of PHP, you may tell XAMPP to use it by modifying the PHP configuration file (php.ini). This file may be located in the XAMPP installation directory’s “php” subdirectory. You may also customize Apache by modifying the httpd.conf file, which is stored in the XAMPP installation directory’s “apache” subdirectory. This file includes the Apache web server’s configuration parameters, such as the document root and virtual hosts.
Test your Setup
After you have finished installing and configuring XAMPP, you should test it to ensure that everything is operating properly. With the following code, you can construct a basic PHP file:
Save the file as info.php and store it in Apache’s document root directory, which is normally in the XAMPP installation directory/htdocs. After that, navigate to http://localhost/info.php in your web browser to access the file. If everything is in order, you should see a page with information about your PHP installation.
Troubleshoot
If you encounter any problems during the setup process, there are several things you can check. Make sure that the Apache and MariaDB services are running, check your PHP and Apache configuration files for any errors, and ensure that your PHP and database versions are compatible.
In conclusion, setting up a local development environment for PHP is an essential step for any PHP developer. It allows you to test and debug your code on your own computer, without the need for a live web server. This guide has walked you through the process of setting up a local development environment for PHP on Windows, Mac, or Linux machines, including installing a web server, PHP, a database, and a development environment. With the help of pre-configured packages like XAMPP and WAMP, it’s easy to set up the development environment.
Q&A
Q: What are the steps to setting up a local development environment for PHP?
A: The steps to setting up a local development environment for PHP include:
- Install a web server (such as Apache or Nginx)
- Install PHP
- Install a database management system (such as MySQL or MariaDB)
- Install a PHP development environment (such as Eclipse, NetBeans, or PhpStorm)
- Alternatively, you can use a pre-configured package such as XAMPP or WAMP.
Q: What are the most popular web servers for PHP development?
A: The most popular web servers for PHP development are Apache and Nginx. Apache is the most widely used web server, while Nginx is becoming increasingly popular for high-traffic websites.
Q: Where can I download the latest version of PHP?
A: The latest version of PHP can be downloaded from the official website: https://windows.php.net/download/
Q: What is XAMPP and WAMP?
A: XAMPP and WAMP are packages that include Apache, PHP, and a database management system (MariaDB or MySQL respectively). They are simple to install and configure, making them an excellent choice for novices.
Q: How can I test my PHP setup?
A: You can test your PHP setup by creating a simple PHP file with the following code:
Save the file as info.php and store it in Apache’s document root directory, then navigate to http://localhost/info.php in your web browser. If everything is in order, you should see a page with information about your PHP installation.
Q: What should I do if I encounter problems during the setup process?
A: Check the Apache and PHP log files, double-check your configuration settings, and ensure that no other services are utilizing the same port as your web server if you run into issues throughout the setup process.
PUBLISHED ON: FEBRUARY 27, 2023
Apache, PHP, MariaDB and FakeSMTP are essential tools for web development on a Windows machine. Apache is a web server that allows you to host your own websites and applications, PHP is a popular programming language used for server side scripting, MariaDB is a database management system, and FakeSMTP is a Java application that simulates an SMTP server for local development. .
This tutorial will walk you through the process of installing and configuring these tools on your Windows computer.
Prerequisites
Before you begin, you’ll need to download the following installers:
- Apache for Windows: https://apachelounge.com/download/
- PHP 7 for Windows (select Thread Safe): https://windows.php.net/download/
- MariaDB for Windows: https://mariadb.org/download/
- FakeSMTP (required for Windows): http://nilhcem.com/FakeSMTP/download.html
You will also need to install the latest C++ Redistributable for Visual Studio 2017, which can be downloaded from https://microsoft.com/en-in/download/details.aspx?id=48145.
Installing MariaDB/MySQL in Windows
- Install the MariaDB server by running the downloaded installer.
- If necessary, you can change the port during the installation process. If you change the port, you’ll need to update the connection string in PHP.
Installing the Apache Server in Windows
- Unzip the downloaded Apache archive into the
C:\Apachedirectory (or another location). - Go to the
C:\Apache\confdirectory and open thehttpd.conffile in a text editor. - In the «httpd.conf» file, change the line
# ServerName www.domain.com:80toServerName localhost. - Find all occurrences of
AllowOverride Noneand change them toAllowOverride All. - Enable
mod_rewriteby uncommenting the line#LoadModule rewrite_module modules/mod_rewrite.so. - To register Apache as a service, open the powershell and go to the Apache directory (for example,
C:\Apache24bin) and enter the commandhttpd -k install. Apache will now appear in the Services list.
Apache customization
Change the document root
You can change the default directory in which Apache looks for websites by looking for the DocumentRoot and Directory lines in the httpd.conf file and changing the directory path to the desired location. For instance:
DocumentRoot "F:/"
<Directory "F:/">
    Options Indexes FollowSymLinks
    AllowOverride All
    Require all granted
</Directory>
Creating virtual hosts with custom local domains
You can create virtual hosts with custom local domains for each of your projects by adding a VirtualHost block to the httpd.conf file for each project. For instance:
<VirtualHost 127.0.0.1:80>
    ServerAdmin user.name@mail.com
    DocumentRoot "F:/public_html"
    ServerName www.domain.com
    ServerAlias domain.com
    ServerAlias www.domain.co
    ServerAlias domain.co
    ErrorLog "logs/domain.log"
<VirtualHost>
PHP installation in Windows
- Unzip the downloaded PHP file into the
C:\php7directory (or a different location). - Rename or copy «php-ini-development.ini» to «php.ini».
- Open «
php.ini» and find the «Dynamic Extensions» section. Uncomment the extensions you want to load (for example, bz2, curl, fileinfo, intl, imap, mbstring, mysqli, openssl, pdo_mysql, pdo_sqlite, sqlite3, xsl). - Change the SMTP port to 2525.
- To add PHP to system environment variables, open the shell and enter the command
setx path "%PATH%, C:\php7" /M. - To configure Apache to use PHP, open the Apache configuration file (for example,
C:\Apache24\conf\httpd.conf) and add the linesPHPIniDir "C:/PHP7",AddHandler application/x-httpd -php .phpandLoadModule php7_module "C:/PHP7/php7apache2_4.dll". - In the «DirectoryIndex» section of the httpd.conf file, change the
DirectoryIndex index.htmlline toDirectoryIndex index.php.
Installing FakeSMTP in Windows
FakeSMTP is a Java application that simulates an SMTP server for local development on Windows. To install FakeSMTP:
- Download and unzip the FakeSMTP application to your desired location (for example,
C:\FakeSMTP). - To start FakeSMTP, open the console and go to the FakeSMTP directory (for example,
C:\FakeSMTP) and execute this commandjava -jar fakeSMTP-2.0.jar --start-server --background --port 2525 --bind- address 127.0 .0.1 --output-dir L:\_email.
Alternatively, you can create a command file (e.g. «fakesmpt.cmd») with the following content:
@echo off
start java -jar C:\FakeSMTP\fakeSMTP-2.0.jar --start-server --background --port 2525 --bind-address 127.0.0.1 --output-dir L:\_emails
So, to start FakeSMTP, simply double click on the «fakesmpt.cmd» file.
Conclusion
By following the steps in this tutorial, you should now have Apache, PHP, MariaDB, and FakeSMTP installed and configured on your Windows computer. You can now start developing and hosting your own websites and applications using these tools.