
Note
This module is part of the ansible.windows collection (version 2.8.0).
You might already have this collection installed if you are using the ansible package.
It is not included in ansible-core.
To check whether it is installed, run ansible-galaxy collection list.
To install it, use: ansible-galaxy collection install ansible.windows.
To use it in a playbook, specify: ansible.windows.win_package.
Synopsis
-
Installs or uninstalls software packages for Windows.
-
Supports
.exe,.msi,.msp,.appx,.appxbundle,.msix, and.msixbundle. -
These packages can be sourced from the local file system, network file share or a url.
-
See provider for more info on each package type that is supported.
Parameters
|
Parameter |
Comments |
|---|---|
|
arguments any |
Any arguments the installer needs to either install or uninstall the package. If the package is an MSI do not supply the This is only used for the Can be a list of arguments and the module will escape the arguments as necessary, it is recommended to use a string when dealing with MSI packages due to the unique escaping issues with msiexec. When using a list of arguments each item in the list is considered to be a single argument. As such, if an argument in the list contains a space then Ansible will quote this to ensure that this is seen by Windows as a single argument. Should this behaviour not be what is required, the argument should be split into two separate list items. See the examples section for more detail. |
|
chdir path |
Set the specified path as the current working directory before installing or uninstalling a package. This is only used for the |
|
checksum string added in ansible.windows 2.8.0 |
If a checksum is passed to this parameter, the digest of the package will be calculated before executing it to verify that the path or downloaded file has the expected contents. |
|
checksum_algorithm string added in ansible.windows 2.8.0 |
Specifies the hashing algorithm used when calculating the checksum of the path provided. Choices:
|
|
client_cert string |
The path to the client certificate (.pfx) that is used for X509 authentication. This path can either be the path to the The WinRM connection must be authenticated with Other authentication types can set client_cert_password when the cert is password protected. |
|
client_cert_password string |
The password for client_cert if the cert is password protected. |
|
creates_path path |
Will check the existence of the path specified and use the result to determine whether the package is already installed. You can use this in conjunction with |
|
creates_service string |
Will check the existing of the service specified and use the result to determine whether the package is already installed. You can use this in conjunction with |
|
creates_version string |
Will check the file version property of the file at
You can use this in conjunction with |
|
expected_return_code list / elements=integer |
One or more return codes from the package installation that indicates success. The return codes are read as a signed integer, any values greater than 2147483647 need to be represented as the signed equivalent, i.e. To convert a unsigned number to the signed equivalent you can run “[Int32](“0x{0:X}” -f ([UInt32]3221225477))”. A return code of This is only used for the Default: |
|
follow_redirects string |
Whether or the module should follow redirects.
When following a redirected URL, the Choices:
|
|
force_basic_auth boolean |
By default the authentication header is only sent when a webservice responses to an initial request with a 401 status. Since some basic auth services do not properly send a 401, logins will fail. This option forces the sending of the Basic authentication header upon the original request. Choices:
|
|
dictionary |
Extra headers to set on the request. This should be a dictionary where the key is the header name and the value is the value for that header. |
|
http_agent string |
Header to identify as, generally appears in web server logs. This is set to the Default: |
|
log_path path |
Specifies the path to a log file that is persisted after a package is installed or uninstalled. This is only used for the When omitted, a temporary log file is used instead for those providers. This is only valid for MSI files, use |
|
maximum_redirection integer |
Specify how many times the module will redirect a connection to an alternative URI before the connection fails. If set to Default: |
|
path string |
Location of the package to be installed or uninstalled. This package can either be on the local file system, network share or a url. When If If |
|
product_id string |
The product id of the installed packaged. This is used for checking whether the product is already installed and getting the uninstall information if For msi packages, this is the For msp packages, this is the For msix packages, this is the For registry (exe) packages, this is the registry key name under the registry paths specified in provider. This value is ignored if This SHOULD be set when the package is an |
|
provider string |
Set the package provider to use when searching for a package. The The The The The Choices:
|
|
proxy_password string |
The password for proxy_username. |
|
proxy_url string |
An explicit proxy to use for the request. By default, the request will use the IE defined proxy unless use_proxy is set to |
|
proxy_use_default_credential boolean |
Uses the current user’s credentials when authenticating with a proxy host protected with Proxies that use The module will only have access to the user’s credentials if using If not using Choices:
|
|
proxy_username string |
The username to use for proxy authentication. |
|
state string |
Whether to install or uninstall the package. The module uses product_id to determine whether the package is installed or not. For all providers but Choices:
|
|
url_method string |
The HTTP Method of the request. |
|
url_password string |
The password for url_username. |
|
url_timeout integer |
Specifies how long the request can be pending before it times out (in seconds). Set to Default: |
|
url_username string |
The username to use for authentication. |
|
use_default_credential boolean |
Uses the current user’s credentials when authenticating with a server protected with Sites that use The module will only have access to the user’s credentials if using If not using Choices:
|
|
use_proxy boolean |
If Choices:
|
|
validate_certs boolean |
If This should only be used on personally controlled sites using self-signed certificates. Choices:
|
|
wait_for_children boolean added in ansible.windows 1.3.0 |
The module will wait for the process it spawns to finish but any processes spawned in that child process as ignored. Set to This is useful if the install/uninstaller is just a wrapper which then calls the actual installer as its own child process. When this option is This should not be required for most installers and setting to Requires Windows Server 2012 or Windows 8 or newer to use. Choices:
|
Notes
Note
-
When
state=absentand the product is an exe, the path may be different from what was used to install the package originally. If path is not set then the path used will be what is set underQuietUninstallStringorUninstallStringin the registry for that product_id. -
By default all msi installs and uninstalls will be run with the arguments
/log, /qn, /norestart. -
All the installation checks under
product_idandcreates_*add together, if one fails then the program is considered to be absent.
See Also
Examples
- name: Install the Visual C thingy
  ansible.windows.win_package:
    path: http://download.microsoft.com/download/1/6/B/16B06F60-3B20-4FF2-B699-5E9B7962F9AE/VSU_4/vcredist_x64.exe
    product_id: '{CF2BEA3C-26EA-32F8-AA9B-331F7E34BA97}'
    arguments: /install /passive /norestart

- name: Install Visual C thingy with list of arguments instead of a string
  ansible.windows.win_package:
    path: http://download.microsoft.com/download/1/6/B/16B06F60-3B20-4FF2-B699-5E9B7962F9AE/VSU_4/vcredist_x64.exe
    product_id: '{CF2BEA3C-26EA-32F8-AA9B-331F7E34BA97}'
    arguments:
      - /install
      - /passive
      - /norestart

- name: Install MSBuild thingy with arguments split to prevent quotes
  ansible.windows.win_package:
    path: https://download.visualstudio.microsoft.com/download/pr/9665567e-f580-4acd-85f2-bc94a1db745f/vs_BuildTools.exe
    product_id: '{D1437F51-786A-4F57-A99C-F8E94FBA1BD8}'
    arguments:
      - --norestart
      - --passive
      - --wait
      - --add
      - Microsoft.Net.Component.4.6.1.TargetingPack
      - --add
      - Microsoft.Net.Component.4.6.TargetingPack

- name: Install Remote Desktop Connection Manager from msi with a permanent log
  ansible.windows.win_package:
    path: https://download.microsoft.com/download/A/F/0/AF0071F3-B198-4A35-AA90-C68D103BDCCF/rdcman.msi
    product_id: '{0240359E-6A4C-4884-9E94-B397A02D893C}'
    state: present
    log_path: D:\logs\vcredist_x64-exe-{{lookup('pipe', 'date +%Y%m%dT%H%M%S')}}.log

- name: Install Application from msi with multiple properties for installer
  ansible.windows.win_package:
    path: C:\temp\Application.msi
    state: present
    arguments: >-
      SERVICE=1
      DBNAME=ApplicationDB
      DBSERVER=.\SQLEXPRESS
      INSTALLDIR="C:\Program Files (x86)\App lication\App Server"

- name: Install Microsoft® SQL Server® 2019 Express (DPAPI example)
  ansible.windows.win_package:
    path: C:\temp\SQLEXPR_x64_ENU\SETUP.EXE
    product_id: Microsoft SQL Server SQL2019
    arguments:
      - SAPWD=VeryHardPassword
      - /ConfigurationFile=C:\temp\configuration.ini
  become: true
  vars:
    ansible_become_method: runas
    ansible_become_user: "{{ user }}"
    ansible_become_pass: "{{ password }}"

- name: Uninstall Remote Desktop Connection Manager
  ansible.windows.win_package:
    product_id: '{0240359E-6A4C-4884-9E94-B397A02D893C}'
    state: absent

- name: Install Remote Desktop Connection Manager locally omitting the product_id
  ansible.windows.win_package:
    path: C:\temp\rdcman.msi
    state: present

- name: Uninstall Remote Desktop Connection Manager from local MSI omitting the product_id
  ansible.windows.win_package:
    path: C:\temp\rdcman.msi
    state: absent

# 7-Zip exe doesn't use a guid for the Product ID
- name: Install 7zip from a network share with specific credentials
  ansible.windows.win_package:
    path: \\domain\programs\7z.exe
    product_id: 7-Zip
    arguments: /S
    state: present
  become: true
  become_method: runas
  become_flags: logon_type=new_credential logon_flags=netcredentials_only
  vars:
    ansible_become_user: DOMAIN\User
    ansible_become_password: Password

- name: Install 7zip and use a file version for the installation check
  ansible.windows.win_package:
    path: C:\temp\7z.exe
    creates_path: C:\Program Files\7-Zip\7z.exe
    creates_version: 16.04
    state: present

- name: Uninstall 7zip from the exe
  ansible.windows.win_package:
    path: C:\Program Files\7-Zip\Uninstall.exe
    product_id: 7-Zip
    arguments: /S
    state: absent

- name: Uninstall 7zip without specifying the path
  ansible.windows.win_package:
    product_id: 7-Zip
    arguments: /S
    state: absent

- name: Install application and override expected return codes
  ansible.windows.win_package:
    path: https://download.microsoft.com/download/1/6/7/167F0D79-9317-48AE-AEDB-17120579F8E2/NDP451-KB2858728-x86-x64-AllOS-ENU.exe
    product_id: '{7DEBE4EB-6B40-3766-BB35-5CBBC385DA37}'
    arguments: '/q /norestart'
    state: present
    expected_return_code: [0, 666, 3010]

- name: Install a .msp patch
  ansible.windows.win_package:
    path: C:\Patches\Product.msp
    state: present

- name: Remove a .msp patch
  ansible.windows.win_package:
    product_id: '{AC76BA86-A440-FFFF-A440-0C13154E5D00}'
    state: absent

- name: Enable installation of 3rd party MSIX packages
  ansible.windows.win_regedit:
    path: HKLM:\SOFTWARE\Microsoft\Windows\CurrentVersion\AppModelUnlock
    name: AllowAllTrustedApps
    data: 1
    type: dword
    state: present

- name: Install an MSIX package for the current user
  ansible.windows.win_package:
    path: C:\Installers\Calculator.msix  # Can be .appx, .msixbundle, or .appxbundle
    state: present

- name: Uninstall an MSIX package using the product_id
  ansible.windows.win_package:
    product_id: InputApp
    state: absent
Return Values
Common return values are documented here, the following are the fields unique to this module:
|
Key |
Description |
|---|---|
|
checksum string added in ansible.windows 2.8.0 |
<algorithm> checksum of the package Returned: checksum_algorithm is set, package exists, and not check mode Sample: |
|
log string |
The contents of the MSI or MSP log. Returned: installation/uninstallation failure for MSI or MSP packages Sample: |
|
rc integer |
The return code of the package process. Returned: change occurred Sample: |
|
reboot_required boolean |
Whether a reboot is required to finalise package. This is set to true if the executable return code is 3010. Returned: always Sample: |
|
stderr string |
The stderr stream of the package process. Returned: failure during install or uninstall Sample: |
|
stdout string |
The stdout stream of the package process. Returned: failure during install or uninstall Sample: |
Collection links
- Issue Tracker
- Repository (Sources)
When using Ansible to manage Windows, many of the syntax and rules that apply
for Unix/Linux hosts also apply to Windows, but there are still some differences
when it comes to components like path separators and OS-specific tasks.
This document covers details specific to using Ansible for Windows.
Use Cases
Ansible can be used to orchestrate a multitude of tasks on Windows servers.
Below are some examples and info about common tasks.
Installing Software
There are three main ways that Ansible can be used to install software:
-
Using the
win_chocolateymodule. This sources the program data from the default
public Chocolatey repository. Internal repositories can
be used instead by setting thesourceoption. -
Using the
win_packagemodule. This installs software using an MSI or .exe installer
from a local/network path or URL. -
Using the
win_commandorwin_shellmodule to run an installer manually.
The win_chocolatey module is recommended since it has the most complete logic for checking to see if a package has already been installed and is up-to-date.
Below are some examples of using all three options to install 7-Zip:
# Install/uninstall with chocolatey
- name: Ensure 7-Zip is installed through Chocolatey
  win_chocolatey:
    name: 7zip
    state: present

- name: Ensure 7-Zip is not installed through Chocolatey
  win_chocolatey:
    name: 7zip
    state: absent

# Install/uninstall with win_package
- name: Download the 7-Zip package
  win_get_url:
    url: https://www.7-zip.org/a/7z1701-x64.msi
    dest: C:\temp\7z.msi

- name: Ensure 7-Zip is installed through win_package
  win_package:
    path: C:\temp\7z.msi
    state: present

- name: Ensure 7-Zip is not installed through win_package
  win_package:
    path: C:\temp\7z.msi
    state: absent

# Install/uninstall with win_command
- name: Download the 7-Zip package
  win_get_url:
    url: https://www.7-zip.org/a/7z1701-x64.msi
    dest: C:\temp\7z.msi

- name: Check if 7-Zip is already installed
  win_reg_stat:
    name: HKLM:\SOFTWARE\Microsoft\Windows\CurrentVersion\Uninstall\{23170F69-40C1-2702-1701-000001000000}
  register: 7zip_installed

- name: Ensure 7-Zip is installed through win_command
  win_command: C:\Windows\System32\msiexec.exe /i C:\temp\7z.msi /qn /norestart
  when: 7zip_installed.exists == false

- name: Ensure 7-Zip is uninstalled through win_command
  win_command: C:\Windows\System32\msiexec.exe /x {23170F69-40C1-2702-1701-000001000000} /qn /norestart
  when: 7zip_installed.exists == true
Some installers like Microsoft Office or SQL Server require credential delegation or
access to components restricted by WinRM. The best method to bypass these
issues is to use become with the task. With become, Ansible will run
the installer as if it were run interactively on the host.
Note
Many installers do not properly pass back error information over WinRM. In these cases, if the install has been verified to work locally the recommended method is to use become.
Note
Some installers restart the WinRM or HTTP services, or cause them to become temporarily unavailable, making Ansible assume the system is unreachable.
Installing Updates
The win_updates and win_hotfix modules can be used to install updates
or hotfixes on a host. The module win_updates is used to install multiple
updates by category, while win_hotfix can be used to install a single
update or hotfix file that has been downloaded locally.
Note
The win_hotfix module has a requirement that the DISM PowerShell cmdlets are
present. These cmdlets were only added by default on Windows Server 2012
and newer and must be installed on older Windows hosts.
The following example shows how win_updates can be used:
- name: Install all critical and security updates
  win_updates:
    category_names:
    - CriticalUpdates
    - SecurityUpdates
    state: installed
  register: update_result

- name: Reboot host if required
  win_reboot:
  when: update_result.reboot_required
The following example show how win_hotfix can be used to install a single
update or hotfix:
- name: Download KB3172729 for Server 2012 R2
  win_get_url:
    url: http://download.windowsupdate.com/d/msdownload/update/software/secu/2016/07/windows8.1-kb3172729-x64_e8003822a7ef4705cbb65623b72fd3cec73fe222.msu
    dest: C:\temp\KB3172729.msu

- name: Install hotfix
  win_hotfix:
    hotfix_kb: KB3172729
    source: C:\temp\KB3172729.msu
    state: present
  register: hotfix_result

- name: Reboot host if required
  win_reboot:
  when: hotfix_result.reboot_required
Set Up Users and Groups
Ansible can be used to create Windows users and groups both locally and on a domain.
Local
The modules win_user, win_group and win_group_membership manage
Windows users, groups and group memberships locally.
The following is an example of creating local accounts and groups that can
access a folder on the same host:
- name: Create local group to contain new users
  win_group:
    name: LocalGroup
    description: Allow access to C:\Development folder

- name: Create local user
  win_user:
    name: '{{ item.name }}'
    password: '{{ item.password }}'
    groups: LocalGroup
    update_password: false
    password_never_expires: true
  loop:
  - name: User1
    password: Password1
  - name: User2
    password: Password2

- name: Create Development folder
  win_file:
    path: C:\Development
    state: directory

- name: Set ACL of Development folder
  win_acl:
    path: C:\Development
    rights: FullControl
    state: present
    type: allow
    user: LocalGroup

- name: Remove parent inheritance of Development folder
  win_acl_inheritance:
    path: C:\Development
    reorganize: true
    state: absent
Domain
The modules win_domain_user and win_domain_group manages users and
groups in a domain. The below is an example of ensuring a batch of domain users
are created:
- name: Ensure each account is created
  win_domain_user:
    name: '{{ item.name }}'
    upn: '{{ item.name }}@MY.DOMAIN.COM'
    password: '{{ item.password }}'
    password_never_expires: false
    groups:
    - Test User
    - Application
    company: Ansible
    update_password: on_create
  loop:
  - name: Test User
    password: Password
  - name: Admin User
    password: SuperSecretPass01
  - name: Dev User
    password: '@fvr3IbFBujSRh!3hBg%wgFucD8^x8W5'
Running Commands
In cases where there is no appropriate module available for a task,
a command or script can be run using the win_shell, win_command, raw, and script modules.
The raw module simply executes a Powershell command remotely. Since raw
has none of the wrappers that Ansible typically uses, become, async
and environment variables do not work.
The script module executes a script from the Ansible control node on
one or more Windows hosts. Like raw, script currently does not support
become, async, or environment variables.
The win_command module is used to execute a command which is either an
executable or batch file, while the win_shell module is used to execute commands within a shell.
Choosing Command or Shell
The win_shell and win_command modules can both be used to execute a command or commands.
The win_shell module is run within a shell-like process like PowerShell or cmd, so it has access to shell
operators like <, >, |, ;, &&, and ||. Multi-lined commands can also be run in win_shell.
The win_command module simply runs a process outside of a shell. It can still
run a shell command like mkdir or New-Item by passing the shell commands
to a shell executable like cmd.exe or PowerShell.exe.
Here are some examples of using win_command and win_shell:
- name: Run a command under PowerShell
  win_shell: Get-Service -Name service | Stop-Service

- name: Run a command under cmd
  win_shell: mkdir C:\temp
  args:
    executable: cmd.exe

- name: Run a multiple shell commands
  win_shell: |
    New-Item -Path C:\temp -ItemType Directory
    Remove-Item -Path C:\temp -Force -Recurse
    $path_info = Get-Item -Path C:\temp
    $path_info.FullName

- name: Run an executable using win_command
  win_command: whoami.exe

- name: Run a cmd command
  win_command: cmd.exe /c mkdir C:\temp

- name: Run a vbs script
  win_command: cscript.exe script.vbs
Note
Some commands like mkdir, del, and copy only exist in
the CMD shell. To run them with win_command they must be
prefixed with cmd.exe /c.
Argument Rules
When running a command through win_command, the standard Windows argument
rules apply:
-
Each argument is delimited by a white space, which can either be a space or a
tab. -
An argument can be surrounded by double quotes
". Anything inside these
quotes is interpreted as a single argument even if it contains whitespace. -
A double quote preceded by a backslash
\is interpreted as just a double
quote"and not as an argument delimiter. -
Backslashes are interpreted literally unless it immediately precedes double
quotes; for example\==\and\"==" -
If an even number of backslashes is followed by a double quote, one
backslash is used in the argument for every pair, and the double quote is
used as a string delimiter for the argument. -
If an odd number of backslashes is followed by a double quote, one backslash
is used in the argument for every pair, and the double quote is escaped and
made a literal double quote in the argument.
With those rules in mind, here are some examples of quoting:
- win_command: C:\temp\executable.exe argument1 "argument 2" "C:\path\with space" "double \"quoted\""

argv[0] = C:\temp\executable.exe
argv[1] = argument1
argv[2] = argument 2
argv[3] = C:\path\with space
argv[4] = double "quoted"

- win_command: '"C:\Program Files\Program\program.exe" "escaped \\\" backslash" unquoted-end-backslash\'

argv[0] = C:\Program Files\Program\program.exe
argv[1] = escaped \" backslash
argv[2] = unquoted-end-backslash\

# Due to YAML and Ansible parsing '\"' must be written as '{% raw %}\\{% endraw %}"'
- win_command: C:\temp\executable.exe C:\no\space\path "arg with end \ before end quote{% raw %}\\{% endraw %}"

argv[0] = C:\temp\executable.exe
argv[1] = C:\no\space\path
argv[2] = arg with end \ before end quote\"
For more information, see escaping arguments.
Creating and Running a Scheduled Task
WinRM has some restrictions in place that cause errors when running certain
commands. One way to bypass these restrictions is to run a command through a
scheduled task. A scheduled task is a Windows component that provides the
ability to run an executable on a schedule and under a different account.
Ansible version 2.5 added modules that make it easier to work with scheduled tasks in Windows.
The following is an example of running a script as a scheduled task that deletes itself after
running:
- name: Create scheduled task to run a process
  win_scheduled_task:
    name: adhoc-task
    username: SYSTEM
    actions:
    - path: PowerShell.exe
      arguments: |
        Start-Sleep -Seconds 30  # This isn't required, just here as a demonstration
        New-Item -Path C:\temp\test -ItemType Directory
    # Remove this action if the task shouldn't be deleted on completion
    - path: cmd.exe
      arguments: /c schtasks.exe /Delete /TN "adhoc-task" /F
    triggers:
    - type: registration

- name: Wait for the scheduled task to complete
  win_scheduled_task_stat:
    name: adhoc-task
  register: task_stat
  until: (task_stat.state is defined and task_stat.state.status != "TASK_STATE_RUNNING") or (task_stat.task_exists == False)
  retries: 12
  delay: 10
Note
The modules used in the above example were updated/added in Ansible
version 2.5.
Path Formatting for Windows
Windows differs from a traditional POSIX operating system in many ways. One of
the major changes is the shift from / as the path separator to \. This
can cause major issues with how playbooks are written, since \ is often used
as an escape character on POSIX systems.
Ansible allows two different styles of syntax; each deals with path separators for Windows differently:
YAML Style
When using the YAML syntax for tasks, the rules are well-defined by the YAML
standard:
-
When using a normal string (without quotes), YAML will not consider the
backslash an escape character. -
When using single quotes
', YAML will not consider the backslash an
escape character. -
When using double quotes
", the backslash is considered an escape
character and needs to escaped with another backslash.
Note
You should only quote strings when it is absolutely
necessary or required by YAML, and then use single quotes.
The YAML specification considers the following escape sequences:
-
\0,\\,\",\_,\a,\b,\e,\f,\n,\r,\t,
\v,\L,\Nand\P– Single character escape -
<TAB>,<SPACE>,<NBSP>,<LNSP>,<PSP>– Special
characters -
\x..– 2-digit hex escape -
\u....– 4-digit hex escape -
\U........– 8-digit hex escape
Here are some examples on how to write Windows paths:
# GOOD
tempdir: C:\Windows\Temp

# WORKS
tempdir: 'C:\Windows\Temp'
tempdir: "C:\\Windows\\Temp"

# BAD, BUT SOMETIMES WORKS
tempdir: C:\\Windows\\Temp
tempdir: 'C:\\Windows\\Temp'
tempdir: C:/Windows/Temp
This is an example which will fail:
# FAILS
tempdir: "C:\Windows\Temp"
This example shows the use of single quotes when they are required:
---
- name: Copy tomcat config
  win_copy:
    src: log4j.xml
    dest: '{{tc_home}}\lib\log4j.xml'
Legacy key=value Style
The legacy key=value syntax is used on the command line for ad hoc commands,
or inside playbooks. The use of this style is discouraged within playbooks
because backslash characters need to be escaped, making playbooks harder to read.
The legacy syntax depends on the specific implementation in Ansible, and quoting
(both single and double) does not have any effect on how it is parsed by
Ansible.
The Ansible key=value parser parse_kv() considers the following escape
sequences:
-
\,',",\a,\b,\f,\n,\r,\tand
\v– Single character escape -
\x..– 2-digit hex escape -
\u....– 4-digit hex escape -
\U........– 8-digit hex escape -
\N{...}– Unicode character by name
This means that the backslash is an escape character for some sequences, and it
is usually safer to escape a backslash when in this form.
Here are some examples of using Windows paths with the key=value style:
# GOOD
tempdir=C:\\Windows\\Temp

# WORKS
tempdir='C:\\Windows\\Temp'
tempdir="C:\\Windows\\Temp"

# BAD, BUT SOMETIMES WORKS
tempdir=C:\Windows\Temp
tempdir='C:\Windows\Temp'
tempdir="C:\Windows\Temp"
tempdir=C:/Windows/Temp

# FAILS
tempdir=C:\Windows\temp
tempdir='C:\Windows\temp'
tempdir="C:\Windows\temp"
The failing examples don’t fail outright but will substitute \t with the
<TAB> character resulting in tempdir being C:\Windows<TAB>emp.
Limitations
Some things you cannot do with Ansible and Windows are:
-
Upgrade PowerShell
-
Interact with the WinRM listeners
Because WinRM is reliant on the services being online and running during normal operations, you cannot upgrade PowerShell or interact with WinRM listeners with Ansible. Both of these actions will cause the connection to fail. This can technically be avoided by using async or a scheduled task, but those methods are fragile if the process it runs breaks the underlying connection Ansible uses, and are best left to the bootstrapping process or before an image is
created.
Developing Windows Modules
Because Ansible modules for Windows are written in PowerShell, the development
guides for Windows modules differ substantially from those for standard standard modules. Please see
Windows module development walkthrough for more information.
Ansible — один из самых популярных инструментов администрирования конфигурации и автоматизации инфраструктуры. Он помогает автоматизировать настройку / выделение ресурсов инфраструктуры, развертывание программного обеспечения и общее управление инфраструктурой.

Изначально Ansible был доступен в Linux. Однако, благодаря новому взгляду Microsoft на открытый исходный код, улучшениям сообщества и принятию более гибкого метода разработки программного обеспечения, ориентированного на DevOps, служба поддержки Windows постепенно набирает обороты.
Хотя для поддержки Windows требуется немного больше настроек, после первоначальной настройки это не так уж плохо. Есть два возможных способа установить его.
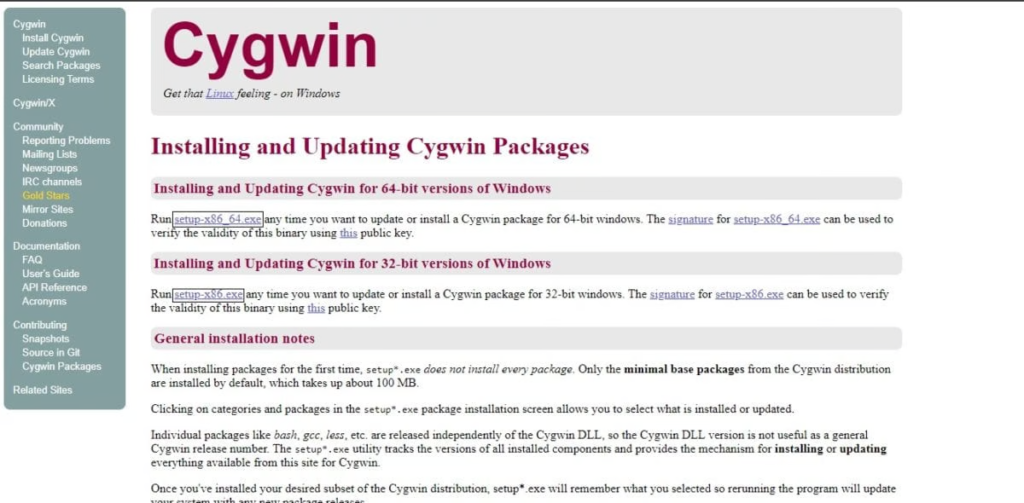
Установка Ansible с помощью Cygwin
Вы слышали о Cygwin?
Это среда, совместимая с POSIX, для запуска в Windows. Это означает, что в Windows можно запускать множество функций, которые вы обычно выполняете в ОС на базе UNIX.
Если вы впервые слышите о Cygwin, то я бы обратился к их официальному веб-сайту, чтобы получить больше понимания.
Установка Cygwin по умолчанию не распространяется на Ansible. Следовательно, вы должны выбрать их во время установки, как описано ниже, вручную.
- Загрузите Cygwin (выберите 32-разрядный или 64-разрядный пакет Cygwin в зависимости от вашей системы)
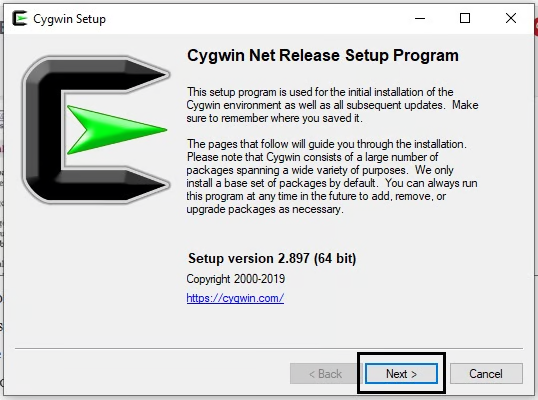
- Запустите установочный файл Cygwin, который вы загрузили выше, и следите за экраном.
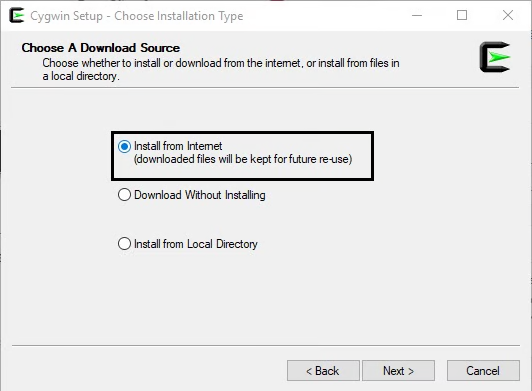
- Выберите источник загрузки в качестве “Install from Internet” (Установить из Интернета).
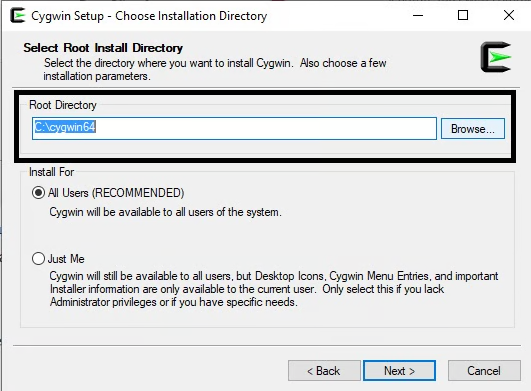
- Укажите корневой каталог, в который вы хотели бы установить свое приложение
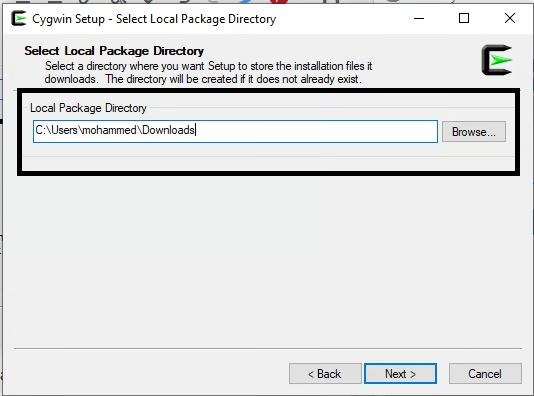
- Выберите каталог, в который вы хотели бы установить свои пакеты Cygwin
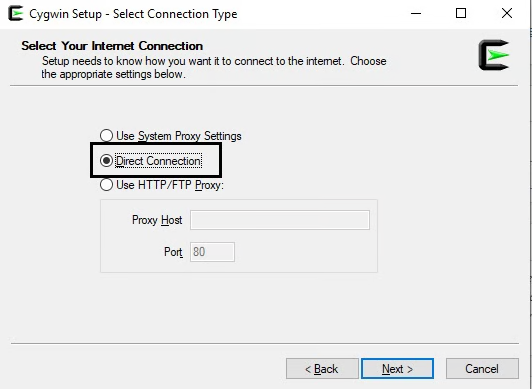
- Выберите прямое подключение, если вы не используете прокси.
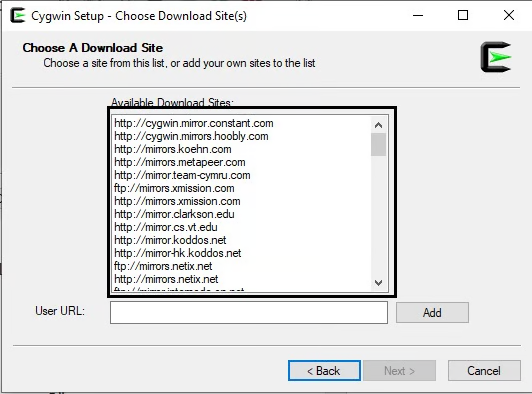
- Выберите зеркало для загрузки ваших пакетов. Вы можете выбрать любое из списка.
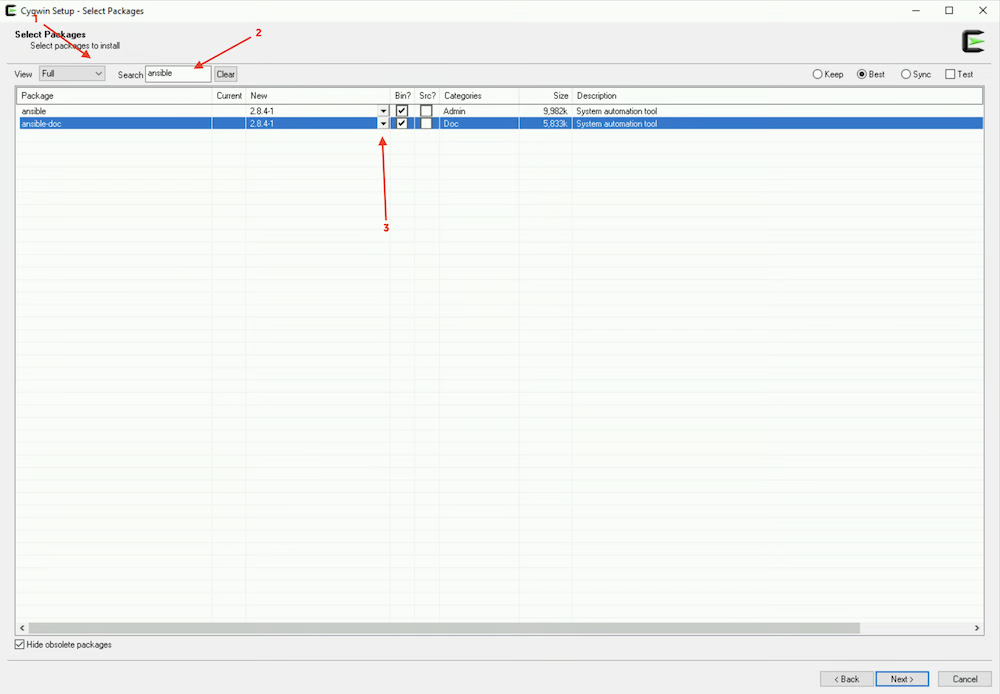
- Будут показаны пакеты, доступные для установки; здесь мы должны выбрать ansible – явно выбрать “Просмотреть как полный», затем выполнить поиск ”ansible», а затем выбрать последнюю версию, как показано ниже.
- Ansible-doc необязателен, нажмите далее
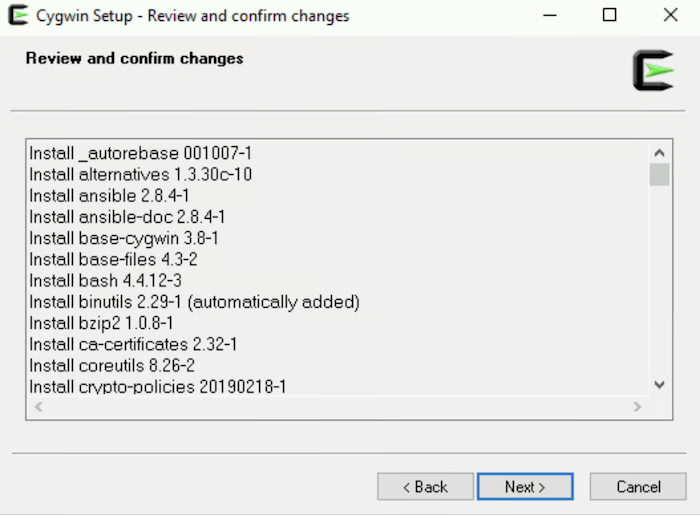
- Просмотрите и подтвердите изменения, нажав далее
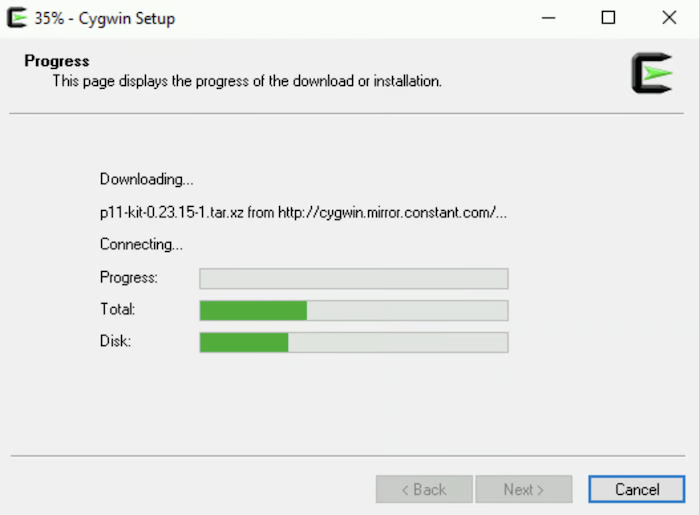
- Программа загрузит и установит необходимые пакеты.
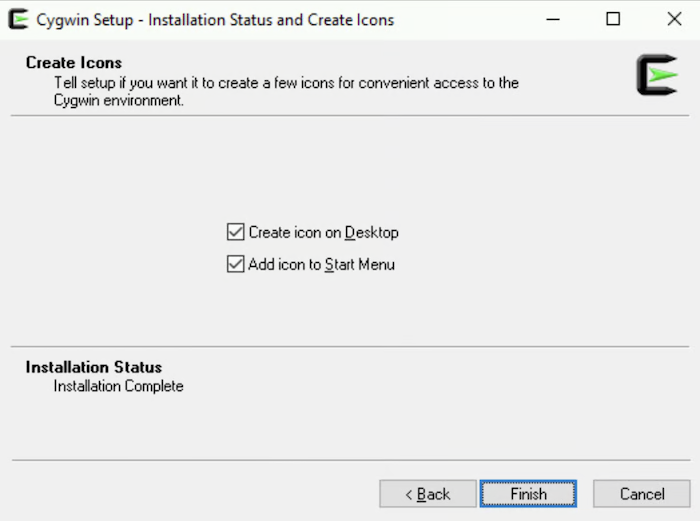
- После завершения вы получите сообщение об успешном завершении, нажмите Готово
Поздравляем! Вы установили Cygwin с Ansible в Windows. Давайте проверим это.
- Дважды щелкните значок Cygwin Terminal на рабочем столе и введите
ansible --version
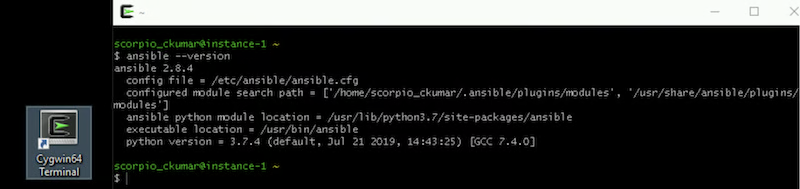
И, как вы можете видеть, он успешно установлен.
Продолжайте и поиграйте с этим. Если вы заинтересованы в изучении Ansible, тогда ознакомьтесь с этим курсом Udemy.
Установка Ansible с помощью Ubuntu в Windows 10
Спасибо Microsoft. Теперь можно установить Ubuntu в Windows 10.
Давайте начнем.
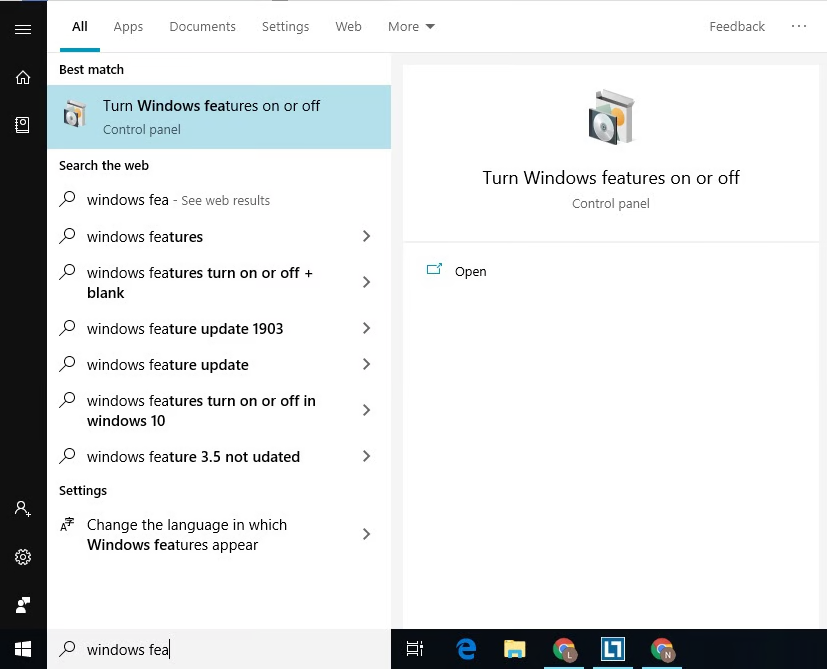
- Найдите функции Windows в окне поиска. И когда появится надпись “Включить или выключить функции Windows”, нажмите на нее.
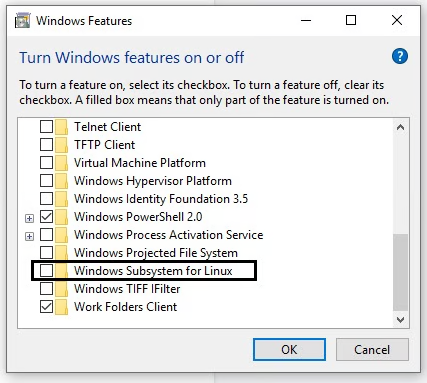
- Откроется окно с кучей функций. Прокрутите вниз и установите флажок Подсистема Windows для опции Linux. И после этого нажмите на кнопку OK.
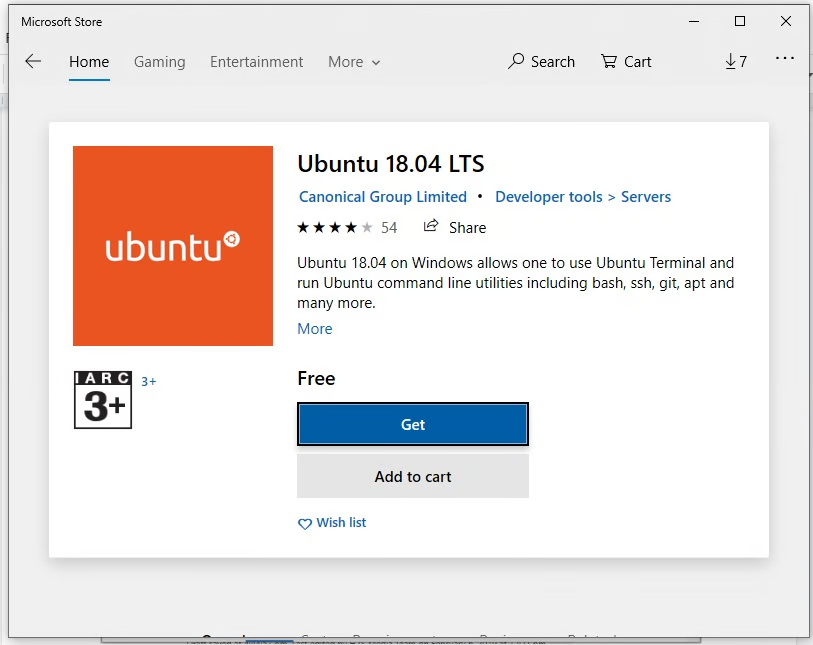
- Откройте Microsoft Store и найдите Ubuntu, чтобы установить последнюю версию.
- После установки вы увидите кнопку запуска, используйте ее, чтобы открыть Ubuntu bash.
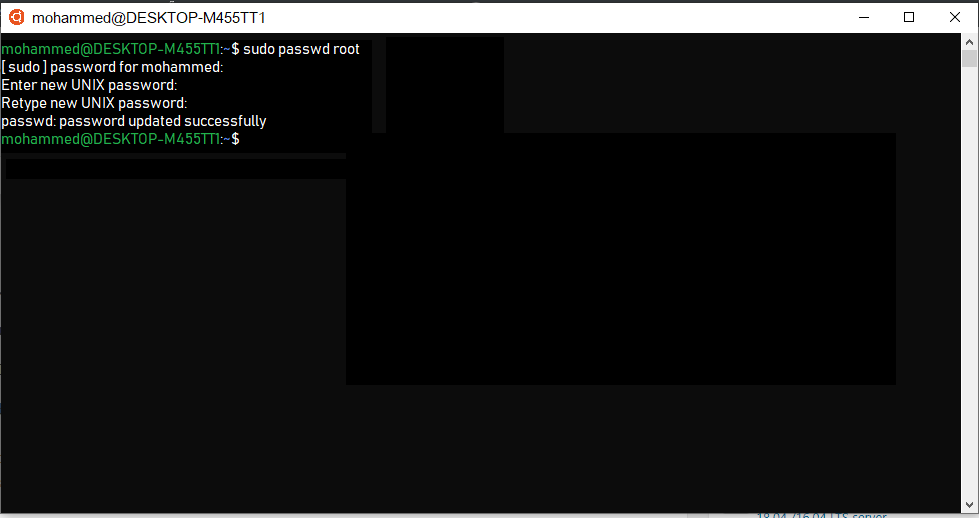
- В Ubuntu bash вам будет предложено установить имя пользователя и пароль для пользователя по умолчанию. Вы также можете установить пароль учетной записи root отсюда, введя
sudo passwd root
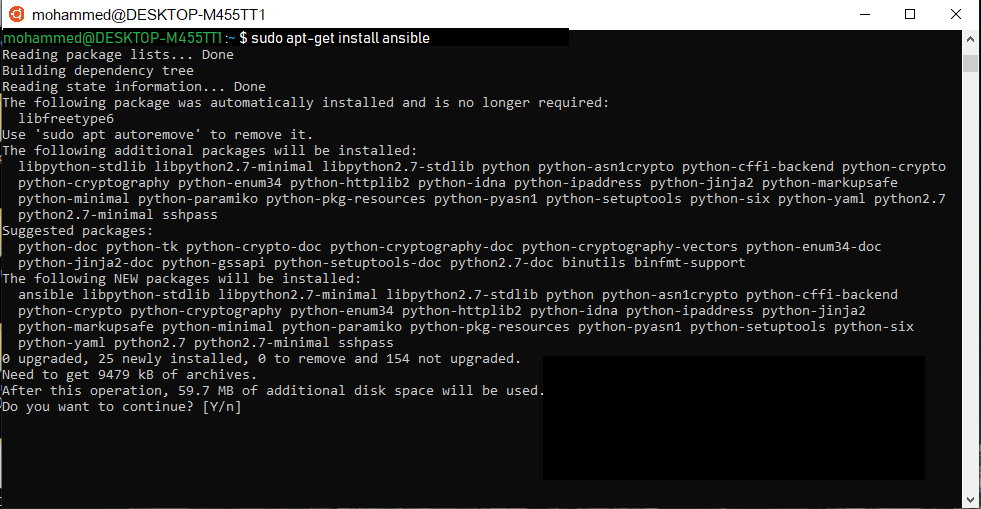
- Пришло время установить Ansible с помощью следующих команд.
sudo apt-get update
sudo apt-get install software-properties-common
sudo apt-add-repository ppa:ansible/ansible
sudo apt-get update
sudo apt-get install ansible- Press Y when it asks for…
После установки давайте протестируем, создав и запустив демо-версию playbook.
- Создайте файл с именем testbook.yml
nano testbook.yml- Добавьте следующие строки и сохраните файл
- name: testing ansible
hosts: localhost
tasks:
- name: echo a message
debug: msg=”this is working"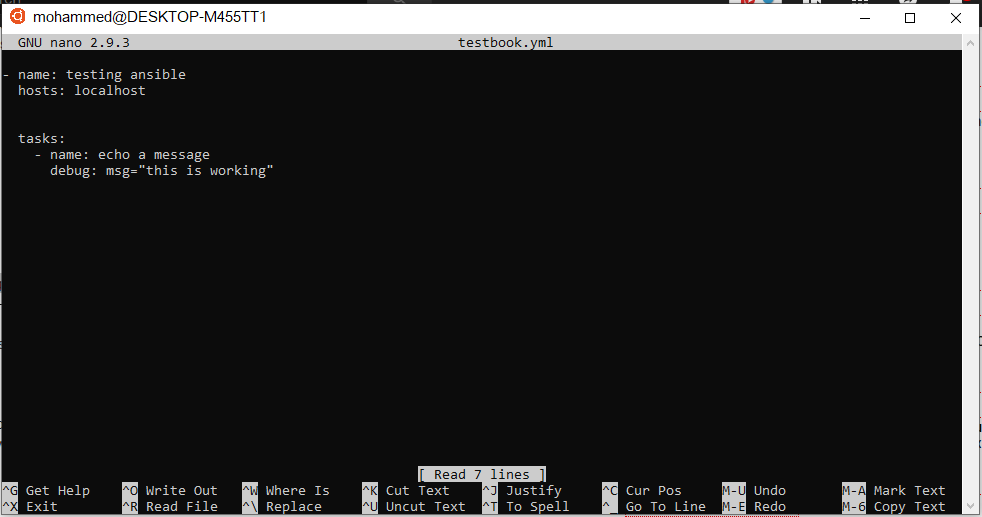
И, наконец, запустите playbook.
ansible playbook testbook.yml --connection=localЗаключение
Надеюсь данная инструкция, поможет вам установить Ansible в Windows.
Источник
ansible-windows
This repository contains ansible configurations for installing software on Windows systems.
prerequisite
This command sets the network category of a connection profile to «Private» in Windows.
Set-NetConnectionProfile -NetworkCategory Private
This command retrieves the network connection profiles on the local computer. It provides information about each network connection, including the network name, interface alias, interface index, and network category (Public, Private, or Domain).
This command is used to configure Windows Remote Management (WinRM) quickly. WinRM is a Microsoft implementation of the WS-Management Protocol, which allows remote management of computers running Windows. Running winrm quickconfig enables basic WinRM settings on the local computer, such as starting the WinRM service, setting up the WinRM listener, and allowing WinRM through the Windows Firewall. This command is often used when setting up systems for remote administration or automation tasks.
Software will be installed on a remote system.
git
curl
jq
nodejs
pm2
openjdk17
1. Copy this script in remote windows system.
You can copy this file in any drive or directory in the windows system.
D:\ConfigureRemotingForAnsible.ps1
2. Execute below commands to run the script.
Open the powershell command prompt and fire the command.
powershell.exe -ExecutionPolicy Bypass -File D:\ConfigureRemotingForAnsible.ps1 -CertValidityDays 100
Set-ExecutionPolicy RemoteSignedc
You will need to allow the port 59861 from you windows machine to allow remote installation.
3. Go to the ansible server.
Go to the directory /etc/ansible/ and create a installation file install_software.yml
---
- name: Install Git, Curl, and jq on Windows 10
  hosts: windows
  gather_facts: no
  tasks:
    - name: Install Git using Chocolatey
      win_chocolatey:
        name: git
        state: present
      vars:
        ansible_winrm_server_cert_validation: ignore

    - name: Install Curl using Chocolatey
      win_chocolatey:
        name: curl
        state: present
      vars:
        ansible_winrm_server_cert_validation: ignore

    - name: Install jq using Chocolatey
      win_chocolatey:
        name: jq
        state: present
      vars:
        ansible_winrm_server_cert_validation: ignore

    - name: Install Node.js using Chocolatey
      win_chocolatey:
        name: nodejs
        state: present
        version: 18.17.0
      vars:
        ansible_winrm_server_cert_validation: ignore

    - name: Install PM2 using npm
      win_shell: npm install -g pm2
      vars:
        ansible_winrm_server_cert_validation: ignore

    - name: Install JDK 17 using Chocolatey
      win_chocolatey:
        name: openjdk17
        state: present
      vars:
        ansible_winrm_server_cert_validation: ignore
4. Update client host
Open the host file in ansible directory and update client details.
[windows]
192.168.1.20 ansible_user=Admin ansible_password=Your_password ansible_connection=winrm
5. Execute the installtion
Run below command to execute commands written in the ansible.
ansible-playbook -i hosts install_software.yml
It will take a few minutes to install the required software.
How to Install Windows software with Ansible?
Today I’m going to reveal a secret to installing the software in a Windows-managed host using Chocolatey Package Manager.
I’m Luca Berton and welcome to today’s episode of Ansible Pilot
Ansible module win_chocolatey
Chocolatey is the package manager for windows, it has the largest online registry of Windows packages.
At the moment it contains nearly 9000 Community Maintained Packages.
Today we’re talking about Ansible module win_chocolatey to automate the software installation process.
The full name is chocolatey.chocolatey.win_chocolatey, which means that is part of the collection distributed by “chocolatey”.
It manages packages in Windows using chocolatey. It’s the windows correspondent of the ansible package module.
Parameters
namelist—string — the name of the packagestatestring — present / latest /absent /downgrade /reinstalledversionstring — specific versionpinnedboolean — no/yessourcestring — URL/path
The parameter list is pretty wide but this four are the most important options.
In the “name” parameter you are going to specify the name of the package or a list of packages.
If you would like to install a specific version you could specify it in the “version” parameter.
The state specifies the action that we would like to perform. In our case for install is “present or latest”.
I’d like to mention some additional parameters that might be useful for you.
The “pinned” parameter allows to pin the Chocolatey package or not. Pin a package to suppress upgrades.
During the next upgrade for all packages, Chocolatey will automatically skip the pinned packages.
“source” allows specifying a local repository for packages if available.

Playbook
Are you ready to make your hands dirty?
Let’s jump in a quick live Playbook of a playbook about the win_chocolatey module.
- win_chocolatey.yml
---
- name: win_chocolatey module Playbook
  hosts: all
  become: false
  gather_facts: false
  vars:
    - packages:
      - git
      - notepadplusplus
  tasks:
    - name: install packages
      chocolatey.chocolatey.win_chocolatey:
        name: "{{ packages }}"
        state: present
code with ❤️ in GitHub
Conclusion
Now you know better the Ansible module win_chocolatey and how you could use it successfully in your playbook to automate your day-to-day activities.
Subscribe to the YouTube channel, Medium, and Website, X (formerly Twitter) to not miss the next episode of the Ansible Pilot.
Academy
Learn the Ansible automation technology with some real-life examples in my
Udemy 300+ Lessons Video Course.

My book Ansible By Examples: 200+ Automation Examples For Linux and Windows System Administrator and DevOps

Donate
Want to keep this project going? Please donate
Patreon
Buy me a Pizza