
Note
This module is part of the ansible.windows collection (version 2.8.0).
You might already have this collection installed if you are using the ansible package.
It is not included in ansible-core.
To check whether it is installed, run ansible-galaxy collection list.
To install it, use: ansible-galaxy collection install ansible.windows.
To use it in a playbook, specify: ansible.windows.win_package.
Synopsis
-
Installs or uninstalls software packages for Windows.
-
Supports
.exe,.msi,.msp,.appx,.appxbundle,.msix, and.msixbundle. -
These packages can be sourced from the local file system, network file share or a url.
-
See provider for more info on each package type that is supported.
Parameters
|
Parameter |
Comments |
|---|---|
|
arguments any |
Any arguments the installer needs to either install or uninstall the package. If the package is an MSI do not supply the This is only used for the Can be a list of arguments and the module will escape the arguments as necessary, it is recommended to use a string when dealing with MSI packages due to the unique escaping issues with msiexec. When using a list of arguments each item in the list is considered to be a single argument. As such, if an argument in the list contains a space then Ansible will quote this to ensure that this is seen by Windows as a single argument. Should this behaviour not be what is required, the argument should be split into two separate list items. See the examples section for more detail. |
|
chdir path |
Set the specified path as the current working directory before installing or uninstalling a package. This is only used for the |
|
checksum string added in ansible.windows 2.8.0 |
If a checksum is passed to this parameter, the digest of the package will be calculated before executing it to verify that the path or downloaded file has the expected contents. |
|
checksum_algorithm string added in ansible.windows 2.8.0 |
Specifies the hashing algorithm used when calculating the checksum of the path provided. Choices:
|
|
client_cert string |
The path to the client certificate (.pfx) that is used for X509 authentication. This path can either be the path to the The WinRM connection must be authenticated with Other authentication types can set client_cert_password when the cert is password protected. |
|
client_cert_password string |
The password for client_cert if the cert is password protected. |
|
creates_path path |
Will check the existence of the path specified and use the result to determine whether the package is already installed. You can use this in conjunction with |
|
creates_service string |
Will check the existing of the service specified and use the result to determine whether the package is already installed. You can use this in conjunction with |
|
creates_version string |
Will check the file version property of the file at
You can use this in conjunction with |
|
expected_return_code list / elements=integer |
One or more return codes from the package installation that indicates success. The return codes are read as a signed integer, any values greater than 2147483647 need to be represented as the signed equivalent, i.e. To convert a unsigned number to the signed equivalent you can run “[Int32](“0x{0:X}” -f ([UInt32]3221225477))”. A return code of This is only used for the Default: |
|
follow_redirects string |
Whether or the module should follow redirects.
When following a redirected URL, the Choices:
|
|
force_basic_auth boolean |
By default the authentication header is only sent when a webservice responses to an initial request with a 401 status. Since some basic auth services do not properly send a 401, logins will fail. This option forces the sending of the Basic authentication header upon the original request. Choices:
|
|
dictionary |
Extra headers to set on the request. This should be a dictionary where the key is the header name and the value is the value for that header. |
|
http_agent string |
Header to identify as, generally appears in web server logs. This is set to the Default: |
|
log_path path |
Specifies the path to a log file that is persisted after a package is installed or uninstalled. This is only used for the When omitted, a temporary log file is used instead for those providers. This is only valid for MSI files, use |
|
maximum_redirection integer |
Specify how many times the module will redirect a connection to an alternative URI before the connection fails. If set to Default: |
|
path string |
Location of the package to be installed or uninstalled. This package can either be on the local file system, network share or a url. When If If |
|
product_id string |
The product id of the installed packaged. This is used for checking whether the product is already installed and getting the uninstall information if For msi packages, this is the For msp packages, this is the For msix packages, this is the For registry (exe) packages, this is the registry key name under the registry paths specified in provider. This value is ignored if This SHOULD be set when the package is an |
|
provider string |
Set the package provider to use when searching for a package. The The The The The Choices:
|
|
proxy_password string |
The password for proxy_username. |
|
proxy_url string |
An explicit proxy to use for the request. By default, the request will use the IE defined proxy unless use_proxy is set to |
|
proxy_use_default_credential boolean |
Uses the current user’s credentials when authenticating with a proxy host protected with Proxies that use The module will only have access to the user’s credentials if using If not using Choices:
|
|
proxy_username string |
The username to use for proxy authentication. |
|
state string |
Whether to install or uninstall the package. The module uses product_id to determine whether the package is installed or not. For all providers but Choices:
|
|
url_method string |
The HTTP Method of the request. |
|
url_password string |
The password for url_username. |
|
url_timeout integer |
Specifies how long the request can be pending before it times out (in seconds). Set to Default: |
|
url_username string |
The username to use for authentication. |
|
use_default_credential boolean |
Uses the current user’s credentials when authenticating with a server protected with Sites that use The module will only have access to the user’s credentials if using If not using Choices:
|
|
use_proxy boolean |
If Choices:
|
|
validate_certs boolean |
If This should only be used on personally controlled sites using self-signed certificates. Choices:
|
|
wait_for_children boolean added in ansible.windows 1.3.0 |
The module will wait for the process it spawns to finish but any processes spawned in that child process as ignored. Set to This is useful if the install/uninstaller is just a wrapper which then calls the actual installer as its own child process. When this option is This should not be required for most installers and setting to Requires Windows Server 2012 or Windows 8 or newer to use. Choices:
|
Notes
Note
-
When
state=absentand the product is an exe, the path may be different from what was used to install the package originally. If path is not set then the path used will be what is set underQuietUninstallStringorUninstallStringin the registry for that product_id. -
By default all msi installs and uninstalls will be run with the arguments
/log, /qn, /norestart. -
All the installation checks under
product_idandcreates_*add together, if one fails then the program is considered to be absent.
See Also
Examples
- name: Install the Visual C thingy
  ansible.windows.win_package:
    path: http://download.microsoft.com/download/1/6/B/16B06F60-3B20-4FF2-B699-5E9B7962F9AE/VSU_4/vcredist_x64.exe
    product_id: '{CF2BEA3C-26EA-32F8-AA9B-331F7E34BA97}'
    arguments: /install /passive /norestart

- name: Install Visual C thingy with list of arguments instead of a string
  ansible.windows.win_package:
    path: http://download.microsoft.com/download/1/6/B/16B06F60-3B20-4FF2-B699-5E9B7962F9AE/VSU_4/vcredist_x64.exe
    product_id: '{CF2BEA3C-26EA-32F8-AA9B-331F7E34BA97}'
    arguments:
      - /install
      - /passive
      - /norestart

- name: Install MSBuild thingy with arguments split to prevent quotes
  ansible.windows.win_package:
    path: https://download.visualstudio.microsoft.com/download/pr/9665567e-f580-4acd-85f2-bc94a1db745f/vs_BuildTools.exe
    product_id: '{D1437F51-786A-4F57-A99C-F8E94FBA1BD8}'
    arguments:
      - --norestart
      - --passive
      - --wait
      - --add
      - Microsoft.Net.Component.4.6.1.TargetingPack
      - --add
      - Microsoft.Net.Component.4.6.TargetingPack

- name: Install Remote Desktop Connection Manager from msi with a permanent log
  ansible.windows.win_package:
    path: https://download.microsoft.com/download/A/F/0/AF0071F3-B198-4A35-AA90-C68D103BDCCF/rdcman.msi
    product_id: '{0240359E-6A4C-4884-9E94-B397A02D893C}'
    state: present
    log_path: D:\logs\vcredist_x64-exe-{{lookup('pipe', 'date +%Y%m%dT%H%M%S')}}.log

- name: Install Application from msi with multiple properties for installer
  ansible.windows.win_package:
    path: C:\temp\Application.msi
    state: present
    arguments: >-
      SERVICE=1
      DBNAME=ApplicationDB
      DBSERVER=.\SQLEXPRESS
      INSTALLDIR="C:\Program Files (x86)\App lication\App Server"

- name: Install Microsoft® SQL Server® 2019 Express (DPAPI example)
  ansible.windows.win_package:
    path: C:\temp\SQLEXPR_x64_ENU\SETUP.EXE
    product_id: Microsoft SQL Server SQL2019
    arguments:
      - SAPWD=VeryHardPassword
      - /ConfigurationFile=C:\temp\configuration.ini
  become: true
  vars:
    ansible_become_method: runas
    ansible_become_user: "{{ user }}"
    ansible_become_pass: "{{ password }}"

- name: Uninstall Remote Desktop Connection Manager
  ansible.windows.win_package:
    product_id: '{0240359E-6A4C-4884-9E94-B397A02D893C}'
    state: absent

- name: Install Remote Desktop Connection Manager locally omitting the product_id
  ansible.windows.win_package:
    path: C:\temp\rdcman.msi
    state: present

- name: Uninstall Remote Desktop Connection Manager from local MSI omitting the product_id
  ansible.windows.win_package:
    path: C:\temp\rdcman.msi
    state: absent

# 7-Zip exe doesn't use a guid for the Product ID
- name: Install 7zip from a network share with specific credentials
  ansible.windows.win_package:
    path: \\domain\programs\7z.exe
    product_id: 7-Zip
    arguments: /S
    state: present
  become: true
  become_method: runas
  become_flags: logon_type=new_credential logon_flags=netcredentials_only
  vars:
    ansible_become_user: DOMAIN\User
    ansible_become_password: Password

- name: Install 7zip and use a file version for the installation check
  ansible.windows.win_package:
    path: C:\temp\7z.exe
    creates_path: C:\Program Files\7-Zip\7z.exe
    creates_version: 16.04
    state: present

- name: Uninstall 7zip from the exe
  ansible.windows.win_package:
    path: C:\Program Files\7-Zip\Uninstall.exe
    product_id: 7-Zip
    arguments: /S
    state: absent

- name: Uninstall 7zip without specifying the path
  ansible.windows.win_package:
    product_id: 7-Zip
    arguments: /S
    state: absent

- name: Install application and override expected return codes
  ansible.windows.win_package:
    path: https://download.microsoft.com/download/1/6/7/167F0D79-9317-48AE-AEDB-17120579F8E2/NDP451-KB2858728-x86-x64-AllOS-ENU.exe
    product_id: '{7DEBE4EB-6B40-3766-BB35-5CBBC385DA37}'
    arguments: '/q /norestart'
    state: present
    expected_return_code: [0, 666, 3010]

- name: Install a .msp patch
  ansible.windows.win_package:
    path: C:\Patches\Product.msp
    state: present

- name: Remove a .msp patch
  ansible.windows.win_package:
    product_id: '{AC76BA86-A440-FFFF-A440-0C13154E5D00}'
    state: absent

- name: Enable installation of 3rd party MSIX packages
  ansible.windows.win_regedit:
    path: HKLM:\SOFTWARE\Microsoft\Windows\CurrentVersion\AppModelUnlock
    name: AllowAllTrustedApps
    data: 1
    type: dword
    state: present

- name: Install an MSIX package for the current user
  ansible.windows.win_package:
    path: C:\Installers\Calculator.msix  # Can be .appx, .msixbundle, or .appxbundle
    state: present

- name: Uninstall an MSIX package using the product_id
  ansible.windows.win_package:
    product_id: InputApp
    state: absent
Return Values
Common return values are documented here, the following are the fields unique to this module:
|
Key |
Description |
|---|---|
|
checksum string added in ansible.windows 2.8.0 |
<algorithm> checksum of the package Returned: checksum_algorithm is set, package exists, and not check mode Sample: |
|
log string |
The contents of the MSI or MSP log. Returned: installation/uninstallation failure for MSI or MSP packages Sample: |
|
rc integer |
The return code of the package process. Returned: change occurred Sample: |
|
reboot_required boolean |
Whether a reboot is required to finalise package. This is set to true if the executable return code is 3010. Returned: always Sample: |
|
stderr string |
The stderr stream of the package process. Returned: failure during install or uninstall Sample: |
|
stdout string |
The stdout stream of the package process. Returned: failure during install or uninstall Sample: |
Collection links
- Issue Tracker
- Repository (Sources)
To Install an Application on Windows by using Ansible playbook
Introduction:
Ansible is an open-source tool for managing software configurations and deploying applications. Chocolately is a management tool for Windows software.
Master Server Requirements:
ansible
python3-pip
pywinrm (python package
Windows Requirements:
powershell 3+
Dot net 4
Installation Procedure:
Step 1: Search for chocolatey in browser
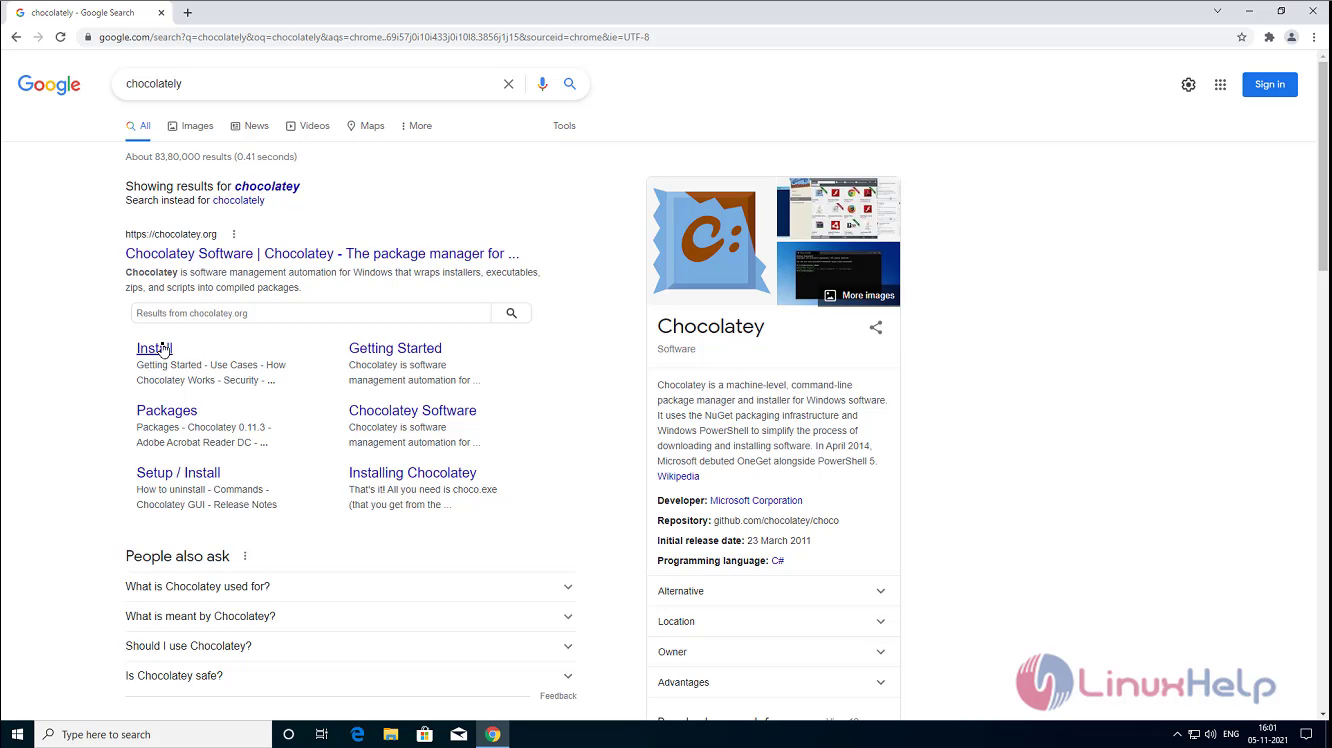
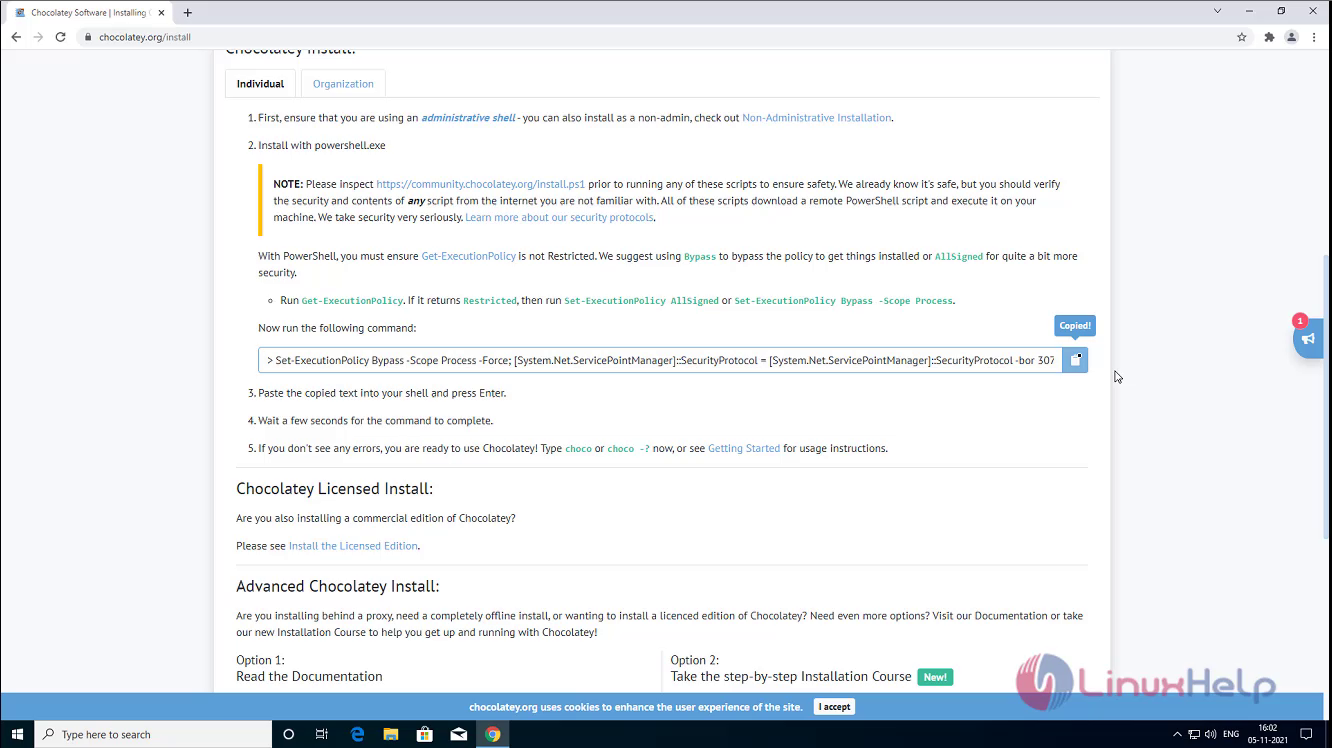
Step 2: Copy the installation command in chocolatey install page
Step 3: Run Powershell ISE as an administrator
Step 4: Install chocolatey by using the following command
PS C:\WINDOWS\system32> Set-ExecutionPolicy Bypass -Scope Process -Force;

[System.Net.ServicePointManager]::SecurityProtocol = [System.Net.ServicePointManager]::SecurityProtocol -bor 3072; iex ((New-Object System.Net.WebClient).DownloadString('https://community.chocolatey.org/install.ps1'))
Forcing web requests to allow TLS v1.2 (Required for requests to Chocolatey.org)
Getting latest version of the Chocolatey package for download.
Not using proxy.
Getting Chocolatey from https://community.chocolatey.org/api/v2/package/chocolatey/0.11.3.
Downloading https://community.chocolatey.org/api/v2/package/chocolatey/0.11.3 to C:\Users\Admin\AppData\Local\Temp\chocolatey\chocoInstall\chocolatey.zip
Not using proxy.
Extracting C:\Users\Admin\AppData\Local\Temp\chocolatey\chocoInstall\chocolatey.zip to C:\Users\Admin\AppData\Local\Temp\chocolatey\chocoInstall
Installing Chocolatey on the local machine
Creating ChocolateyInstall as an environment variable (targeting 'Machine')
  Setting ChocolateyInstall to 'C:\ProgramData\chocolatey'
WARNING: It's very likely you will need to close and reopen your shell
  before you can use choco.
Restricting write permissions to Administrators
We are setting up the Chocolatey package repository.
The packages themselves go to 'C:\ProgramData\chocolatey\lib'
  (i.e. C:\ProgramData\chocolatey\lib\yourPackageName).
A shim file for the command line goes to 'C:\ProgramData\chocolatey\bin'
  and points to an executable in 'C:\ProgramData\chocolatey\lib\yourPackageName'.
Step 5: Check the OS version by using the following command
root@linuxhelp:~# lsb_release -a
No LSB modules are available.
Distributor ID:	Ubuntu
Description:	Ubuntu 21.04
Release:	21.04
Codename:	hirsute
Step 6: Check the availability of Ansible package
root@linuxhelp:~# apt list -a ansible
Listing... Done
ansible/hirsute,hirsute,now 4.8.0-1ppa~hirsute all [installed]
ansible/hirsute,hirsute 2.10.7-1 all
Step 7: Check the availability of python3-pip package
root@linuxhelp:~# apt list -a python3
Listing... Done
python3/hirsute,now 3.9.4-1 amd64 [installed,automatic]

python3/hirsute 3.9.4-1 i386
Step 8: Check the availability of python package pywinrm
root@linuxhelp:~# pip list | grep pywinrm
pywinrm                0.4.2


ansible_winrm_server_cert_validation=ignore
Step 9: Install the plugins of chocolatey for ansible
root@linuxhelp:~# ansible-galaxy collection install chocolatey.chocolatey

Starting galaxy collection install process
Nothing to do. All requested collections are already installed. If you want to reinstall them, consider using `--force`.
Step 10:Create inventory for Windows node system
root@linuxhelp:~# vi /etc/ansible/hosts

[windows]
192.168.2.134

[windows:vars]
ansible_user=Admin
ansible_password=Admin@123
ansible_port=5986
ansible_connection=winrm
Step 11:Create playbook for installing namecoin application
root@linuxhelp:~# vi install.yml
hosts: windows
  gather_facts: true
  tasks:
  - name: install namecoin
    win_chocolatey:
      name: namecoin
      state: present
Step 12: Check the syntax of the install.yml ansible playbook by using the following command
root@linuxhelp:~# ansible-playbook install.yml --syntax-check

playbook: proxyset.yml
Step 13: Run the install.yml playbook by using the following command
root@linuxhelp:~# ansible-playbook install.yml

PLAY [windows] **************************************************************************************

TASK [Gathering Facts] ******************************************************************************
ok: [192.168.2.134]

TASK [install namecoin] *****************************************************************************
changed: [192.168.2.134]

PLAY RECAP ******************************************************************************************
192.168.2.134              : ok=2    changed=1    unreachable=0    failed=0    skipped=0    rescued=0    ignored=0
Step 14 : Namecoin application installed on Windows Client system
Step 15: Create playbook for uninstall namecoin application
root@linuxhelp:~# vi uninstall.yml
- hosts: windows
  gather_facts: true
  tasks:
  - name: Uninstall namecoin
    win_chocolatey:
      name: namecoin
      state: absent
~
Step 16: Check the syntax of the uninstall.yml ansible playbook by using the following command
root@linuxhelp:~# ansible-playbook uninstall.yml --syntax-check

playbook: removeproxy.yml
Step 17: Run the uninstall.yml playbook by using the following command
root@linuxhelp:~# ansible-playbook uninstall.yml

PLAY [windows] **************************************************************************************

TASK [Gathering Facts] ******************************************************************************
ok: [192.168.2.134]

TASK [Uninstall namecoin] ***************************************************************************
changed: [192.168.2.134]

PLAY RECAP ******************************************************************************************
192.168.2.134              : ok=2    changed=1    unreachable=0    failed=0    skipped=0    rescued=0    ignored=0
Step 18: Namecoin application Uninstalled on Windows Client system
With this installation of an application on Windows by using Ansible comes to an end
By this time most of the readers on this blog know I am an automation junkie and Ansible is my dealer. I started using Chocolatey about 2 years ago as it is an efficient open-source package manager for Windows operating systems similar to what brew is for Mac OS systems. In today’s tutorial, I am going to cover how to use Chocolatey and Ansible together to manage desktop apps on Windows operating systems.
Prerequisite Initial Steps
The initial steps would be to have Ansible set up already and Chocolatey installed on your Windows machine. You can follow the tutorials below to set up Ansible and install Chocolatey:
How To Set Up Ansible Inside A Github Repository And Automate Your Workloads
Ansible is an open-source configuration management and IT automation platform. Let’s jump in and set up our Ansible Github repository and run an example automation playbook.
Opensource GeeksChad Crouch

Installing Chocolatey
Chocolatey is software management automation for Windows that wraps installers, executables, zips, and scripts into compiled packages. Chocolatey integrates w/SCCM, Puppet, Chef, etc. Chocolatey is trusted by businesses to manage software deployments.
Chocolatey Software

Script To Set Ansible Connection To Windows Host Locally Via WSL
WSL also known as Windows Subsystem For Linux is a lightweight virtual machine that you can enable to run Linux on your Windows computer. Ensure that you set up WSL by following these steps:
Install Ubuntu on WSL2 on Windows 10 | Ubuntu
Ubuntu is an open source software operating system that runs from the desktop, to the cloud, to all your internet connected things.
Ubuntu

Once WSL is installed and Ansible and Chocolatey are set up. Copy the Powershell script below and name it windows-host-setup.ps1. Navigate to the directory and run this command to execute the setup that will allow you to access your Windows localhost through WSL — powershell.exe -ExecutionPolicy ByPass -File "windows-host-setup.ps1"
$url = "https://raw.githubusercontent.com/ansible/ansible/devel/examples/scripts/ConfigureRemotingForAnsible.ps1"
$file = "$env:temp\ConfigureRemotingForAnsible.ps1"
(New-Object -TypeName System.Net.WebClient).DownloadFile($url, $file)
powershell.exe -ExecutionPolicy ByPass -File $file
Set Up Inventory And Playbooks
Once the above script is executed successfully the next steps are to add your inventory file and playbook to manage your desktop apps on your Windows system. Create a directory called choco and add localhost_inventory.yml and desktop_apps.yml and copy the scripts below:
#localhost_inventory.yml

all:
  hosts: localhost
  vars:
    ansible_user: user #add your windows username here
    ansible_connection: winrm
    ansible_winrm_server_cert_validation: ignore
#desktop_apps.yml
---
- hosts: localhost
  connection: local
  tasks:
    - name: Install/Uninstall/Update Chromium
      win_chocolatey:
        name:
        - chromium
        state: absent

    - name: Install/Uninstall/Update Slack
      win_chocolatey:
        name:
        - slack
        state: present

    - name: Install/Uninstall/Update Telegram
      win_chocolatey:
        name:
        - telegram
        state: latest
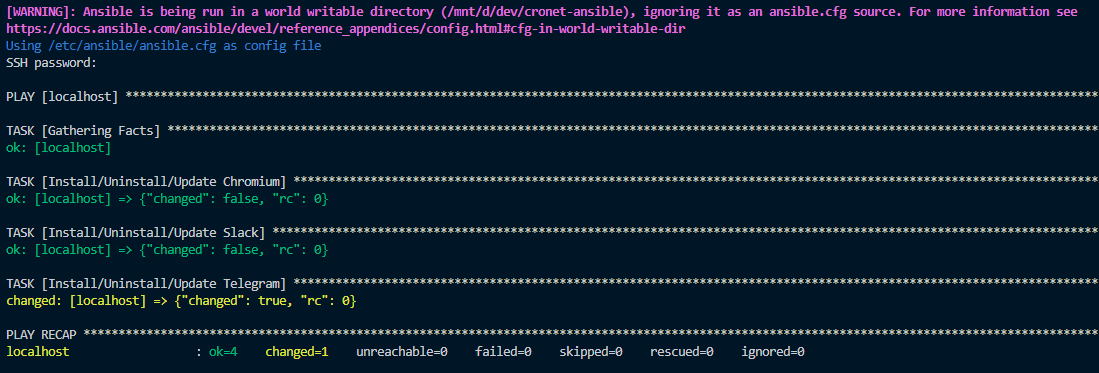
The desktop_apps.yml script can be updated by looking at the chocolatey package website to see which packages are available to install. In this tutorial we are going to uninstall Chromium, ensure that Slack is installed else it will be installed, update Telegram to the latest version if installed, and if not install the latest version. This ansible module states work as follows:
- absent — uninstall package/software
- present — ensure the software is installed and if not install the latest version
- latest — update software to the latest version and if it does not exist install the latest version
Once all the above steps are completed run the following command to execute this Ansible playbook — ansible-playbook choco/desktop_apps.yml -i choco/localhost_inventory.yml --ask-pass --verbose and you will be prompted to input your Windows password.
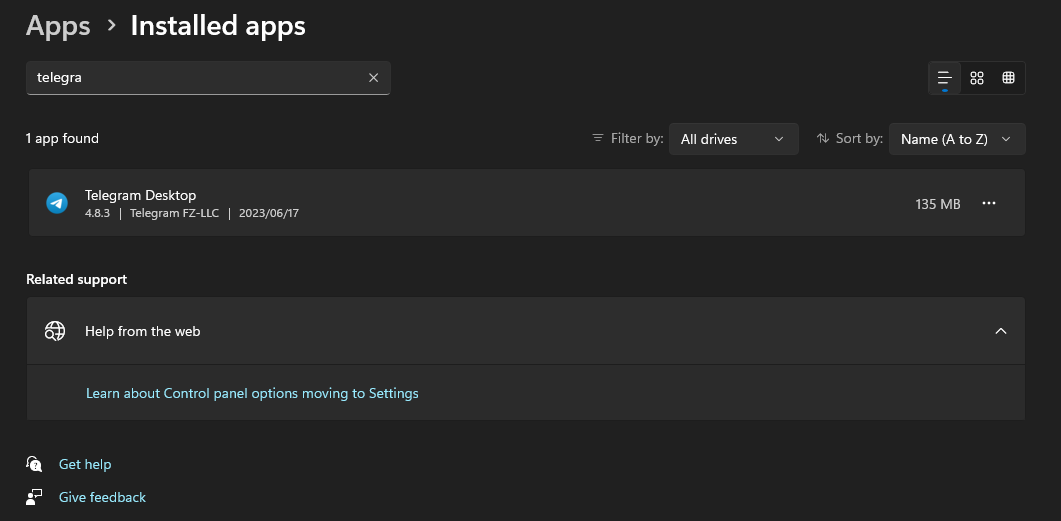
Once successful you can search for the apps and should see that you have installed or updated your desktop apps to the latest version like in this example below.
Conclusion
In conclusion, Chocolatey is an awesome open-source package manager for Windows operating systems and has a large community behind it. If you enjoyed this article consider signing up for our newsletter and don’t forget to share it with people that would find it useful. Leave a comment below with a tutorial you would like us to cover.
ansible-windows
This repository contains ansible configurations for installing software on Windows systems.
prerequisite
This command sets the network category of a connection profile to «Private» in Windows.
Set-NetConnectionProfile -NetworkCategory Private
This command retrieves the network connection profiles on the local computer. It provides information about each network connection, including the network name, interface alias, interface index, and network category (Public, Private, or Domain).
This command is used to configure Windows Remote Management (WinRM) quickly. WinRM is a Microsoft implementation of the WS-Management Protocol, which allows remote management of computers running Windows. Running winrm quickconfig enables basic WinRM settings on the local computer, such as starting the WinRM service, setting up the WinRM listener, and allowing WinRM through the Windows Firewall. This command is often used when setting up systems for remote administration or automation tasks.
Software will be installed on a remote system.
git
curl
jq
nodejs
pm2
openjdk17
1. Copy this script in remote windows system.
You can copy this file in any drive or directory in the windows system.
D:\ConfigureRemotingForAnsible.ps1
2. Execute below commands to run the script.
Open the powershell command prompt and fire the command.
powershell.exe -ExecutionPolicy Bypass -File D:\ConfigureRemotingForAnsible.ps1 -CertValidityDays 100
Set-ExecutionPolicy RemoteSignedc
You will need to allow the port 59861 from you windows machine to allow remote installation.
3. Go to the ansible server.
Go to the directory /etc/ansible/ and create a installation file install_software.yml
---
- name: Install Git, Curl, and jq on Windows 10
  hosts: windows
  gather_facts: no
  tasks:
    - name: Install Git using Chocolatey
      win_chocolatey:
        name: git
        state: present
      vars:
        ansible_winrm_server_cert_validation: ignore

    - name: Install Curl using Chocolatey
      win_chocolatey:
        name: curl
        state: present
      vars:
        ansible_winrm_server_cert_validation: ignore

    - name: Install jq using Chocolatey
      win_chocolatey:
        name: jq
        state: present
      vars:
        ansible_winrm_server_cert_validation: ignore

    - name: Install Node.js using Chocolatey
      win_chocolatey:
        name: nodejs
        state: present
        version: 18.17.0
      vars:
        ansible_winrm_server_cert_validation: ignore

    - name: Install PM2 using npm
      win_shell: npm install -g pm2
      vars:
        ansible_winrm_server_cert_validation: ignore

    - name: Install JDK 17 using Chocolatey
      win_chocolatey:
        name: openjdk17
        state: present
      vars:
        ansible_winrm_server_cert_validation: ignore
4. Update client host
Open the host file in ansible directory and update client details.
[windows]
192.168.1.20 ansible_user=Admin ansible_password=Your_password ansible_connection=winrm
5. Execute the installtion
Run below command to execute commands written in the ansible.
ansible-playbook -i hosts install_software.yml
It will take a few minutes to install the required software.
How to Install Windows software with Ansible?
Today I’m going to reveal a secret to installing the software in a Windows-managed host using Chocolatey Package Manager.
I’m Luca Berton and welcome to today’s episode of Ansible Pilot
Ansible module win_chocolatey
Chocolatey is the package manager for windows, it has the largest online registry of Windows packages.
At the moment it contains nearly 9000 Community Maintained Packages.
Today we’re talking about Ansible module win_chocolatey to automate the software installation process.
The full name is chocolatey.chocolatey.win_chocolatey, which means that is part of the collection distributed by “chocolatey”.
It manages packages in Windows using chocolatey. It’s the windows correspondent of the ansible package module.
Parameters
namelist—string — the name of the packagestatestring — present / latest /absent /downgrade /reinstalledversionstring — specific versionpinnedboolean — no/yessourcestring — URL/path
The parameter list is pretty wide but this four are the most important options.
In the “name” parameter you are going to specify the name of the package or a list of packages.
If you would like to install a specific version you could specify it in the “version” parameter.
The state specifies the action that we would like to perform. In our case for install is “present or latest”.
I’d like to mention some additional parameters that might be useful for you.
The “pinned” parameter allows to pin the Chocolatey package or not. Pin a package to suppress upgrades.
During the next upgrade for all packages, Chocolatey will automatically skip the pinned packages.
“source” allows specifying a local repository for packages if available.

Playbook
Are you ready to make your hands dirty?
Let’s jump in a quick live Playbook of a playbook about the win_chocolatey module.
- win_chocolatey.yml
---
- name: win_chocolatey module Playbook
  hosts: all
  become: false
  gather_facts: false
  vars:
    - packages:
      - git
      - notepadplusplus
  tasks:
    - name: install packages
      chocolatey.chocolatey.win_chocolatey:
        name: "{{ packages }}"
        state: present
code with ❤️ in GitHub
Conclusion
Now you know better the Ansible module win_chocolatey and how you could use it successfully in your playbook to automate your day-to-day activities.
Subscribe to the YouTube channel, Medium, and Website, X (formerly Twitter) to not miss the next episode of the Ansible Pilot.
Academy
Learn the Ansible automation technology with some real-life examples in my
Udemy 300+ Lessons Video Course.

My book Ansible By Examples: 200+ Automation Examples For Linux and Windows System Administrator and DevOps

Donate
Want to keep this project going? Please donate
Patreon
Buy me a Pizza