
WYSIWYG (конструктор) есть и для JavaFX, и для Swing, и для AWT, для простого и функционального интерфейса лучше Swing, для дизайна — JavaFX, для максимального быстродействия — AWT, на Android XML Layout все это одинаково мало похоже, но JavaFX поддерживает XML-разметку, Windows Forms здесь вовсе ни при чем, это технология для C#, а то, о чем вы говорите, независимо от платформы называется GUI.
Ответ написан
2
комментария
DJF — Desktop Java Forms
Коротко на русском: Djf — легковесная десктоп master-detail библиотека на базе Java Swing, с заимствованными GUI идеями из FoxBase и Oracle Forms,
опирающаяся на концепции ORM Hibernate и использующая Miglayout (и не только) для компоновки, а также RSyntaxTextArea для подсветки текстовых панелей.
В библиотеке сделана реализация на перемещение курсором между UI элементами без использования мыши (как это было в 90-х на FoxBase 
Формы, панели, виджеты и бины описываются через XML, количество аттрибутов описания минимизировано.
Форма — это расширение JInternalFrame, и из нее можно вызвать другую форму и т.д.,
причем текущая форма сохраняет свое состояние, а следующая форма визуально полностью перекрывает текущую.
Форма может быть модальной и в этом случае она не сможет вызвать следующую форму.
Форма(ы) масштабируется в соответствие с размером родительского контейнера JFrame.
Кроме того в Djf можно увеличивать размер текста через stepPercent виджет, что позволяет более комфортно работать с формами на малоразмерном дисплее.
Djf is Desktop Java Forms, a compact master-detail UI library like FoxBase, but based on Swing.
Djf uses Hibernate mapping concepts for data, for component layout — Miglayout and RSyntaxTextArea for text panels.
You can see almost all examples of forms definition, data bindings and assistances in demo application.
After downloading you can run this demo: java -jar djf-demo-1.6-standalone.jar

Main features
- Easy CRUD operations.
- View relationships between parent and multiple types of children. There can be various combinations, for example:
- master table and its detail table(s);
- master table and its nested detail table(s);
- master table and its several detail fields with table(s);
- several master tables and their detail table(s);
- Reusing components, such as forms, panels and beans.
- Each form has zero to n models and one control panel with following buttons: add record, refresh form, delete record, save, exit form.
- Each form invokes another form (there is no limit).
- Moving between UI-items without mouse (like in DOS forms) by using tab button, up-down arrows (with CTRL combination for text panels)
- Adaptive column display in the grid depending on the resolution.
- Shows wait panel during execution of long operations.
- Supports the following widgets: table, tgrid (tree based on table), combobox and parent-child (linked) combobox, label, text, int, long, num, short, byte, date, textarea, checkbox, period, password, file, phone.
- Supports user activity log.
Requirements
Djf requires JDK 1.6 or higher.
Minimalistic code sample
public class HelloWorldSimple {
    public static void main(String[] args) {
        Djf.getConfigurator().configure(null);
        Djf.runForm("ru/smartflex/djf/demo/xml/HelloWorldSimple.frm.xml", SizeFrameEnum.HALF);
    }
}
<form>
    <description>Hello world simple form</description>
    <layout clazz="java.awt.BorderLayout"/>
    <panel>
        <layout clazz="net.miginfocom.swing.MigLayout">
            <param type="string" value="align 50% 50%"/>
        </layout>
        <items>
            <label text="Djf just said: Hello world !!!" font="Arial:B30" fground="#09ACF2"/>
        </items>
    </panel>
</form>

Licensing
Djf is issued on under the GNU Lesser General Public License.
Support
If you have any issues or questions or suggestions you can send me a letter by email: gali.shaimardanov@gmail.com
Примечания
Для работы в последних версиях IDEA необходимо проставить в каждом из трех модулей language level: 7
Это вызвано тем, что Djf собран под Jdk 1.6.
Более детально о настройках IDEA написано тут https://stackoverflow.com/questions/12900373/idea-javac-source-release-1-7-requires-target-release-1-7
Форум —
Development
0
0
- Ссылка
| ← |
[pygtk] connect/disconnect |
|
считать данные из конфига |
→ |
http://www.devexpress.com/Products/NET/Controls/WinForms/Grid/build.xml
http://www.devexpress.com/Products/NET/Controls/WinForms/Grid/index.xml?lang=en
★★
()
автор топика
- Показать ответ
- Ссылка
Нету.
★★☆
()
- Ссылка
Ответ на:
комментарий
от sanyock
Для Swing какой-то набор есть: http://www.jidesoft.com/products/grids
kamre ★★★
()
- Ссылка
Вы не можете добавлять комментарии в эту тему. Тема перемещена в архив.
| ← |
[pygtk] connect/disconnect |
Development
|
считать данные из конфига |
→ |
Javonet WinForms Calculator Window
Javonet Quick Start Guide
For more information how to use Javonet in common scenerios like creating objects, invoking methods, getting/setting fields, subscribing events and others please refer to our Javonet Quick Start Guide
Overview
This sample show how to build .NET WinForms window from Java code. If you look for a solution how to embed existing .NET WinForms or WPF user control within Java AWT, Swing or JavaFX window check our guide here: Embedding .NET User Controls in Java
Download Sample Project
Use the links below to download full source code and binaries of the sample project created in this tutorial:
Download Source Code and Binaries
Introduction
In this tutorial you will learn how to build Java application with WinForms interface, how to extend .NET class in Java and how to build custom strongly-typed wrapper for .NET object. Javonet allows you to create WinForms window the same way as you would do it in .NET by extending “Form” class. Using built-in events bridge you can subscribe to .NET events and provide fully functional interactive interface.
Use cases
This solution might be helpful in each situation where you have business logic implemented in Java and just wants to expose the user interface using .NET, when you plan to migrate your Java application to .NET or if you have another system built on Java which forces you to develope user logic in Java but you would like to levarage possiblities of WinForms interace.
Prerequisites
To build Java application with WinForms interface all you need is Javonet developer license and Javonet desktop license for each end-user workstation.
Step by step instruction
1) Before using Javonet it’s good practice to prepare Javonet XML configuration file first. XML configuration file allows us to provide license details, apartment state and assemblies to be referenced in easy to access and modify way. Using XML config files it’s not required to activate or configure Javonet from code, just by first usage of Javonet API it will configure itself automatically.
Our XML configuration file will look like the one presented below. We will use two .NET libraries from .NET framework, therefore in the “reference” section we add “System.Windows.Forms” and “System.Drawing”. Notice that we provide just name of the library not the full path, this way Javonet will use library located in GAC.
<!--?xml version="1.0" encoding="ISO-8859-1" ?-->
<javonet>
<references>
    <reference>System.Windows.Forms</reference>
    <reference>System.Drawing</reference>
</references>
<activation>
    <username>YOUR NAME</username>
    <email>[email protected]</email>
    <licencekey>YOUR-LICENSE-KEY</licencekey>
</activation>
<settings>
    <apartmentState>STA</apartmentState> <!--Remember to set apartment state to STA-->
    <framework>v40</framework> <!--To use STA you must load .NET 4.0 or 4.5 but you can still use .NET 3.5 DLLs-->
</settings>
</javonet>
One of the most important change is ApartmentState, this value indicates in what kind of apartment state our .NET process main thread will be running, to create WinForms window it should be set to STA (Single Thread Application).
Save the XML presented above in “javonet.xml” file.
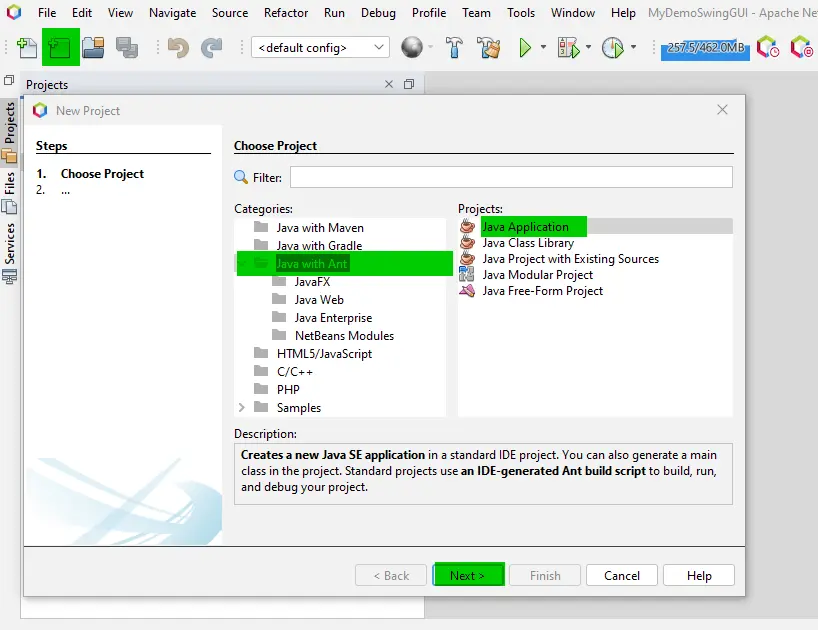
2) Now we can create our Java Project in Eclipse using menu “File > Java Project”. Give the name “JavonetWinformsApp” and press “Finish”.
3) When our application is ready we have to copy “javonet.jar” and “javonet.xml” (prepared in first step) to our new project. Next right click on your project go to “New > Class” and in the “New Java Class” window provide name “JavonetWinformsAppMain” and check field “public static void main(String[] args)” so the default entry method will be created. Next create another Java Class without “main” method, called “CalculatorForm” this class we will use to extend “Form” and implement our WinForms form logic. Our project should look like this:
WinForms Sample Project
4) Next step is to add “javonet.jar” file reference to our project. Right click on the project choose “Build Path > Configure Build Path” and in the new window go to “Add JARs” and choose “javonet.jar” from the our project. Accept all windows and close until you will get back to the project view.
New item in our project should appear called “Referenced Libraries” with javonet library inside.
5) Now we can build our application. We will start with CalculatorForm. The first step is to tell Javonet that our class “CalculatorForm” will be extending .NET “Form” class. To do it extend NObject class and add default constructor in which you will call base constructor providing type of .NET class to be extended.
public class CalculatorForm extends NObject {
  public CalculatorForm() throws JavonetException   {
    super("System.Windows.Forms.Form");
  }
}
Because during initialization of base .NET type any .NET exception can occure our constructor must declare that it can throw JavonetException which wraps any .NET side exception. As you see in call to base constructor by “super” operator we pass as argument string constant with full name of .NET type which will be extended by our Java class. From now our CalculatorForm class can access any protected and public fields and methods of “Form” class using Javonet notation. In this class we will implement our interface design and logic.
Let’s create standard “InitializeComponents” method where we will specify details about our window design. This method will be called from our constructor:
public class CalculatorForm extends NObject {
  private NObject tbDisplay;

  public CalculatorForm() throws JavonetException
  {
    super("System.Windows.Forms.Form");
    InitializeComponents();
  }

  private void InitializeComponents() throws JavonetException
  {
    this.set("Text", "Javonet Calculator");
    this.set("Width", 266);

    tbDisplay=Javonet.New("System.Windows.Forms.TextBox");
    tbDisplay.set("Width", 250);
    tbDisplay.set("Height", 100);
    tbDisplay.set("Text", "0");
    tbDisplay.set("TextAlign", new NEnum("System.Windows.Forms.HorizontalAlignment","Right"));
    NObject font = Javonet.New("System.Drawing.Font","Verdana", 24F);
    tbDisplay.set("Font", font);

    this.getRef("Controls").invoke("Add", tbDisplay);
  }
}
Now our code works pretty the same as .NET WinForms window definitione. We have added “tbDisplay” TextBox variable on class level (as it is instance of .NET object we hold it in NObject variable). Next we added “InitializeComponents” method which we call from constructor. In this method we call set on local “Text” and “Width” fields of our .NET window and we initialize new instance of TextBox for which we set several properties and font. Please notice that we use .NET enum field to specify HorizontalAlignment of our text and we also initialize .NET font object which we pass as reference to “Font” field on our TextBox object. At the end we get Controls property of our Form and invoke “Add” method passing our TextBox instance as argument.
Now we are almost ready to run our first WinForms window. The only missing part is “ShowDialog” or “Show” method which we can wrap in our “CalculatorForm” class so it will be accessible as strongly-types method in our Java application. This is good example of preparing custom wrapper classes if you would like to expose .NET objects in strongly-typed manner for your Java applications. Such wrapping method should look like this:
public void ShowDialog() throws JavonetException
{
  this.invoke("ShowDialog");
}
Our wrapping method is called the same as .NET counterpart and accepts exactly the same arguments (in this case no arguments). Now any other class in our Java application can call “ShowDialog” method on our Form like it was regular Java method. This one we will use in our main method at startup of our application:
public class JavonetWinformsAppMain {
  public static void main(String[] args) throws JavonetException {
    CalculatorForm frmMain = new CalculatorForm();
    frmMain.ShowDialog();
  }
}
The final result of executing our application should be as follows:
Javonet WinForms Calculator Form
And that’s it we have real WinForms window initiated by Java application by extending .NET Form class in Java. Now we can add some buttons and event listeners to handle click events. We will declare buttons variables as NObject field on class level and initialize them in our “InitializeComponents” method:
  button1=Javonet.New("System.Windows.Forms.Button");
  button1.set("Height", 50);
  button1.set("Width", 50);
  button1.set("Top", 50);
  button1.set("Text", "1");
  button1.addEventListener("Click", new NEventListener() {
    public void eventOccurred(Object[] arguments) {
      button1_Click((NObject)arguments[0],(NObject)arguments[1]);
    }
  });
  this.getRef("Controls").invoke("Add", button1);
Here you can see how our button initialization looks like. We initialize new Button object, set some properties and add new Event Listener for “Click” event. There are several different ways for subscribing .NET events about which you can read more in our Quick Start Guide. This example uses anonymous class. While .NET event occurs our “eventOccurred” method is called. As you see .NET event arguments are delivered in Object array but we split them into regular arguments in our event handler method “button1_Click”. As arguments are “Object sender, EventArgs e” so both are .NET instances our event handler accepts as arguments two NObject variables. Our event handler method looks like this:
private void button1_Click(NObject sender, NObject e)
{
  NumberPressed(1);
}
Implementation of “NumberPressed” method is simply displaying pressed numer and performing some simple calculation:
private void NumberPressed(Integer number)
{
  try {
    String current = tbDisplay.get("Text");

    if (current.equals(operation) || current.equals("0"))
      current="";
    tbDisplay.set("Text", current+number.toString());
  } catch (JavonetException e) {
    e.printStackTrace();
  }
}
Now our application has new button “1” and after pressing this button the digit “1” is appended to our display. Now we can specify rest of the controls and finalize our calculator application written in Java with WinForms interface. On the image below you can see the final result. For full application source code please download our full sample.
Javonet WinForms Calculator Window
Download Sample Project
Use the links below to download full source code and binaries of the sample project created in this tutorial:
Download Source Code and Binaries
-
Why Do We Use Java Swing
-
Windows Builder Eclipse Plugin
-
NetBeans Java Swing GUI Builder
A great graphical user interface integrates features such as customization control, split viewing of design code, and an easy-to-use interface and should be clean and lightweight.
In this article, first, we will show how to install the Windows builder GUI development plugin for the Java Swing Designer Application in Eclipse. Second, we will also show you how to use NetBeans Java Swing GUI development.
Why Do We Use Java Swing
Java Swing Class is a compact graphical user interface platform that helps reduce the time and effort to repeat tasks. You can navigate/toggle to choose between gadgets, and your code will be generated automatically.
Note
It is a foundation class in Java that aids in creating window-based applications. Furthermore, you can use GUI developers to construct Java Swing apps because it is open-source.
Classification of Java Swing Class
To understand Java Swing more clearly, please see the following diagram.
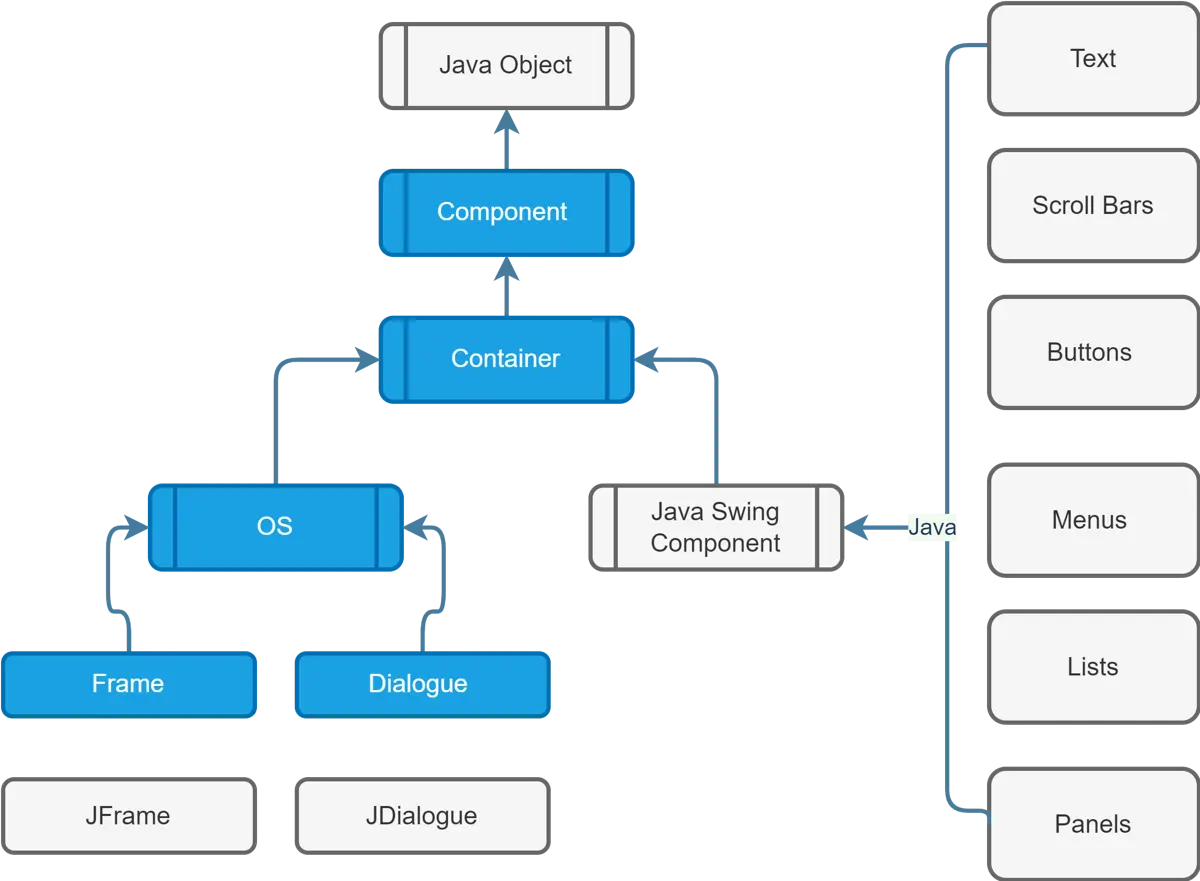
Diagram Summary:
The diagram depicts the relationship between a Java object at the top and a JFrame at the bottom.
All of the components we as users frequently interact with, such as Lists, Buttons, Texts, and so on, are inherited by the JComponent class.
Furthermore, we can see that the containers were added higher with the component and lower with our operating system; these extend on frames and dialogue boxes on the user’s operating system.
All key Swing elements are included in the foundation within one’s graphical user interface app.
Windows Builder Eclipse Plugin
This Eclipse plugin integrates SWT Designer and Swing Designer into a single package.
You can develop Java GUI apps without wiring code. Its WYSIWYG visual designer, for example, provides you with layout tools to create simple forms for complex windows.
It’s cool since it helps generate the code for you. Furthermore, you can add controls to your settings by using drag-and-drop capabilities, null layouts, and event handling.
You can also use a properties editor to modify the properties of your settings.
Windows Builder Plugin:
Follow These Steps:
-
Installation: WindowBuilder
-
Add to Eclipse (drag-and-drop):

-
Confirm the installation process:
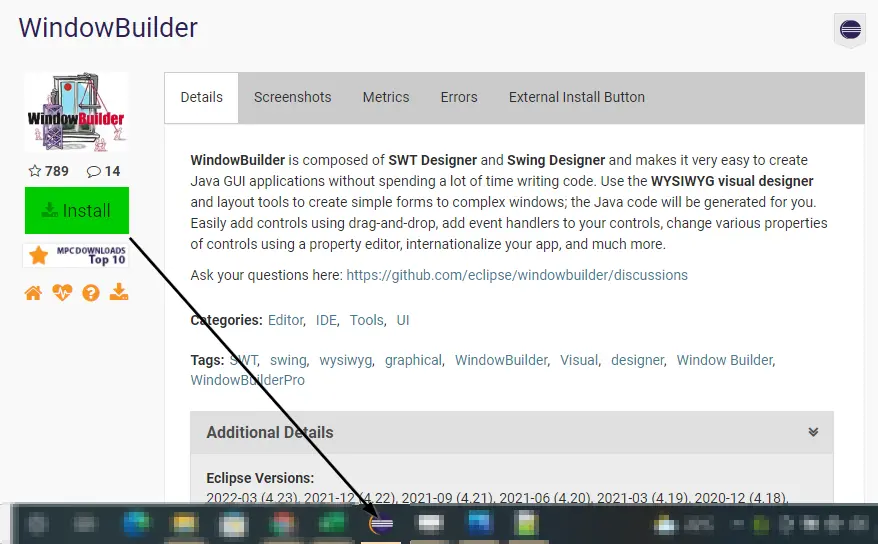

Install Windows Builder Plugin From Eclipse Marketplace
The following way to download WB is another simple approach for installing Windows Builder in your Eclipse IDE.
You have to start your Eclipse and see what version it is.
Note
We are using Eclipse 2021-12.
-
Then go to
Help. -
Select
Install New Software. -
Search for your Eclipse version.
-
Click on
General Purpose Tools. -
Check all the Windows Builder features you want to install.
-
Once you have checked all the options, confirm and wait for the installation process to finish.
-
Do not forget to restart Eclipse after the installation has finished.
Use Windows Builder for Swing GUI Development
After successfully installing all the resources from the Eclipse marketplace server repository into your local workstation, you should be thinking, how do I create a Java Swing Application using the Windows Builder GUI development platform?
Do the following steps:
-
Go to
File. -
Choose
New. -
Other -
Search
WindowBuilder=>Swing Designer=>Application Window.
Note
You can also select other tools from the WB. We have also created the following demo for you to follow the correct steps.
Summary:
We demonstrated two simple methods for installing a GUI Builder in your IDE. We also categorized a Java Swing class and talked about the significance of GUI-based Swing development.
NetBeans Java Swing GUI Builder
NetBeans GUI Builder supports the production of sophisticated and elegant graphical user interface applications. The best part is that you don’t have to be a pro to do it.
You also don’t need deep expertise in layout management. Even a beginner can try it out and create an excellent Java application using Jforms or other components from the Java Swing Foundation class.
What does this IDE offer?
- Open Source
- Layout Management
- Container-based lightweight development
- Availability of Null layouts
- Powerful customization
- Drag-and-drop features
- Easy to use
Are you already excited?
First, you need to download Apache NetBeans IDE if you have not.
-
Download: NetBeans
-
Once downloaded, launch and create a new project.
-
After that, type your project name and finish.
-
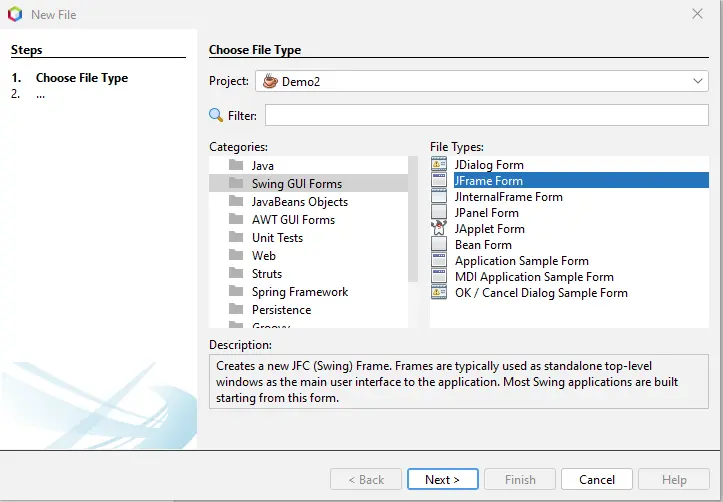
Once you have created a new project, you need to create a class. Right-click on your project >
new>class.
Note
NetBeans will generate the following code dynamically after finishing it.
public class Demo2 extends javax.swing.JFrame {
  public Demo2() {
    initComponents();
  }
  @SuppressWarnings("unchecked")
  // <editor-fold defaultstate="collapsed" desc="Generated Code">
  private void initComponents() {
    setDefaultCloseOperation(javax.swing.WindowConstants.EXIT_ON_CLOSE);
    javax.swing.GroupLayout layout = new javax.swing.GroupLayout(getContentPane());
    getContentPane().setLayout(layout);
    layout.setHorizontalGroup(layout.createParallelGroup(javax.swing.GroupLayout.Alignment.LEADING)
                                  .addGap(0, 400, Short.MAX_VALUE));
    layout.setVerticalGroup(layout.createParallelGroup(javax.swing.GroupLayout.Alignment.LEADING)
                                .addGap(0, 300, Short.MAX_VALUE));
    pack();
  } // </editor-fold>
  public static void main(String args[]) {
    //<editor-fold defaultstate="collapsed" desc=" Look and feel setting code (optional) ">
    try {
      for (javax.swing.UIManager.LookAndFeelInfo info :
          javax.swing.UIManager.getInstalledLookAndFeels()) {
        if ("Nimbus".equals(info.getName())) {
          javax.swing.UIManager.setLookAndFeel(info.getClassName());
          break;
        }
      }
    } catch (ClassNotFoundException ex) {
      java.util.logging.Logger.getLogger(Demo2.class.getName())
          .log(java.util.logging.Level.SEVERE, null, ex);
    } catch (InstantiationException ex) {
      java.util.logging.Logger.getLogger(Demo2.class.getName())
          .log(java.util.logging.Level.SEVERE, null, ex);
    } catch (IllegalAccessException ex) {
      java.util.logging.Logger.getLogger(Demo2.class.getName())
          .log(java.util.logging.Level.SEVERE, null, ex);
    } catch (javax.swing.UnsupportedLookAndFeelException ex) {
      java.util.logging.Logger.getLogger(Demo2.class.getName())
          .log(java.util.logging.Level.SEVERE, null, ex);
    }
    //</editor-fold>
    java.awt.EventQueue.invokeLater(new Runnable() {
      public void run() {
        new Demo2().setVisible(true);
      }
    });
  }
}
Summary:
We’d like you to forget about the code for a moment! It’s just the beauty of GUI builders that you’ll be able to evaluate with more expertise and understanding of the fundamentals.
Can you see the connections now? So it must be a yes.
IDE builders will make your coding more accessible. It is not — however, the best practice for everybody.
Yet, if you can get the job done, custom drag and drop should not compromise your skill sets.
That said, given a few days of continuous effort, you will be able to create essential Windows-based Java Swing apps and others.
If you’re still confused, here’s how to get started with your first Java Swing project in NetBeans.
Enjoying our tutorials? Subscribe to DelftStack on YouTube to support us in creating more high-quality video guides. Subscribe