
If you’ve ever used Linux or know someone who uses Linux, then you’ve probably heard of the sudo command. The command is a critical component to just about every Linux distribution and what it does is let you run a command as a different user, most notably the root user. On certain Linux distributions, you can log in as the root user by using the su command, but this is considered highly risky and no one ever does it.
Actually, it’s so dangerous that it’s disabled by default on Linux distributions like Ubuntu. Instead, you have to use the sudo command if you want to run a command as the root user. So what about Windows? Well, unfortunately, most people are logged into Windows as Administrators, which is the same as root user in Linux. However, Microsoft has tried to lessen the dangerous effects of being logged in as an Administrator by enabling User Account Control or UAC.
That way, even if the user has Administrative privileges, applications running under that account will not inherit those privileges unless it’s manually authorized by the user. This helps prevent malware and spyware from infecting a Windows user who is logged in as an Administrator.
So while Linux users have the sudo command, what do Windows user have? Are there alternatives that Windows users can use to run commands with elevated privileges? Is there a sudo command for Windows? In this article, I’ll talk about five alternatives to the sudo command for Windows users.
Note: Some of these tools are quite old now, so they may or may not work with the latest versions of Windows.
Windows has the runas command, which is the direct counterpart to sudo on Linux. Using the runas command, you can execute a script, program or command as a different user or as an administrator. The full syntax for the runas command is:
runas [{/profile|/noprofile}] [/env] [/netonly] [/smartcard] [/showtrustlevels] [/trustlevel] /user:UserAccountName program
If you wanted to open an administrative command prompt, you could type the following:
runas /noprofile /user:Administrator cmd

/noprofile will not load the current user profile. You can remove that if you need access to the user environment variables. If you wanted to open a text file using Notepad with administrator privileges, you could use this command:
runas /user:Administrator "notepad my_file.txt"
You can checkout the Technet page on runas for more information on how to use it.
Note that when using runas command, if you install a program or make changes to settings, etc., the changes will be made to the user account that you are running the command on. For example, let’s say you have user X who is a normal user and user Y, who is an administrator. If you log into X and then do a runas using the Administrator credentials, changes will be made to the Administrator’s settings, not user X.
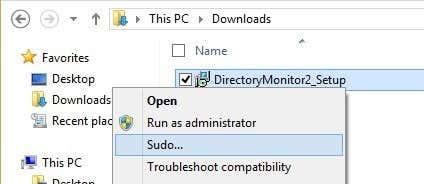
So if you install an application by right-clicking on the EXE file and choosing Run as Administrator, it’ll get installed to the built-in Administrator user profile, not the one you are logged into. If you want true elevated privileges like sudo without the profile issues, check out the next alternative below.
Sudo for Windows – Sourceforge
Sudo for Windows is a free program you can install that will give you the same experience of the sudo command on Linux for Windows. The only difference is that Sudo for Windows “preserves the user’s profile and ownership of created objects” as stated by the developer. This is really handy if you like to use elevated permissions for installing apps or making changes to user locations like My Documents, etc.
It’ll give you Administrative privileges, but will keep all the changes in the current profile instead of the account you’re using to run the command with. The program requires .NET version 2.0, which you can’t download individually. In order to get 2.0, you have to install .NET Framework 3.5, which include 2.0.
Once you install Sudo for Windows, you need to add the user accounts that you to allow to have elevated privileges to a specific group created by the program called Sudoers. Right-click on My Computer or This PC and click on Manage. Then expand Users and Groups and click on Groups. You should see one called Sudoers.

Double-click on Sudoers and click on the Add button.
On the next dialog, click the Advanced button and then click Find Now. This will list out all users and groups on the system. Double-click the user you want to add.

Repeat this step for however many users you want to add. Then click OK and you should see the members listed in the Members listbox shown above. Click OK and now you should be able to use the sudo GUI and command. If you right-click on a program, you’ll see the Sudo option.
You can also open a command prompt and type sudo to run command with elevated permissions.

Overall, it’s pretty nifty and works very well. However, note that this particular program is really useful for launching programs or processes either via right-click or via the command prompt, but it’s not meant for running command line apps. For example, if you wanted to do sudo mkdir “c:\Program Files\new”, this won’t work using Sudo for Windows. For that functionality, there is another program called the same thing, but by a different developer. Read below.
Sudo for Windows – Luke Sampson
There’s another developer who wrote another Sudo for Windows that lets you execute command line apps too. So let’s go back to the example about creating a new folder in C:\Program Files. You can’t really do this by default.

Above I’m using PowerShell, but you’ll get the same error using the command prompt also. However, once you install Sudo for Windows, just add the word sudo to the front of the command and it works perfectly with no errors!
To install it, you need to open PowerShell and then type in the following commands in order:
iex (new-object net.webclient).downloadstring('https://get.scoop.sh')

set-executionpolicy unrestricted -s cu -f

scoop install sudo
If everything works OK, you should see the following output in PowerShell after each command:

That’s it! Now you can start typing in commands and adding sudo in front. The only annoying thing about this program is that the UAC window still pops up and you have click Yes for it to work. Even with that slight annoyance, the benefits are well worth it.
Elevate
Elevate is a program that works with UAC and doesn’t work exactly like sudo. With Elevate, it will change the executing user to Administrator like the runas command does. However, it’s useful for working in the command line or with batch files.

The main purpose of elevate is not to get around UAC, but to start a process in an elevated state from a non-elevated shell and then continuing on as normal even after the command has completed. Elevate is useful for scripting because you don’t have to worry about trying to script the whole right-clicking and running a command prompt as Administrator process.
Elevation PowerToys for Windows
For those of you who do a lot of work on the command line or work with scripts and batch files, then the Elevation PowerToys for Windows page has quite a few useful tools and scripts.

The script elevation power toys were created to overcome the frustrating aspects of UAC when trying to elevate a program from the command line or running scripts as administrators.
Hopefully, that’s enough tools and programs for you to make you feel like you’re actually using sudo on Windows. There’s no perfect replacement for it, but there are quite a few options that come close. If you use something else to elevate programs, commands or scripts in Windows, let us know in the comments. Enjoy!
Related Posts
- The 5 Best Blue Light Filter Apps For Windows, Mac and Linux
- Best 10 Free PDF Editors for Windows
- 5 Best Audiobook Players for Windows
- 7 Best Noise Cancellation Software for Windows and Mac
- Best Beat Making Software for Windows
gsudo — a sudo for Windows
gsudo is a sudo equivalent for Windows, with a similar user-experience as the original Unix/Linux sudo.
Allows you to run a command (or re-launch your current shell) with elevated permissions, in the current console window or a new one.
Just prepend gsudo (or the sudo alias) to your command and it will run elevated. For PowerShell use this syntax: gsudo { ScriptBlock }
One UAC popup will appear each time. You can see less popups if you enable gsudo cache.
It detects your current shell and elevates your command as native shell commands. (Supports Cmd, PowerShell, WSL, git-bash, MinGW, Cygwin, Yori, Take Command, BusyBox & NuShell.)
Table of contents
- gsudo — a sudo for Windows
- Table of contents
- Demo
- Features
- Installation
- Usage
- Usage from PowerShell / PowerShell Core
- PowerShell Module
- Usage from WSL (Windows Subsystem for Linux)
- Usage from PowerShell / PowerShell Core
- Configuration
- Credentials Cache
- Known issues
- FAQ
- Please support gsudo! 💵
⭐ Extended documentation available at: https://gerardog.github.io/gsudo/
Demo

(with gsudo config CacheMode auto)
Features
-
Elevated commands are shown in the current console. No new window (unless you specify
-n) -
Credentials cache:
gsudocan elevate many times showing only one UAC pop-up if the user opts-in to enable the cache. -
Detects your current shell (Supports
CMD,PowerShell,WSL,Bash for Windows(Git-Bash/MinGW/MSYS2/Cygwin),Yori,Take CommandandNuShell), and elevates your command correctly. -
Supports being used on scripts:
- Outputs StdOut/StdErr can be piped or captured (e.g.
gsudo dir | findstr /c:"bytes free" > FreeSpace.txt) and exit codes too (%errorlevel%). Ifgsudofails to elevate, the exit code will be 999. - If
gsudois invoked from an already elevated console, it will just run the command (it won’t fail). So, you don’t have to worry if you rungsudoor a script that usesgsudofrom an already elevated console. (The UAC popup will not appear, as no elevation is required)
- Outputs StdOut/StdErr can be piped or captured (e.g.
-
gsudo !!elevates the last executed command. Works on CMD, Git-Bash, MinGW, Cygwin (and PowerShell with gsudo module only)
Installation
- Using Scoop:
scoop install gsudo - Using WinGet:
winget install gerardog.gsudo - Using Chocolatey:
choco install gsudo - Manual Setup: download and run the proper
MSIinstaller for you system from the latest release. - Running this line: (script):
PowerShell -Command "Set-ExecutionPolicy RemoteSigned -scope Process; [Net.ServicePointManager]::SecurityProtocol = 'Tls12'; iwr -useb https://raw.githubusercontent.com/gerardog/gsudo/master/installgsudo.ps1 | iex"
- Portable:
- Download
gsudo.portable.zipfrom the latest release. - Extract the folder corresponding to your processor architecture (x64, x86, or arm64) from the zip file to a suitable directory on your computer.
- Optionally, add that directory to your system’s PATH environment variable if it’s not already accessible.
- Download
Please restart all your console windows after installing to ensure that the PATH environment variable is refreshed.
Note: gsudo.exe is portable. No windows service is required or system change is done, except adding it to the Path.
Usage
gsudo [options]                  # Starts your current shell elevated
gsudo [options] {command} [args] # Runs {command} with elevated permissions
gsudo cache [on | off | help]    # Starts/Stops a credentials cache session. (less UAC popups)
gsudo status [--json | filter ]  # Shows current user, cache and console status.
gsudo !!                         # Re-run last command as admin. (YMMV)
New Window options:
 -n | --new            # Starts the command in a new console/window (and returns immediately).
 -w | --wait           # When in new console, wait for the command to end.
 --keepShell           # After running a command, keep the elevated shell open.
 --keepWindow          # After running a command in a new console, ask for keypress before closing the console/window.

Security options:
 -u | --user {usr}     # Run as the specified user. Asks for password. For local admins shows UAC unless '-i Medium'
 -i | --integrity {v}  # Specify integrity level: Untrusted, Low, Medium, MediumPlus, High (default), System
 -s | --system         # Run as Local System account (NT AUTHORITY\SYSTEM).
 --ti                  # Run as member of NT SERVICE\TrustedInstaller
 -k                    # Kills all cached credentials. The next time gsudo is run a UAC popup will be appear.

Shell related options:
 -d | --direct         # Skips Shell detection. Assume CMD shell or CMD {command}.
 --loadProfile         # When elevating PowerShell commands, load user profile.

Other options:
 --loglevel {val}      # Set minimum log level to display: All, Debug, Info, Warning, Error, None
 --debug               # Enable debug mode.
 --copyns              # Connect network drives to the elevated user. Warning: Verbose, interactive asks for credentials
 --copyev              # (deprecated) Copy environment variables to the elevated process. (not needed on default console mode)
 --chdir {dir}         # Change the current directory to {dir} before running the command.
Note: You can use anywhere the sudo alias created by the installers.
Examples:
gsudo   # elevates the current shell in the current console window (Supports Cmd/PowerShell/Pwsh Core/Yori/Take Command/git-bash/cygwin)
gsudo -n # launch the current shell elevated in a new console window
gsudo -n -w powershell ./Do-Something.ps1 # launch in new window and wait for exit
gsudo notepad %windir%\system32\drivers\etc\hosts # launch windows app

sudo notepad # sudo alias built-in

# redirect/pipe input/output/error example
gsudo dir | findstr /c:"bytes free" > FreeSpace.txt

gsudo config LogLevel "Error"          # Configure Reduced logging
gsudo config Prompt "$P [elevated]$G " # Configure a custom Elevated Prompt
gsudo config Prompt --reset            # Reset to default value

# Enable credentials cache (less UAC popups):
gsudo config CacheMode Auto
Usage from PowerShell / PowerShell Core
gsudo detects if invoked from PowerShell and elevates PS commands (unless -d is used to elevate CMD commands).
The command to elevate will run in a different process, so it can’t access the parent $variables and scope.
To elevate a commands or script block: Wrap it in {curly braces}.
# Syntax:
gsudo { ScriptBlock }
gsudo [options] { ScriptBlock } [-args $argument1[..., $argumentN]] ;

# Examples:
gsudo { Write-Output "Hello World" }

# Pass arguments with -args
$MyString = "Hello World"
gsudo { Write-Output $args[0] } -args $MyString

# Output is serialized as PSObjects with properties.
$services = gsudo { Get-Service 'WSearch', 'Winmgmt'}
Write-Output $services.DisplayName

# Inputs too: Example elevated iteration of a list.
Get-ChildItem . | gsudo { $Input.CreationTime}
Alternative syntaxes:
2. Invoke-gsudo wrapper function: (much slower)
# Pass values (not variables by reference) by prefixing `$using:`. I.E.

$MyString = "Hello World"
Invoke-Gsudo { Write-Output $using:MyString }

# Syntax:
Invoke-Gsudo [-ScriptBlock] <ScriptBlock>
             [[-ArgumentList] <Object[]>]
             [-InputObject <PSObject>]
             [-LoadProfile | -NoProfile]
             [-Credential <PSCredential>]
- PowerShell function.
- Performs auto serialization of inputs & outputs.
- You can prefix variables with the `$using:` scope modifier (like `$using:variableName`) and their serialized value is applied.
- Use `-LoadProfile` or `-NoProfile` to override profile loading or not.
- Use `-Credential` option for Run As User (same as `-u` but for `Get-Credentials`).
- Better forwarding of your current context to the elevated instance (current Location, $ErrorActionPreference)
3. Manual string interpolation. (not recommended)
I don’t recommend this approach as it is really hard to do proper escape all special characters.
Usage: gsudo 'string literal'

# Variable substitutions example:
$file='C:\My Secret.txt';
$algorithm='md5';
$hash = gsudo "(Get-FileHash '$file' -Algorithm $algorithm).Hash"
# or
$hash = gsudo "(Get-FileHash ""$file"" -Algorithm $algorithm).Hash"
- Accepts a string literal with the command to elevate.
- Returns a list of strings.
PowerShell Module
-
Optional: Import module
gsudoModule.psd1into your PowerShell Profile:- Adds syntax auto-complete to gsudo in PowerShell. Plus, it suggests the 3 previous commands, making your workflow smoother than ever!
- Enables
gsudo !!on Powershell, to elevate the last executed command. - Adds Functions:
Test-IsGsudoCacheAvailableReturns true if a gsudo cache is active (meaning elevation with no UAC is possible).Test-IsProcessElevated: Returns true if the current process is elevated.Test-IsAdminMember: Returns true if the current user is member of theLocal Administratorsgroups, which means it can elevate with.
# Add the following line to your $PROFILE
Import-Module "gsudoModule"

# Or run:
Write-Output "`nImport-Module `"gsudoModule`"" | Add-Content $PROFILE
- If you haven’t already customized your PowerShell prompt (for example by installing Oh-My-Posh), you can easily add a red
#indicating that the current process is elevated:
To do so add this line to your profile (after importing
gsudoModule):Set-Alias Prompt gsudoPrompt

Usage from WSL (Windows Subsystem for Linux)
On WSL, elevation and root are different concepts. root allows full administration of WSL but not the windows system. Use WSL’s native su or sudo to gain root access. To get admin privilege on the Windows box you need to elevate the WSL.EXE process. gsudo allows that (a UAC popup will appear).
On WSL bash, prepend gsudo to elevate WSL commands or gsudo -d for CMD commands.
# elevate default shell
PC:~$ gsudo

# run elevated WSL command
PC:~$ gsudo mkdir /mnt/c/Windows/MyFolder

# run elevated Windows command
PC:~$ gsudo -d notepad C:/Windows/System32/drivers/etc/hosts
PC:~$ gsudo -d "notepad C:\Windows\System32\drivers\etc\hosts"

# test for gsudo and command success
retval=$?;
if [ $retval -eq 0 ]; then
    echo "Success";
elif [ $retval -eq $((999 % 256)) ]; then # gsudo failure exit code (999) is read as 231 on wsl (999 mod 256)
    echo "gsudo failed to elevate!";
else
    echo "Command failed with exit code $retval";
fi;
Configuration
 gsudo config                          # Show current config settings & values.
 gsudo config {key} [--global] [value] # Read or write a user setting
 gsudo config {key} [--global] --reset # Reset config to default value
 --global                              # Affects all users (overrides user settings)
Credentials Cache
The Credentials Cache, if enabled and active, allows to elevate several times from a parent process with only one UAC pop-up. After 5 minutes without elevations, the cache session closes automatically (Configurable timeout via gsudo config CacheDuration).
While this very convenient, it’s important to understand its potential security risks. Even if gsudo itself is secure, the inherent vulnerability lies in the host process. If your system is already compromised by a malicious process, it can manipulate the permitted process (e.g., Cmd/Powershell) and force an active gsudo cache instance to elevate privileges without triggering a UAC prompt.
This risk is the trade-off for using the Credentials Cache. The cache is safe to use as long as you are confident there are no malicious processes running on your system.
Here are the Credentials Cache Modes:
Explicit:(default) Every elevation shows a UAC popup, unless a cache session is started manually…- To start or stop a cache session run:
gsudo cache {on | off} - This is the default mode. (Use
gsudo config CacheMode Explicitto revert to this value).
- To start or stop a cache session run:
Auto:Similar to unix-sudo. The first elevation shows a UAC popup and starts a cache session automatically.- Run
gsudo config CacheMode Autoto use this mode.
- Run
Disabled:Every elevation shows a UAC popup, and trying to start a cache session will throw an error..- Run
gsudo config CacheMode Disabledto use this mode.
- Run
In any case, you can stop all cache sessions with gsudo -k.
Learn more
Known issues
-
The elevated instances do not have access to the network shares connected on the non-elevated space. This is not a
gsudoissue but how Windows works. Use--copyNSto replicate Network Shares into the elevated session, but this is not bi-directional and is interactive (may prompt for user/password). -
gsudo.execan be placed on a network share and invoked as\\server\share\gsudo {command}but doesn’t work if your current folder is a network drive. For example do not map\\server\share\toZ:and thenZ:\>gsudo do-something. -
Please report issues in the Issues section.
FAQ
-
Why is it named
gsudoinstead of justsudo?When I created
gsudo, there were othersudopackages on most Windows popular package managers such asChocolateyandScoop, so I had no other choice to pick another name.gsudoinstallers create an alias forsudo, so feel free to usesudoon your command line to invokegsudo. -
Which dotnet version is built with?
Versions prior to v1.3.0 used .NET 4.6 because it was included in every Windows 10/11 installation.
From v1.4.0 up to v2.5.1, gsudo has been built using .net7.0 NativeAOT. This approach offers faster load times, reduced memory usage, and allows the tool to run on machines without any .NET runtime installed.
Starting with v2.6.0, we’ve migrated to net9.0 due to the end-of-life of net7.0.
-
Is
gsudoa port of*nix sudo?No.
gsudoreminds of the original sudo regarding user expectations. Manysudofeatures are*nixspecific and could never have aWindowscounterpart. Other features (such assudoers) could potentially be implemented but are not at this point. -
What are the requirements? Does it work in Windows 7/8?
It works on Win7 SP1 onwards. Some features may only work in Windows 10/11, like elevating as TrustedInstaller.
-
How do I return to the previous security level after using gsudo?
In the same way as you would with
Unix/Linux sudo:gsudodoes not alter the current process, instead it launches a new process with different permissions/integrity level. To go back to the previous level, just end the new process. ForCommand PromptorPowerShelljust typeexit.
Please support gsudo! 💵
- Please give us a star! ⭐
- Help spread the word by mentioning
gsudoin social networks! - Sponsor or Donate
Introduction
When it comes to managing administrative tasks on Linux systems, the command sudo has long been the go-to solution. However, Windows users have often found themselves missing out on this convenient privilege escalation tool. Fortunately, with the introduction of gsudo for Windows, users can now enjoy similar functionality. In this blog post, we’ll delve into the world of gsudo, comparing it to sudo on Linux and exploring how to create an alias in your PowerShell profile to streamline your workflow.
Understanding gsudo
gsudo is an open-source utility that enables users to run commands with elevated privileges on Windows systems. Similar to sudo on Linux, gsudo provides a way to temporarily elevate permissions, allowing users to perform administrative tasks without the need to log in as an administrator or switch to a separate elevated command prompt.
Comparing gsudo to sudo
While gsudo and sudo serve the same purpose on their respective platforms, there are a few key differences to consider.
-
Syntax and usage:
On Linux, the
sudocommand is used before any other command to elevate privileges. For example,sudo apt updateruns theapt updatecommand with administrative rights. Conversely, gsudo on Windows is used as a prefix to the entire command line, such asgsudo npm install -g create-react-app. This difference in syntax is a result of the underlying architecture and design choices of the two operating systems. -
Elevation mechanism:
In Linux,
sudouses the system’s default authentication mechanism, typically requiring the user’s password to grant elevated privileges. On Windows, gsudo leverages the User Account Control (UAC) mechanism, which prompts the user with a UAC dialog to confirm the elevation request. This approach aligns with Windows’ security model and ensures that users are aware of and explicitly approve the elevation of privileges. -
Plugin support:
One of the advantages of
sudoon Linux is its extensibility through plugins, which allow for fine-grained control over command execution. At present, gsudo does not have a plugin system, limiting its capabilities to basic privilege elevation. However, as an open-source project, gsudo has the potential to evolve and introduce plugin support in the future.
Creating a PowerShell Alias for gsudo
To streamline your workflow and eliminate the need to type gsudo every time, you can create an alias for gsudo in your PowerShell profile. Here’s how:
- Open PowerShell by searching for “PowerShell” in the Start Menu.
-
Run the following command to open your PowerShell profile in a text editor:
- If the profile file does not exist, PowerShell will prompt you to create one. Select “Yes” to proceed.
-
In the profile file, add the following line:
1
Set-Alias -Name sudo -Value gsudo
- Save the file and close the text editor.
-
Restart PowerShell or run the following command to reload your profile:
With the alias in place, you can now use sudo in your PowerShell session to execute commands with elevated privileges, just like you would with gsudo.
Conclusion
gsudo brings the power of sudo to the Windows operating system, allowing users to execute commands with elevated privileges conveniently. While there are some differences between gsudo and sudo, their core purpose remains the same: facilitating administrative tasks without the need for a separate administrative login. By creating an alias for gsudo in your PowerShell profile, you can further enhance your productivity and enjoy a more streamlined experience on your Windows machine.
This post is licensed under CC BY 4.0 by the author.
В Windows есть механизм runas, чтобы запускать процесс от имени другого пользователя. Ничего добавлять не нужно.
scoop install sudo
(Не шутка)
Параметр в реестре:
reg add HKLM\SOFTWARE\Microsoft\Windows\CurrentVersion\Policies\System /v LocalAccountTokenFilterPolicy /t REG_DWORD /d 1 /f
отключает действие UAC для процессов запускаемых удаленно. Устанавливать его надо на ПК, на котором будут удаленно запускаться приложения. После установки требуется перезагрузка.
Когда он установлен и вы запускаете что-то удаленно с правами администратора удаленного компьютера, то программа запускается с реальными администраторскими правами, без фильтра UAC.
Например с помощью того же psexec (или wmic) можно будет запускать удаленно приложения.
Не уверен, что это сработает в случае с ssh и telnet, т.к. сервер службы работает на удаленном компьютере.
С PowerShell локальным все достаточно несложно, например:
Start-Process «C:\Program Files\PowerShell\7\pwsh.exe» -Verb runAs -WorkingDirectory c:\ -wait
С удаленным компьютером все несколько сложнее
1. На удаленном компьютере запускаем
Set-Item -Path WSMan:\localhost\Client\TrustedHosts -Value »
Вместо можно поставить и * но это чревато сами понимаете чем…
2. На локальном запускаем Invoke-Command -ComputerName $hostname -ScriptBlock { Ваш срипт здесь } -Credential $hostname\ladmin | Format-List
There is no good equivalent for the Unix
sudo
Show archive.org snapshot
command in Windows. Below are a few workarounds that are all unsatisfactory to some degree.
Windows comes with a runas command that allows you to run a command as another user. The syntax you want to run something as root is like this:
You will be prompted for the Administrator password, not the password for the current user. You will also need to activate the Administrator user, which is disabled by default for good reason.
Rails
long term support
Rails LTS keeps your applications secure with fast, reliable updates long after the official end of live of your Ruby on Rails version (2.3, 3.2, 4.2, 5.2 and 6.1)
Read more