
Если вы хотите изменить значок по умолчанию для определенной папки или ярлык, который вы создали, вы можете спросить, где можно найти новые значки. Хотя существует множество веб-сайтов, предлагающих пользовательские наборы значков, вы, тем не менее, можете предпочесть использовать значки, которые уже найдены на вашем компьютере или устройстве с Windows 10. В этой статье мы покажем вам, где значки хранятся в Windows 10. Если вы хотите найти все файлы значков Windows 10 по умолчанию, читайте дальше.
Иконки обычно хранятся внутри файлов ICO. Однако файлы ICO имеют большой недостаток: они могут содержать только один значок. В Windows 10 множество приложений, папок, файлов и ярлыков, и многие из них имеют свои уникальные значки. Если бы у Windows был файл ICO для каждого используемого значка, это привело бы к значительному числу файлов значков.
Чтобы решить эту проблему, вместо использования файлов ICO для хранения значков, Windows использует файлы DLL. Основным преимуществом DLL- файла является тот факт, что он может содержать несколько значков внутри. На самом деле, вы можете сравнить DLL- файл значков с библиотекой значков. Если вы хотите изменить значок определенного файла, папки или ярлыка, вы можете просто установить его расположение значка, чтобы оно указывало на определенный файл DLL и конкретный значок из него.
Большинство значков из Windows 10 хранятся в файлах DLL. В следующем разделе мы покажем, где находятся эти библиотеки DLL со значками в Windows 10.
Где расположены значки Windows 10 по умолчанию?
Мы попытались упорядочить наш список значков Windows 10 по умолчанию как по расположению их файлов DLL, так и с учетом основного назначения значков, найденных внутри файлов DLL. Далее вы можете увидеть наш список мест из Windows 10, где вы найдете файлы .DLL, содержащие значки:
1. %systemroot%\system32\imageres.dll
Файл imageres.dll содержит много значков, используемых практически везде в Windows 10. Он содержит значки для различных типов папок, аппаратных устройств, периферийных устройств, действий и так далее.
2. %systemroot%\system32\shell32.dll
Файл shell32.dll также содержит множество значков, используемых в различных частях Windows 10. Вместе с imageres.dll , shell32.dll содержит одну из самых больших коллекций значков. Внутри вы можете найти значки для Интернета, устройств, сетей, периферийных устройств, папок и так далее.
3. %systemroot%\system32\pifmgr.dll
Pifmgr.dll содержит некоторые значки в старом стиле, которые были найдены в более старых версиях Windows, таких как Windows 95 и Windows 98. В нем вы можете найти забавные значки, которые изображают такие вещи, как окно, труба, шар, шляпа волшебника, и другие. 🙂
4. %systemroot%\explorer.exe
Explorer.exe имеет несколько значков, используемых File Explorer и его более ранними версиями. Первый значок является значком по умолчанию, используемым в проводнике , но следующие использовались в старых версиях Windows для таких вещей, как принтеры, папки, действия, приложения для обмена сообщениями, почта и другие.
5. %systemroot%\system32\accessibilitycpl.dll
Accessibilitycpl.dll имеет набор значков, которые используются в основном для специальных возможностей в Windows 10. Он имеет значки с людьми, курсорами мыши, увеличительным стеклом, мышью и клавиатурой и так далее.
6. %systemroot%\system32\ddores.dll
Ddores.dll содержит значки для аппаратных устройств и ресурсов, таких как динамики, наушники, экраны, компьютеры, пульты дистанционного управления и игровые планшеты, мыши и клавиатуры, камеры, принтеры и так далее.
7. %systemroot%\system32\moricons.dll
Moricons.dll — это еще один файл, который содержит значки в старом стиле, используемые Microsoft в старых версиях Windows. Большинство значков здесь относятся к программам MS-DOS, но у вас также есть значки для старых языков программирования, таких как Turbo Pascal или FoxPro.
8. %systemroot%\system32\mmcndmgr.dll
Mmcndmgr.dll — еще один файл со старинными значками, который, как мы полагаем, был разработан главным образом для настроек, связанных с управлением компьютером. Среди прочего, он включает в себя значки для сетей, папок, аутентификации, времени, компьютеров и серверов.
9. %systemroot%\system32\mmres.dll
Mmres.dll имеет несколько значков с различными аудио ресурсами, такими как динамики, наушники, микрофоны и веб-камера.
10. %systemroot%\system32\netcenter.dll
Netcenter.dll имеет несколько значков для сетевых настроек и функций.
11. %systemroot%\system32\netshell.dll
Netshell.dll содержит значки для всех видов сетевых подключений и соответствующего оборудования или технологий.
Например, внутри него вы можете найти значки для Bluetooth, беспроводных маршрутизаторов и сетевых подключений.
12. %systemroot%\system32\networkexplorer.dll
Networkexplorer.dll — другой файл .dll с несколькими периферийными устройствами, такими как телефон, маршрутизатор, принтер или факс, и некоторыми значками, связанными с сетью.
13. %systemroot%\system32\pnidui.dll
Pnidui.dll имеет значки для настроек, связанных с сетью (состояние Ethernet или беспроводной сети, расположение в сети и т.д.). Большинство значков здесь прозрачного белого цвета, поэтому вы должны выбрать их, чтобы увидеть, как они выглядят.
14. %systemroot%\system32\sensorscpl.dll
Sensorscpl.dll имеет несколько значков для разных типов датчиков. Хотя большинство из них выглядят одинаково, их детали указывают на такие вещи, как температура, мощность, ветер и т.д.
15. %systemroot%\system32\setupapi.dll
Setupapi.dll имеет значки, используемые для мастеров установки различных аппаратных устройств. Он имеет экраны, периферийные устройства, аппаратные компоненты, разъемы и разъемы, игровые панели и другие.
16. %systemroot%\system32\wmploc.dll
Wmploc.dll содержит мультимедийные значки, используемые для мультимедийных устройств, музыкальные и видеофайлы, папки, CD и DVD диски и так далее.
17. %systemroot%\system32\wpdshext.dll
Wpdshext.dll имеет значки для некоторых портативных устройств, таких как камеры, телефоны или mp3-плееры, и несколько индикаторов батареи.
18. %systemroot%\system32\compstui.dll
Comstui.dll включает в себя различные классические иконки из более старых версий Windows.
На нем есть иконки с лампочками, почтой, принтерами, документами, телефонами, факсимильными аппаратами и так далее.
19. %systemroot%\system32\ieframe.dll
Ieframe.dll содержит значки, используемые Internet Explorer для его ярлыков, кнопок и меню.
20. %systemroot%\system32\dmdskres.dll
Dmdskres.dll содержит значки, используемые только для управления дисками.
21. %systemroot%\system32\dsuiext.dll
Dsuiext.dll включает в себя значки для сетевых служб. Он имеет значки с серверами, людьми, принтерами, офисными зданиями, службами аутентификации и так далее.
22. %systemroot%\system32\mstscax.dll
Mstscax.dll хранит только несколько значков, используемых для подключений к удаленному рабочему столу, с компьютерами, уведомлениями и сертификатами безопасности.
23. %systemroot%\system32\wiashext.dll
Wiashext.dll имеет несколько значков для различных устройств обработки изображений, таких как сканеры, камеры, фото и видеокамеры, и несколько похожих значков.
24. %systemroot%\system32\comres.dll
Comres.dll содержит несколько значков, которые изображают пользователя, папку, карандаш и некоторые действия.
25. %systemroot%\system32\mstsc.exe
Mstsc.exe содержит несколько других значков, связанных с сетью, но также включает в себя другие значки, такие как динамик, микрофон и логотип Windows 8.
26. actioncentercpl.dll, aclui.dll, autoplay.dll, comctl32.dll, xwizards.dll, ncpa.cpl, url.dll (все в %systemroot%\system32\)
Все эти файлы содержат значки; однако у многих есть только одна иконка внутри или только несколько, поэтому мы решили упомянуть их все вместе. У них есть значки, используемые в Центре действий Windows 10 , некоторые значки ошибок и информации, значки автозапуска, некоторые значки пользователей и значки веб-сайтов.
Как использовать значки, хранящиеся в файле .DLL
Значки, хранящиеся в файлах .DLL, не могут быть скопированы и сохранены в другом месте, по крайней мере, если вы не используете специальное приложение, которое может извлекать значки из файлов .DLL. Однако вы можете использовать любой значок, хранящийся в таком файле, чтобы установить его в качестве значка, используемого папкой, библиотекой или ярлыком. Просто скопируйте и вставьте путь, который мы указали для интересующей вас DLL, в поле «Искать значки в этом файле».
Просмотров: 26 841
Читайте также: 16 Способов освободить место на диске в Windows 10.
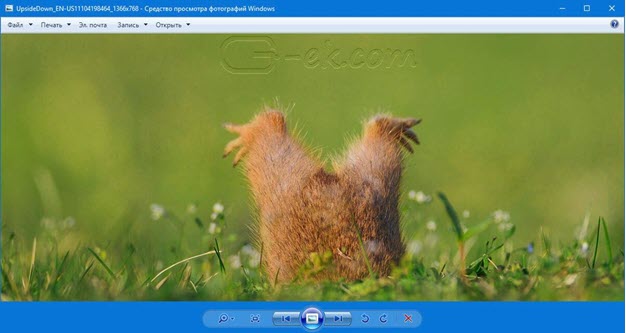
Microsoft в новых версиях Windows 10 скрыла от пользователей старое доброе «Средство Просмотра фотографий Windows», На смену которому пришло современное приложение, под названием «Фотографии» (Photos), нельзя сказать, что новое приложение не удобное, просто не совсем привычное.
Несмотря на то что новое приложение «Фотографии» имеет более богатый функционал в отличии от старого классического, но многие пользователи хотят вернуть «Средство Просмотра фотографий Windows», на самом деле это несложно.
Как вернуть Классическое Средство Просмотра фотографий в Windows 10?
Предлагаем нашим читателям Три способа, с помощью которых, вы сможете установить классический просмотрщик для использования в качестве программы по умолчанию, для просмотра ваших любимых изображений и фотографий.
- Первый способ — позволит вам иметь под рукой готовый Reg файл, вы всегда сможете восстановить средство просмотра фотографий на нескольких компьютерах.
- Второй способ — более быстрый, просто выполните команду в Windows Powershell.
- Третий способ — с помощью приложения и библиотеки shimgvw.dll
Microsoft, не удалила Просмотрщик из Windows 10, установить в настройках Средство Просмотра фотографий Windows по умолчанию нельзя, так как оно отсутствует в списке Приложения по умолчанию. А в Классической панели управления ассоциировать с ним можно только файлы с расширением TIFF. Давайте исправим это ограничение в Windows 10 и включим всеми любимый старый, добрый «Просмотр фотографий».
Просмотр фотографий Windows может быть активирован путем редактирования реестра. Необходимо добавить набор значений для ассоциации графических файлов в Раздел реестра —
[HKEY_LOCAL_MACHINE\SOFTWARE\Microsoft\Windows Photo Viewer\Capabilities\FileAssociations].Это можно сделать в ручную или с помощью команды Powershell.
Включить Windows Photo Viewer с помощью готового Reg файла.
Чтобы сэкономить Ваше время, ниже, я добавил уже готовый файл реестра, теперь вам нет необходимость вносить сложные правки в реестре вручную, все что нужно — загрузить архив, распаковать и запустить файл: Windows 10 Photo Viewer.reg.
Шаг 1: Загрузите архив Windows 10 Photo Viewer.zip и распакуйте его.
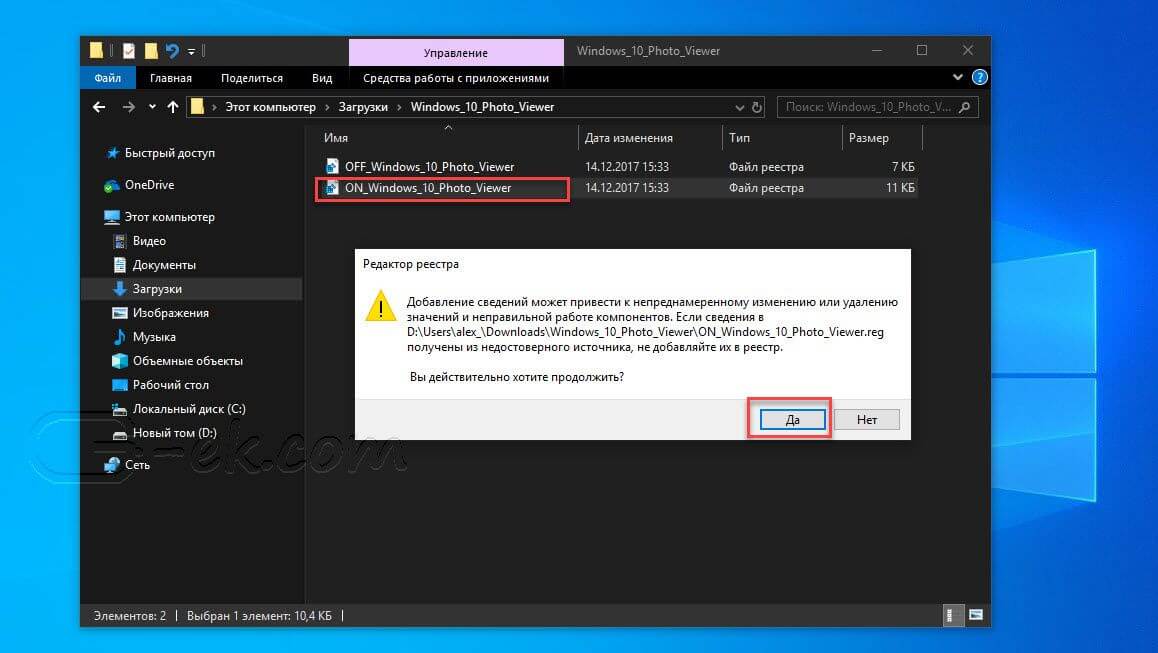
Шаг 2: В полученной папке, найдите и запустите файл — «ON_Windows_10_Photo_Viewer»
Шаг 3: Подтвердите запрос контроля учетных записей и добавление сведений.
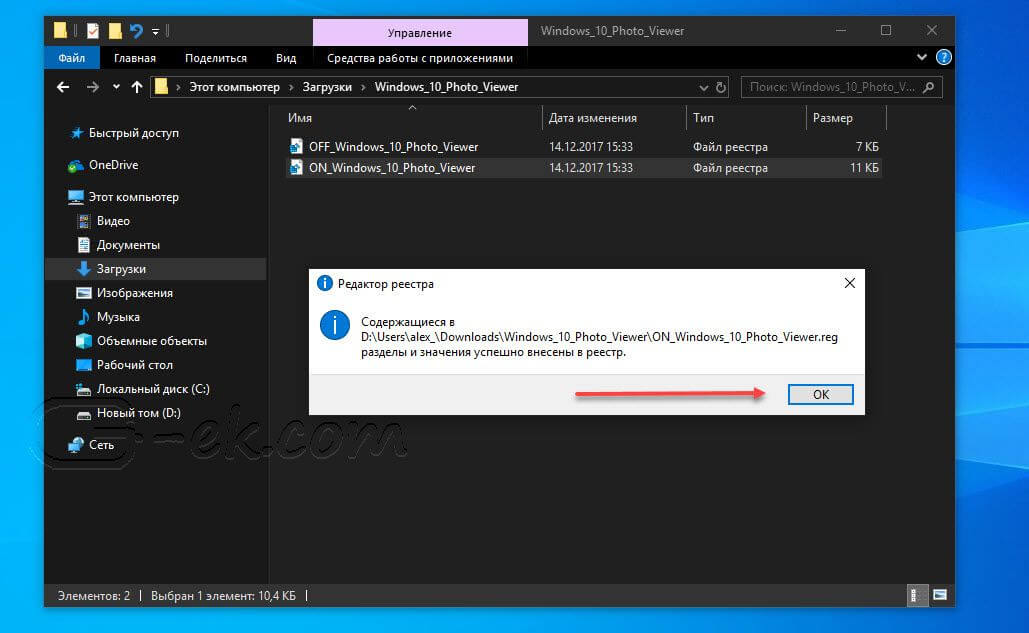
После запуска, все необходимые разделы и значения будут автоматически внесены в реестр, о чем вы будете оповещены, (см. скриншот ниже).
Шаг 4: Теперь откройте Параметры Windows, нажав сочетания клавиш Win + I или нажмите на значок шестеренки в меню «Пуск».
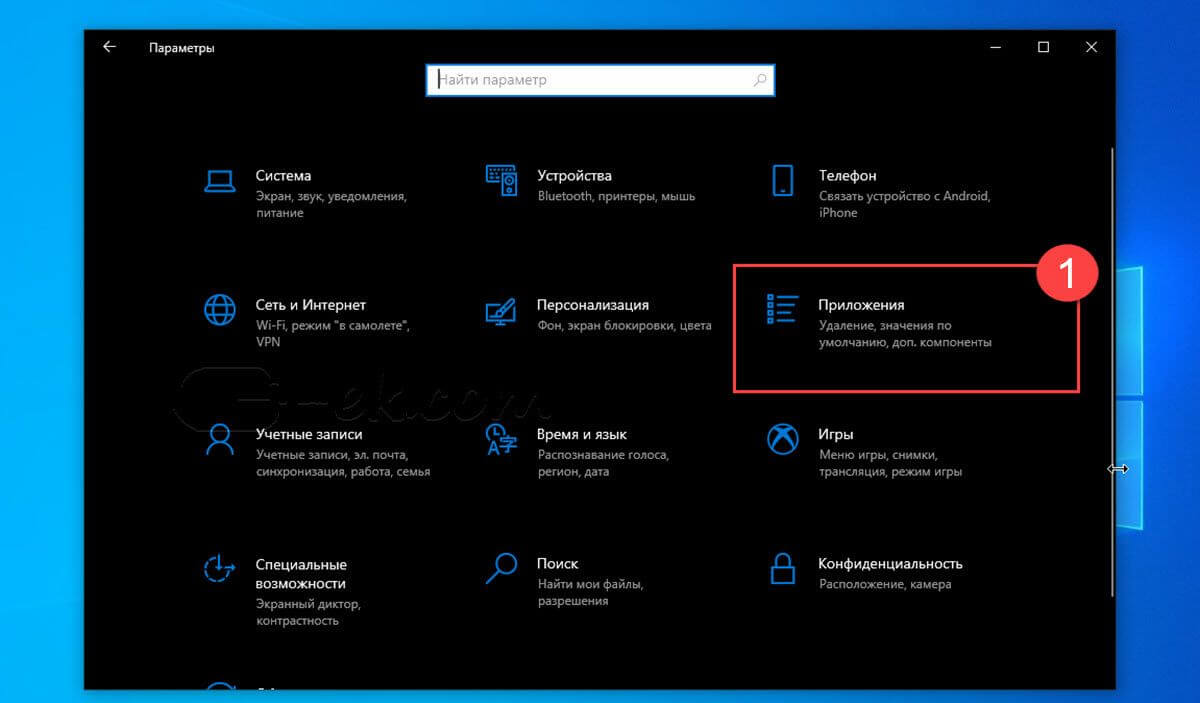
Шаг 5: Перейдите в группу настроек «Приложения» → «Приложения по умолчанию».
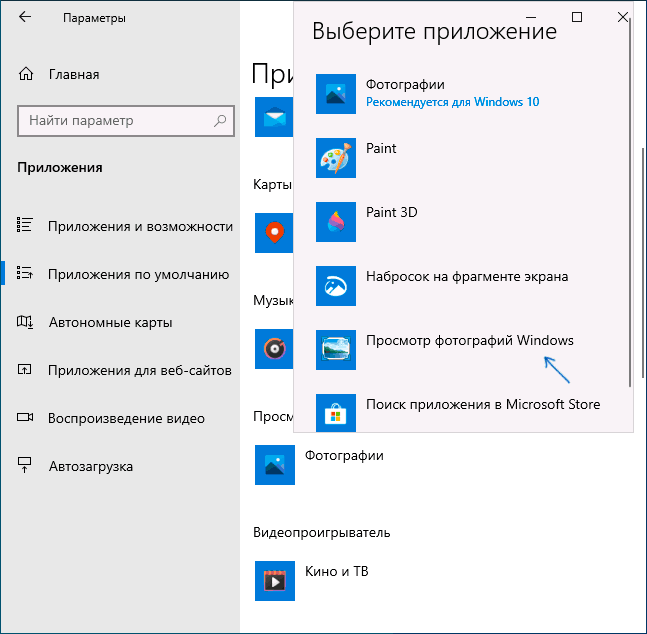
На открывшийся странице «Приложения по умолчанию», найдите раздел «Просмотр фотографий», нажмите на значок приложения которое используется по умолчанию и выберите в выпадающем меню «Просмотр фотографий Windows». См. скрин ниже:
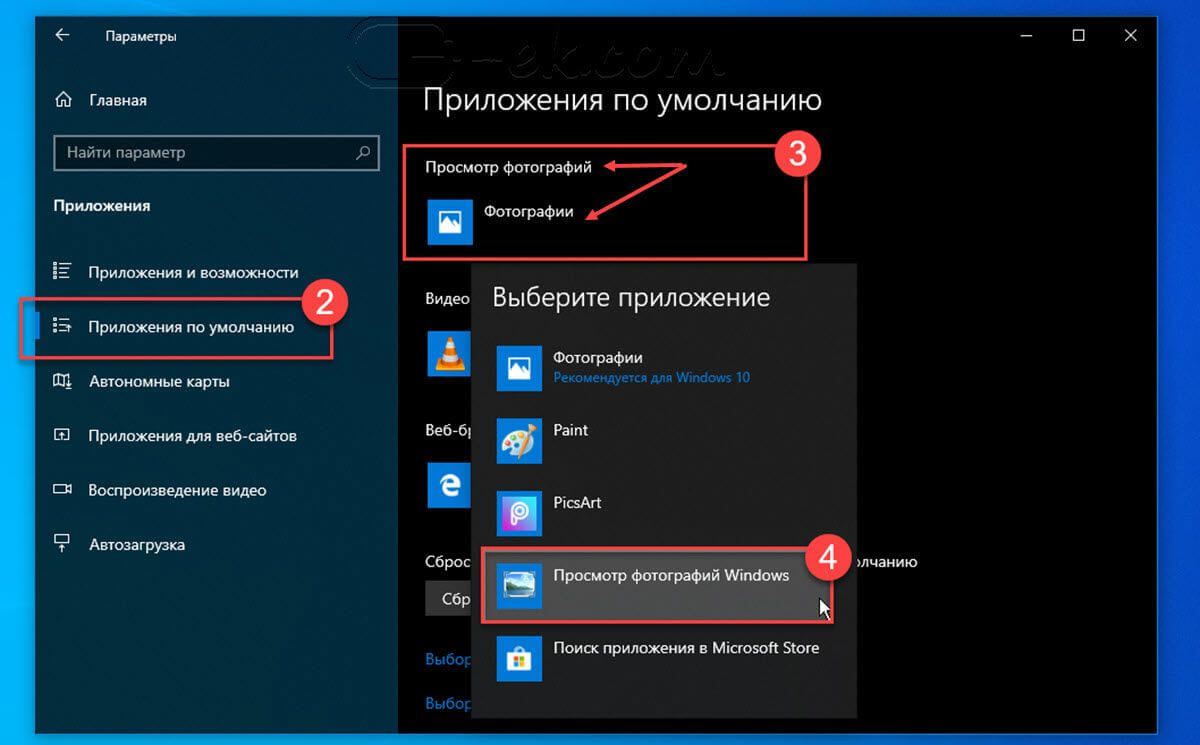
Или, вы можете кликнуть правой кнопкой мыши на любом изображении и выбрать в контекстном меню «Открыть с помощью»
В появившимся окне «Каким образом вы хотите открыть этот файл», выберите «Просмотр фотографий Windows».
Примечание: Если вы захотите вернуть настройки по умолчанию файл отката присутствует в архиве.
Все!
Способ 2 — Включить классическое средство просмотра фотографий с помощью Powershell.
Данный способ отличается от первого, только настройкой Приложения по умолчанию, выполняется для каждого типа изображения.
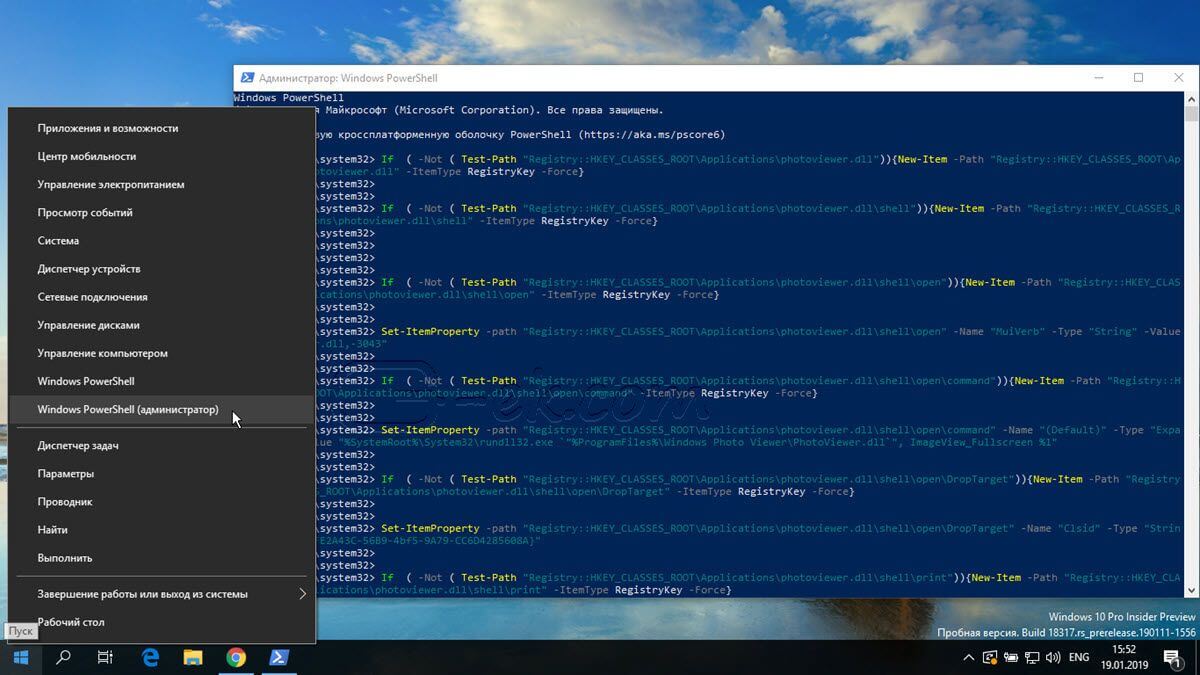
Шаг 1: Кликните правой кнопкой мыши на меню «Пуск».
Шаг 2: В появившемся контекстном меню выберите Windows Powershell (администратор) — Это важно!
Шаг 3: Скопируйте и вставьте следующие команды:
Примечание: Скопируйте и вставьте все команды за один раз включая символ # и нажмите клавишу Enter.
If  ( -Not ( Test-Path "Registry::HKEY_CLASSES_ROOT\Applications\photoviewer.dll")){New-Item -Path "Registry::HKEY_CLASSES_ROOT\Applications\photoviewer.dll" -ItemType RegistryKey -Force}
If  ( -Not ( Test-Path "Registry::HKEY_CLASSES_ROOT\Applications\photoviewer.dll\shell")){New-Item -Path "Registry::HKEY_CLASSES_ROOT\Applications\photoviewer.dll\shell" -ItemType RegistryKey -Force}
If  ( -Not ( Test-Path "Registry::HKEY_CLASSES_ROOT\Applications\photoviewer.dll\shell\open")){New-Item -Path "Registry::HKEY_CLASSES_ROOT\Applications\photoviewer.dll\shell\open" -ItemType RegistryKey -Force}
Set-ItemProperty -path "Registry::HKEY_CLASSES_ROOT\Applications\photoviewer.dll\shell\open" -Name "MuiVerb" -Type "String" -Value "@photoviewer.dll,-3043"
If  ( -Not ( Test-Path "Registry::HKEY_CLASSES_ROOT\Applications\photoviewer.dll\shell\open\command")){New-Item -Path "Registry::HKEY_CLASSES_ROOT\Applications\photoviewer.dll\shell\open\command" -ItemType RegistryKey -Force}
Set-ItemProperty -path "Registry::HKEY_CLASSES_ROOT\Applications\photoviewer.dll\shell\open\command" -Name "(Default)" -Type "ExpandString" -Value "%SystemRoot%\System32\rundll32.exe `"%ProgramFiles%\Windows Photo Viewer\PhotoViewer.dll`", ImageView_Fullscreen %1"
If  ( -Not ( Test-Path "Registry::HKEY_CLASSES_ROOT\Applications\photoviewer.dll\shell\open\DropTarget")){New-Item -Path "Registry::HKEY_CLASSES_ROOT\Applications\photoviewer.dll\shell\open\DropTarget" -ItemType RegistryKey -Force}
Set-ItemProperty -path "Registry::HKEY_CLASSES_ROOT\Applications\photoviewer.dll\shell\open\DropTarget" -Name "Clsid" -Type "String" -Value "{FFE2A43C-56B9-4bf5-9A79-CC6D4285608A}"
If  ( -Not ( Test-Path "Registry::HKEY_CLASSES_ROOT\Applications\photoviewer.dll\shell\print")){New-Item -Path "Registry::HKEY_CLASSES_ROOT\Applications\photoviewer.dll\shell\print" -ItemType RegistryKey -Force}
If  ( -Not ( Test-Path "Registry::HKEY_CLASSES_ROOT\Applications\photoviewer.dll\shell\print\command")){New-Item -Path "Registry::HKEY_CLASSES_ROOT\Applications\photoviewer.dll\shell\print\command" -ItemType RegistryKey -Force}
Set-ItemProperty -path "Registry::HKEY_CLASSES_ROOT\Applications\photoviewer.dll\shell\print\command" -Name "(Default)" -Type "ExpandString" -Value "%SystemRoot%\System32\rundll32.exe `"%ProgramFiles%\Windows Photo Viewer\PhotoViewer.dll`", ImageView_Fullscreen %1"
If  ( -Not ( Test-Path "Registry::HKEY_CLASSES_ROOT\Applications\photoviewer.dll\shell\print\DropTarget")){New-Item -Path "Registry::HKEY_CLASSES_ROOT\Applications\photoviewer.dll\shell\print\DropTarget" -ItemType RegistryKey -Force}
Set-ItemProperty -path "Registry::HKEY_CLASSES_ROOT\Applications\photoviewer.dll\shell\print\DropTarget" -Name "Clsid" -Type "String" -Value "{60fd46de-f830-4894-a628-6fa81bc0190d}"
#
Шаг 4: После выполнения команды закройте окно Powershell и откройте папку с изображениями.
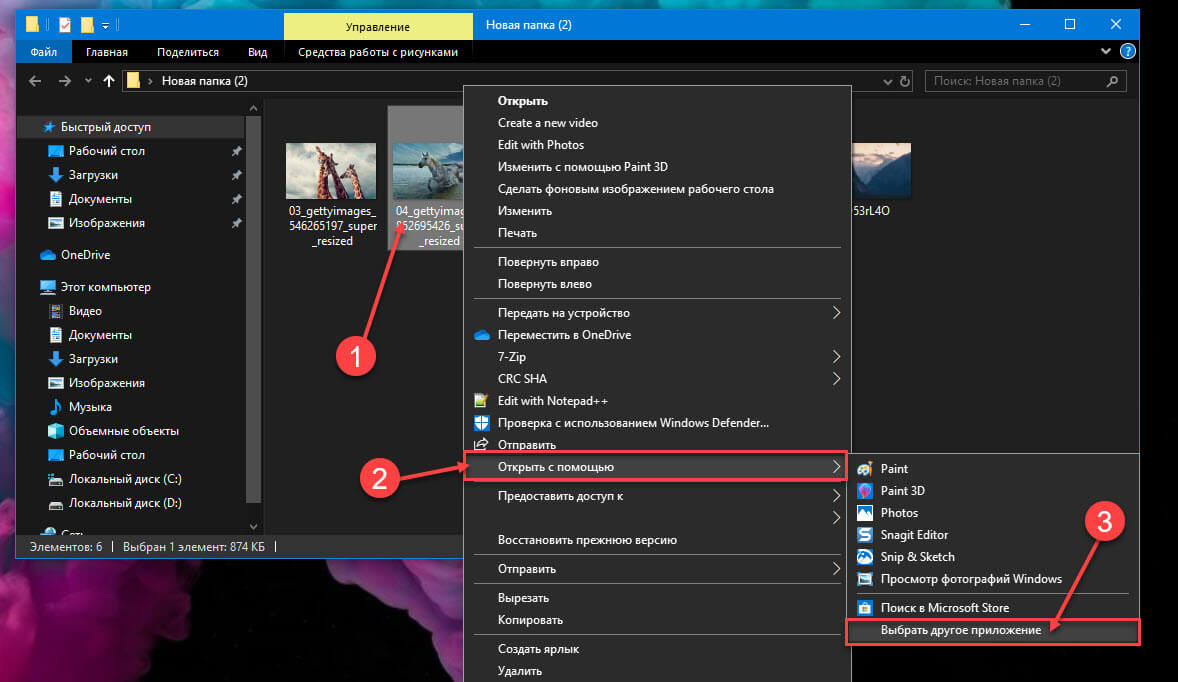
Шаг 5: Нажмите правой кнопкой мыши на любой картинке и выберите в контекстном меню «Открыть с помощью» → «Выбрать другое приложение».
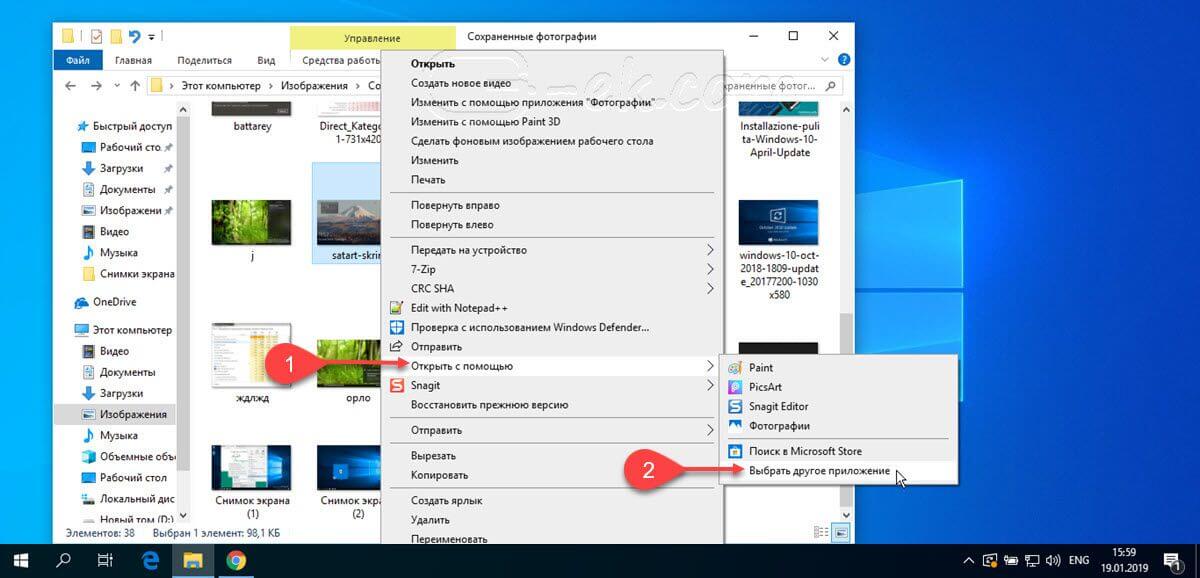
Шаг 6: В открывшимся окне Найдите и нажмите «Просмотр фотографий Windows», Для того чтобы фото и картинки открывались всегда с помощью «Средства Просмотра фотографий Windows» не забудьте поставить галочку как на скриншоте ниже:
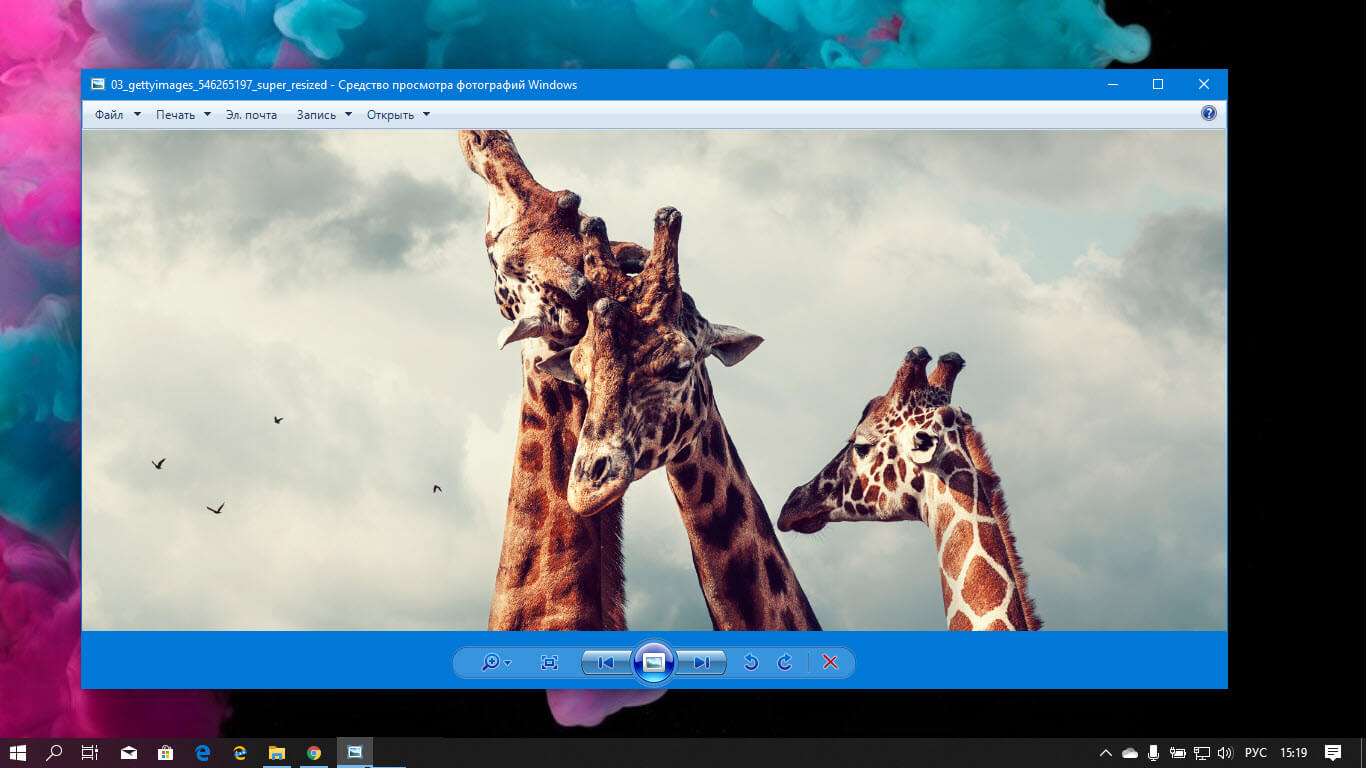
Все! вы справились, перейдите в папку с изображениями или фотографиями и дважды кликните на любой картинке, изображение откроется в «Средстве Просмотра фотографий Windows»!
Способ 3 — Как вернуть стандартный просмотрщик изображений с помощью приложения.
Поскольку способы выше работают при условии что в системе есть файл библиотеки динамической компоновки shimgvw.dll. Еще один способ вернуть средство просмотра фотографий, с помощью отдельного приложения которое уже включает в себя нужную библиотеку если ваша по какой либо причине, повреждена.
Оригинальный просмотрщик картинок в Windows — это не совсем обычное приложение. Расположено оно в библиотеке shimgvw, следовательно и запустить его напрямую нельзя — нужен как минимум rundll32.
Чтобы сделать загрузчик не нужно ничего кроме небольшого числа функций WinAPI, получилось мини-приложение не требующее установки, которое включает в себя две библиотеки shimgvw.dll из Windows 7 и XP SP3, с размером всего 502 килобайта. На выходе получаем независимый просмотрщик картинок, который можно записать на флешку и всегда иметь под рукой.
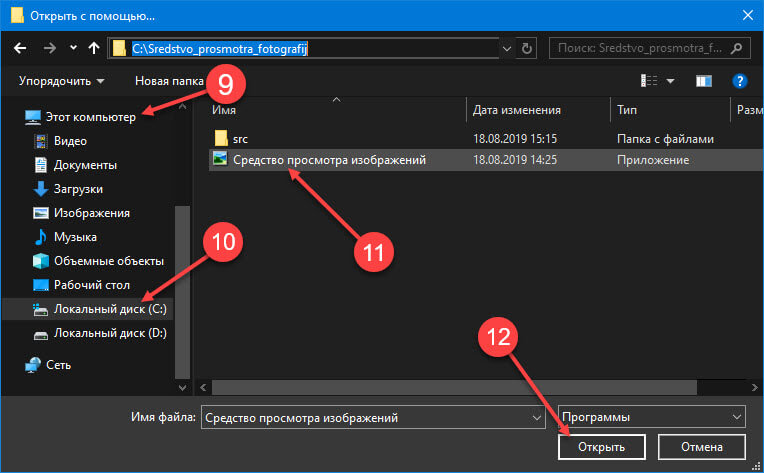
Шаг 1: Загрузите мини приложение: Средство просмотра изображений для Windows 10.
Шаг 2: Распакуйте полученный архив Sredstvo_prosmotra_fotografij.zip в любое место, я скопирую содержимое архива в корневую директорию диска С:\.
Шаг 3: Теперь, откройте папку с изображениями, кликните на одном из них правой кнопкой мыши и выберите «Открыть с помощью» → «Выбрать другое приложение».
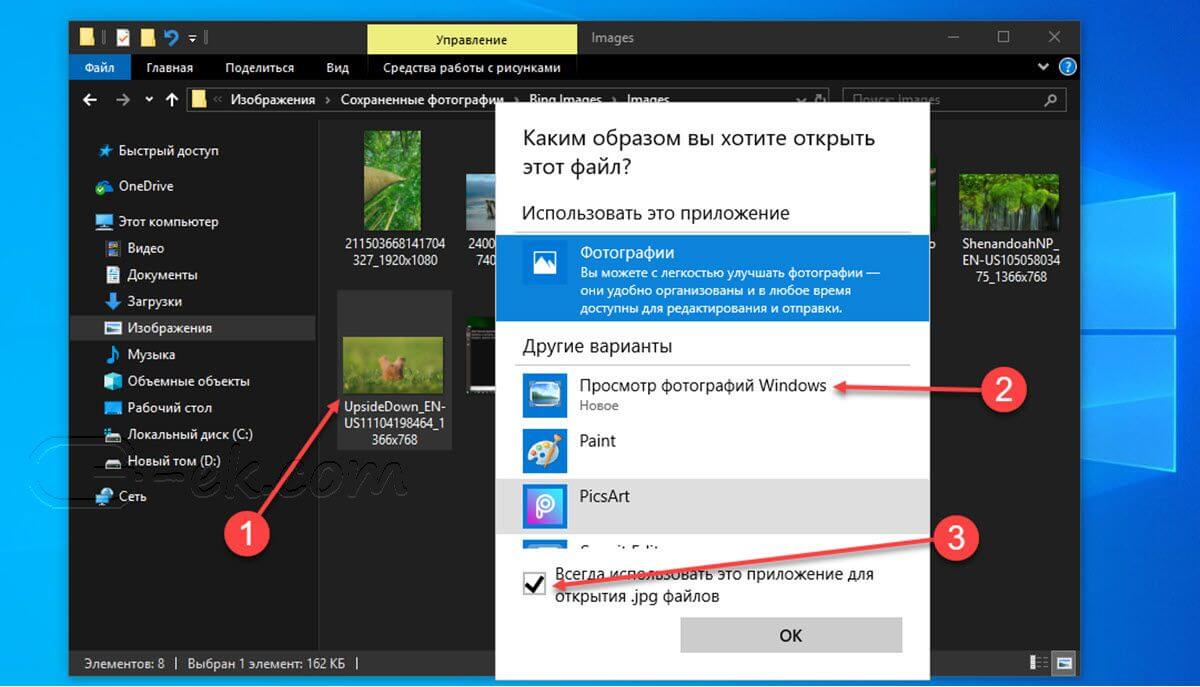
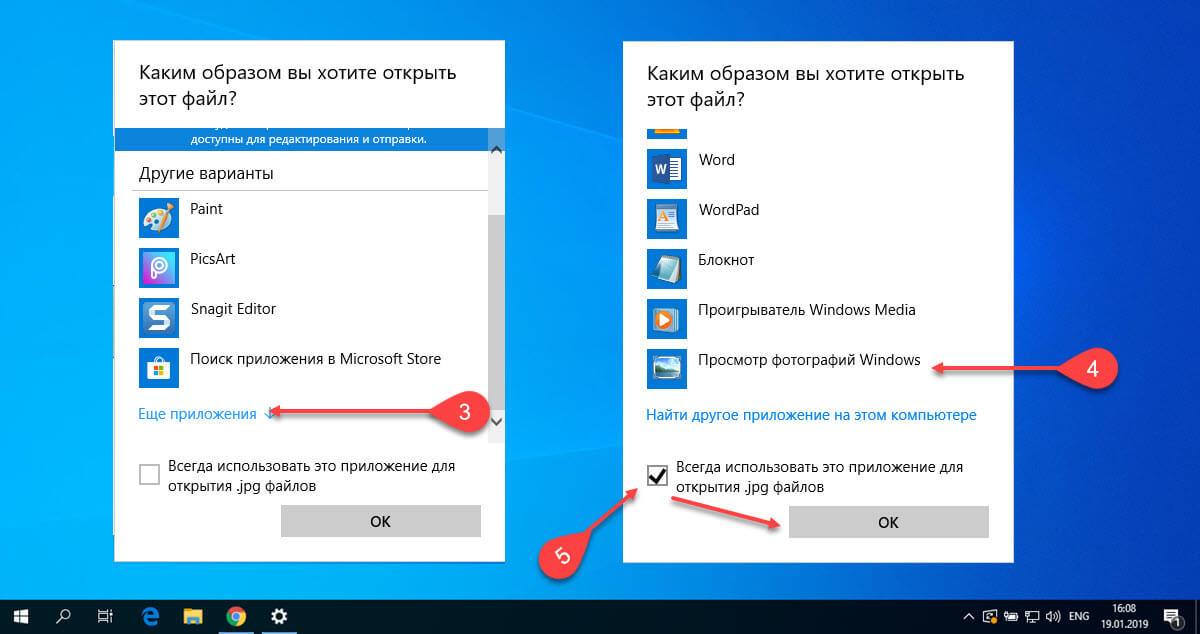
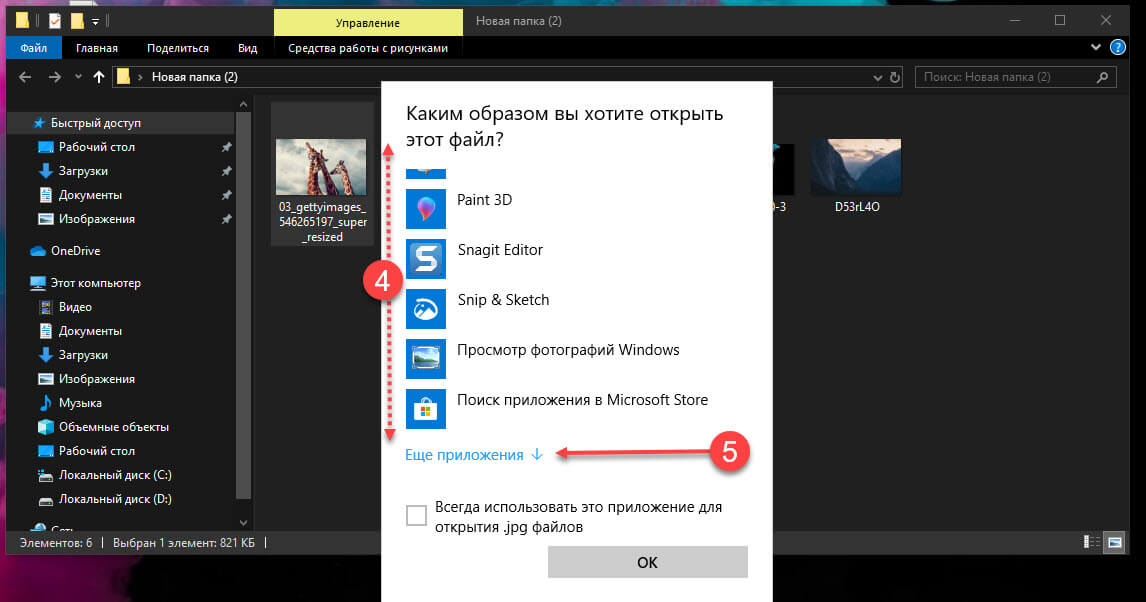
Шаг 3: В окне запроса «Каким образом вы хотите открыть этот файл» прокрутите список в самый низ и нажмите ссылку «Еще приложения».
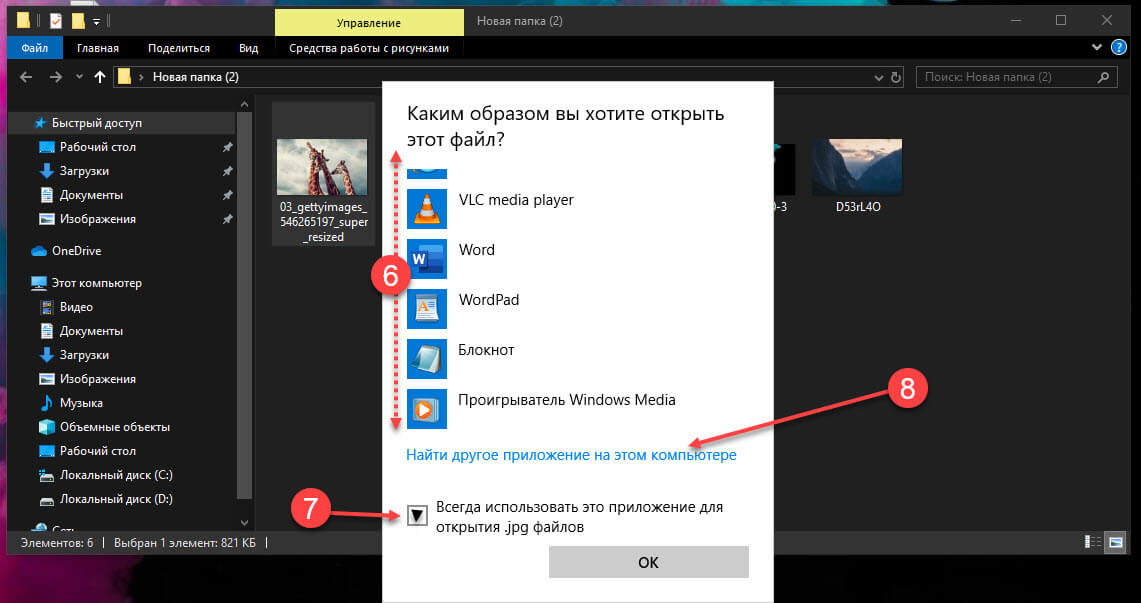
Шаг 4: В следующем окне, установите флажок для «Всегда использовать это приложение для открытия файла jpg» и нажмите ссылку «Найти другое приложение на этом компьютере».
Шаг 5: Теперь перейдите в папку где вы распаковали загруженный архив (я поместил содержимое архива в корень диска С:\Sredstvo_prosmotra_fotografij), выберите файл «Средство просмотра изображений» и нажмите кнопку «Открыть».
Все! Просмотрщик работает!
Повторите эту процедуру для таких типов файлов: .jpg, .jpeg, .png, .tiff, .bmp, .gif, .tif Или, Вы можете настроить ассоциации файлов в приложении «Параметры» перейдите «Приложения» → «Приложения по умолчанию» → «Выбор стандартных приложений для всех типов».
Для того чтобы вернуть просмотр фотографий как в XP, в нем работают анимированные гифки, вам придётся выполнить часть данного руководства, описанную выше. После выполнения, просто переименуйте в папке «Sredstvo_prosmotra_fotografij» библиотеку shimgvw.dll в Win7-shimgvw.dll, а xp-shimgvw.dll в shimgvw.dll.
Все!
Вам может быть интересно: Как вернуть классическое Средство Просмотра фотографий в Windows 11
В Windows 10 файлы изображений по умолчанию открываются в новом приложении «Фотографии», которое может быть несколько непривычным, а на мой взгляд оно и хуже предыдущей стандартной программы для этих целей «Средство просмотра фотографий Windows».
При этом, в настройках приложений по умолчанию в Windows 10 старый вариант просмотра фотографий отсутствует, равно как и найти отдельный exe файл для него не представляется возможным. Тем не менее, возможность сделать так, чтобы фото и картинки открывались в старом варианте «Просмотр фотографий Windows» (как в Windows 7 и 8.1) можно, и ниже — о том, как это сделать. См. также: Лучшие бесплатные программы для просмотра фото и управления изображениями.
- Как включить Средство просмотра фотографий в Windows 10
- Как сделать старый просмотр фотографий используемым по умолчанию
- Видео инструкция
Как включить средство просмотра фотографий Windows в Windows 10

Средство просмотра фотографий Windows реализовано в библиотеке photoviewer.dll (который никуда не делся), а не в отдельном исполняемом exe файле. И, для того, чтобы его можно было назначать используемым по умолчанию, потребуется добавить некоторые ключи в реестр (которые были в ОС раньше, но нет в Windows 10).
Для этого вам потребуется запустить блокнот, после чего скопировать в него код, представленный ниже, который будет использоваться для добавления соответствующих записей в реестр.
Windows Registry Editor Version 5.00
[HKEY_CLASSES_ROOT\Applications\photoviewer.dll]

[HKEY_CLASSES_ROOT\Applications\photoviewer.dll\shell]

[HKEY_CLASSES_ROOT\Applications\photoviewer.dll\shell\open]
"MuiVerb"="@photoviewer.dll,-3043"

[HKEY_CLASSES_ROOT\Applications\photoviewer.dll\shell\open\command]
@=hex(2):25,00,53,00,79,00,73,00,74,00,65,00,6d,00,52,00,6f,00,6f,00,74,00,25,\
00,5c,00,53,00,79,00,73,00,74,00,65,00,6d,00,33,00,32,00,5c,00,72,00,75,00,\
6e,00,64,00,6c,00,6c,00,33,00,32,00,2e,00,65,00,78,00,65,00,20,00,22,00,25,\
00,50,00,72,00,6f,00,67,00,72,00,61,00,6d,00,46,00,69,00,6c,00,65,00,73,00,\
25,00,5c,00,57,00,69,00,6e,00,64,00,6f,00,77,00,73,00,20,00,50,00,68,00,6f,\
00,74,00,6f,00,20,00,56,00,69,00,65,00,77,00,65,00,72,00,5c,00,50,00,68,00,\
6f,00,74,00,6f,00,56,00,69,00,65,00,77,00,65,00,72,00,2e,00,64,00,6c,00,6c,\
00,22,00,2c,00,20,00,49,00,6d,00,61,00,67,00,65,00,56,00,69,00,65,00,77,00,\
5f,00,46,00,75,00,6c,00,6c,00,73,00,63,00,72,00,65,00,65,00,6e,00,20,00,25,\
00,31,00,00,00

[HKEY_CLASSES_ROOT\Applications\photoviewer.dll\shell\open\DropTarget]
"Clsid"="{FFE2A43C-56B9-4bf5-9A79-CC6D4285608A}"

[HKEY_CLASSES_ROOT\Applications\photoviewer.dll\shell\print]

[HKEY_CLASSES_ROOT\Applications\photoviewer.dll\shell\print\command]
@=hex(2):25,00,53,00,79,00,73,00,74,00,65,00,6d,00,52,00,6f,00,6f,00,74,00,25,\
00,5c,00,53,00,79,00,73,00,74,00,65,00,6d,00,33,00,32,00,5c,00,72,00,75,00,\
6e,00,64,00,6c,00,6c,00,33,00,32,00,2e,00,65,00,78,00,65,00,20,00,22,00,25,\
00,50,00,72,00,6f,00,67,00,72,00,61,00,6d,00,46,00,69,00,6c,00,65,00,73,00,\
25,00,5c,00,57,00,69,00,6e,00,64,00,6f,00,77,00,73,00,20,00,50,00,68,00,6f,\
00,74,00,6f,00,20,00,56,00,69,00,65,00,77,00,65,00,72,00,5c,00,50,00,68,00,\
6f,00,74,00,6f,00,56,00,69,00,65,00,77,00,65,00,72,00,2e,00,64,00,6c,00,6c,\
00,22,00,2c,00,20,00,49,00,6d,00,61,00,67,00,65,00,56,00,69,00,65,00,77,00,\
5f,00,46,00,75,00,6c,00,6c,00,73,00,63,00,72,00,65,00,65,00,6e,00,20,00,25,\
00,31,00,00,00

[HKEY_CLASSES_ROOT\Applications\photoviewer.dll\shell\print\DropTarget]
"Clsid"="{60fd46de-f830-4894-a628-6fa81bc0190d}"

[HKEY_LOCAL_MACHINE\SOFTWARE\Microsoft\Windows Photo Viewer\Capabilities\FileAssociations]
".bmp"="PhotoViewer.FileAssoc.Tiff"
".dib"="PhotoViewer.FileAssoc.Tiff"
".gif"="PhotoViewer.FileAssoc.Tiff"
".jfif"="PhotoViewer.FileAssoc.Tiff"
".jpe"="PhotoViewer.FileAssoc.Tiff"
".jpeg"="PhotoViewer.FileAssoc.Tiff"
".jpg"="PhotoViewer.FileAssoc.Tiff"
".jxr"="PhotoViewer.FileAssoc.Tiff"
".png"="PhotoViewer.FileAssoc.Tiff"
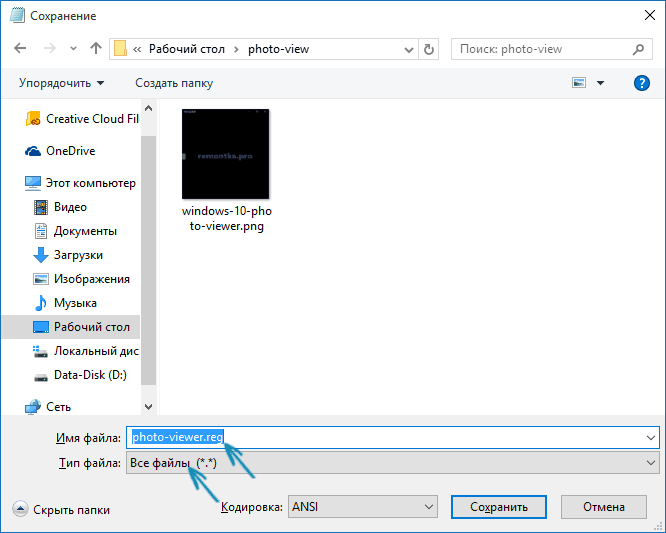
Затем в блокноте выберите файл — сохранить как, а в окне сохранения в поле «Тип файла» выберите «Все файлы» и сохраните ваш файл с любым именем и расширением «.reg». Подробнее на тему, если что-то не срабатывает — Как создать файл .REG в Windows 10, 8.1 и Windows 7.
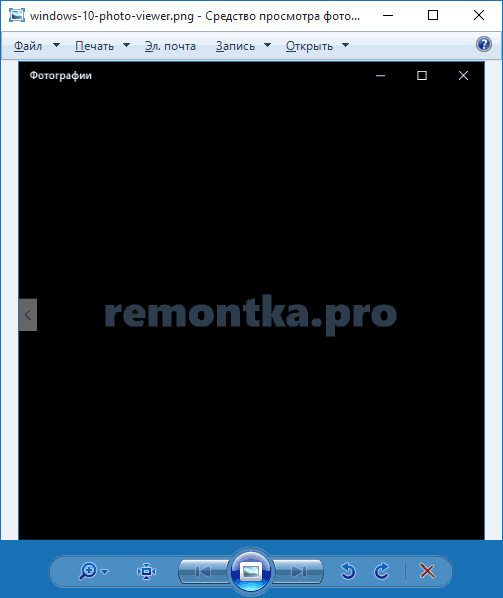
После сохранения, кликните по данному файлу правой кнопкой мыши и выберите в контекстном меню пункт «Слияние» (в большинстве случаев работает и простой двойной клик по файлу).
Подтвердите согласие с добавлением сведений в реестр на запрос об этом. Готово, сразу после сообщения о том, что данные были успешно добавлены в реестр, приложение «Просмотр фотографий Windows» будет доступно для использования.
Как установить средство просмотра фотографий в качестве приложения по умолчанию для фото и других файлов изображений
Для того, чтобы после проделанных действий установить стандартный просмотр фотографий в качестве используемого по умолчанию для определенного типа файла:
- Кликните правой кнопкой мыши по изображению этого типа и выберите «Открыть с помощью» — «Выбрать другое приложение»
- В окне выбора приложения, нажмите «Еще приложения», после чего выберите «Просмотр фотографий Windows» и отметьте пункт «Всегда использовать это приложение для открытия файлов». Нажмите Ок.

К сожалению, этот метод предполагает, что для каждого типа файлов изображений процедуру потребуется повторить, однако есть способ назначить средство просмотра фотографий для открытия всех поддерживаемых типов фото и картинок:
- Зайдите в Параметры — Приложения — Приложения по умолчанию.
- В пункте «Просмотр фотографий» выберите старое средство просмотра фотографий.

- Дополнительно, в этом же разделе настроек, внизу вы можете открыть «Задать значения по умолчанию по приложению», выбрать Средство просмотра фотографий Windows, нажать кнопку «Управление» и задать, какие типы файлов должны открываться в этой программе.
Видео инструкция
Примечание: если сделать всё описываемое вручную для вас сложно, можно использовать стороннюю бесплатную утилиту Winaero Tweaker, чтобы включить старый просмотр фотографий в Windows 10.
On Windows 10 you can do many customizations to personalize it according to your preference. One such option is to change or replace the icons. Windows 10 comes with many in-built icons that you can apply by knowing their location.
In this article, we will show you where to find icons in Windows 10 so that you can easily access them. The good news is that the location is very similar to Windows 8 and 7, which should make it easy for you to find your way around. Let’s get started.
To fix various Windows 10/11 problems, we recommend Outbyte PC Repair:
This software will repair common computer errors, protect you from file loss, malware damage, hardware failure, and optimise your computer for peak performance. In three simple steps, you can resolve PC issues and remove virus damage:
- Download Outbyte PC Repair Software
- Click Start Scan to detect Windows 10/11 issues that may be causing PC issues.
- Click Repair All to fix issues with your computer’s security and performance.
This month, Outbyte has been downloaded by 23,167 readers.
How are Windows 10 icons stored?
Icons are usually available in the .ico file format. However, with Windows 10, things are different. Windows 10 has lots of applications, folders, files, and shortcuts, and many of them have unique icons. So, if Windows had an ICO file for each icon it uses, that would make for a considerable number of icon files.
To fix this, Windows 10 categorize icons and store them in the Dynamic Link Library (DLL) files. The advantage of a DLL file is that it can hold a large number of icons. So when you want to change the icon of a particular type, for example, File Explorer, just browse the DLL file where the file explorer icons are located and choose the suitable icons.
Where is the Windows 10 Icon Location?
As mentioned, Windows icons are categorized into different DLL files based on their types. All these DLL files are located in C:\Windows\System32. Here is the location where different icons are stored:
Default Icons (Imageres.dll)
The icons which are by default applied on the Windows are stored on this location: C:\Windows\System32\imageres.dll. This is the biggest icon library on Windows 10.
Retro Icons (Pifmgr.dll)
Windows 10 also comes with the icons of the previous Windows version. So, if you want to apply the retro icons to get the feel of Windows XP or Windows 7, navigate to this location when changing the icon: C:\Windows\System32\pifmgr.dll.
Accessibility Icons (Accessibilitycpl.dll)
On the System32 folder, there is also a set of accessibility icons that consists of icons of people, mouse cursors, magnifying glass, keyboard, and more. To apply one of these icons browse this location: C:\Windows\System32\accessibilitycpl.dll.
Hardware Device Icons (DDORes.dll)
The icons for hardware devices such as speakers, headphones, mice and keyboards, screens, computers, remotes, gaming pads, cameras, printers, and so on are available at this location: C:\Windows\System32\DDORes.dll. With these icons, you can change the default hardware icons on Windows.
Management Settings Icons (Mmcndmgr.dll)
If you require to change your management settings icon for example networks, folders, authentication, time, computers, and servers, you can access them from this path: C:\Windows\System32\mmcndmgr.dll.
Old Programing Language Icons (Moricons.dll)
Windows 10 also stores the icons of MS-DOS and old programming languages such as Turbo Pascal, FoxPro, and more. These icons will take your system back in time and give it a retro look. To apply these icons navigate to this location: C:\Windows\System32\moricons.dll
Audio Resource Icons (Mmres.dll)
To give a new look to your Audio resource icons, you can use the audio resource icons present at this location: C:\Windows\System32\mmres.dll. Here you will get icons like speakers, headphones, microphones, and a webcam.
Network Icons (Netshell.dll)
The network connection and peripherals icons like Bluetooth, wireless routers, network adapters, and more can be found at: C:\Windows\System32\netshell.dll.
Multimedia Icons (Wpdshext.dll)
If you are bored with the default multimedia icons of your Windows 10 like media devices, music, video files, CD, DVD, and many more, then you can give them a new look by choosing the multimedia icons from the following path: C:\Windows\System32\wpdshext.dll
File Explorer Icons (Explorer.exe)
Explorer.exe file contains the icons that are used by File Explorer. From here you can set or change the icons for things like printers, messenger apps, mail, folders, actions, and others. You can find these icons at: C:\Windows\System32\explorer.exe.
How to change Windows 10 Icons?
After knowing the Windows 10 icon location, you can now modify them as per your preference. Here is how to do that.
Change the Desktop Icons
To change the Desktop icons such as Recycle Bin, Network, and others, follow these steps:
- Click on the Start button and select Settings from the list.
- Choose Personalization settings from the list.
- Switch to the Themes tab from the left pane.
- Scroll down and under Related Settings, click on Desktop icon settings.

- Next, select the icon you want to change and click on the Change Icon.

- Select a new icon from the available ones.

Change the Folder Icons
On Windows 10, you can easily change any folder icon. Here are the steps to do that:
- Right-click on the folder whose icon you want to change and select Properties.
- Switch to Customize tab and click on the Change Icon button.
- Select the new icon for your folder from the available options.
Change Desktop Shortcut Icons
Like Folder icons, you can also change the icons of the app’s shortcuts. Follow these instructions:
- Right-click on the shortcut whose icon you want to change and select Properties.
- Under the Shortcut tab, click on the Change icon.
- Select a new icon from the available ones.
Conclusion
So as you can see, the Windows 10 icon location is fixed but they are scattered all over the System32 folder. However, with a little research and exploration, you can find any type of icon that you are looking for to change the look of your system. Just be careful not to delete or rename any essential files while hunting for those desired icons.
Where are my default program icons located?
The default program icons are usually stored in the C:\Program Files\Windows NT folder. However, this may vary depending on your system settings and the programs that you have installed.
How do I change an icon for a file or folder on Windows?
There are a few ways to do this. One way is to right-click on the file or folder and select “Properties.” Then click on the “Customize” tab and select from one of the available icons. Another way is to open File Explorer and navigate to the desired file or folder. Right-click on it and select “Change Icon.” A window will pop up with a list of available icons. Select the one you want and click “OK.”
Can I create my own Windows icon?
Yes, you can create your own Windows icon using an icon editor such as Microsoft Paint or Adobe Photoshop. Once you have created the icon, you can save it in the ICO format and then use it on your system.
Peter is an Electrical Engineer whose primary interest is tinkering with his computer. He is passionate about Windows 10 Platform and enjoys writing tips and tutorials about it.
Icons are an important part of Windows, helping us easily find things like the Recycle Bin, This PC, and Network. Did you ever want to change the default icon for a folder or shortcut you’ve created? Or maybe you’re curious about where the default icons (used by Windows for all its apps and features) are stored. In this guide, I’ll show you exactly where to find them, regardless of whether you’re using Windows 10 or Windows 11. So, if you’re ready to find where Windows keeps its default icon files, read on:
How are Windows icons stored?
Icons are usually stored inside ICO files. However, ICO files have a big disadvantage: they can hold only one icon. Both Windows 10 and Windows 11 have lots of applications, folders, files, and shortcuts, and many use unique icons. If Windows had an ICO file for each icon it uses, that would make for a considerable number of icon files.
To solve this problem, instead of using ICO files to store icons, Windows uses DLL files (and sometimes also EXE files). The main advantage of a DLL file is being able to hold multiple icons inside. As a matter of fact, you could compare an icon DLL file with a library of icons. When you want to change the icon of a particular file, folder, or shortcut, you can just set its icon location to point to a specific DLL file and a specific icon from it.
Most icons from Windows operating systems are stored inside DLL files. In the next section, I’ll show you where these DLLs with icons are found in Windows 10 and Windows 11.
Where are default icons stored in Windows?
I tried to organize the list of default Windows 10 and Windows 11 icons, both by their DLL files location and by taking into account the primary purpose of the icons found inside the DLL files. Next, you can see my list of locations from Windows where you find DLL files containing icons:
%systemroot%\system32\imageres.dll
The imageres.dll file contains many Windows 10 and Windows 11 icons, used almost everywhere in the operating system. It has icons for different types of folders, hardware devices, peripherals, actions, etc.
Icons stored in the imageres.dll file
%systemroot%\system32\shell32.dll
The shell32.dll file also has lots of icons used in various parts of Windows 10, as well as in Windows 11. Together with imageres.dll and ddores.dll, shell32.dll hosts one of the largest icon collections. Inside it, you can find icons for the internet, devices, networks, peripherals, and folders.
Icons stored in the shell32.dll file
TIP: Did your desktop icons disappear? Here’s how to restore them in Windows 10 and Windows 11.
%systemroot%\system32\ddores.dll
Ddores.dll contains many icons for hardware devices and resources, such as speakers, headphones, screens, computers, remotes, gaming pads, mice and keyboards, cameras, and printers.
Icons stored in the ddores.dll file
%systemroot%\system32\pifmgr.dll
Pifmgr.dll contains some old-style icons that were used in older versions of Windows, like Windows 95 and Windows 98. In it, you can find funny icons that depict things such as a window, a trumpet, a ball, and a wizard hat. 🙂
Icons stored in the pifmgr.dll file
%systemroot%\explorer.exe
Explorer.exe has a few icons used by File Explorer and its older versions. The first icon is the default icon used by File Explorer, but the next ones were used in older Windows versions for things like printers, folders, actions, messenger apps, and mail.
Icons stored in the explorer.exe file
%systemroot%\system32\accessibilitycpl.dll
Accessibilitycpl.dll has a set of icons used mainly for the accessibility features in Windows. For example, it includes icons with people, mouse cursors, a magnifying glass, a mouse, and a keyboard.
Icons stored in the accessibilitycpl.dll file
%systemroot%\system32\moricons.dll
Moricons.dll is another file that contains old-style icons used by Microsoft in old Windows versions. Most of the icons here are about MS-DOS programs, but you also have icons for old programming languages, such as Turbo Pascal or FoxPro.
Icons stored in the moricons.dll file
%systemroot%\system32\mmcndmgr.dll
Mmcndmgr.dll is yet another file with vintage icons, which I believe were designed mainly for computer management-related settings. Among others, it includes icons for networks, folders, authentication, time, computers, and servers.
Icons stored in the mmcndmgr.dll file
%systemroot%\system32\mmres.dll
Mmres.dll has a few modern-looking icons with various audio resources, like speakers, headphones, microphones, and a webcam.
Icons stored in the mmres.dll file
%systemroot%\system32\netcenter.dll
Netcenter.dll has several icons for network-related settings and features.
Icons stored in the netcenter.dll file
%systemroot%\system32\netshell.dll
Netshell.dll contains icons for all kinds of network connections and associated hardware or technologies. For instance, inside it, you can find icons for Bluetooth, wireless routers, and network connections.
Icons stored in the netshell.dll file
%systemroot%\system32\networkexplorer.dll
Networkexplorer.dll is another DLL file with icons for a series of peripherals, such as phones, routers, printers, fax machines, and some other network devices.
Icons stored in the networkexplorer.dll file
%systemroot%\system32\pnidui.dll
Pnidui.dll has icons for network-related settings (Ethernet or wireless status, network locations, etc.). Most of the icons here are transparent white, so you have to select them to see what they look like.
Icons stored in the pnidui.dll file
IMPORTANT: This DLL file seems to be missing in Windows 11 version 24H2 (or newer), yet it’s still present in Windows 10 and older versions of Windows 11.
%systemroot%\system32\sensorscpl.dll
Sensorscpl.dll has a few icons for different kinds of sensors. While most of them look similar, their details indicate things like temperature, power, and wind.
Icons stored in the sensorscpl.dll file
%systemroot%\system32\setupapi.dll
Setupapi.dll has icons used for the setup wizards of various hardware devices. It has screens, peripherals, hardware components, connectors and plugs, gaming pads, and others.
Icons stored in the setupapi.dll file
%systemroot%\system32\wmploc.dll
Wmploc.dll contains multimedia icons used for media devices, audio and video files, folders, CD and DVD discs, and so on.
Icons stored in the wmploc.dll file
%systemroot%\system32\wpdshext.dll
Wpdshext.dll has icons for some portable devices, such as cameras, phones, MP3 players, and a few battery indicators.
Icons stored in the wpdshext.dll file
%systemroot%\system32\compstui.dll
Comstui.dll includes various classic icons from older versions of Windows. It has icons with light bulbs, mail, printers, documents, telephones, fax machines, and so on.
Icons stored in the compstui.dll file
%systemroot%\system32\ieframe.dll
Ieframe.dll contains the icons used by the old Internet Explorer for its shortcuts, buttons, and menus.
Icons stored in the ieframe.dll file
%systemroot%\system32\dmdskres.dll
Dmdskres.dll contains icons only used for disk management.
Icons stored in the dmdskres.dll file
%systemroot%\system32\dsuiext.dll
Dsuiext.dll includes icons for network services.
It has icons with servers, people, printers, office buildings, authentication services, and so on.
Icons stored in the dsuiext.dll file
%systemroot%\system32\mstscax.dll
Mstscax.dll stores just a few icons used for remote desktop connections with computers, notifications, and security certificates.
Icons stored in the mstscax.dll file
%systemroot%\system32\wiashext.dll
Wiashext.dll has a few icons for various imaging hardware devices, like scanners, photo and video cameras, and a few similar icons.
Icons stored in the wiashext.dll file
%systemroot%\system32\comres.dll
Comres.dll contains a few icons that depict a user, a folder, a pencil, and some actions.
Icons stored in the comres.dll file
%systemroot%\system32\mstsc.exe
Mstsc.exe holds a few network-related icons but also includes other icons like a speaker, a microphone, and the Windows 8 logo.
Icons stored in the mstsc.exe file
actioncentercpl.dll, aclui.dll, autoplay.dll, comctl32.dll, filemgmt.dll, mssvp.dll, ncpa.cpl, url.dll, xwizards.dll (all in %systemroot%\system32\)
All these files contain icons. However, many have only one icon inside or just a few, so I decided to mention them all together. They have icons used in the Windows notifications panel, some error and info icons, an autoplay icon, some user icons, and websites icons.
Icons stored in the mssvp.dll file
Most other executable files in %systemroot% and its subfolders
In both Windows 10 and Windows 11, the Windows folder contains essential system files, libraries, and executables that are essential for the operating system to function properly. Some of these executable files also have associated icons, which can represent specific system tools or functions. However, note that most of them contain only a few icons, and some include only one.
Besides the explorer.exe I mentioned earlier, other notable executable files with icons in the Windows folder and its subfolders are: calc.exe, cleanmgr.exe, cmd.exe, control.exe, fsquirt.exe, msconfig.exe, taskmgr.exe, and wscript.exe.
Icons stored in the wscript.exe file
Having said that, would you like to get the full list of Windows icons locations in one go? Here’s…
The list of Windows icons locations
In case you want to save the complete list of locations for Windows icons, here it is in a code format that you can easily copy/paste and store anywhere you want:
%systemroot%\system32\imageres.dll
%systemroot%\system32\shell32.dll
%systemroot%\system32\ddores.dll
%systemroot%\system32\pifmgr.dll
%systemroot%\explorer.exe
%systemroot%\system32\accessibilitycpl.dll
%systemroot%\system32\moricons.dll
%systemroot%\system32\mmcndmgr.dll
%systemroot%\system32\mmres.dll
%systemroot%\system32\netcenter.dll
%systemroot%\system32\netshell.dll
%systemroot%\system32\networkexplorer.dll
%systemroot%\system32\pnidui.dll
%systemroot%\system32\sensorscpl.dll
%systemroot%\system32\setupapi.dll
%systemroot%\system32\wmploc.dll
%systemroot%\system32\wpdshext.dll
%systemroot%\system32\compstui.dll
%systemroot%\system32\ieframe.dll
%systemroot%\system32\dmdskres.dll
%systemroot%\system32\dsuiext.dll
%systemroot%\system32\mstscax.dll
%systemroot%\system32\wiashext.dll
%systemroot%\system32\comres.dll
%systemroot%\system32\mstsc.exe
%systemroot%\system32\actioncentercpl.dll
%systemroot%\system32\aclui.dll
%systemroot%\system32\autoplay.dll
%systemroot%\system32\comctl32.dll
%systemroot%\system32\filemgmt.dll
%systemroot%\system32\mssvp.dll
%systemroot%\system32\ncpa.cpl
%systemroot%\system32\url.dll
%systemroot%\system32\xwizards.dll
%systemroot%\notepad.exe
%systemroot%\regedit.exe
%systemroot%\system32\calc.exe
%systemroot%\system32\cleanmgr.exe
%systemroot%\system32\cmd.exe
%systemroot%\system32\control.exe
%systemroot%\system32\fsquirt.exe
%systemroot%\system32\msconfig.exe
%systemroot%\system32\taskmgr.exe
%systemroot%\system32\wscript.exe
How to use the icons stored inside a DLL file
Icons stored inside DLL files cannot be copied and saved elsewhere, at least not unless you use a special app that can extract icons from DLL files. However, you can set any icon stored inside such a file as the icon used by a folder, library, or shortcut. If you need guidance on how to change the icons associated with your shortcuts, this tutorial helps: How to change a shortcut icon in Windows 11 and Windows 10. Just copy and paste the path I provided for the DLL that interests you in the field named “Look for icons in this file.”
Change the icon of a shortcut
If you are not satisfied with the options available in the standard Windows icon files, then you might want to look at other places to find icons: 8 websites with free desktop icons for Windows.
P.S.: Where to find the Windows icon used for the Start button?
Some of our readers asked us where they can find the Windows logo icon — the one used by Windows 10 and Windows 11 for the Start Menu button. Here’s the answer:
If you have Windows 10, the Start icon is not an icon per se. Instead of a classic ICO file, Windows 10 uses a PNG image file for the Start Menu button. You can find it in the following location:
C:\Windows\System32\@WLOGO_48x48.png
The location of the Windows 10 logo icon used on the Start Menu button
The same applies to Windows 11, which uses a PNG image file for the Start Menu button too. You can find it here:
C:\Windows\System32\@WLOGO_96x96.png
The location of the Windows 11 logo icon used on the Start Menu button
Although the Start Menu icons in Windows 10 and Windows 11 are PNG files, the good news is that you can transform any PNG file into a regular icon file with the ICO file extension easily. Here are the steps to do that: 2 ways to convert PNG, SVG, JPG files to ICO files in Windows.
Do you know any other Windows icons locations?
Now that you know where Windows stores its default icons, you can easily personalize your desktop or fix any missing ones. As you have seen, both Windows 10 and Windows 11 have lots of built-in icon sets, and the icon folders and files are pretty much the same in both operating systems. Depending on what kind of icon you need, there’s a good chance that you’ll find it inside one of the DLL files or executables listed in this guide. Do you know other built-in icon locations from Windows? If you do, don’t hesitate to share them in the comments section, and I’ll update this article as soon as possible.