
Is your Windows PC driving you bonkers with Alt+Space or Win+Space popping open search bars and menus when you least expect it?
Do you keep hitting key combos that whisk you out of your workflow? You are not alone.

Accidental keyboard shortcuts can disrupt your focus and reduce productivity. But you can banish irksome shortcuts for good on Windows 10 and 11 PCs.
This guide covers everything you need to know to disable problematic key combos.
Why Keyboard Shortcuts Cause Chaos on Windows 10/11 PC
Microsoft packs dozens of shortcuts into Windows to help speed up tasks. Most assist productivity. Others hinder more than help. You likely use some shortcuts heavily without thinking twice. Examples include copy/paste and app switching with Alt+Tab.
But it takes just one wrong key combo to interrupt your flow.
Ever hit Win+L by accident and get booted to the lock screen?
Or invoked search instead of basic text editing? Shortcuts turned saboteurs can drive anyone batty.
How to Turn Off Alt + Space and Windows + Space Keyboard Shortcuts on Windows 10/11 PC
The good news? You have options to block problematic shortcuts that do more harm than good.
#1 – Use Microsoft PowerToys To Turn Off Troublesome Shortcuts

Microsoft’s free PowerToys utility provides granular control to remap or disable any keyboard shortcut in Windows 10 and 11. The Keyboard Manager module lets you target specific combos.
Follow these steps to quash annoying shortcuts with PowerToys:
- Install PowerToys from the Microsoft Store if you lack it
- Open PowerToys and click Keyboard Manager in the left pane
- Find the shortcut in Remap Keys and change the mapping dropdown
- Select Disabled to turn off a shortcut entirely
- Click Apply when finished remapping shortcuts
Customizing shortcuts with PowerToys takes seconds. Just disable undesirable combos and improve your productivity.
#2 – Leverage Windows Registry Editor to Block Shortcuts
The Registry Editor lets you tweak Windows settings and behaviors at a low level. Tech-savvy users can exploit this to turn off problematic keyboard shortcuts.
Use these steps to banish shortcuts via the Registry:
- Type “regedit” and launch as admin
- Navigate to HKEY_CURRENT_USER\Software\Microsoft\Windows\CurrentVersion\Explorer
- Create a key called DisabledHotkeys if it does not exist
- Make new String Values named after each shortcut
- Set their Value Data to disable
- Restart your PC for changes to apply
Intermediates should feel comfortable spelunking in regedit to block shortcuts. Novices may prefer the PowerToys method. Either approach effectively resolves troublesome combos.
#3 – Target Other Irritating Keyboard Habits
Beyond basic shortcuts, other key combos also flummox users:
Accidental Caps Lock – Fat fingering Caps Lock mid-typing leads to jarring BLOCK LETTER words. Create a registry string value called NoCapsLock and set to 1 to disable this entirely.
Run Dialog Triggers – Win+R pulls up the Run dialog to launch apps. Kill this with a NoRun regedit string also set to 1.
Errant Windows Key Presses – A stray Win key hit minimizes everything. Add a NoWinKeys value in regedit to ignore presses.
These additional options supplement shortcut disabling for complete keyboard relief.
Do You Really Need the Alt + Space and Windows + Space Shortcut on Windows PC?

Before fully disabling a keyboard shortcut, consider if you actually use it intentionally. Analyze when you invoke the combo and if removing it may hurt more than help.
Alt+Space and Win+Space often do more harm than good with accidental pops. But other broadly used shortcuts like copy/paste improve quality of life. Proceed carefully in your disabling efforts.
Try Keyboard Blockers For Temporary Relief
If you just want to temporarily ignore certain key presses, keyboard blocking tools exist:
- AutoHotKey scripts
- Shortcut Manager utilities
- Specialty hardware keyboards
These options let you enable/disable on the fly instead of permanent disabling. Test what works best for your needs.
Windows Dispatch is a website supported by its readers & community. Some pages may contain affiliate links which may allow us to earn a little money when you buy through them.
David Porter
David is prolific writer and full-time Digital Nomad. He is an American expat living in Indonesia who loves to follow the recent technology updates. In his free time, he loves surfing and travel the edge of Indonesia.

This tutorial will show you how to enable or disable the Alt + Spacebar keyboard shortcut to quickly «Press to talk» or «Press and hold to talk» with Copilot for your account in Windows 11.
Microsoft Copilot is your everyday AI companion that helps you to be smarter, more productive, more creative, and more connected to the people and things around you. Whether you want to learn how to code, plan an Influencer level vacation, or just need a little help writing a hard email, your everyday AI companion is there to help you get the job done like a pro. If you missed that meeting and need a quick recap or can’t figure out the tax code for your new side hustle, Copilot is there to sprinkle some AI pixie dust on the problem. There when you need it, Copilot works smoothly, seamlessly, and securely across your Microsoft apps to elevate everything you do. Speed up tasks, get more personalized answers and useful information, or find new creative inspiration. And you can do it all by asking for what you want the way you naturally write and speak. It doesn’t care if the task is big or small, it’s just there to help you get the job done. Copilot empowers you to achieve anything you can imagine.
Copilot Voice allows you to talk with Copilot with a microphone using natural language.
Starting with Copilot version 1.25024.100.0, Microsoft is starting to roll out Press to talk across all Insider Channels via the Microsoft Store. This is gradually rolling out so not all Insiders will get the update right away. Press to talk allows you to interact with Copilot using your voice by using a hotkey, providing instant responses while staying in your current workflow and continuing tasks without interruption. To start a voice conversation with Copilot, hold the Alt + Spacebar for 2 seconds on your PC. To end your conversation, press the Esc key. If there is no speaking for several seconds Copilot will automatically end the conversation. When the conversation is over the microphone on the screen will disappear.
Starting with Windows 11 build 26200.5516 (Dev) and build 26120.3653 (Beta 24H2), and build 22635.5160 (Beta 23H2), you can now launch Copilot on Windows with Win + C. You can personalize your Copilot key and Win + C experience at any time with the existing Customize Copilot key on keyboard setting.
- To access the press to talk feature and start a conversation with Copilot on Windows, press and hold the Copilot key for 2 seconds. For PCs without the Copilot key, press and hold Win + C for 2 seconds. To end your conversation, press the Esc key. If there is no speaking for several seconds, Copilot will automatically end the conversation. When the conversation is over, the microphone on the screen will disappear. As announced previously, you can also press and hold Alt + Spacebar to talk with Copilot on Windows. Press to talk allows you to interact with Copilot using your voice, providing instant responses while staying in your current workflow and continuing tasks without interruption. Press to talk is supported in the latest Copilot app update (version 1.25033.139.0 and higher). This update is beginning to roll out across Insider Channels via the Microsoft Store.
- Developers can get the same trigger for press to talk for their apps that support the Copilot key by using Handle Microsoft Copilot hardware key state changes. Note, the enterprise-focused Microsoft 365 Copilot app does not have this support today.
- Win + C and press to talk are gradually rolling out so not all Insiders will get the update right away. We are excited to be previewing improvements with our Insiders to ensure all our customers have a great Copilot experience for Windows.
Reference:
Note: The Copilot app for Windows uses the RegisterHotKey function for the Alt + Space keyboard shortcut. Many apps use this keyboard shortcut today. For any apps installed on your PC that might utilize this keyboard shortcut, Windows will register whichever app is launched first on your PC and running in the background as the app that is invoked when using Alt + Space.
Here’s How:
1 Open the Copilot app.
2 While in full view, click/tap on the Account button, and click/tap on Settings. (see screenshot below)

3 Do step 4 (on) or step 5 (off) below for what you want.
4 Turn On Alt+Spacebar for «Press to talk» with Copilot
A) Under Voice Mode, turn on Press and hold Alt+Spacebar on your PC to quickly talk to Copilot. (see screenshot below)
B) Select Press and hold to talk or Press to talk (default) in the How to talk to Copilot drop menu for what you want.
C) Click/tap on the Back arrow button to exit Copilot settings.

5 Turn Off Alt+Spacebar for «Press to talk» with Copilot
This is the default setting.
A) Under Voice Mode, turn off Press and hold Alt+Spacebar on your PC to quickly talk to Copilot. (see screenshot below)
B) Click/tap on the Back arrow button to exit Copilot settings.
That’s it,
Shawn Brink
Related Tutorials
- Start Voice Conversation with Copilot in Windows 11
- Change Copilot Voice in Microsoft Edge, Web, Windows 11 and 10
- Enable or Disable Alt+Spacebar shortcut for Copilot Quick View in Windows 11 and 10
In Windows, there are often times we encounter an issue where an active window may suddenly go completely off the screen and became non-clickable. This issue is usually caused by accidental moving of the window by user’s action such as accidental hotkey pressing or by the app itself.
This guide will show you how to move a window that accidentally went off-screen back to your main desktop screen in Windows 11.
Fix Window went off-screen issue in Windows 11
The solution to the issue depends if you have multiple monitors or just one. In most cases, using the first or second solution below may quickly bring your off-screen window back to your desktop screen no matter the number of screens you have. Try the fixes below. If one doesn’t work, try the other.
Fix 1: Windows + Arrow keys
The built-in shortcut key – Windows + Arrow keys in Windows 11 is to quickly snap a window to a side of the screen. You can press Windows + Up, Down, Left or Right arrow keys to snap a window to the top, bottom, left or right of your screen respectively. You can try to use this method to force snap an off-screen window back to your main screen.
While selecting the problem window (just select the app on the taskbar), try to press Windows + Left (or Right) arrow keys repeatedly and see if the window that went off-screen can be brought back to your main screen.
Fix 2: Alt + Space to open window menu
In Windows 11, the Alt + Space shortcut key opens the window menu of the currently selected window. The window menu consists of options such as Move, Size, Minimize and Maximize.
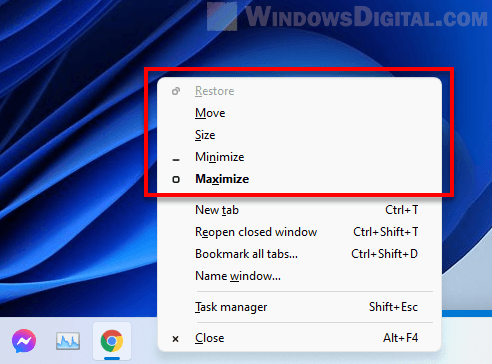
To try this fix, first select the problem window by selecting it on the taskbar. Then, press Alt + Space to bring up the window menu and select Maximize and see if the window will maximize on your main screen.
If it doesn’t bring the window back, press Alt + Space again and select Move. If Move option is greyed-out, select Restore first and repeat again. Once Move is selected, press any of the arrow keys once. This is to snap your mouse cursor to the window so you can move the window by moving your mouse.
Now, try to move your mouse cursor around and see if it can move the window that went off-screen back to your main screen. Don’t click any mouse button while moving as doing so will cancel the move action.
Alternatively, after pressing Alt + Space and selecting Move, you can use only arrow keys to move the window. However, moving window with arrow keys will be much slower. You will likely need to press and hold the arrow key (try left or right key) for a couple of seconds and see if you can bring the off-screen window back to your main screen.
Fix 3: Shift + Right-click a window
Similar to Alt + Space, Shift + Right-click does the same thing to open the window menu of an active window. If pressing Alt + Space doesn’t open the window menu of the problem window, try Shift + Right-click instead.
To do so, press and hold the Shift key and Right-click on the problem app on the taskbar to open the window menu of the app. Then, follow the same steps in Fix 2 to attempt moving the off-screen window back to your desktop screen.
Fix 4: Change Resolution
Another workaround to the window went off-screen problem is to change the screen resolution back and forth in Windows 11. Changing screen resolution somehow forces all opened windows to reset back to the main visible screen.
You can try to change your screen resolution to another resolution and see if the off-screen window can be moved back to the main screen. Then, change the screen resolution back to your preferred value once the issue is resolved.
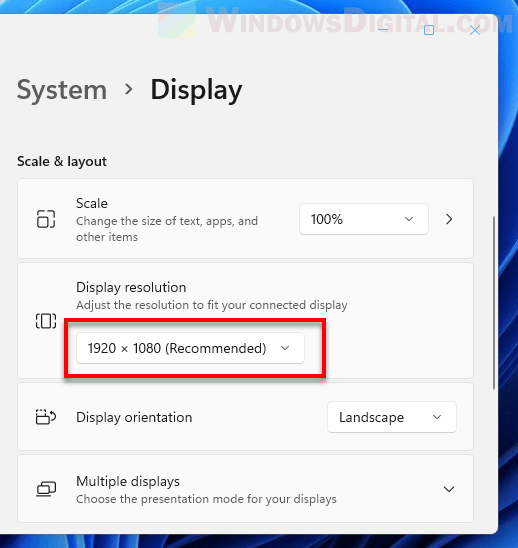
To change screen resolution in Windows 11, right-click any blank area on the desktop screen and select Display settings. Under Display resolution, click on the drop-down menu to switch to a different screen resolution.
Managing your windows efficiently is key to boosting productivity, especially when working with multiple applications on a single screen or across multiple monitors. In Windows 11, you can move windows without relying on the mouse, making it convenient for those who prefer keyboard shortcuts. This tutorial will guide you through various methods to move windows using only your keyboard.
Windows 11 provides a variety of keyboard shortcuts that can help you manage windows across your desktop. Whether you’re trying to retrieve a window stuck off-screen, snap it to a new position, or move it between monitors, there’s a shortcut for that. These methods are particularly useful in setups with multiple monitors or when navigating between numerous open windows.
By following the steps below, you’ll learn how to move windows in Windows 11 using keyboard shortcuts, allowing for smoother window navigation and enhancing your multitasking abilities.
How To Move Windows to the Front Using Hotkeys
This method allows users to cycle through open windows and switch to the desired one without using the mouse. It’s a simple way to move and manage windows when you have many applications running.
- Press and hold Alt + TabHold down the “Alt” key and press the “Tab” key. A preview of all open windows will appear on the screen, showing the currently open applications.

- Select the Window and Move to the FrontWhile still holding the “Alt” key, continue pressing “Tab” to cycle through the open windows. Once the window you want is highlighted, release both keys, and the selected window will be brought to the front.


How To Move Windows Freely on the Desktop Using the Keyboard
The “Alt + Space” shortcut opens the window menu, giving you options like move, minimize, or maximize. This method is particularly useful for moving windows that are stuck off-screen.
- Press “Alt + Space” and select “Move”Press “Alt + Space” to bring up the window menu. Use the arrow keys to navigate to the “Move” option and press “Enter”.

- Press the “M” Key as an AlternativeAlternatively, press the “M” key to select the “Move” option directly. Your cursor will change to a cross with arrows, indicating the window is ready to be moved.

- Move the Window with Arrow Keys
on your keyboard to move the window in the desired direction. If you need more precise movement, hold down the “Ctrl” key while using the arrow keys.
Use the arrow keys

- Finalize with EnterOnce you have moved the window to the desired location, press “Enter” to finalize the window’s position.


How to Use the Windows + Insert Hotkey to Minimize Inactive Windows
The “Windows + Insert” shortcut is ideal for quickly minimizing all inactive windows, decluttering your screen and focusing on one active window. This is particularly useful when you need to clear distractions and work with just one application.
- Press “Windows + Insert”Press the “Windows + Insert” keys together to minimize all inactive windows, leaving only the currently active window visible on the screen.

- Repeat to Restore Minimized WindowsTo restore all minimized windows to their original positions, press “Windows + Insert” again.


How to Move and Snap Windows Using Hotkeys
This method allows users to snap windows to different areas of the screen using the keyboard. It’s particularly useful when working with multiple windows and monitors.
- Press “Windows + Left” or “Right” Arrow
Press and hold the “Windows” key and then the “Left Arrow” or “w” key to snap the active window to the left or right side of the screen. - Use Arrow Keys to AdjustYou can then press “Windows + Up Arrow” or “Windows + Down Arrow” to further adjust the window’s position to a corner.
- Move Windows Across MonitorsIf you have multiple monitors, keep pressing “Windows + Left” or “Windows + Right” to move the window from one monitor to the other.
How to Use Task View Shortcuts to Move Windows Across Virtual Desktops
Task View is a powerful feature in Windows 11 that gives users an overview of all active windows and virtual desktops. It allows you to move windows between virtual desktops using only the keyboard, which is particularly useful when managing different projects on separate desktops without relying on the mouse.
- Press “Windows + Tab” to Open Task View
Press the “Windows” key and then the “Tab” key. This opens Task View, showing all active windows and virtual desktops. - Select the Window
to select the window you want to move or switch to another desktop.
Use the arrow keys - Press “Shift + F10” to Open the Context Menu
With the desired window selected, press “Shift + F10″ to open the context menu for the selected window. - Use Arrow Keys to Select “Move to”
Use the Arrow Keys to navigate through the context menu and select the “Move to” option. - Select the Target Virtual DesktopOnce “Move to” is selected, use the Arrow Keys to choose the virtual desktop you want to move the window to. Press “Enter” to confirm and move the window to the chosen desktop.
- Switch Desktops (Optional)
After moving the window, if you wish to switch to the target desktop, press “Ctrl + Windows + Left Arrow” or “Ctrl + Windows + Right Arrow” to quickly navigate to the new desktop where the window was moved.
How to Move Windows Between Virtual Desktops Using Shortcuts Without Task View
This method allows you to switch between virtual desktops without opening Task View, making it faster to navigate between multiple desktops.
Press Ctrl + Alt + Left or Right ArrowHold down the “Ctrl + Alt” keys and press the “Left Arrow” or “Right Arrow” to move between virtual desktops.
How to to Move Windows Between Monitors without Task View
For users with multiple monitors, this shortcut allows you to move windows between different monitors without using the mouse.
Press “Windows + Shift + Left” or “Right” Arrow
Hold down “Windows + Shift” and press the “Left Arrow” or “Right Arrow” to move the active window from one monitor to the other.
FAQ – Frequently Asked Questions About Window Management in Windows 11 with Keyboard Shortcuts
How do I cycle between all open windows using the keyboard?
To cycle through open windows, hold Alt and press Tab. A thumbnail preview of each window will appear. Continue pressing Tab while holding Alt to navigate through the list. Release both keys when the desired window is highlighted to bring it to the forefront.
How can I move a window using the keyboard if it is off my computer screen?
Press Alt + Space to open the window’s system menu, then press M to select the Move option. Use the arrow keys to slide the window back into view. If the window is far off-screen, you might need to press the arrow keys several times. Press Enter to set the new position of the window.
How to resize a stuck window using only the keyboard?
Activate the window, then press Alt + Space and hit S to select the Size option. Use the arrow keys to adjust the borders of the window. Each arrow key adjusts the border corresponding to its direction. To finalize the resizing, press Enter.
What shortcut can I use to switch directly to a specific application window without cycling through others?
Use Alt + Esc to instantly switch to the next window in the stacking order. This shortcut moves the current window to the end of the order and brings the next one to the front, which can be useful for quick switches without visual previews.
Can I close a window using a keyboard shortcut?
To close the active window immediately, press Alt + F4. This shortcut is universally applicable to almost all applications in Windows, effectively terminating the active program unless the application prompts for unsaved changes.
Is there a way to move a window from one virtual desktop to another without opening Task View?
To move a window to a different virtual desktop directly, focus on the window, then press Ctrl + Windows + Shift + Left Arrow or Right Arrow. This combination moves the active window to the next or previous desktop, based on the arrow direction.
How do I create a new virtual desktop using a keyboard shortcut?
Press Ctrl + Windows + D to generate a new virtual desktop quickly. This feature helps organize multiple projects or tasks by allowing you to separate related windows into different virtual spaces.
Is it possible to quickly switch back to the last active window?
Simply tap Alt + Tab to toggle focus back to the last active window. This shortcut is useful for alternating quickly between two applications without cycling through all open applications.
Can I use keyboard shortcuts to focus on the desktop directly?
Press Windows + D to show or hide the desktop. This shortcut minimizes all open windows, clearing the screen and focusing on the desktop. Press it again to restore the windows to their original state.
How do I rearrange minimized windows in the taskbar using only the keyboard?
To navigate through windows represented on the taskbar, press Windows + T. Once focused on the taskbar, use left and right arrow keys to select a window. Press Enter to maximize or bring it into focus.
How can I find a window that I minimized and can’t seem to locate?
Press Windows + M to minimize all open windows to the taskbar, which should make it easier to locate specific minimized windows. Alternatively, use Windows + D to minimize and then bring back all windows, which can sometimes refresh the layout and visibility of windows.
Can I adjust a window’s transparency using keyboard shortcuts?
Windows 11 does not support adjusting window transparency through standard keyboard shortcuts. For transparency or other visual effects, you may need to explore third-party software solutions that provide customizable keyboard shortcuts for such features.
How to cycle through controls within a window using the keyboard?
Use the Tab key to navigate forward through interactive elements like buttons, links, and fields within a window. To move backward, press Shift + Tab. When you reach the desired control, use Enter or Space to activate or select the control. This method is highly useful in dialog boxes or forms.
Is there a shortcut for switching directly to the desktop from any application?
Press Windows + M to minimize all windows and shift focus immediately to the desktop, an alternative to Windows + D. Use Windows + Shift + M to restore all minimized windows back to their original state.
Can I maximize a window directly from the keyboard without using ‘Alt + Space’?
With the window active, press Windows + Up Arrow. This command maximizes the window directly without navigating through the system menu. If the window is already maximized, using this shortcut has no effect.
Related: How to Restore Hidden or Minimized Windows
Related: How to Switch Between Desktops in Windows 11 or Windows 10
Related: How to Show All Open Windows on the Taskbar in Windows 11
Last Updated on November 7, 2024 2:48 pm CET
Short description
|
5 |
Open the shortcut menu for the active window. |
Detailed description
No detailed description available. Write a suggestion >>
Suggest a detailed explanation for this shortcut below
Please write a description that could help, warn or inform users about this shortcut. Descriptions can be a few sentences.
HTML is OK. One shortcut have only one description, so this shouldn’t be a something like comment.
Disclaimer: Descriptions can only appear anonymous at this time, and we may not publish every suggestion.
Your name or nickname (optional)Your email (optional — we may need to contact you)
More: Display all Windows 11 shortcuts.
For beginners: How to press Alt + Space on your keyboard?
Typically you first hold down modifiers (if exist), and then press remaining key(s) in the shortcut. So,
Press and hold Alt and while holding, press Space then release all.
Suggest correction / addition
Please report misspellings or errors about this shortcut’s description below:Your name or nickname (optional)Your email (optional — we may need to contact you)
Share this page on:
email