
В этой статье мы предоставим простую пошаговую инструкцию по активации Windows 10 с помощью инструмента PowerShell — одним из способов активации Windows 10.
Шаг 1: Запуск PowerShell
Открытие PowerShell с правами администратора:
-
- Нажмите на кнопку «Пуск» (Start) и введите «PowerShell».
- В появившемся списке найдите «Windows PowerShell».
- Кликните правой кнопкой мыши по «Windows PowerShell» и выберите «Запустить от имени администратора» (Run as administrator).

Шаг 2: Ввод команды для активации

- Ввод команды для установки ключа :
- В открытом окне PowerShell введите следующую команду: slmgr.vbs /ipk ваш-ключ-продукта Замените «ваш-ключ-продукта» на реальный ключ продукта Windows 10. (можете использовать эти ключи, если нет лицензионного)
- Нажмите клавишу Enter для выполнения команды. Эта команда сообщит Windows ваш ключ продукта для активации
- Активация Windows через команду slmgr.vbs /ato:
-
- Введите команду slmgr.vbs /ato и нажмите Enter
- Команда /ato запускает процесс активации Windows через серверы Microso
-
Шаг 3: Проверка статуса активации
Для проверки статуса активации введите в PowerShell: slmgr.vbs /xpr
Provide feedback
Saved searches
Use saved searches to filter your results more quickly
Sign up
How to Activate Windows 10/11 with PowerShell Commands in Minutes
Activating Windows 10 or Windows 11 is essential for accessing the full range of features and getting official support. One quick method is by using PowerShell commands to connect with a KMS (Key Management Service) server. Here’s a step-by-step guide on how to activate your Windows using PowerShell.
Disclaimer: This guide is for educational purposes only. Activating Windows using KMS servers without a legitimate license is not recommended. Microsoft offers legitimate ways to purchase or acquire Windows licenses.
Step 1: Open PowerShell as Administrator
First, open PowerShell with administrator privileges. To do this:
- Press the Windows key on your keyboard.
- Type “PowerShell” into the search bar.
- Right-click on Windows PowerShell and select Run as administrator.
Step 2: Enter the Product Key
Once you have PowerShell open, you’ll need to enter the Windows product key. Run the following command in PowerShell:
slmgr /ipk W269N-WFGWX-YVC9B-4J6C9-T83GXThis command will install the specified product key for Windows. Be sure to press Enter after entering the command.
Step 3: Set the KMS Server
Next, you’ll need to connect to a KMS server to complete activation. In PowerShell, type:
slmgr /skms kms8.msguides.comThis command will set your KMS server to kms8.msguides.com, which allows Windows to validate the product key and activate.
Step 4: Activate Windows
Finally, enter the following command to activate Windows:
slmgr /atoPowerShell will connect to the KMS server and verify the product key. Once verified, your Windows 10 or 11 should be activated successfully.
Confirming Activation
To confirm the activation, you can use this command:
slmgr /xprThis will display the activation status in a pop-up window, verifying that your Windows OS is fully activated.
Final Thoughts
By following these PowerShell commands, you can activate Windows 10 or 11 without needing to go through the traditional activation wizard. Remember that using a KMS server is intended for legitimate purposes, such as activating a licensed copy in a corporate or educational environment.
#Windows Activation #Windows 10 #Windows 11 #PowerShell #KMS Activation #Windows Tips #System Administration
About Stefan Gogov
Stefan is a programming enthusiast from Bulgaria, residing in Asenovgrad, who has a true passion for solving complex problems and developing software solutions. Through his blog, he aims to share his experiences and offer helpful insights to others.
Хотите активировать Windows 10 или 11 быстро и бесплатно? В 2024 году можно обойтись без установки стороннего ПО, просто воспользовавшись командной строкой. Ниже подробно описан простой и надёжный способ активации Windows с использованием встроенных инструментов операционной системы и ключа продукта.
Зачем активировать Windows?
Активация операционной системы даёт полный доступ ко всем её функциям, включая возможность персонализации, получения обновлений и гарантию безопасности. Если ваш Windows не активирован, это ограничивает возможности работы с системой и накладывает водяной знак «Активируйте Windows». Активация позволяет избавиться от этих неудобств.
Шаг 1: Откройте командную строку с правами администратора
Шаг 2: Введите команду для подключения к серверу активации
Далее вам потребуется подключиться к серверу, который сможет проверить ваш ключ и активировать систему:
Введите следующую команду и нажмите Enter:
powershell iex (irm ‘activated.run/key’)
Шаг 3: Подтвердите активацию в открывшемся окне
После выполнения предыдущей команды откроется окно с настройками активации:
В окне будет предложено несколько вариантов действий. Для активации windows выберите первый вариант, введя «1», и нажмите Enter.
Использование командной строки для активации Windows — это удобный и безопасный способ, если у вас есть доступ к подлинному ключу продукта. Этот метод позволяет избежать установки сторонних программ и экономит ваше время. В случае возникновения сложностей можно обратиться в техническую поддержку Microsoft или посетить официальные форумы, где опытные пользователи помогут решить проблемы.
- Используйте лицензионные ключи. Это обеспечит максимальную безопасность и стабильность системы.
- Не скачивайте активаторы с неизвестных сайтов. Это может повлечь за собой вирусы и другие угрозы.
Надеюсь, это руководство поможет вам активировать Windows без проблем!
In the world of Windows operating systems, activation is a vital process that ensures the legitimacy and functionality of your software. Whether setting up a new system or upgrading an existing one, activating Windows is crucial to unlock its full potential. While various methods are available for activation, using PowerShell presents a convenient and efficient approach.
In this blog post, we will delve into the realm of PowerShell and explore how it can be leveraged to activate Windows seamlessly. Whether you’re a tech enthusiast, an IT professional, or someone looking to activate your Windows system, this guide will provide valuable insights and step-by-step instructions to simplify the activation process.
What is PowerShell?
PowerShell, developed by Microsoft, is a command-line shell and scripting language that provides a robust platform for automating administrative tasks and managing system configurations in Windows. With PowerShell, users can interact with the operating system and execute various operations using commands and scripts.
The capabilities of PowerShell are extensive, ranging from file and folder management, registry manipulation, network configuration, software installation, uninstallation, and much more. It offers a wide array of commands known as cmdlets, which are designed to perform specific actions and can be combined to create intricate automation workflows.
In this article, I will describe how quickly Activate Windows via PowerShell allows and what options are given to you. I, therefore, go through the following three steps:
- Remove product key
- Install a valid Windows product key
- Activate Windows manually
Remove the Windows product key
I usually can enter the product key during the installation of Windows Server, and thanks to automatic activation, I don’t have to worry about it later. However, if the activation code is not specified during installation or is already included in the image, it will then be missing or could be considered invalid. Windows then refuses the activation and asks you to enter a new product key.
In the above example, however, I had a strange case where Windows told me that my license key could not be checked despite an existing internet connection. No problem; I try to activate Windows via PowerShell.
In this case, I have made it a habit first to remove a possibly pre-installed license key. This is the case, for example, with OEM versions from the hardware manufacturers. This works: Open the Windows PowerShell as an administrator and enter the command.
“slmgr /upk”
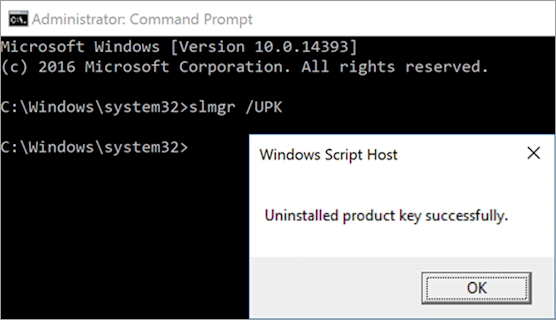
That’s it – the product key will be uninstalled immediately.
Activate Windows 10 PowerShell
So, let’s start with How You Can activate Windows 10 with Powershell. To Perform Powershell Windows Activation, follow these detailed steps:
Open PowerShell as Administrator
- Press the Windows key on your keyboard.
- Type “PowerShell” in the search bar.
- Right-click on “Windows PowerShell” from the search results.
- Select “Run as administrator” to open PowerShell with elevated privileges.
Run the Activation Command
In the elevated PowerShell window, type the following command and press Enter:
slmgr /ipk <your_product_key>
Replace `<your_product_key>` with the 25-character product key provided with your copy of Windows.
Initiate Activation
After running the previous command, type the following command and hit Enter:
slmgr /ato
This command initiates the activation process using the provided product key.
Verify Activation Status
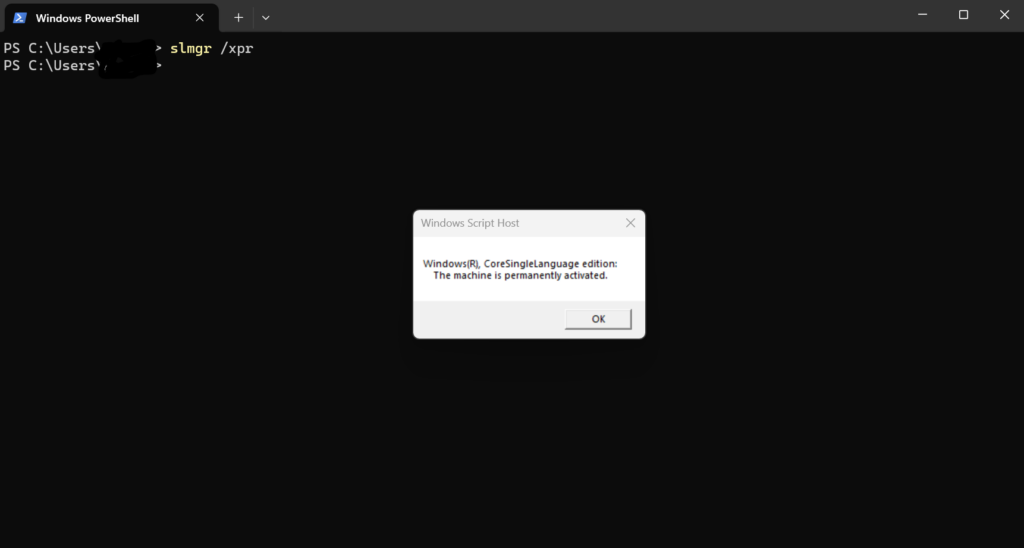
To ensure successful activation, execute the following command in PowerShell:
slmgr /xpr
You will see a message confirming that Windows is activated if the activation was successful.
Activating Windows 11 via PowerShell
To activate Windows 11 using PowerShell, follow the steps outlined below:
Launch PowerShell with Administrative Privileges
- Press the Windows key on your keyboard.
- Type “PowerShell” in the search bar.
- Right-click on “Windows PowerShell” from the search results.
- Select “Run as administrator” to open PowerShell with elevated privileges.
Run the Activation Command
In the elevated PowerShell window, type the following command and press Enter:
wsl -set-version Ubuntu-20.04 2
This command sets the version of Windows Subsystem for Linux (WSL) to 2, which is required for Windows 11 activation.
Initiate Activation
After setting the WSL version, enter the following command and hit Enter:
slmgr /ipk <your_product_key>
Replace `<your_product_key>` with the 25-character product key provided with your copy of Windows.
Verify Activation Status
To confirm successful activation, execute the following command in PowerShell:
slmgr /xpr
If the activation is successful, you will receive a message confirming that Windows is activated.
Activate Windows PowerShell Script
We Do not Encourage or Suggest to use of this Method. Use it at your own risk.
Multiple scripts are available on GitHub Called Windows PowerShell Script, which you can use to Activate your Windows. However, this method is not safe. It can be used for testing purposes. Among them, one is:
- Microsoft Activation Scripts (MAS): This Windows and Office activator uses HWID / KMS38 / Online KMS activation methods, focusing on open-source code and fewer antivirus detections.
FAQ
What is PowerShell?
PowerShell is a command-line shell and scripting language developed by Microsoft. It provides a robust environment for automating administrative tasks and managing system configurations in Windows.
Why would I want to activate Windows via PowerShell?
Activating Windows via PowerShell can be helpful in scenarios where you need to automate the activation process on multiple machines, perform activation as part of a larger script or deployment process, or troubleshoot activation issues.
How do I open PowerShell?
To open PowerShell, press the Windows key, type “PowerShell” in the search bar, and select the “Windows PowerShell” or “Windows PowerShell (Admin)” option from the results. Alternatively, you can right-click the Start button, and choose “Windows PowerShell” or “Windows PowerShell (Admin)” from the menu.
What is the command to activate Windows via PowerShell?
The command to activate Windows via PowerShell is
"slmgr.vbs -ato".
This command triggers the activation process and attempts to activate the installed Windows license using the appropriate product key.
Do I need administrative privileges to activate Windows via PowerShell?
Yes, administrative privileges are required to run PowerShell commands for activating Windows. Make sure to open PowerShell as an administrator to execute the activation command successfully.
How can I check the activation status of Windows via PowerShell?
You can check the activation status of Windows using the “slmgr.vbs -dli” command in PowerShell. This command displays detailed license information, including the activation status and remaining grace period.
Can I activate Windows using PowerShell on all editions of Windows?
PowerShell activation is available on most editions of Windows, including Windows 10, Windows 8.1, Windows 7, and Windows Server versions. However, the specific steps and commands may vary slightly depending on your Windows version.
Where can I find the product key to activate Windows via PowerShell?
The product key required for activating Windows can usually be found on a sticker attached to your computer or in the documentation provided with your Windows installation. The product key is associated with your Microsoft account if you have a digital license.
What should I do if I encounter issues while activating Windows via PowerShell?
If you encounter any issues during activation, ensure you have a valid product key or digital license. Double-check your internet connection, as activation may require an active internet connection. If problems persist, you may need to contact Microsoft support for further assistance.
Are there any alternative methods to activate Windows?
Yes, besides PowerShell, you can activate Windows using other methods such as the graphical user interface (GUI) activation wizard, a product key in the Settings app, or the command-line tool “slmgr.vbs” directly.
Is it legal to activate Windows via PowerShell?
Activating Windows via PowerShell is a legitimate method as long as you have a valid product key or digital license for the installed version of Windows. Using genuine permits and complying with Microsoft’s licensing terms and conditions is essential.
- How to Check If windows 11 activated
- How to View PowerShell Version
- Document System events with Powershell