
Applies ToWindows 11 Windows 10
Windows allows adding multiple user account to use the same device, enabling each user to have their own settings, documents, and applications.
For example, parents can have their own accounts with administrative privileges to manage settings and install software, while children can have standard accounts with parental controls enabled to monitor and limit their usage. This ensures that each family member has a personalized experience with their own files, settings, and appropriate access levels, while also keeping family members’ data private and secure from each other.
For personal and work or school use, having separate user accounts can help maintain a clear boundary between personal files and activities and those related to work or school. For instance, a user might have one account with personal emails, social media, and leisure applications, and another account with work or school emails, productivity software, and access to professional or educational resources. This separation not only helps in organizing and focusing on the task at hand but also adds an extra layer of security by keeping sensitive work or school data compartmentalized.
-
In the Settings app on your Windows device, select Accounts > Other user or use the following shortcut:
Other Users
-
Under Add other user, select Add account
-
Enter the account information for this person to sign in:
-
If the person you’re adding already has a Microsoft account, enter the email address
-
If the person you’re adding doesn’t have a Microsoft account, you can use their email address to create one. Enter the email address that person uses most frequently and select Sign up for a new email address
-
If you select the option I don’t have this person’s sign-in information, you can sign up for a new email address and create a new Microsoft account. If you want to create a local account, select the option Add a user without a Microsoft account
-
-
Follow the instructions to finish setting up the account
Important:
-
Microsoft recommends using a Microsoft account, not a local account, when signing in to Windows. Using a Microsoft account in Windows allows for seamless integration of Microsoft services, enhanced security, and sync across devices, unlike a local account.
-
Learn more about Microsoft accounts in Sign in with a Microsoft account.
If you are part of a family group, you can also add your family members to Windows from the Settings app > Accounts > Family, or with the following shortcut:
Family
To learn more, see Getting started with Microsoft Family Safety.
-
In the Settings app on your Windows device, select Accounts > Other user or use the following shortcut:
Other Users
-
Under Other users, select the flyout for the account you want to remove
-
Next to Account and data , select Remove
Note: removing an account doesn’t delete the person’s Microsoft account. It removes their sign-in information and data from the device.
If you’re using the same Windows device for both personal and school or business work, you might want to connect the accounts to make it easier for you to access files, email, apps, and information associated with each account. When you connect your work or school account, you’ll be connected to your organization, and have access to its resources.
Note: to connect a work or school account, your organization must support personal devices, or bring your own device (BYOD) scenarios.
-
In the Settings app on your Windows device, select Accounts > Access work or school or use the following shortcut:
Access work or school
-
Next to Add a work or school account, select Connect
-
Enter the account information, select the account type, and then select Add
-
In the Settings app on your Windows device, select Accounts > Access work or school or use the following shortcut:
Access work or school
-
Select the dropdown next to your work or school account and select Disconnect
-
Select Yes to confirm
Note: disconnecting a work or school account doesn’t delete the account. It removes the sign-in information and data from the device.
To make signing in to your accounts easier and faster, you might want to add accounts for different apps.
-
In the Settings app on your Windows device, select Accounts > Email & accounts or use the following shortcut:
Email & accounts
-
To add an account used by email. calendar, or contacts, select Add an account under Accounts used by email, calendar, and contacts
-
For other apps, select Add a Microsoft account or Add a work or school account
-
Follow the prompts to add the account
If needed, a user account can be configured as an administrator.
Important: you should limit the number of administrators on your Windows device because administrators have complete control over the system. Administrators can change settings, install software, and access all files. If too many people have this level of access, it could lead to security risks like malware installation or unwanted changes to your system. It’s safer to have fewer administrators and to use standard user accounts for day-to-day activities.
-
In the Settings app on your Windows device, select Accounts > Other user or use the following shortcut:
Other Users
-
Under Other users, select the flyout for the account you want to change
-
Next to Account options, select Change account type
-
From the dropdown, select the account type and then select OK
Need more help?
Want more options?
Explore subscription benefits, browse training courses, learn how to secure your device, and more.
В этой инструкции для начинающих о том, как создать нового пользователя Windows 10 несколькими способами, как сделать его администратором или наоборот, создать ограниченную учетную запись пользователя компьютера или ноутбука. Также может пригодиться: Как удалить пользователя Windows 10.
В Windows 10 присутствуют два типа учетных записей — учетные записи Майкрософт (требующие адреса электронной почты и синхронизирующие параметры онлайн) и локальные учетные записи пользователей, не отличающиеся от тех, которые могут быть вам привычны по ранним версиям Windows. При этом одну учетную запись всегда можно «превратить» в другую (например, Как удалить учетную запись Майкрософт). В статье будут рассмотрено создание пользователей с обоими типами учетных записей. Также может быть полезным: Как сделать пользователя администратором в Windows 10.
- Создание нового пользователя в Параметрах Windows 10
- Как создать пользователя в командной строке
- Локальные пользователи и группы Windows 10
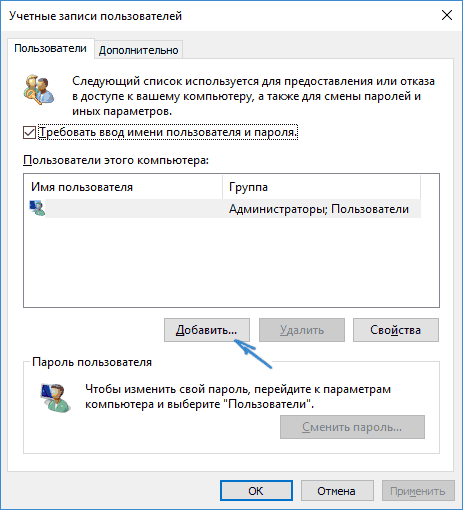
- Добавление пользователя в control userpasswords2
- Видео инструкция
Создание пользователя в параметрах Windows 10
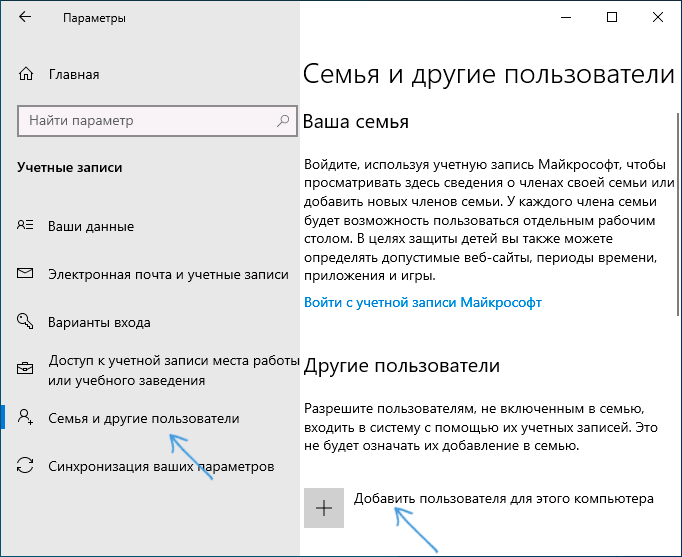
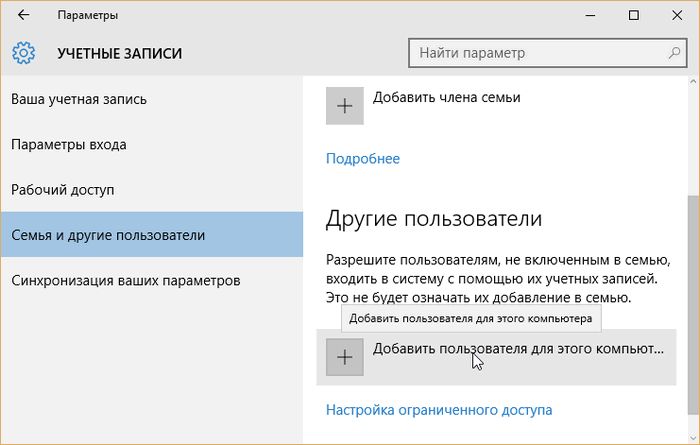
Основной способ создания нового пользователя в Windows 10 — использование пункта «Учетные записи» нового интерфейса настроек, доступного в «Пуск» — «Параметры». В указанном пункте настроек откройте раздел «Семья и другие пользователи».
- В разделе «Ваша семья» вы сможете (при условии, что используете учетную запись Майкрософт) создать учетные записи для членов семьи (также синхронизируемые с Майкрософт), подробнее о таких пользователях я писал в инструкции Родительский контроль Windows 10.
- Ниже, в разделе «Другие пользователи» можно добавить «простого» нового пользователя или администратора, учетная запись которого не будет контролироваться и являться «членом семьи», можно использовать как учетные записи Майкрософт, так и локальные учетные записи. Этот вариант будет рассматриваться далее.
Для создания нового пользователя, не входящего в семью и без возможностей родительского контроля, выполните следующие шаги:
- В разделе «Другие пользователи» нажмите «Добавить пользователя для этого компьютера».

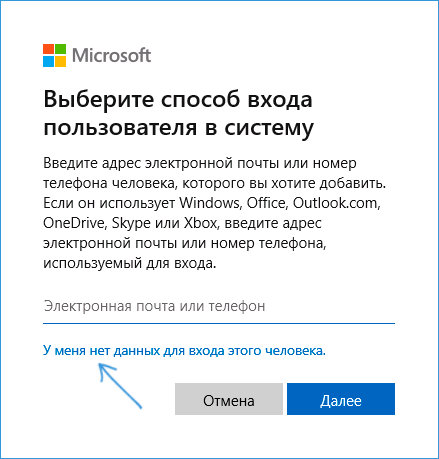
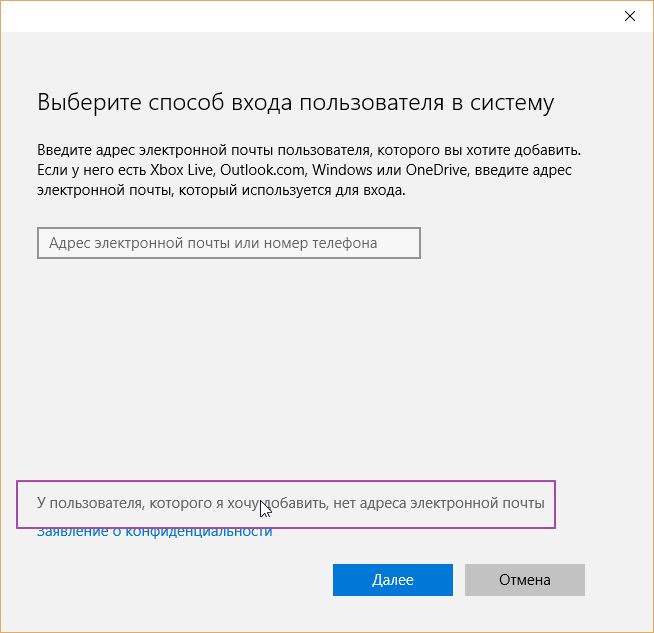
- В следующем окне вам будет предложено указать адрес электронной почты или номер телефона — введите их, при условии, что вы хотите добавить пользователя с уже существующей учетной записью Майкрософт.
- Если вы собираетесь создавать локальную учетную запись (или даже учетную запись Майкрософт, но пока не зарегистрировали e-mail для нее), нажмите «У меня нет данных для входа этого человека» внизу окна.

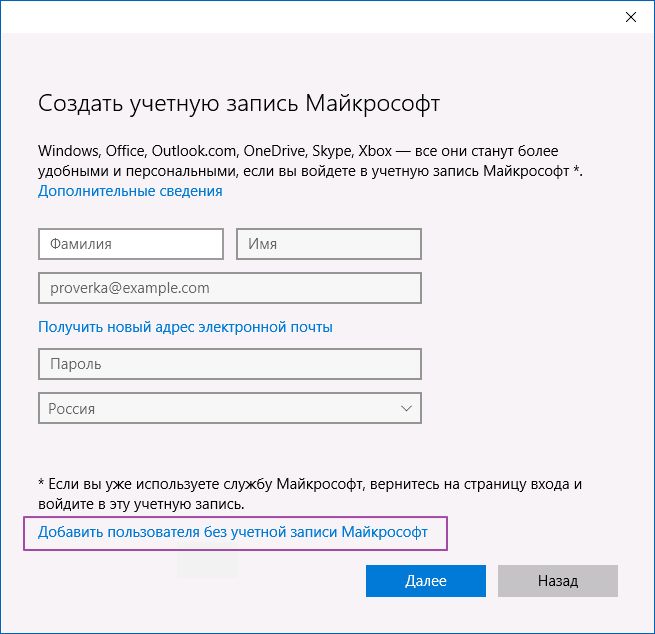
- В следующем окне будет предложено создать учетную запись Майкрософт. Вы можете заполнить все поля для создания пользователя с такой учетной записью или нажать «Добавить пользователя без учетной записи Майкрософт» внизу.

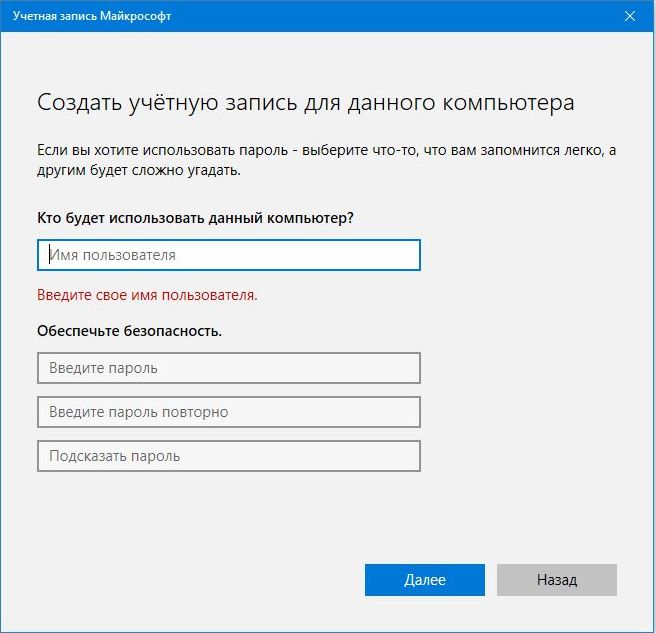
- В следующем окне останется ввести имя пользователя, пароль (если требуется пользователь без пароля, просто не вводите ничего в соответствующие поля), подсказку для пароля и указать вопросы для восстановления пароля, на случай, если он будет забыт. Этого достаточно, чтобы новый пользователь Windows 10 появился в системе и под его учетной записью был возможен вход.


По умолчанию, новый пользователь имеет права «обычного пользователя». Если нужно сделать его администратором компьютера, выполните следующие шаги (при этом, вы для этого также должны быть администратором):
- Зайдите в Параметры — Учетные записи — Семья и другие пользователи.
- В разделе «Другие пользователи» нажмите по пользователю, которого нужно сделать администратором и кнопку «Изменить тип учетной записи».
- В списке выберите «Администратор» и нажмите Ок.


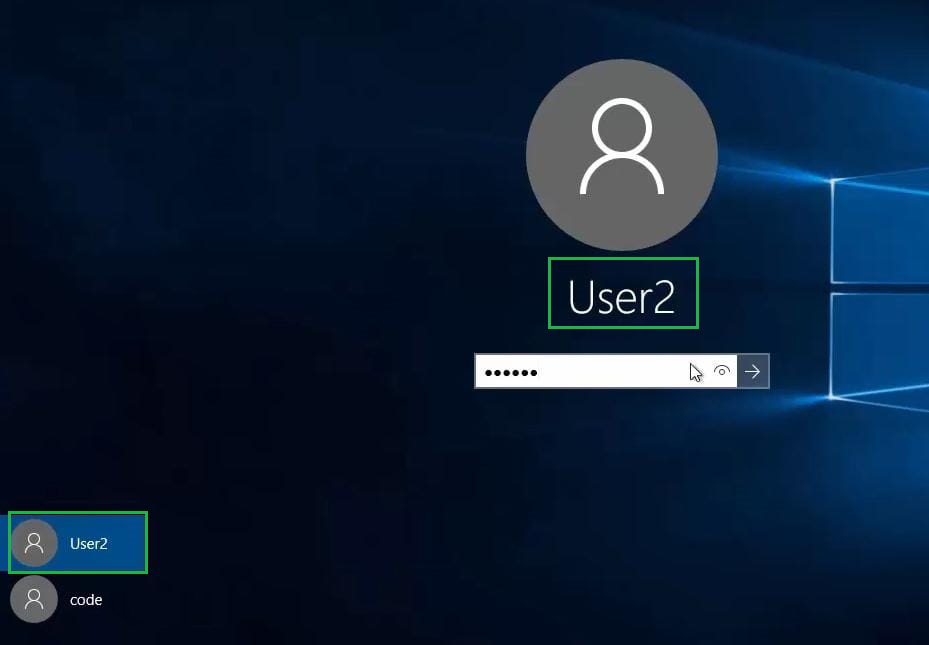
Войти под новым пользователем можно, нажав по имени текущего пользователя вверху меню пуск или с экрана блокировки, предварительно выйдя из текущей учетной записи.
Как создать нового пользователя в командной строке
Для того, чтобы создать пользователя с помощью командной строки Windows 10, запустите ее от имени администратора (например, через меню правого клика по кнопке «Пуск»), после чего введите команду (если имя пользователя содержит пробелы, используйте кавычки, пароль брать в кавычки не нужно):
net user имя_пользователя пароль /add
И нажмите Enter.
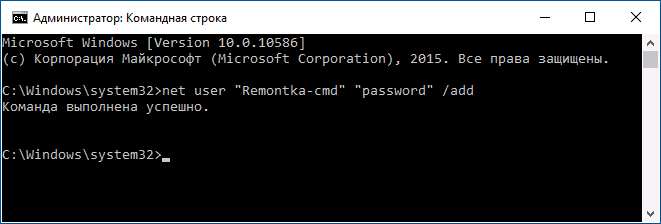
После успешного выполнения команды, в системе появится новый пользователь. Также вы можете сделать его администратором, используя следующую команду (если команда не сработала, а у вас не лицензия Windows 10, попробуйте вместо Администраторы писать administrators):
net localgroup Администраторы имя_пользователя /add
Вновь созданный таким образом пользователь будет иметь локальную учетную запись на компьютере.
Создание пользователя в «Локальные пользователи и группы» Windows 10
И еще один способ создания локальной учетной записи с помощью элемента управления «Локальные пользователи и группы»:
- Нажмите клавиши Win+R, введите lusrmgr.msc в окно «Выполнить» и нажмите Enter.
- Выберите «Пользователи», а затем в списке пользователей кликните правой кнопкой мыши и нажмите «Новый пользователь».

- Задайте параметры для нового пользователя.

Чтобы сделать созданного пользователя администратором, кликните по его имени правой кнопкой мыши, выберите пункт «Свойства». Затем, на вкладке «Членство в группах» нажмите кнопку «Добавить», наберите «Администраторы» и нажмите «Ок».
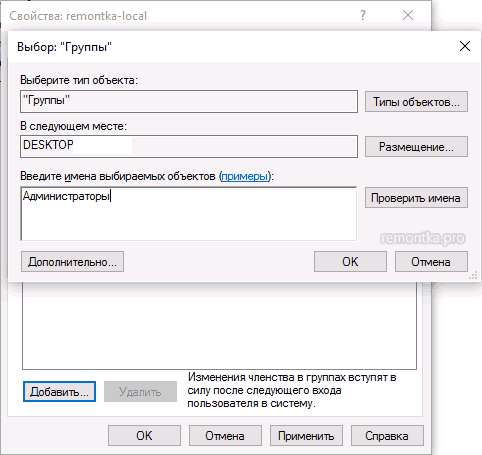
Готово, теперь выбранный пользователь Windows 10 будет иметь права администратора.
Добавление учетной записи в control userpasswords2
И еще один очень простой способ добавления новой учетной записи пользователя Windows 10:
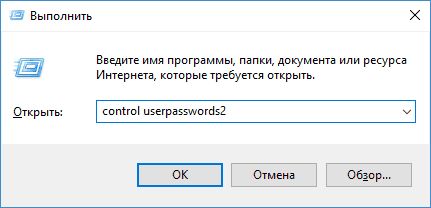
- Нажмаем клавиши Win+R, вводим control userpasswords2

- В списке пользователей нажимаем кнопку добавления нового пользователя

- Дальнейшее добавление нового пользователя (доступны как учетная запись Майкрософт, так и локальная учетная запись) будет выглядеть тем же самым образом, что и в первом из описанных способов.


Видео инструкция
Если остались какие-либо вопросы или что-то не получается так просто, как это описано в инструкции — пишите, постараюсь помочь.
Adding users from command line is much easier rather than going through UI. It saves lot of time for Windows admins to add users in bulk using CLI commands/script. Net user command is the one that Windows users can use to manage user accounts, read on to know how to add users from CMD.
To add a new user account on local computer:
net user username password /ADD
Example: To add a new user account with the loginid John and with password fadf24as
net user John fadf24as /ADD
Hide password
If you do not want the password to be visible while adding new user account, you can use ‘*’ as shown below.
C:\>net user /add John *
Type a password for the user:
Retype the password to confirm:
The command completed successfully.
C:\>
To add a new user account to the domain:
net user username password /ADD /DOMAIN
Note that the command does not include the name of the domain, it automatically adds to the domain the computer belongs to.
Example:
net user John fadf24as /ADD /DOMAIN
Rename a user account
Net use command does not have any switches to rename a user account. But we can do that using wmic commands. Please check this – Rename user accounts on Windows
Few more advanced uses of net user command.
To set user full name while creating the user account
net user username password /ADD /FULLNAME:"User_Fullname"
To allow user to change password:
net user username password /ADD /PASSWORDCHG:Yes
To restrict user not to change the password:
net user username userpasswd /ADD /PASSWORDCHG:NO
To set account expiry time we can use /EXPIRES switch. This can also be used to set that the account never expires.
To specify if the user must have a password set we can use /PASSWORDREQ switch. For more information on all net user options, read this – Net user command: syntax and examples
How to create a new administrator account?
An administrator account can’t be created directly. We first need to create a user account and then add the user to the administrators group.
Errors:
- If you don’t have privileges to add new user account to the system, you would get an error like below.
C:\>net user John /add
System error 5 has occurred.
Access is denied.
C:\>
- While adding user to domain, make sure that your computer is connected to the domain. Otherwise it throws up below error.
C:\>net user testuser testpassword /ADD /DOMAIN
The request will be processed at a domain controller for domain mydomain.com.
System error 1355 has occurred.
The specified domain either does not exist or could not be contacted.
Related Posts:
Remove user from group
Last Updated :
04 Oct, 2024
Learning how to create a new user account in Windows is essential for managing multiple users on your computer. Whether you’re using Windows 10 or Windows 11, the process is straightforward and helps you set up personalized environments for different users. In this guide, we’ll walk you through the steps to add a new user and explain the benefits of proper Windows user account setup. Whether it’s for work, family, or guests, knowing how to create a user account ensures each person has their own space to store files and settings.
Creating a New User On Windows
Step 1: At first, we need to open the settings of the device. There will be some options available. Among the options, there is an option present called ‘Account’. We need to click on that. This will help to get more new options.

Step 2: After that on the left-hand side, there are more options present. Among those options, we need to click on Family & Other Users. This option helps to create a new account for the other user member.
Step 3: Now, in the newly opened window, there will be two sections. One is for Family & the other is for outside members. We have to create the account from the view of outsiders. We need to click on the button, ‘Add Someone Else To This PC’.
Note: If a user wants to create an account under the Family section, there should be a Microsoft Account present. We need to always add a Microsoft Account for creating a new account for outsider members. If user want to add data for himself or for any other, there are always be a Microsoft Account present in this section. So, it is advisable to always go with the Other Users option. A Microsoft account doesn’t need there.

Step 4: After clicking on the above button, a new window will be opened. There it will ask for the Microsoft Account. But we need to skip this. For that purpose, we need to click on the below-mentioned link. This will help to skip this part.

Step 5: Then in the next step, it will ask to create one Microsoft Account. But our intention is not to create one Microsoft Account. Our intention is not to create the Microsoft Account. So, we have to skip this part also. So, we have to click on the very below link there. That link will help to create a user account without a Microsoft Account.

Step 6: Now, a new window will open. This is our desired window. There is no need to provide a Microsoft Account. We need to provide a Username there. Also, we need to provide a password for that. There we have to provide a password hint for that. This is like a Security Question we used to provide for any password. As per the convenience of the user, they can provide any data. After that, we need to click on Next.

Step 7: After that, it will come back to the Accounts Page. We will find new user data on that page. We have provided the Username as User2.

Step 8: Now, we can restart the machine. Or we can log out from the device. There we will find the User2 account present. Users can log in with the User2 account by providing the password.
Conclusion
By following these steps, you can easily create a new user account in Windows and manage multiple profiles efficiently. Whether you’re on Windows 10 or Windows 11, setting up individual user accounts allows for better organization and security. Explore the various Windows account creation steps and customize each profile according to your needs, ensuring a smooth user experience for everyone who accesses your computer.
Добавить учетные записи для других членов семьи в Windows 10 можно по-разному. Покажем пять различных способов, как добавить учетную запись в Windows 10.
Windows 10: добавление новой учетной записи пользователя
-
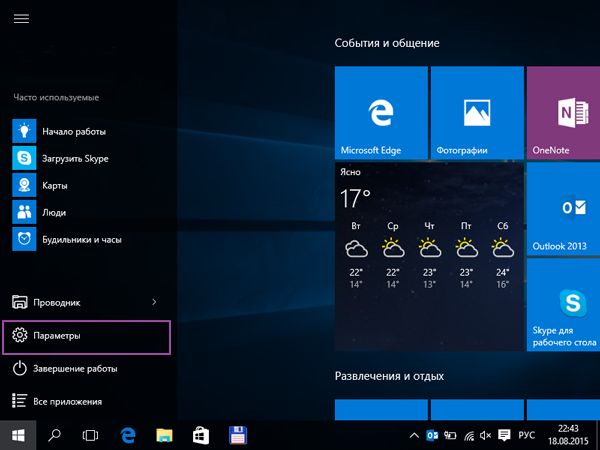
Откройте меню «Пуск» в Windows 10 и выберите Параметры со значком шестеренки.

Windows 10: параметры системы -
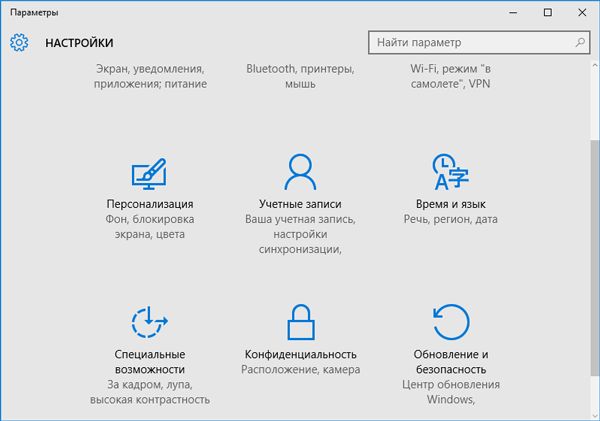
Откройте категорию Учетные записи. Здесь вы можете настроить учетную запись Microsoft или локальную учетную запись.

Настройка учетных записей в Windows 10 -
Перейдите к категории Семья и другие пользователи слева и нажмите Добавить пользователя для этого компьютера.

Windows 10: добавление нового пользователя - По умолчанию Microsoft хочет, чтобы вы добавили нового пользователя через учетную запись Microsoft. Если для вас это не проблема, просто введите его e-mail или номер телефона, использовавшийся при регистрации учетной записи, и нажмите Далее. Новый пользователь будет добавлен автоматически, вся его информация будет взята из учетной записи Microsoft.
Как создать пользователя в Windows 10 без учетной записи Microsoft?
Если же вам нужно создать пользователя в Windows 10 для человека без учетной записи Microsoft, выполните следующее:
-
В окне выбора способа входа в систему нажмите У пользователя, которого я хочу добавить, нет адреса электронной почты.

Windows 10: создание локального пользователя - В следующем окне выберите один из двух вариантов, который вам наиболее удобен: либо создайте для человека учетную запись Microsoft, введя имя, пароль и выбрав страну, либо нажмите Добавить пользователя без учетной записи Microsoft.

Windows 10: добавление пользователя без учетной записи Microsoft - Откроется окно создания локальной учетной записи Windows 10. Введите имя, пароль, подтверждение и подсказку, нажмите Далее. Пользователь будет создан.
Как создать пользователя в Windows 10 через утилиту управления учетными записями?
Еще один способ добавления пользователя в Windows 10, которым мало кто пользуется. Заключается он в том, чтобы запустить утилиту управления учетными записями пользователей.
- Нажмите Win + R и в окне Выполнить введите: control userpasswords2 и нажмите Enter.
Запуск управления учетными записями в Windows 10 - В отобразившемся окне нажимаем кнопку добавления нового пользователя.
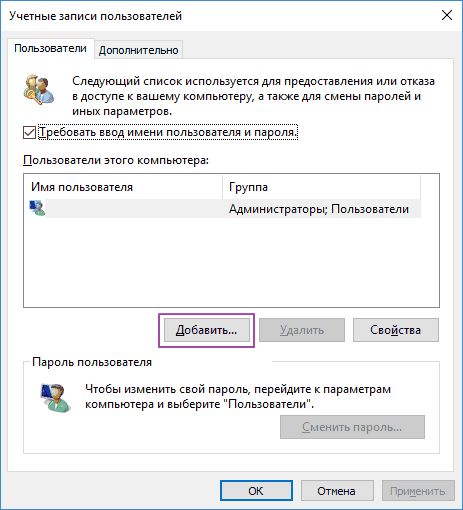
Дальнейшая процедура полностью аналогична тому, что описано выше — либо добавляем пользователя с учетной записью Microsoft, либо без.
Как добавить пользователя в Windows 10 через групповые политики?
Еще один способ создания учетной записи — использовать элемент управления «Локальные пользователи и группы».
- Нажмите клавиши Win+R, в окне Выполнить введите: lusrmgr.msc и нажмите Enter.
- Выберите Пользователи на панели слева, кликните правой кнопкой мыши списке пользователей и нажмите Новый пользователь.
Создание пользователя через управление групповыми политиками в Windows 10 - Задайте параметры для нового пользователя.

При использовании этого способа созданный пользователь будет локальным — то есть, он позволяет создать пользователя без учетной записи Microsoft.
Как добавить пользователя в Windows 10 через командную строку?
Последний способ создать пользователя — с помощью командной строки Windows 10. В этом случае новая учетная запись также будет локальной.
- Запустите командную строку от имени администратора (например, через меню правого клика по кнопке «Пуск»).
- Введите команду (если имя пользователя или пароль содержат пробелы, используйте кавычки):
net user имя_пользователя пароль /add
3. Нажмите Enter. Пользователь с заданным именем и паролем будет добавлен.
Этот способ всегда сработает, если не добавляется пользователь в Windows 10 стандартными средствами — например, после неудачного обновления.
Читайте также:
- 5 ошибок при запуске Windows 10, и что с ними делать
- Что лучше, Windows 7 или Windows 10: сравнительная таблица
- Локальная учетная запись Windows: как ее создать, удалить или изменить
Фото: авторские, pixabay.com