
hello,
I’ve been working on update of a (somewhat complex) program from python 3.7 to 3.10. Our application uses a swig to generate a number of pyd files that reference dlls on windows. Due to quirks of our build, the pyd and dll files are not in the same directory. In python 3.8+, this causes some issues as our previous method of adding the paths to PATH on windows is no longer valid. Python no longer uses PATH to search for dlls. Instead, you must explicitly add the paths using os.add_dll_directory().
This is fine for our normal executable. I can add the directories as required in the main python module and python is able to import the dlls in the pyd libraries.
However, for pytest, I’m seeing errors such as these when I attempt to use existing unittests with python 3.10:
______________________________ ERROR collecting kernel/units/unittest/TestUnitsChecks.py ______________________________
ImportError while importing test module 'C:\ANSYSDev\develop\SystemCoupling\PyLib\kernel\units\unittest\TestUnitsChecks.py'.
Hint: make sure your test modules/packages have valid Python names.
Traceback:
..\..\Core_Dependencies\CPython\3_10\winx64\Release\python\lib\importlib\__init__.py:126: in import_module
return _bootstrap._gcd_import(name[level:], package, level)
kernel\units\__init__.py:9: in <module>
import pyExt.Units
..\runTime\winx64\bin\pyExt\Units.py:13: in <module>
from . import _Units
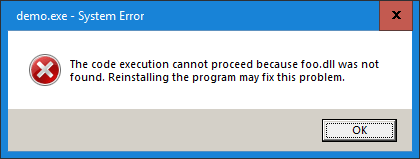
E ImportError: DLL load failed while importing _Units: The specified module could not be found.
The pyd file can’t find the dll dependency. Adding os.add_dll_directory() to the unittest module doesn’t allow for the dll to be found. The dll is found if I add os.add_dll_directory() to kernel\units\__init__.py, but that’s not ideal as I do not want that call to be in the module when not running unittests.
Does anybody know where I should define the paths such that pytest can load the module?
Reading the doc, I do see that there’s a pythonpath config option, but that only adds paths to PYTHONPATH for python module imports, not dll imports.
Just to confirm, all my unittests do pass if I copy my dlls into the same directory as the pyd files. I can update my builds to do this, but I was hoping to keep my updates to a minimum.
Published on Dec 16, 2018.
Edit: I added a section about delayed loading thanks to comments which pointed out that I had overlooked this
There are two ways of loading a shared library (.DLL on Windows, .so on most Unix platforms, and .dylib on macs). One is to use a function like LoadLibary or dlopen. Then you must manually extract the functions from the library with GetProcAddress or dlsym. Most linkers (all that I know of) also allow you to link with a shared library so that it’s loaded on startup and its functions are automatically resolved to symbols in your code. That’s particularly useful as it’s the only sensible way to load a C++ interface from a shared library.
The first way (the manual one) works almost the same way on all platforms. You can supply a path to the shared library file, either a relative or an absolute one, and it will work. I’m going to discuss the second way of loading shared libraries: the automatic one. There is a critical difference between how it works on Windows and other operating systems, namely, the way in which the executable1 searches for the shared library file to load.
If you’re a Windows-only programmer, you probably developed your own way to deal with DLL Hell, whether it’s by redirection or careful output directory management. Or, you know, alternatively, you try to use DLLs as little as possible. Anyway, you should know that on other operating systems when linking with a shared library (.so or .dylib file), you can supply a search path for it to the linker itself. In fact, to some people’s occasional frustration, the default search path when linking with no specific arguments is the absolute path to the shared library. This search path is called an rpath.
If you do multi-platform programming, you’ve probably experienced frustration with the lack of rpaths on Windows.
If you’re not a Windows programmer, I don’t know why you’re reading this article, but to put it simply: In Windows, shared libraries, or DLLs, don’t have rpaths. Instead the executable searches for a shared library by filename in a variety of places which you cannot control when building the executable. It searches the files in the same directory as the executable, then files in your PATH environment variable, and some other insignificant places. And if the DLL isn’t there?…
Why do we want that on Windows?
Some may be wondering why one would want such a thing. I’m sure some are perfectly content with the DLL search order, but here are two very popular use-cases2:
Using third party libraries
This is probably the most common case. You want to use a third party library, but you don’t really want to build it yourself, so you download a handy binary release and extract it… well, somewhere. Or you do want to build it yourself, but you do it with its default settings and it spits out its binaries again somewhere.
Most Windows programmers are likely familiar with this scenario.
Using CMake (or anything other than .vcxproj, really)
CMake is the de facto standard for building C and C++ software these days. Most open source C++ projects use it. Of course there are many alternatives and most of them work the same way: the default output for a target is likely not the same for all targets3. So, when you build a project which outputs DLL files, by default it’s very likely that not all DLL files and executables will end up in the same directory.
I suspect that most Windows programmers who use a build system (or a build system generator) other than Visual Studio’s .sln and .vcxproj files are familiar with this scenario as well.
What do people do?
Given that this is a pretty popular issue in Windows development, there are already popular solutions to both use cases, each with its own downsides compared to rpath.
Change the output directory
This is probably the most popular solution for the case where you have a project which outputs executables and DLLs. You just manually change the output directory for all targets to be the same. In CMake you will often see people changing CMAKE_RUNTIME_OUTPUT_DIRECTORY to something4. This sets the output directory for all executables and DLLs to be that something.
Many projects use this. I use this. As a whole it’s a relatively safe and often adequate solution5. There are some cases, however, where a common output directory is inapplicable:
- Having multiple targets which produce binaries with the same name. It’s impossible to have them in the same directory.
- Creating some configuration files with the same name. With CMake this can happen when you have files which depend on generator expressions which may be placed in
$<TARGET_FILE_DIR>. In any case configuration files whose name doesn’t depend on the executable name will clash. - Same goes for output files with generic names, like
output.log.
These are indeed very rare and some people might even say that they are bad practice and should be avoided. However, if something like this does happen, it can very well be missed which can lead to subtle and hard to detect bugs.
Copying DLLs
When dealing with third party libraries, you typically don’t have such fine control over where their DLL files end up, so copying them alongside your executables is often the choice. This is probably the most popular solution for third party libraries. It’s employed by many existing package managers. This requires a common output directory6 and carries with it the drawbacks of having one, but it’s also wasteful, having multiple copies of the same files over and over again.
To avoid this waste there’s another popular approach here and that is copying or installing third party DLLs to some directory in your PATH. This fixes the problem of filename clashes, but introduces a new one: the so called DLL Hell. DLL Hell is when you have multiple DLLs with the same name in your PATH. Executables will automatically load the first one which matches, but that may not be what you want. There might be differences in version or Debug/Release differences. Such problems are hard to detect and often lead to crazy behavior or, worse, subtle and hard to detect bugs. There is a way to deal with that on Windows (I mentioned redirection manifests above), but it requires you to have control over the DLLs as opposed to the executables. If a third-party vendor doesn’t support redirection manifests, it may be really hard to add them on your own.
What else can people do?
Having a common output directory and copying third party dependencies to it mostly works. It’s what almost everyone does. But I don’t like it. And neither should you!
Manually taking care of this is iffy and error prone. Knowing how easy it is to just specify a search path for a shared library on other platforms makes me cringe every time I have to deal with this Windows-specific problem.
I decided to do some research and try to find a solution. Here’s what I found:
(Useless) application configuration files
One of the first things I found in my research were application configuration files. At first glance it seems like the ideal solution: You add a manifest to the executable, you add a configuration file, and in it you specify search paths for DLLs. Voilà! Rpaths on Windows.
I was so impressed by this that I began envisioning a CMake library which would take care of this automatically. I thought of the interface, how it would work… and then it dawned on me to ask myself why there isn’t anyone already doing it. Sure, it seems like a somewhat obscure feature, but someone had to have thought of this.
My second glance explained why this isn’t a solution. See, in the linked docs they talked about assemblies. Windows documentation used to use the term “assembly” quite loosely before, but it has been mostly improved to mean exactly one thing: .NET binaries: .NET executables and .NET DLLs.
If you program managed binaries, this might be useful info to you (and most likely you already know this), but I work mainly with native binaries. I suspect most readers do, too. So, yeah… this really got my hopes up, but sadly it does nothing to native binaries.
Registry “App Paths”
There’s this thing called App Paths. In your registry under HKLM or HKCU you can find Software\Microsoft\Windows\CurrentVersion\App Paths\ which contains a list of applications that can be started from the Run (Win-R) window without specifying a full path. If you open this, you will probably find your browser, your video player, and similar default programs inside.
You can add your own, though. Just add a new key with the name of your executable (say “myexe.exe”), then in the default value supply the actual path to that executable. In doing so you will inform the operating system that an executable is globally available to run. Now you can run without the full path to the executable via the Run window, by calling ShellExecute.
The important thing here is that Windows will also load another value from the registry key of your executable. It’s called “Path” and in it you can supply a string which will be appended to the PATH environment variable when the executable is started. So in Path you can add directories which contain the DLLs you need.

Like this
This will work.
…when you run it from the Run menu.
…or when you start it from another program, by calling ShellExecute.
…even when you double-click it in Windows Explorer.
…but crucially and to my great annoyance NOT when you run it from the command line and NOT when started from Visual Studio with F5 or ctrl-F5.
Well, technically you can start it from the command line by typing > explorer myexe.exe, or if you create you own “starter” program which forwards all arguments to ShellExecute, but both will open a new window. This means the standard output of your executable will not be in the console window you started it from. Also, if you want to debug it from Visual Studio, you can manually attach to the process. It’s not impossible to work like this.
Not to mention that this is pretty hard to automate. You have to play a lot with the registry as part of the build process. Not so nice. Oh, and if you have multiple executables with the same name or you want to use this for DLLs, you’re also out of luck.
This info is useful for Windows application development, of course, but I’m sure those who do that are already familiar with this. As a solution to our rpath problem, this is not very practical.
Visual Studio specific: Custom .user file
So App Paths doesn’t help us when we run executables from the console or from the IDE. This reminded me that there’s a much better development alternative if you’re like me: you use Visual Studio and 99% of the time you start your executables from within it with F5 or ctrl-F5 instead of from the console or otherwise.
Visual Studio allows you to set a custom environment for a project when you start it from the IDE. It’s in project Settings>Debugging. The important thing about the Debugging settings is that they’re not stored in the .vcxproj file, but instead in an associated .vcxproj.user file. This file is not touched by the popular .vcxproj generators like CMake, so you can actually generate it yourself.
Here’s an example:
<?xml version="1.0" encoding="utf-8"?>
<!-- Template configured by CMake -->
<Project ToolsVersion="@USEFILE_VERSION@" xmlns="http://schemas.microsoft.com/developer/msbuild/2003">
  <PropertyGroup>
    <LocalDebuggerWorkingDirectory>@USERFILE_WORKING_DIR@</LocalDebuggerWorkingDirectory>
    <LocalDebuggerEnvironment>PATH=@USERFILE_PATH@;%PATH%$(LocalDebuggerEnvironment)</LocalDebuggerEnvironment>
    <DebuggerFlavor>WindowsLocalDebugger</DebuggerFlavor>
  </PropertyGroup>
</Project>
Then from CMake you can configure it with something like:
if(MSVC)
    set(USEFILE_VERSION 15.0) # Visual Studio 2017, use MSVC_VERSION
                              # to properly set this variable
                              # (it's not in the scope of the article)
    set(USERFILE_WORKING_DIR your\\working\\dir) # windows paths
    set(USERFILE_PATH path\\to\\lib1;path\\to\\lib2)

    configure_file(
        "UserFile.template.user"
        "${CMAKE_CURRENT_BINARY_DIR}/${YOUR_TARGET_NAME}.vcxproj.user"
        @ONLY
    )
endif()
I’ve used this on a couple of occasions. It can actually make your life a bit easier if you always start the program from Visual Studio in development.
But I digress…
Patching the executable
At this point I had to admit that the operating system wasn’t going to help me. Then I thought something along the lines of the following:
What does automatically loading a DLL actually mean? To load a DLL you have to call
LoadLibraryin some way or another. So the linker must produce some code which callsLoadLibrary("mydll.dll");and then updates the symbols I use from this DLL to the correct addresses.
This of course means that the executable contains the raw string "mydll.dll" somewhere inside it. What if instead of this it contains "C:\mydll.dll"?
This seemed like an easy-to-have revelation, so I searched for something on this subject and quickly found this blog post by Max Bolingbroke.
In short, here’s what he does:
- Build executable which links to some DLL.
- Open the executable with a binary editor, find the name of the DLL and change it to a full path.
- In case there is not enough room for the full path, you can either create
a_dll_with_a_really_long_name_which_will_be_replaced_by_a_full_path_to_a_dll_with_a_shorter_name.dll - Or patch the linker .lib file with dlltool.exe:
dlltool --output-lib library.lib --dllname veryverylongdllname.dll library.oonly to replace the longer name with your full path with the binary editor afterwards. - Or if you’re using a .def file, you can specify the long DLL name in it.
- In case there is not enough room for the full path, you can either create
- That’s it. You hacked yourself an rpath for the DLL on Windows.
Do check out the blog post. It contains the whole process. It’s made with MinGW, but I was able to replicate his results with executables created by msvc as well. In fact, I created a small (and naïve) command line utility which can be used to patch an existing executable or DLL according to the strategy from above. It works for binaries produced by MinGW or msvc.
Yes. This really works. The problem is that automating it is indeed a bit of a pain. You have to patch executables after they’re built and this really confuses your build system. I suspect that using my tool or a similar one, an automation is possible (though likely build-system-specific), but still, it’s patching executables as a post build step. It’s definitely something which is frowned upon in C and C++ circles.
I therefore wouldn’t recommend this strategy over single-output-directory-and-third-party-dlls-copies, but if you’re pressed to have the closest possible thing to an rpath on Windows, this really seems like the only way. I for one will definitely keep it in mind in case I ever have to use it.
Visual C/C++ specific: delayed DLL loading
Microsoft’s linker LINK.exe supports delayed loading. This feature allows a linked DLL to be loaded when the first call to a function from it is made instead of at the startup of the executable. To make use of delayed loading you should add the /DELAYLOAD:dllname switch to the linker command (for example /DELAYLOAD:foo.dll).
At first I didn’t realize how this can help. After all, I don’t care when the DLL is loaded but where it’s loaded from. But after some comments to this I found out that I had neglected to see ways to make this actually quite useful.
First there’s the naïve (and quite dangerous) approach which you should probably not use: SetDllDirectory. This function allows you to set the search path for DLLs which LoadLibrary will use. This will probably work for the simplest of cases, but there are some problems which would make it from unusable to dangerous:
- If you call functions from a DLL globally, this will not work. You have no way to guarantee that
SetDllDirectorywill be called before your global calls7. SetDllDirectorysets the search paths for the entire process. This means that these search paths will be used for all calls toLoadLibrary. Depending on what kind of DLLs you have on your system, this may actually lead to stuff being loaded which you don’t want and bring you to a whole new level of DLL Hell.
There’s another approach, though. Using the delayed loading helper function.
In a typical delayed loading scenario (where you only care about when or if some DLLs are loaded) you would link with Delayimp.lib which provides a function to do the actual delayed loading. You must define a hook function which the helper function will use. The hook function is quite easy to use and actually allows you to substitute the call to LoadLibrary with your own. You can see how to do so in the docs. You would also see that setting the delayed loading hook depends on initializing a global variable, which brings us back to the problem of using functionality from the DLL globally. You will need this global to be initialized first, but you will have no way of guaranteeing it7.
The thing is that you could choose to not link with Delayimpl.lib and instead provide a delayed loading function yourself. Now this is not trivial but it seems to be possible. I will probably play around with this in the following days and update this article.
Using delayed loading with a custom helper function seems to be the closest thing you can get, without patching the executable. Still, there are several obvious problems with it which make it unpleasant:
- It is LINK.exe specific, so Visual Studio specific. No MinGW here.
- You will have to include a significant platform-specific piece of code in every binary
- Your build system will have to supply the paths to libraries to the compiler. This is not really that trivial, because you will somehow have to transfer the knowledge of what DLLs you are using to the compiler. The easiest solution here would probably be for the build system to configure some .c file which will be added to the binary.
Nevertheless this does seem quite workable, and as I said I will play with it more.
What would be really nice?
As you can see, sadly none of the solutions above are ideal. There is simply no great alternative to rpath on Windows, even though thanks to delayed loading we could manage it somehow, and thanks to Max Bolingbroke we learned how to hack it in. But from learning how to hack it in, it seems as though it’s not that hard to actually have a solution. The linker could easily do it for us. In fact you saw that dlltool.exe gets us halfway there already.
So here’s my appeal to people who write linkers for Windows:
Can we have a way to specify paths for DLLs?
Micosoft, can we have this for LINK.exe?
/RENAMEDLL:"foo.dll","c:\foo.dll"
Mingw-w64, can we have this for ld.exe?
--renamedll "foo.dll" "c:/foo.dll"
Please?
CodeGuru content and product recommendations are editorially independent. We may make money when you click on links to our partners. Learn More.
Configuring workstations to handle shared DLLs is difficult. In many
organizations, the PATH environment becomes a point of contention between project teams.
Configuring a PATH specific to your application can solve the problems associated with
using a common search PATH, and eliminate many configuration errors in your application as
well. This article first describes the current methods of application configuration
and the problems associated with them. Finally, the specific details of adding an
application specific path in the registry are described. The solution is compatible
with both NT and ’95.
As many of you already know, and as the Visual C++ documentation illustrates, the
operating system will use the following algorithm for locating a DLL. (Load Visual
C++ help on LoadLibrary()).
- The directory where the executable module for the current process is located.
- The current directory.
- The Windows system directory. The GetSystemDirectory function
retrieves the path of this directory. - The Windows directory. The GetWindowsDirectory function
retrieves the path of this directory. - The directories listed in the PATH environment variable.
Now, imagine the following situation in which two applications (ONE.EXE and TWO.EXE)
need to share a common DLL (COMMON.DLL). The applications install the files into the
following directories.
| Application 1 | Application 2 |
| C:Program FilesONEONE.exe | C:Program FilesTWOTWO.exe |
| C:Program FilesCommonCOMMON.DLL | C:Program FilesCommonCOMMON.DLL |
There are several ways to configure the machine using the above search algorithm.
1) Put all applications into a single directory
Hmm, one big directory. Sounds great until you need to remove one application,
and can’t figure out which files to delete. While your at it, why not just make one
big .EXE file?
2) Modify the current directory
Faced with the above problems, many programs were configured to be started with the
current directory pointing to the DLL. This is easily set in the short-cut which
starts the application. While this gives each program control of the DLLs that it
loads, it also has several side effects:
- Any documents written will be written to the DLL location.
- File Open dialogs start out in the DLL location.
- Programmatically changing the current directory may cause future DLL loads to fail.
- It’s difficult to control current directory if one program invokes another.
3) Put common files into the Windows or System directory
Many applications store DLLs in the Windows or System directory. This creates a
maintenance problem, particularly if the system files need to be replaced. Many
organizations have begun locking down the Windows and System directories, in an effort to
reduce maintenance costs.
4) Modify the PATH environment variable
Certainly the most straight forward approach is to have C:Program FilesCommon added
to the path. This was how things were done in the Win 3.1 days. There are
several problems:
- If the workstation includes several applications, the PATH becomes incredibly long.
- The order in which directories appear on the path becomes important.
- The system spends a great deal of time searching directories that are never used by the
application. - The program cannot determine which location is used to load a DLL.
- Installation programs require re-boots for the path changes to take effect.
Finally, Application Specific Paths!
Microsoft has offered a solution to all these problems. Each application can now
store it own path the registry under the following key:
HKEY_LOCAL_MACHINESOFTWAREMicrosoftWindowsCurrentVersionApp
Paths
The use the application path, set a key for your application, using ONE.EXE from the
example above:
HKEY_LOCAL_MACHINE…CurrentVersionApp PathsONE.exe
Set the (Default) value to the full path of your executable, for example:
C:Program FilesONEONE.exe
Add a sub-key named Path, set it’s value to the full path of the DLL, for example:
C:Program FilesCommon
With an App Path registry entry, the system will load DLLs in the following order.
- The directories listed in the App Path registry key
- The directory where the executable module for the current process is located.
- The current directory.
- The Windows system directory. The GetSystemDirectory function
retrieves the path of this directory. - The Windows directory. The GetWindowsDirectory function
retrieves the path of this directory. - The directories listed in the PATH environment variable.
Run REGEDIT to see examples of other applications, and how they setup their App Path
keys.
History
Для быстрого доступа к командам в командной строке без необходимости ввода полного пути к исполняемому файлу можно добавить путь к папке с этими исполняемыми файлами в переменную PATH в Windows, особенно это может быть полезным при работе с adb, pip и python, git, java и другими средствами разработки с отладки.
В этой пошаговой инструкции о том, как добавить нужный путь в системную переменную PATH в Windows 11, Windows 10 или другой версии системы: во всех актуальных версиях ОС действия будут одинаковыми, а сделать это можно как в графическом интерфейсе, так и в командной строке или PowerShell. Отдельная инструкция про переменные среды в целом: Переменные среды Windows 11 и Windows 10.
Добавление пути в PATH в Свойствах системы
Для возможности запуска команд простым обращением к исполняемому файлу без указания пути, чтобы это не вызывало ошибок вида «Не является внутренней или внешней командой, исполняемой программой или пакетным файлом», необходимо добавить путь к этому файлу в переменную среды PATH.
Шаги будут следующими:
- Нажмите клавиши Win+R на клавиатуре (в Windows 11 и Windows 10 можно нажать правой кнопкой мыши по кнопке Пуск и выбрать пункт «Выполнить»), введите sysdm.cpl в окно «Выполнить» и нажмите Enter.
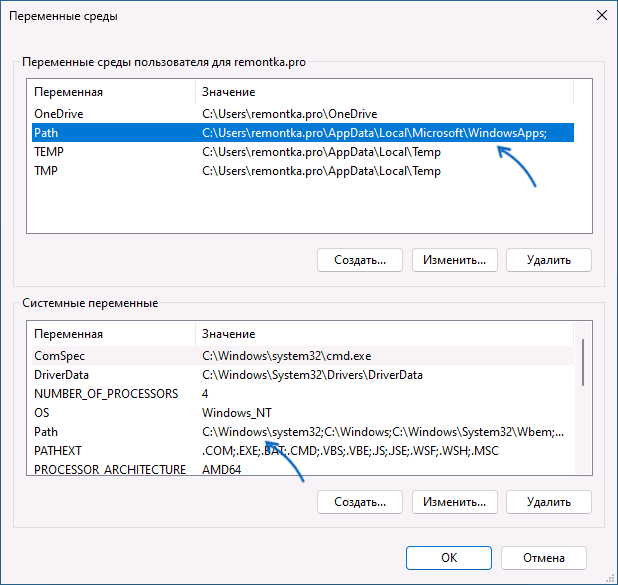
- Перейдите на вкладку «Дополнительно» и нажмите кнопку «Переменные среды».

- Вы увидите список переменных среды пользователя (вверху) и системных переменных (внизу). PATH присутствует в обоих расположениях.

- Если вы хотите добавить свой путь в PATH только для текущего пользователя, выберите «Path» в верхней части и нажмите «Изменить» (или дважды нажмите по переменной PATH в списке). Если для всех пользователей — то же самое в нижней части.
- Для добавления нового пути нажмите «Создать», а затем впишите новый путь, который требуется добавить в переменную PATH в новой строке. Вместо нажатия «Создать» можно дважды кликнуть по новой строке для ввода нового пути.

- После ввода всех необходимых путей нажмите «Ок» — ваша папка или папки добавлены в переменную PATH.


Внимание: после добавления пути в переменную PATH потребуется перезапустить командную строку (если она была запущена в момент изменения), чтобы использовать команды без указания полного пути.
Как добавить путь в переменную PATH в командной строке и PowerShell
Вы можете добавить переменную PATH для текущей сессии в консоли: то есть она будет работать до следующего запуска командной строки. Для этого используйте команду:
set PATH=%PATH%;C:\ваш\путь
Есть возможность добавить путь в PATH с помощью командной строки и на постоянной основе (внимание: есть отзывы, что может повредить записи в переменной PATH, а сами изменения производятся для системной переменной PATH), команда будет следующей:
setx /M path "%path%;C:\ваш\путь"

Набор команд для добавления пути в переменную PATH пользователя с помощью PowerShell:
$PATH = [Environment]::GetEnvironmentVariable("PATH")
$my_path = "C:\ваш\путь"
[Environment]::SetEnvironmentVariable("PATH", "$PATH;$my_path", "User")
Если требуется добавить путь в системную переменную PATH для всех пользователей, последнюю команду изменяем на:
[Environment]::SetEnvironmentVariable("PATH", "$PATH;$my_path", "Machine")
Download Article
Download Article
- Registering a Single DLL
- Re-Registering All DLLs
- Q&A
- Tips
- Warnings
|
|
|
|
This wikiHow teaches you how to register a DLL file, which creates a path from the file to the Windows registry. Registering a DLL can fix startup issues for some programs, but most DLL files either don’t support registration or are already registered. Keep in mind that you cannot register DLLs that came pre-installed on your Windows computer, as these DLLs are vital to Windows’ operation and Windows updates will fix any out-of-date or malfunctioning DLLs.
Registering a DLL File Using Command Prompt
- To register a DLL file on your Windows PC, you can use the regsvr command at the Command Prompt (CMD).
- Open the Command Prompt as an administrator. You’ll need admin rights to add the DLL to the registry.
- Use the command regsvr32 <path/to/filename.dll> to register the DLL.
-

You can use a combination of the «regsvr» command and a DLL file’s name to register the DLL if the DLL file supports the Register Server export command. This will create a path from the Windows registry to the DLL file, making it easier for Windows processes to find and use the DLL file.
- You’ll most commonly need to use this method to register DLLs which came with third-party programs that are supposed to interface directly with system-level resources (e.g., Command Prompt).
-
If the DLL is already registered, it doesn’t support the Register Server export command, or its code doesn’t allow it to be connected to the Windows registry, you’ll receive an error which says, «The module [DLL name] was loaded but the entry point DllRegisterServer was not found». If you see this error message occur, the DLL cannot be registered.
- The «entry point» error isn’t so much a problem as it is a confirmation, as seeing this error means that your DLL doesn’t need to be registered.
Advertisement
-
Go to the folder location of the DLL that you want to register. Once you’ve found the DLL file that you want to register, you can proceed.
- If you installed a program for which you want to register a DLL, for example, you would go to the program’s installation folder (e.g., «C:\Program Files\[program name]»).
-
Right-click the DLL file, then click Properties in the drop-down menu. A pop-up window will open.
-
In the text box at the top of the Properties window, you’ll see the DLL’s full name. This is the name you’ll need to enter later.
- Since most DLLs have difficult-to-remember names, consider leaving up the Properties window when you’re done here; that way, you’ll be able to copy the name later.
-
Click and drag your cursor across the string of text to the right of the «Location» heading, then press Ctrl+C to copy the folder path to the DLL.
-
Click the Windows logo in the bottom-left corner of the screen.
-
Type command prompt into the Start search bar. You should see the Command Prompt icon appear at the top of the window.
-
To do so:
- Right-click

Command Prompt.
- Click Run as administrator
- Click Yes when prompted.
- Right-click
-
Type in cd and type a space, press Ctrl+V to paste in the path to the DLL file, and press ↵ Enter.
- For example, if your DLL file is in the «SysWOW64» folder that’s inside the stock «Windows» folder, your command would look like this:
cd C:\Windows\SysWOW64
- For example, if your DLL file is in the «SysWOW64» folder that’s inside the stock «Windows» folder, your command would look like this:
-
Type in regsvr32 and type a space, then type in your DLL’s name (complete with the «.dll» extension) and press ↵ Enter. If your DLL can be registered, doing this will result in a confirmation message.
- For example, if the DLL’s name is «usbperf.dll», your command would look like this:
regsvr32 usbperf.dll - To copy the DLL’s name at this point, re-open the folder with the DLL in it (the Properties window should pop up), then highlight the name in the text box and press Ctrl+C. You can then paste the name into Command Prompt by pressing Ctrl+V.
- If the DLL is either already registered or unable to be registered, you’ll see the «entry point» error pop up instead of a confirmation message.
- For example, if the DLL’s name is «usbperf.dll», your command would look like this:
-
If entering the «regsvr» command results in an error that isn’t the «entry point» error, you may need to unregister the DLL before you can actually register it:
- Type in regsvr32 /u name.dll and press ↵ Enter. Make sure to replace «name» with the DLL’s name.
- Type in regsvr32 name.dll and press ↵ Enter, again remembering to replace «name» with the DLL’s name.


Advertisement
-
By creating a list of your computer’s DLL files and running the list as a BAT file, you can automatically register all of your computer’s DLL files. This is optimal if you don’t have a specific DLL that you want to register.
-
Click the Windows logo in the bottom-left corner of the screen.
-
Type command prompt into the Start search bar. You should see the Command Prompt icon appear at the top of the window.
-
To do so:
- Right-click
Command Prompt.
- Click Run as administrator
- Click Yes when prompted.
- Right-click
-
Type in cd c:\Windows and press ↵ Enter. This will tell Command Prompt to execute the next command inside of the «Windows» folder.
-
Type dir *.dll /s /b > C:\regdll.bat into Command Prompt, then press ↵ Enter. Doing so allows Command Prompt to create a file listing the location and name of every DLL in the Windows directory.
-
Once you see the «c:\Windows>» line of text appear below the command you entered, you’re free to exit Command Prompt and proceed.
-
You can find it from within File Explorer:
- Open File Explorer

(or press ⊞ Win+E).
- Click This PC on the left side of the window.
- Double-click your computer’s OS (C:) hard drive.
- Scroll down (if necessary) until you see a file named «regdll».
- Open File Explorer
-
In order to save your changes, you’ll need to place a copy of the «regdll» file on your desktop:
- Click the file once to select it.
- Press Ctrl+C.
- Click the desktop.
- Press Ctrl+V.
-
Click the file on your desktop once to select it, then do the following:
- Right-click the «regdll» file.
- Click Edit in the drop-down menu.
-
While optional, completing this step will cut down significantly on the amount of time it takes to register the DLL files. You can delete any lines of text which have the following locations:[1]
- C:\Windows\WinSXS — The bottom quarter or so of the text document will contain these lines of text.
- C:\Windows\Temp — You’ll find these near the section where the «WinSXS» lines were.
- C:\Windows\$patchcache$ — These are harder to find. You can run a search by pressing Ctrl+F, typing in $patchcache$, and clicking Find next.
-
You can do this by using Notepad’s «Find and Replace» feature:
- Click Edit.
- Click Replace… in the drop-down menu.
- Type c:\ into the «Find what» text box.
- Type Regsvr32.exe /s c:\ into the «Replace with» text box.
- Click Replace All
- Exit the window.
-
Press Ctrl+S to save your changes, then click the X in the top-right corner of the Notepad window to close it. At this point, you’re ready to run the «regdll.bat» file.
-
Right-click the «regdll.bat» file, click Run as administrator, and click Yes when prompted to run it in Command Prompt. Doing so will allow Command Prompt to begin registering every available DLL; this process can take a long time to complete, so just make sure your computer is on and plugged in for the duration.
-
Once the process finishes running, you can close Command Prompt. Your computer’s DLL files should now be registered.


Advertisement
Add New Question
-
Question
What do I do if the «register» button will not work?
War_lizard
Community Answer
Refresh the page or restart the computer.
Ask a Question
200 characters left
Include your email address to get a message when this question is answered.
Submit
Advertisement
-
Unregistering a DLL is helpful if you want to delete it, as every registered DLL is considered «read-only» and thus impossible to delete without unregistering first.
Thanks for submitting a tip for review!
Advertisement
-
DLLs are essential for Windows to run properly. While nearly impossible to do, accidentally deleting or changing a system DLL will harm your computer.
Advertisement
References
About This Article
Article SummaryX
The easiest way to register a DLL is by updating your Windows computer to the latest version of its operating system. If you want to register DLLs manually instead, you can generate a list of all DLLs on your computer from within Command Prompt, after which point you can open the list in Notepad. After removing unnecessary entries from the list and adding commands before the DLLs you want to register, you can save the Notepad file as a Windows Batch (.bat) file and then execute it by double-clicking it. This will result in all of the selected DLL files on your computer being re-registered.
Did this summary help you?
Thanks to all authors for creating a page that has been read 2,174,251 times.