
C:\>adb
Android Debug Bridge version 1.0.32
-a - directs adb to listen on all interfaces for a connection
-d - directs command to the only connected USB device
returns an error if more than one USB device is present.
-e - directs command to the only running emulator.
returns an error if more than one emulator is running.
-s <specific device> - directs command to the device or emulator with the given
serial number or qualifier. Overrides ANDROID_SERIAL
environment variable.
-p <product name or path> - simple product name like 'sooner', or
a relative/absolute path to a product
out directory like 'out/target/product/sooner'.
If -p is not specified, the ANDROID_PRODUCT_OUT
environment variable is used, which must
be an absolute path.
-H - Name of adb server host (default: localhost)
-P - Port of adb server (default: 5037)
devices [-l] - list all connected devices
('-l' will also list device qualifiers)
connect <host>[:<port>] - connect to a device via TCP/IP
Port 5555 is used by default if no port number is specified.
disconnect [<host>[:<port>]] - disconnect from a TCP/IP device.
Port 5555 is used by default if no port number is specified.
Using this command with no additional arguments
will disconnect from all connected TCP/IP devices.
device commands:
adb push [-p] <local> <remote>
- copy file/dir to device
('-p' to display the transfer progress)
adb pull [-p] [-a] <remote> [<local>]
- copy file/dir from device
('-p' to display the transfer progress)
('-a' means copy timestamp and mode)
adb sync [ <directory> ] - copy host->device only if changed
(-l means list but don't copy)
(see 'adb help all')
adb shell - run remote shell interactively
adb shell <command> - run remote shell command
adb emu <command> - run emulator console command
adb logcat [ <filter-spec> ] - View device log
adb forward --list - list all forward socket connections.
the format is a list of lines with the following format:
<serial> " " <local> " " <remote> "\n"
adb forward <local> <remote> - forward socket connections
forward specs are one of:
tcp:<port>
localabstract:<unix domain socket name>
localreserved:<unix domain socket name>
localfilesystem:<unix domain socket name>
dev:<character device name>
jdwp:<process pid> (remote only)
adb forward --no-rebind <local> <remote>
- same as 'adb forward <local> <remote>' but fails
if <local> is already forwarded
adb forward --remove <local> - remove a specific forward socket connection
adb forward --remove-all - remove all forward socket connections
adb reverse --list - list all reverse socket connections from device
adb reverse <remote> <local> - reverse socket connections
reverse specs are one of:
tcp:<port>
localabstract:<unix domain socket name>
localreserved:<unix domain socket name>
localfilesystem:<unix domain socket name>
adb reverse --norebind <remote> <local>
- same as 'adb reverse <remote> <local>' but fails
if <remote> is already reversed.
adb reverse --remove <remote>
- remove a specific reversed socket connection
adb reverse --remove-all - remove all reversed socket connections from device
adb jdwp - list PIDs of processes hosting a JDWP transport
adb install [-lrtsd] <file>
adb install-multiple [-lrtsdp] <file...>
- push this package file to the device and install it
(-l: forward lock application)
(-r: replace existing application)
(-t: allow test packages)
(-s: install application on sdcard)
(-d: allow version code downgrade)
(-p: partial application install)
adb uninstall [-k] <package> - remove this app package from the device
('-k' means keep the data and cache directories)
adb bugreport - return all information from the device
that should be included in a bug report.
adb backup [-f <file>] [-apk|-noapk] [-obb|-noobb] [-shared|-noshared] [-all] [-system|-nosystem] [<packages...>]
- write an archive of the device's data to <file>.
If no -f option is supplied then the data is written
to "backup.ab" in the current directory.
(-apk|-noapk enable/disable backup of the .apks themselves
in the archive; the default is noapk.)
(-obb|-noobb enable/disable backup of any installed apk expansion
(aka .obb) files associated with each application; the default
is noobb.)
(-shared|-noshared enable/disable backup of the device's
shared storage / SD card contents; the default is noshared.)
(-all means to back up all installed applications)
(-system|-nosystem toggles whether -all automatically includes
system applications; the default is to include system apps)
(<packages...> is the list of applications to be backed up. If
the -all or -shared flags are passed, then the package
list is optional. Applications explicitly given on the
command line will be included even if -nosystem would
ordinarily cause them to be omitted.)
adb restore <file> - restore device contents from the <file> backup archive
adb help - show this help message
adb version - show version num
scripting:
adb wait-for-device - block until device is online
adb start-server - ensure that there is a server running
adb kill-server - kill the server if it is running
adb get-state - prints: offline | bootloader | device
adb get-serialno - prints: <serial-number>
adb get-devpath - prints: <device-path>
adb status-window - continuously print device status for a specified device
adb remount - remounts the /system and /vendor (if present) partitions on the device read-write
adb reboot [bootloader|recovery] - reboots the device, optionally into the bootloader or recovery program
adb reboot-bootloader - reboots the device into the bootloader
adb root - restarts the adbd daemon with root permissions
adb usb - restarts the adbd daemon listening on USB
adb tcpip <port> - restarts the adbd daemon listening on TCP on the specified port
networking:
adb ppp <tty> [parameters] - Run PPP over USB.
Note: you should not automatically start a PPP connection.
<tty> refers to the tty for PPP stream. Eg. dev:/dev/omap_csmi_tty1
[parameters] - Eg. defaultroute debug dump local notty usepeerdns
adb sync notes: adb sync [ <directory> ]
<localdir> can be interpreted in several ways:
- If <directory> is not specified, /system, /vendor (if present), and /data partitions will be updated.
- If it is "system", "vendor" or "data", only the corresponding partition
is updated.
environmental variables:
ADB_TRACE - Print debug information. A comma separated list of the following values
1 or all, adb, sockets, packets, rwx, usb, sync, sysdeps, transport, jdwp
ANDROID_SERIAL - The serial number to connect to. -s takes priority over this if given.
ANDROID_LOG_TAGS - When used with the logcat option, only these debug tags are printed.
C:\>
- What is ADB
- ADB Architecture
- ADB port is occupied
-
Basic usage
- Command syntax
- Specify the target device for the command
- start stop
- View adb version
- Run adbd as root
- Specify the network port of adb server
-
Device connection management
- Query connected devices/emulators
- USB connection
- Wireless connection (USB cable required)
- Wireless connection (no need to use USB cable)
-
Application Management
- View application list
- All applications
- system applications
- third-party usage
- Install APK
- Adb install internal principle introduction
- Uninstall the app
- Clear application data and cache
- View foreground activity
- View running Services
- View application details
-
Interact with the application
- Activating Activity
- Transfer Service
- Send broadcast
- Forcibly stop the application
- Disable apps and start
- Revoke the permissions of the application
-
File Management
- Copy the files in the device to the computer
- Copy files from computer to device
-
Simulation key/input
- Power button
- menu
- HOME key
- return key
- volume control
- Media Control
- Turn on/off the screen
- Slide to unlock
- Enter text
-
View log
- Android log
- Kernel log
-
View device information
- Model
- Battery status
- Screen Resolution
- Screen density
- Display parameters
- android_id
- IMEI
- Android system version
- IP address
- Mac address
- CPU information
- Memory information
- More hardware and system properties
-
Modify settings
- Resolution
- Screen density
- Display area
- Turn off USB debugging mode
- Display and hide status bar and navigation bar
- Return to normal mode
-
Useful functions
- Screenshots
- Record screen
- Remount.
- View connected WiFi passwords
- Set the system date and time
- restart cellphone
- Check if the device is rooted
- Use Monkey for stress testing
- Turn on/off WiFi
- Turn on/off data traffic
-
Flashing related commands
- Restart to Recovery mode
- Restart from Recovery to Android
- Restart to Fastboot mode
- Update the system via sideload
- More adb shell commands
- View process
- View real-time resource usage
- View process UID
- Other
-
Security related
- Enable SELinux
- Disable SELinux
- Enable dm_verity
- Disable dm_verity
-
common problem
- Failed to start adb server
*The content of this article is integrated from the Internet, welcome to reprint. *
I believe that friends who do Android development have used ADB commands, but they are only limited to installing application push files and device restarting. I don’t know the deeper ones. In fact, we can understand a little more. There are some uncommon scenarios we should at least Knowing that it can be done, for example, we know adb install but not adb shell am start. The former is used to install software, and the latter is used to open the software. A usage scenario of the latter makes me pay attention to him: the company customizes the Android system. When debugging the screen, it depends on whether the screen is full to verify that the driver is normal. This is a troublesome approach. It is to be installed and opened in the hands of Android developers with eclipse or other ide. Obviously, it is much more complicated than the driver who connects the data line and uses the adb command. Therefore, it is necessary to know more.
The following may be more cumbersome, I will try to be simple, please be patient and finish reading.
What is ADB
The full name of Adb is Android Debug Bridge: Android Debug Bridge. The picture below shows the official introduction of Adb by Android:

It can be seen that the original intention of Android is to use a tool such as adb to assist developers in debugging apk faster and better in the process of developing android applications, so adb has the ability to install and uninstall apk, copy and push files, view device hardware information, and view Functions such as applications occupying resources and executing shell commands on the device;
We can find the adb tool in the platform-tools directory of the android sdk installation directory;
The permission mechanism of the existing Android system is becoming more and more perfect. Many operations that hope to bypass the permission management mechanism are no longer available, but Adb can achieve it. In fact, Adb has a lot of authority to some extent, even on the latest version of the Android system. Because Adb is designed to facilitate debugging by developers, it is necessary to expose some interfaces outside of permissions. So many companies can use this feature to bypass the permission mechanism to do some operations on non-Root non-customized machines (the specific usage is mentioned below), of course, there are also various ways, such as connecting via mobile phone OTG, which will not be repeated here.
ADB Architecture
In order to facilitate understanding, we start with three instructions, we often use adb start-server, adb devices, adb kill-server.
Then we often see this output interface:
C:\Users\dell>adb devices
List of devices attached
* daemon not running. starting it now at tcp:5037 *
* daemon started successfully *
Enter fullscreen mode
Exit fullscreen mode
So there are three questions here, why is the server, the server corresponds to the server or the server? If the mobile phone is the client, does the server refer to the service opened on the computer. And what is this daemon?
ADB is a C/S architecture application, composed of three parts:
- Adb client running on the PC side:
The command line program «adb» is used to run adb commands from a shell or script. First, the «adb» program tries to locate the ADB server on the host. If the ADB server cannot be found, the «adb» program automatically starts an ADB server. Next, when the adbd of the device and the adb server on the pc side establish a connection, the adb client can send a service request to the ADB servcer; - Adb server running on the PC side:
ADB Server is a background process running on the host. Its function is to detect the connection and removal of the USB port sensing device, and the start or stop of the emulator instance. ADB Server also needs to send the request of the adb client to the corresponding adbd via usb or tcp; - The resident process adb demon (adbd) running on the device side:
The program «adbd» runs as a background process in the Android device or emulator system. Its function is to connect to the ADB server and provide some services for the client running on the host;
ADB port is occupied
A small partner said that he hoped that I would put the Adb startup problem at the top, because he often encountered the problem of adb unable to find the device, then I will put it in front, I think it is definitely not only she will encounter this situation .
5037 is the default port of adb. If port 5037 is occupied, we will be troubled by not finding the device when using the Adb command. This problem is often encountered for those who are not very familiar with Adb, so I will This usage is placed at the beginning of the article so that friends can find it easily;
The idea of solving this kind of port occupation problem is the same, three steps:
- Find the Pid of the process using the port;
C:\Windows\system32>netstat -aon|findstr 5037
TCP 127.0.0.1:5037 0.0.0.0:0 LISTENING 3172
Enter fullscreen mode
Exit fullscreen mode
- Find the corresponding process name through PID (easy to locate, you can skip);
C:\Windows\system32>tasklist /fi "PID eq 3172"

Image name PID session name session# memory usage
========================= ======== ================ = ========== ============
360MobileLink.exe 3172 Console 4 40,208 K
Enter fullscreen mode
Exit fullscreen mode
- Use the command to terminate the operation of the command;
C:\Users\wwx229495>taskkill /pid 3172 /f
Success: The process with PID 3172 has been terminated.
Enter fullscreen mode
Exit fullscreen mode
Sometimes, some rogue programs will copy a copy of Adb.exe to the windows environment variable, such as C://Windows/system32, at this time we can use Where
The Adb command finds out the path where adb is located and deletes it.
Basic usage
What can adb do? The answer is that all operations that can be performed on mobile phones can be implemented with adb. That is to say, if you play 6, your touch screen is completely broken, and the display is completely broken, just give you a motherboard, and you can still complete the actions you want to do. Of course, this is not recommended in general scenarios, efficiency is the priority.
The following content is transferred from the blog of a big cow on github. If there is any infringement, please inform and delete it immediately;
Late
Command syntax
The basic syntax of the adb command is as follows:
adb [-d|-e|-s ]
If there is only one device/emulator connected, you can omit the part [-d|-e|-s ] and use adb directly.
Specify the target device for the command
If there are multiple devices/emulators connected, you need to specify the target device for the command.
| Parameters | Meaning |
|---|---|
| -d | Specify the only Android device currently connected via USB as the command target |
| -e | Specify the only simulator currently running as the command target |
-s <serialNumber> |
Specify the device/emulator with the corresponding serialNumber number as the command target |
When multiple devices/emulators are connected, the -s parameter is commonly used. The serialNumber can be obtained through the adb devices command. Such as:
$ adb devices

List of devices attached
cf264b8f device
emulator-5554 device
10.129.164.6:5555 device
Enter fullscreen mode
Exit fullscreen mode
Cf264b8f, emulator-5554 and 10.129.164.6:5555 in the output are serialNumber.
For example, you want to specify the device cf264b8f to run the adb command to obtain the screen resolution:
adb -s cf264b8f shell wm size
Enter fullscreen mode
Exit fullscreen mode
Another example is to install an application on the device 10.129.164.6:5555 (the format of serialNumber in this form is :, which is generally a wirelessly connected device or a third-party Android emulator such as Genymotion):
adb -s 10.129.164.6:5555 install test.apk
Enter fullscreen mode
Exit fullscreen mode
*In the case of multiple devices/simulators, these parameters are used to specify the target device for the command. The following is a simplified description and will not be repeated. *
start stop
Start the adb server command:
adb start-server
Enter fullscreen mode
Exit fullscreen mode
(Generally, there is no need to manually execute this command. If you find that the adb server is not started when running the adb command, it will be automatically activated.)
Stop the adb server command:
adb kill-server
Enter fullscreen mode
Exit fullscreen mode
View adb version
adb version
Enter fullscreen mode
Exit fullscreen mode
Sample output
Android Debug Bridge version 1.0.36
Revision 8f855a3d9b35-android
Enter fullscreen mode
Exit fullscreen mode
Run adbd as root
The operating principle of adb is that the adb server on the PC side establishes a connection with the daemon adbd on the mobile phone side, and then the adb client on the PC side forwards the command through the adb server, and adbd parses and runs after receiving the command.
So if adbd is executed with normal permissions, some commands that require root permissions to execute cannot be directly executed with adb xxx. At this time, you can execute commands after adb shell and then su, or you can let adbd execute with root privileges, which can execute high-privileged commands at will.
command:
adb root
Enter fullscreen mode
Exit fullscreen mode
Normal output:
restarting adbd as root
Enter fullscreen mode
Exit fullscreen mode
Now run adb shell again and see if the command line prompt becomes #?
Some mobile phones cannot be executed with root privileges through the adb root command after rooting. For example, some Samsung models will prompt adbd cannot run as root in production builds. You can install adbd Insecure first, and then adb root Try it.
Correspondingly, if you want to restore adbd to non-root privileges, you can use the adb unroot command.
Specify the network port of adb server
adb -P <port> start-server
Enter fullscreen mode
Exit fullscreen mode
The default port is 5037.
Device connection management
Query connected devices/emulators
command:
adb devices
Enter fullscreen mode
Exit fullscreen mode
Sample output:
List of devices attached
cf264b8f device
emulator-5554 device
10.129.164.6:5555 device
Enter fullscreen mode
Exit fullscreen mode
The output format is [serialNumber] [state], serialNumber is what we often call SN, and the state is as follows:
offline —— Indicates that the device is not successfully connected or has no response.
device-The device is connected. Note that this state does not indicate that the Android system has been fully started and operable. The device instance can be connected to adb during the device startup process, but the system will be in an operable state after startup.
no device —— No device/emulator connection.
The above output shows that three devices/emulators are currently connected, and cf264b8f, emulator-5554 and 10.129.164.6:5555 are their SNs respectively. It can be seen from the name emulator-5554 that it is an Android emulator, and 10.129.164.6:5555, which is the serialNumber of the form :, is generally a wirelessly connected device or a third-party Android emulator such as Genymotion.
Common abnormal output:
No device/emulator is successfully connected.
List of devices attached
The device/emulator is not connected to adb or not responding.
List of devices attached
cf264b8f offline
USB connection
To use adb normally through USB connection, you need to ensure several points:
The hardware status is normal.
Including the Android device is in the normal boot state, the USB cable and various interfaces are intact.
Developer options and USB debugging mode for Android devices are turned on.
You can go to «Settings»-«Developer Options»-«Android Debugging» to view.
If you can’t find the developer option in the settings, you need to use an easter egg to show it: click the «version number» 7 times in «Settings»-«About Phone».
The device drive status is normal.
It seems that you don’t need to worry about this under Linux and Mac OS X. Under Windows, you may encounter a situation where you need to install a driver. To confirm this, you can right-click «Computer»-«Properties» and go to the «Device Manager» to view related devices Whether there is a yellow exclamation mark or question mark, if not, it means the drive status is good. Otherwise, you can download a mobile assistant program to install the driver first.
Confirm the status after connecting the computer and the device via the USB cable.
adb devices
Enter fullscreen mode
Exit fullscreen mode
If you can see
xxxxxx device
The connection is successful.
Wireless connection (USB cable required)
In addition to connecting the device and the computer via USB to use adb, you can also use a wireless connection-although there are steps to use USB during the connection process, your device can get rid of the limitation of the USB cable within a certain range after the connection is successful. !
Steps:
Connect the Android device and the computer to run adb to the same local area network, for example to the same WiFi.
Connect the device to the computer via a USB cable.
Make sure that the connection is successful (you can run adb devices to see if the device can be listed).
Let the device monitor TCP/IP connections on port 5555:
adb tcpip 5555
Enter fullscreen mode
Exit fullscreen mode
Disconnect the USB connection.
Find the IP address of the device.
Generally, it can be found in «Settings»-«About Phone»-«Status Information»-«IP Address», or you can use the adb command to view it using the method in the section View Device Information-IP Address below.
Connect the device by IP address.
adb connect <device-ip-address>
Enter fullscreen mode
Exit fullscreen mode
Here is the device IP address found in the previous step.
Confirm the connection status.
adb devices
Enter fullscreen mode
Exit fullscreen mode
If you can see
<device-ip-address>:5555 device
Enter fullscreen mode
Exit fullscreen mode
The connection is successful.
If you can’t connect, please confirm that the Android device and the computer are connected to the same WiFi, and then execute the step of adb connect <device-ip-address> again;
If it still does not work, restart adb via adb kill-server and try again from the beginning.
Disconnect wireless connection
command:
adb disconnect <device-ip-address>
Enter fullscreen mode
Exit fullscreen mode
Wireless connection (no need to use USB cable)
Note: root permission is required.
The previous section «Wireless connection (requires USB cable)» is the method introduced in the official document, which requires the help of USB data cable to achieve wireless connection.
Since we want to achieve wireless connection, can all steps be wireless? The answer is yes.
Install a terminal emulator on the Android device.
Devices that have already been installed can skip this step. The download address of the terminal emulator I use is: Terminal Emulator for Android Downloads
Connect the Android device and the computer to run adb to the same local area network, for example to the same WiFi.
Open the terminal emulator on the Android device and run the commands in sequence:
su
setprop service.adb.tcp.port 5555
Enter fullscreen mode
Exit fullscreen mode
Find the IP address of the Android device.
Generally, it can be found in «Settings»-«About Phone»-«Status Information»-«IP Address», or you can use the adb command to view it using the method in the section View Device Information-IP Address below.
Connect the Android device via adb and IP address on the computer.
adb connect <device-ip-address>
Enter fullscreen mode
Exit fullscreen mode
Here is the device IP address found in the previous step.
If you can see the output connected to :5555, it means the connection is successful.
Section Note 1:
Some devices, such as Xiaomi 5S + MIUI 8.0 + Android 6.0.1 MXB48T, may need to restart the adbd service before step 5, and run on the device’s terminal emulator:
restart adbd
Enter fullscreen mode
Exit fullscreen mode
If restart does not work, try the following command:
stop adbd
start adbd
Enter fullscreen mode
Exit fullscreen mode
Application Management
View application list
The basic command format for viewing the application list is
adb shell pm list packages [-f] [-d] [-e] [-s] [-3] [-i] [-u] [--user USER_ID] [FILTER]
Enter fullscreen mode
Exit fullscreen mode
That is, on the basis of adb shell pm list packages, you can add some parameters to filter and view different lists. The supported filter parameters are as follows:
| Parameters | Display list |
|---|---|
| None | All applications |
| -f | Display the apk file associated with the application |
| -d | Only display disabled apps |
| -e | Only show enabled apps |
| -s | Only show system apps |
| -3 | Only display third-party applications |
| -i | Display the installer of the application |
| -u | Include uninstalled apps |
<FILTER> |
Package name contains <FILTER> string |
All applications
command:
adb shell pm list packages
Enter fullscreen mode
Exit fullscreen mode
Sample output:
package:com.android.smoketest
package:com.example.android.livecubes
package:com.android.providers.telephony
package:com.google.android.googlequicksearchbox
package:com.android.providers.calendar
package:com.android.providers.media
package:com.android.protips
package:com.android.documentsui
package:com.android.gallery
package:com.android.externalstorage
...
// other packages here
...
Enter fullscreen mode
Exit fullscreen mode
system applications
command:
adb shell pm list packages -s
Enter fullscreen mode
Exit fullscreen mode
third-party usage
command:
adb shell pm list packages -3
Enter fullscreen mode
Exit fullscreen mode
Applications whose package name contains a certain string
For example, to view the list of applications whose package name contains the string mazhuang, command:
adb shell pm list packages mazhuang
Enter fullscreen mode
Exit fullscreen mode
Of course, you can also use grep to filter:
adb shell pm list packages | grep mazhuang
Enter fullscreen mode
Exit fullscreen mode
Install APK
Command format:
adb install [-lrtsdg] <path_to_apk>
Enter fullscreen mode
Exit fullscreen mode
parameter:
Adb install can be followed by some optional parameters to control the behavior of installing APK. The available parameters and their meanings are as follows:
| Parameters | Meaning |
|---|---|
| -l | Install the application to the protected directory /mnt/asec |
| -r | Allow overwrite installation |
| -t | Allow to install the application specified by application android:testOnly="true" in AndroidManifest.xml |
| -s | Install the application to the sdcard |
| -d | Allow downgrade to overwrite installation |
| -g | Grant all runtime permissions |
After running the command, if you see output similar to the following (the status is Success), the installation is successful:
[100%] /data/local/tmp/1.apk
pkg: /data/local/tmp/1.apk
Success
Enter fullscreen mode
Exit fullscreen mode
The above is the output of the latest version of adb of v1.0.36, which will show the progress percentage of pushing the apk file to the phone.
Using the old version of adb, the output is like this:
12040 KB/s (22205609 bytes in 1.801s)
        pkg: /data/local/tmp/SogouInput_android_v8.3_sweb.apk
Success
Enter fullscreen mode
Exit fullscreen mode
And if the status is Failure, the installation failed, for example:
[100%] /data/local/tmp/map-20160831.apk
        pkg: /data/local/tmp/map-20160831.apk
Failure [INSTALL_FAILED_ALREADY_EXISTS]
Enter fullscreen mode
Exit fullscreen mode
Common installation failure output codes, meanings and possible solutions are as follows:
| Output | Meaning | Solution |
|---|---|---|
| INSTALL_FAILED_ALREADY_EXISTS | The application already exists, or uninstalled but not uninstalled cleanly |
adb install, use the -r parameter, or first adb uninstall <packagename> and then install |
| INSTALL_FAILED_INVALID_APK | Invalid APK file | |
| INSTALL_FAILED_INVALID_URI | Invalid APK file name | Make sure there is no Chinese in the APK file name |
| INSTALL_FAILED_INSUFFICIENT_STORAGE | Not enough space | Clean up space |
| INSTALL_FAILED_DUPLICATE_PACKAGE | A program with the same name already exists | |
| INSTALL_FAILED_NO_SHARED_USER | The requested shared user does not exist | |
| INSTALL_FAILED_UPDATE_INCOMPATIBLE | The application with the same name has been installed before, but the data is not removed when uninstalling; or the application has been installed, but the signature is inconsistent | First adb uninstall <packagename> then install |
| INSTALL_FAILED_SHARED_USER_INCOMPATIBLE | The requested shared user exists but the signature is inconsistent | |
| INSTALL_FAILED_MISSING_SHARED_LIBRARY | The installation package uses a shared library that is not available on the device | |
| INSTALL_FAILED_REPLACE_COULDNT_DELETE | Cannot be deleted when replacing | |
| INSTALL_FAILED_DEXOPT | dex optimization verification failed or insufficient space | |
| INSTALL_FAILED_OLDER_SDK | The device system version is lower than the application requirements | |
| INSTALL_FAILED_CONFLICTING_PROVIDER | A content provider with the same name as the app already exists in the device | |
| INSTALL_FAILED_NEWER_SDK | The device system version is higher than the application requirements | |
| INSTALL_FAILED_TEST_ONLY | The application is test-only, but the -t parameter is not specified during installation |
|
| INSTALL_FAILED_CPU_ABI_INCOMPATIBLE | Contains native code of incompatible device CPU application binary interface | |
| INSTALL_FAILED_MISSING_FEATURE | The application uses a feature that is not available on the device | |
| INSTALL_FAILED_CONTAINER_ERROR | 1. sdcard access failed; 2. The application signature is consistent with the ROM signature and is regarded as a built-in application. |
1. Confirm that the sdcard is available, or install it to the built-in storage; 2. Do not use the same signature as the ROM when packaging. |
| INSTALL_FAILED_INVALID_INSTALL_LOCATION | 1. Cannot be installed to the specified location; 2. The application signature is consistent with the ROM signature and is regarded as a built-in application. |
1. Switch the installation location, add or delete the -s parameter;2. Do not use the same signature as the ROM when packaging. |
| INSTALL_FAILED_MEDIA_UNAVAILABLE | The installation location is not available | Usually sdcard, confirm that the sdcard is available or install to the built-in storage |
| INSTALL_FAILED_VERIFICATION_TIMEOUT | Verify installation package timeout | |
| INSTALL_FAILED_VERIFICATION_FAILURE | Failed to verify the installation package | |
| INSTALL_FAILED_PACKAGE_CHANGED | The application does not match the expectations of the calling program | |
| INSTALL_FAILED_UID_CHANGED | The application has been installed before, and it is not consistent with the UID assigned this time | Clean up residual files from previous installations |
| INSTALL_FAILED_VERSION_DOWNGRADE | A newer version of this app has been installed | Use the -d parameter |
| INSTALL_FAILED_PERMISSION_MODEL_DOWNGRADE | The installed target SDK supports the application of the same name with runtime permissions, and the version to be installed does not support runtime permissions | |
| INSTALL_PARSE_FAILED_NOT_APK | The specified path is not a file or does not end with .apk
|
|
| INSTALL_PARSE_FAILED_BAD_MANIFEST | Unable to parse AndroidManifest.xml file | |
| INSTALL_PARSE_FAILED_UNEXPECTED_EXCEPTION | The parser encountered an exception | |
| INSTALL_PARSE_FAILED_NO_CERTIFICATES | The installation package is not signed | |
| INSTALL_PARSE_FAILED_INCONSISTENT_CERTIFICATES | The app has been installed, and the signature is inconsistent with the APK file | Uninstall the app on the device first, then install it |
| INSTALL_PARSE_FAILED_CERTIFICATE_ENCODING | CertificateEncodingException |
|
| INSTALL_PARSE_FAILED_BAD_PACKAGE_NAME | There is no or invalid package name in the manifest file | |
| INSTALL_PARSE_FAILED_BAD_SHARED_USER_ID | An invalid shared user ID is specified in the manifest file | |
| INSTALL_PARSE_FAILED_MANIFEST_MALFORMED | A structural error was encountered while parsing the manifest file | |
| INSTALL_PARSE_FAILED_MANIFEST_EMPTY | The operable tag (instrumentation or application) could not be found in the manifest file | |
| INSTALL_FAILED_INTERNAL_ERROR | Installation failed due to system problems | |
| INSTALL_FAILED_USER_RESTRICTED | Users are restricted from installing apps | |
| INSTALL_FAILED_DUPLICATE_PERMISSION | The application tries to define an existing permission name | |
| INSTALL_FAILED_NO_MATCHING_ABIS | The application contains native code not supported by the application binary interface of the device | |
| INSTALL_CANCELED_BY_USER | App installation needs to be confirmed on the device, but the device is not operated or canceled | Agree to install on the device |
| INSTALL_FAILED_ACWF_INCOMPATIBLE | The application is not compatible with the device | |
| does not contain AndroidManifest.xml | Invalid APK file | |
| is not a valid zip file | Invalid APK file | |
| Offline | The device is not connected successfully | First connect the device to adb successfully |
| unauthorized | The device is not authorized to allow debugging | |
| error: device not found | There is no successfully connected device | First connect the device to adb successfully |
| protocol failure | The device has been disconnected | First connect the device to adb successfully |
| Unknown option: -s | Installation to sdcard is not supported under Android 2.2 | Do not use the -s parameter |
| No space left on device | Not enough space | Clean up space |
| Permission denied … sdcard … | sdcard is not available | |
| signatures do not match the previously installed version; ignoring! | The app has been installed and the signatures are inconsistent | Uninstall the app on the device first, then install it |
when parsing APK file
Reference: [PackageManager.java]
Adb install internal principle introduction
adb install is actually completed in three steps:
- Push the apk file to /data/local/tmp.
- Call pm install to install.
- Delete the corresponding apk file under /data/local/tmp.
Therefore, when necessary, you can also follow this step to manually perform the installation process step by step.
Uninstall the app
command:
adb uninstall [-k] <packagename>
Enter fullscreen mode
Exit fullscreen mode
<packagename> represents the package name of the application, and the -k parameter is optional, meaning that the application is uninstalled but the data and cache directory are retained.
Command example:
adb uninstall com.qihoo360.mobilesafe
Enter fullscreen mode
Exit fullscreen mode
Means to uninstall 360 Mobile Guard.
Clear application data and cache
command:
adb shell pm clear <packagename>
Enter fullscreen mode
Exit fullscreen mode
<packagename> represents the application name package. The effect of this command is equivalent to clicking «Clear Cache» and «Clear Data» on the application information interface in the settings.
Command example:
adb shell pm clear com.qihoo360.mobilesafe
Enter fullscreen mode
Exit fullscreen mode
Means to clear the data and cache of 360 Mobile Guard.
View foreground activity
command:
adb shell dumpsys activity activities | grep mFocusedActivity
Enter fullscreen mode
Exit fullscreen mode
Sample output:
mFocusedActivity: ActivityRecord{8079d7e u0 com.cyanogenmod.trebuchet/com.android.launcher3.Launcher t42}
Enter fullscreen mode
Exit fullscreen mode
Among them, com.cyanogenmod.trebuchet/com.android.launcher3.Launcher is the Activity currently in the foreground.
View running Services
command:
adb shell dumpsys activity services [<packagename>]
Enter fullscreen mode
Exit fullscreen mode
The <packagename> parameter is not necessary. Specifying <packagename> means viewing the Services related to a certain package name, and not specifying it means viewing all Services.
<packagename> does not have to give a complete package name. For example, if you run adb shell dumpsys activity services org.mazhuang, then the package name org.mazhuang.demo1, org.mazhuang.demo2, org.mazhuang123 and other related Services will be listed come out.
View application details
command:
adb shell dumpsys package <packagename>
Enter fullscreen mode
Exit fullscreen mode
The output contains a lot of information, including Activity Resolver Table, Registered ContentProviders, package name, userId, path to file resource code after installation, version information, permission information and grant status, signature version information, etc.
<packagename> represents the application package name.
Sample output:
Activity Resolver Table:
  Non-Data Actions:
      android.intent.action.MAIN:
        5b4cba8 org.mazhuang.guanggoo/.SplashActivity filter 5ec9dcc
          Action: "android.intent.action.MAIN"
          Category: "android.intent.category.LAUNCHER"
          AutoVerify=false

Registered ContentProviders:
  org.mazhuang.guanggoo/com.tencent.bugly.beta.utils.BuglyFileProvider:
    Provider{7a3c394 org.mazhuang.guanggoo/com.tencent.bugly.beta.utils.BuglyFileProvider}

ContentProvider Authorities:
  [org.mazhuang.guanggoo.fileProvider]:
    Provider{7a3c394 org.mazhuang.guanggoo/com.tencent.bugly.beta.utils.BuglyFileProvider}
      applicationInfo=ApplicationInfo{7754242 org.mazhuang.guanggoo}

Key Set Manager:
  [org.mazhuang.guanggoo]
      Signing KeySets: 501

Packages:
  Package [org.mazhuang.guanggoo] (c1d7f):
    userId=10394
    pkg=Package{55f714c org.mazhuang.guanggoo}
    codePath=/data/app/org.mazhuang.guanggoo-2
    resourcePath=/data/app/org.mazhuang.guanggoo-2
    legacyNativeLibraryDir=/data/app/org.mazhuang.guanggoo-2/lib
    primaryCpuAbi=null
    secondaryCpuAbi=null
    versionCode=74 minSdk=15 targetSdk=25
    versionName=1.1.74
    splits=[base]
    apkSigningVersion=2
    applicationInfo=ApplicationInfo{7754242 org.mazhuang.guanggoo}
    flags=[ HAS_CODE ALLOW_CLEAR_USER_DATA ALLOW_BACKUP]
    privateFlags=[ RESIZEABLE_ACTIVITIES]
    dataDir=/data/user/0/org.mazhuang.guanggoo
    supportsScreens=[small, medium, large, xlarge, resizeable, anyDensity]
    timeStamp=2017-10-22 23:50:53
    firstInstallTime=2017-10-22 23:50:25
    lastUpdateTime=2017-10-22 23:50:55
    installerPackageName=com.miui.packageinstaller
    signatures=PackageSignatures{af09595 [53c7caa2]}
    installPermissionsFixed=true installStatus=1
    pkgFlags=[ HAS_CODE ALLOW_CLEAR_USER_DATA ALLOW_BACKUP]
    requested permissions:
      android.permission.READ_PHONE_STATE
      android.permission.INTERNET
      android.permission.ACCESS_NETWORK_STATE
      android.permission.ACCESS_WIFI_STATE
      android.permission.READ_LOGS
      android.permission.WRITE_EXTERNAL_STORAGE
      android.permission.READ_EXTERNAL_STORAGE
    install permissions:
      android.permission.INTERNET: granted=true
      android.permission.ACCESS_NETWORK_STATE: granted=true
      android.permission.ACCESS_WIFI_STATE: granted=true
    User 0: ceDataInode=1155675 installed=true hidden=false suspended=false stopped=true notLaunched=false enabled=0
      gids=[3003]
      runtime permissions:
        android.permission.READ_EXTERNAL_STORAGE: granted=true
        android.permission.READ_PHONE_STATE: granted=true
        android.permission.WRITE_EXTERNAL_STORAGE: granted=true
    User 999: ceDataInode=0 installed=false hidden=false suspended=false stopped=true notLaunched=true enabled=0
      gids=[3003]
      runtime permissions:


Dexopt state:
  [org.mazhuang.guanggoo]
    Instruction Set: arm64
      path: /data/app/org.mazhuang.guanggoo-2/base.apk
      status: /data/app/org.mazhuang.guanggoo-2/oat/arm64/base.odex [compilation_filter=speed-profile, status=kOatUpToDa
      te]
Enter fullscreen mode
Exit fullscreen mode
Interact with the application
Mainly use the am <command> command, the commonly used <command> are as follows:
| command | Use |
|---|---|
start [options] <INTENT> |
Start the activity specified by <INTENT>
|
startservice [options] <INTENT> |
Start the service specified by <INTENT>
|
broadcast [options] <INTENT> |
Send the broadcast specified by <INTENT>
|
force-stop <packagename> |
Stop <packagename> related processes |
<INTENT> The parameters are very flexible, and correspond to the Intent in the code when writing Android programs.
The options used to determine the intent object are as follows:
| Parameters | Meaning |
|---|---|
-a <ACTION> |
Specify the action, such as android.intent.action.VIEW
|
-c <CATEGORY> |
Specify category, such as android.intent.category.APP_CONTACTS
|
-n <COMPONENT> |
Specify the complete component name, which is used to clearly specify which Activity to start, such as com.example.app/.ExampleActivity
|
<INTENT> can also carry data, just like Bundle when writing code:
| Parameters | Meaning |
|---|---|
--esn <EXTRA_KEY> |
null value (only key name) |
| `-e | —es <EXTRA_KEY> <EXTRA_STRING_VALUE>` |
--ez <EXTRA_KEY> <EXTRA_BOOLEAN_VALUE> |
boolean value |
--ei <EXTRA_KEY> <EXTRA_INT_VALUE> |
integer value |
--el <EXTRA_KEY> <EXTRA_LONG_VALUE> |
long value |
--ef <EXTRA_KEY> <EXTRA_FLOAT_VALUE> |
float 值 |
--eu <EXTRA_KEY> <EXTRA_URI_VALUE> |
URI |
--ecn <EXTRA_KEY> <EXTRA_COMPONENT_NAME_VALUE> |
component name |
--eia <EXTRA_KEY> <EXTRA_INT_VALUE>[,<EXTRA_INT_VALUE...] |
integer 数组 |
--ela <EXTRA_KEY> <EXTRA_LONG_VALUE>[,<EXTRA_LONG_VALUE...] |
long 数组 |
Activating Activity
Command format:
adb shell am start [options] <INTENT>
Enter fullscreen mode
Exit fullscreen mode
E.g:
adb shell am start -n com.tencent.mm/.ui.LauncherUI
Enter fullscreen mode
Exit fullscreen mode
Indicates that the main interface of WeChat is activated.
adb shell am start -n org.mazhuang.boottimemeasure/.MainActivity --es "toast" "hello, world"
Enter fullscreen mode
Exit fullscreen mode
It means to call up org.mazhuang.boottimemeasure/.MainActivity and pass it the string data key-value pair toast-hello, world.
Transfer Service
Command format:
adb shell am startservice [options] <INTENT>
Enter fullscreen mode
Exit fullscreen mode
E.g:
adb shell am startservice -n com.tencent.mm/.plugin.accountsync.model.AccountAuthenticatorService
Enter fullscreen mode
Exit fullscreen mode
Indicates that a certain service of WeChat has been activated.
Send broadcast
Command format:
adb shell am broadcast [options] <INTENT>
Enter fullscreen mode
Exit fullscreen mode
It can be broadcast to all components or only to specified components.
For example, to broadcast BOOT_COMPLETED to all components:
adb shell am broadcast -a android.intent.action.BOOT_COMPLETED
Enter fullscreen mode
Exit fullscreen mode
For another example, only broadcast BOOT_COMPLETED to org.mazhuang.boottimemeasure/.BootCompletedReceiver:
adb shell am broadcast -a android.intent.action.BOOT_COMPLETED -n org.mazhuang.boottimemeasure/.BootCompletedReceiver
Enter fullscreen mode
Exit fullscreen mode
This type of usage is very practical when testing. For example, a broadcast scene is difficult to create. You can consider sending broadcasts in this way.
It can send the pre-defined broadcast of the system and also send the self-defined broadcast. The following is part of the system predefined broadcast and normal trigger timing:
| action | Trigger timing |
|---|---|
| android.net.conn.CONNECTIVITY_CHANGE | Network connection has changed |
| android.intent.action.SCREEN_ON | The screen lights up |
| android.intent.action.SCREEN_OFF | The screen goes off |
| android.intent.action.BATTERY_LOW | If the battery is low, a low battery prompt box will pop up |
| android.intent.action.BATTERY_OKAY | The battery is restored |
| android.intent.action.BOOT_COMPLETED | The device has started up |
| android.intent.action.DEVICE_STORAGE_LOW | Storage space is too low |
| android.intent.action.DEVICE_STORAGE_OK | Storage space recovery |
| android.intent.action.PACKAGE_ADDED | A new application is installed |
| android.net.wifi.STATE_CHANGE | The WiFi connection status has changed |
| android.net.wifi.WIFI_STATE_CHANGED | WiFi status changes to enable/disable/starting/disabling/unknown |
| android.intent.action.BATTERY_CHANGED | The battery level has changed |
| android.intent.action.INPUT_METHOD_CHANGED | The system input method has changed |
| android.intent.action.ACTION_POWER_CONNECTED | External power connection |
| android.intent.action.ACTION_POWER_DISCONNECTED | External power supply disconnected |
| android.intent.action.DREAMING_STARTED | The system started to sleep |
| android.intent.action.DREAMING_STOPPED | The system stops sleeping |
| android.intent.action.WALLPAPER_CHANGED | The wallpaper has changed |
| android.intent.action.HEADSET_PLUG | Plug in headphones |
| android.intent.action.MEDIA_UNMOUNTED | Unload external media |
| android.intent.action.MEDIA_MOUNTED | Mount external media |
| android.os.action.POWER_SAVE_MODE_CHANGED | Enable power saving mode |
(The above broadcasts can all be triggered by adb)
Forcibly stop the application
command:
adb shell am force-stop <packagename>
Enter fullscreen mode
Exit fullscreen mode
Command example:
adb shell am force-stop com.qihoo360.mobilesafe
Enter fullscreen mode
Exit fullscreen mode
Means to stop all the processes and services of 360 Security Guard.
Disable apps and start
Command example:
adb shell pm disable-user <packagename>
adb shell pm disable <packagename>
Enter fullscreen mode
Exit fullscreen mode
adb shell pm disable-user [options] <packagename>
Enter fullscreen mode
Exit fullscreen mode
Command example:
adb shell pm enable <packagename>
Enter fullscreen mode
Exit fullscreen mode
Revoke the permissions of the application
- Grant permissions to the app. Only optional permissions declared by the application can be granted
adb shell pm grant <packagename> <PACKAGE_PERMISSION>
Enter fullscreen mode
Exit fullscreen mode
For example: adb -d shell pm grant packageName android.permission.BATTERY_STATS
- Cancel app authorization
adb shell pm revoke <packagename> <PACKAGE_PERMISSION>
Enter fullscreen mode
Exit fullscreen mode
Option --user user_id: the user to be disabled For example, grant permissions to the application. On devices running Android 6.0 (API level 23) and higher, the permission can be any permission declared in the application manifest. On devices running Android 5.1 (API level 22) and lower, it must be an optional permission defined by the application.
Disclaimer: The above order is an unconventional order. I am not responsible for any damage to your equipment, forcible stop, etc. You are performing this operation on your device, and you are responsible for it.
File Management
Copy the files in the device to the computer
command:
adb pull <file path in device> [directory on computer]
Enter fullscreen mode
Exit fullscreen mode
Among them, the directory parameter on the computer can be omitted, and the default is copied to the current directory.
example:
adb pull /sdcard/sr.mp4 ~/tmp/
Enter fullscreen mode
Exit fullscreen mode
*Tips: *The file path on the device may require root privileges to access. If your device has been rooted, you can use the adb shell and su commands to obtain root privileges in the adb shell, then cp /path/on/device /sdcard/filename Copy the file to sdcard, then adb pull /sdcard/filename /path/on/pc.
Copy files from computer to device
command:
adb push <file path on computer> <directory in device>
Enter fullscreen mode
Exit fullscreen mode
example:
adb push ~/sr.mp4 /sdcard/
Enter fullscreen mode
Exit fullscreen mode
*Tips: *The file path on the device may not be directly written by ordinary permissions. If your device has been rooted, you can first adb push /path/on/pc /sdcard/filename, and then adb shell and su in adb shell After obtaining root permissions, cp /sdcard/filename /path/on/device.
Simulation key/input
There is a very useful command called input in adb shell, through which you can do some interesting things.
The complete help information of the input command is as follows:
Usage: input [<source>] <command> [<arg>...]

The sources are:
      mouse
      keyboard
      joystick
      touchnavigation
      touchpad
      trackball
      stylus
      dpad
      gesture
      touchscreen
      gamepad

The commands and default sources are:
      text <string> (Default: touchscreen)
      keyevent [--longpress] <key code number or name> ... (Default: keyboard)
      tap <x> <y> (Default: touchscreen)
      swipe <x1> <y1> <x2> <y2> [duration(ms)] (Default: touchscreen)
      press (Default: trackball)
      roll <dx> <dy> (Default: trackball)
Enter fullscreen mode
Exit fullscreen mode
For example, to simulate a click: //Click the position of the coordinate point x=50 y=250 on the screen.
adb shell input tap 50 250
For example, using the adb shell input keyevent command, different keycodes can achieve different functions. For the complete keycode list, see KeyEvent. The excerpts are as follows:
| keycode | Meaning |
|---|---|
| 3 | HOME key |
| 4 | Back key |
| 5 | Open the dial-up application |
| 6 | Hang up the call |
| 24 | Increase volume |
| 25 | Reduce the volume |
| 26 | Power button |
| 27 | Taking photos (need to be in the camera application) |
| 64 | Open the browser |
| 82 | Menu key |
| 85 | Play/Pause |
| 86 | Stop playing |
| 87 | Play the next song |
| 88 | Play the previous song |
| 122 | Move the cursor to the beginning of the line or the top of the list |
| 123 | Move the cursor to the end of the line or the bottom of the list |
| 126 | Resume playback |
| 127 | Pause playback |
| 164 | Mute |
| 176 | Open system settings |
| 187 | Switch application |
| 207 | Open contacts |
| 208 | Open the calendar |
| 209 | Open music |
| 210 | Open the calculator |
| 220 | Reduce screen brightness |
| 221 | Increase screen brightness |
| 223 | System hibernation |
| 224 | Light up the screen |
| 231 | Open the voice assistant |
| 276 | If there is no wakelock, let the system hibernate |
The following are some usage examples of input command.
Power button
db shell input keyevent 26
Enter fullscreen mode
Exit fullscreen mode
The effect is equivalent to pressing the power button.
menu
command:
adb shell input keyevent 82
Enter fullscreen mode
Exit fullscreen mode
HOME key
command:
adb shell input keyevent 3
Enter fullscreen mode
Exit fullscreen mode
return key
command:
adb shell input keyevent 4
Enter fullscreen mode
Exit fullscreen mode
volume control
Increase volume:
adb shell input keyevent 24
Enter fullscreen mode
Exit fullscreen mode
lower the volume:
adb shell input keyevent 25
Enter fullscreen mode
Exit fullscreen mode
Mute:
adb shell input keyevent 164
Enter fullscreen mode
Exit fullscreen mode
Media Control
play / Pause:
adb shell input keyevent 85
Enter fullscreen mode
Exit fullscreen mode
Stop play:
adb shell input keyevent 86
Enter fullscreen mode
Exit fullscreen mode
Play the next song:
adb shell input keyevent 87
Enter fullscreen mode
Exit fullscreen mode
Play the previous song:
adb shell input keyevent 88
Enter fullscreen mode
Exit fullscreen mode
Resume playback:
adb shell input keyevent 126
Enter fullscreen mode
Exit fullscreen mode
Pause playback:
adb shell input keyevent 127
Enter fullscreen mode
Exit fullscreen mode
Turn on/off the screen
The analog power button described above can be used to switch the screen on and off, but if you clearly want to turn on or off the screen, you can use the following method.
Light up the screen:
adb shell input keyevent 224
Enter fullscreen mode
Exit fullscreen mode
Turn off the screen:
adb shell input keyevent 223
Enter fullscreen mode
Exit fullscreen mode
Slide to unlock
If the lock screen does not have a password and is unlocked by swiping gestures, you can unlock it by input swipe.
Command (parameters are based on model Nexus 5, for example, swipe up gesture to unlock):
adb shell input swipe 300 1000 300 500
Enter fullscreen mode
Exit fullscreen mode
The parameters 300 1000 300 500 respectively represent the start point x coordinate, the start point y coordinate, the end point x coordinate, and the end point y coordinate.
Enter text
When the focus is on a text box, you can use the input command to enter text.
command:
adb shell input text hello
Enter fullscreen mode
Exit fullscreen mode
Now hello appears in the text box.
View log
The Android system log is divided into two parts, the underlying Linux kernel log is output to /proc/kmsg, and the Android log is output to /dev/log.
Android log
Command format:
[adb] logcat [<option>] ... [<filter-spec>] ...
Enter fullscreen mode
Exit fullscreen mode
Common usages are listed as follows:
Filter logs by level
Android logs are divided into the following priority (priority):
-V —— Verbose (lowest, most output)
-D —— Debug I —— Info
-W —— Warning
-E —— Error
-F—— Fatal
-S —— Silent (the highest, nothing is output)
Filtering logs by a certain level will output logs of that level and above.
For example, the command:
adb logcat *:W
Enter fullscreen mode
Exit fullscreen mode
Warning, Error, Fatal and Silent logs will be output.
(Note: Under macOS, you need to add double quotation marks to :W so that * as the tag parameter, such as adb logcat «:W», otherwise an error will be reported no matches found: *:W.)
Filter logs by tag and level
<filter-spec> can be composed of multiple <tag>[:priority].
For example, the command:
adb logcat ActivityManager:I MyApp:D *:S
Enter fullscreen mode
Exit fullscreen mode
It means to output the log above Info of tag ActivityManager, output the log above Debug of tag MyApp, and the Silent log of other tags (that is, to block other tag logs).
Log Format
You can use the adb logcat -v <format> option to specify the log output format.
The log supports the following types of <format>:
-brief
The default format. The format is:
/():
Example:
D/HeadsetStateMachine( 1785): Disconnected process message: 10, size: 0
-process
The format is:
()
Example:
D( 1785) Disconnected process message: 10, size: 0 (HeadsetStateMachine)
-tag
The format is:
/:
Example:
D/HeadsetStateMachine: Disconnected process message: 10, size: 0
To
-raw
The format is:
Example:
Disconnected process message: 10, size: 0
-time
The format is:
/():
Example:
08-28 22:39:39.974 D/HeadsetStateMachine( 1785): Disconnected process message: 10, size: 0
-threadtime
The format is:
:
Example:
08-28 22:39:39.974 1785 1832 D HeadsetStateMachine: Disconnected process message: 10, size: 0
-long
The format is:
[ : /]
Example:
[08-28 22:39:39.974 1785: 1832 D/HeadsetStateMachine] Disconnected process message: 10, size: 0
The specified format can be used simultaneously with the above filtering. such as:
adb logcat -v long ActivityManager:I *:S
Enter fullscreen mode
Exit fullscreen mode
Clear log
adb logcat -c
Enter fullscreen mode
Exit fullscreen mode
Kernel log
command:
adb shell dmesg
Enter fullscreen mode
Exit fullscreen mode
Sample output:
<6>[14201.684016] PM: noirq resume of devices complete after 0.982 msecs
<6>[14201.685525] PM: early resume of devices complete after 0.838 msecs
<6>[14201.753642] PM: resume of devices complete after 68.106 msecs
<4>[14201.755954] Restarting tasks ... done.
<6>[14201.771229] PM: suspend exit 2016-08-28 13:31:32.679217193 UTC
<6>[14201.872373] PM: suspend entry 2016-08-28 13:31:32.780363596 UTC
<6>[14201.872498] PM: Syncing filesystems ... done.
Enter fullscreen mode
Exit fullscreen mode
The [14201.684016] in the brackets represents the time since the kernel started, in seconds.
Through the kernel log we can do some things, such as measuring the kernel startup time, find the time before the Freeing init memory line in the kernel log after the system is started.
View device information
Model
command:
adb shell getprop ro.product.model
Enter fullscreen mode
Exit fullscreen mode
Sample output:
Nexus 5
Battery status
command:
adb shell dumpsys battery
Enter fullscreen mode
Exit fullscreen mode
Input example:
  Current Battery Service state:
  AC powered: false
  USB powered: true
  Wireless powered: false
  status: 2
  health: 2
  present: true
  level: 44
  scale: 100
  voltage: 3872
  temperature: 280
  technology: Li-poly
Enter fullscreen mode
Exit fullscreen mode
Among them, scale represents the maximum power, and level represents the current power. The output above indicates that 44% of the battery is left.
Screen Resolution
command:
adb shell wm size
Enter fullscreen mode
Exit fullscreen mode
Sample output:
Physical size: 1080x1920
Enter fullscreen mode
Exit fullscreen mode
The device screen resolution is 1080px * 1920px.
If it is modified using the command, the output may be:
Physical size: 1080x1920
Override size: 480x1024
Enter fullscreen mode
Exit fullscreen mode
Indicates that the screen resolution of the device was originally 1080px * 1920px, but is currently modified to 480px * 1024px.
Screen density
command:
adb shell wm density
Sample output:
Physical density: 420
The device screen density is 420dpi.
If it is modified using the command, the output may be:
Physical density: 480
Override density: 160
Indicates that the screen density of the device was originally 480dpi, but is currently modified to 160dpi.
Display parameters
command:
adb shell dumpsys window displays
Enter fullscreen mode
Exit fullscreen mode
Sample output:
WINDOW MANAGER DISPLAY CONTENTS (dumpsys window displays)
  Display: mDisplayId=0
    init=1080x1920 420dpi cur=1080x1920 app=1080x1794 rng=1080x1017-1810x1731
    deferred=false layoutNeeded=false
Enter fullscreen mode
Exit fullscreen mode
Among them, mDisplayId is the display number, init is the initial resolution and screen density. The height of the app is smaller than that in init, which means that there are virtual buttons at the bottom of the screen. The height is 1920-1794 = 126px and 42dp.
android_id
command:
adb shell settings get secure android_id
Enter fullscreen mode
Exit fullscreen mode
Sample output:
51b6be48bac8c569
Enter fullscreen mode
Exit fullscreen mode
IMEI
In Android 4.4 and below versions, IMEI can be obtained by the following command:
adb shell dumpsys iphonesubinfo
Enter fullscreen mode
Exit fullscreen mode
Sample output:
Phone Subscriber Info:
  Phone Type = GSM
  Device ID = 860955027785041
The Device ID is IMEI.
Enter fullscreen mode
Exit fullscreen mode
In Android 5.0 and above, the output of this command is empty, and it must be obtained by other means (root permission is required):
adb shell
su
service call iphonesubinfo 1
Enter fullscreen mode
Exit fullscreen mode
Sample output:
Result: Parcel(
  0x00000000: 00000000 0000000f 00360038 00390030'........8.6.0.9.'
  0x00000010: 00350035 00320030 00370037 00350038 '5.5.0.2.7.7.8.5.'
  0x00000020: 00340030 00000031 '0.4.1...')
Enter fullscreen mode
Exit fullscreen mode
Extracting the effective content inside is the IMEI, for example, here is 860955027785041.
Reference: adb shell dumpsys iphonesubinfo not working since Android 5.0 Lollipop
Android system version
command:
adb shell getprop ro.build.version.release
Enter fullscreen mode
Exit fullscreen mode
Sample output:
5.0.2
IP address
Every time you want to know the IP address of the device, you have to «Settings»-«About Phone»-«Status Information»-«IP Address», which is annoying, right? It can be easily viewed through adb.
command:
adb shell ifconfig "| grep Mask"
Enter fullscreen mode
Exit fullscreen mode
Sample output:
inet addr:10.130.245.230 Mask:255.255.255.252
inet addr: 127.0.0.1 Mask: 255.0.0.0
Enter fullscreen mode
Exit fullscreen mode
Then 10.130.245.230 is the device IP address.
This command has no output on some devices. If the device is connected to WiFi, you can use the following command to view the local area network adb shell ifconfig wlan0 Example:
wlan0: ip 10.129.160.99 mask 255.255.240.0 flags [up broadcast running multicast]
Enter fullscreen mode
Exit fullscreen mode
or
wlan0 Link encap:UNSPEC
          inet addr:10.129.168.57 Bcast:10.129.175.255 Mask:255.255.240.0
          inet6 addr: fe80::66cc:2eff:fe68:b6b6/64 Scope: Link
          UP BROADCAST RUNNING MULTICAST MTU:1500 Metric:1
          RX packets:496520 errors:0 dropped:0 overruns:0 frame:0
          TX packets: 68215 errors:0 dropped:0 overruns:0 carrier:0
          collisions:0 txqueuelen:3000
          RX bytes: 116266821 TX bytes: 8311736
Enter fullscreen mode
Exit fullscreen mode
If the above command still does not get the expected information, you can try the following command (available in some system versions):
adb shell netcfg
Enter fullscreen mode
Exit fullscreen mode
Sample output:
wlan0 UP 10.129.160.99/20 0x00001043 f8:a9:d0:17:42:4d
lo UP 127.0.0.1/8 0x00000049 00:00:00:00:00:00
p2p0 UP 0.0.0.0/0 0x00001003 fa:a9:d0:17:42:4d
sit0 DOWN 0.0.0.0/0 0x00000080 00:00:00:00:00:00
rmnet0 DOWN 0.0.0.0/0 0x00000000 00:00:00:00:00:00
rmnet1 DOWN 0.0.0.0/0 0x00000000 00:00:00:00:00:00
rmnet3 DOWN 0.0.0.0/0 0x00000000 00:00:00:00:00:00
rmnet2 DOWN 0.0.0.0/0 0x00000000 00:00:00:00:00:00
rmnet4 DOWN 0.0.0.0/0 0x00000000 00:00:00:00:00:00
rmnet6 DOWN 0.0.0.0/0 0x00000000 00:00:00:00:00:00
rmnet5 DOWN 0.0.0.0/0 0x00000000 00:00:00:00:00:00
rmnet7 DOWN 0.0.0.0/0 0x00000000 00:00:00:00:00:00
rev_rmnet3 DOWN 0.0.0.0/0 0x00001002 4e:b7:e4:2e:17:58
rev_rmnet2 DOWN 0.0.0.0/0 0x00001002 4e:f0:c8:bf:7a:cf
rev_rmnet4 DOWN 0.0.0.0/0 0x00001002 a6:c0:3b:6b:c4:1f
rev_rmnet6 DOWN 0.0.0.0/0 0x00001002 66:bb:5d:64:2e:e9
rev_rmnet5 DOWN 0.0.0.0/0 0x00001002 0e:1b:eb:b9:23:a0
rev_rmnet7 DOWN 0.0.0.0/0 0x00001002 7a:d9:f6:81:40:5a
rev_rmnet8 DOWN 0.0.0.0/0 0x00001002 4e:e2:a9:bb:d0:1b
rev_rmnet0 DOWN 0.0.0.0/0 0x00001002 fe:65:d0:ca:82:a9
rev_rmnet1 DOWN 0.0.0.0/0 0x00001002 da:d8:e8:4f:2e:fe
Enter fullscreen mode
Exit fullscreen mode
You can see information such as the network connection name, activation status, IP address, and Mac address.
Mac address
command:
adb shell cat /sys/class/net/wlan0/address
Enter fullscreen mode
Exit fullscreen mode
Sample output:
f8:a9:d0:17:42:4d
Enter fullscreen mode
Exit fullscreen mode
This is the local area network Mac address, mobile network or other connection information can be viewed through the adb shell netcfg command mentioned in the previous section «IP address».
CPU information
command:
adb shell cat /proc/cpuinfo
Enter fullscreen mode
Exit fullscreen mode
Sample output:
Processor: ARMv7 Processor rev 0 (v7l)
processor: 0
BogoMIPS: 38.40

processor: 1
BogoMIPS: 38.40

processor: 2
BogoMIPS: 38.40

processor: 3
BogoMIPS: 38.40

Features: swp half thumb fastmult vfp edsp neon vfpv3 tls vfpv4 idiva idivt
CPU implementer: 0x51
CPU architecture: 7
CPU variant: 0x2
CPU part: 0x06f
CPU revision: 0

Hardware: Qualcomm MSM 8974 HAMMERHEAD (Flattened Device Tree)
Revision: 000b
Serial: 0000000000000000
Enter fullscreen mode
Exit fullscreen mode
This is the CPU information of Nexus 5. We can see from the output that the hardware used is Qualcomm MSM 8974, and the processor number is 0 to 3, so it is quad-core and the architecture used is ARMv7 Processor rev 0 (v71).
Memory information
command:
adb shell cat /proc/meminfo
Enter fullscreen mode
Exit fullscreen mode
Sample output:
MemTotal: 1027424 kB
MemFree: 486564 kB
Buffers: 15224 kB
Cached: 72464 kB
SwapCached: 24152 kB
Active: 110572 kB
Inactive: 259060 kB
Active(anon): 79176 kB
Inactive(anon): 207736 kB
Active(file): 31396 kB
Inactive(file): 51324 kB
Unevictable: 3948 kB
Mlocked: 0 kB
HighTotal: 409600 kB
HighFree: 132612 kB
LowTotal: 617824 kB
LowFree: 353952 kB
SwapTotal: 262140 kB
SwapFree: 207572 kB
Dirty: 0 kB
Writeback: 0 kB
AnonPages: 265324 kB
Mapped: 47072 kB
Shmem: 1020 kB
Slab: 57372 kB
SReclaimable: 7692 kB
SUnreclaim: 49680 kB
KernelStack: 4512 kB
PageTables: 5912 kB
NFS_Unstable: 0 kB
Bounce: 0 kB
WritebackTmp: 0 kB
CommitLimit: 775852 kB
Committed_AS: 13520632 kB
VmallocTotal: 385024 kB
VmallocUsed: 61004 kB
VmallocChunk: 209668 kB
Enter fullscreen mode
Exit fullscreen mode
Among them, MemTotal is the total memory of the device, and MemFree is the current free memory.
More hardware and system properties
More hardware and system properties of the device can be viewed through the following commands:
adb shell cat /system/build.prop
Enter fullscreen mode
Exit fullscreen mode
This will output a lot of information, including the «model» and «Android system version» mentioned in the previous sections.
The output also includes some other useful information, which can also be viewed separately through the adb shell getprop command. Some properties are listed as follows:
| Attribute name | Meaning |
|---|---|
| ro.build.version.sdk | SDK version |
| ro.build.version.release | Android system version |
| ro.build.version.security_patch | Android security patch level |
| ro.product.model | Model |
| ro.product.brand | Brand |
| ro.product.name | Device name |
| ro.product.board | Processor model |
| ro.product.cpu.abilist | Abi list supported by CPU [Section 1] |
| persist.sys.isUsbOtgEnabled | Whether to support OTG |
| dalvik.vm.heapsize | Maximum memory limit for each application |
| ro.sf.lcd_density | Screen density |
Section Note 1:
Some ROMs customized by small factories may have modified the attribute name of the abi list supported by the CPU. If you can’t find it with the ro.product.cpu.abilist attribute name, you can try:
adb shell cat /system/build.prop | grep ro.product.cpu.abi
Enter fullscreen mode
Exit fullscreen mode
Sample output:
ro.product.cpu.abi=armeabi-v7a
ro.product.cpu.abi2=armeabi
Enter fullscreen mode
Exit fullscreen mode
Modify settings
*Note: After modifying the settings, running the recovery command may still display abnormalities. You can run adb reboot to restart the device, or manually restart. *
The principle of modifying settings is mainly to modify the setting values stored in /data/data/com.android.providers.settings/databases/settings.db through the settings command.
Resolution
command:
adb shell wm size 480x1024
Enter fullscreen mode
Exit fullscreen mode
Means to modify the resolution to 480px * 1024px.
Restore the original resolution command:
adb shell wm size reset
Enter fullscreen mode
Exit fullscreen mode
Screen density
command:
adb shell wm density 160
Enter fullscreen mode
Exit fullscreen mode
Means to modify the screen density to 160dpi.
Restore the original screen density command:
adb shell wm density reset
Enter fullscreen mode
Exit fullscreen mode
Display area
command:
adb shell wm overscan 0,0,0,200
Enter fullscreen mode
Exit fullscreen mode
The four numbers respectively indicate the margin pixels from the left, top, right, and bottom edges. The above command means to leave the bottom of the screen 200px blank.
Restore the original display area command:
adb shell wm overscan reset
Enter fullscreen mode
Exit fullscreen mode
Turn off USB debugging mode
command:
adb shell settings put global adb_enabled 0
restore:
It can’t be restored with commands, after all, if USB debugging is turned off, adb cannot connect to the Android device.
Go to the device to manually restore it: «Settings»-«Developer Options»-«Android Debugging».
Display and hide status bar and navigation bar
The related settings mentioned in this section correspond to «Extended Desktop» in Cyanogenmod.
command:
adb shell settings put global policy_control <key-values>
Enter fullscreen mode
Exit fullscreen mode
<key-values> can be composed of the following keys and their corresponding values, in the format of <key1>=<value1>:<key2>=<value2>.
| key | Meaning |
|---|---|
| immersive.full | Hide at the same time |
| immersive.status | Hide the status bar |
| immersive.navigation | Hide the navigation bar |
| immersive.preconfirms | ? |
The values corresponding to these keys can be combined with commas as the following values:
| value | Meaning |
|---|---|
apps |
All applications |
* |
All interfaces |
packagename |
Specify application |
-packagename |
Exclude specific applications |
E.g:
adb shell settings put global policy_control immersive.full=*
Enter fullscreen mode
Exit fullscreen mode
Indicates that the status bar and navigation bar are hidden at the same time in all interfaces.
adb shell settings put global policy_control immersive.status=com.package1,com.package2:immersive.navigation=apps,-com.package3
Enter fullscreen mode
Exit fullscreen mode
It means setting to hide the status bar in applications with package names com.package1 and com.package2, and hide the navigation bar in all applications except package names com.package3.
Return to normal mode
What if I don’t want to be full screen?
adb shell settings put global policy_control null
Enter fullscreen mode
Exit fullscreen mode
Useful functions
Screenshots
Save screenshot to computer:
adb exec-out screencap -p> sc.png
Enter fullscreen mode
Exit fullscreen mode
If the adb version is older and the exec-out command cannot be used, it is recommended to update the adb version at this time. If you cannot update, you can use the following troublesome methods:
First save the screenshot to the device:
adb shell screencap -p /sdcard/sc.png
Enter fullscreen mode
Exit fullscreen mode
Then export the png file to the computer:
adb pull /sdcard/sc.png
Enter fullscreen mode
Exit fullscreen mode
You can use adb shell screencap -h to view the help information of the screencap command. The following are two meaningful parameters and their meanings:
| Parameters | Meaning |
|---|---|
| -p | Specify the save file as png format |
| -d display-id | Specify the screen number of the screenshot (if there are multiple screens) |
Actually, if the specified file name ends with .png, you can omit the -p parameter; otherwise, you need to use the -p parameter. If you do not specify the file name, the content of the screenshot file will be directly output to stdout.
Another way to take a screenshot of a one-line command and save it to the computer:
Linux and Windows
adb shell screencap -p | sed "s/\r$//"> sc.png
Enter fullscreen mode
Exit fullscreen mode
Mac OS X
adb shell screencap -p | gsed "s/\r$//"> sc.png
Enter fullscreen mode
Exit fullscreen mode
This method needs to use the gnu sed command, which is available directly under Linux, and under the bin folder of the Git installation directory under Windows. If you really cannot find the command, you can download sed for Windows and add the folder where sed.exe is located to the PATH environment variable.
However, using the sed command that comes with the system under Mac will report an error:
sed: RE error: illegal byte sequence
Enter fullscreen mode
Exit fullscreen mode
Need to install gnu-sed, and then use the gsed command:
brew install gnu-sed
Enter fullscreen mode
Exit fullscreen mode
Record screen
The recorded screen is saved to /sdcard in mp4 format:
adb shell screenrecord /sdcard/filename.mp4
Enter fullscreen mode
Exit fullscreen mode
Press Ctrl-C when you need to stop, the default recording time and maximum recording time are both 180 seconds.
If you need to export to a computer:
adb pull /sdcard/filename.mp4
Enter fullscreen mode
Exit fullscreen mode
You can use adb shell screenrecord —help to view the help information of the screenrecord command. The following are common parameters and their meanings:
| Parameters | Meaning |
|---|---|
| —size WIDTHxHEIGHT | The size of the video, such as 1280x720, the default is the screen resolution. |
| —bit-rate RATE | The bit rate of the video, the default is 4Mbps. |
| —time-limit TIME | Recording duration, in seconds. |
| —verbose | Output more information. |
Remount the system partition as writable
*Note: root permission is required. *
The /system partition is mounted as read-only by default, but some operations such as adding commands to the Android system, deleting its own applications, etc. require writing to /system, so you need to remount it as read-write.
step:
Enter the shell and switch to root user authority.
command:
adb shell
su
Enter fullscreen mode
Exit fullscreen mode
View the current partition mounting status.
command:
mount
Enter fullscreen mode
Exit fullscreen mode
Sample output:
rootfs / rootfs ro, relatime 0 0
tmpfs /dev tmpfs rw,seclabel,nosuid,relatime,mode=755 0 0
devpts /dev/pts devpts rw,seclabel,relatime,mode=600 0 0
proc /proc proc rw,relatime 0 0
sysfs /sys sysfs rw,seclabel,relatime 0 0
selinuxfs /sys/fs/selinux selinuxfs rw,relatime 0 0
debugfs /sys/kernel/debug debugfs rw,relatime 0 0
none /var tmpfs rw,seclabel,relatime,mode=770,gid=1000 0 0
none /acct cgroup rw,relatime,cpuacct 0 0
none /sys/fs/cgroup tmpfs rw,seclabel,relatime,mode=750,gid=1000 0 0
none /sys/fs/cgroup/memory cgroup rw,relatime,memory 0 0
tmpfs /mnt/asec tmpfs rw,seclabel,relatime,mode=755,gid=1000 0 0
tmpfs /mnt/obb tmpfs rw,seclabel,relatime,mode=755,gid=1000 0 0
none /dev/memcg cgroup rw,relatime,memory 0 0
none /dev/cpuctl cgroup rw,relatime,cpu 0 0
none /sys/fs/cgroup tmpfs rw,seclabel,relatime,mode=750,gid=1000 0 0
none /sys/fs/cgroup/memory cgroup rw,relatime,memory 0 0
none /sys/fs/cgroup/freezer cgroup rw,relatime,freezer 0 0
/dev/block/platform/msm_sdcc.1/by-name/system /system ext4 ro,seclabel,relatime,data=ordered 0 0
/dev/block/platform/msm_sdcc.1/by-name/userdata /data ext4 rw,seclabel,nosuid,nodev,relatime,noauto_da_alloc,data=ordered 0 0
/dev/block/platform/msm_sdcc.1/by-name/cache /cache ext4 rw,seclabel,nosuid,nodev,relatime,data=ordered 0 0
/dev/block/platform/msm_sdcc.1/by-name/persist /persist ext4 rw,seclabel,nosuid,nodev,relatime,data=ordered 0 0
/dev/block/platform/msm_sdcc.1/by-name/modem /firmware vfat ro,context=u:object_r:firmware_file:s0,relatime,uid=1000,gid=1000,fmask=0337,dmask=0227,codepage =cp437,iocharset=iso8859-1,shortname=lower,errors=remount-ro 0 0
/dev/fuse /mnt/shell/emulated fuse rw,nosuid,nodev,relatime,user_id=1023,group_id=1023,default_permissions,allow_other 0 0
/dev/fuse /mnt/shell/emulated/0 fuse rw,nosuid,nodev,relatime,user_id=1023,group_id=1023,default_permissions,allow_other 0 0
Enter fullscreen mode
Exit fullscreen mode
Find the line with /system that we are concerned about:
/dev/block/platform/msm_sdcc.1/by-name/system /system ext4 ro,seclabel,relatime,data=ordered 0 0
Enter fullscreen mode
Exit fullscreen mode
Remount.
command:
mount -o remount,rw -t yaffs2 /dev/block/platform/msm_sdcc.1/by-name/system /system
Enter fullscreen mode
Exit fullscreen mode
Here /dev/block/platform/msm_sdcc.1/by-name/system is the file path we got from the output of the previous step.
If the output does not prompt an error, the operation is successful, and you can do whatever you want with the files under /system.
View connected WiFi passwords
*Note: root permission is required. *
command:
adb shell
su
cat /data/misc/wifi/*.conf
Enter fullscreen mode
Exit fullscreen mode
Sample output:
network={
ssid="TP-LINK_9DFC"
scan_ssid=1
psk="123456789"
key_mgmt=WPA-PSK
group=CCMP TKIP
auth_alg=OPEN
sim_num=1
priority=13893
}

network={
ssid="TP-LINK_F11E"
psk="987654321"
key_mgmt=WPA-PSK
sim_num=1
priority=17293
}
Enter fullscreen mode
Exit fullscreen mode
ssid is the name we see in the WLAN settings, psk is the password, and key_mgmt is the security encryption method.
Set the system date and time
*Note: root permission is required. *
command:
adb shell
su
date -s 20160823.131500
Enter fullscreen mode
Exit fullscreen mode
Means to change the system date and time to 13:15:00 on August 23, 2016.
restart cellphone
command:
adb reboot
Enter fullscreen mode
Exit fullscreen mode
Check if the device is rooted
command:
adb shell
su
Enter fullscreen mode
Exit fullscreen mode
At this time, the command line prompt is $, which means that there is no root authority, and # means that it is rooted.
Use Monkey for stress testing
Monkey can generate pseudo-random user events to simulate clicks, touches, gestures and other operations, and can perform random stress tests on programs under development.
Simple usage:
adb shell monkey -p <packagename> -v 500
Enter fullscreen mode
Exit fullscreen mode
It means to send 500 pseudo-random events to the application specified by <packagename>.
For detailed usage of Monkey, refer to the official documentation.
Turn on/off WiFi
Note: root permission is required.
Sometimes you need to control the WiFi status of the device, you can use the following commands to complete.
Turn on WiFi:
adb root
adb shell svc wifi enable
Enter fullscreen mode
Exit fullscreen mode
Turn off WiFi:
adb root
adb shell svc wifi disable
Enter fullscreen mode
Exit fullscreen mode
Set wifi priority, use wifi first when there is network and wifi
adb shell svc wifi prefer
Enter fullscreen mode
Exit fullscreen mode
If the execution is successful, the output will be empty; if the command is executed without root permission, the execution will fail and the output will be Killed.
Turn on/off data traffic
svc data disable
Enter fullscreen mode
Exit fullscreen mode
This command can close the data connection, that is, the Internet traffic. Everyone knows that there are many switches to control the Internet, but most of them are realized by adding a suffix to the access point on the apn, but this command will not change any settings of the apn. The bottom layer closes the data connection. It should be the most thorough, and does not affect the apn settings. What is the difference between this and apndroid? When apndroid closes the Internet data, the downloading connection may not be forcibly closed (this is also mentioned in apndroid’s own instructions). For example, if you are downloading a 10M movie, if you download 1M, the download will not sound. Use apndroid to close the connection, maybe the download will continue, not immediately. But with this command, it clicked away without mercy.
adb shell svc data enable
Enter fullscreen mode
Exit fullscreen mode
This is to open the Internet data connection, which is the opposite of the previous command.
adb shell svc data prefer
Enter fullscreen mode
Exit fullscreen mode
This command is to control the data connection prior to wifi. We all know that under normal circumstances, when there is wifi, the data network connection will not be used. But this command is the opposite. If there is a data network, use data network traffic first, and use wifi when there is no data network.
Flashing related commands
Restart to Recovery mode
command:
adb reboot recovery
Enter fullscreen mode
Exit fullscreen mode
Restart from Recovery to Android
command:
adb reboot
Enter fullscreen mode
Exit fullscreen mode
Restart to Fastboot mode
command:
adb reboot bootloader
Enter fullscreen mode
Exit fullscreen mode
Update the system via sideload
If we download the system update package corresponding to the Android device to the computer, we can also complete the update through adb.
Take the update in Recovery mode as an example:
Restart to Recovery mode.
command:
adb reboot recovery
Enter fullscreen mode
Exit fullscreen mode
Operate on the Recovery interface of the device to enter Apply update-Apply from ADB.
*Note: Different Recovery menus may be different from this. Some first-level menus have Apply update from ADB. *
*Upload and update the system via adb. *
command:
adb sideload <path-to-update.zip>
Enter fullscreen mode
Exit fullscreen mode
More adb shell commands
The Android system is based on the Linux kernel, so many commands in Linux have the same or similar implementations in Android and can be called in adb shell. The adb shell command has been used in the previous part of this document.
View process
adb shell ps
Enter fullscreen mode
Exit fullscreen mode
example:
USER PID PPID VSIZE RSS WCHAN PC NAME
root 1 0 8904 788 ffffffff 00000000 S /init
root 2 0 0 0 ffffffff 00000000 S kthreadd
...
u0_a71 7779 5926 1538748 48896 ffffffff 00000000 S com.sohu.inputmethod.sogou:classic
u0_a58 7963 5926 1561916 59568 ffffffff 00000000 S org.mazhuang.boottimemeasure
...
shell 8750 217 10640 740 00000000 b6f28340 R ps
Enter fullscreen mode
Exit fullscreen mode
Meaning of each column:
| Column name | Meaning |
|---|---|
| USER | Owned user |
| PID | Process ID |
| PPID | Parent process ID |
| NAME | Process name |
View real-time resource usage
adb shell top
Enter fullscreen mode
Exit fullscreen mode
example:
User 0%, System 6%, IOW 0%, IRQ 0%
User 3 + Nice 0 + Sys 21 + Idle 280 + IOW 0 + IRQ 0 + SIRQ 3 = 307

  PID PR CPU% S #THR VSS RSS PCY UID Name
 8763 0 3% R 1 10640K 1064K fg shell top
  131 0 3% S 1 0K 0K fg root dhd_dpc
 6144 0 0% S 115 1682004K 115916K fg system system_server
  132 0 0% S 1 0K 0K fg root dhd_rxf
 1731 0 0% S 6 20288K 788K fg root /system/bin/mpdecision
  217 0 0% S 6 18008K 356K fg shell /sbin/adbd
 ...
 7779 2 0% S 19 1538748K 48896K bg u0_a71 com.sohu.inputmethod.sogou:classic
 7963 0 0% S 18 1561916K 59568K fg u0_a58 org.mazhuang.boottimemeasure
 ...
Enter fullscreen mode
Exit fullscreen mode
Meaning of each column:
| Column name | Meaning |
|---|---|
| PID | Process ID |
| PR | Priority |
| CPU% | The percentage of CPU occupied at the current instant |
| S | Process status (R=run, S=sleep, T=track/stop, Z=zombie process) |
| #THR | Number of threads |
| VSS | Virtual Set Size virtual memory consumption (including memory occupied by shared libraries) |
| RSS | Resident Set Size actually uses physical memory (including memory occupied by shared libraries) |
| PCY | Scheduling strategy priority, SP_BACKGROUND/SPFOREGROUND |
| UID | User ID of the process owner |
| NAME | Process name |
The top command also supports some command line parameters, the detailed usage is as follows:
Usage: top [-m max_procs] [-n iterations] [-d delay] [-s sort_column] [-t] [-h]
    -m num shows how many processes at most
    -n num exit after refreshing how many times
    -d num refresh interval (unit: second, default value 5)
    -s col Sort by a column (available col values: cpu, vss, rss, thr)
    -t display thread information
    -h show help document
Enter fullscreen mode
Exit fullscreen mode
View process UID
There are two options:
adb shell dumpsys package <packagename> | grep userId=
Enter fullscreen mode
Exit fullscreen mode
Such as:
$ adb shell dumpsys package org.mazhuang.guanggoo | grep userId=
   userId=10394
Enter fullscreen mode
Exit fullscreen mode
After finding the pid of the corresponding process through the ps command, adb shell cat /proc/<pid>/status | grep Uid
Such as:
$ adb shell
gemini:/ $ ps | grep org.mazhuang.guanggoo
u0_a394 28635 770 1795812 78736 SyS_epoll_ 0000000000 S org.mazhuang.guanggoo
gemini:/$ cat /proc/28635/status | grep Uid
Uid: 10394 10394 10394 10394
gemini:/$
Enter fullscreen mode
Exit fullscreen mode
Other
The following is a brief description of other commonly used commands. The commands that have been specifically mentioned above will not be explained separately:
| Command | Features |
|---|---|
| cat | Display file content |
| cd | Change directory |
| chmod | Change file access mode/access permissions |
| df | Check disk space usage |
| grep | Filter output |
| kill | Kill the process of the specified PID |
| ls | List the contents of the directory |
| mount | View and manage mount directories |
| mv | Move or rename files |
| ps | View the running process |
| rm | Delete files |
| top | Check the resource usage of the process |
Security related
Enable SELinux
Enable SELinux
adb root
adb shell setenforce 1
Enter fullscreen mode
Exit fullscreen mode
Disable SELinux
adb root
adb shell setenforce 0
Enter fullscreen mode
Exit fullscreen mode
Enable dm_verity
adb root
adb enable-verity
Enter fullscreen mode
Exit fullscreen mode
Disable dm_verity
adb root
adb disable-verity
Enter fullscreen mode
Exit fullscreen mode
common problem
Failed to start adb server
Error message
error: protocol fault (couldn't read status): No error
Enter fullscreen mode
Exit fullscreen mode
possible reason
The 5037 port that the adb server process wants to use is occupied.
solution
Find the process occupying port 5037, and then terminate it. Take Windows as an example:
netstat -ano | findstr LISTENING

...
TCP 0.0.0.0:5037 0.0.0.0:0 LISTENING 1548
...
Enter fullscreen mode
Exit fullscreen mode
Here 1548 is the process ID, end the process with the command:
taskkill /PID 1548
Enter fullscreen mode
Exit fullscreen mode
Then start adb and there is no problem.
Все способы:
- Шаг 1: Скачивание и установка
- Шаг 2: Запуск утилиты ADB
- Способ 1: «Командная строка» Windows
- Способ 2: Windows PowerShell
- Дополнительно. Подключение Android-устройства к ADB на ПК
- Вопросы и ответы: 3
Шаг 1: Скачивание и установка
Прежде чем запуск консольной утилиты ADB станет возможным, конечно же, необходимо загрузить и инсталлировать её на компьютер. В действительности, существует множество вариантов получения и развёртывания софта, который обеспечивает функционирование Android Debug Bridge на ПК под управлением Windows 10, а следующая инструкция демонстрирует, как это сделать задокументированным разработчиками технологии Android Debug Bridge, а значит, самым надёжным и эффективным способом.
Скачать SDK Platform Tools (ADB и Fastboot) с официального сайта
- Перейдите по представленной перед этой инструкцией ссылке. В результате откроется веб-страница с описанием и возможностью загрузки включающего ADB пакета SDK Platform Tools на интернет-ресурсе Android Developers от Google.
- Переместитесь в раздел веб-страницы «Downloads»,

щёлкните по имеющейся здесь ссылке «Download SDK Platform-Tools for Windows».
- Прокрутите информацию в отобразившемся поверх веб-страницы окне до конца,

установите отметку в чекбоксе «I have read and agree with the above terms and conditions».
- Нажмите на ставшую активной после выполнения предыдущего шага кнопку «Download Android SDK Platform-Tools for Windows».
- Если это предполагают настройки браузера, укажите (и запомните) путь сохранения предоставляемого сайтом ZIP-архива на диске компьютера

(по умолчанию будет скачан в системную библиотеку Win 10 «Загрузки»). Подтвердите инициацию получения пакета

и дождитесь окончания этого процесса.
- По завершении скачивания файла platform-tools_rВЕРСИЯ-windows.zip откройте содержащую его папку

в Проводнике Windows.

Читайте также: Запуск «Проводника» в ОС Windows 10
- В результате разархивации пакета SDK Platform Tools образуется директория, которая содержит вложенную папку «platform-tools» –

именно она и является целевой в нашем случае.

По сути, на этом получение утилиты ADB можно считать завершённым, её уже можно запускать из указанной папки средствами консоли Windows 10 одним из предложенных далее в этой статье способов. При этом, для удобства в дальнейшем, а также полного соответствия рекомендациям разработчиков Android Debug Bridge необходимо скопировать или переместить каталог «platform-tools»

в корень
системного диска ПК (С:).

Кроме прочего, каталог с утилитой ADB можно переименовать по собственному усмотрению (например, сократить наименование или как-то иначе, но не применяя кириллических символов). При таком подходе запомните присвоенное каталогу с утилитой ADB имя, и точно вводите его вместо
platform-toolsпри выполнении дальнейших инструкций из этого материала.
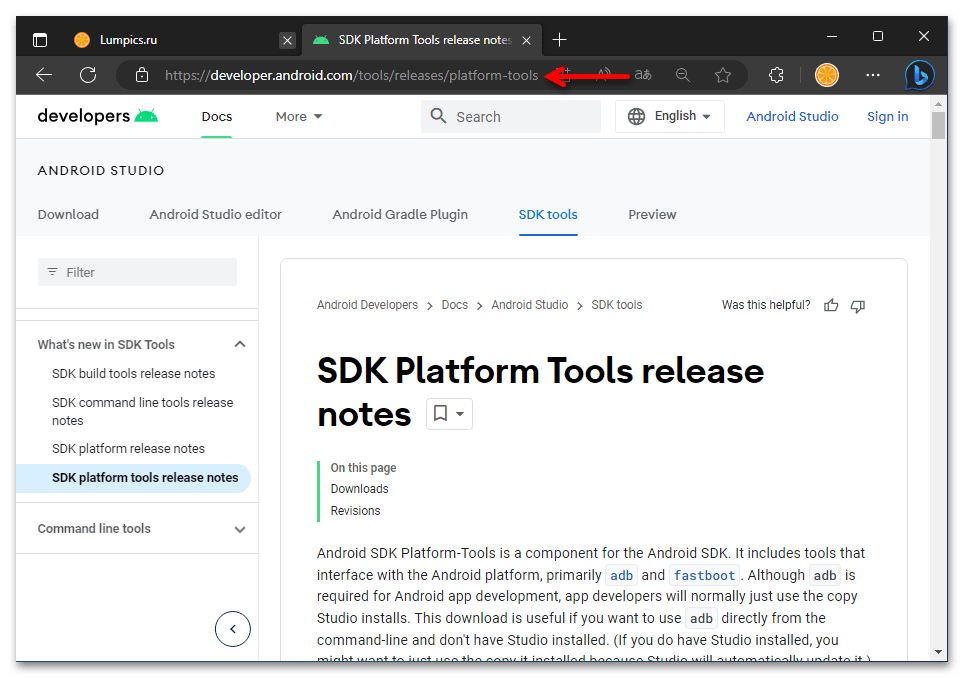

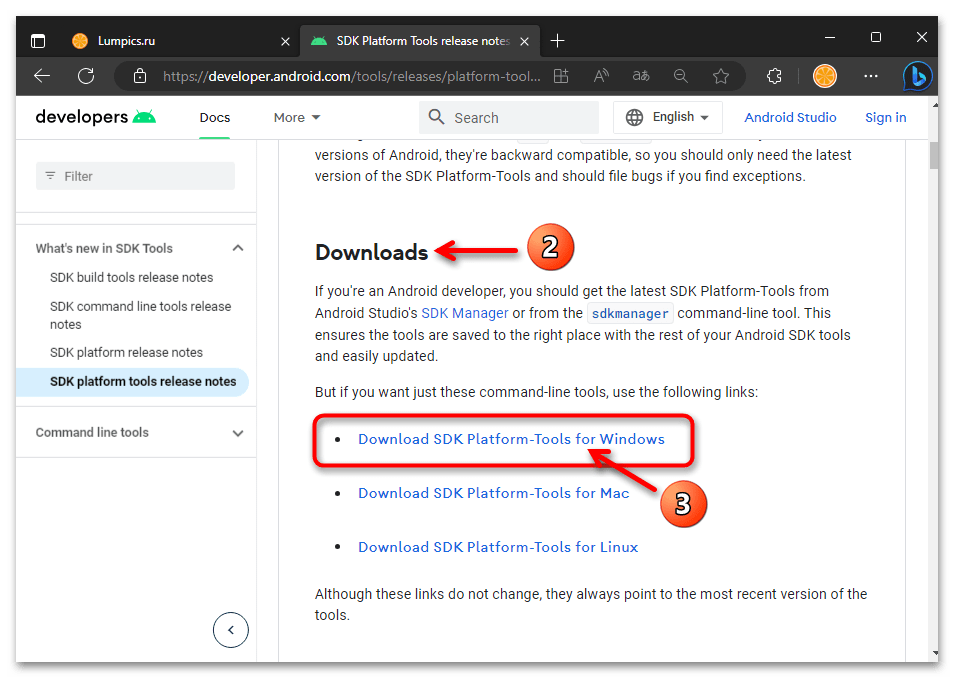
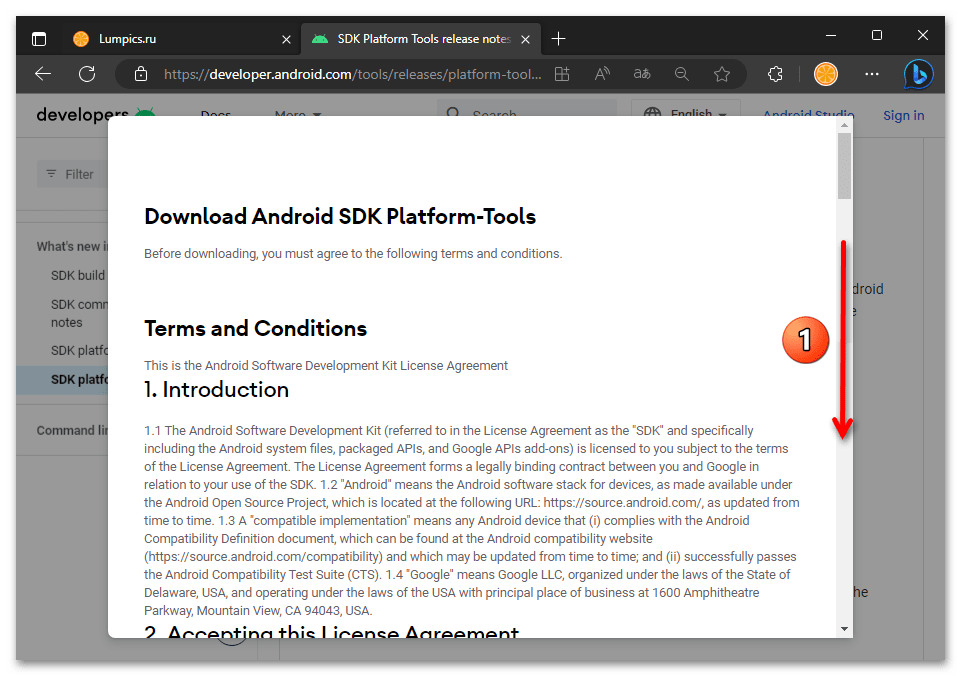
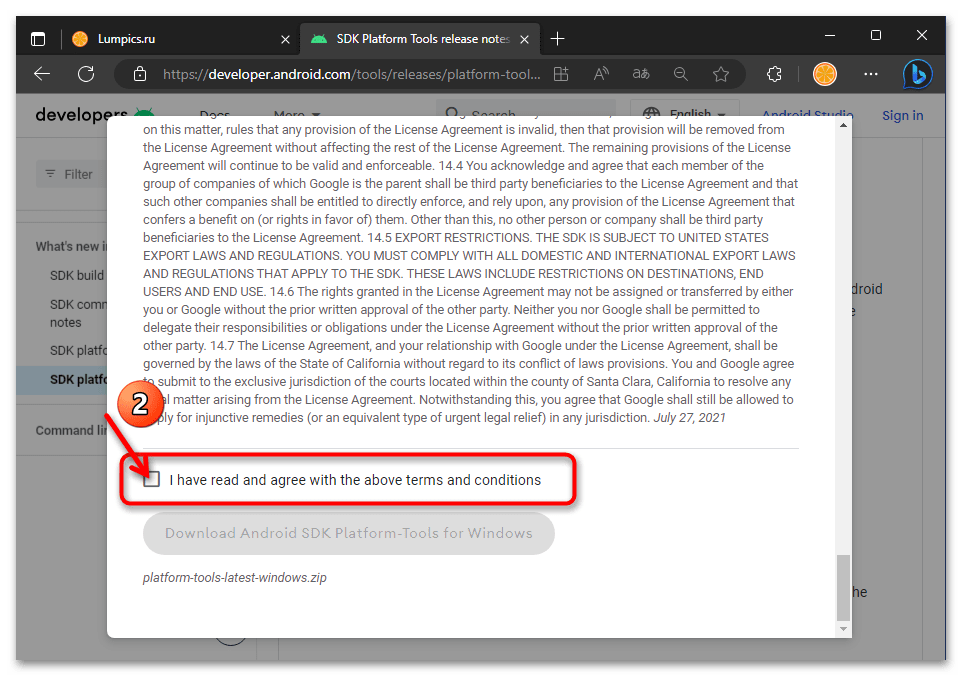
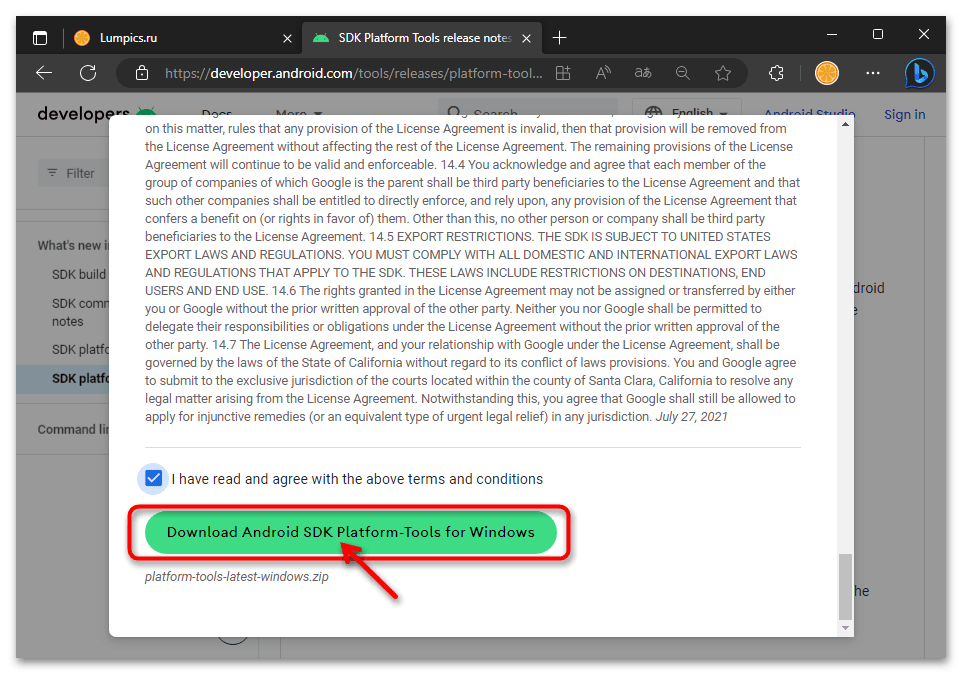
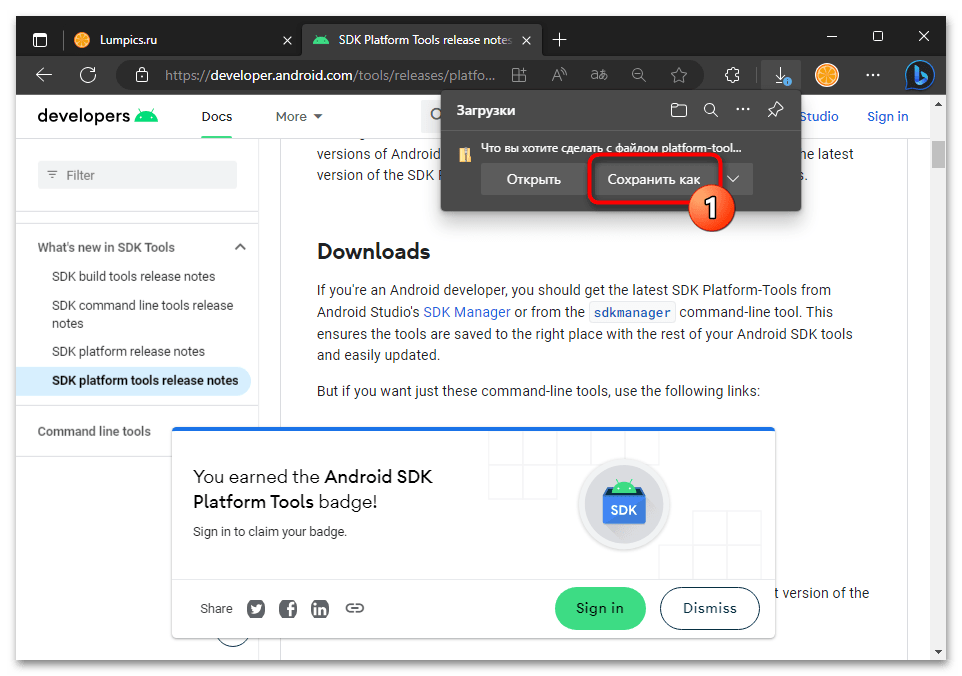
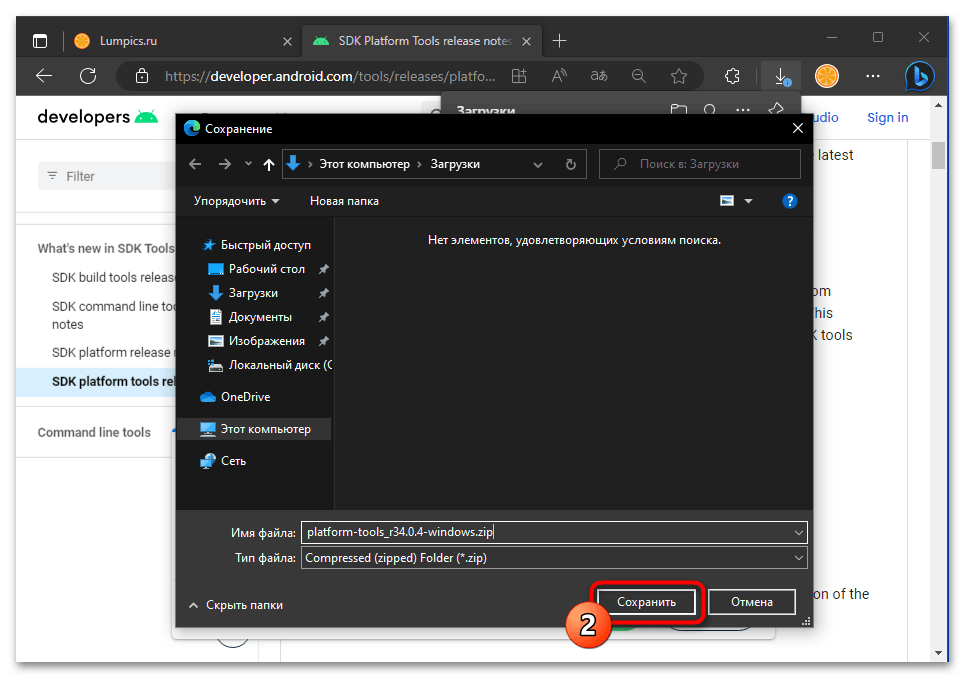
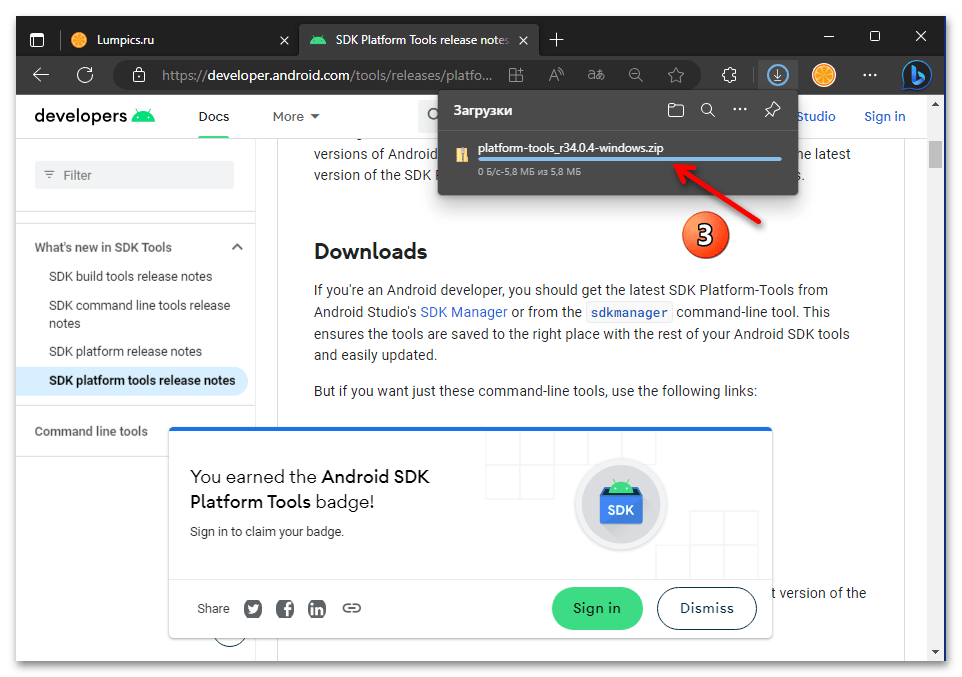
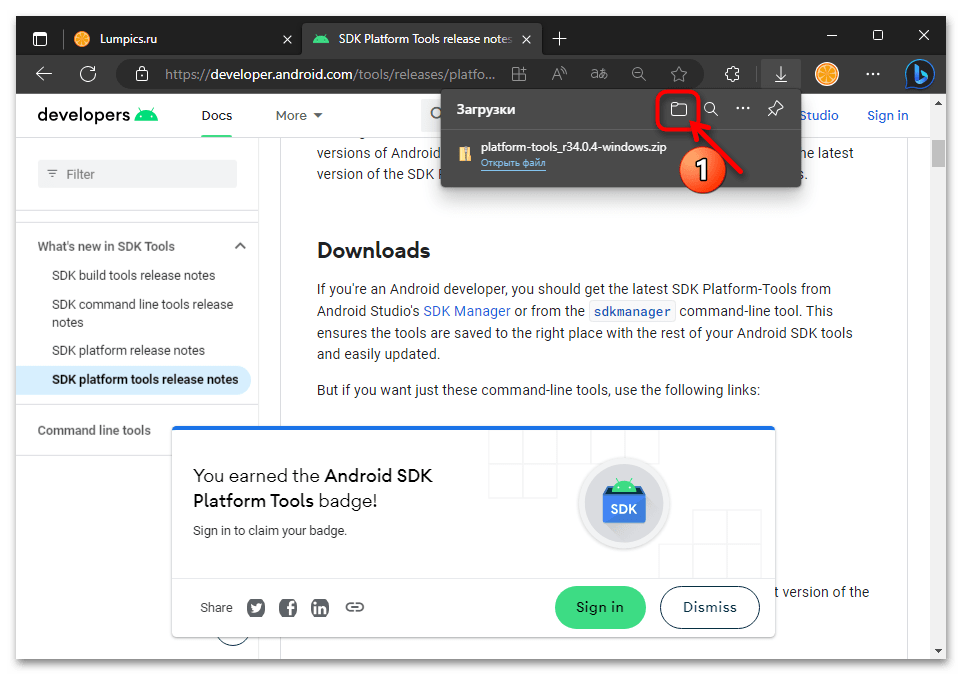

Далее извлеките всё содержимое архива в отдельный каталог. (С этой целью кликните правой кнопкой мыши по наименованию пакета, выберите «Извлечь всё» в открывшемся контекстном меню, подтвердите действие).
Подробнее: Распаковка ZIP-архивов в ОС Windows 10

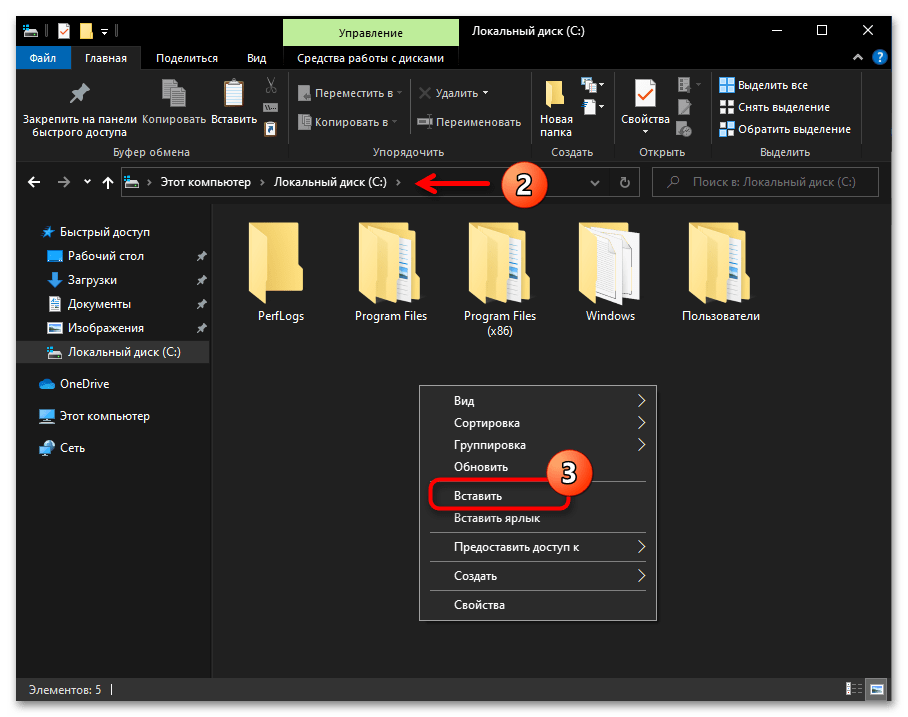
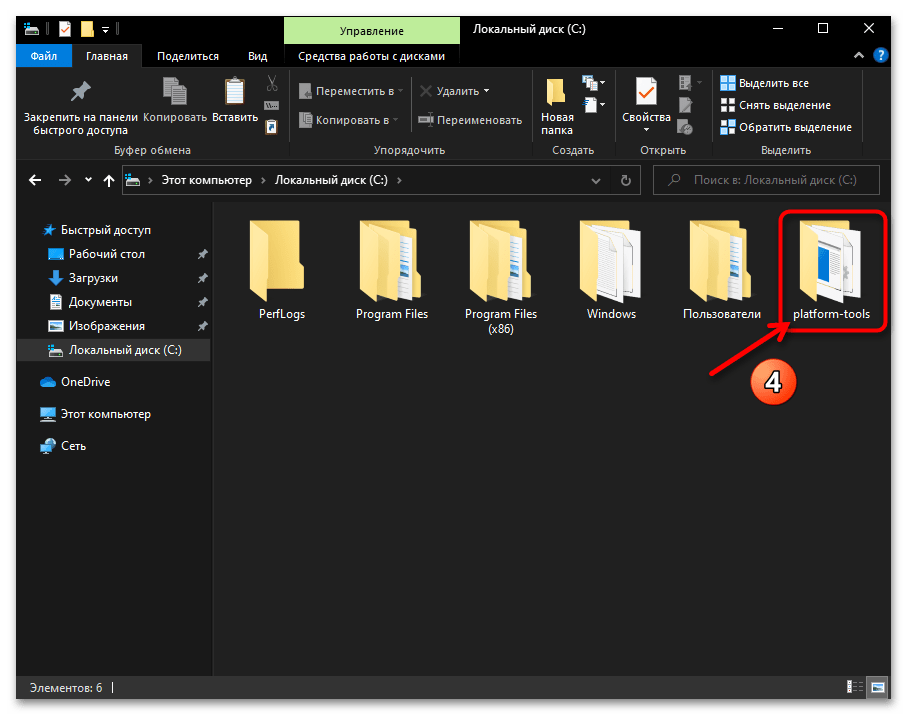
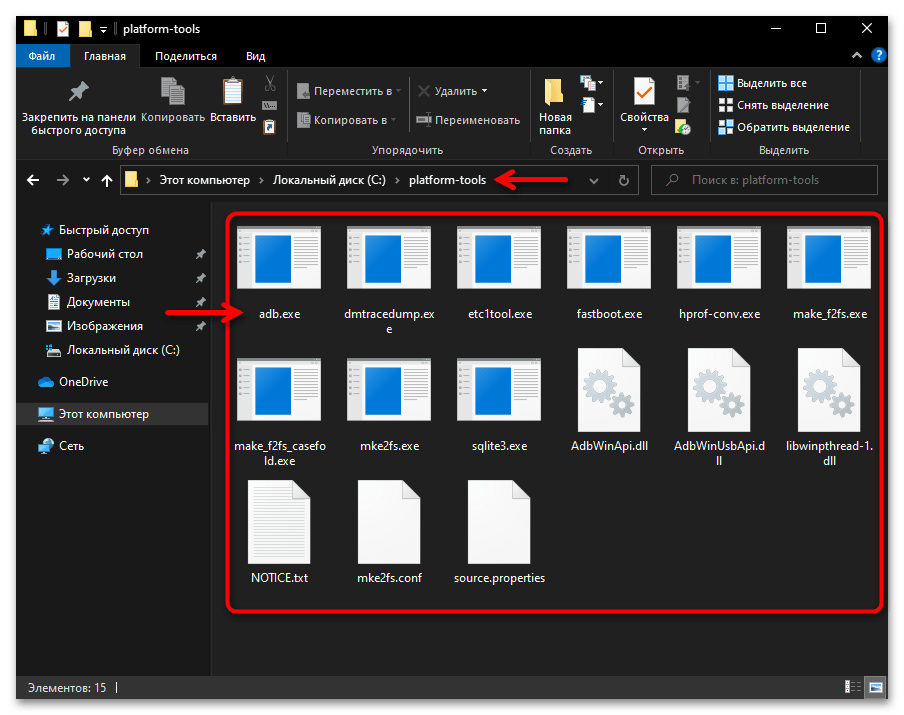
Входящие в комплект SDK Platform Tools утилиты (не только рассматриваемая в этой статье ADB, но также Fastboot) в случае с Windows 10 могут быть запущены и эффективно эксплуатироваться в классической «Командной строке», а также её более современном аналоге – консольной оболочке «PowerShell». Далее рассмотрим подробно, как используются оба указанных инструмента для решения нашей задачи.
Способ 1: «Командная строка» Windows
По сути, чтобы получить доступ к функциям утилиты ADB через «Командную строку» Windows, достаточно открыть во второй содержащий компоненты первой каталог («platform-tools»). Практически это реализуемо минимум двумя путями, вы можете использовать тот, который кажется более удобным.
Вариант 1: Консольная команда «cd»
Самый распространённый и привычный большинству метод запуска консольной утилиты ADB заключается в открытии приложения «Командная строка» и переходе через неё в папку с целевым софтом с помощью специализированной текстовой команды:
- Любым способом запустите «Командную строку» Виндовс 10. К примеру, и быстрее всего с этой целью можно задействовать оснастку «Выполнить»: нажмите «Windows» + «R» на клавиатуре, введите в поле «Открыть» отобразившегося окошка следующий текст:
cmd
Щёлкните по кнопке «ОK» мышкой или нажмите «Enter».
Подробнее: Открытие «Командной строки» в Windows 10
- Введите команду перехода в каталог утилиты ADB – она состоит из указания
cdи затем полного пути к целевой директории на диске компьютера. То есть, если вы точно следовали рекомендациям выше в статье, команда будет следующей:cd C:\platform-tools
Написав команду, отправьте её на выполнение — для этого нажмите «Ввод» на клавиатуре.
- Фактически всё, далее можно приступать к отправке текстовых команд ADB, — утилита готова к их приёму и обработке. Чтобы удостовериться в том, что отладочный мост введён в эксплуатацию, а также для получения списка основных команд ADB, можно ввести в консоли и отправить на выполнение следующее указание:
adb.exe
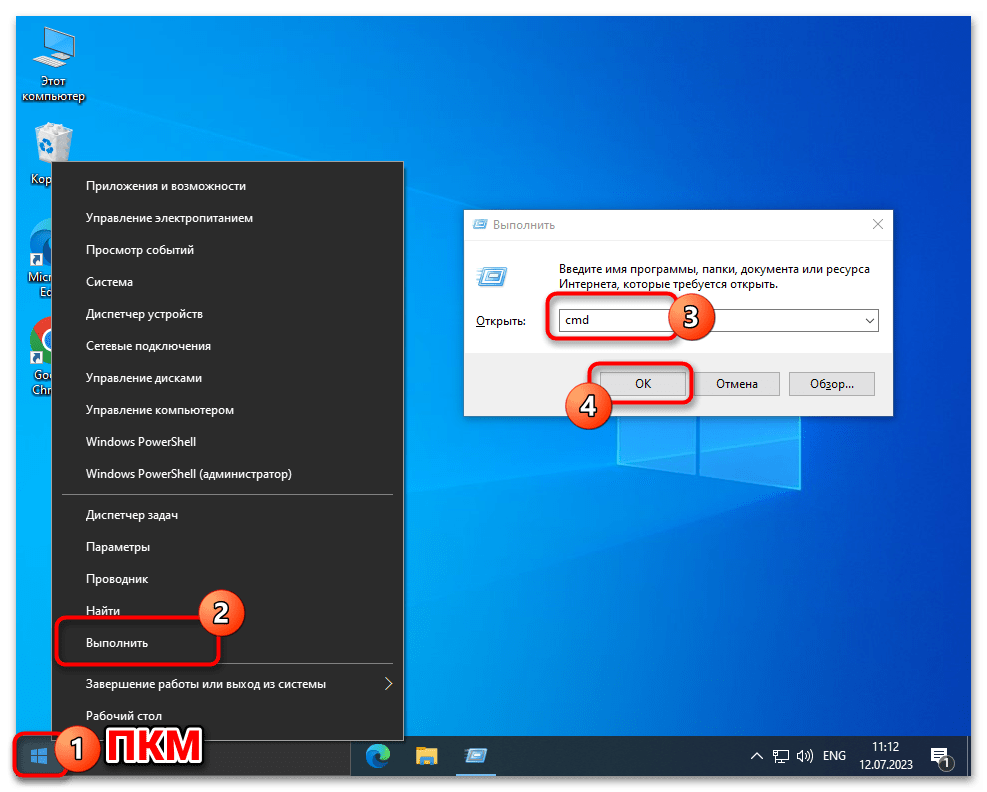
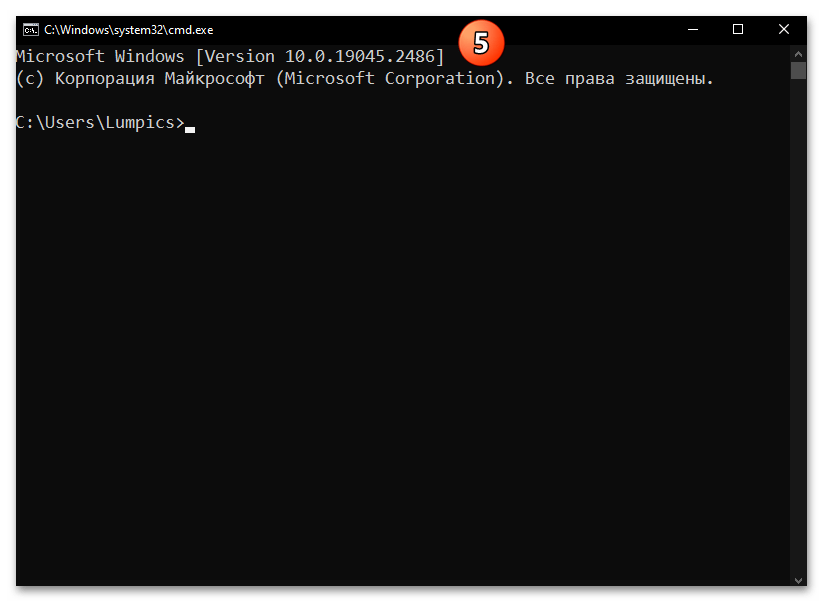
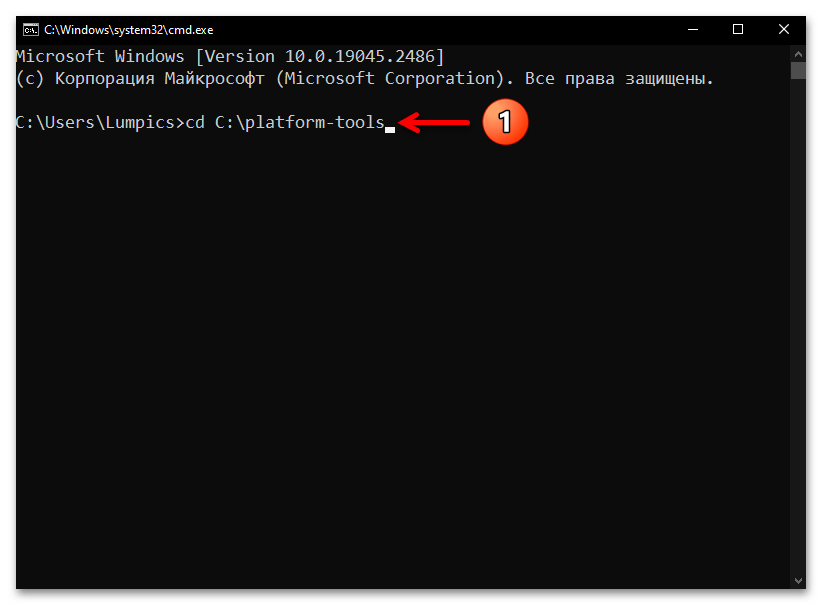
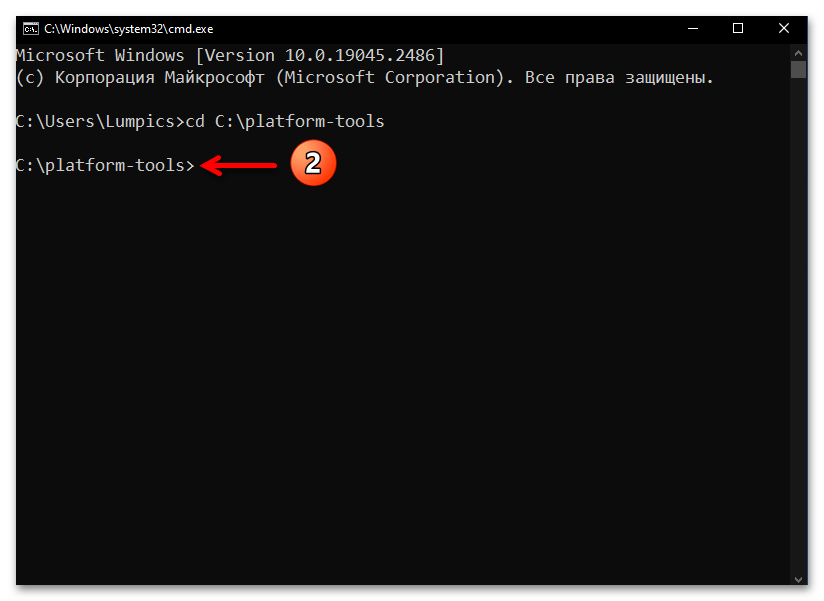
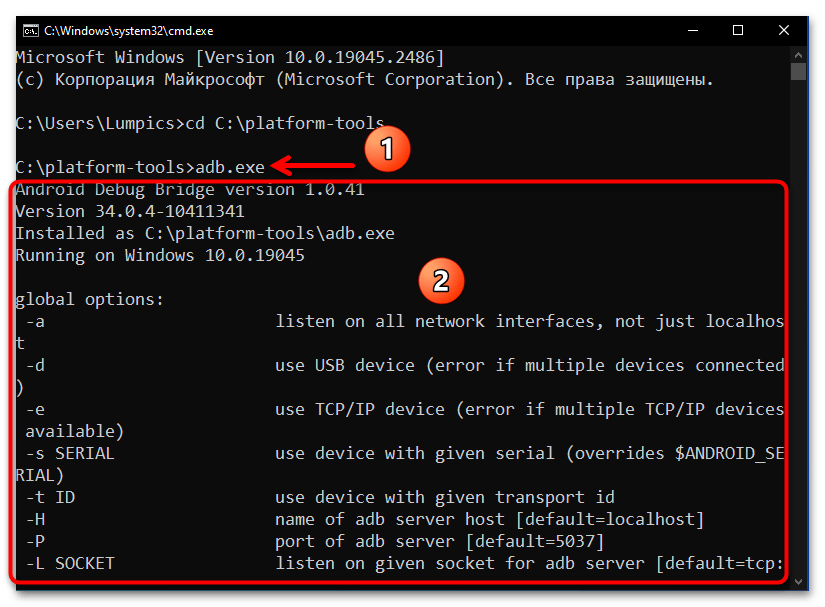
Вариант 2: Средства Проводника Windows
Более удобный и часто выполнимый быстрее, нежели вышеописанный, подход к запуску утилиты АДБ в классической «Командной строке» эксплуатирует возможности системного файлового менеджера Виндовс 10:
- Откройте Проводник Windows 10, перейдите в каталог ADB («platform-tools»).
- Кликните левой кнопкой мыши в (важно!) свободной от надписей области поля, которое расположено в верхней части окна Проводника и отображает путь

к текущей открытой вами папке.
- С клавиатуры введите следующий текст:
cmd - Нажмите «Enter» — в результате запустится «Командная строка» Windows c уже открытой в ней папкой «platform-tools».

На этом наша задача считается решённой, вы можете приступать к вводу в «Командную строку» и отправке на выполнение команд Android Debug Bridge.
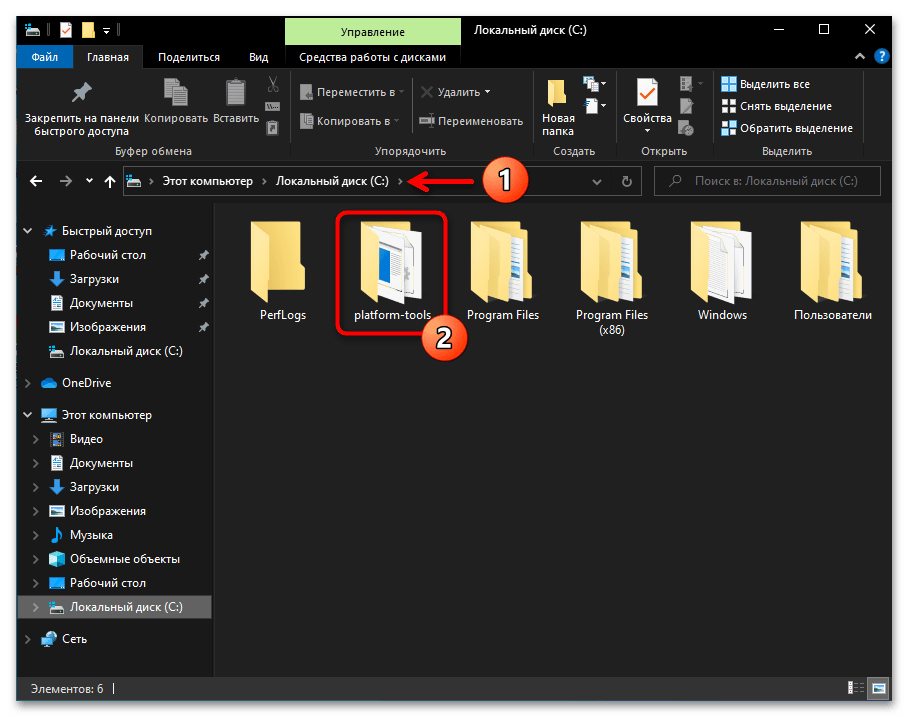
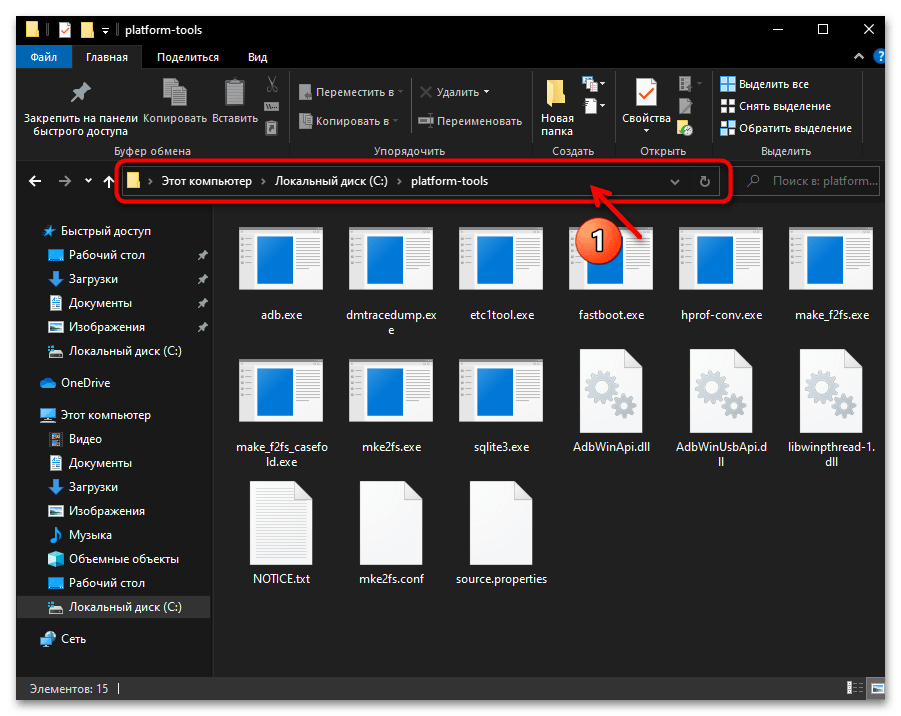
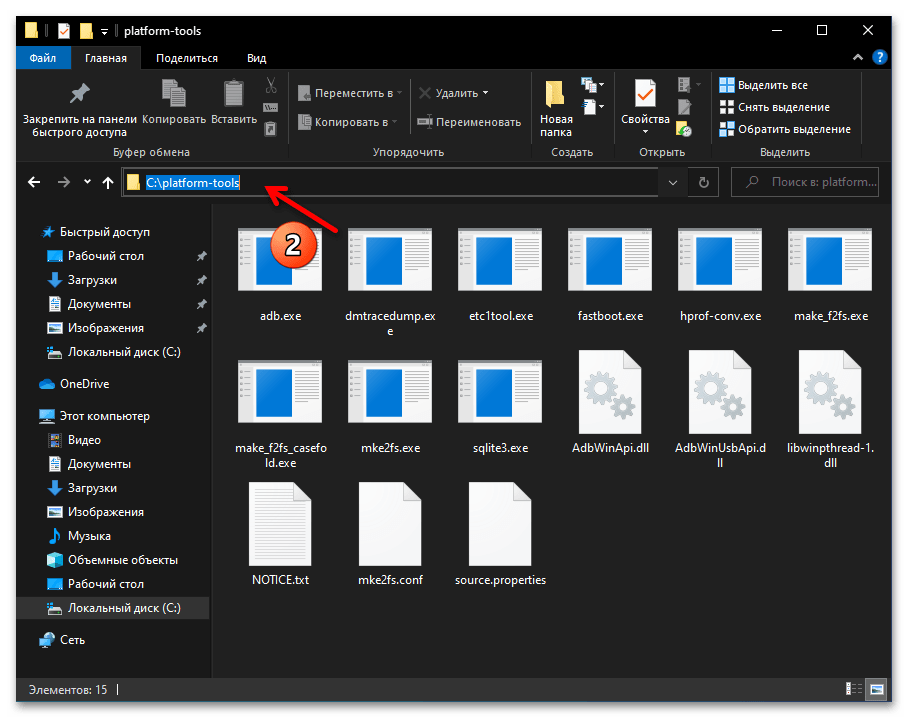
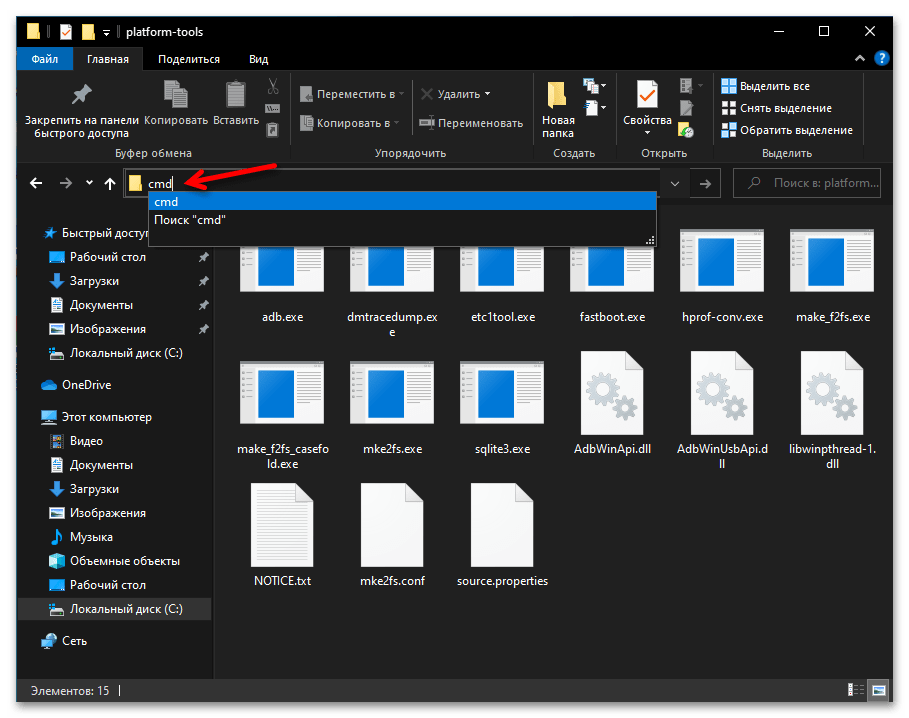
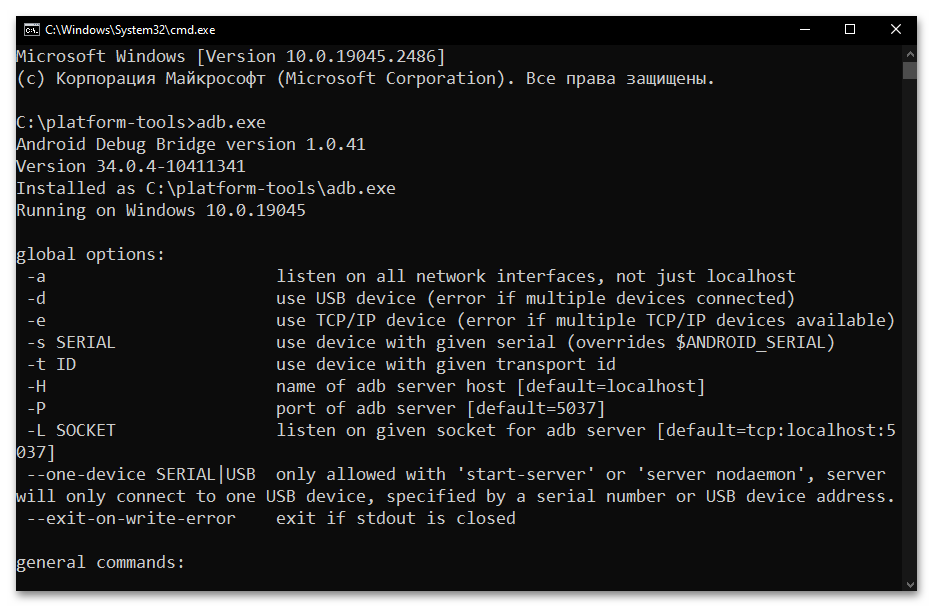
Способ 2: Windows PowerShell
Запуск ADB через поставляемое в комплекте ОС Windows 10 средство PowerShell выполняется не намного сложнее, нежели при использовании классической «Командной строки», а практически реализуется одним из двух нижеописанных путей.
Вариант 1: Консольная команда «cd»
Основной вариант запуска Android Debug Bridge средствами PowerShell фактически повторяет таковой в «Командной строке», — необходимо запустить консоль, а затем с помощью специальной команды открыть в ней каталог с утилитой ADB и сопровождающими её файлами.
- Откройте консольную оболочку PowerShell. Как и классическую «Командную строку» в Windows 10 это средство можно запустить большим числом способов, а быстрее всего — из меню дополнительных действий кнопки «Пуск» на «Панели задач» операционки: кликните по последней правой кнопкой манипулятора и выберите «Windows PowerShell» в отобразившемся перечне.

Подробнее: Запуск «PowerShell» в ОС Windows 10
- Введите команду перехода в папку утилиты ADB, — её синтаксис аналогичен рассмотренному выше в этом материале указанию для классической «Командной строки»:
cd C:\platform-tools
Нажав «Ввод» на клавиатуре, отправьте указание на выполнение консолью.
- Собственно, всё — средство ADB готово к выполнению своего предназначения. Дальнейшие ваши действия двухвариантные:
- При запуске ADB-команд в Windows PowerShell по умолчанию перед ними необходимо прописывать префикс
./. То есть, к примеру, чтобы вывести в консоли список основных команд ADB в текущем случае, необходимо отправить на выполнение следующее текстовое указание:./adb.exe
После написания команды и нажатия «Enter» получаем следующий результат:
- Если подставлять
./перед каждой передаваемой средствами ПоверШелл через Андроид Дебаг Бридж командой вы не желаете, то можете перед началом работы открыть себе доступ к «классической» командной строке в современной консольной оболочке. Для этого запустите в PowerShell команду:cmd
Далее отправляйте указания ADB мобильному девайсу c ОС Android без префикса:


- При запуске ADB-команд в Windows PowerShell по умолчанию перед ними необходимо прописывать префикс
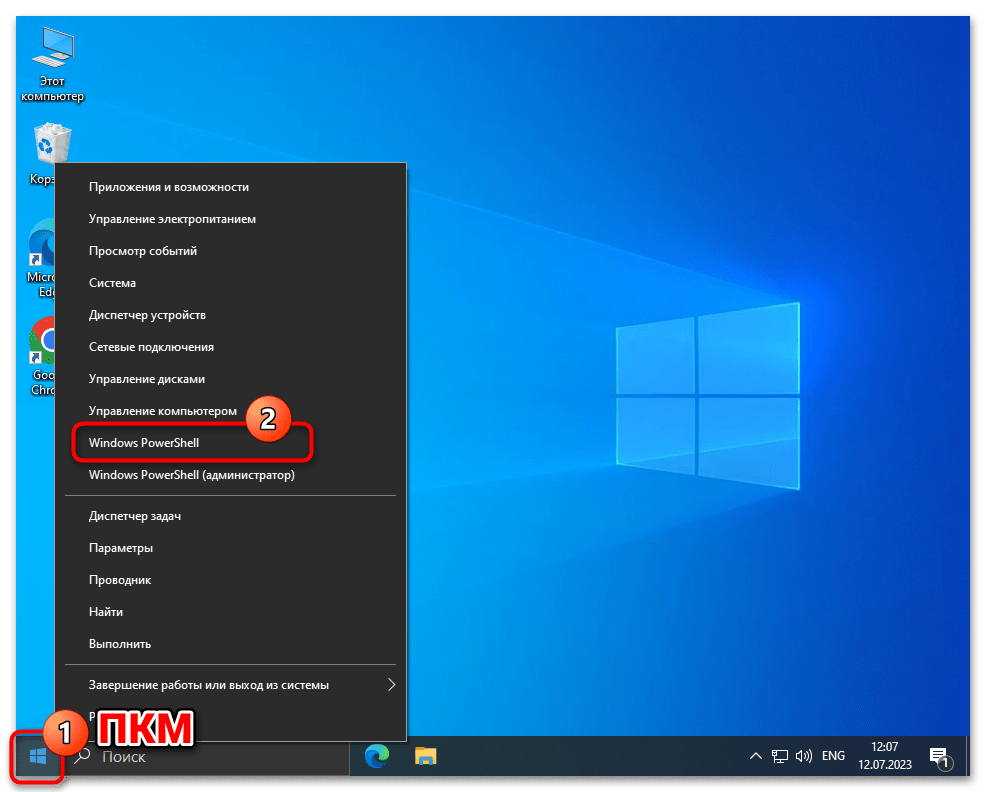

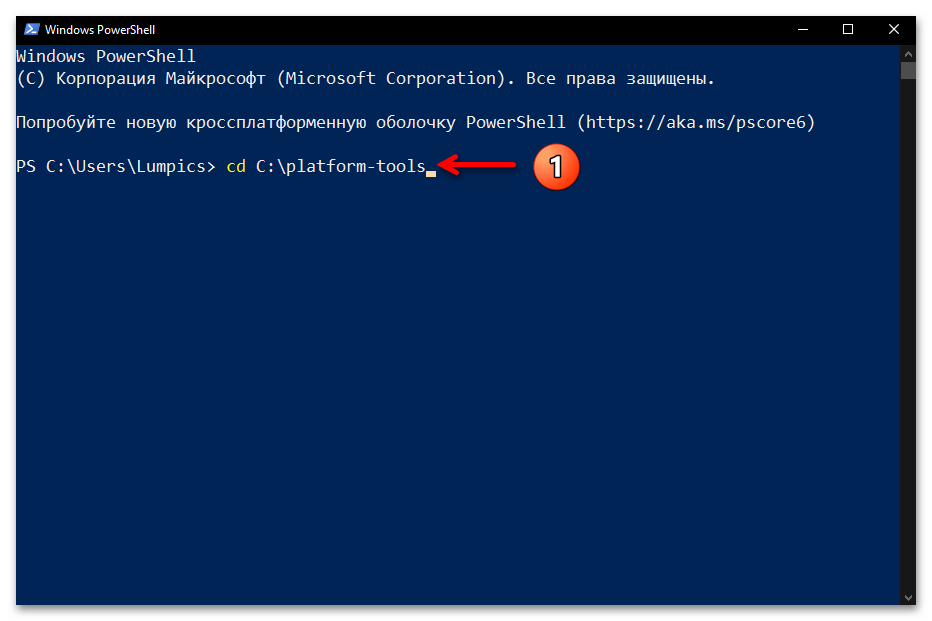

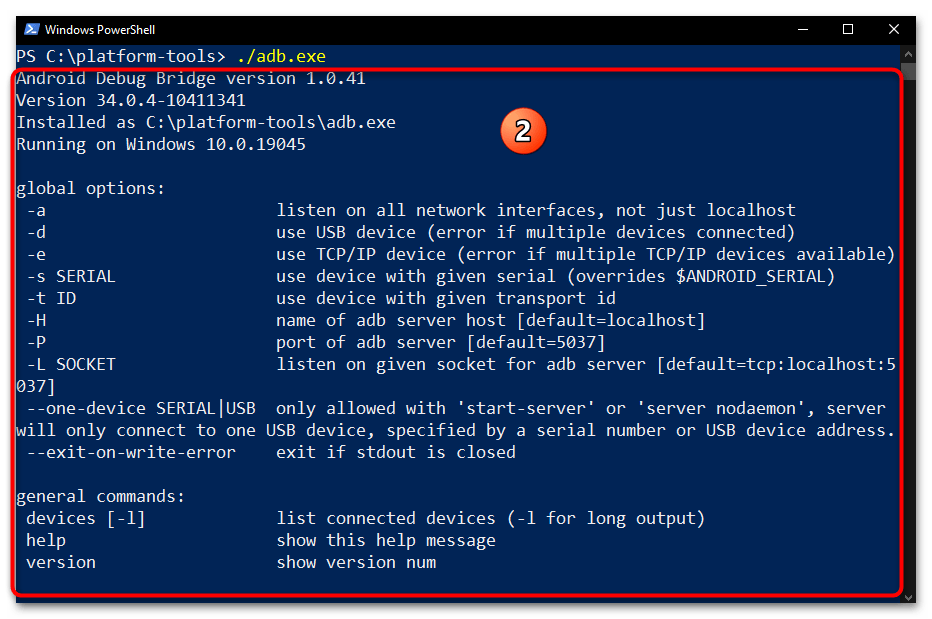
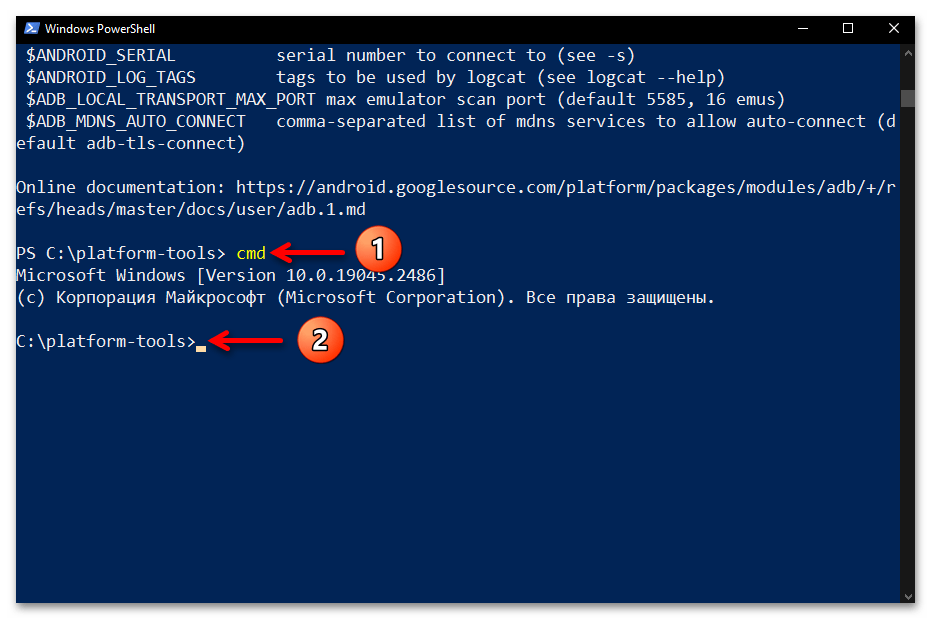
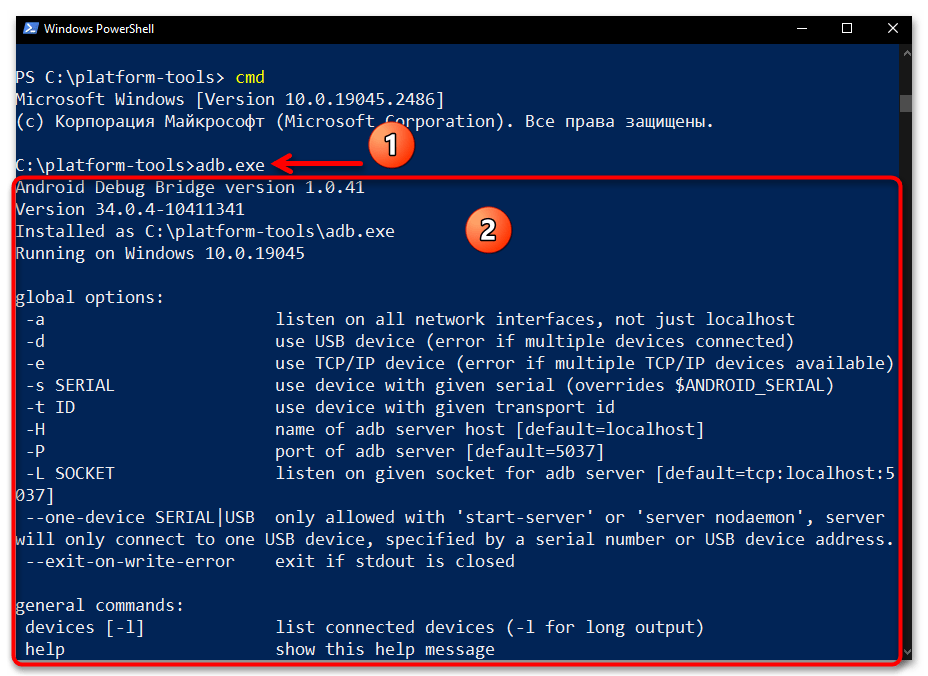
Вариант 2: Расширенное контекстное меню папки
Ещё один метод запуска ADB в консольной оболочке PowerShell реализуется средствами Проводника Windows 10, а его использование часто оказывается более удобным, нежели описанный выше подход.
- Перейдите в папку с утилитой ADB через Проводник Win 10.
- Нажмите «Shift» на клавиатуре компьютера и, удерживая эту клавишу, щёлкните правой кнопкой манипулятора по свободному от элементов (значков файлов) месту в демонстрирующей содержимое каталога «platform-tools» области окна Проводника.
- По результату вышеописанной манипуляции откроется расширенное контекстное меню папки (после этого можно прекратить воздействие на кнопку «Shift» клавиатуры). В меню выберите пункт «Открыть окно Power Shell здесь».
- Итогом манипуляций станет запуск приложения Windows Power Shell c уже открытым в нём каталогом «platform-tools». На этом наша задача считается решённой, приступайте к вводу и отправке на выполнение команд Android Debug Bridge.

(Принцип здесь тот же, что и при рассмотренном выше варианте запуска утилиты: либо предварительно запустите команду
cmd, а затем отправляйте ADB-команды в их «стандартном» виде; либо подставляйте префикс./перед каждым указанием).
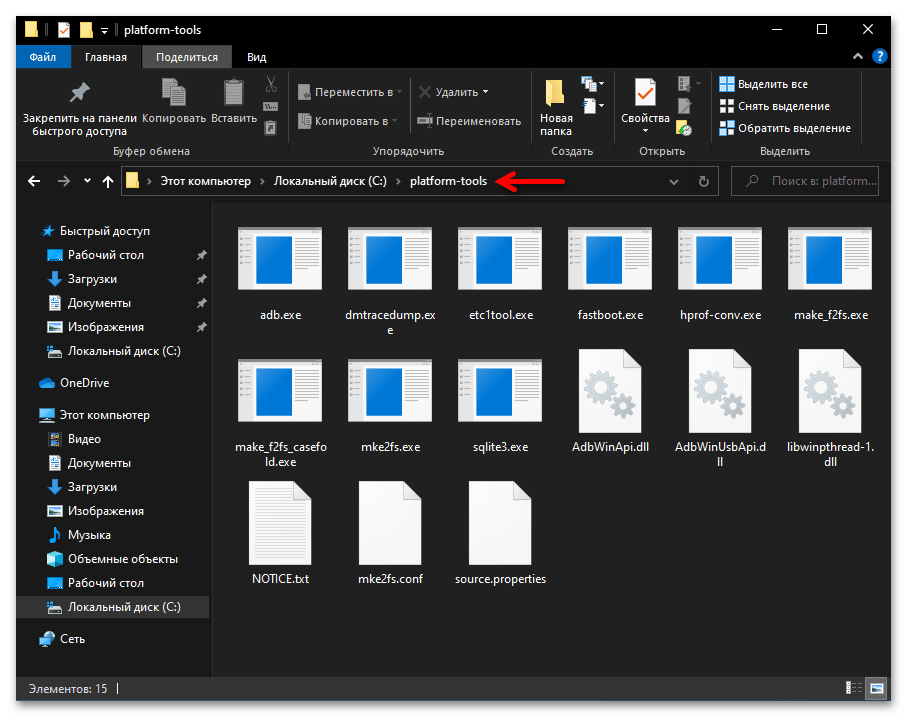
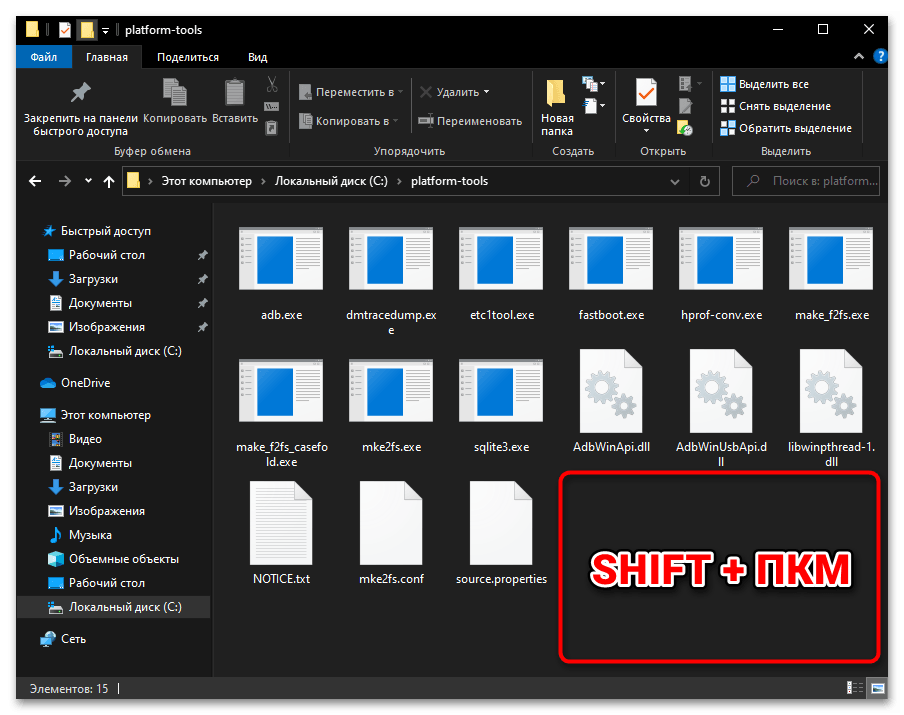
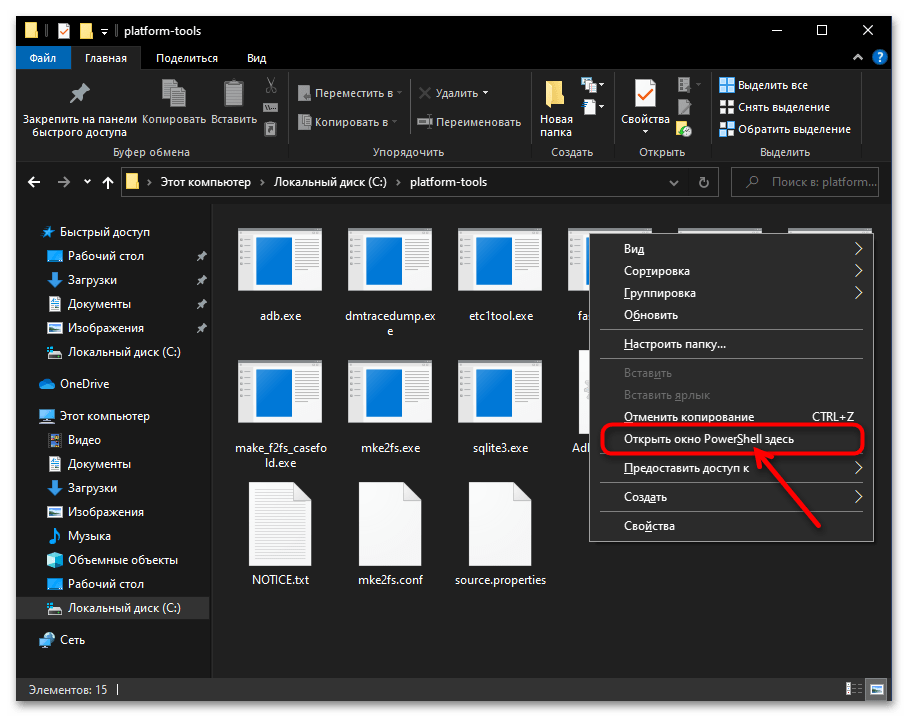

Дополнительно. Подключение Android-устройства к ADB на ПК
Чтобы скачивание, развёртывание и запуск ADB в среде Windows 10 позволили достичь конечных целей своего осуществления, то есть вы получили возможность производить вмешательство в работу системного ПО управляемого ОС Android мобильного девайса с компьютера, чрезвычайно важно правильно подключить смартфон или планшет к консольной утилите. Полный алгоритм выполнения данной операции изложен ниже.
Скачать универсальные драйверы от Google для работы с Android-девайсами через ADB
- Прежде чем приступать к выполнению вмешательства в работу системного ПО смартфона или планшета под управлением ОС Android с компьютера через ADB, на мобильном устройстве необходимо активировать особый режим функционирования – «Отладка через USB».

Сделайте это в первую очередь, а подробные инструкции по решению данного вопроса, если они необходимы, вы обнаружите в статьях по следующим ссылкам:
Подробнее:
Как включить «Отладку по USB» на Android-девайсе
Активация режима «Отладка по USB» на смартфонах Xiaomi (Mi, Redmi, POCO) - Подсоедините Андроид-девайс с активированной «Отладкой по ЮСБ» к USB-порту компьютера кабелем.
- Далее, например из контекстного меню кнопки «Пуск» на «Панели задач» операционки, откройте «Диспетчер устройств» Windows 10.
- Убедитесь, что мобильное устройство определилось операционной системой правильно и для него загружен необходимый драйвер. В таком варианте «Диспетчер устройств» отображает категорию «Android Phone», и в ней — запись «Android Composite ADB Interface» (последняя не должна сопровождаться какими-либо отметками, типа восклицательного знака на жёлтом фоне).

Если с определением Android-девайса в «Диспетчере устройств» Windows 10 наблюдаются какие-либо проблемы, чаще всего их следует решать путём установки/переустановки ADB-драйвера.
Читайте также: Инсталляция драйверов для работы с Android-девайсами с ПК
Опять же, в большинстве случаев, самым правильным выбором драйвера для обеспечения сопряжения ПК и Андроид-устройства через АДБ будет универсальный компонент, доступный для скачивания на интернет-ресурсе «Android Developers»

(ссылка доступна перед настоящей инструкцией).
- Запустите утилиту ADB любым из предложенных выше в этом материале способом.

Напишите и отправьте на выполнение консолью Windows 10 следующую команду:
аdb devices - Если сопряжение ПК и мобильного устройства через Android Debug Bridge осуществляется впервые, «Командная строка»/«PowerShell» в ответ на указание из предыдущего пункта инструкции выдаст следующее:
List of devices attached
ID_Android-устройства unauthorized
В таком случае, возьмите (не отсоединяя от компьютера) смартфон или планшет, разблокируйте его. Поставьте отметку «Всегда разрешать отладку с этого компьютера» в отображаемом на экране Android-девайса окне «Отладка по USB», а после этого коснитесь кнопки «Разрешить».
Далее перейдите к окну консоли с запущенной утилитой ADB на компьютере, повторите запуск команды
аdb devices. - Получив в «Командной строке» или «PowerShell» ответ в виде строчки
ID_Android-устройства device, вы можете переходить к непосредственному решению возлагаемых на ADB задач, — смартфон/планшет теперь подключён к утилите правильно и готов к выполнению её (а по сути – ваших) указаний.
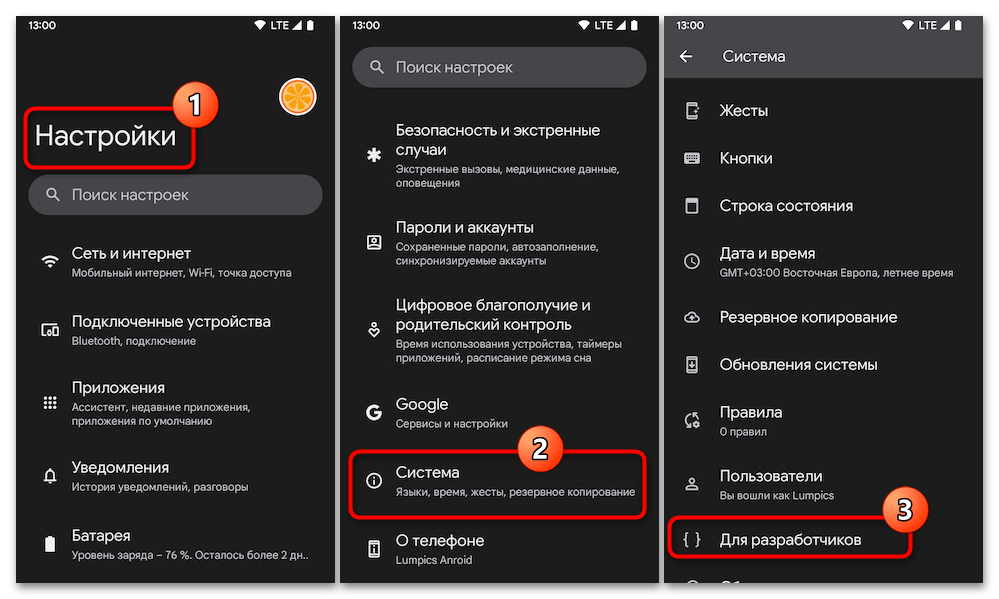
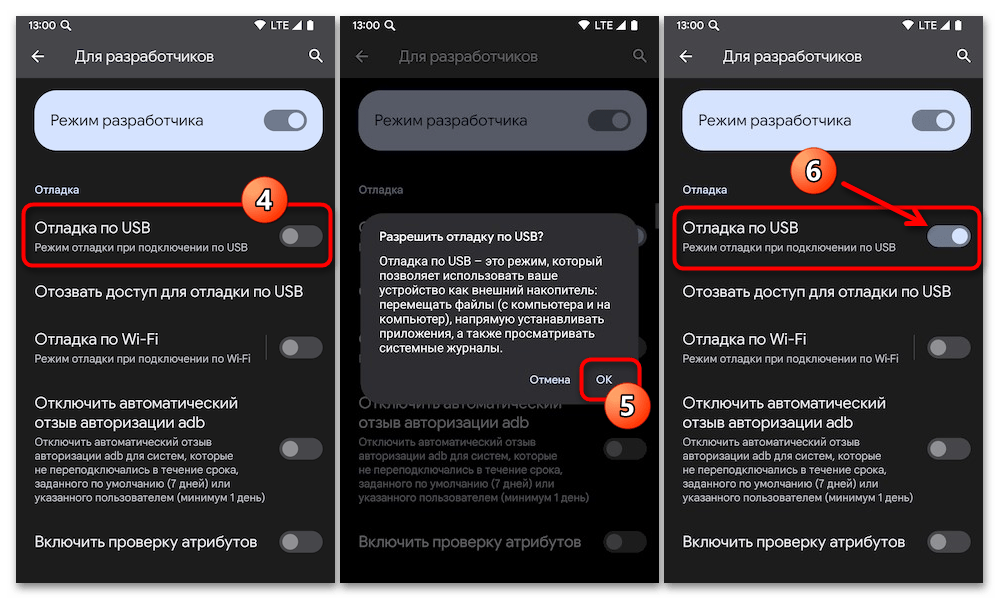
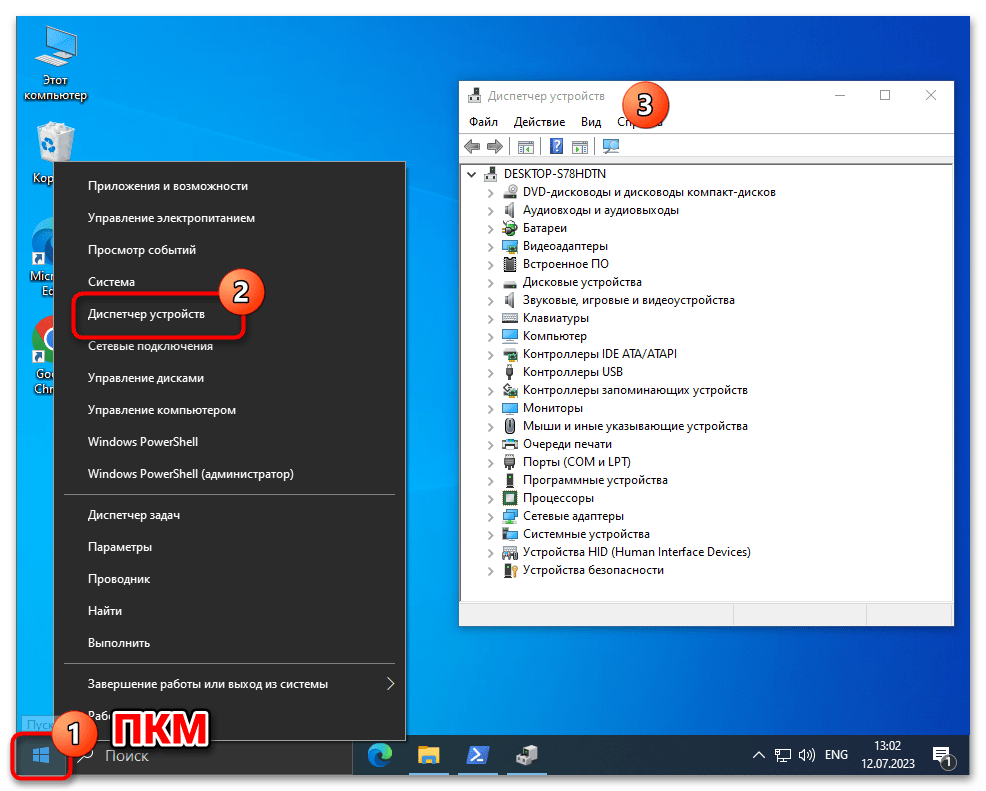
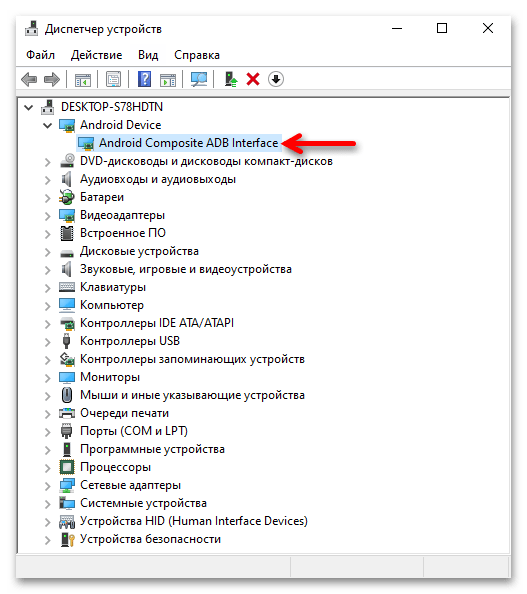
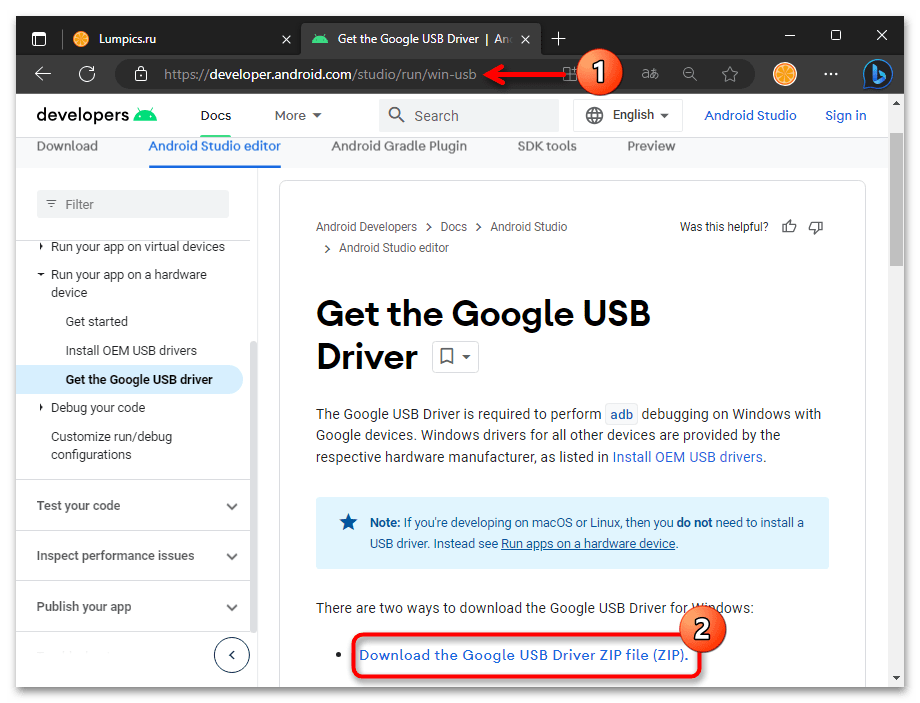
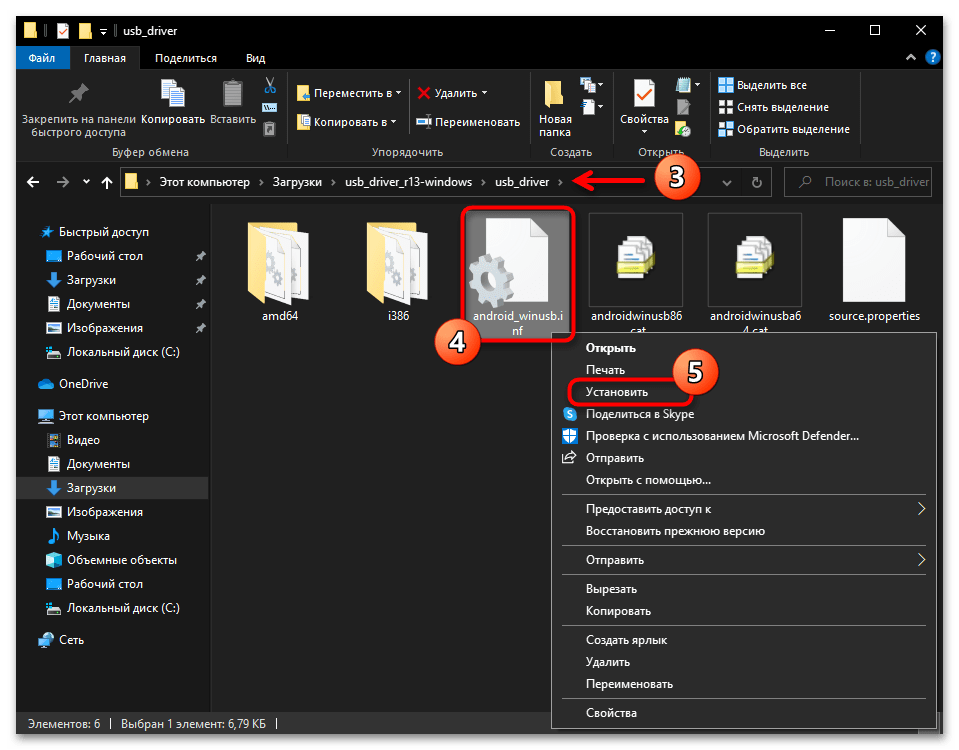
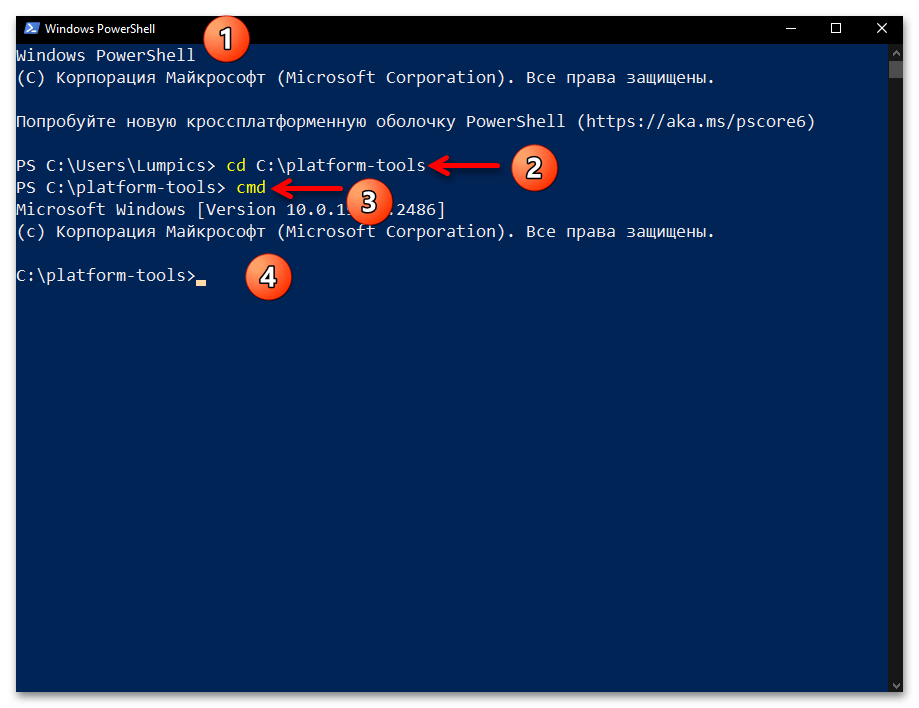
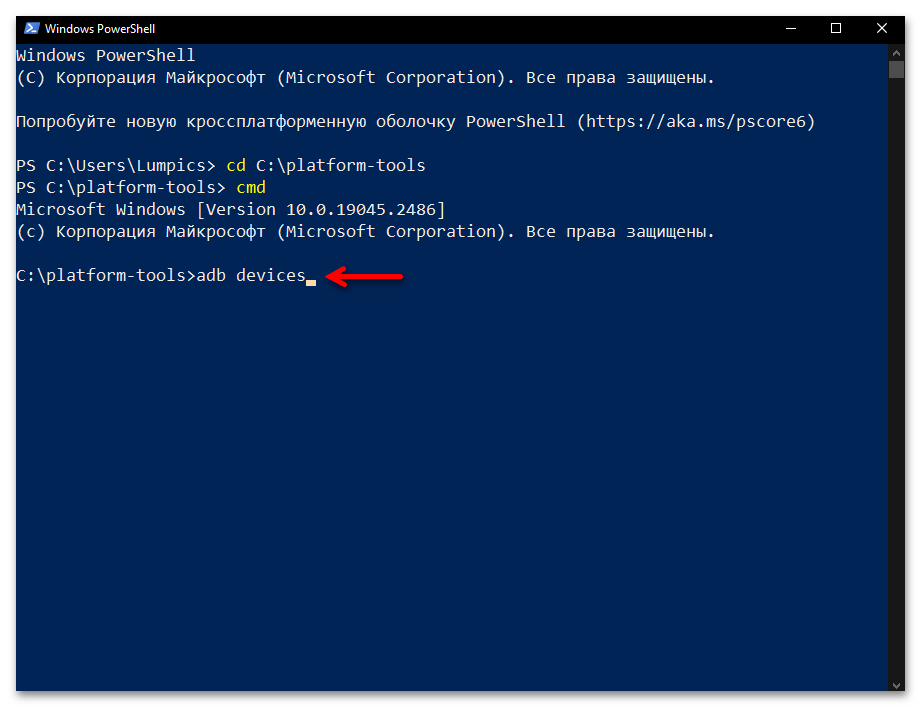
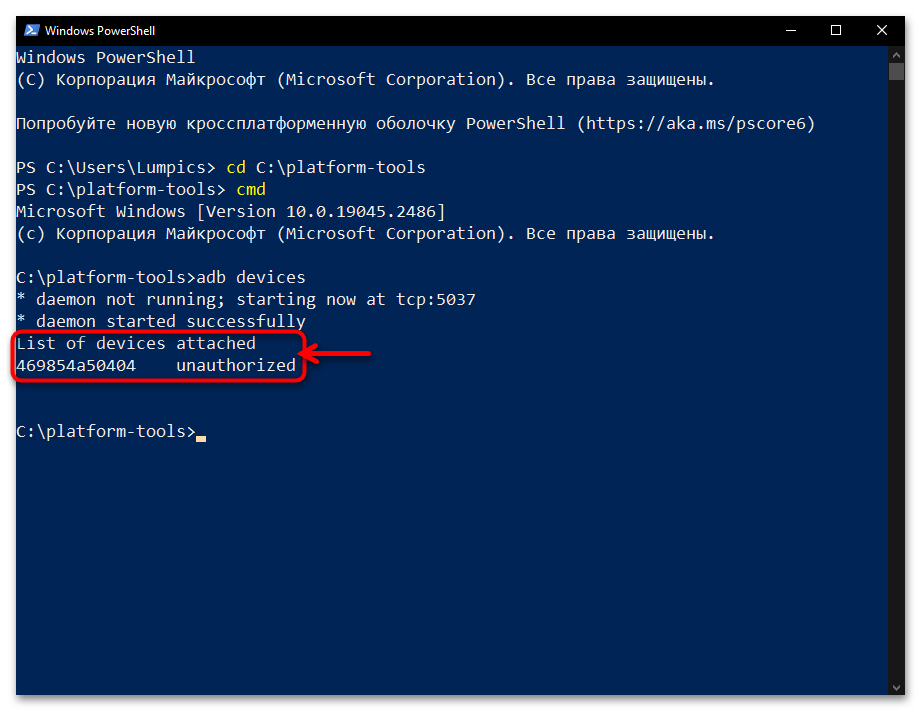
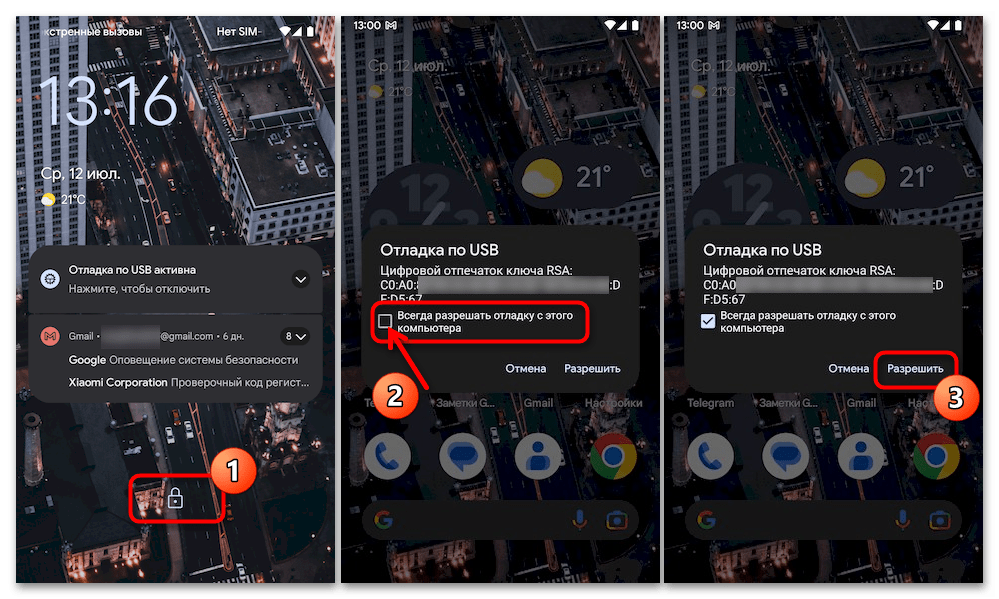
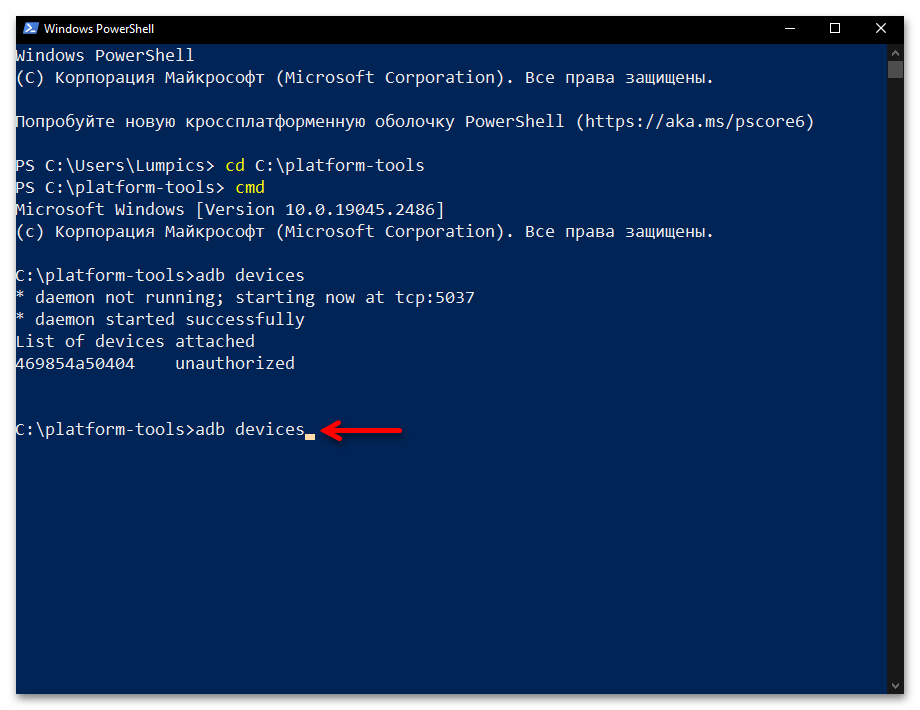
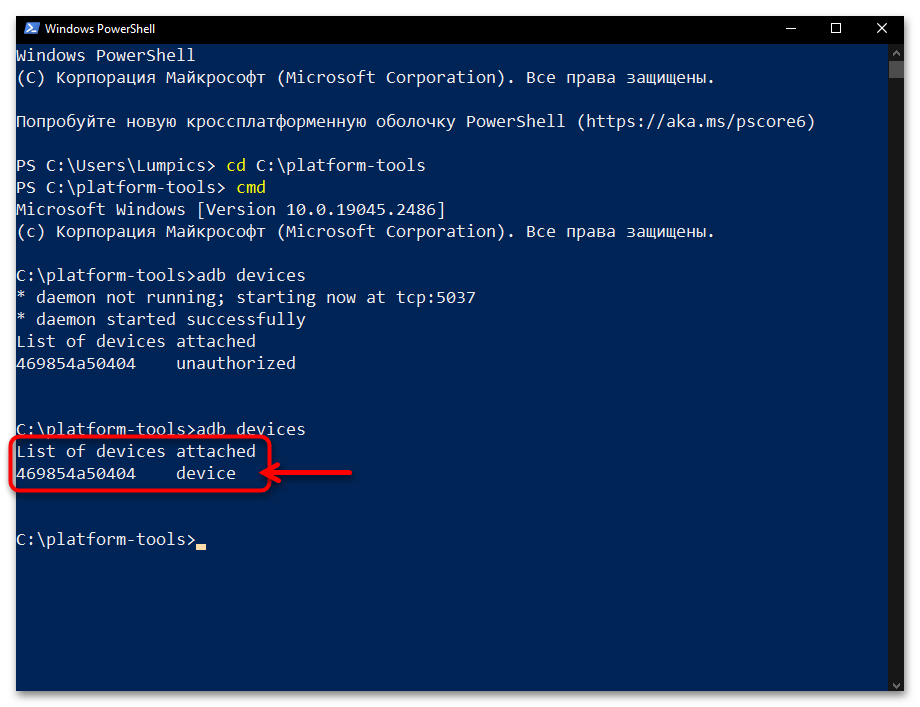
Наша группа в TelegramПолезные советы и помощь
Tutorial to know, how to install ADB on windows 10,8 or 7 including command line to install the ADB on Linux.
The process to Install ADB on Windows 10, 7, or 8.Using without modifying the “Environmental Variables”Install ADB on Linux command line for Linux Mint / Ubuntu or other Linux distros.Enabling Android Developer Options and USB Debugging
It is 2018, and almost everybody has access to a smartphone. Android devices are having a maximum market share, for its presence on almost all the smartphones, which are present in the people’s pockets. Though most tasks can be done with the help of the small pocket-sized computers, a lot of complex tasks can also be easily done, with the help of the ADB-android, or Android Debug Bridge.
ADB is a tool, which can help your Android device, communicate with your computer, to do a number of tasks on your device, directly from the command line, with the help of some simple arguments. The possibility of ADB is almost unlimited, and Google is pushing its boundaries, by adding a number of useful commands to the ADB, to satisfy the need of the power users, who want to use their Android smartphone like a pro.
From copying files to from your Android device to installing and uninstalling apps on your smartphone, ADB allows you to do almost everything with some not so difficult commands. I will also give some great commands to use with ADB, lest you need them. To get a complete list of commands, you can easily search it on the internet. If you want a separate article dedicated to just ADB commands, give your opinion, in the comment section down below.
Without further delay, let’s move on to the ways of installing ADB on Windows and Linux, and I hope, it will surely fulfill the appetite of all the users out there.
Remeber the process of ADB installation on Windows 10, Windows 8 and Windows 7 is same…

Download the ADB installer package from here.
Unzip the files to some location, and copy the contents of the zip file in a new folder named “adb-fastboot” to your home directory, which is “Sarbasish” in my case.
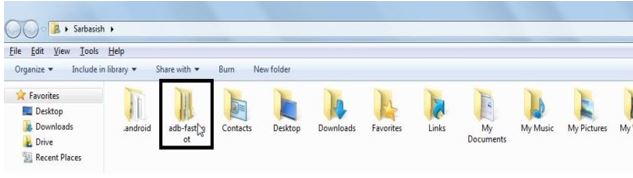
The folder “adb-fastboot” will contain the folder named “platform-tools”, and that will contain the important ADB commands.
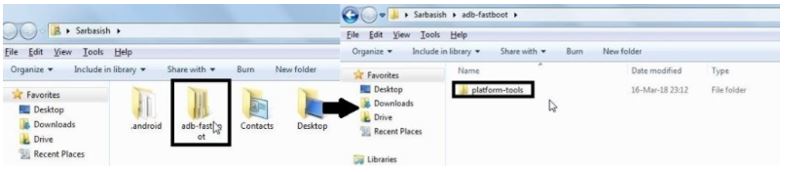
Now open “Environmental Variables”. It can be accessible by going to the Control Panel > System > Change Settings (on the right side).
On Windows 10, just click on “Start”, type “cpl”, and hit enter, to open the Control Panel.

Go to “Advanced”, and then “Environmental Variables”.
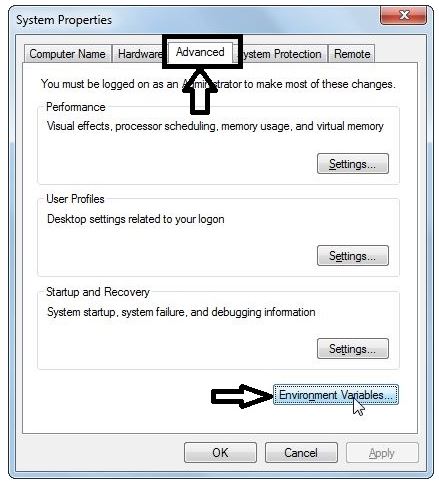
In the “System Variables” section, find out “Path” variable, and append “;%USERPROFILE%\adb-fastboot\platform-tools” to the end, as shown below. Don’t forget to put the “;” before you type the rest, as it can lead to numerous problems in future.
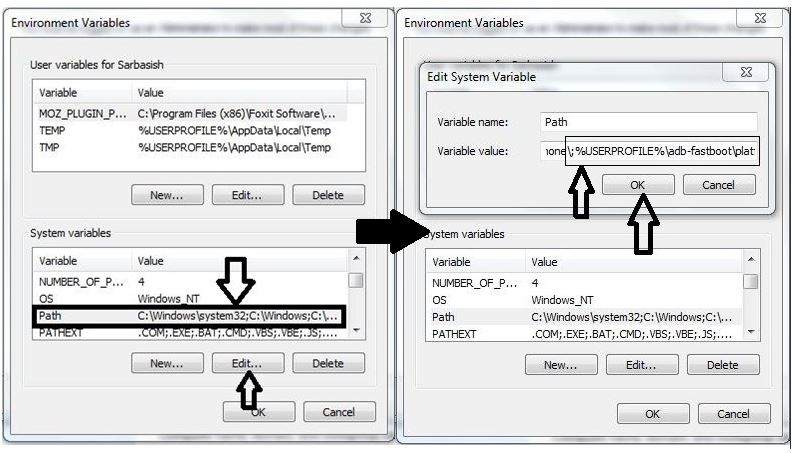
In order to ensure, everything is working perfectly, just open your command prompt, and type “adb”. It is installed correctly if you get the screen shown down below.
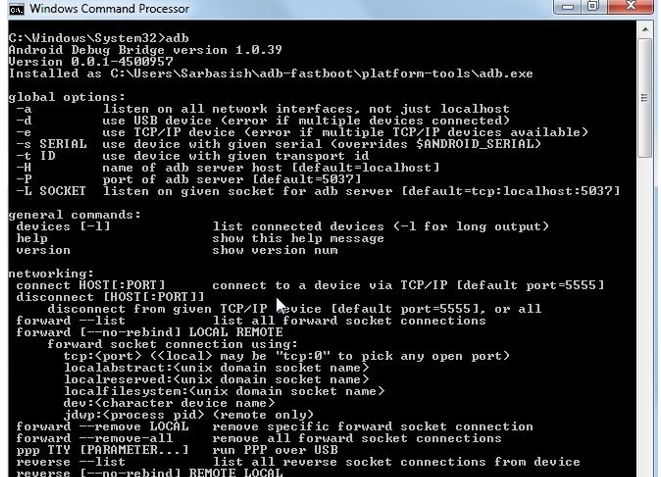
Using without modifying the “Environmental Variables”
If you do not want to change anything in the “Environmental Variables”, you can use the ADB commands in portable mode.
Just keep the “platform-tools” directory on any place on your hard drive, or flash drive to access the commands, by using command prompt from the path, where the folder/directory is stored.
The problem is that, in case of long paths, you will have to type the whole paths, as your working directory should not be changed, else the ADB commands will not run on your system.
Install ADB on Linux command line for Linux Mint / Ubuntu or other Linux distros.
Installation of ADB on Linux system is just a slice of pie. I prefer the Linux terminal, instead of the GUI, as it offers more features.
Just type “sudo apt install adb”, by opening a Terminal, on your Linux.
You will be asked to enter the user password. Type the password, and hit the enter key. Don’t worry, as the password will not appear on the screen. It is a security feature on Linux Terminal. You will get a screen something like this.
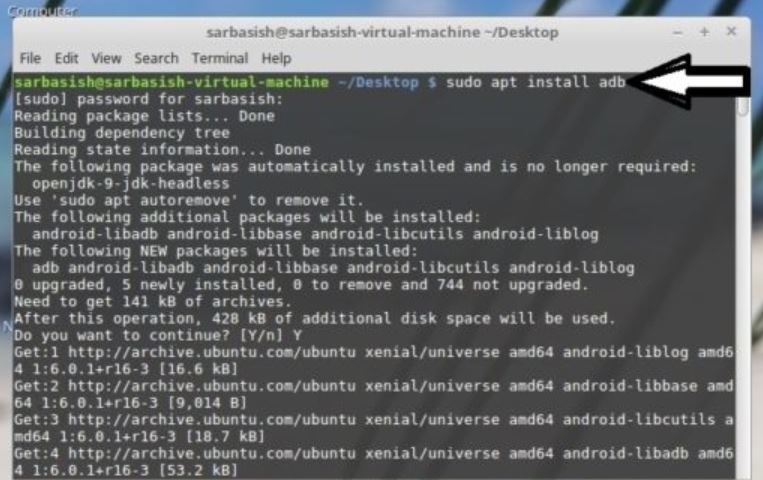
Now, you will be asked for a permission at the middle of the operation. Just press “Y”, and hit the enter key again.
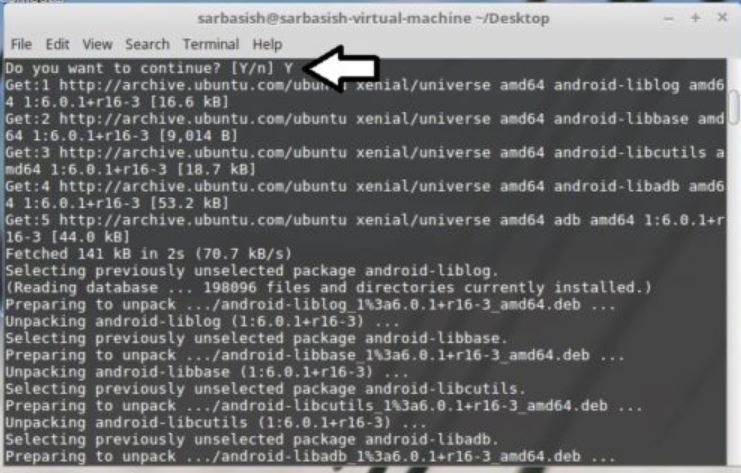
You are done with the installation of ADB on Linux, after a couple of seconds.
To ensure everything is installed correctly, type “adb”, and hit the enter key. If a screen like this appears, ADB is installed properly, and you are good to go.
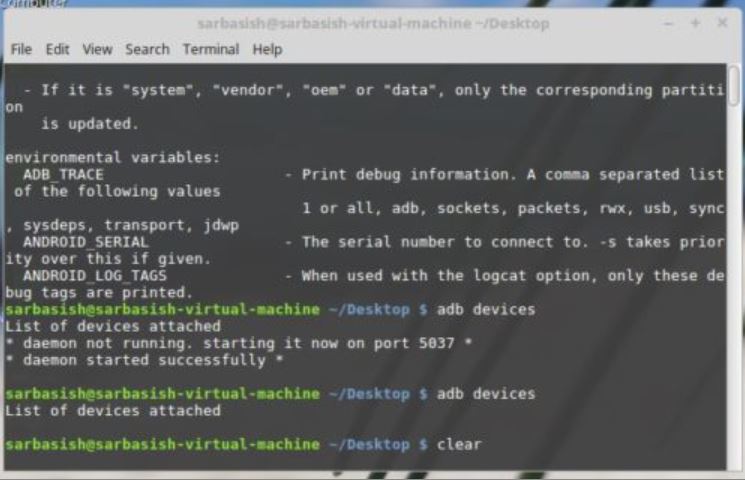
You are done with the tasks to install ADB on your computer. Now you can do a number of expert tasks on your mobile, from your computer, just by typing some commands. Now, some settings need to be changed on your Android device, so that it becomes ready to accept ADB commands. Pick up your device, and follow the steps given here.
Enabling Android Developer Options and USB Debugging
Step 1: It is the time to enable “Developer Options” on your smartphone, it is the time to enable it first.
Step 2: Just go to Device Settings>About Device. Now tap on the “Build Number” 7 times, and you will get the message “You are now a developer!”
Step 3: Now you can access “Developer Options” from your device settings.

Step 4: Open Developer options, and find out the option saying “USB debugging” Turn it on. It actually says the Android system to grant commands from the ADB. A warning message will come, for the purpose of formality. Just tap on “OK”.
You are done.
To test, whether your device is working properly, with ADB, just get hands on your USB cable, and use it to connect your computer to your smartphone.
You may get the following message, whether to allow USB debugging, on the connected computer. Just tap on OK, and if you want to connect your Android device regularly to that computer, tap on the checkbox saying “Always allow from this computer”, before tapping the “OK”.
Open Command Prompt on Windows or Terminal on Linux, and type “adb devices”. Don’t call me a poor guy for having a single device. The devices will be listed in a way shown here.
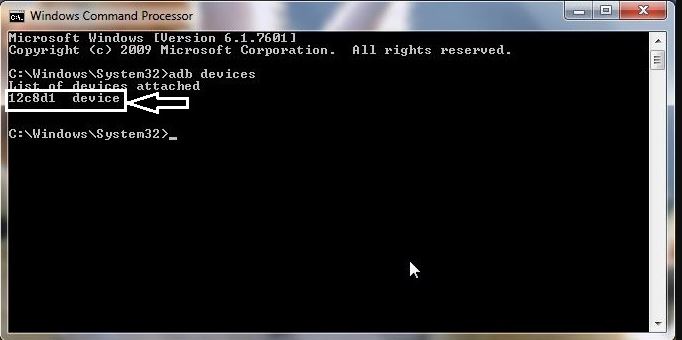
In case, you cannot find your device, on the list, you might have to download the ADB drivers for your Android device, from the OEM’s website. Most smartphones even come with the ADB drivers for Windows, but not all.
Some useful ADB commands
adb devices
List down all the all the Android devices, connected to your computer.
adb install <package_name.apk>
It will install the desired APK file on your Android device. Enter the command, without the brackets.
Example: adb install 1.apk
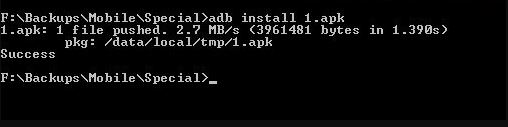
adb uninstall <package_name>
This is not as easy as the “install” command, as you will have to specify the package name, instead of the apk name. In most cases, Android packages come with names like com.developername.appname.
Thus, it is a little tricky. Though, you can always get the package name of a particular app, by just Googling it.
adb push <local_URL> <remote_URL>
Entering the command without the brackets will copy files from your computer to your Android device. Replace local_URL with the URL of the file on your computer, and remote_URL, with the URL, where you want to paste it.
adb pull <remote_URL> <local_URL>
Just does the opposite of “push”. But not specifying the local_url, will copy the files to the current directory.
adb shell
It opens a Linux shell, which is actually running on your Android device. You will find similarity, of this command if you have used SSH clients like PuTTY or KiTTY in the past.
adb reboot
Reboots your Android device
adb reboot-bootloader
Reboots your Android device to bootloader mode. (Not recommended for novice users)
adb reboot recovery
Reboots your device to recovery mode. (Not recommended for novice users)
Hope this small information on how to install ADB on Windows 10,8,7 or Linux via command line helped you a lot. If you are facing any issues, don’t hesitate to comment it down below.
ALSO SEE:
- How to Remotely Control Android Smartphone From PC Using Airdroid
- Install Wine on Ubuntu or Linux Mint using Terminal To Run Window Apps
- How to download and install Mobdro on your Android device securely
- 10 Best Free Terminal Emulator APP for Android
- 6 Best Linux Penetration Testing Distributions for Ethical hacking
ADB, or Android Debug Bridge, lets you control your Android smartphone or tablet via a command line interface. It’s supported on all desktop operating systems, including Windows, macOS, Linux, and even Chrome OS. While its primary purpose is to help developers debug their apps, ADB has other uses too. You can use the Android Debug Bridge to sideload APK files, delete system apps, install software updates, factory reset your device, unlock its bootloader, root your phone, and more. Find out how to use it below.
QUICK ANSWER
To use ADB, you’ll first need to enable USB Debugging on your Android device and download the command line utility on a computer. Keep reading for a step-by-step guide.
JUMP TO KEY SECTIONS
- How to set up ADB on a computer
- How to enable USB Debugging on Android
- How to use ADB: Connection, commands, and more
How to set up ADB on a computer: Windows, macOS, and Linux
There are two ways to set up the ADB command line on your computer. The easiest way is to install Android Studio, which is primarily a development environment for Android apps. But if you’re not an app developer, it’s a large unnecessary download since all you need is the tiny ADB utility. Luckily, you can also download that portion separately by following these steps:
Head to the Android SDK Platform Tools page. Click on the Platform-tools download link for your operating system. You should now have a zip archive in your Downloads folder. Unzip the archive into a new folder.

Calvin Wankhede / Android Authority
Launch a command line tool. On Windows, open the Search menu and launch Command Prompt. If you’re on macOS, open Terminal instead.

Calvin Wankhede / Android Authority
Navigate to the folder from earlier inside the command line window. A sample command to do so on Windows is C:\Users\<user>\Downloads\platform-tools. Use your operating system’s file browser to find the exact path.

Calvin Wankhede / Android Authority
At this point, we’re nearly ready to execute ADB commands. However, you still need to allow your Android device to accept an ADB connection from your computer.
How to enable USB Debugging on Android for ADB connections
With your computer now prepared and ready to go, the hard part is out of the way. On your Android device, follow these steps:
Head to the Settings app on your Android device, scroll to the bottom, enter System, and tap About Phone. Next, find the Build Number entry and tap it repeatedly. After seven taps, you should see a notification stating that you’re now a developer.
Go back to the main Settings screen, enter the newly unlocked Developer options menu, and enable USB debugging. Your device will warn you against enabling this feature, tap OK to continue.
And that’s it — you’ve now prepared your Android device to accept incoming ADB connections. Simply connect it to your computer via a USB cable and follow the instructions in the next section.
How to use ADB: Connection, commands, and more
With everything set up, return to the command line window on your computer and initiate a connection with the adb devices command. This will bring up a confirmation prompt on your Android device, asking if you trust the computer. Tap Allow to proceed and optionally, check the “Always allow from this computer” box.

C. Scott Brown / Android Authority
Once authorized, you should be able to use the adb devices command without any errors. You should see one connected device show up here. If the output is blank instead, check the connection between your computer and Android device and try a different cable. Alternatively, you might need to download and install USB drivers for your device. You can typically find this on your device manufacturer’s website, like this one for Samsung.

As mentioned previously, there’s plenty you can do with ADB commands. Here are a few examples to try out:
adb install app.apk— This will install an apk file on your device. Keep in mind that you’ll have to copy the apk file to the platform-tools folder or specify a path in the command instead.adb uninstall x— Replace the x in this command with a package name of your choice. This is a popular command used to remove manufacturer apps and other bloatware that often can’t be uninstalled from within the Android settings menu.adb logcat— This command generates a device log file that allows you to find error messages and debug information.adb push <local> <remote> or adb pull <remote> <local>— Copy files to or from your Android device. You’ll have to specify the source and destination paths of the file at the end of either command.adb reboot— Reboot your Android device. You can also specifyadb reboot fastbootoradb reboot recoveryto enter the bootloader and recovery menus instead
For even more commands, simply enter the adb help command. Don’t forget that you can use adb on almost any device running Android, including smart TVs and Chromebooks. I use adb on the latter to sideload apps that aren’t otherwise available on the Play Store using the above commands.
FAQs
ADB commands allow you to install apps, software updates, and control your Android smartphone from a computer.
Gaining access to ADB is often the first thing you’ll do to root an Android phone, but it’s only one of many steps. Before rooting, you will have to unlock your device’s bootloader. We recommend following a guide specific to your device.
The ADB sideload command allows you to manually install an OTA update or custom ROM on your device from a computer. This command lets you install software updates or a custom operating system without booting into Android.
The ADB pull command will save files to the platform-tools or adb folder if you haven’t specified a destination. If you want to specify where a file is saved, add a path on your computer to the end of the command like this example on Windows: adb pull /sdcard/pic.jpg %USERPROFILE%\Downloads\
ADB, or Android Debug Bridge, is a command-line tool that allows developers to find errors or other problems while testing an app or software update. The adb logcat command, for example, outputs a log file for debugging.