
Все способы:
- Способ 1: «Сетевые подключения»
- Способ 2: «Диспетчер устройств»
- Способ 3: «Командная строка»
- Способ 4: Консоль «PowerShell»
- Вопросы и ответы: 0
Способ 1: «Сетевые подключения»
Список как активных, так и неактивных сетевых адаптеров можно посмотреть в разделе настроек «Сетевые подключения». Там же их можно включить или отключить.
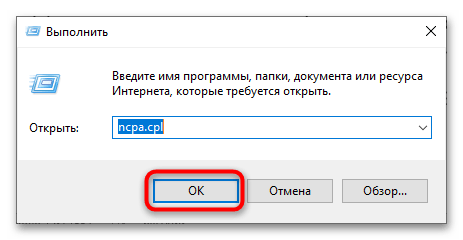
- Откройте оснастку «Сетевые подключения» командой
ncpa.cpl, выполнив ее в диалоговом окошке, вызванном нажатием клавиш Win + R. - Нажмите по отключенному сетевому устройству правой кнопкой мыши и выберите из контекстного меню пункт «Включить».
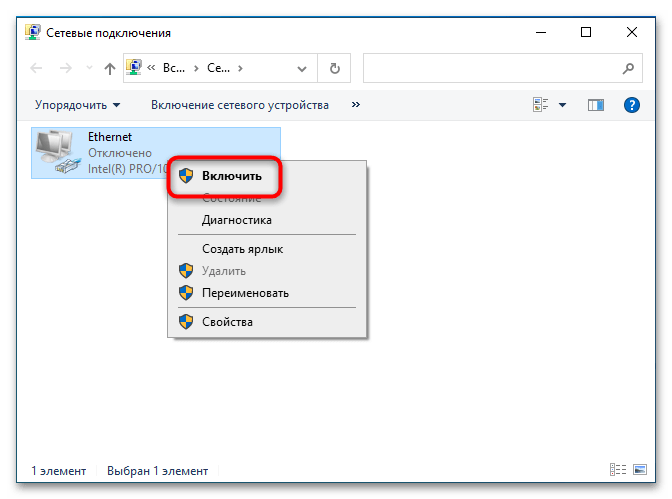
В результате устройство изменит свой статус на «Включено» и будет готово к использованию.
Способ 2: «Диспетчер устройств»
Включить нужный сетевой адаптер можно также из интерфейса «Диспетчера устройств».
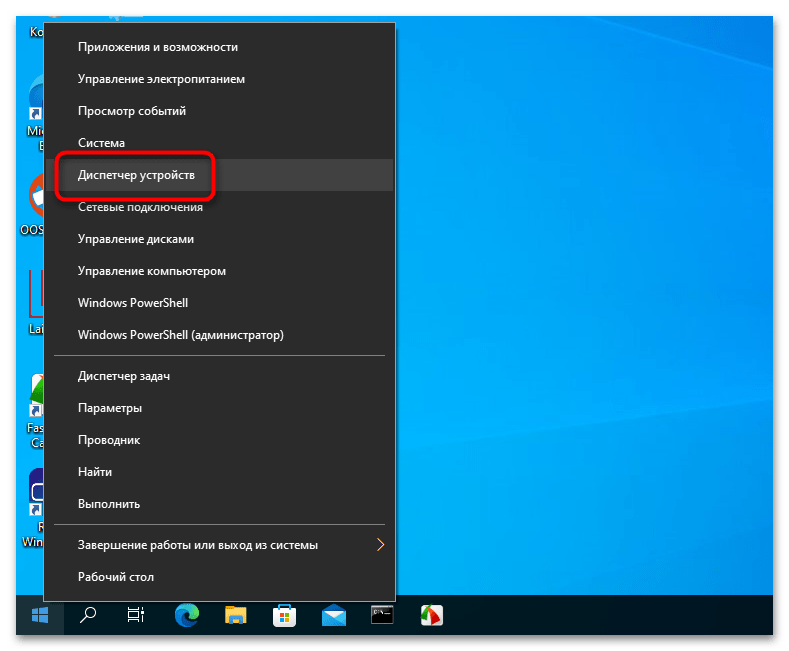
- Откройте «Диспетчер устройств» из контекстного меню кнопки «Пуск» либо командой
devmgmt.mscв диалоговом окошке «Выполнить» (Win + R). - Разверните раздел «Сетевые адаптеры» и найдите в списке отключенное устройство. Оно будет помечено значком в виде черной стрелки, направленной вниз. Нажмите по нему правой кнопкой мыши и выберите из меню опцию «Включить устройство».

В результате адаптер станет доступным для настройки и использования.
Способ 3: «Командная строка»
Имеющие навыки работы с «Командной строкой» пользователи могут включать и отключать сетевые адаптеры средствами консольных утилит «wmic» и «netsh».
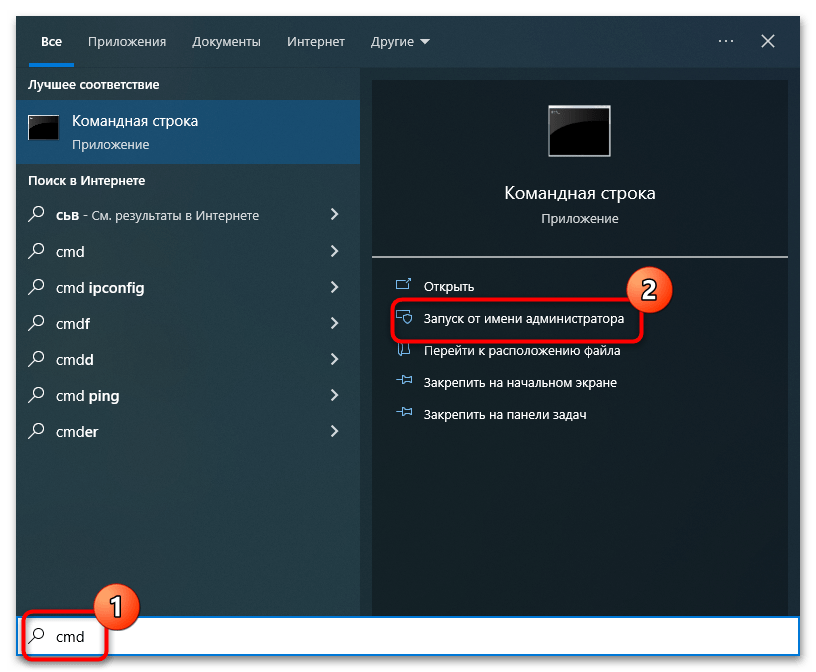
- Откройте «Командную строку» от имени администратора из поиска Windows либо другим известным способом.
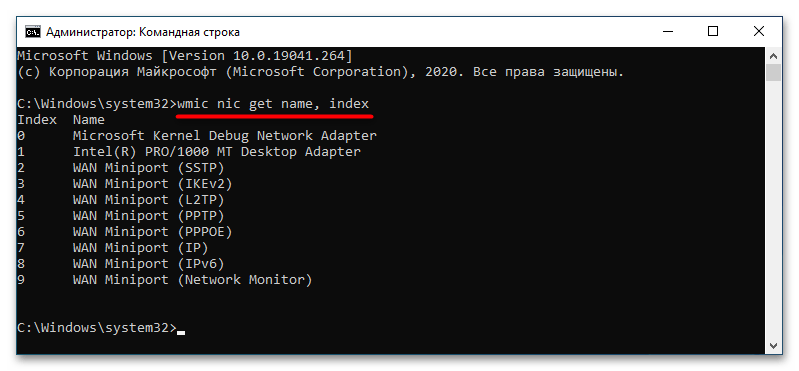
- Выполните команду
wmic nic get name, index, чтобы вывести список доступных сетевых адаптеров. Запомните индекс нужного устройства. - Включите адаптер, для чего выполните команду
wmic path win32_networkadapter where index=1 call enable, указав в качестве параметра index индекс (номер) нужного устройства.

Примерно по тому же алгоритму включается сетевой адаптер с помощью консольной утилиты «netsh».
- Запустите «Командную строку» от имени администратора.
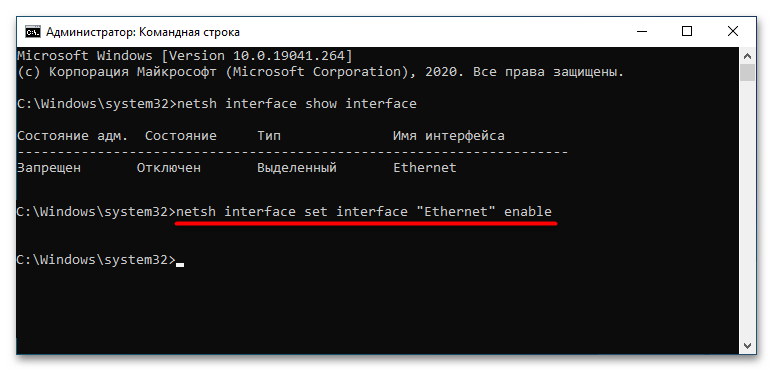
- Выполните команду вывода списка сетевых устройств
netsh interface show interface. Запомните значение «Имя интерфейса» сетевого адаптера, который необходимо включить. - Выполните команду
netsh interface set interface "Ethernet" enable, где Ethernet – имя сетевого адаптера.

И в том, и в другом случае настройки вступают в силу сразу же.
Способ 4: Консоль «PowerShell»
Включение и отключение сетевых адаптеров поддерживаются и консолью «PowerShell». Вводимые команды будут отличаться от тех, что продемонстрированы в предыдущем способе.
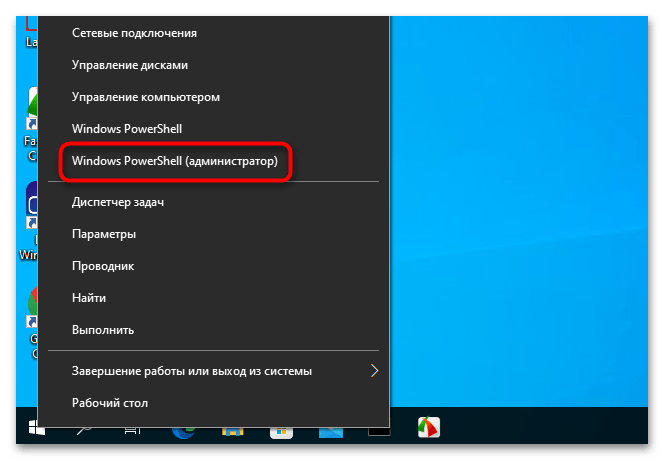
- Откройте «PowerShell» от имени администратора из контекстного меню кнопки «Пуск».
- Выполните команду
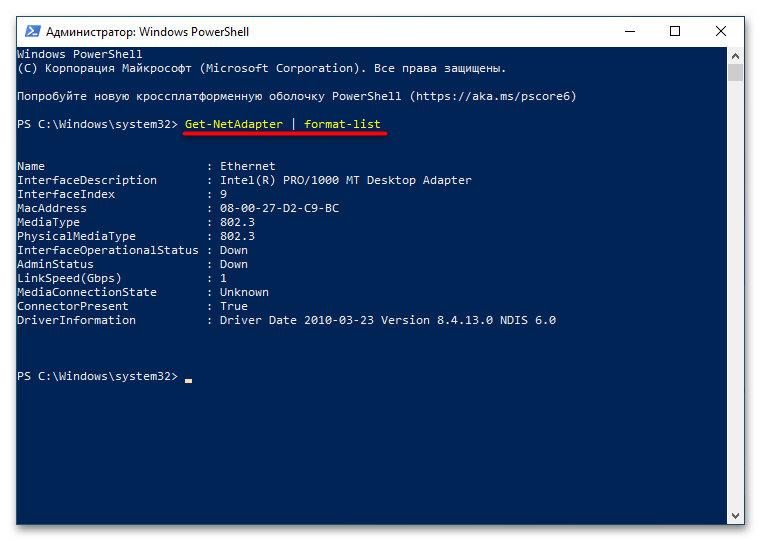
Get-NetAdapter | format-list, чтобы вывести список доступных сетевых адаптеров и запомните имя нужного (значение Name). - Включите устройство, для чего тут же в консоли выполните команду
Enable-NetAdapter -Name "Ethernet" -Confirm:$false, заменив Ethernet названием нужного адаптера.
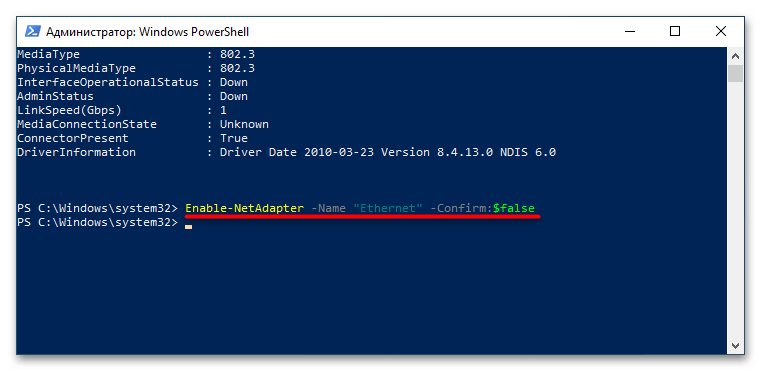
Результат будет аналогичным – сетевое устройство включится, после чего его можно будет использовать для подключения компьютера к интернету.
Наша группа в TelegramПолезные советы и помощь
Обновлено:
Опубликовано:
Графический интерфейс
Командная строка
CMD
Powershell
Графический интерфейс
В правом нижнем углу кликните правой кнопкой мыши по значку сети — выберите Центр управления сетями и общим доступом
В меню слева найдите и кликните по Изменение параметров адаптера
В открывшемся окне нажмите правой кнопкой мыши по значку того сетевого адаптера, который нужно включить / отключить. В контекстном меню будет возможность выбрать соответствующее действие. В данном примере включаем сеть с названием Ethernet
Командная строка
Рассмотрим варианты с использованием командных строк — классической cmd и Powershell.
CMD
Открываем командную строку от имени администратора. Вводим команду для показа всех сетевых интерфейсов, которые есть в системе:
netsh interface show interface
Результат будет, примерно, следующий:
Состояние адм. Состояние Тип Имя интерфейса
———————————————————————
Разрешен Подключен Выделенный Ethernet 2
Разрешен Подключен Выделенный Ethernet
* в данном примере в системе есть два интерфейса — Ethernet и Ethernet 2.
Теперь, чтобы отключить интерфейс, например, «Ethernet 2», вводим:
netsh interface set interface «Ethernet 2» disable
А для включения вводим:
netsh interface set interface «Ethernet 2» enable
Powershell
Открываем от имени администратора консоль Powershell и вводим команду для просмотра сетевых интерфейсов:
Get-NetAdapter | format-table Name, InterfaceDescription, Status
Теперь для отключения сетевого адаптера вводим:
Disable-NetAdapter -Name «Ethernet 2» -Confirm:$false
Для включения:
Enable-NetAdapter -Name «Ethernet 2» -Confirm:$false
Была ли полезна вам эта инструкция?
Да Нет
Subscribe By Email
Join 790 other subscribers
In this article, I’m going to show you how to fix disabled network adapter in Windows 10 Desktop or laptop. This is a really annoying error that most of the time happens on Windows 10 operating system. This error attempts on Windows 10 desktop. Though the ethernet line is connected to the CPU but again there is not any sign or icon of the network adapter. When you browse device manager. There as well you see miniature yellow triangle icon. This happens due to virus or hardware compatibility and the network adapter will be missed. You’ll not be able to see it on the network area connection as well.
Fix Disabled Network Adapter on Windows 10 Desktop
Although there are several ways to fix disabled network adapter or missing network adapter in Windows 10 but in this post, I will show solitary two ways. Both ways working perfectly. Especially the second method. To solve or Fix Windows 10 Network Adapters Disabled in Network Connections, follow the step by step guide down below.
How to Fix Disabled Network Adapter on Windows 10
Step #1. First Method
Use Network Reset to Reinstall Network Devices
Using network reset should help you to solve the network adapter problem. This can fix connection problems you might have after upgrading from a previous version of Windows to Windows 10, as well as fix problems where you can connect to the Internet, but not to shared network drives. It removes any network adapters you have installed and the settings for them. After your PC restarts, any network adapters are reinstalled, and the settings for them are set to the defaults.
#1. Click on the Start button, then select Settings.
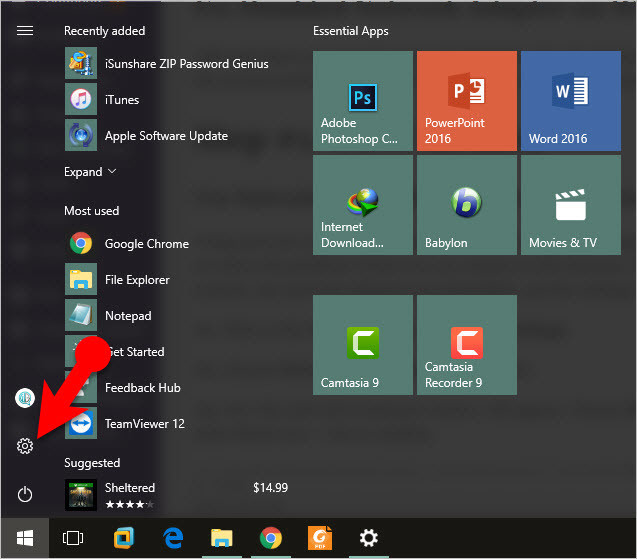
Windows 10 Settings
#2. Choose Network & Internet from the list.
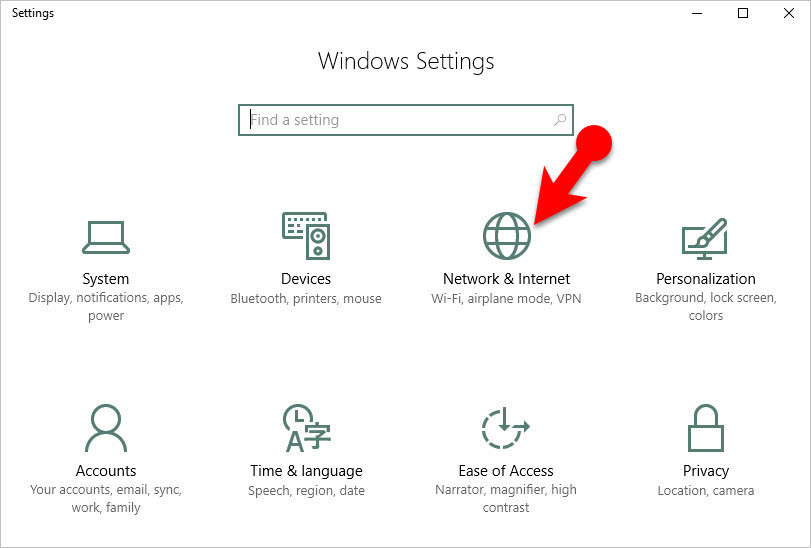
Choose Network & Internet
#3. Now the network & internet window will appear. Choose Status from the left-hand side. Navigate to the bottom of the window then click on Network reset.

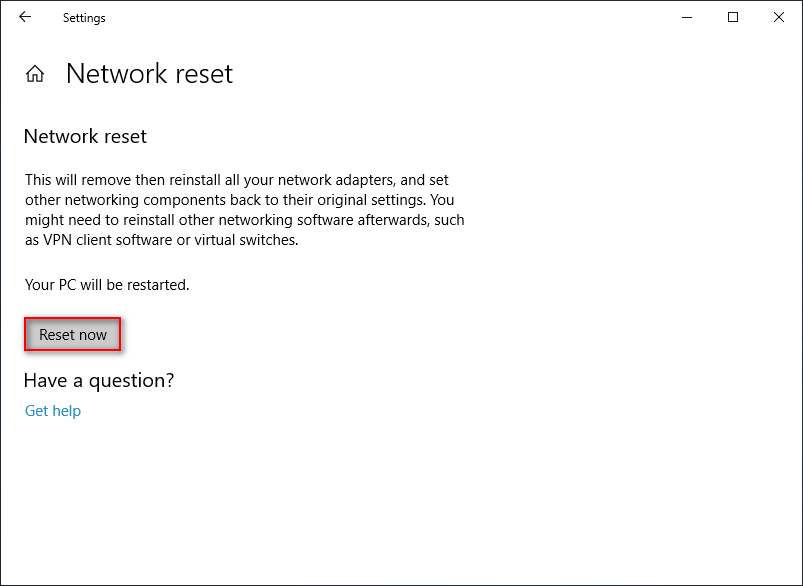
Reset Network
#4. On the Network reset screen, select Reset now and click Yes to confirm. Wait for your PC to restart and see if that fixes the problem.
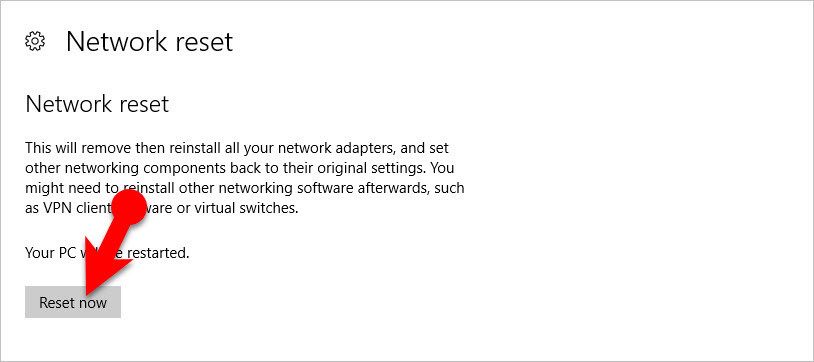
Network Reset
Notes:
After using network reset, you might need to reinstall and set up other networking software you might be using, such as VPN client software or virtual switches from Hyper‑V (if you’re using that or other network virtualization software).
Network reset might set each one of your known network connections to a public network mode. In a public network mode, your PC is not discoverable to other PCs and devices on the network, which can help make your PC more secure. However, if your PC is part of a homegroup or used for file or printer sharing, you’ll need to make your PC discoverable again. To do this, go to Settings>Network & Internet>Wi-Fi. On the Wi-Fi screen, select Manage known networks > the network connection you want to change > Properties, and then turn on the switch under Make this PC discoverable.
Step #2. Second Method
The second method is amazing and works 100% on many of the devices. This method is especially for Desktop users that get this error message. Apply the following procedure to fix network adapter connectivity issue.
First, you need EDIMAX WiFi card and that’s so cheap you can buy it from amazon or eBay. If you do not do online shopping just buy it from the computer accessories store. Anyway, if this error really molests you so buy this product then connect to your Desktop. You’ll get the WiFi signal and connect your computer to the internet.
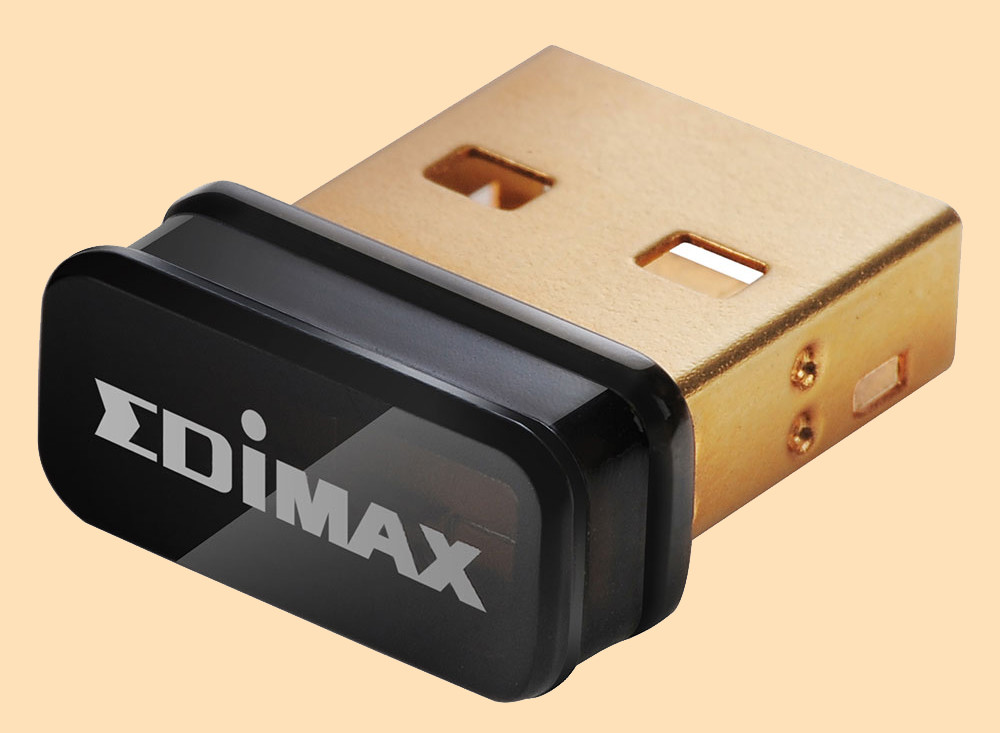
Enable Network Adapter with Edimax
Note: Keep in mind that you don’t need direct internet wire. Because the Adapter is missing and does not work properly. When you connect EDIMAX WiFi card, you will install another network adapter to your device so it means it works correctly. Now follow the step by step guide.
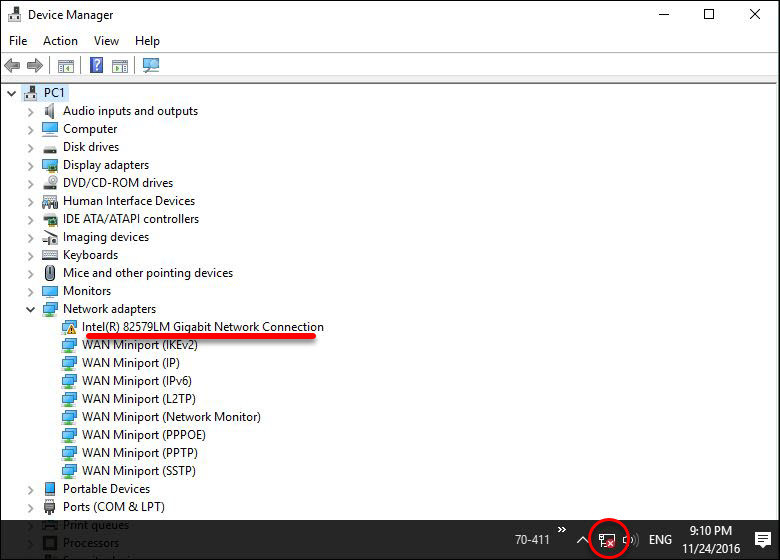
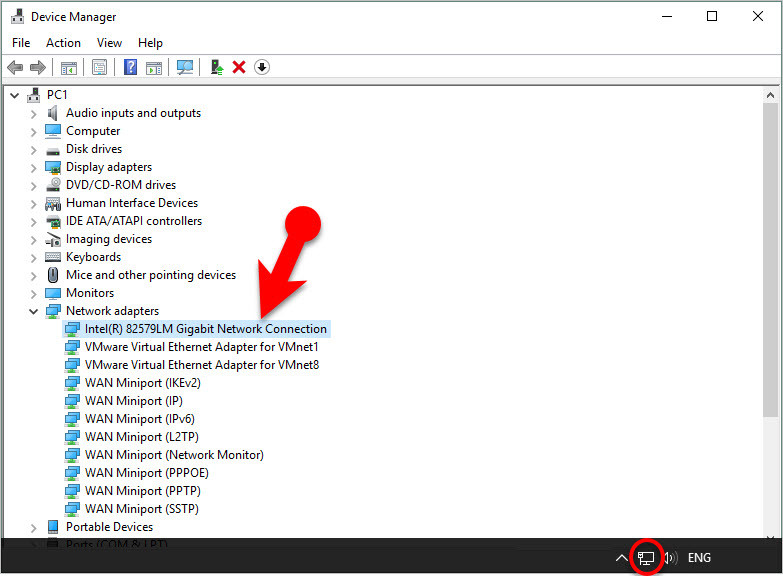
#1. Press Windows key+X and then choose Device Manager.
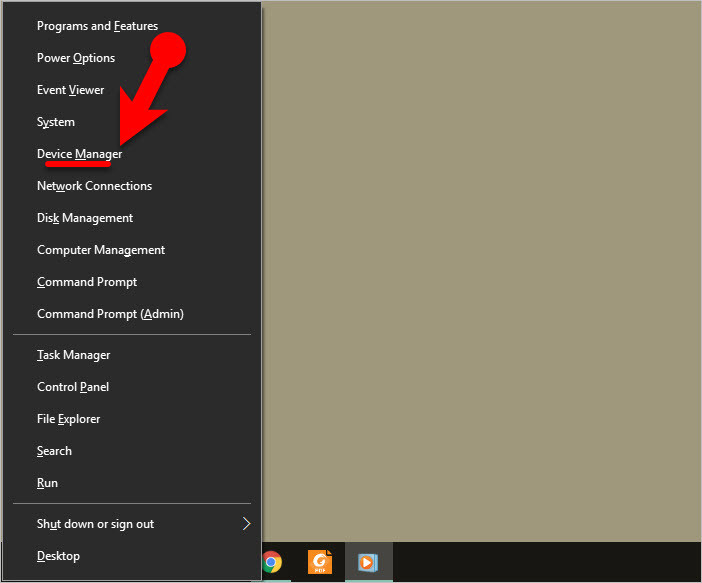
Choose Device Manager
#2. Once the device manager is opened then expand Network Adapter. Right-click on (Intel R 82579LM Gigabit Network Connection). Navigate to Driver tab then tap on Update Driver.
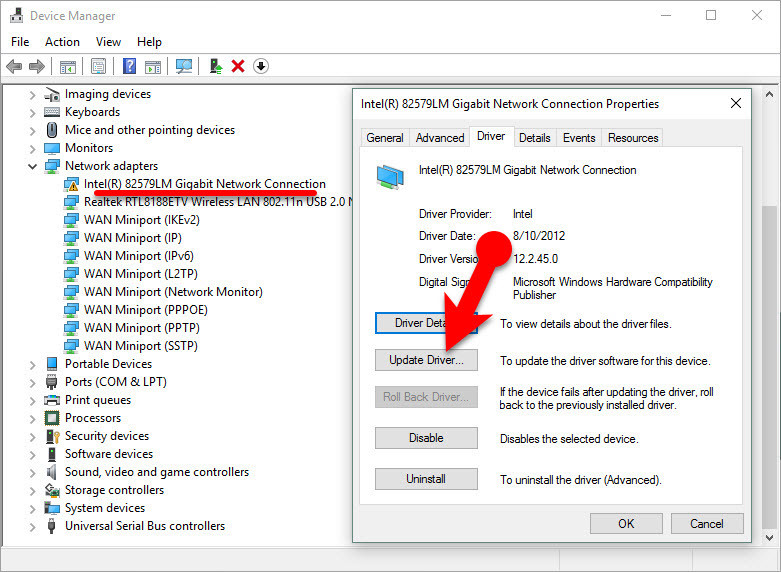
Network Adapter
#3. In the How do you want to search for driver software window? You have two options.
- Search automatically for updated driver software: When you choose the first option, the window will search your computer and the internet for the latest driver software for your device, unless you’ve disabled this feature in your device installation settings.
- Browse my computer for driver software: You can choose your own driver software from your computer manually.
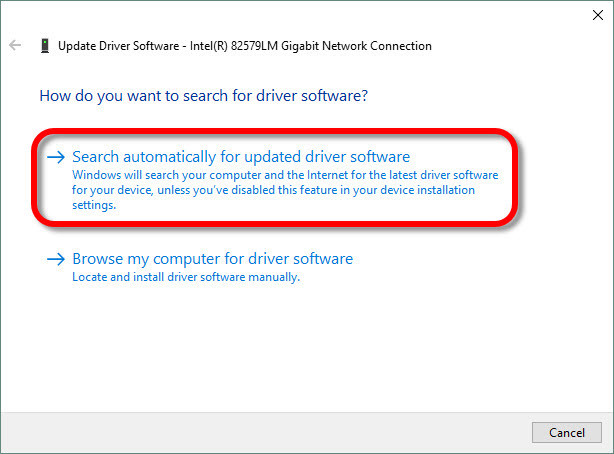
Search Automatically for Updated driver
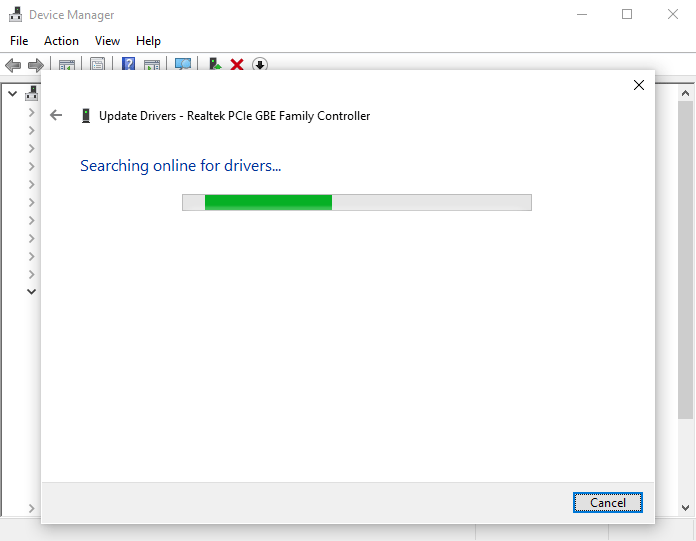
#4. Searching for an online software update.
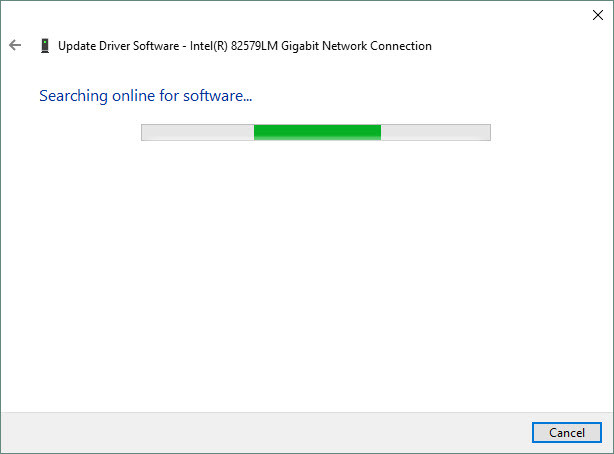
Searching for an Online Software
#5. Downloading the driver software.
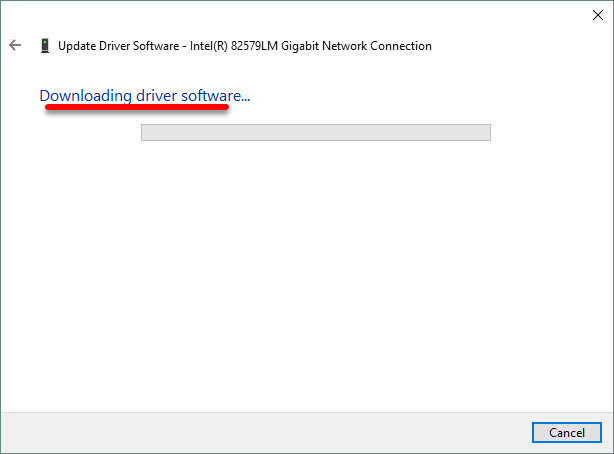
Downloading Driver Software
#6. Windows has successfully updated your driver software. Click Close.
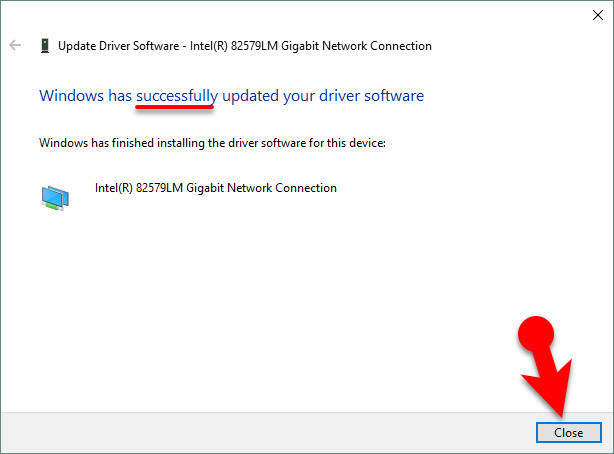
Close
When the driver is downloaded, your network adapter should look like the snapshot below.
Network Adapter is Disabled
Conclusion
In this post, I have covered how to fix disabled network adapter on desktop PC. I have mentioned two methods to fix network adapter internet connection. If you have any question regarding this article, feel free to share via the comment section below. Thanks for being with us.
Searches Related to Network Adapter is Disabled
Enable network adapter windows 10
How to enable network adapter windows 8
How to enable network adapter using command prompt
Wireless network connection adapter is disabled windows 7
Wireless network connection disabled won’t enable
Local area connection adapter is disabled windows 10
How to enable ethernet adapter windows 10
How to enable wireless network in windows 7
Mukhtar Jafari
Mukhtar Jafari is the founder of wikigain.com. He holds certifications as a CISCO Certified Entry Networking Technician (CCENT) and Cisco Certified Network Associate (CCNA), and has obtained a diploma in IT Networking from TAFE. He is passionate about assisting fellow technology enthusiasts and is thus engaged in part-time work at wikigain.com. Through this platform, he shares his expertise and experiences to benefit individuals who are new to the field of information technology.
Одна из частых проблем пользователей, особенно после чистой установки Windows — компьютер или ноутбук не видит сетевой адаптер: не важно, идет ли речь о сетевой карте Ethernet или же о сетевом адаптере Wi-Fi, причины обычно одни и те же.
В этой инструкции подробно о том, что делать, если ПК или ноутбук не видит сетевой адаптер в Windows 11 или Windows 10, чтобы решить проблему.
Включение сетевой карты или Wi-Fi адаптера в БИОС/UEFI
Если в диспетчере устройств отсутствуют любые признаки наличия сетевого адаптера: нет неизвестных устройств или устройств с ошибками, при этом вы уверены, что физически он присутствует, возможно, сетевая карта Ethernet или Wi-Fi адаптер отключены в БИОС.
Шаги, чтобы это проверить и включить сетевой адаптер в БИОС/UEFI:
- Зайдите в БИОС/UEFI, на ПК обычно для этого нужно нажать клавишу Del при включении, на ноутбуке — чаще F2 (но возможны и иные варианты). Подробнее: Как зайти в БИОС/UEFI на компьютере и ноутбуке.
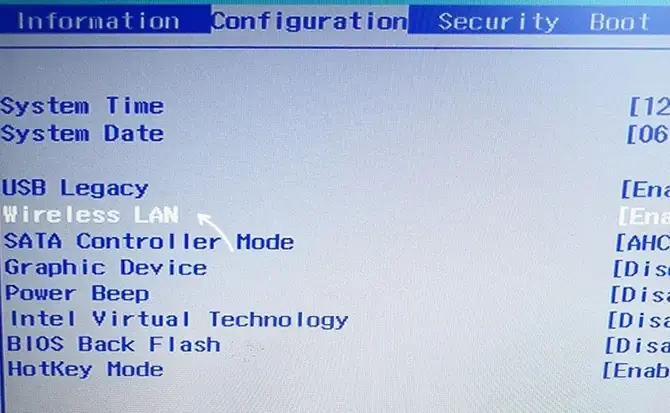
- Найдите раздел и пункты, отвечающие за включение и отключение периферийных устройств. Варианты пути могут быть разными, например: Advanced — Onboard Device Configuration, где необходимо включить LAN/Ethernet/Network или WLAN/Wireless/Wi-Fi адаптер (установить в Enabled).

- Параметры могут находиться и в других разделах, например: Configuration, Chipset, Onboard Devices, Integrated Peripherals, Network Configuration.

- Во всех случаях ищем обозначение нужного адаптера, и, если его состояние установлено в Disabled, переключаем в Enabled, затем выходим с сохранением настроек БИОС (обычно — клавиша F10).


После включения сетевого адаптера в БИОС и повторного запуска Windows драйверы сетевого адаптера обычно устанавливаются автоматически: но иногда не те, либо по какой-то причине вообще не могут установиться: это тоже может быть причиной того, что сетевая карта или беспроводный адаптер не видны.
Драйверы сетевого адаптера
В случае, если в диспетчере устройств отображаются какие-либо сетевые адаптеры, неизвестные устройства, либо устройства с ошибками (желтый восклицательный знак), вероятнее всего причиной проблемы является отсутствие подходящих драйверов.
Наиболее надежный путь — вручную скачать и установить драйверы с официального сайта производителя материнской платы ПК либо с сайта производителя ноутбука именно для вашей модели устройства. Порядок действия будет следующим:
- С компьютера (или даже смартфона) где есть доступ в Интернет, найдите официальную страницу поддержки вашей модели материнской платы или ноутбука.
- На странице поддержки устройства найдите раздел загрузки драйверов, а в нём — соответствующие драйверы сетевого адаптера. Для сетевой карты Ethernet они могут иметь названия Network Driver, LAN Driver, Ethernet Driver, для беспроводной сети — Wi-Fi, WLAN, Wireless LAN, скачайте эти драйверы к себе на устройство, а затем скопируйте на компьютер с проблемой. Внимание: если на сайте представлены драйверы только для предыдущей версии Windows, всё равно попробуйте их скачать и установить — обычно они могут исправно работать и в современных Windows 11 и Windows 10.

- Установите скачанные драйверы и проверьте, была ли решена проблема.
- На некоторых ПК и ноутбуках возможна ситуация, когда драйверы сетевого адаптера не устанавливаются либо не работают пока не будут установлены оригинальные драйверы чипсета или управления питанием. Если вы столкнулись с этим, попробуйте также скачать и установить их. Вас будут интересовать драйверы Chipset, Power Management, ACPI, ATK, Intel ME или Management Engine, Serial I/O
- После установки драйверов рекомендую перезагрузить компьютер.
- Если сетевой адаптер отображается в диспетчере устройств, но не работает или работает с ошибками, можно попробовать следующий вариант действий: в диспетчере устройств нажмите правой кнопкой мыши по сетевому адаптеру, выберите пункт «Обновить драйвер», затем: Найдите драйверы на этом компьютере — Выбрать драйвер из списка доступных драйверов на компьютере. Проверьте, нет ли в списке совместимых драйверов каких-то иных вариантов, помимо установленного в настоящий момент: при наличии выберите его и нажмите кнопку «Далее» для установки.


Если вы не можете найти драйверы самостоятельно, можно попробовать выполнить установку с помощью специализированных программ, рекомендую Snappy Driver Installer.
В завершение — ещё некоторые варианты, которые могут оказаться полезными в некоторых сценариях возникновения проблем с наличием сетевого адаптера в Windows:
- Если сетевой адаптер пропадает после завершения работы и включения, но появляется, если использовать пункт «Перезагрузка» в меню завершения работы, попробуйте отключить быстрый запуск — это может помочь.
- Проверьте наличие сетевых адаптеров в скрытых и отключенных устройств в диспетчере устройств. Чтобы показать скрытые устройства, используйте пункт меню «Вид». Для отключенных устройств рядом со значком отображается стрелка, а если нажать по устройству правой кнопкой мыши, в контекстном меню будет доступен пункт «Включить устройство».
- Попробуйте использовать встроенное средство устранения неполадок сети и посмотреть, о чем оно сообщает. В некоторых случаях сообщение может выглядеть как «Не удалось обнаружить правильно установленный сетевой адаптер», тема рассмотрена в этой инструкции. Многие другие сообщения средства устранения неполадок также рассмотрены на этом сайте: можно использовать поиск по сайту, не исключено, что инструкция найдётся.
- Если аппаратные проблемы исключены, а проблема появилась на давно работающей Windows и не сразу, могут помочь точки восстановления системы.
- Попробуйте загрузиться с LiveCD с поддержкой сети — если в этом случае сетевой адаптер исправно работает, проблема в установленной системе, драйверах и настройках. Если нет — в настройках БИОС, подключении, либо аппаратных неисправностях сетевого адаптера.
- Дополнительно при решении проблемы могут пригодиться инструкции: Не работает интернет в Windows 10 (подойдет и для Windows 11), Что делать, если работает Wi-Fi на ноутбуке, Не работает Интернет по кабелю или Wi-Fi.
Надеюсь, один из вариантов поможет в решении проблемы. Если остаются вопросы — опишите ситуацию в деталях в комментариях ниже, не исключено, что мне удастся подсказать подходящее решение.
-
Home
-
News
- Top 9 Ways To Solve Windows 10 Network Adapter Missing
By Sarah |
Last Updated
A network adapter is very essential device in network connection; it can help you send and receive data on both a wired and a wireless network. It can be regarded as the interface for a computer to a network. Recently, I find the Windows 10 network adapter missing issue bothered many people, so I’d like to talk about it.
A network adapter is part of the internal hardware to help you communicate with other devices through network. Without an adapter, you can’t connect with other server, computer or device. So when it goes wrong, people get frustrated.
Network Adapter Missing on Windows 10
I recently experienced a Windows 10 network adapter missing problem. After searching the Internet, I found many people who run into the same problem as me. So I’d like to share some useful solutions when there is no network adapter in Device Manager Windows 10. (Here’s some MiniTool software to help you deal with different issues on Windows 10.)
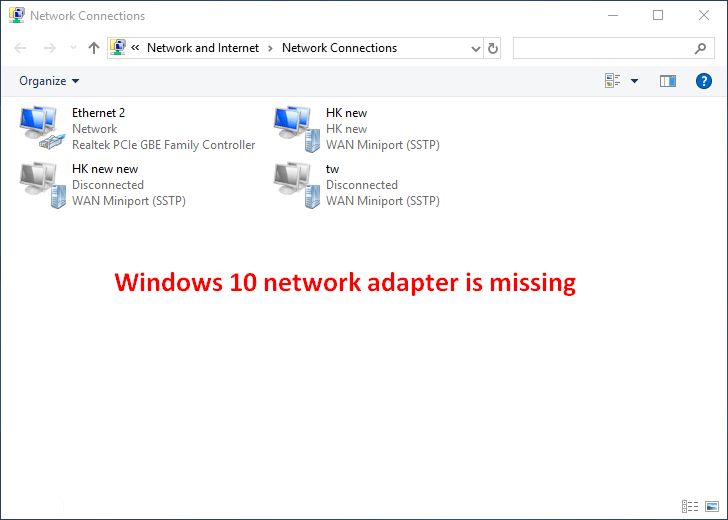
When you can’t see the Wireless Adapter after opening Network Connections, you should go to check the Device Manager. If the wireless adapter not showing in Device Manager Windows 10, it indicates that your Network Adapter is really missing (there’s another explanation for this: your Network Adapter is not detected). You need to fix the Windows 10 wireless adapter missing issue as soon as possible since you won’t be able to access internet before that.
Windows 10 Network Adapter Missing
If you can’t find network adapter in Device Manager, it means your network adapter missing in Windows 10. But don’t worry, you still have chance to make the missing or disappeared network adapter show up and work. Here are some useful ways to troubleshoot Windows 10 network adapter not working (network adapter missing) issue.
- Restart & reconnect hardware.
- Update network driver.
- Uninstall/roll back network driver.
- Show hidden devices.
- Run the network adapter troubleshooter.
- Reset network.
- Disable VPN & remove antivirus.
- Check the physical network button.
- Upgrade your system.
There are actually 3 main causes of Windows 10 no network adapters:
- The network adapter driver on your device is outdated, corrupted or incompatible with other drivers.
- You have recently upgraded your system and the settings are not proper. (New Windows 10 1903 Update Breaking Network Adaptors.)
- Your device is attacked by virus or malware. (How to recover files deleted by virus?)
9 Ways to Fix Windows 10 Network Adapter Missing
Fix 1: Restart & Reconnect Hardware
One: restart Windows 10.
Rebooting can fix many issues magically, so you should try to solve network driver missing by restarting your device.
Two:
Reconnect cable.
Shut down your device -> remove the power cord from your device gently -> wait for a while (more than 10 seconds) -> plug the power cord again -> power on your device.
Reconnect battery.
Shut down your device -> remove all the power supply -> take off the battery cover -> take the battery out gently -> wait for a while (a few minutes is suggested) -> put the battery back -> turn on your device.
In addition, you can try to deal with the network adapter problem by putting your device in the sleep mode for some time.
Fix 2: Update Network Driver
- Right click on the Windows button and Choose Device Manager.
- Find Network adapters and expand it.
- Browse the option to find certain adapter; right click on it.
- Choose Update driver and click Search automatically for updated driver software.
- Wait for the driver searching and downloading process.
- Restart your Windows 10 device when previous operations are finished.
Please click Enable device if it’s disabled.
Fix 3: Uninstall/Roll Back Network Driver
Uninstall driver:
- Repeat step 1 to step 3 mentioned in last method.
- Choose Uninstall device and click Uninstall to confirm.
Roll back driver:
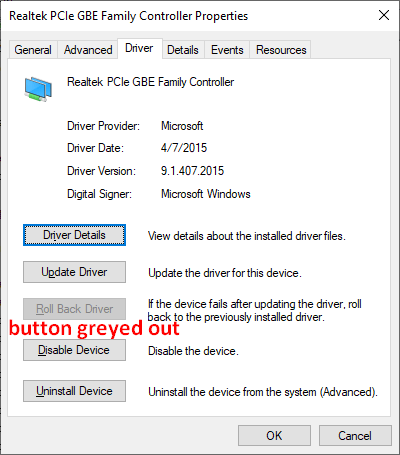
- Repeat step 1 to step 3 mentioned in last method.
- Choose Properties from the menu.
- Shift to the Driver tab at the top.
- Click Roll Back Driver and follow on-screen instructions.
If the Roll Back Driver button is not available, you can try your luck at the corresponding manufacture’s website.
Fix 4: Show Hidden Devices
Sometimes, you may find the Windows 10 network adapter missing since it is hidden in the Device Manager window. You can unhide it and expand the “Network adapters” sections to check if the missing network adapter is appearing on PC or not.
- Open Device Manager on your PC.
- Select View from the top menu bar.
- Make sure the Show hidden devices option is checked.
- Select Action and click Scan for hardware changes.
- Expand the Network adapters section in your Device Manager window.
- Check whether the missing network adapter is appearing now or not.

You can also try this method when external drive not showing up on PC.
Fix 5: Run the Network AdapterTroubleshooter
- Press Windows + I on the keyboard.
- Find and select Update & Security.
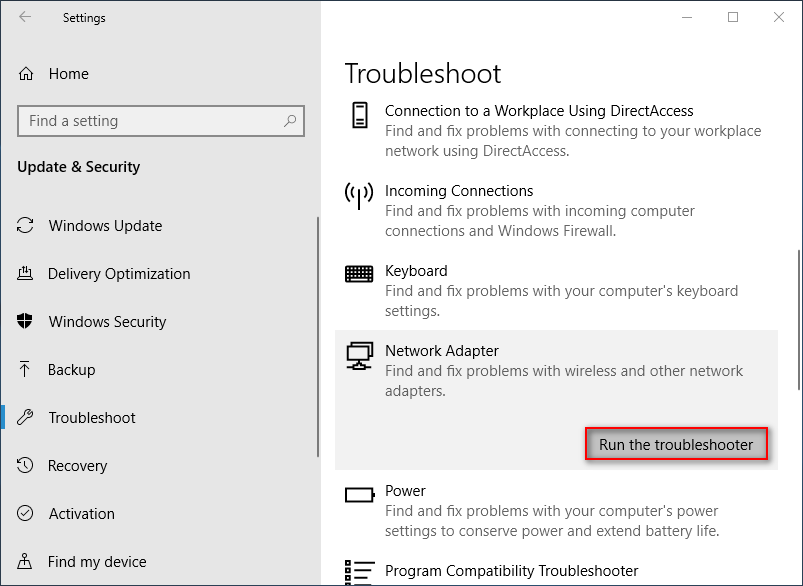
- Select Troubleshoot from the left pane.
- Find Network Adapter under Find and fix other problems section; click it.
- Click on the Run the troubleshooter button that appears just now.
- Wait for the process to finish and follow the instructions.
Fix 6: Reset Network
- Open Settings app.
- Select Network & Internet.
- Keep Status selected in the left pane.
- Scroll down in the right pane to find and click Network reset.
- Click Reset now to confirm your selection.
Fix 7 ~ 9
Other optional methods for fix Windows 10 network adapter missing:
- Disable the VPN on your device and remove the antivirus software.
- Go to check the physical network button if there is any.
- Upgrade your system to the latest version.
Please read this page if your files are lost after Windows update.
About The Author
Position: Columnist
Sarah has been working as an editor at MiniTool since she graduated from university. Sarah aims at helping users with their computer problems such as disk errors and data loss. She feels a sense of accomplishment to see that users get their issues fixed relying on her articles. Besides, she likes to make friends and listen to music after work.