
The Active Directory is a depository of all information computers, users, and services and the Active Directory users and computers are the container of all the information about the users and computers and more than the information, you can manage users and computer accounts through this management tool whether you create, remove or manage users. In this article, I’ll show you how to create users, computer accounts in Windows server 2016.
#1: Create users
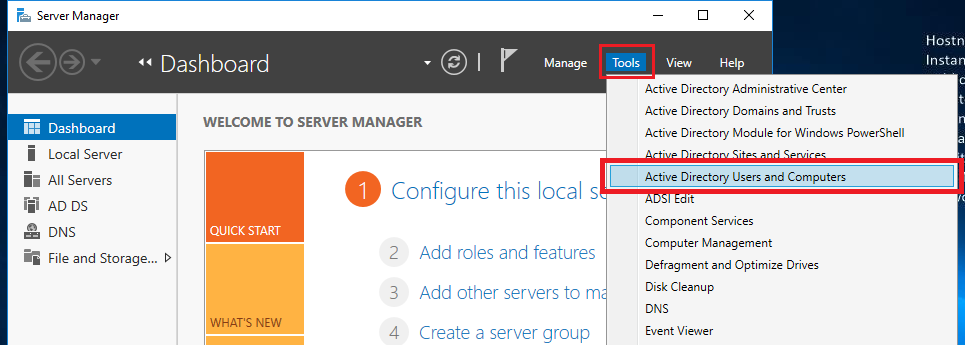
1. Open Server Manager and click on Tools tab then select Active Directory Users and Computers.

2. Expand the server node and click on the Users node, when you see all the default users and groups just click on the Create a new User button on the top as shown to create a new user account.

3. Enter the user details like name, last name, logon name etc. The logon name is the name that you want to logon to the network through, you will be given an email address in the network like mine is mehdi@tactig.com as shown then hit Next.

4. Now enter a complex password then confirm your password and below the password box you’ll see some options that should know them;
- User must change the password at next logon; is used when you create a user and give a simple password as a network administrator then you want the user to change the password at first logon.
- User cannot change password; is used when you don’t want a user to change his account password.
- Password never expires; is used when you don’t want users to change the password frequently. Most organizations force the users to change the password after a particular time. It is good to have the most secure account.
- Account is disabled; is used when you want to disable unused accounts. Leave the first option selected and hit Next.

5. When the user is created in Users container, finish the wizard by clicking on the Finish button.

#2: Create group
After creating users, now it’s time to create the groups we need for our specific team, location or jobs. Groups are created for simplifying the management. When you create a group, specify some people as member of that group, you give some rights to that group instead giving ever single user that right. Members of the group is not users only, they can be admins. You can make a group member of other group which is called nesting-group.
1. In order to create a group click on the Users node, then click on Create a new group button on the top as shown.

2. Enter the group name and you’ll see group scopes are available, select the Global scope. It is used when you want to make a group according to geography, common job, department, functions. Now choose the Group type (Security option: It is used when you want to specify which group can have access to which resource.

#3: Group Membership
1. If you want someone to be member of a group, you can do it from user properties > member of and make it member of a group. Also you can go to group properties > members and add a user. I follow the first way, right-click on the user and select Properties.

2. Here click on the Member Of tab then click on the Add button to add your account to a group.

3. Type name of the group in the box as shown then click on the OK button.

4. And now you’re in the group of KabulUsers. Now just click on the OK button to finish the wizard and apply the function.

Conclusion: Active Directory Users and Groups is an important title in network. I hope you learn this easy steps, how to create users and computer accounts. For advanced details of the users and groups, other articles will be published here. For any question leave a comment.
If you’ve ever managed an Active Directory domain controller, you’re probably familiar with this long-standing, easy-to-use «Active Directory Users and Computers» console.
Here is a full presentation of it.
- Available folders
- Builtin folder
- Computers folder
- Domain Controllers folder
- ForeignSecurityPrincipals folder
- Managed Service Accounts folder
- Users folder
- Create new objects in your Active Directory domain
- Create a new user
- Create a new group
- Create an organizational unit
- Reference a shared folder
- Reference a shared printer
- Add a printer on a client PC from the Active Directory
- Advanced features
- Filter options
- Actions
- Delegate Control
- Find
- Change Domain
- Change Domain Controller
- Raise domain functional level
- Operations Master
- Properties
- Resultant Set of Policy (Planning)
1. Available folders
By default, only the main folders are displayed :
- Builtin
- Computers
- Domain Controllers
- ForeignSecurityPrincipals
- Managed Service Accounts
- Users
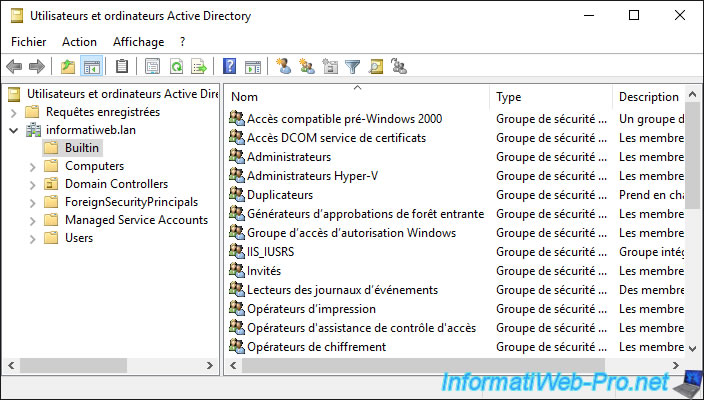
1.1. Builtin folder
In the «Builtin» folder, you will find the groups created by default by Windows Server and Active Directory.
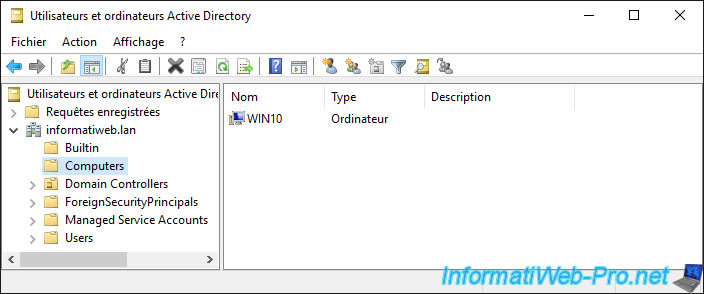
1.2. Computers folder
In the «Computers» folder, you will find the «computer» type objects corresponding to the client computers that you have joined to your Active Directory domain.
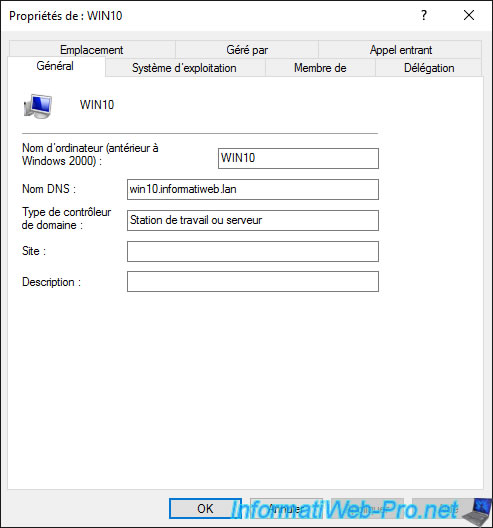
If you display the properties of a computer type object, you will find, for example :
- the NETBIOS name of the affected computer
- its full DNS name
- the type of computer or domain controller. In this case, it indicates that it’s a workstation. In other words, a client computer with a client version of Windows (ex : Win 10).
In the «Operating System» tab, you will find information about the operating system installed on it :
- the name of the operating system : in our case, Windows 10 Professional
- its version : 10.0 (19041)
- the service pack installed (if applicable)

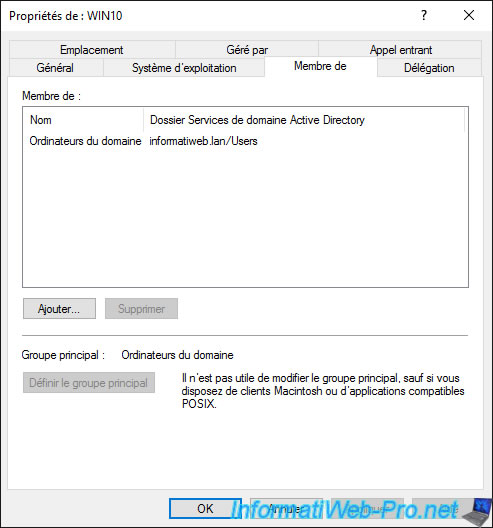
In the «Member of» tab, you can choose in which group you want to add this computer.
By default, computer objects are members of the «Domain Computers» group.
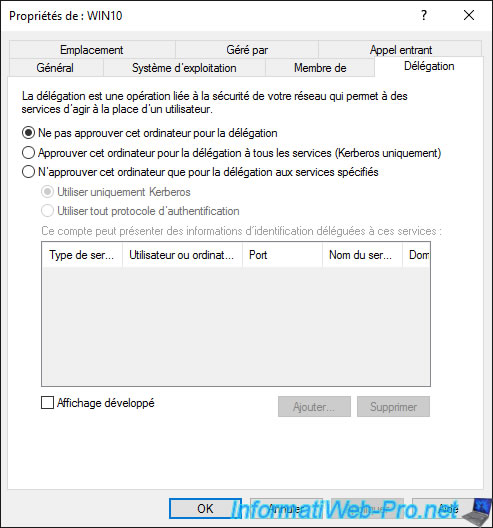
In the «Delegation» tab, you can approve or not this computer for Kerberos or for specific services.
This tab is particularly useful when you implement dynamic migration with several Hyper-V servers.
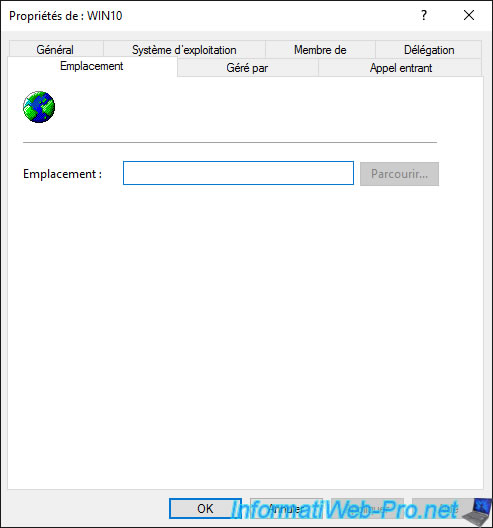
In the «Location» tab, you can choose its location.
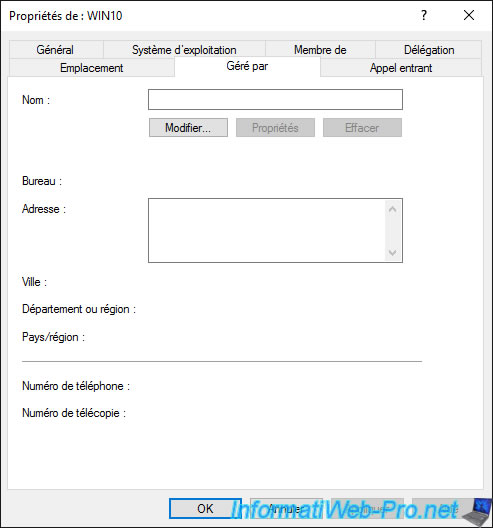
You can delegate management of a computer to a user in your Active Directory domain.
Although this «Managed By» tab is mostly useful for domain controllers.
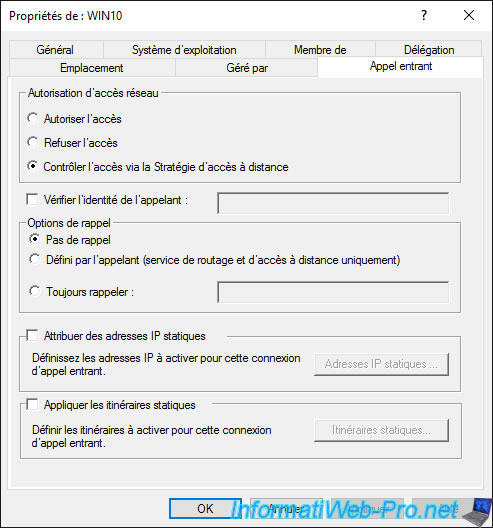
Finally, in the «Dial-In» tab, you can :
- choose whether this computer can access the network or not, or if this setting is managed by the «NPS Network policy»
- assign static IP addresses to this computer
- apply static routes if necessary
1.3. Domain Controllers folder
In the «Domain Controllers» folder, you will find the list of domain controllers joined to this Active Directory domain.
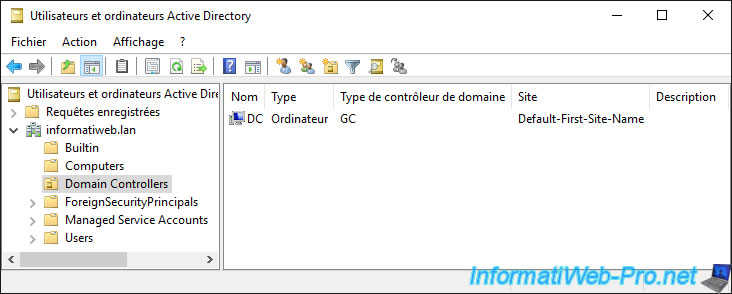
If you display the properties of the computer object of a domain controller, you may find out :
- his NETBIOS name
- his DNS name
- what type is this domain controller : global catalog, …
- in which Active Directory site it’s located
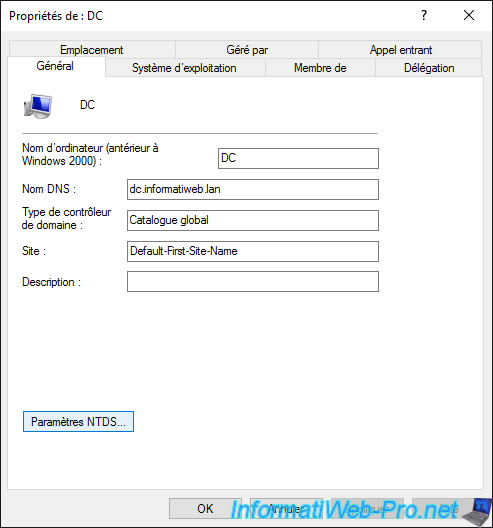
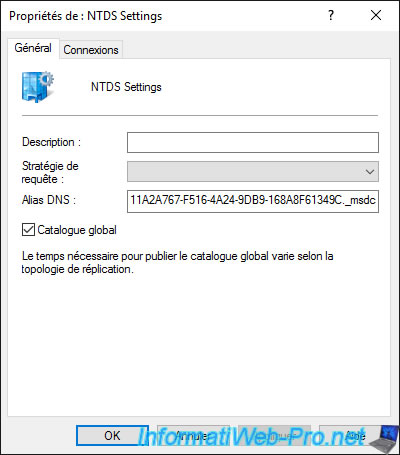
In the case of a domain controller, a «NTDS Settings» button is present in the properties of the computer object.
In these NTDS Settings, you can choose whether or not this domain controller should act as a «Global Catalog».
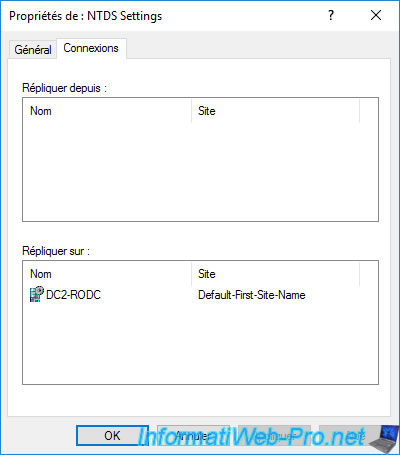
In the «Connections» tab, you will find the list of domain controllers from or to which the data of your Active Directory domain are replicated.
For example, assuming that we add a new domain controller to our Active Directory domain, and that we choose our domain controller «DC» as the source, we would see a «DC2-RODC — Default-First-Site-Name» appear in the «Replicate To» list.
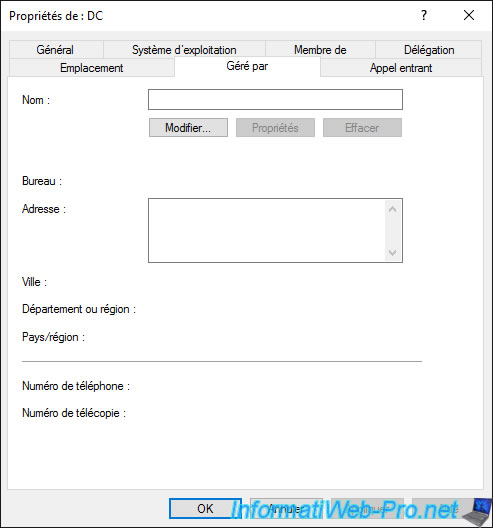
The «Managed By» tab is blank by default for writable domain controllers.
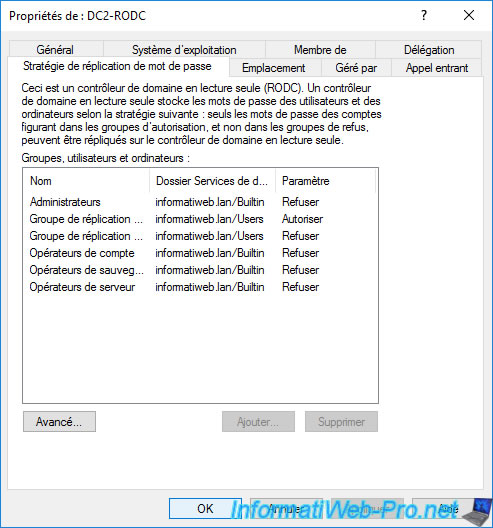
In the case of read-only domain controllers (RODCs), an additional «Password Replication Policy» tab will be displayed.
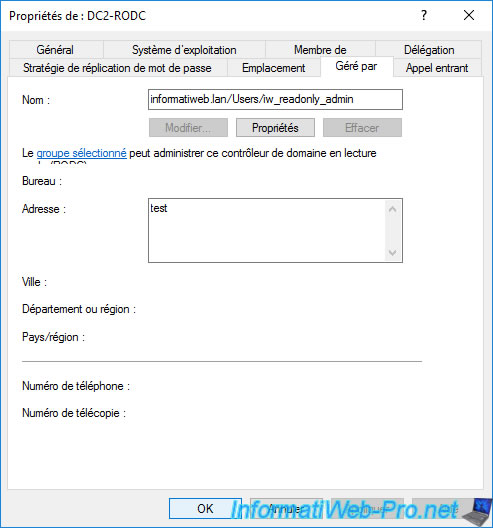
Still in the case of a read-only domain controller (RODC), you will be able to find the name of its delegated administrator if you defined one when you deployed this read-only domain controller (RODC).
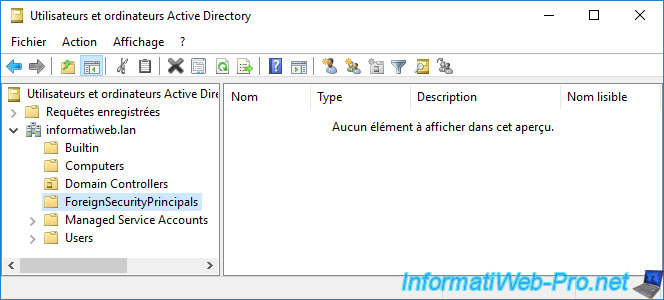
1.4. ForeignSecurityPrincipals folder
This «ForeignSecurityPrincipals» folder looks empty by default, but actually contains several special security-related identities.
To learn all about this somewhat special folder, refer to the Microsoft site : Active Directory: Foreign Security Principals and Special Identities
To display the contents of this «ForeignSecurityPrincipals» folder, you must go to the «View» menu and click «Advanced Features».
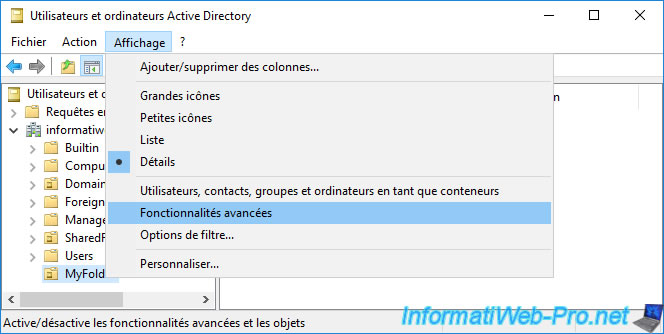
Now, as you can see, several security identities appear, include one which is for example linked to the «NT AUTHORITY\Authenticated Users» group.

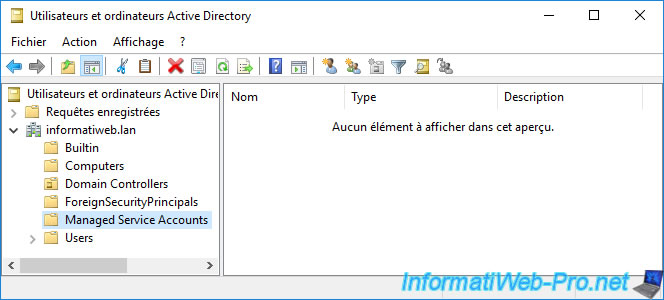
1.5. Managed Service Accounts folder
Managed Service Accounts are domain accounts whose password is automatically managed by the domain controller.
These managed service accounts are used to run specific services (the services that you find on Windows), scheduled tasks or for application pools on Microsoft IIS web servers.
Sources : Running Assessments with Managed Service Accounts
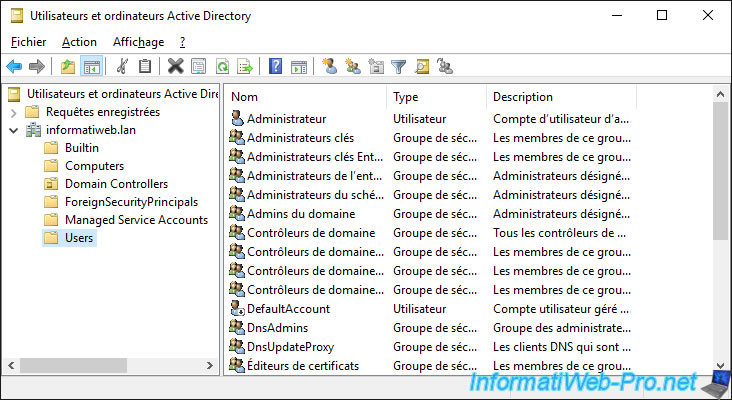
1.6. Users folder
In the «Users» folder, you will find by default, a list of users and groups created during the installation of Windows Server or created later during the installation of specific roles (including AD DS).
Among these users and groups, you will obviously find :
- the «Administrator» account of the server which also becomes the administrator of the domain when you promote your server as a domain controller
- the «Domain Admins» group
- and more
Active Directory Users and Computers is a Microsoft Management Console (MMC) snap-in that allows IT administrators to manage users, computers, groups, and other objects within an Active Directory environment. In Windows Server 2016, this tool is essential for managing and maintaining the Active Directory infrastructure efficiently.
Features of Active Directory Users and Computers in Windows Server 2016
- Creation and management of user accounts
- Organizing users into groups for easier administration
- Assigning and managing permissions for users and groups
- Resetting passwords and enforcing password policies
- Managing computer accounts within the domain
- Delegating administrative tasks to specific users or groups
Using Active Directory Users and Computers
With Active Directory Users and Computers in Windows Server 2016, administrators can perform various tasks efficiently. By opening the tool, you can:
- Select the domain you want to manage
- Create new user accounts by providing relevant details
- Modify user account properties such as name, password, group membership, etc.
- Create and manage security groups for better access control
- Enable or disable user accounts as needed
- Organize computer objects in the domain for easier management
Benefits of Active Directory Users and Computers
- Centralized management of user and computer accounts
- Improved security through role-based access control
- Efficient delegation of administrative tasks
- Streamlined account and password management
By utilizing Active Directory Users and Computers in Windows Server 2016, organizations can enhance their network security, simplify user and computer management, and increase overall productivity.
With Active Directory Users and Computers, IT administrators can effectively manage their Active Directory infrastructure and ensure a secure and well-organized environment.
Make the most out of your Windows Server 2016 Active Directory environment by mastering the use of Active Directory Users and Computers.
#ActiveDirectory #WindowsServer2016 #ADUsersAndComputers #ITManagement #NetworkSecurity #MicrosoftServer #MMC #AdministrativeTasks
Below are detailed instructions on how you can setup Active Directory on your Windows Server 2016.
Sections on installing Active Directory.
- Change the Computer Name
- Install Active Directory Feature
- Promote Server to a Domain Controller
- Testing Active Directory Installation
- Additional Notes
Note: You can only do the steps below if you are an Administrator of your Windows Server.
Change the Computer Name
This is an optional step, but I would highly encourage you to do this so that your computer name will not be like EC2AMAZ-3TVT1HF, but a more descriptive one.
In this case since I am going to use the computer that we will setup as an Active Directory Domain Contoller I shall name my Windows Server as DC01.
In fact, you will have a lot of problem if you rename your computer after installing Active Directory. So better do it now before continuing to the next step.
Follow the steps on my post to change the Computer Name of your Windows Server 2016.
For now check the System Information page of the Windows Server.
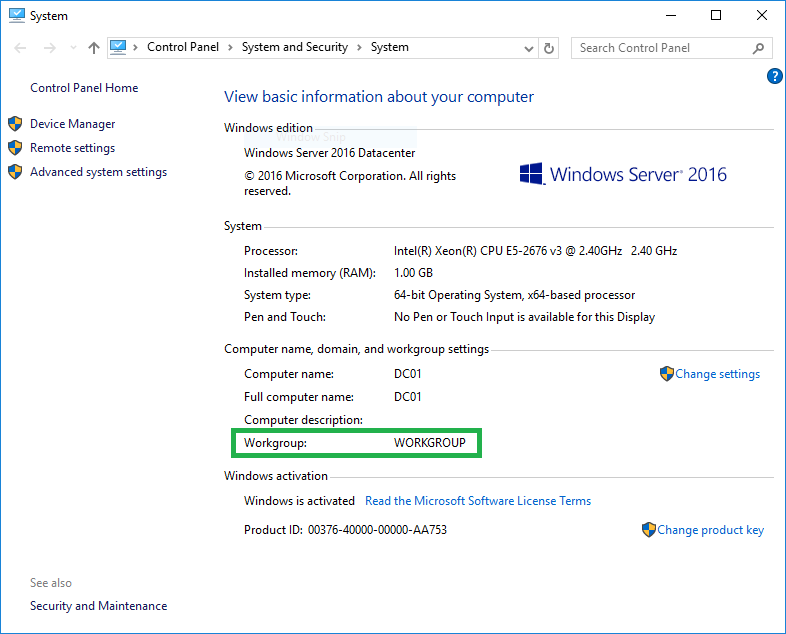
Note the Workgroup.
Install Active Directory Feature
Now that we have updated the Computer Name of our Windows Server we can now start installing Active Directory.
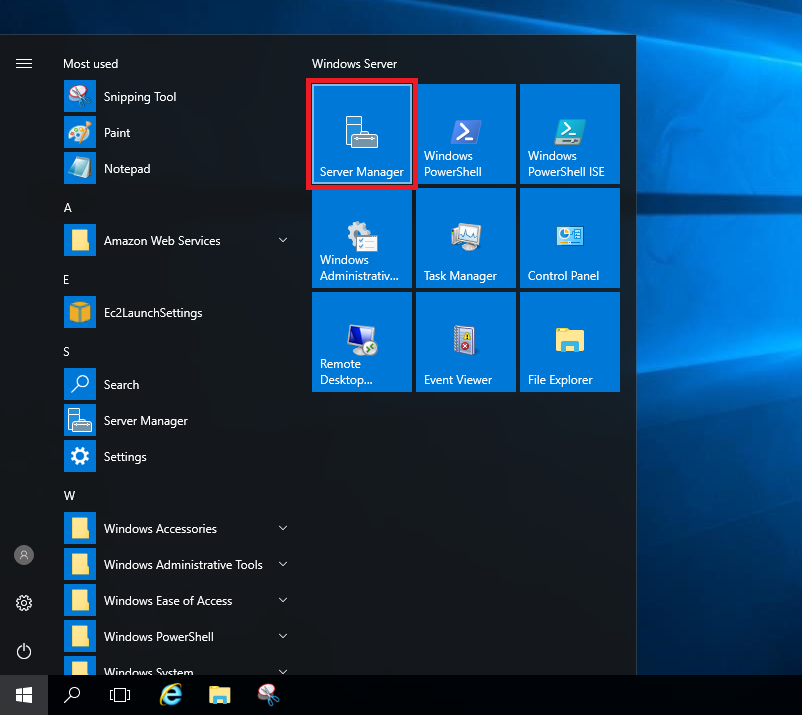
Click on the Window Icon on the bottom-left side of the screen. Click Server Manager from the Menu.
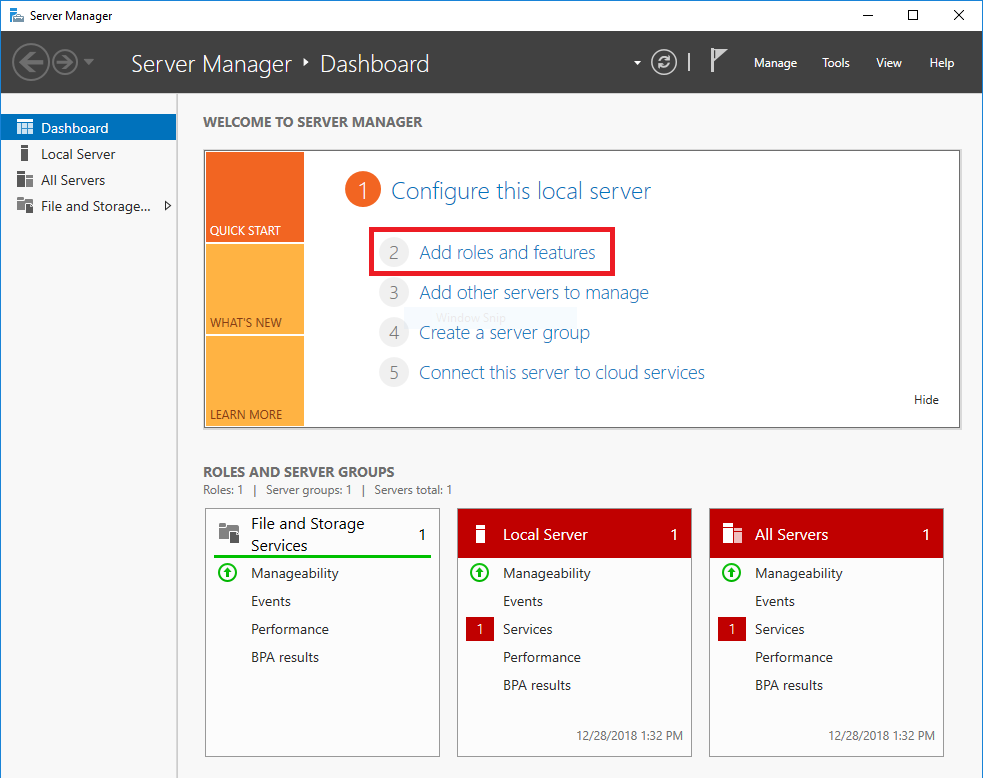
On the Server Manage Window click on Add roles and features.
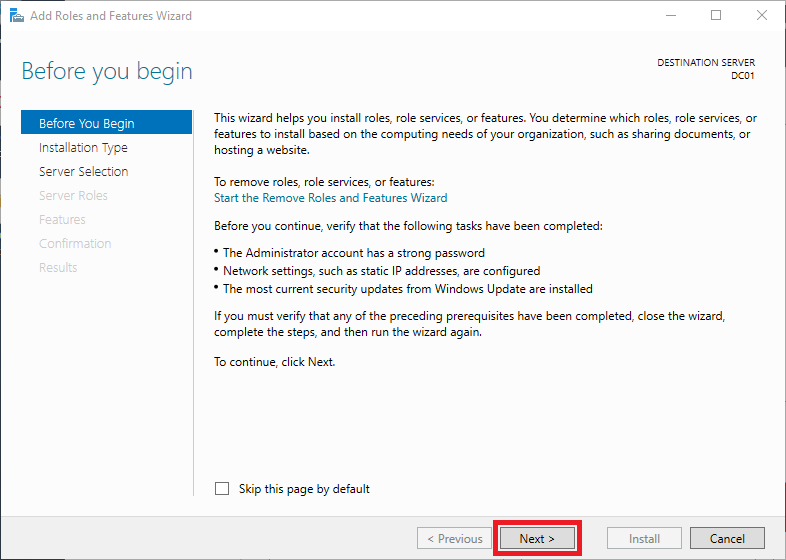
The Add Roles and Features Wizard Window will show up. Click Next.
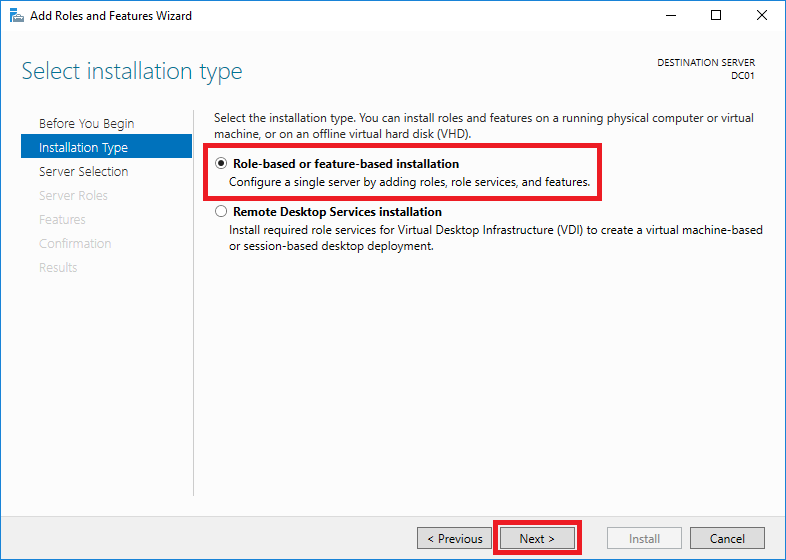
Make sure that Role-based or feature-based installation is selected then click Next.
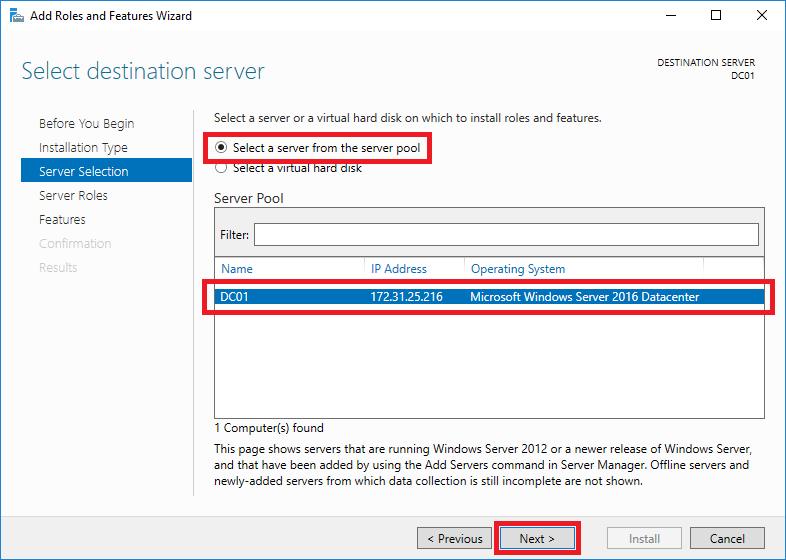
Ensure that Select a server from the server pool is selected. Then the current Windows Server is selected on the list. Click Next.
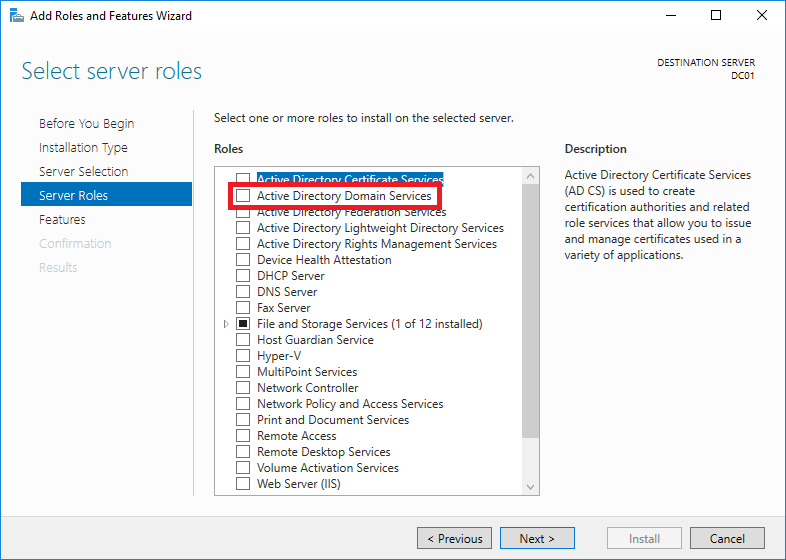
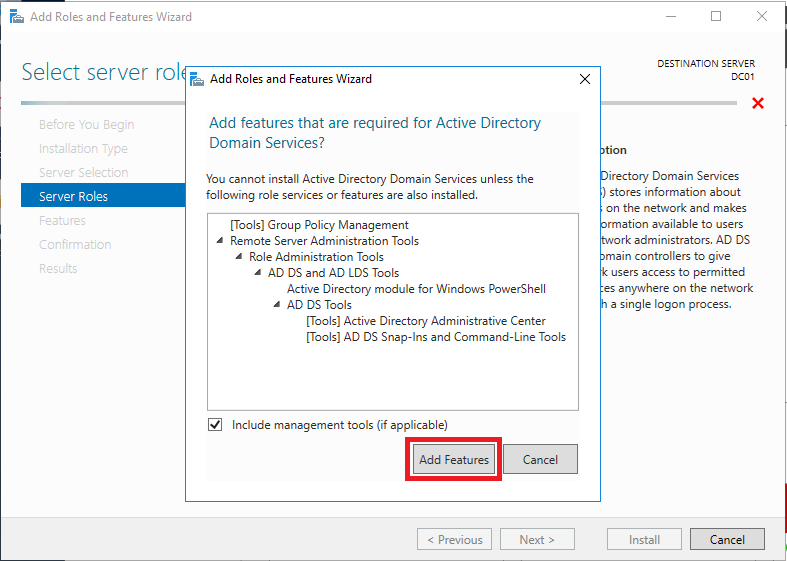
Click on the checkbox of Active Directory Domain Services. The Add Roles and Features Wizard will pop-up.
Click Add Features. The window will close.
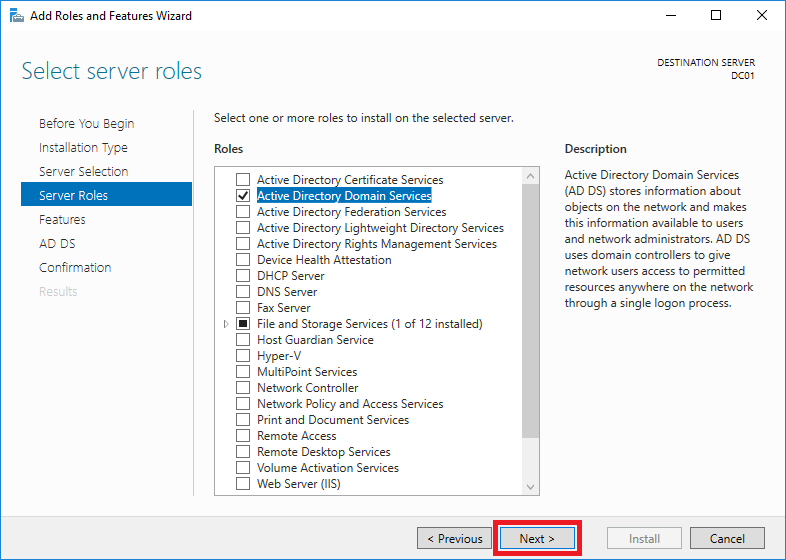
Now that Active Directory Domain Services is now checked, click Next.
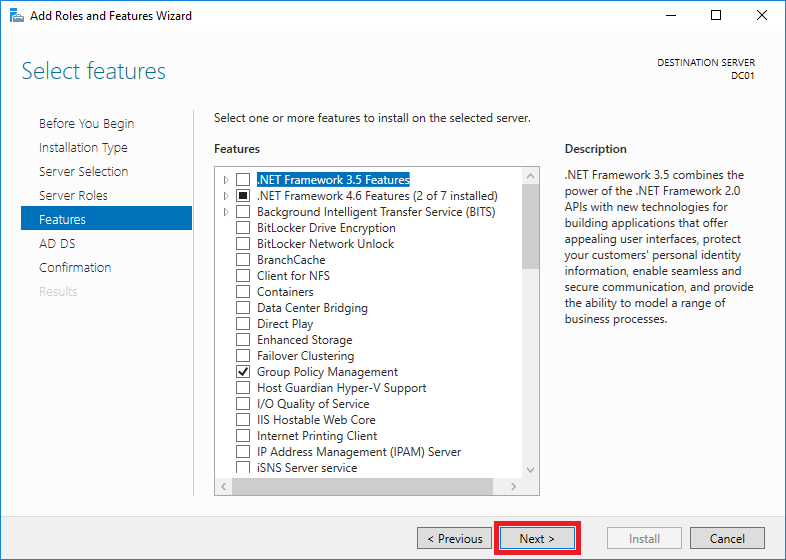
No changes needed on the Select Feature page. Click Next.
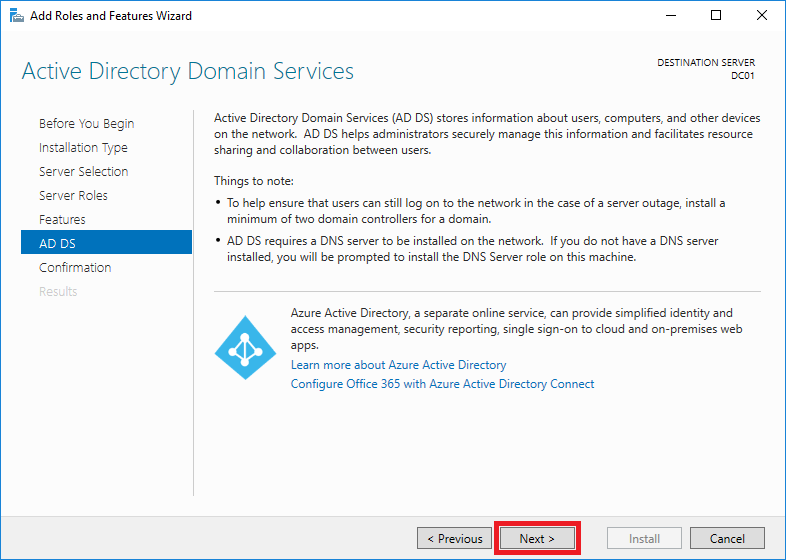
Next will just explain what Active Directory Domain Services is. Click Next.
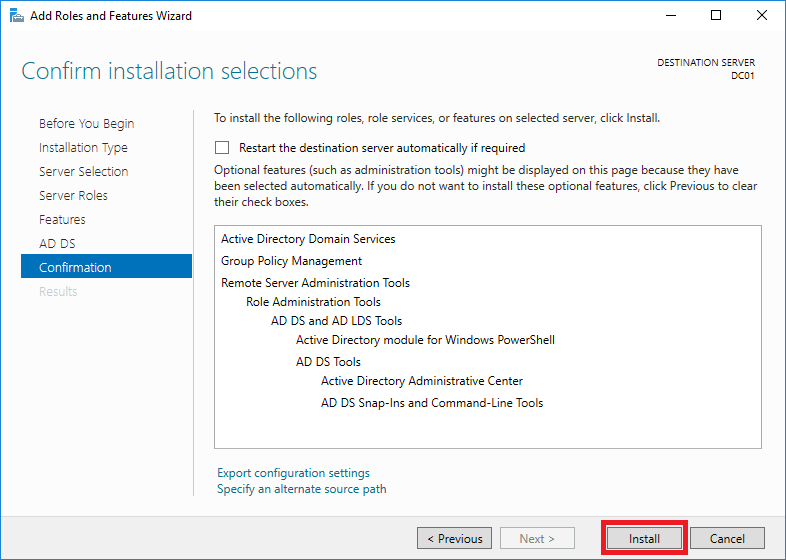
Click Install.
Installation will start and will take around 5 minutes to finish.
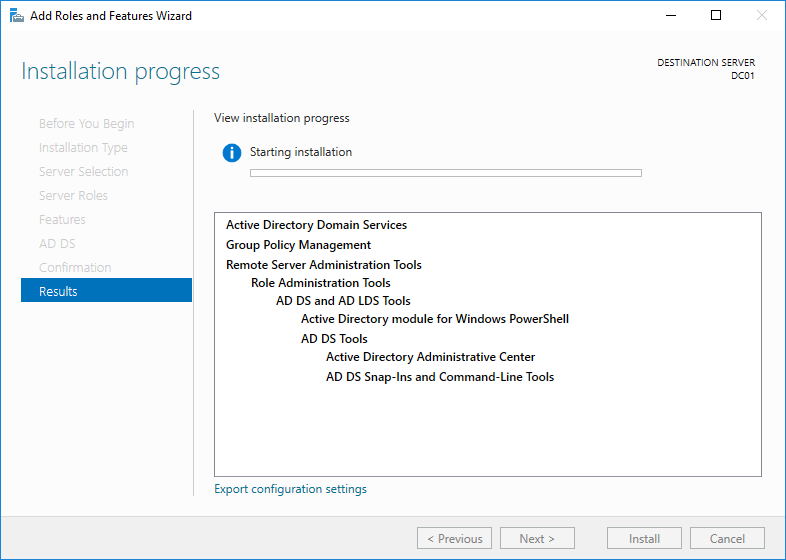
Once installation is finished the status bar will be full and it will say Configuration required. Installation succeeded on DC01.
Note: DC01 is the Computer Name that I configured. This might be different from yours.
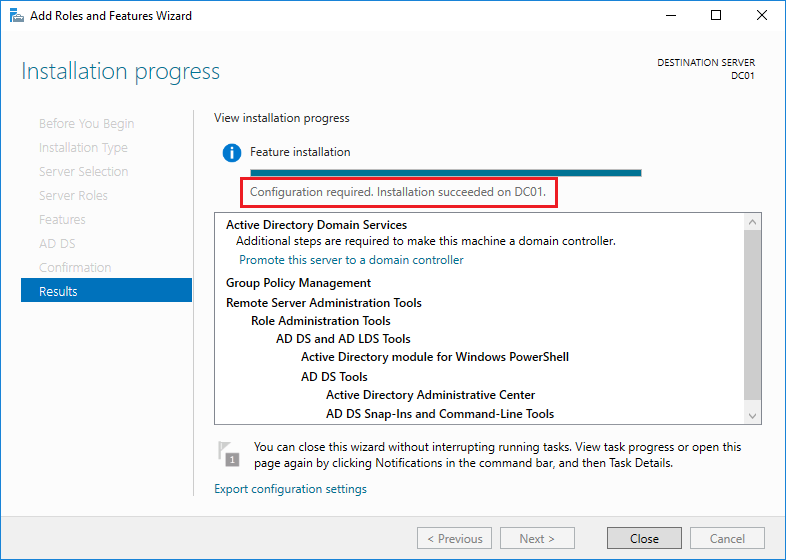
Do NOT click on Close yet as we still have additional configuration to do as the above message says.
Promote Server to a Domain Controller
Once Active Directory is installed we need to Configure the Windows Server to a Domain Controller.
Note: The Windows Server that you are using is the Primary Domain Controller. For backup we will need to create another Windows Server as Secondary Domain Controller.
Click on Promote this server to a domain controller.
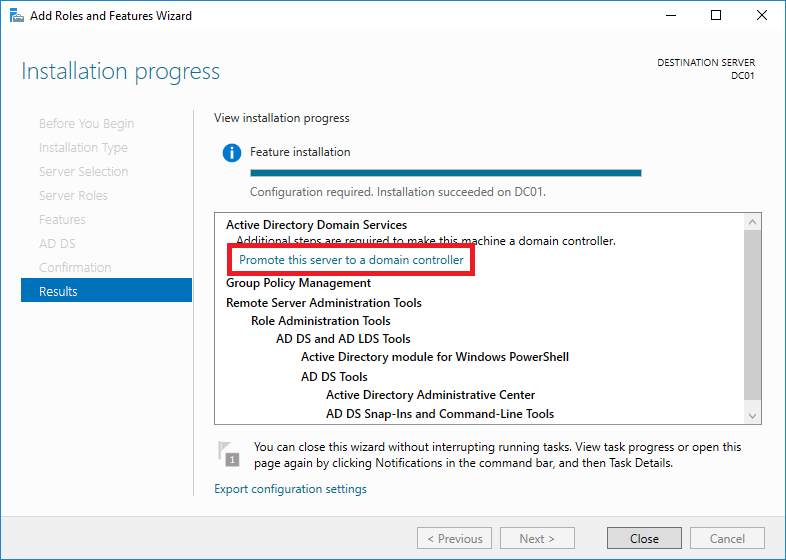
The Active Directory Domain Services Configuration Wizard window will pop-up.
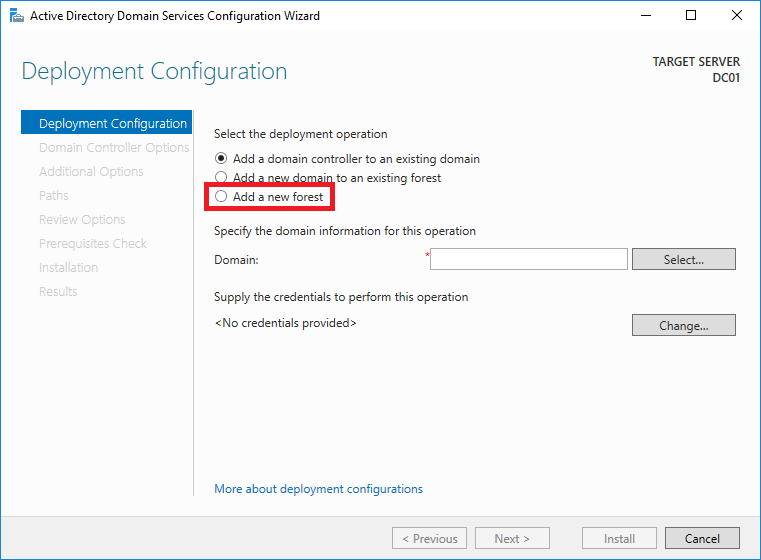
Since this is the first time we are creating an Active Directory Domain Controller select Add a new forest.
Type your target domain name on the Root domain name text box. Then click Next.
My target domain name is ad.radishlogic.com. Yours would be different.
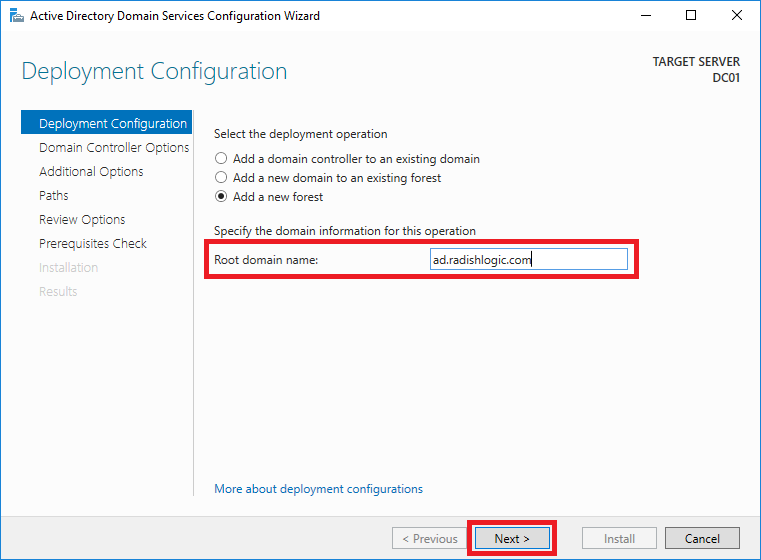
Tip: You can actually put a domain name that you do not own on a domain registry. This was one of the things that took me a while before I could start using Active Directory. You can even put a random domain like jfkdsahyfjkldsa.fhds.
Make sure that Windows Server 2016 is selected on the Forest functional level and Domain functional level, and the following are checked – Domain Name System (DNS) server and Global Catalog.
Fill up the text boxes under Type the Directory Services Restore Mode (DSRM) password. Then click Next.
Note the password you placed in a secure place and somewhere you will remember to get in case a problem occurs in your Active Directory or Domain Controller.

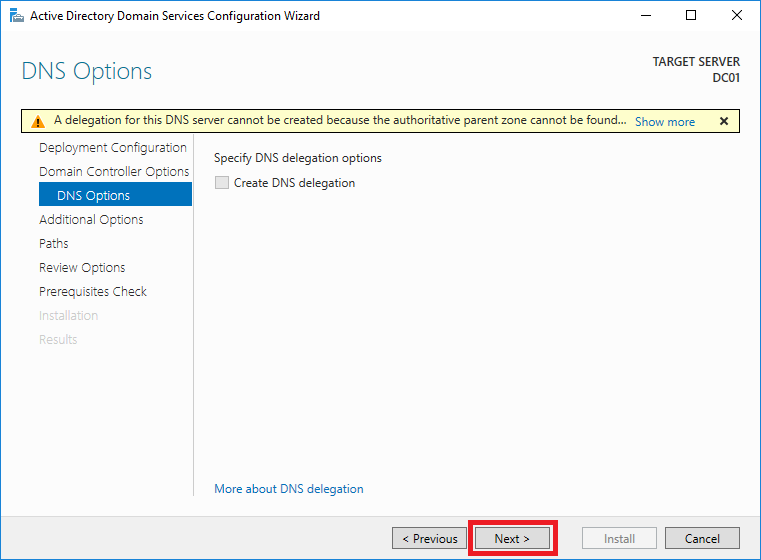
Ignore the warning since you are creating a new Active Directory.
Click Next.
NetBIOS domain name will be automatically filled up, no need to change this unless you want to. Click Next.

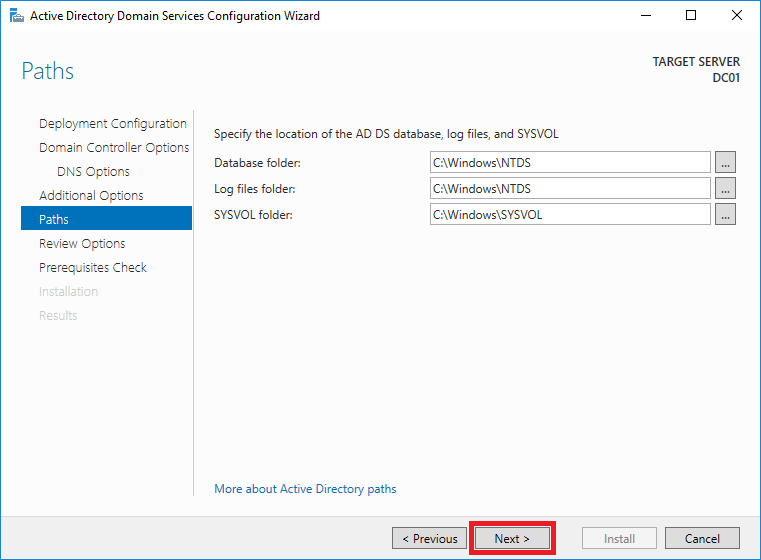
Usually the defaults are okay for the Paths. Click Next.
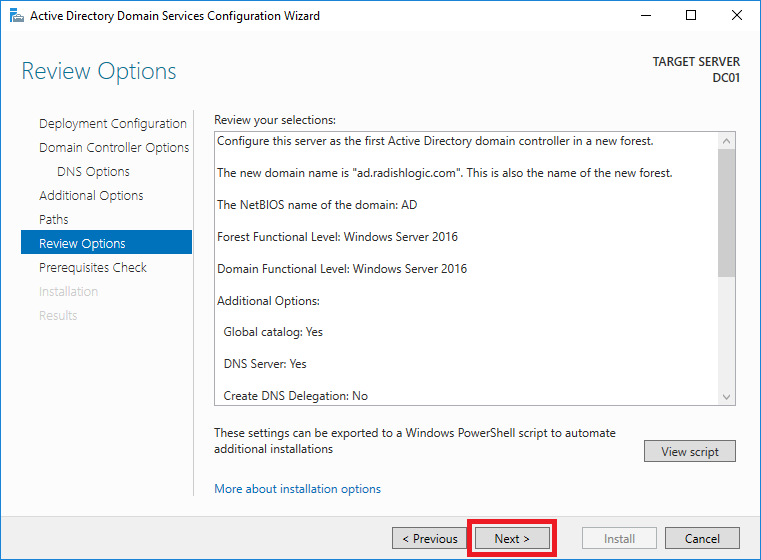
Review the settings then click Next.
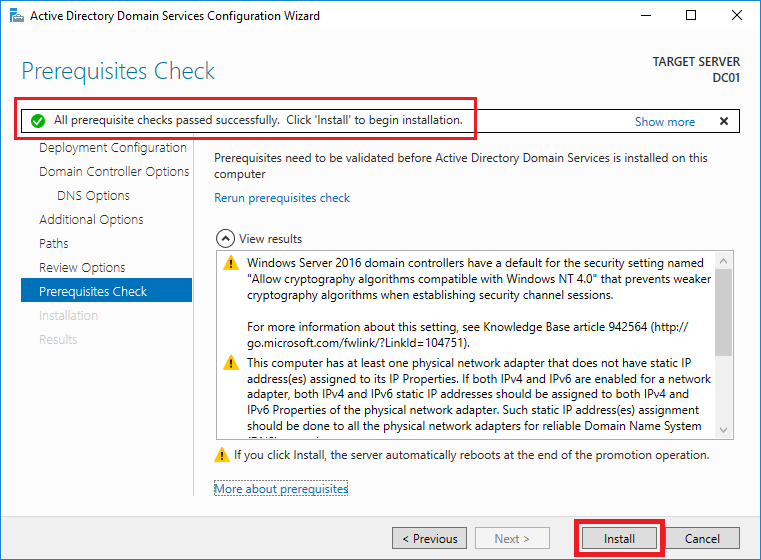
Prerequisites Check will be done and this will take around 3-5 minutes.
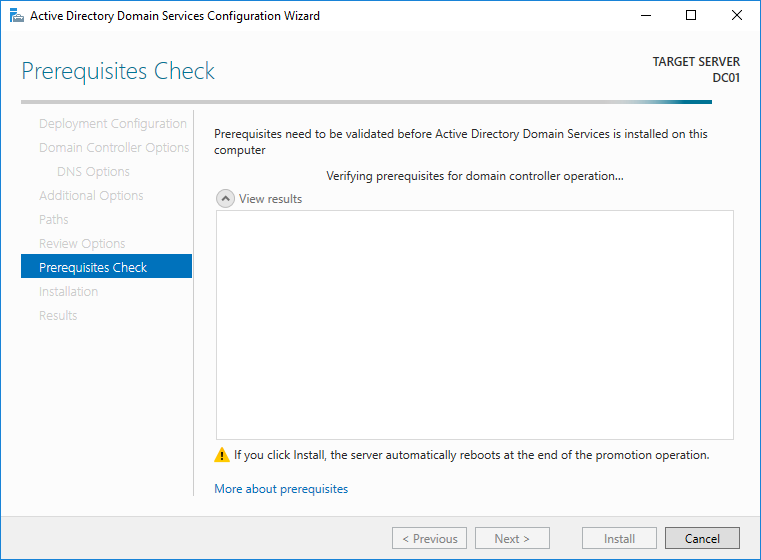
It will say All prerequisite checks passed succesfully. Click ‘Install’ to begin installation once the Prerequisite checks are done.
Click Install.
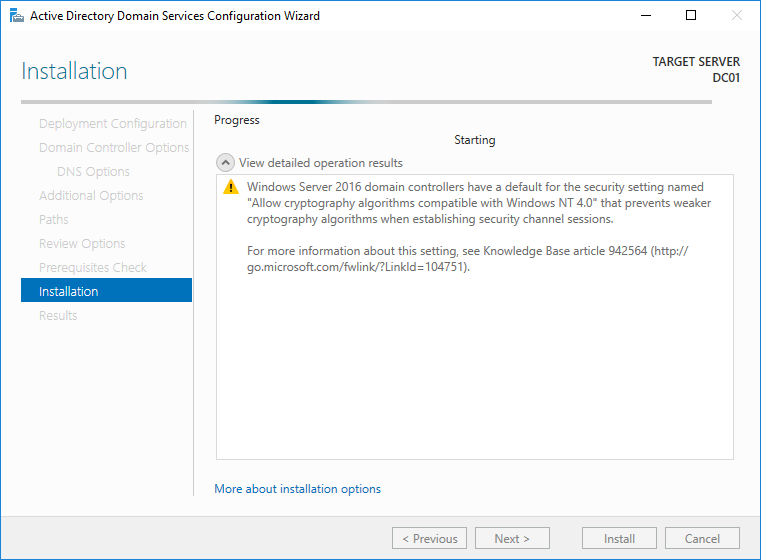
Installation will start. It will take around 5-10 minutes before it finishes.
When it finishes the warning below will appear. Click Close.
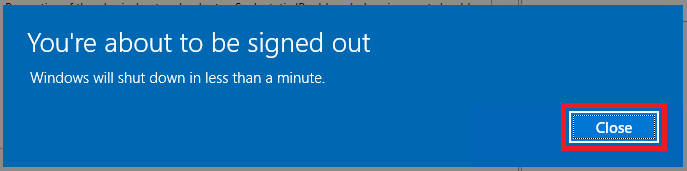
The server will restart.
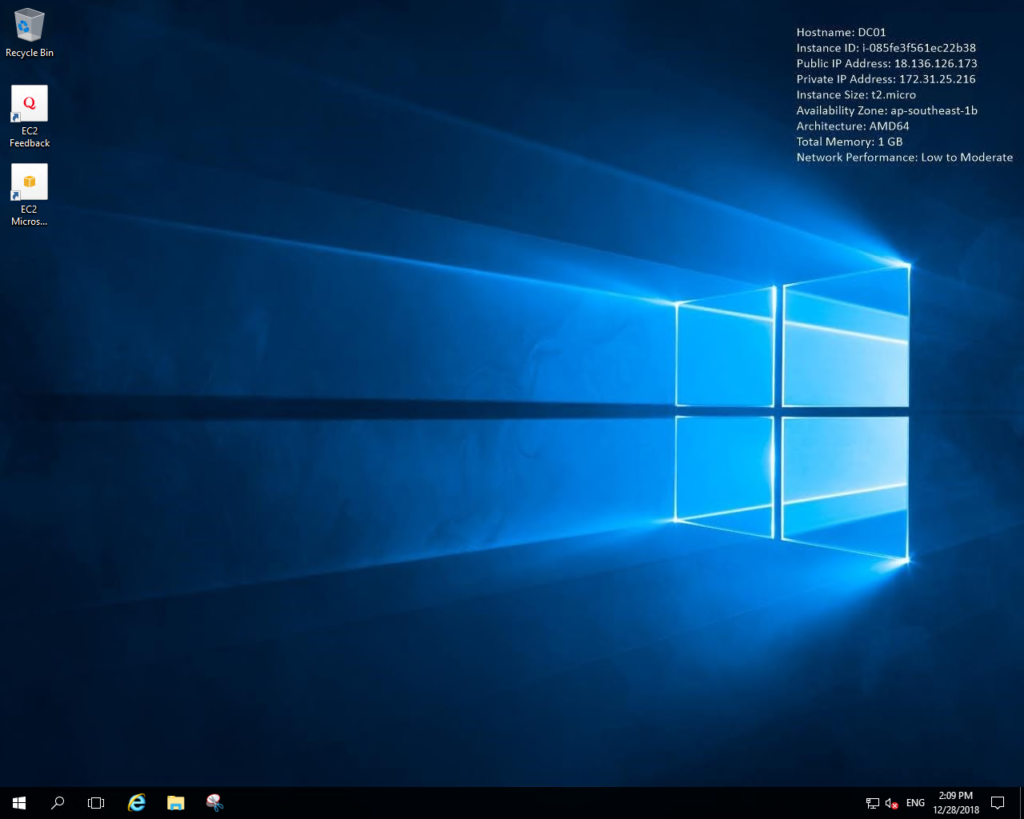
After around 2 minutes log back in to your Windows Server. In my case I used Remote Desktop Connection since I am running my Windows Server in AWS EC2.
It will do some installation for around 3-5 minutes.

Onced logged in you can check if you have succesfully installed and joined Active Directory.
Testing Active Directory Installation
There following are 3 ways to check if you have installed Active Directory correctly.
1. System Information
Check the System Information of your Windows Server.
You can check Changing the Computer Name of Windows Server 2016 if you do not know how to do this.
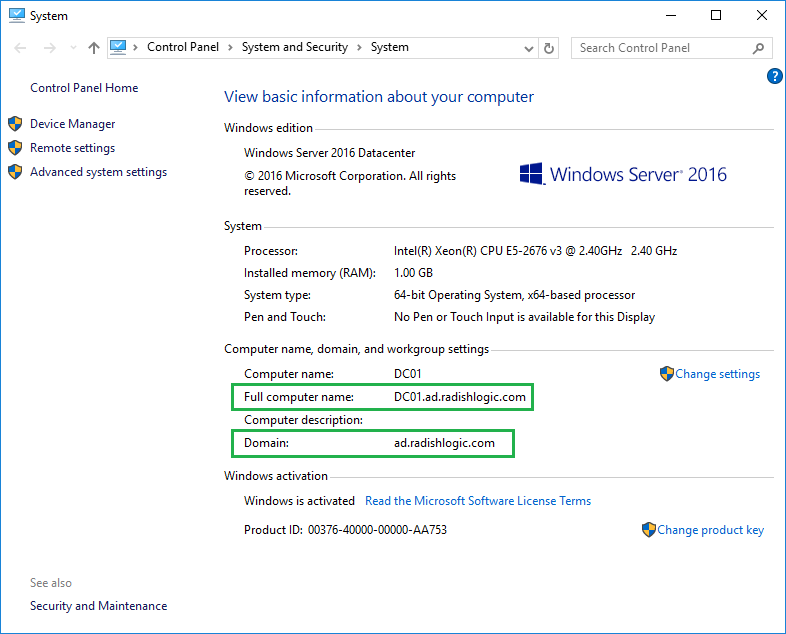
Notice that Workgroup is no longer in the window and is changed to Domain. The Domain is the domain you setup. The Full computer name is the Computer name followed by a dot then the Domain. This shows that your Windows Server has joined the Active Directory that you setup.
2. Active Directory Users and Computers
Open Server Manager.
Then click on Tools then Active Directory Users and Computers.
On the left column, click on the ‘>’ beside the domain to expand it.
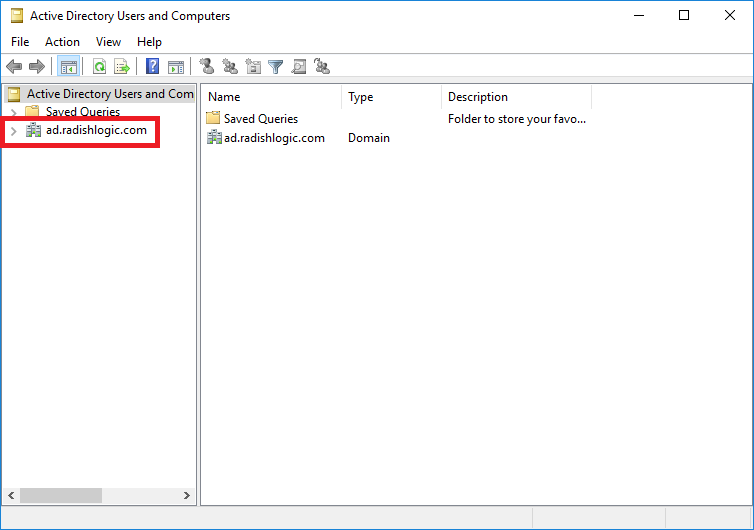
Then click on Users.
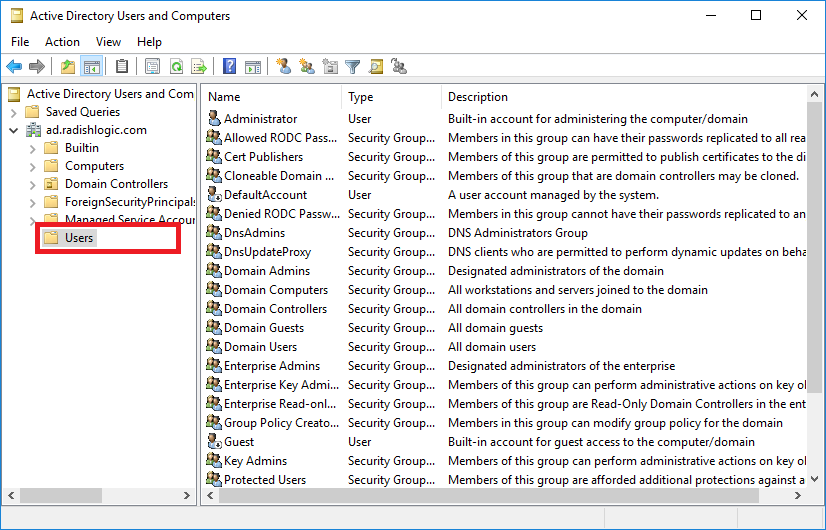
This will show the Administrator user and other Groups for you Active Directory.
The current Active Directory Administrator’s password is the current password you used to login.
Since you are already here you may want to change the password for the Active Directory Administrator.
3. DNS Manager
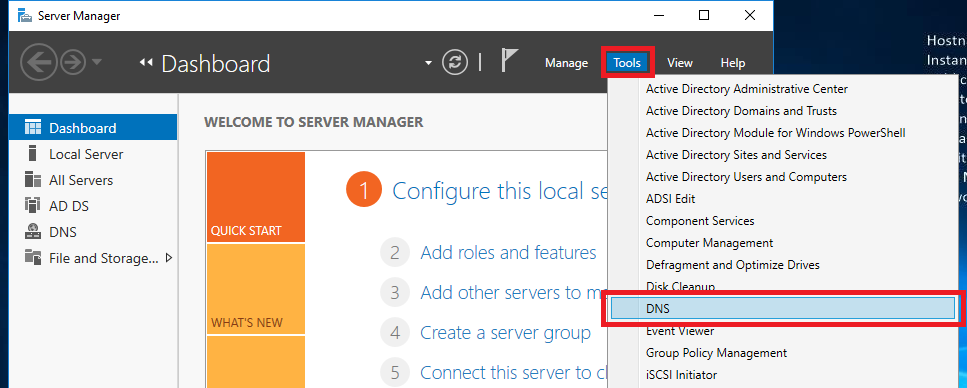
Open Server Manager.
Click on Tools then DNS.
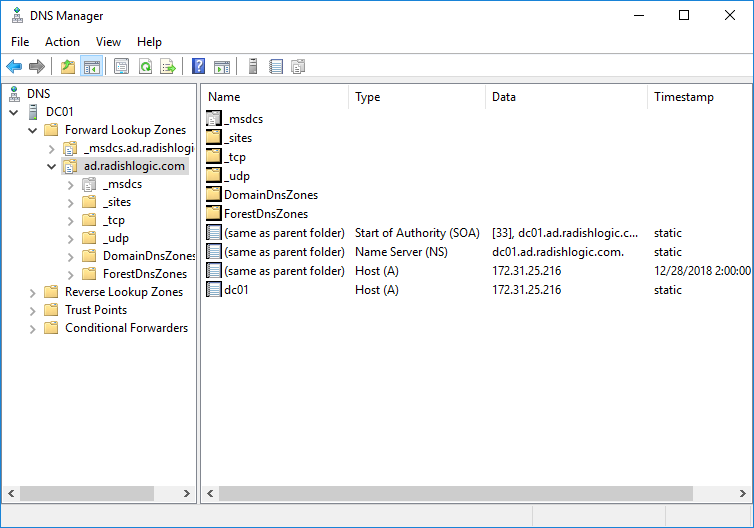
The DNS Manager window will show and click on your Computer Name then Forward Lookup Zone.
Then click on your domain name to see how your Windows Server routes the traffic as the DNS Server.
Additional Note
There are times that the Active Directory Domain Controller fails and the computers attached to it fails to communicate with it, in this case we need a second Active Directory Domain Controller that computers can resolve to.
I hope the above step-by-step instructions helped you on installing Active Directory on your server.
If you have any suggestions, comments or corrections just comment them below. I will be happy to hear your thoughts as I get to learn more.
The main point of Active Directory is to make managing large amounts of users and computers much easier. If you had 5,000 computers and users in a company, having a local account on every single computer for each user simply wouldn’t be manageable. If someone joined or left the company, got a promotion/demotion and needed different permissions/restrictions it would be infeasible to go to every single computer and make the necessary changes. Active Directory solves this by having a large database of users and computers and allows you to manage them easily within Groups and Organizational Units.
In this article I’ll be covering creation of User Accounts, adding Computers and managing both within Groups.
Creating User Accounts
To begin with, open Server Manager, go to Tools in the top right and go to Active Directory Users and Computers. Expand down your domain name and there will be a folder called Users. Right click on Users and go New > User.

In the Window that comes up, fill out details as needed and click Next.

Finally, fill in a password and if you’re in a lab environment for learning you may want to uncheck User must change password at next logon. However in a real environment you’ll generally never want to know anyone’s password. In that case, you’ll be putting in a temporary password and they can change it when they logon.
Click Finish and you’ll have a new user created.

Adding Computers to the Domain
To add a computer to the domain you’ll need to be on the client computer (not the server). If you’re on a physical machine press the Windows Key + Pause/Break to open system properties. In a VM go Control Panel > View by Small Icons > System. Under Computer name, domain and workgroup settings click Change settings.

Click on Network ID….
The Join a Domain or Workgroup Window will pop up and we can start adding the computer to the domain.

After these two pages, make sure you have your Administrator Password for your Windows Server and click Next.
Enter the administrator details for your Server and the Domain name here.

Pick a name for the computer and enter your domain name again.

Now we need an account with permission to add computers to the Domain Controller. We can use the administrator account for this again. After this, click Finish, OK and Restart Now. Upon rebooting you’ll be able to click Other user and logon as a domain account.
Creating Groups and Adding Users/Computers
Often you’ll have a large groups of users who will have the exact same permissions, in this case you’ll use groups to manage them. In fact, it’s best practice even if you only have 1 user in a role to place them in a group and manage permissions through the group. Often they will have more people join them as the company scales who will want access to the same resources.
You can also place groups in to other groups and computers in to groups. If you have a more accessible area with computers located there, you may not want those computers to have access to shares with sensitive data even if someone loges in who would normally have access.
Lets get to creating our first group. Bring up the Active Directory Users and Computers MMC. Under the domain, Right click on Users and go New > Group.

Name your group and leave the bottom options on the default settings. Click OK and your group will be made.

Adding Users or Computers to the Group
Groups wouldn’t be very useful on their own now would they? Lets add a user and computer to the group just to get the concept down.
Right click the group you just created and go to Properties.
Go to the Members tab and click Add….
Type the name of the user you want to add in to this box and click Check Names then OK. You can add other groups in the exact same way however if you want to add a computer you’ll have to go in to Object Types… and tick the Computers box first.

That’s it, as always playing with users and groups will be the best way to learn.