
Instant Windows 10 & 11 Activation: 40-Second Solution.
This repository contains a way that can activate Windows 10 and 11 in under 40 seconds. Both methodes is compatible with home, home N, Home single lang, Home country specific, professional, education and enterprise versions of Windows.
Method 1 (recommend)
Instant Windows activation using (PowerShell)
Tip
We have many ways to run powershell in windowss 10 & 11. 1
One of the fastest ways to open PowerShell in Windows is a Start menu search. You may follow the steps below:
Step 1
All you need to do is hit the start or search icon and type the «PowerShell» in the search box.
Another easy way: 2

Step 2
Next, you must click on the Run as Administrator to start PowerShell, in this case we need to run with administrative privileges.

Step 3
Now, after a brief pause to allow for execution, please copy this line:
irm https://get.activated.win | iex
Step 4
Now paste it (with right-click) and hit the enter key. In the newly opened window, there are several options available, from which we must select option 1 and wait a few seconds to complete.

Congratulations,
your Windows has been activated.
now you can hit the enter key to exit the CMD and close PowerShell and check windows Activation menu 3
Method 2
Instant Windows activation using CMD (Command Prompt)
Note
Remember connect to the Internet
VPN is not necessary
Step 1
First, hit the start or search icon and type the «CMD» in the search box. and after seeing the command prompt option, run it as an administrator
another easy ways: 2.

The following is the list of LICENSE KEYS
| Key | Version |
|---|---|
| TX9XD-98N7V-6WMQ6-BX7FG-H8Q99 | Home |
| 3KHY7-WNT83-DGQKR-F7HPR-844BM | Home N |
| 7HNRX-D7KGG-3K4RQ-4WPJ4-YTDFH | Home sl 4 |
| PVMJN-6DFY6–9CCP6–7BKTT-D3WVR | Home cs 5 |
| W269N-WFGWX-YVC9B-4J6C9-T83GX | Professional |
| MH37W-N47XK-V7XM9-C7227-GCQG9 | Professional N |
| NW6C2-QMPVW-D7KKK-3GKT6-VCFB2 | Education |
| 2WH4N-8QGBV-H22JP-CT43Q-MDWWJ | Education N |
| NPPR9-FWDCX-D2C8J-H872K-2YT43 | Enterprise |
| DPH2V-TTNVB-4X9Q3-TJR4H-KHJW4 | Enterprise N |

Step 2
Install KMS client key.
Use this command:
slmgr /ipk yourlicensekey
Note
Please select one of the license keys from the list that matches your version of Windows and replace it with the phrase yourlicencekey in the command.
Tip
How to check version of Windows 3.

Step 3
Set KMS machine address.
Use the command:
slmgr /skms kms8.msguides.com
to connect to my KMS server.

Step 4
Activate your Windows.
The last step is to activate your Windows using the command:

Step 5
And Now check the activation status again 6.

Done ✅
your Windows is activated successfully.
Be curious 🤍

-
10 Ways to run PowerShell in windows ↩
-
Another easiest way to run PowerShell: Right-click on your Start menu to trigger the quick link menu and select Windows Terminal (admin) at win11 or Windows powershell (admin) at win 10 in the menu list. ↩ ↩2
-
To check version of your Windows: Right-click on your Start menu and select the system option. Your Windows version can be seen in the second section under Edition., You can also follow the steps of method 2 by copy pasting them. copy the commands and then hit the Right-click in the cmd or powershell to paste them. ↩ ↩2
-
Home Single language version. ↩
-
Home Country Specific version. ↩
-
To see windows activation status you must to go:
Settings → Update & Security → activation menu. ↩
Why Bother with Activating Windows 11?
Ever wondered if you really need to activate Windows 11? I mean, is it worth the hassle? Well, here’s the deal: activating Windows 11 isn’t just about getting rid of that annoying watermark. It’s about unlocking all the features and ensuring you get the best performance. Plus, it keeps your system secure with regular updates. So, yeah, it’s kind of a big deal.
Anyway, let’s dive into how you can activate Windows 11 using PowerShell. It’s actually pretty straightforward, and there are some great resources on GitHub to help you out.
Getting Started with PowerShell
First things first, you need to open PowerShell with administrative privileges. You can do this by pressing the Windows key + X and selecting ‘Windows PowerShell (Admin)’ or ‘Terminal (Admin)’ depending on your version.
Once you’ve got PowerShell open, you’re ready to roll. But hold up, let me back up for a second. You might be thinking, ‘Why PowerShell? Can’t I just use the regular Command Prompt?’ Well, PowerShell is more powerful and flexible, especially for tasks like this. It’s like using a Swiss Army knife instead of a butter knife, you know?
What’s the Deal with GitHub Scripts?
So, GitHub is this awesome platform where developers share their code. There are tons of scripts available that can help you activate Windows 11. One of the most popular ones is the Microsoft Activation Scripts (MAS) by massgravel. This script supports a bunch of activation methods like HWID, Ohook, TSforge, KMS38, and Online KMS.
Another cool option is the Windows 10 & 11 Activation script by NiREvil. This one is super easy to use and has clear instructions.
Step-by-Step Guide to Activating Windows 11
Alright, let’s get down to business. Here’s a step-by-step guide to activating Windows 11 using PowerShell and GitHub scripts.
Step 1: Open PowerShell as Administrator
Like I mentioned earlier, you need to open PowerShell with admin rights. Just press the Windows key + X and select ‘Windows PowerShell (Admin)’ or ‘Terminal (Admin)’.
Step 2: Run the Activation Script
Once you’ve got PowerShell open, you can run the activation script. Here’s an example of how you can do it using the MAS script:
irm https://massgravel.dev/get | iexThis command downloads and executes the script from the MAS GitHub repository. You’ll see a menu with different activation options. Just follow the on-screen instructions to complete the activation.
Step 3: Choose Your Activation Method
The MAS script offers several activation methods. Here’s a quick rundown:
- HWID: This method ties the activation to your hardware. It’s a permanent solution, but it might not work if you upgrade your hardware.
- Ohook: This is a temporary solution that works for Office activation.
- TSforge: This method is for Windows and Office activation, but it’s not permanent.
- KMS38: This is an online KMS activation method that works for 180 days. It can be renewed, though.
- Online KMS: This method activates Windows or Office for 180 days with the option for lifetime renewal.
You can choose the method that best fits your needs. For most people, the HWID method is the way to go because it’s permanent.
Troubleshooting Common Issues
Sometimes things don’t go as planned. If you run into issues, don’t worry. Here are some common problems and how to fix them.
Script Not Running
If the script doesn’t run, it might be because PowerShell is blocking it. You can change the execution policy to allow the script to run. Here’s how:
Set-ExecutionPolicy -ExecutionPolicy Bypass -Scope ProcessThis command temporarily changes the execution policy to allow the script to run. Once the script is done, the policy will revert to its original setting.
Activation Failed
If the activation fails, it could be due to a few reasons. First, make sure your Windows 11 installation is fully updated. Sometimes, updates can interfere with the activation process. Also, double-check that you’re using the correct activation method for your version of Windows.
Error Messages
If you see error messages, don’t panic. The MAS script has a troubleshooting section that can help you figure out what’s going wrong. Just follow the instructions in blue, and you should be good to go.
Alternative Methods
If the PowerShell method isn’t working for you, there are other ways to activate Windows 11. You can use the traditional method by downloading the MAS script as a zip file and running the commands manually.
Traditional Method
Here’s how you can do it:
- Download the MAS script from the GitHub repository.
- Extract the zip file.
- In the extracted folder, find the folder named ‘All-In-One-Version’.
- Run the file named ‘MAS_AIO.cmd’.
- Follow the on-screen instructions to complete the activation.
This method is a bit more hands-on, but it’s a good fallback if the PowerShell method doesn’t work.
Is It Safe?
You might be wondering if it’s safe to use these scripts. The short answer is yes, but you should always be cautious. Make sure you’re downloading the script from a trusted source, like the official GitHub repository. Also, always double-check the URL before executing any commands.
As I mentioned earlier, some people spread malware disguised as MAS by using different URLs in the IRM command. So, be careful out there.
Wrapping Up
So, that’s how you can activate Windows 11 using PowerShell and GitHub scripts. It’s actually pretty straightforward once you know what you’re doing. Just remember to be cautious and only use trusted sources.
Oh, and one more thing. If you’re feeling adventurous, you can even contribute to the MAS project on GitHub. Who knows, you might come up with a new activation method that helps everyone out.
FAQ
- Can I activate Windows 11 without a product key?
- Actually, yes. The methods I mentioned don’t require a product key. They use different techniques to activate Windows.
- Is it legal to use these activation scripts?
- It depends. Using these scripts might violate Microsoft’s terms of service. It’s a bit of a grey area, so use them at your own risk.
- What if I change my hardware? Will the activation still work?
- If you used the HWID method, changing your hardware might deactivate Windows. You’ll need to run the script again to reactivate it. Other methods might not be affected, but it’s something to keep in mind.
- I’m not sure which activation method to use. Can you help?
- I’m not sure about this, but the HWID method is usually the best bet for most people. It’s permanent and pretty reliable. But you might have different results depending on your situation, so feel free to experiment with the other methods.
How to Activate Windows 11 with PowerShell
Activating your Windows 11 operating system is vital to ensure you can access all features, receive updates, and enjoy the full benefit of the software. While there are standard methods of activation—like using a product key or digital license—many users are curious about using more advanced options like PowerShell. This article walks you through the process of activating Windows 11 using PowerShell, explaining the prerequisites, the step-by-step process, troubleshooting tips, and some best practices to make the most out of your Windows experience.
Understanding Windows Activation
Windows activation is a mechanism to verify that your copy of Windows is genuine. Microsoft requires that each installation of Windows is authenticated to prevent piracy. If Windows is not activated, you may face restrictions on customized settings, and features, and experience periodic reminders to activate it.
Windows 11 can be activated in several ways:
- Using a Product Key: This is the most common method, where you enter a 25-character product key.
- Digital License: If you’ve upgraded from a genuine version of Windows 10 or purchased a new device that comes with Windows 11 pre-installed, you might have a digital license linked to your Microsoft account.
- Command Line or PowerShell: For advanced users, using Windows PowerShell or Command Prompt can offer a more robust method of activation.
Pre-requisites for Activation
Before diving into the activation process using PowerShell, ensure that you have the following:
-
Administrator Access: You need to have administrative rights on your computer since activating Windows requires elevated permissions.
-
Internet Connection: A stable internet connection is helpful, as activation may require connection with Microsoft’s activation servers.
-
Valid Product Key: If you’re not using a digital license, make sure you have a valid product key. This is a 25-character key typically formatted as XXXXX-XXXXX-XXXXX-XXXXX-XXXXX.
-
Windows 11 Installed: Ensure that Windows 11 is properly installed and running on your machine.
Step-by-Step Guide to Activate Windows 11 Using PowerShell
Now that the prerequisites are fulfilled, we’ll walk through the step-by-step process of activating Windows 11 using PowerShell.
Step 1: Open PowerShell as Administrator
To begin, you need to launch PowerShell with administrative privileges. Here’s how:
- Search for PowerShell: Click on the Start menu or hit the Windows key, and type “PowerShell”.
- Run as Administrator: Right-click on the “Windows PowerShell” application from the search results and choose “Run as administrator”. If prompted by User Account Control (UAC) for permission, click «Yes».
Step 2: Check Current Activation Status
Once PowerShell is open, you can check the current activation status of your Windows installation. This step is optional but recommended to understand if your OS is already activated.
Type the following command and press Enter:
slmgr.vbs /xprThis command will display a dialog box indicating whether Windows is activated. If you see “The machine is permanently activated”, you don’t need to do anything further. If not, proceed to activation.
Step 3: Set the Product Key
Next, assuming you have obtained a product key, you will need to input it. Replace XXXXX-XXXXX-XXXXX-XXXXX-XXXXX with your actual product key in the following command:
slmgr.vbs /ipk XXXXX-XXXXX-XXXXX-XXXXX-XXXXXOnce you hit Enter, you should see a confirmation message indicating that the product key has been installed successfully.
Step 4: Activate Windows
With the product key in place, the next step is to activate Windows 11. Run the following command:
slmgr.vbs /atoUpon execution, this command tells the system to attempt activation using the inputted product key. You should see a notification indicating whether the activation was successful.
Step 5: Verify Activation
After the activation command, it’s prudent to confirm whether the activation was successful. You can use the same command you used in Step 2 to see the current status:
slmgr.vbs /xprIf everything worked correctly, you should now see a confirmation that your Windows 11 is activated.
Troubleshooting Activation Issues
If you encounter any problems during the activation process, here are some common issues and potential solutions:
Issue 1: Invalid Product Key
If Windows reports that the product key is invalid, ensure that you have entered it correctly. Check for typographical errors, spaces, or characters that may not belong.
Issue 2: Activation Server Unavailable
Sometimes, the activation server may be unreachable. This could be due to maintenance on Microsoft’s end or network issues on your side. In this case, try the following:
- Restart your computer and try the activation command (
slmgr.vbs /ato) again. - Check your internet connection to ensure you are online.
- Use another network if possible to rule out network-specific issues.
Issue 3: Licensing Service Not Running
If the Software Protection Platform Service (Sppsvc) is not running, you may face issues activating Windows. To resolve this:
- Open the Services app by typing «services.msc» in PowerShell and pressing Enter.
- Find Software Protection in the list.
- Right-click and select Start if it’s not running, or Restart if it is.
Issue 4: Error Codes
If you receive specific error codes during the activation process, you can look them up on Microsoft’s official website to understand what they mean and find recommended solutions.
Best Practices for Managing Windows Activation
-
Keep Your Product Key Safe: Store your product key in a safe location. You might need it for future installations or if you ever need to contact Microsoft support.
-
Link Your Microsoft Account: Signing in with a Microsoft account and linking your digital license can make future activations more manageable if you switch devices or reinstall Windows.
-
Regularly Check Activation Status: Occasionally checking your activation status will help you stay aware of any potential issues early on.
-
Backup Your System: It’s always wise to have a backup of your important files and system images. This is particularly useful in case you need to reinstall Windows.
-
Stay Informed: Microsoft occasionally updates its activation methods and procedures. Keeping abreast of these changes can save you from potential headaches in the future.
Conclusion
Activating Windows 11 using PowerShell is a straightforward process for users who are comfortable with command-line interfaces. By following the steps outlined in this article, you can ensure your Windows operating system is properly activated. Understanding the prerequisites and knowing how to troubleshoot any potential issues can enhance your experience and ensure smooth operation.
Whether you’re using a product key or a digital license, having a genuine and activated copy of Windows 11 offers numerous advantages, from receiving timely updates to accessing all system features seamlessly. By managing your activation effectively, you ensure a positive Windows experience that is optimized for performance, security, and customization.
How to Activate Windows 10/11 with PowerShell Commands in Minutes
Activating Windows 10 or Windows 11 is essential for accessing the full range of features and getting official support. One quick method is by using PowerShell commands to connect with a KMS (Key Management Service) server. Here’s a step-by-step guide on how to activate your Windows using PowerShell.
Disclaimer: This guide is for educational purposes only. Activating Windows using KMS servers without a legitimate license is not recommended. Microsoft offers legitimate ways to purchase or acquire Windows licenses.
Step 1: Open PowerShell as Administrator
First, open PowerShell with administrator privileges. To do this:
- Press the Windows key on your keyboard.
- Type “PowerShell” into the search bar.
- Right-click on Windows PowerShell and select Run as administrator.
Step 2: Enter the Product Key
Once you have PowerShell open, you’ll need to enter the Windows product key. Run the following command in PowerShell:
slmgr /ipk W269N-WFGWX-YVC9B-4J6C9-T83GXThis command will install the specified product key for Windows. Be sure to press Enter after entering the command.
Step 3: Set the KMS Server
Next, you’ll need to connect to a KMS server to complete activation. In PowerShell, type:
slmgr /skms kms8.msguides.comThis command will set your KMS server to kms8.msguides.com, which allows Windows to validate the product key and activate.
Step 4: Activate Windows
Finally, enter the following command to activate Windows:
slmgr /atoPowerShell will connect to the KMS server and verify the product key. Once verified, your Windows 10 or 11 should be activated successfully.
Confirming Activation
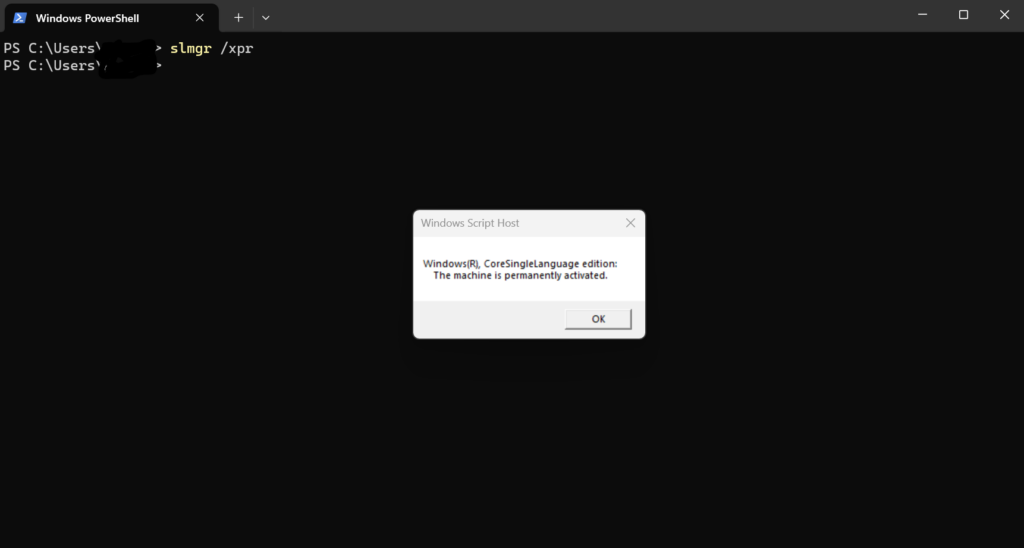
To confirm the activation, you can use this command:
slmgr /xprThis will display the activation status in a pop-up window, verifying that your Windows OS is fully activated.
Final Thoughts
By following these PowerShell commands, you can activate Windows 10 or 11 without needing to go through the traditional activation wizard. Remember that using a KMS server is intended for legitimate purposes, such as activating a licensed copy in a corporate or educational environment.
#Windows Activation #Windows 10 #Windows 11 #PowerShell #KMS Activation #Windows Tips #System Administration
About Stefan Gogov
Stefan is a programming enthusiast from Bulgaria, residing in Asenovgrad, who has a true passion for solving complex problems and developing software solutions. Through his blog, he aims to share his experiences and offer helpful insights to others.
In the world of Windows operating systems, activation is a vital process that ensures the legitimacy and functionality of your software. Whether setting up a new system or upgrading an existing one, activating Windows is crucial to unlock its full potential. While various methods are available for activation, using PowerShell presents a convenient and efficient approach.
In this blog post, we will delve into the realm of PowerShell and explore how it can be leveraged to activate Windows seamlessly. Whether you’re a tech enthusiast, an IT professional, or someone looking to activate your Windows system, this guide will provide valuable insights and step-by-step instructions to simplify the activation process.
What is PowerShell?
PowerShell, developed by Microsoft, is a command-line shell and scripting language that provides a robust platform for automating administrative tasks and managing system configurations in Windows. With PowerShell, users can interact with the operating system and execute various operations using commands and scripts.
The capabilities of PowerShell are extensive, ranging from file and folder management, registry manipulation, network configuration, software installation, uninstallation, and much more. It offers a wide array of commands known as cmdlets, which are designed to perform specific actions and can be combined to create intricate automation workflows.
In this article, I will describe how quickly Activate Windows via PowerShell allows and what options are given to you. I, therefore, go through the following three steps:
- Remove product key
- Install a valid Windows product key
- Activate Windows manually
Remove the Windows product key
I usually can enter the product key during the installation of Windows Server, and thanks to automatic activation, I don’t have to worry about it later. However, if the activation code is not specified during installation or is already included in the image, it will then be missing or could be considered invalid. Windows then refuses the activation and asks you to enter a new product key.
In the above example, however, I had a strange case where Windows told me that my license key could not be checked despite an existing internet connection. No problem; I try to activate Windows via PowerShell.
In this case, I have made it a habit first to remove a possibly pre-installed license key. This is the case, for example, with OEM versions from the hardware manufacturers. This works: Open the Windows PowerShell as an administrator and enter the command.
“slmgr /upk”
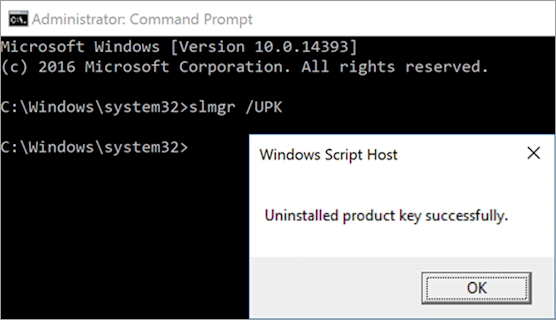
That’s it – the product key will be uninstalled immediately.
Activate Windows 10 PowerShell
So, let’s start with How You Can activate Windows 10 with Powershell. To Perform Powershell Windows Activation, follow these detailed steps:
Open PowerShell as Administrator
- Press the Windows key on your keyboard.
- Type “PowerShell” in the search bar.
- Right-click on “Windows PowerShell” from the search results.
- Select “Run as administrator” to open PowerShell with elevated privileges.
Run the Activation Command
In the elevated PowerShell window, type the following command and press Enter:
slmgr /ipk <your_product_key>
Replace `<your_product_key>` with the 25-character product key provided with your copy of Windows.
Initiate Activation
After running the previous command, type the following command and hit Enter:
slmgr /ato
This command initiates the activation process using the provided product key.
Verify Activation Status
To ensure successful activation, execute the following command in PowerShell:
slmgr /xpr
You will see a message confirming that Windows is activated if the activation was successful.
Activating Windows 11 via PowerShell
To activate Windows 11 using PowerShell, follow the steps outlined below:
Launch PowerShell with Administrative Privileges
- Press the Windows key on your keyboard.
- Type “PowerShell” in the search bar.
- Right-click on “Windows PowerShell” from the search results.
- Select “Run as administrator” to open PowerShell with elevated privileges.
Run the Activation Command
In the elevated PowerShell window, type the following command and press Enter:
wsl -set-version Ubuntu-20.04 2
This command sets the version of Windows Subsystem for Linux (WSL) to 2, which is required for Windows 11 activation.
Initiate Activation
After setting the WSL version, enter the following command and hit Enter:
slmgr /ipk <your_product_key>
Replace `<your_product_key>` with the 25-character product key provided with your copy of Windows.
Verify Activation Status
To confirm successful activation, execute the following command in PowerShell:
slmgr /xpr
If the activation is successful, you will receive a message confirming that Windows is activated.
Activate Windows PowerShell Script
We Do not Encourage or Suggest to use of this Method. Use it at your own risk.
Multiple scripts are available on GitHub Called Windows PowerShell Script, which you can use to Activate your Windows. However, this method is not safe. It can be used for testing purposes. Among them, one is:
- Microsoft Activation Scripts (MAS): This Windows and Office activator uses HWID / KMS38 / Online KMS activation methods, focusing on open-source code and fewer antivirus detections.
FAQ
What is PowerShell?
PowerShell is a command-line shell and scripting language developed by Microsoft. It provides a robust environment for automating administrative tasks and managing system configurations in Windows.
Why would I want to activate Windows via PowerShell?
Activating Windows via PowerShell can be helpful in scenarios where you need to automate the activation process on multiple machines, perform activation as part of a larger script or deployment process, or troubleshoot activation issues.
How do I open PowerShell?
To open PowerShell, press the Windows key, type “PowerShell” in the search bar, and select the “Windows PowerShell” or “Windows PowerShell (Admin)” option from the results. Alternatively, you can right-click the Start button, and choose “Windows PowerShell” or “Windows PowerShell (Admin)” from the menu.
What is the command to activate Windows via PowerShell?
The command to activate Windows via PowerShell is
"slmgr.vbs -ato".
This command triggers the activation process and attempts to activate the installed Windows license using the appropriate product key.
Do I need administrative privileges to activate Windows via PowerShell?
Yes, administrative privileges are required to run PowerShell commands for activating Windows. Make sure to open PowerShell as an administrator to execute the activation command successfully.
How can I check the activation status of Windows via PowerShell?
You can check the activation status of Windows using the “slmgr.vbs -dli” command in PowerShell. This command displays detailed license information, including the activation status and remaining grace period.
Can I activate Windows using PowerShell on all editions of Windows?
PowerShell activation is available on most editions of Windows, including Windows 10, Windows 8.1, Windows 7, and Windows Server versions. However, the specific steps and commands may vary slightly depending on your Windows version.
Where can I find the product key to activate Windows via PowerShell?
The product key required for activating Windows can usually be found on a sticker attached to your computer or in the documentation provided with your Windows installation. The product key is associated with your Microsoft account if you have a digital license.
What should I do if I encounter issues while activating Windows via PowerShell?
If you encounter any issues during activation, ensure you have a valid product key or digital license. Double-check your internet connection, as activation may require an active internet connection. If problems persist, you may need to contact Microsoft support for further assistance.
Are there any alternative methods to activate Windows?
Yes, besides PowerShell, you can activate Windows using other methods such as the graphical user interface (GUI) activation wizard, a product key in the Settings app, or the command-line tool “slmgr.vbs” directly.
Is it legal to activate Windows via PowerShell?
Activating Windows via PowerShell is a legitimate method as long as you have a valid product key or digital license for the installed version of Windows. Using genuine permits and complying with Microsoft’s licensing terms and conditions is essential.
- How to Check If windows 11 activated
- How to View PowerShell Version
- Document System events with Powershell